Armor/AFV: Modern - USA
Modern Armor, AFVs, and Support vehicles.
Hosted by Darren Baker
M1A1 Abrams - All Bout Da Bones -Thunder Run
Dragon164
#226
Visit this Community
British Columbia, Canada
Joined: February 20, 2012
KitMaker: 1,909 posts
Armorama: 1,066 posts
Posted: Wednesday, January 22, 2014 - 09:10 PM UTC
Hi Don,
Great job you are doing!

I mounted the spare road wheel the same way on my Dragon M1A1 w mine plough, but not well.
Here is a pic showing how it is mounted.

Cheers Rob.
ProfessorP
Visit this Community
Minnesota, United States
Joined: February 20, 2007
KitMaker: 339 posts
Armorama: 325 posts
Posted: Thursday, January 23, 2014 - 05:30 AM UTC
Aww crud, looks like I should have clamped the wheel between the two halves of the link. Hmm...wonder how hard it would be to redo this now? I'm going to take another look at it and see if I can modify without damaging the bustle rack itself. Might have to make a new link but I planned to do that anyway for instructional purposes.

Thanks for the pic Rob. That really clears it up.
ProfessorP
Visit this Community
Minnesota, United States
Joined: February 20, 2007
KitMaker: 339 posts
Armorama: 325 posts
Posted: Monday, March 03, 2014 - 10:24 AM UTC
Time for a long-overdue update. Construction stands at about 95-98% at this time. Only the stowage and crew members are remaining at this point.

So, this latest update deals with the crew-manned weapons on the turret...the M2 .50 cal mounted on the TC station and the M240 mounted at the loader's station.

The M2 required some modification to more accurately portray it's remote firing capability. The gun is fired by the TC from a hand switch that can be used inside or outside of the hatch. A solenoid engages a small wheel which depresses on the standard butterfly trigger mechanism to fire the gun. This was scratch built along with the wire that activates it which runs underneath the gun, around the mount and terminates at the base of the mount on the commander's station. You can see the small hole drilled above the slot for the mounting arm in the second picture of the TC station. In the third picture, you can see the charging handle made from brass rod. M2s mounted in this fashion do not use the standard charging handle usually located on the right side of the gun.


For the M240, I substituted the kit part for one from LiveResin. Some of the 240s had partial dismount kits installed so that they could be detached from the turret mount and used on foot. To represent this, I removed the butt-stock and pistol grip from from the LiveResin piece but since it had the heat shielding on the barrel and the bipod legs it would look more like it was ready to be used dismounted. I scratched the thumb trigger on the back of the gun and added a piece of tape to represent a rubber tie-down strap used to hold the bipod legs up. Last thing to add was the charging handle which is actually a steel loop cable.


So, with all major components of the turret assembled, if not installed, the turret is complete.


That leaves stowage and identification panels. For the extended bustle rack, I have to mount the Combat Identification Panel (CIP) on the right and what I think is called a battle board (on the left). The later is cut from micro-plywood as the real ones were made out of, you guessed it, plywood. Some were attached with zipties, but a rear shot of A32 shows that this one was attached with bolts and washers so I'll be adding those later.


That's it for now. Need to determine what stowage will be added before painting and what will go on afterwards. Also need to start fitting the crew.

Thanks for looking.
DeskJockey
Visit this Community
Virginia, United States
Joined: July 17, 2006
KitMaker: 1,558 posts
Armorama: 1,159 posts
Posted: Monday, March 03, 2014 - 11:08 AM UTC
It's looking really good! I love the way the machine guns came out. Where did you get the micro-plywood, by the way?
ProfessorP
Visit this Community
Minnesota, United States
Joined: February 20, 2007
KitMaker: 339 posts
Armorama: 325 posts
Posted: Monday, March 03, 2014 - 11:15 AM UTC
Lucas, thanks for the comments. The micro-plywood was purchased at my local hobby shop, but in the railroad section. I don't recall the brand name but I can look it up when I get home.
ProfessorP
Visit this Community
Minnesota, United States
Joined: February 20, 2007
KitMaker: 339 posts
Armorama: 325 posts
Posted: Wednesday, March 05, 2014 - 05:31 PM UTC
FYI, the micro plywood is from BNM (Bud Nosen Models). It's 3 ply 1/64" aircraft plywood.
mpeplinski
Visit this Community
Michigan, United States
Joined: January 17, 2006
KitMaker: 487 posts
Armorama: 182 posts
Posted: Wednesday, March 05, 2014 - 05:59 PM UTC
Don
Good Lord man! what power optivisor are you using?That is some intricate detail,very very nice build!

Mike
DeskJockey
Visit this Community
Virginia, United States
Joined: July 17, 2006
KitMaker: 1,558 posts
Armorama: 1,159 posts
Posted: Wednesday, March 05, 2014 - 11:24 PM UTC
Thanks, Don! I'll have to hunt some down.
ProfessorP
Visit this Community
Minnesota, United States
Joined: February 20, 2007
KitMaker: 339 posts
Armorama: 325 posts
Posted: Saturday, March 22, 2014 - 05:03 PM UTC
Here's a few more minor updates. Info on whether or not A32 had a second jerry can rack was unclear. Supposedly, all crews were issued two racks but no photos of the left side of this tank show it installed. One of the crew members with whom I have been very fortunate to be in contact with said that he thought he remembered a second one on the left side but wasn't sure. Good enough for me. So, I scratched a second rack (only one PE rack comes in the Dragon kit) and stuck it in between the crew cots and tent which are both clearly shown in the few photos I have of the left side.


Since a CIP is necessary on this side I mounted it in front of the rack which was fairly common. Also added handles to all three CIPS and made some straps from Tamiya tape to attach the one that goes over the j-can basket. In real life, the other two would have been held on by clips directly onto the stowage basket rails.


The number 1 skirt on each side features a crew step made from a length of cable. The kit part is poorly molded and very fragile so I cut them off and replaced them with a couple of lengths of braided wire.


I've prepped most of the stowage pieces, washed them and attached them to toothpicks (or cocktail sticks if you prefer) ready for priming and painting.


This last bit was really fun and adds an extra dimension I would have missed if I hadn't have chatted with an actual crew member. If you look closely at the very first photo of this blog you can just make out a bit of string with stuff on it dangling from the end of the gun tube. Apparently, the crew, in keeping with the vehicle name, hung some chicken bones off the tube and it stayed there throughout the Thunder Run. I decided this needed to be added so I twisted together some extremely fine steel wire stripped from an old cell phone charging cord, and wrapped it around some pieces of brass rod that had been bent and cut at different lengths. I still have to put a dab of Mr. Surfacer on each end of the rods to round them out but I think this will look pretty cool when painted up!


Still thinking about how to pose the crew. Would like to have them firing the crew weapons but haven't tried fitting them together yet. For now though I'm ready to do one final dry-fit of all the components so I can get a photo of the full model before paint. This poses some challenges because of all the sub-assemblies but I'm guessing blue-tack will help stick it together long enough for a photo shoot.

Until next time...thanks for following!
ProfessorP
Visit this Community
Minnesota, United States
Joined: February 20, 2007
KitMaker: 339 posts
Armorama: 325 posts
Posted: Tuesday, March 25, 2014 - 05:21 PM UTC
Pre-paint photos with all the major components tacked together. Gaps in the tracks will be taken out during final assembly and the commander's M2 will be seated properly...it's drooping a bit at the moment as it's only held in place by dry-fit. About ready for primer.


Thanks for following!
DeskJockey
Visit this Community
Virginia, United States
Joined: July 17, 2006
KitMaker: 1,558 posts
Armorama: 1,159 posts
Posted: Tuesday, March 25, 2014 - 10:48 PM UTC
It looks awesome! You've achieved a wonderful level of detail, and the build is very clean. I really like the chicken bones.
ProfessorP
Visit this Community
Minnesota, United States
Joined: February 20, 2007
KitMaker: 339 posts
Armorama: 325 posts
Posted: Wednesday, March 26, 2014 - 04:47 AM UTC
Thanks Lucas, I appreciate the comments.
x3oinx
Visit this Community
England - East Anglia, United Kingdom
Joined: March 08, 2014
KitMaker: 7 posts
Armorama: 7 posts
Posted: Wednesday, March 26, 2014 - 06:26 AM UTC
Fantastic build.. really inspiring. Love the wheel and track damage too. Looking forward to the painting.

:)
pilote14
Visit this Community
Pas-de-Calais, France
Joined: November 01, 2010
KitMaker: 459 posts
Armorama: 432 posts
Posted: Wednesday, March 26, 2014 - 06:37 AM UTC
really great modelling ! i wait for looking paint...
ProfessorP
Visit this Community
Minnesota, United States
Joined: February 20, 2007
KitMaker: 339 posts
Armorama: 325 posts
Posted: Wednesday, May 14, 2014 - 03:56 PM UTC
Well, not much progress to report over the last couple of months. The vehicle has been broken down into sub-assemblies and primed using Tamiya primer. It was about that time that I discovered my Paasche Talon airbrush was not working properly and replacing parts did not solve the problem. So I sent it off to Paasche for inspection and repair. Thankfully it was returned within about 10 days fully repaired and ready to rock. However, I had agreed to a side project and I got started on that.

One of the guys in the group build asked if someone would be willing to paint his crew figs...one for the Bradley he's doing and two more for his Abrams. I said I would and he sent them along. A little cleanup was needed on all three as well as adding mics and wires but otherwise it was a straightforward paint job on each. Here are some shots of the finished figs which I will be sending off to him shortly.

Bradley Commander:


Abrams Commander


Abrams Loader


Now that these are done it's time to get some paint on the Abrams and I'll have to start thinking about my own crew figs pretty soon as well.
ProfessorP
Visit this Community
Minnesota, United States
Joined: February 20, 2007
KitMaker: 339 posts
Armorama: 325 posts
Posted: Sunday, June 15, 2014 - 06:59 AM UTC
Finally getting around to spraying some paint on this thing. Because all the models in the group should look as much alink as possible, we are using the same paint color (MM Acryl Sand FS33531) on the models. However, modelers being who they are, everyone has their own preferred method for finishing. Some like pre-shading, some post-shading, others are using AK washes and filters, etc. A preferred method has been suggested but in the end, I think most guys are doing what they are most comfortable with. As long as we all use the same paint colors, they should be pretty close and this has proven true for those models already complete and in the hands of the build organizer.

I personally have never used a black pre-shading method before and I don't like priming in black either. A traditional color modulation approach would likely produce a result with too much contrast to what the other modelers are doing so I have decided to do a hybrid pre-shade/color-modulation using MM Acryl Dark Tan FS30219, the proscribed MM Acryl Sand FS33531, and MM Acryl Semi-Gloss White FS27875. I've mixed half-steps between the three colors and will use these five colors for the pre-shade/modulation. I got the bottom hull sprayed and detailed and am fairly pleased with the results.


The Dark Tan is not so dark that it will over-contrast with the other models in the group and the straight white will only be used sparingly on the highest details. I've kept the traditional modulation on the hull plates rather subtle, again so that this model will not stand out too much from the others but will still have some depth and interest. I plan to follow up the basic painting with an orange filter, as well as the AK OIF wash and streaking grime.

That's all for now. Gotta get the turret sprayed.

DeskJockey
Visit this Community
Virginia, United States
Joined: July 17, 2006
KitMaker: 1,558 posts
Armorama: 1,159 posts
Posted: Sunday, June 15, 2014 - 07:38 AM UTC
Don--I had missed your earlier update. The figures came out looking really good. I wish I could finish mine that well.

I like the way the hull is shaping up, although if it were me I would tone down the Dark Tan areas a bit, as they look a bit stark right now. Then again, you haven't weathered the hull, so it's hard to say whether toning the color modulation down is really necessary. Which orange filter do you intend to use, by the way?
marcb
Visit this Community
Overijssel, Netherlands
Joined: March 25, 2006
KitMaker: 1,244 posts
Armorama: 1,226 posts
Posted: Sunday, June 15, 2014 - 09:40 AM UTC
Impressive work, and beautifully done!
Love the cammo on the figures. The chickenbones at the end of the barrel is a great touch.
ProfessorP
Visit this Community
Minnesota, United States
Joined: February 20, 2007
KitMaker: 339 posts
Armorama: 325 posts
Posted: Sunday, June 15, 2014 - 09:45 AM UTC
Lucas, thanks for the comments. I think I might tone down the modulation a bit on the front glacis plate where the weld seams are. The tan does look a bit wide there. I'll be using the Sin orange filter for desert camo to restore some of the color back to the sand. I've tested it on a small section already and I can do a couple of passes with this without altering the color too much. Then my plan is to decal and start with the washes and weathering.
bill_c
Staff MemberCampaigns Administrator
MODEL SHIPWRIGHTS
Visit this Community
New Jersey, United States
Joined: January 09, 2008
KitMaker: 10,553 posts
Armorama: 8,109 posts
Posted: Monday, June 16, 2014 - 03:51 AM UTC
Terrific super-detailing. Perfect Scale Modellbau (PSM) has mounting brackets in resin for the spare wheels.
ProfessorP
Visit this Community
Minnesota, United States
Joined: February 20, 2007
KitMaker: 339 posts
Armorama: 325 posts
Posted: Wednesday, June 18, 2014 - 06:04 PM UTC
Base colors are on and some smaller details picked out. Again, not pushing the boundaries on the modulation since I'm just trying to enhance the details, not "volumize" the model too much. Next step will be satin coat and then filters and washes.


One detail note: A32 has blue rings on the barrel as platoon and vehicle number identifiers but the decals supplied in the kit are actually black. So, I used a tip I saw in AFV Modeller magazine: I first painted the evacuator blue and then taped off the rings with Tamiya tape cut to the same width as the decals. I sprayed the area blue again to seal the edges of the tape and prevent the lighter color leaking underneath. Once that was dry, I sprayed the entire barrel using the various sand colors and peeled off the tape before that last layer was completely dry. Result is blue rings with little or no touch-up needed.


DeskJockey
Visit this Community
Virginia, United States
Joined: July 17, 2006
KitMaker: 1,558 posts
Armorama: 1,159 posts
Posted: Wednesday, June 18, 2014 - 10:34 PM UTC
It looks very nice! The rings came out quite well. That's a good tip to keep in mind.
ProfessorP
Visit this Community
Minnesota, United States
Joined: February 20, 2007
KitMaker: 339 posts
Armorama: 325 posts
Posted: Thursday, June 19, 2014 - 05:21 AM UTC
Thanks Lucas. I took your advice and toned down the contrast on the front glacis plate and I think it looks better and more in balance with the rest of the tank. I left the side angled hull plates a little darker since they fall under the shadow of the turret. I think this helps differentiate them more from the hull portions that are not under the turret.

That's a huge turret by the way!
ProfessorP
Visit this Community
Minnesota, United States
Joined: February 20, 2007
KitMaker: 339 posts
Armorama: 325 posts
Posted: Sunday, August 10, 2014 - 03:31 PM UTC
Well, seems I need to do a couple of rounds of updates. Apologies for the image quality...these were all shot with my iPhone since I didn't really have time to set up the camera and tripod during the last few sessions.

After the modulation process shown in the last update, I went on to add paint to some specific areas such as the M240 travel ring, the ammo cans, smoke grenades and anything else that was a different color than the body. I also added some light chipping around the hatches.


At this point I also built the front CIP's which were made from thin card cut to match the size of the stickers that came with the kit. I painted them Sand, shot them with gloss and when that dried, I added the decals. I added a final coat of gloss to protect the decals and let everything dry again. Using a new x-acto blade and a straightedge, I lightly cut panel lines to simulate the beginning of delamination. Once these were done, I attached them to the front of the turret. I also added painted strips of paper around the turret to replicate the velcro tape.


Also attempted add the "51" to the battle board that hangs off the extended bustle rack but the decal provided was much too small compared to reference photos. The chevron decal was OK to use but I had to create a stencil for the numbers by photocopying the decal sheet at 150% and cutting them out. I then tacked it to the battle board and sprayed it black. This worked out well since I was able to place it slightly off-center as it is in the reference photo and it has a slightly imperfect appearance as you would expect from a field applied marking. Finally, I added two bolt heads that are shown in my reference photo. Most of the battle boards I've seen were apparently held on with zip ties but this was looks to have been bolted on.


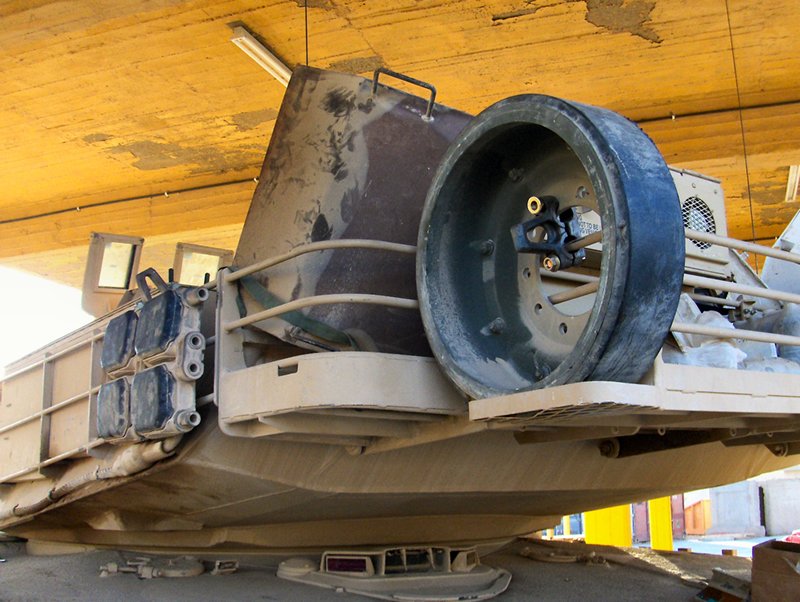
Finally, it was time for the wash. After a couple of light coats of satin varnish over the whole model had been allowed to dry, I began applying the AK Interactive wash from the OIF kit. I applied it as a pinwash, around and into details rather than as an overall wash. To remove it I used Windsor & Newton Artists White Spirit. This process took much longer than expected and fortunately I had only applied the wash to the hull. I think I spent about 5 hours working it to get it to look just right. Another 4 hours went into working on the turret the following night.


I've begun adding the remaining decals starting with the iconic name of this beast.


The string of bones on the gun barrel broke off during the painting process but I'll add it back right at the end.

Once the decals are added to the skirts, I'll move on to painting and weathering the tracks and putting them on along with the wheels. Then it's stowage and crew. Still quite a bit to do...I'll just keep plugging along.

Thanks for looking.


DeskJockey
Visit this Community
Virginia, United States
Joined: July 17, 2006
KitMaker: 1,558 posts
Armorama: 1,159 posts
Posted: Sunday, August 10, 2014 - 11:54 PM UTC
It's looking great! I love the exhaust, in particular. The chipping around the driver's hatch is really well one, too. As an aside, I think you forgot to take off a bit of the pinwash around two fixtures above the roadwheel arms.