Ontario, Canada
Joined: November 03, 2012
KitMaker: 2,275 posts
Armorama: 2,233 posts
Posted: Monday, August 12, 2013 - 11:04 PM UTC
This guys work is amazing !!!
http://s140.photobucket.com/user/louisuni/library/Stug%20III?sort=3&page=1 
Compared to my first attempt lol
gonna try again after seeing that guys work, boy , do I have alot to learn!!
North Carolina, United States
Joined: June 06, 2006
KitMaker: 4,691 posts
Armorama: 3,509 posts
Posted: Monday, August 12, 2013 - 11:42 PM UTC
Man,that looks like a shot of the real thing
United States
Joined: August 30, 2010
KitMaker: 749 posts
Armorama: 521 posts
Posted: Tuesday, August 13, 2013 - 01:01 AM UTC
. The gun is it turned 90 deg. To the right ? I enlarged the picture and is not , just an optical illusion .
Ontario, Canada
Joined: November 03, 2012
KitMaker: 2,275 posts
Armorama: 2,233 posts
Posted: Tuesday, August 13, 2013 - 01:08 AM UTC
Quoted Text
. The gun is it turned 90 deg. To the right ? I enlarged the picture and is not , just an optical illusion .
lol Ya it is, I just had it hanging there.
United States
Joined: August 30, 2010
KitMaker: 749 posts
Armorama: 521 posts
Posted: Tuesday, August 13, 2013 - 02:00 AM UTC
I better get the eyes checked, what's the cylinders on top of the gun ? I though they were turned so the brain did not recognized it .
Ontario, Canada
Joined: November 03, 2012
KitMaker: 2,275 posts
Armorama: 2,233 posts
Posted: Tuesday, August 13, 2013 - 04:08 PM UTC
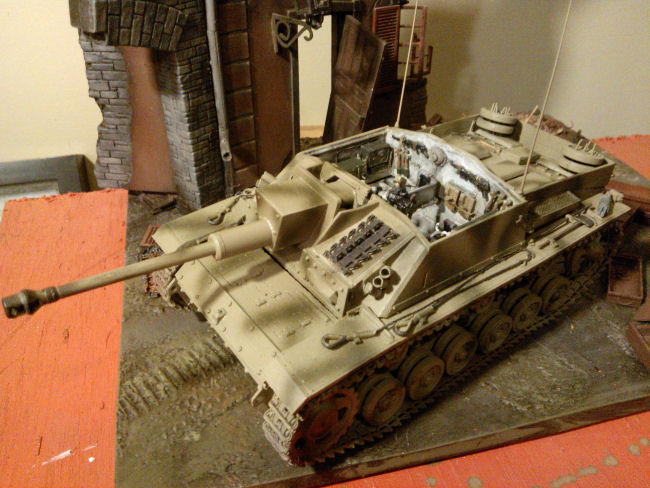
i painted the outside

)
Have to fix interior, pretty dirty inside.
Jakarta Raya, Indonesia
Joined: August 22, 2012
KitMaker: 599 posts
Armorama: 527 posts
Posted: Tuesday, August 13, 2013 - 05:57 PM UTC
Quoted Text
i painted the outside )
Have to fix interior, pretty dirty inside...
Looks good so far, maybe some pics of closer look for the interior after rework will be better if posted here. For the next step, I believe you will go excellent with the diorama concept. Love the red window frames, ruins and buildings

Cheers

Garry
From A Dream Becomes A Vision
From A Vision Becomes A Reality
(Hiram Maxim)
North Carolina, United States
Joined: June 26, 2007
KitMaker: 2,116 posts
Armorama: 1,080 posts
Posted: Tuesday, August 13, 2013 - 06:07 PM UTC
Gauteng, South Africa
Joined: April 04, 2010
KitMaker: 50 posts
Armorama: 49 posts
Posted: Tuesday, August 13, 2013 - 08:15 PM UTC
Hello David,
An awesome effort!
Villiers
Ontario, Canada
Joined: November 03, 2012
KitMaker: 2,275 posts
Armorama: 2,233 posts
Posted: Tuesday, August 13, 2013 - 10:47 PM UTC
Another shot, going to clean it up inside.The tank isn't weathered yet.
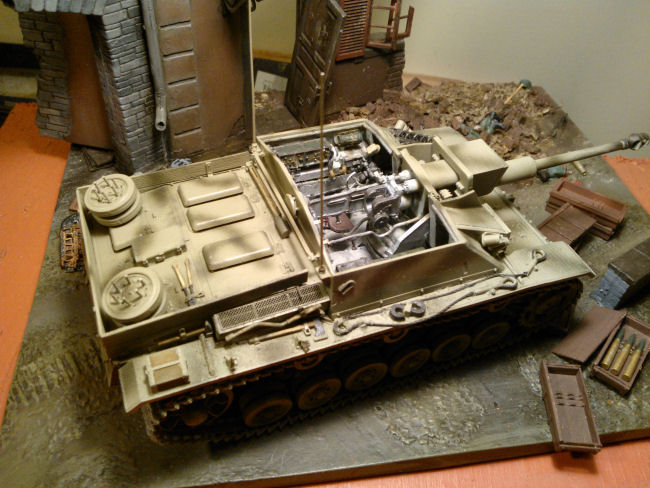
These 2 need interiors
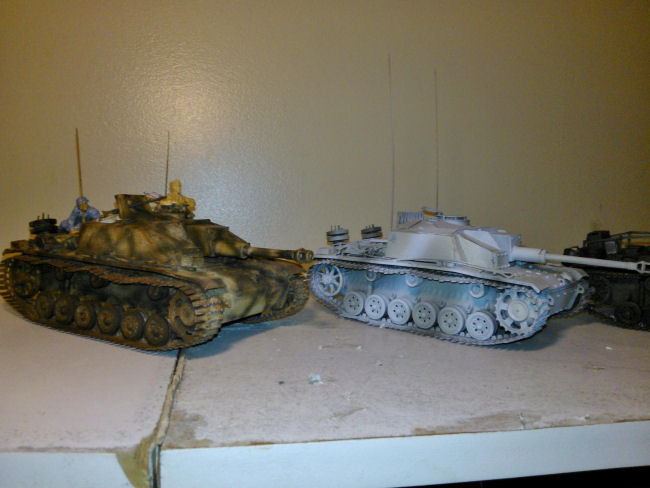
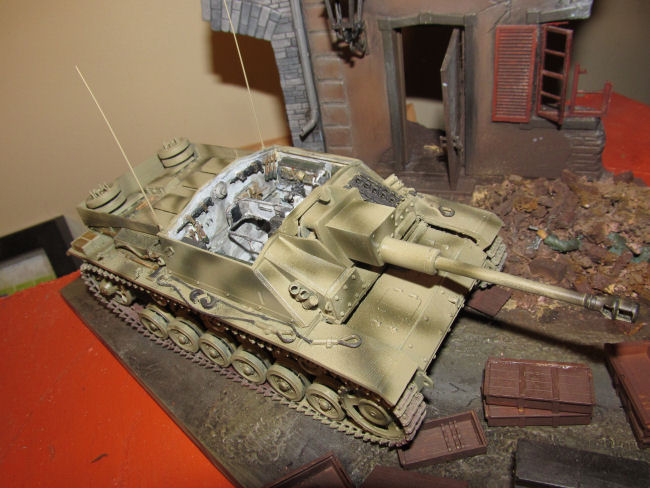
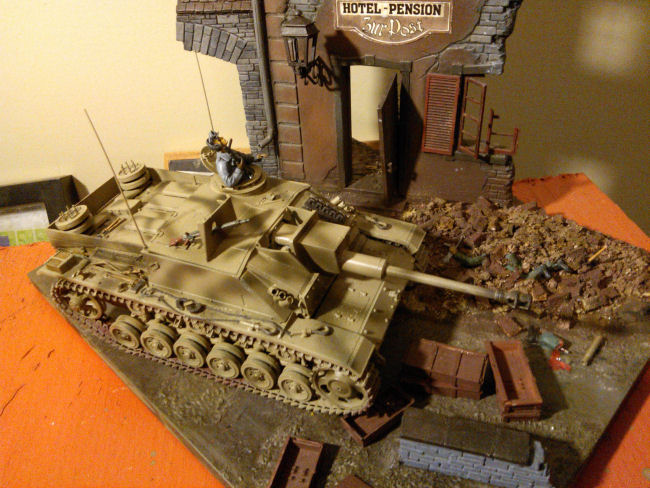
This is the Stug III with the top on. The commander is looking out for airplanes lol.Since the Stug was considered Infantry Assault Gun, the crew wore grey uniforms , not the black panzer uniforms. Correct? You can see poor "Fritz" in the rubble.
Austria
Joined: August 31, 2010
KitMaker: 28 posts
Armorama: 26 posts
Posted: Wednesday, August 14, 2013 - 01:12 AM UTC
Hello David
You built really a nice Stug.
But one point. The MG shield holds only in upright position when it is hooked at the open front hatch. Otherwise it would lay flat folded either forward or backwards. Closed hatch and MG outside would also be unlikely. to easy to loose it. In any case it would make sense to open all hatches with your interior.
Regards from Vienna
Robert
Ontario, Canada
Joined: November 03, 2012
KitMaker: 2,275 posts
Armorama: 2,233 posts
Posted: Wednesday, August 14, 2013 - 02:22 AM UTC
Quoted Text
Hello David
You built really a nice Stug.
But one point. The MG shield holds only in upright position when it is hooked at the open front hatch. Otherwise it would lay flat folded either forward or backwards. Closed hatch and MG outside would also be unlikely. to easy to loose it. In any case it would make sense to open all hatches with your interior.
Regards from Vienna
Robert
Thx Robert. Ya , I had to tack glue it shut to paint it , it will be open when it's complete. Have to find another crew member - loader for it.
Ontario, Canada
Joined: November 03, 2012
KitMaker: 2,275 posts
Armorama: 2,233 posts
Posted: Sunday, October 20, 2013 - 06:39 AM UTC
update: So I ordered the CMK Stug III G interior set, bought Eduard Interior sets for G, F8 & B.Bought a new Cyber hobby Stug III G initial production kit.
I have this above Stug to finish , I have a Cyberhobby/winterketten White Stug III to interior , plus the new Cyberhobby.
I was thinking of un-gluing the top of the StuH 42 , pictured above & putting an interior in it as well?
Ontario, Canada
Joined: November 03, 2012
KitMaker: 2,275 posts
Armorama: 2,233 posts
Posted: Monday, October 28, 2013 - 10:59 PM UTC
update: So I got my CMK Stug III upgrade kit , resin & PE. Plus the other PE sets. So I started with the new cyberhobby kit while also adding parts to the pre built Stug III G above.
Will add photo's after work.
England - South East, United Kingdom
Joined: January 09, 2010
KitMaker: 979 posts
Armorama: 959 posts
Posted: Monday, October 28, 2013 - 11:42 PM UTC
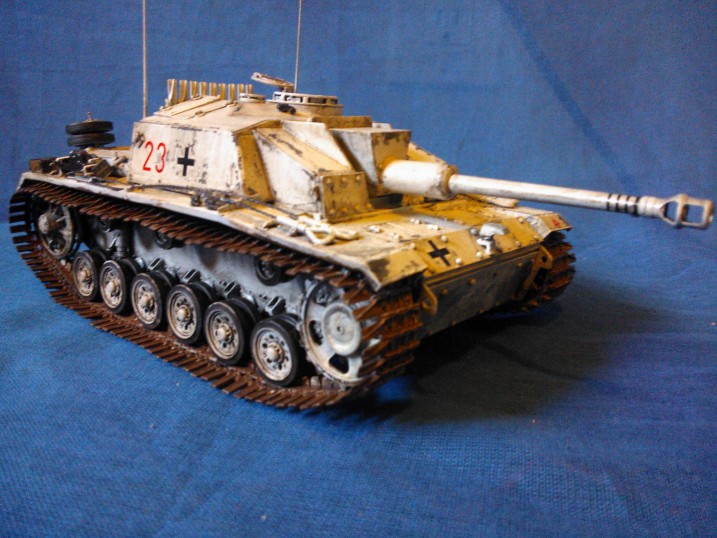
It is a great looking Stug III.
I hate the way the flash washes the colour out of the models paint scheme
JPTRR
 Managing Editor
#051
Tennessee, United States
Joined: December 21, 2002
KitMaker: 7,772 posts
Armorama: 2,447 posts
Posted: Tuesday, October 29, 2013 - 12:55 AM UTC
Quoted Text
So I ordered the CMK Stug III G interior...Eduard Interior sets...I have a Cyberhobby/winterketten White Stug III to interior...StuH 42 , pictured above & putting an interior in...
David, you must really be "into" StuGs - pardon the pun!

Very nice work! I have always wanted to a build a StuG with full interior - much more than other AFVs. Dunno why.
If they demand your loyalty, give them integrity; if they demand integrity, give them your loyalty.--Col John Boyd, USAF
Any plan where you lose your hat is a bad plan.
Ontario, Canada
Joined: November 03, 2012
KitMaker: 2,275 posts
Armorama: 2,233 posts
Posted: Wednesday, October 30, 2013 - 12:46 PM UTC
Yehaw !!!! Look what I finded pa!

Ontario, Canada
Joined: November 03, 2012
KitMaker: 2,275 posts
Armorama: 2,233 posts
Posted: Thursday, October 31, 2013 - 12:38 AM UTC
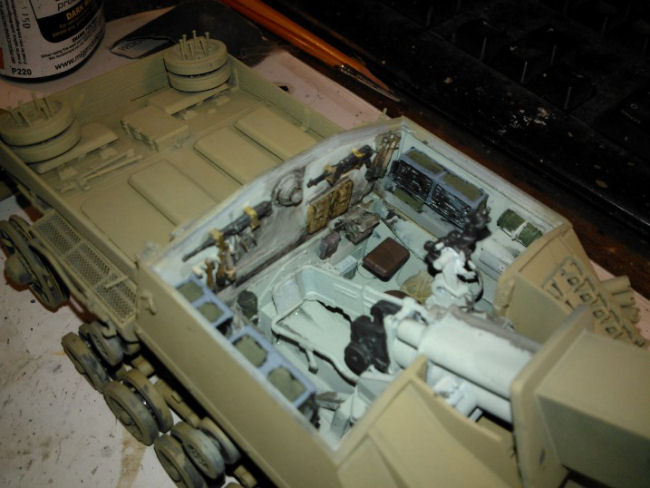
Update.: Ok, so here's a couple pix of the new CyberHobby Stug III G interior. I know it looks like crap but , still working on it. I opted to use the dragon radio's instead of the CMK & Eduard...both look silly.
Just have to wire it up & work on the ammo boxes. Add the MP 40's & Nades.


Ontario, Canada
Joined: November 03, 2012
KitMaker: 2,275 posts
Armorama: 2,233 posts
Posted: Friday, November 01, 2013 - 03:28 AM UTC
I don't have the skill yet to tackle the tiny tiny PE hinges...I think I have to do a few bigger hinges first. I have no idea why I put that chain in there lol.

I will put a coat of paint on everything & see what it looks like...post a pic later today hopefully. k? k...
Ontario, Canada
Joined: November 03, 2012
KitMaker: 2,275 posts
Armorama: 2,233 posts
Posted: Saturday, November 02, 2013 - 11:23 AM UTC
Arkansas, United States
Joined: June 29, 2009
KitMaker: 11,610 posts
Armorama: 7,843 posts
Posted: Sunday, November 03, 2013 - 04:22 AM UTC
That is one great looking interior! For the really small pieces of photoetch, I use a pair of very fine tweezers with a pair of reading glasses and optivisor.
Ideals are peaceful. History is violent.
Ontario, Canada
Joined: November 03, 2012
KitMaker: 2,275 posts
Armorama: 2,233 posts
Posted: Sunday, November 03, 2013 - 08:06 AM UTC
Quoted Text
That is one great looking interior! For the really small pieces of photoetch, I use a pair of very fine tweezers with a pair of reading glasses and optivisor.
Thx Matt!
I will try your info on PE Matt.
I had to change that "big" handle on that radio to PE one.
Today I'm putting the model together to prime. The other Stug III interior is cleaned up & ready for interior detailing. Will post pics after.
New York, United States
Joined: December 29, 2011
KitMaker: 343 posts
Armorama: 313 posts
Posted: Sunday, November 03, 2013 - 08:19 AM UTC
Impressive, really nice job, I can see my self looking for all those tiny pieces on the floor now.. you know when you pick up the tiny piece with tweezers and Twang!, with no landing sound... no idea where it landed.
- John
The Scenic Factory
www.thescenicfactory.com
Ontario, Canada
Joined: November 03, 2012
KitMaker: 2,275 posts
Armorama: 2,233 posts
Posted: Sunday, November 03, 2013 - 02:52 PM UTC
Got the tracks on, ready for paint.
)

Here's the Dragon Stug III cleaned up.

Ontario, Canada
Joined: November 03, 2012
KitMaker: 2,275 posts
Armorama: 2,233 posts
Posted: Monday, November 04, 2013 - 03:01 PM UTC
update- got her painted, 2 more tones to add.


