_GOTOBOTTOM
Dioramas
Do you love dioramas & vignettes? We sure do.
Are you receiving.
gerrysmodels
Visit this Community
Scotland, United Kingdom
Joined: September 13, 2012
KitMaker: 441 posts
Armorama: 429 posts
Posted: Wednesday, August 21, 2013 - 01:11 PM UTC
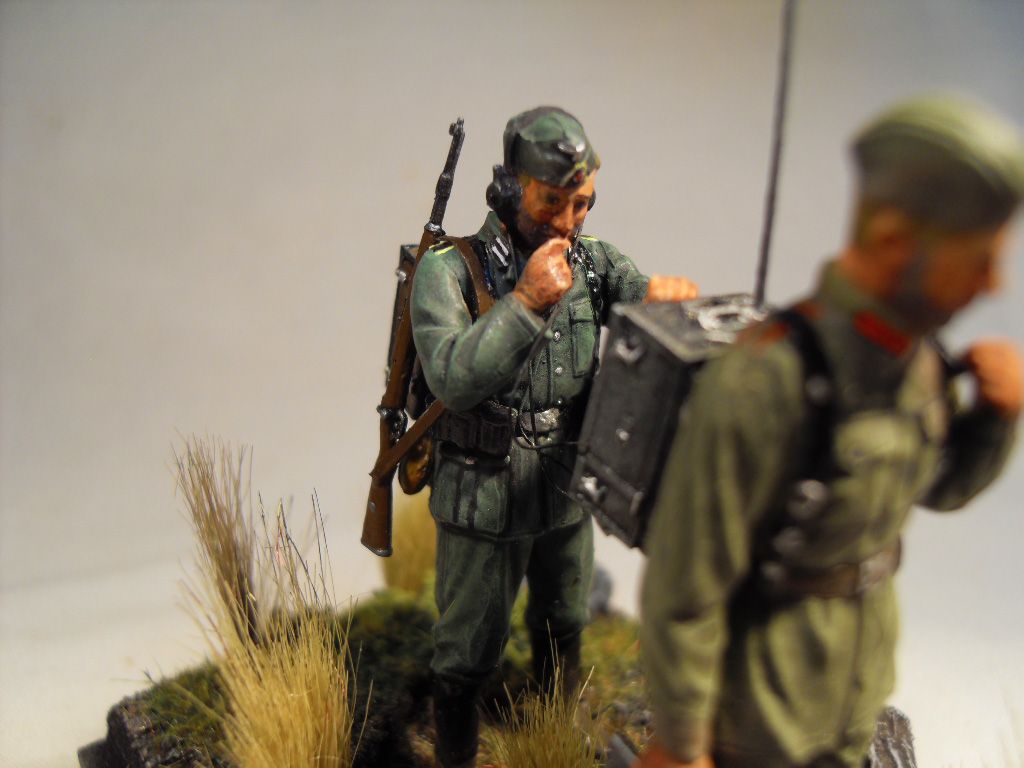
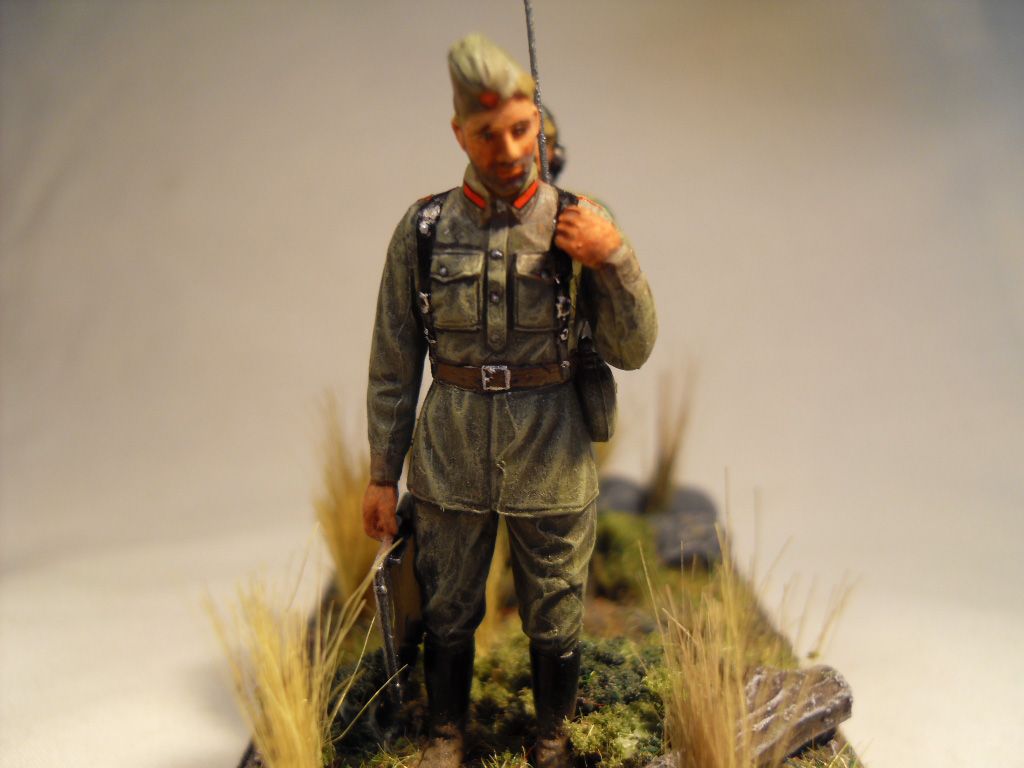
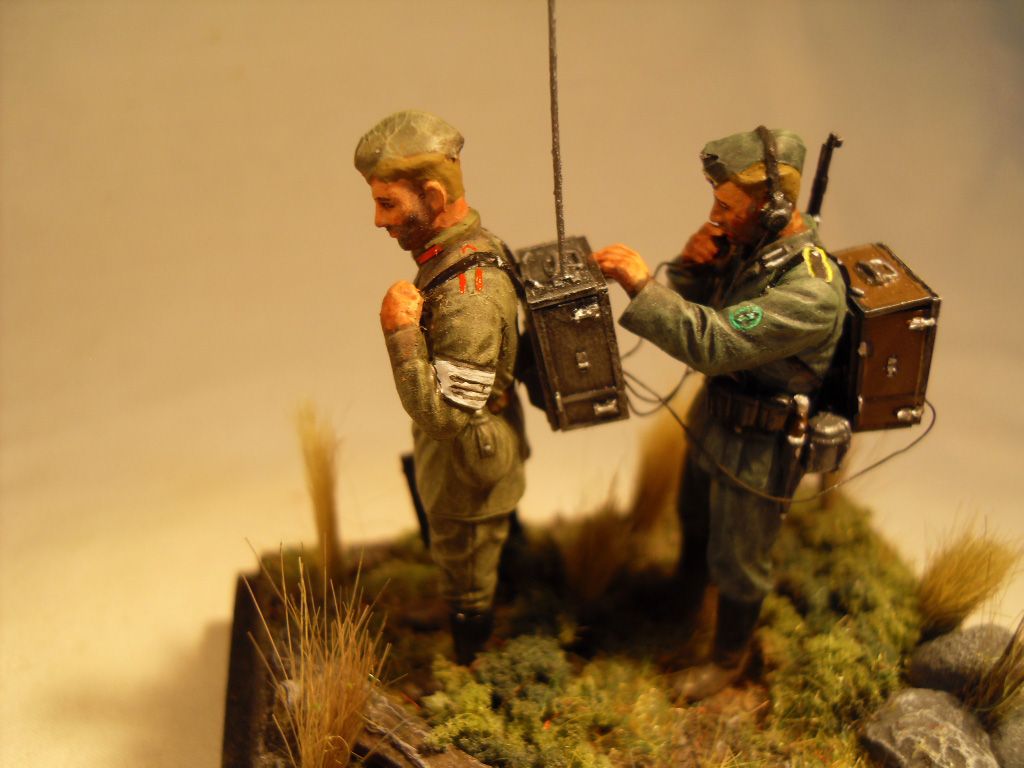
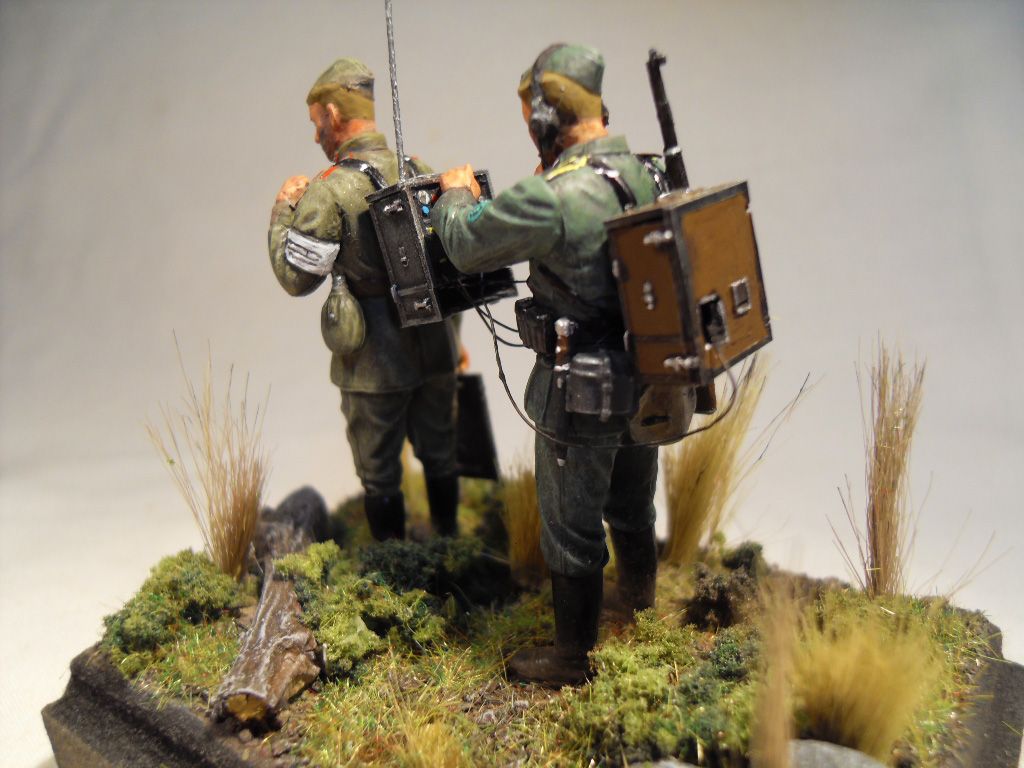
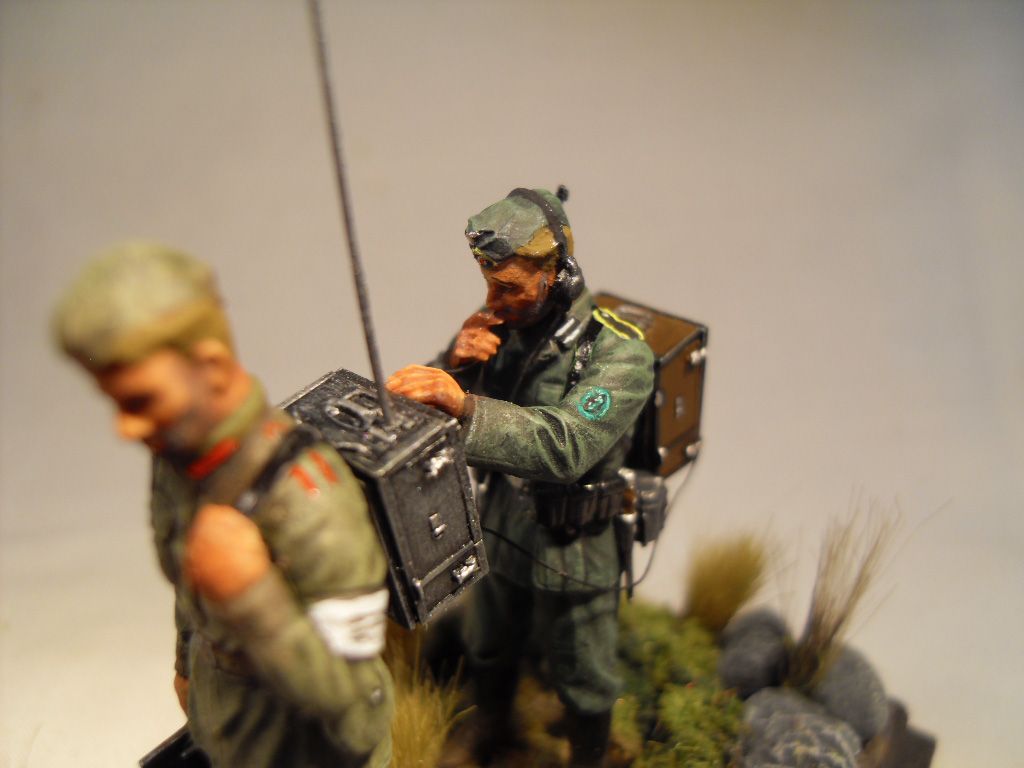
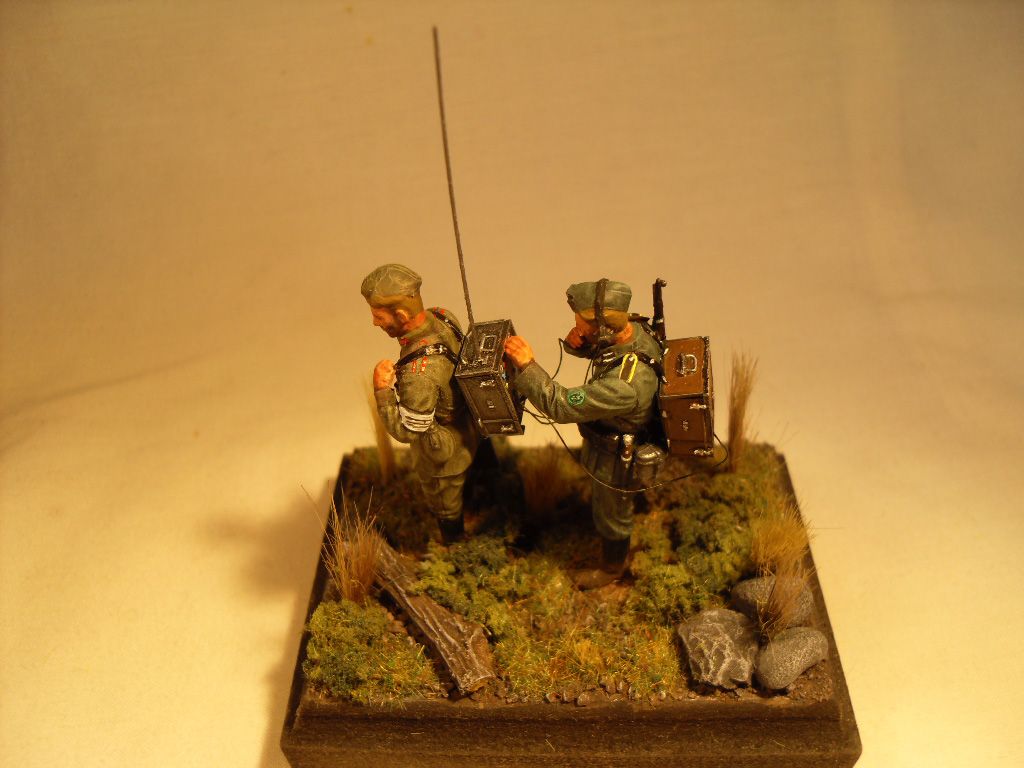
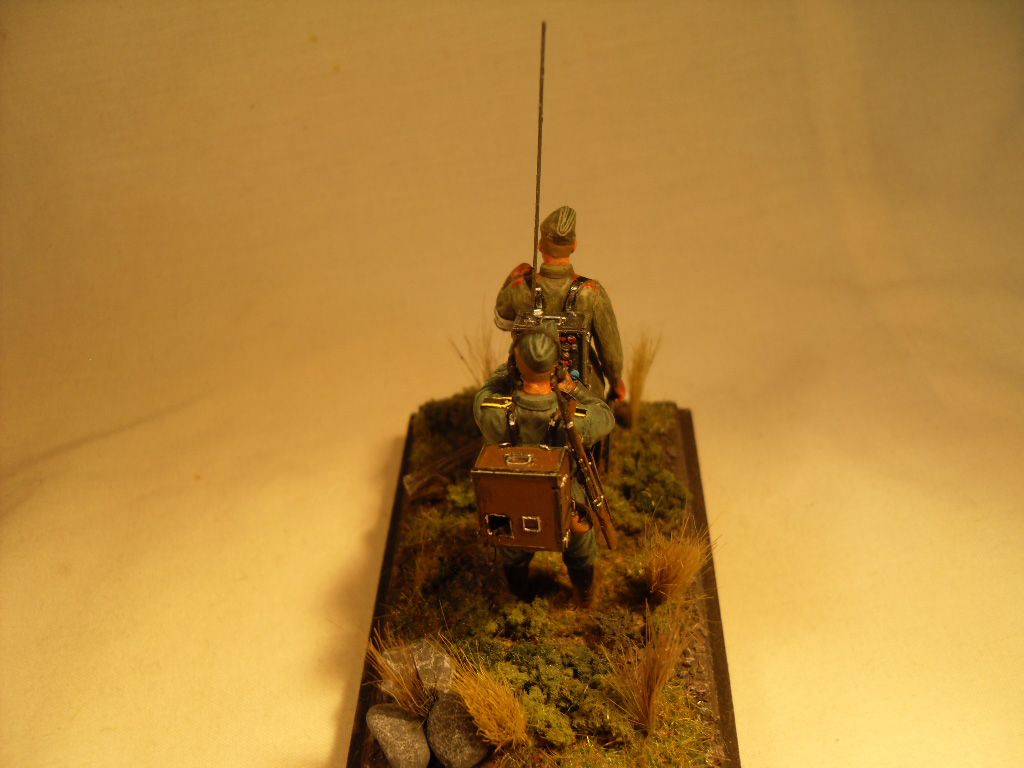
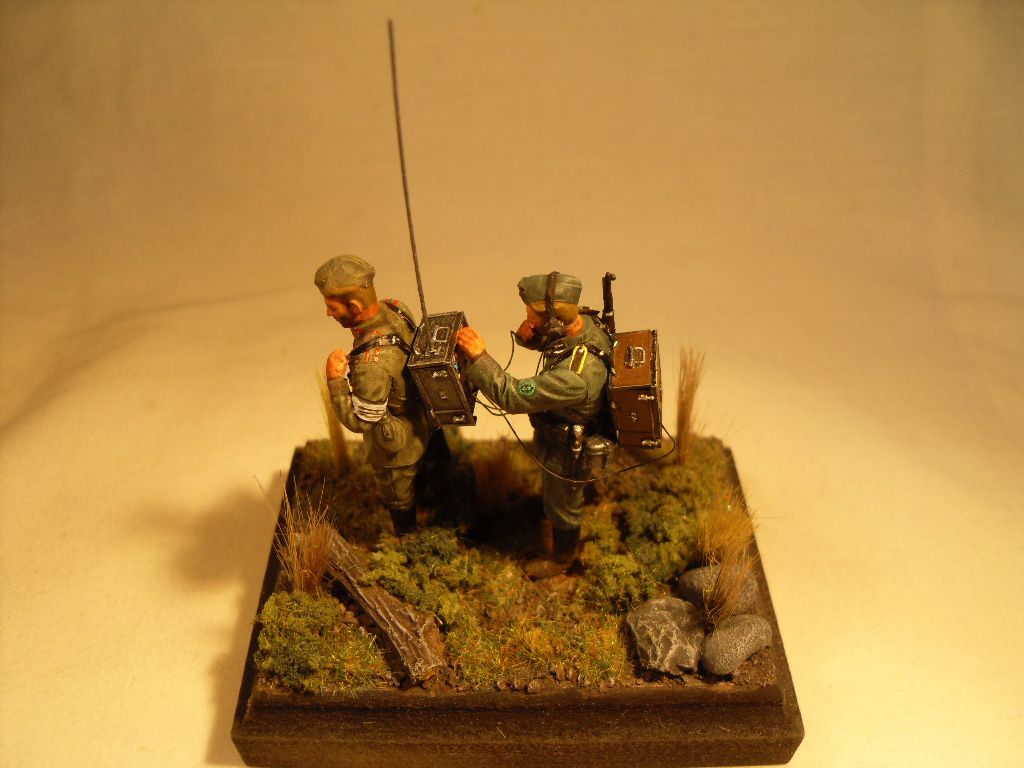
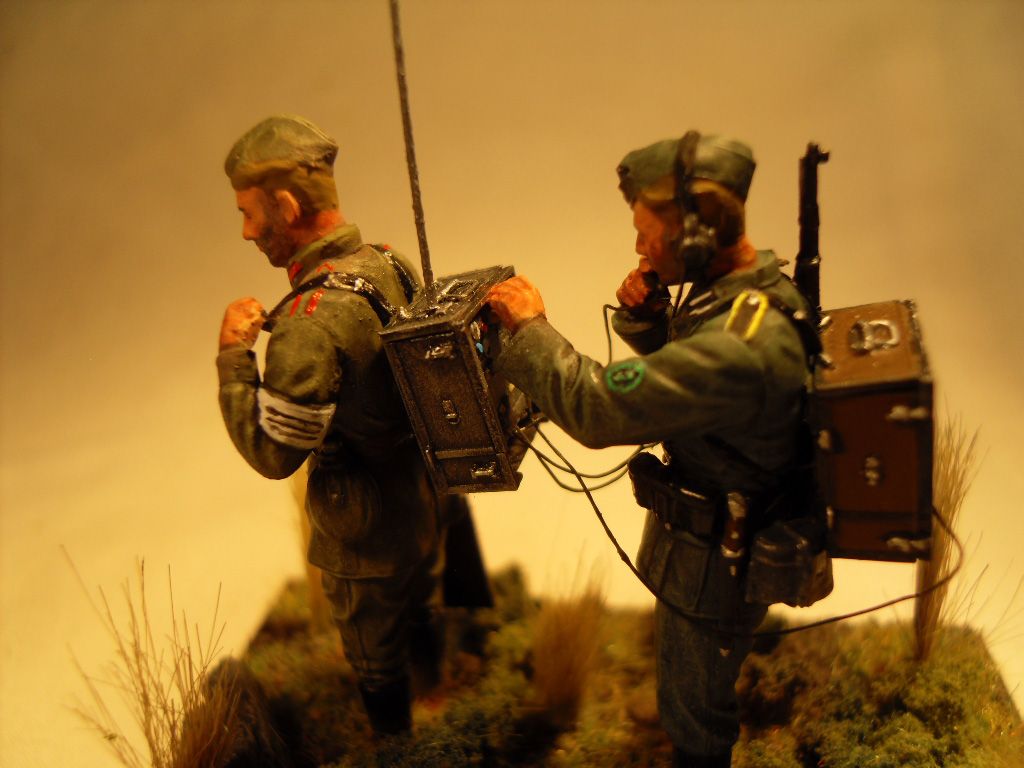
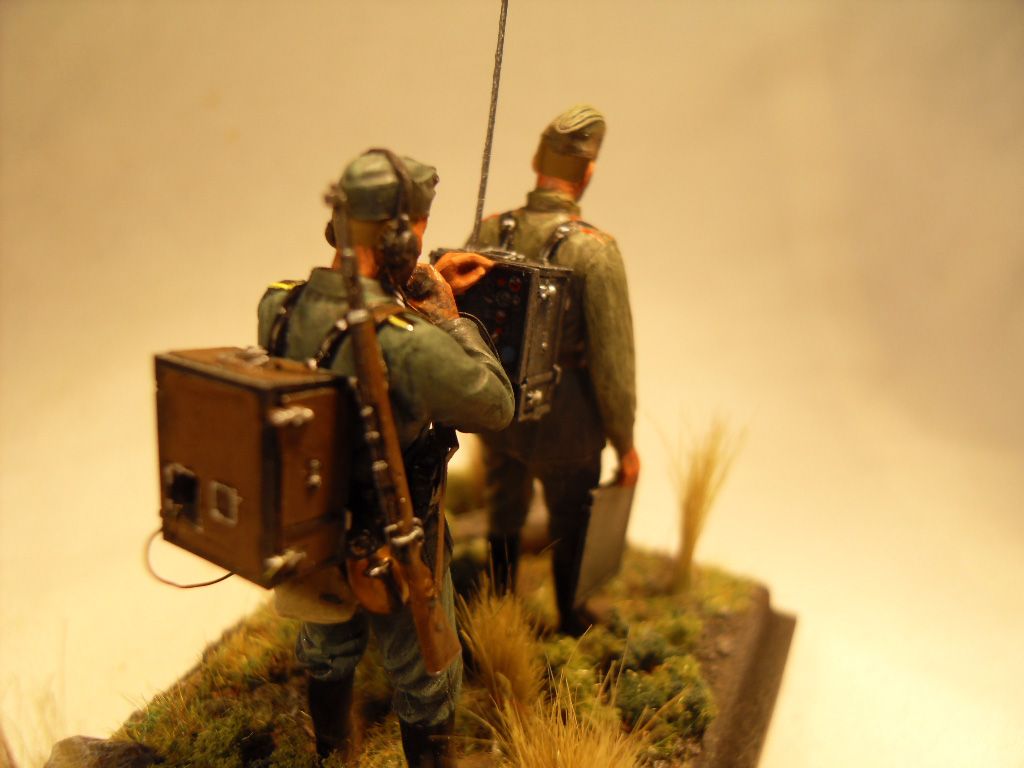
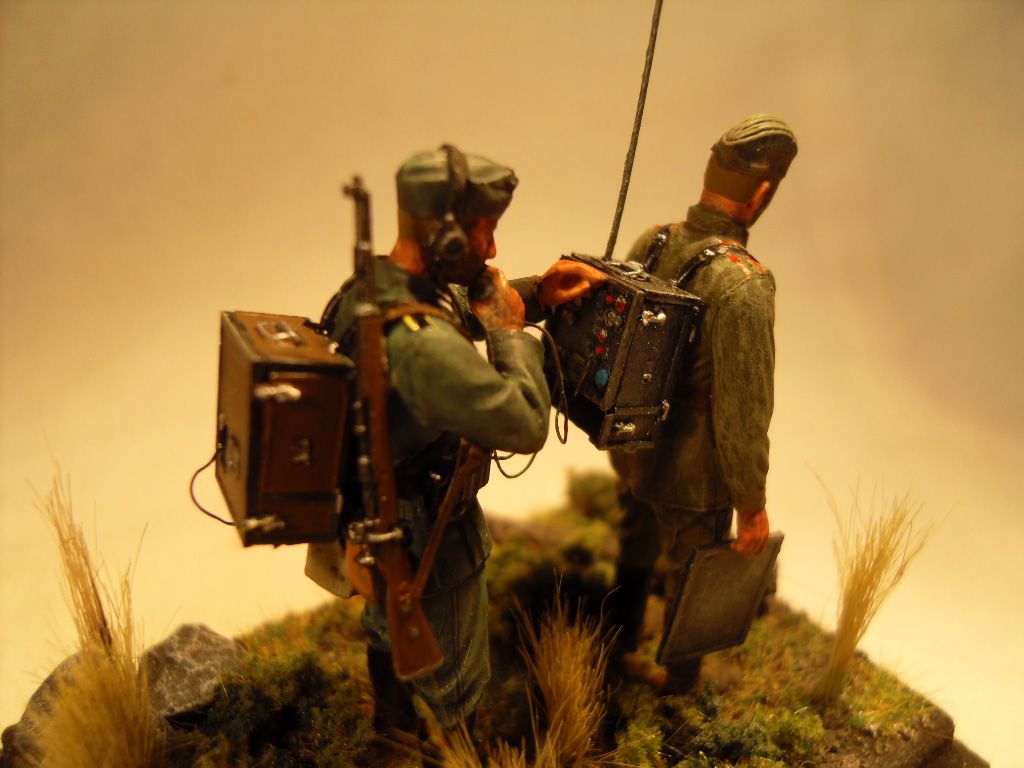
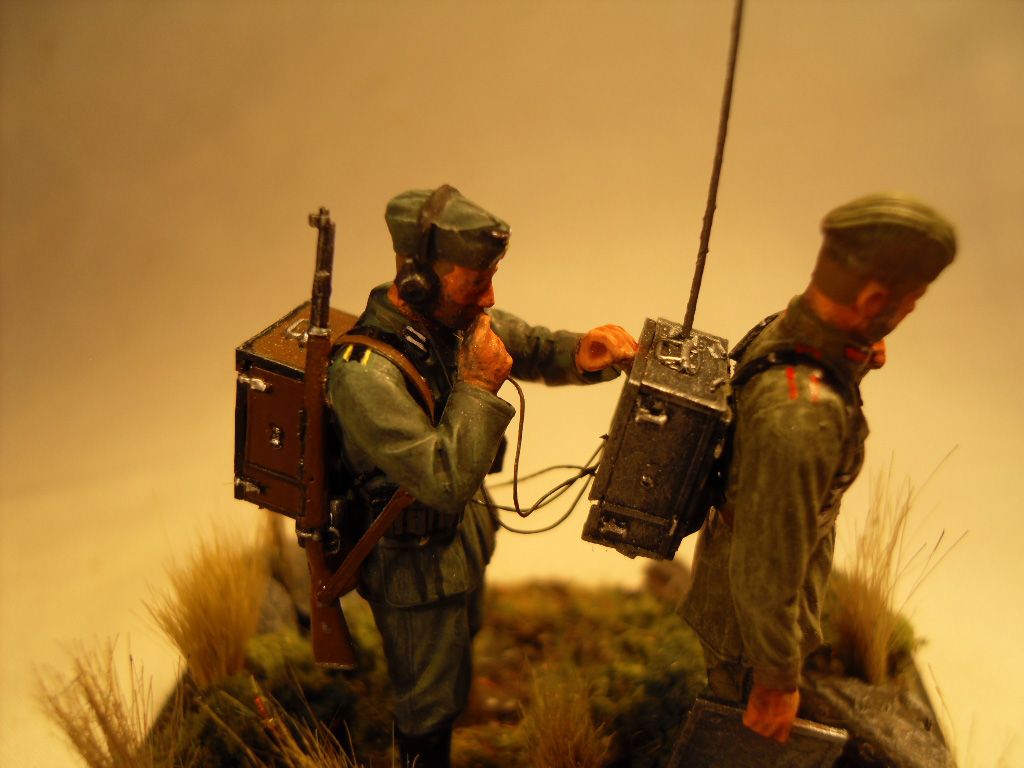
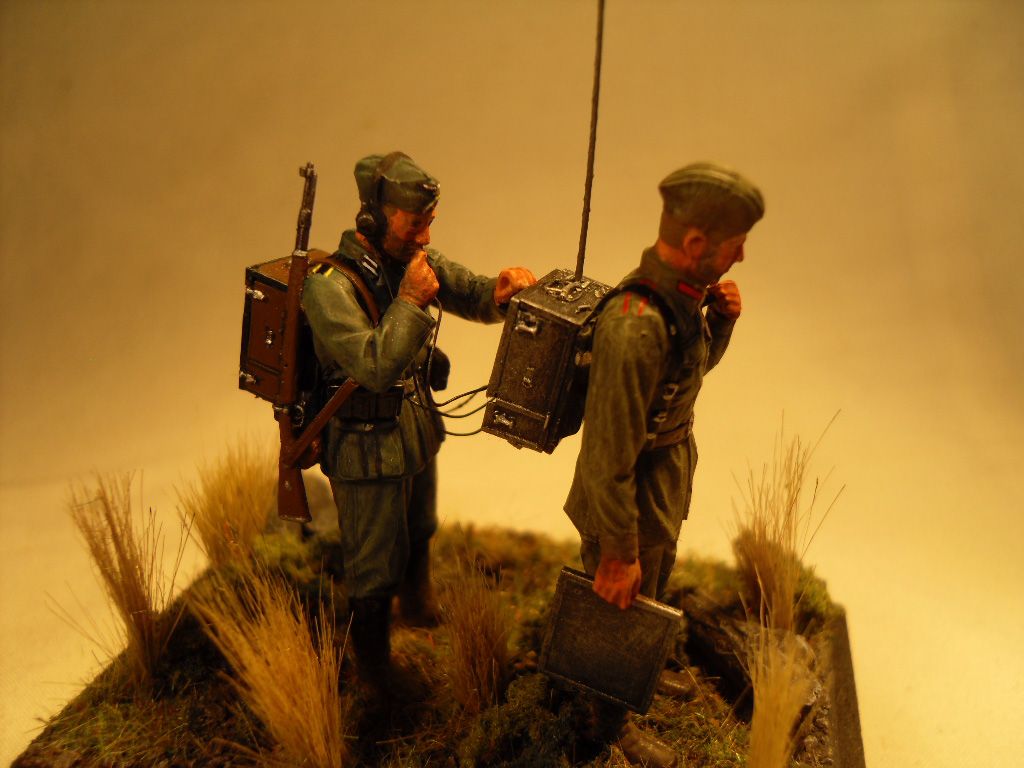
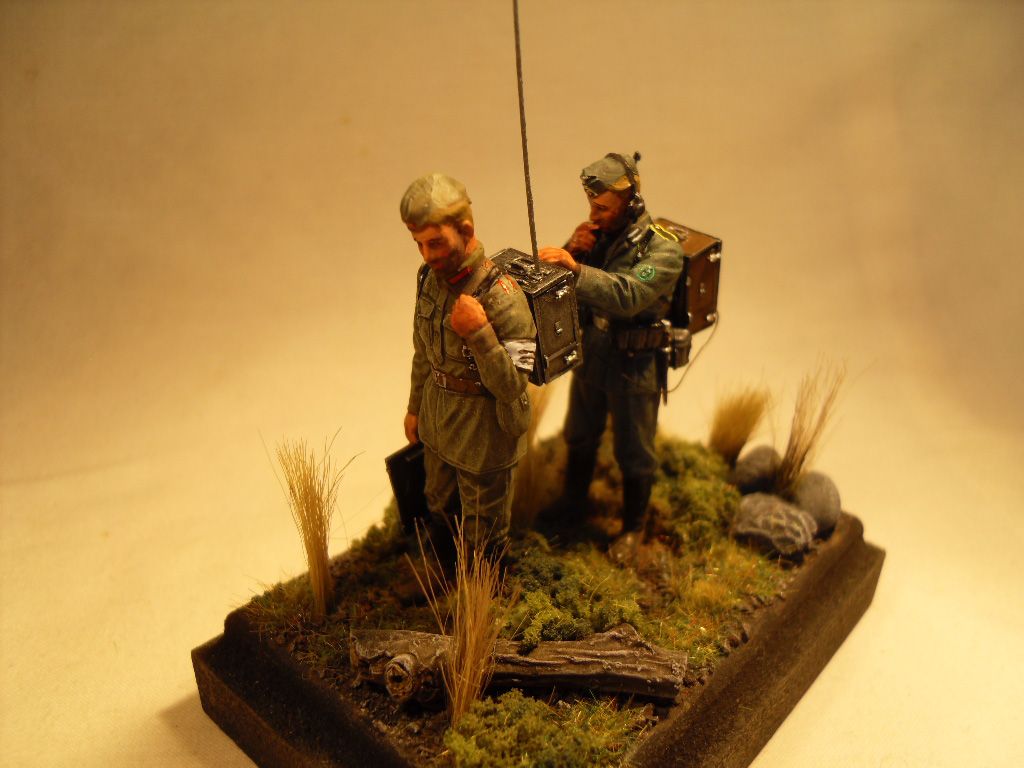
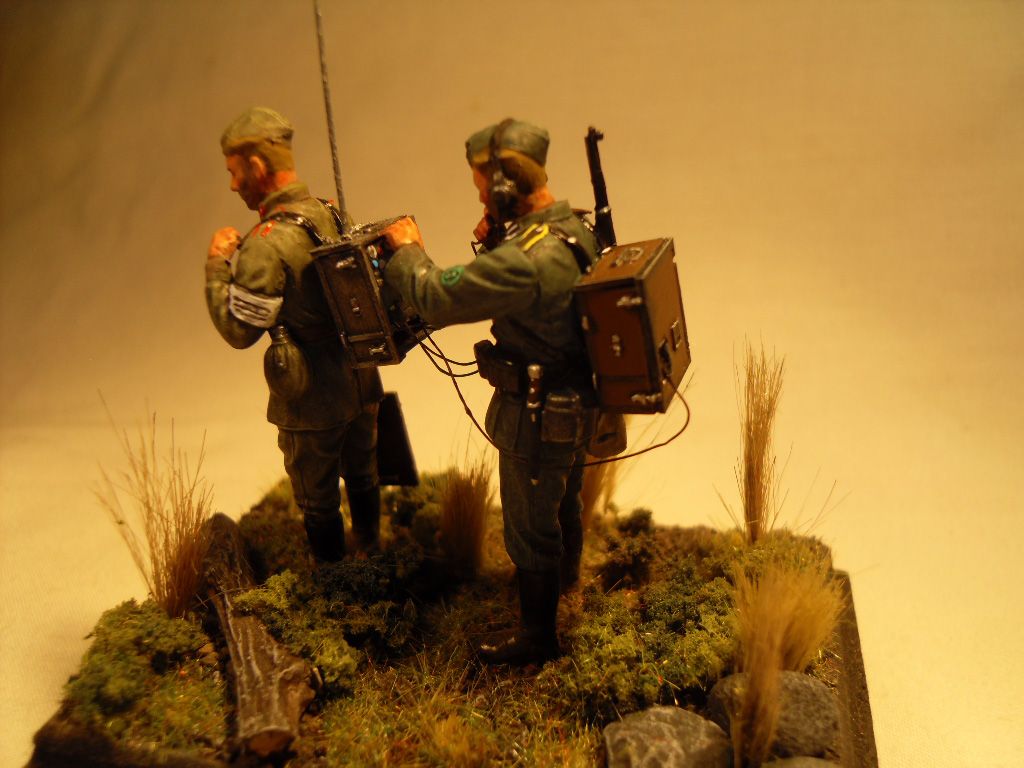
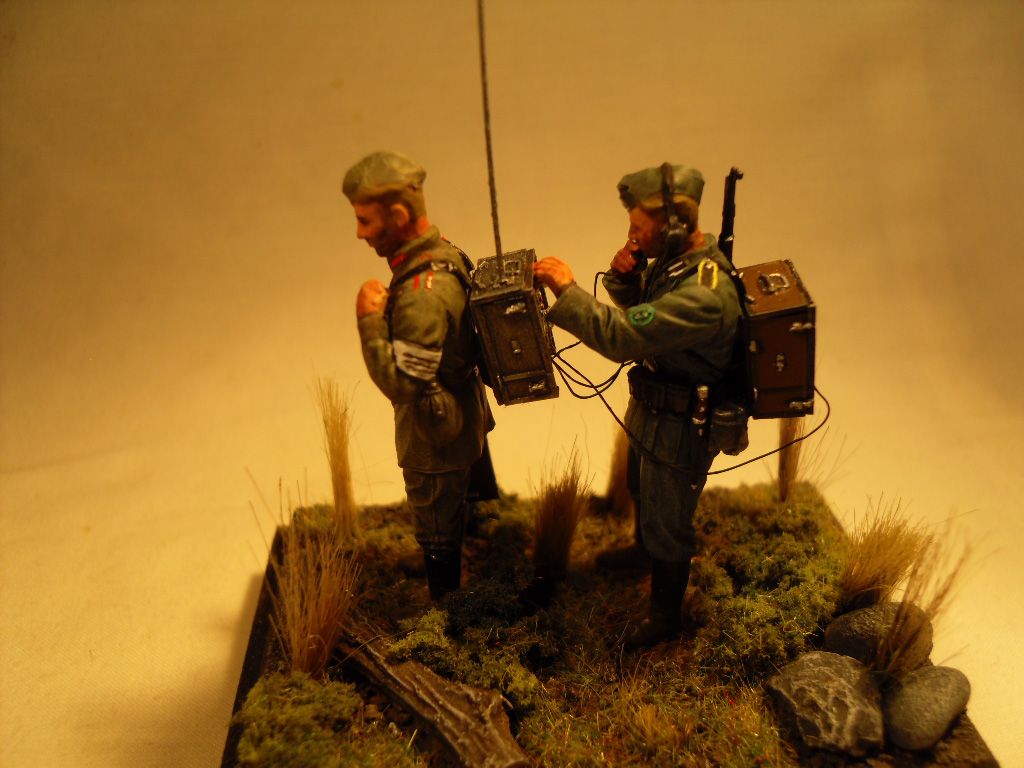
A 1/35 vignette of a German radio operator and assistant.


Biggles2
Visit this Community
Quebec, Canada
Joined: January 01, 2004
KitMaker: 7,600 posts
Armorama: 6,110 posts
Posted: Thursday, August 22, 2013 - 02:53 AM UTC
Hi Jerry! Another dio!! You're mass-producing them! I notice you're painting beards on most of your characters lately. Good idea, but paint them less opaque. Thin out your beard paint and build up the coverage. I use the basic flesh paint + grey, and sometimes a little blue. Use a fine tip brush (5-0 or smaller) and paint a series of fine lines to represent the beard. If the beard is too light, good! Repeat until you achieve the coverage you want.
1stjaeger
Visit this Community
Wien, Austria
Joined: May 20, 2011
KitMaker: 1,744 posts
Armorama: 1,727 posts
Posted: Thursday, August 22, 2013 - 02:58 AM UTC
Hi Gerry,

Really well done m8! You are getting better all the time!

The Funker has the proper Waffenfarbe, his backpack is superbly rendered, this K98 is a lot better, both modelwise and painting,.......but what I don't get is this sort of

"cooperation between Wehrmacht and Red Army" !!!????????????

Please explain!! I'm too stupid to figure it out!

Cheers

Romain

Grauwolf
#084
Visit this Community
Quebec, Canada
Joined: September 14, 2005
KitMaker: 2,485 posts
Armorama: 743 posts
Posted: Thursday, August 22, 2013 - 03:07 AM UTC
Very nice vignette and I too am curious about the
German/Russo co-op....prisoner?... collaborator?

Cheers,
Joe
panzerconor
Visit this Community
Massachusetts, United States
Joined: February 08, 2012
KitMaker: 1,271 posts
Armorama: 1,253 posts
Posted: Thursday, August 22, 2013 - 03:20 AM UTC
Some Russian POW's were pressed into service as auxiliary and what not. I like this little vignette, really accentuates the figure details.
gerrysmodels
Visit this Community
Scotland, United Kingdom
Joined: September 13, 2012
KitMaker: 441 posts
Armorama: 429 posts
Posted: Thursday, August 22, 2013 - 04:01 AM UTC

Quoted Text

Hi Jerry! Another dio!! You're mass-producing them! I notice you're painting beards on most of your characters lately. Good idea, but paint them less opaque. Thin out your beard paint and build up the coverage. I use the basic flesh paint + grey, and sometimes a little blue. Use a fine tip brush (5-0 or smaller) and paint a series of fine lines to represent the beard. If the beard is too light, good! Repeat until you achieve the coverage you want.


Biggles2

Thanks for looking and the tips. Much appreciated.

Learning all the time.

Cheers

Gerry
gerrysmodels
Visit this Community
Scotland, United Kingdom
Joined: September 13, 2012
KitMaker: 441 posts
Armorama: 429 posts
Posted: Thursday, August 22, 2013 - 04:07 AM UTC
[quote]Hi Gerry,

Really well done m8! You are getting better all the time!

The Funker has the proper Waffenfarbe, his backpack is superbly rendered, this K98 is a lot better, both modelwise and painting,.......but what I don't get is this sort of

"cooperation between Wehrmacht and Red Army" !!!????????????


Please explain!! I'm too stupid to figure it out!

Cheers

Romain


Romain

Thanks for looking and taking the time to comment.

During the early stage of Barbarossa unprecedented amounts of POWs were taken by the Germans. A lot of them hated Stalin and looked at the Germans as liberators.

A lot of these guys were used by the Germans in behind the lines roles and wore their own uniforms until they could be issued with German ones. The armband identified the POW as a German auxilliary.

Cheers

Gerry


gerrysmodels
Visit this Community
Scotland, United Kingdom
Joined: September 13, 2012
KitMaker: 441 posts
Armorama: 429 posts
Posted: Thursday, August 22, 2013 - 04:17 AM UTC

Quoted Text

Very nice vignette and I too am curious about the
German/Russo co-op....prisoner?... collaborator?

Cheers,
Joe


Joe

Thanks for looking and taking time to comment.

See my reply to Romain re your question about the Russian helper.

Cheers

Gerry
gerrysmodels
Visit this Community
Scotland, United Kingdom
Joined: September 13, 2012
KitMaker: 441 posts
Armorama: 429 posts
Posted: Thursday, August 22, 2013 - 04:19 AM UTC

Quoted Text

Some Russian POW's were pressed into service as auxiliary and what not. I like this little vignette, really accentuates the figure details.


Connor

Thanks for looking and taking time to comment.

You are quite right about the Russian POW. See my reply to Romain.

Cheers

Gerry
1stjaeger
Visit this Community
Wien, Austria
Joined: May 20, 2011
KitMaker: 1,744 posts
Armorama: 1,727 posts
Posted: Thursday, August 22, 2013 - 08:31 PM UTC
[quote]
Quoted Text

Hi Gerry,

Really well done m8! You are getting better all the time!

The Funker has the proper Waffenfarbe, his backpack is superbly rendered, this K98 is a lot better, both modelwise and painting,.......but what I don't get is this sort of

"cooperation between Wehrmacht and Red Army" !!!????????????


Please explain!! I'm too stupid to figure it out!

Cheers

Romain


Romain

Thanks for looking and taking the time to comment.

During the early stage of Barbarossa unprecedented amounts of POWs were taken by the Germans. A lot of them hated Stalin and looked at the Germans as liberators.

A lot of these guys were used by the Germans in behind the lines roles and wore their own uniforms until they could be issued with German ones. The armband identified the POW as a German auxilliary.

Cheers

Gerry


thanks for the explanation Gerry!

Cheers

Romain
velotrain
Visit this Community
Massachusetts, United States
Joined: December 23, 2010
KitMaker: 384 posts
Armorama: 320 posts
Posted: Friday, August 23, 2013 - 01:25 PM UTC
Hi Gerry – My comments are likely all of the nit-picking variety, but since you’re obviously working hard to improve your skills, I thought I’d toss them out. These are all purely based on my overall visual reaction, as I know nothing of the history; by way of example, I noticed the difference in uniforms, but had no idea the lead guy was a Russian.

Starting with the first photo I noticed that he is carrying the lid clenched between his fingertips, instead of in his hand. No doubt it isn’t very heavy, but it’s still unnatural. It might be hard to create an opening without deforming some fingers, but possibly by working on the hand and also narrowing that part of the lid? If necessary cut part of the lid out so you can position it realistically and then rebuild the connection to the hand with filler. Or, temporarily remove the thumb to reposition the lid, and then reattach it?

Despite both men having dark beards, the hair at the back of their heads appears to be green; particularly in the case of the Russian, where it almost blends into his cap. Also, it seems to carry down the neck too far in each case, and is too squarely cut. I don’t know if any techniques are available to make the hair and uniforms look more three-dimensional, vs. flat and shiny resin. Perhaps also scribe the line where the hair meets the head/cap, so there is some visual indication of separation, vs. flowing together uninterrupted.

Except for the officer’s right hand, it looks like the uniform color has spilled over to the wrists – maybe use some tape or other resist to prevent that.

It looks like the officer’s fore- and middle fingers are connected by webbing, seen most clearly in photo #6. It’s impossible to have any degree of separation like that indicated without it extending back to the palm – try it with your own hand.

The officers left arm is not cleanly connected, which is best seen in photo #5. If you cut it off, the contours will not match if it is rotated some 90 degrees, so the joint has to be worked. It's partly just too high, which correcting might take care of most of the problem.

Clothes meeting the body – I’d suggest always scribing this to make it clear that they are separate, but it is more of a problem when the cuff is supposedly far away from the wrist, but there is no visual support for this, such as in photos #2 and #6. I’m sure it is very difficult, but if you could remove some resin between the cuff and the arm it would really help support the idea that it is separate clothing and not just the same continuous casting – it doesn’t need to go very far down. I notice you’ve painted this area flat black, which may work from a distance, but in the close-up photos you’re showing us it is obvious that this is a flat surface. This is much more glaring with the officer, as the Russian has tight cuffs with his arms facing down. However, scribing a separation line and being more careful with the uniform paint (which the scribing should assist) will help support the illusion.

Try using a real branch instead of painted resin. I realize that it might be hard to find one with the texture you want at that size.

Check the lighting in your images; most of them have a strong yellowish orientation, except for 1-3 and 5-8. I notice those with the better color are shot from closer in, suggesting that as you back away a secondary lighting source becomes more dominant? You might also try the software that combines multiple images so that all/more of it is in focus, or use strong lighting and/or a tripod to allow a higher F-stop for deeper depth-of-field.

I like that you’ve taken the time to trim the individual stalks of the tufts; it looks so bad when they’re all left precisely the same length. I see that you also have a couple trimmed shorter, but perhaps vary the maximum height even more to indicate some in better soil than others.

I should mention that I more easily notice small things that look wrong, whenever the overall scene is well done. If there were really glaring problems, I would focus on them instead of the details that I mention, but these are the things I noticed when I first looked at the photos – since I don’t have the background to know that I should be more concerned about the Russian and German uniforms ;-) I was once in a class that suggested I was a “mismatcher”.
chumpo
Visit this Community
United States
Joined: August 30, 2010
KitMaker: 749 posts
Armorama: 521 posts
Posted: Friday, August 23, 2013 - 02:30 PM UTC
I believe they were called Hiwi's, not sure of the spelling, they worked for the Germans and were actually paid almost as much as a German soldier,
gerrysmodels
Visit this Community
Scotland, United Kingdom
Joined: September 13, 2012
KitMaker: 441 posts
Armorama: 429 posts
Posted: Saturday, August 24, 2013 - 04:13 AM UTC
Charles

Thanks for looking and taking the time to leave some constructive critisism.

I read your piece with interest and have learned a lot by what you have said.

I think that by doing this it is the only way to improve on your skills and get a diferent perspective through other eyes.

The piece of tree that you mentioned is in fact a real piece of branch which I have lightly drybrushed to accentuate the detail.

My photography skills are bad and I do not have a good camera as my budget won't stretch to one meantime.

I did borrow a decent one for a while butI had to give it back and it did make a diference in the photographs I took.

Thanks again

Gerry
gerrysmodels
Visit this Community
Scotland, United Kingdom
Joined: September 13, 2012
KitMaker: 441 posts
Armorama: 429 posts
Posted: Saturday, August 24, 2013 - 04:15 AM UTC

Quoted Text

I believe they were called Hiwi's, not sure of the spelling, they worked for the Germans and were actually paid almost as much as a German soldier,


Edmund

Thanks for looking and taking the time to comment.

You are quite right in your post and thanks for reminding me of their name I had forgoton that fact.

Cheers

Gerry
noddy927
Visit this Community
Scotland, United Kingdom
Joined: February 15, 2013
KitMaker: 1,273 posts
Armorama: 568 posts
Posted: Saturday, August 24, 2013 - 05:47 AM UTC
Hi Gerry
nice little vignette you have there, I see you are getting smaller with your dios.......running out of room?
Overall a very nice little piece, the small details are what I picked up on too, but all in all a nice little piece with a piece of history obviously some of us didn't know about.


Cheers Pete
velotrain
Visit this Community
Massachusetts, United States
Joined: December 23, 2010
KitMaker: 384 posts
Armorama: 320 posts
Posted: Saturday, August 24, 2013 - 10:03 PM UTC

Quoted Text

I believe they were called Hiwi's, not sure of the spelling, they worked for the Germans and were actually paid almost as much as a German soldier,


Not at all to be confused with Kiwi's ;-)
velotrain
Visit this Community
Massachusetts, United States
Joined: December 23, 2010
KitMaker: 384 posts
Armorama: 320 posts
Posted: Tuesday, August 27, 2013 - 11:14 AM UTC

Quoted Text


My photography skills are bad and I do not have a good camera as my budget won't stretch to one meantime.


Gerry - A few thoughts. I don't know what your annual modeling budget is (most of it must go for figures, paint and landscaping material ;-), but consider allocating 10% towards a camera fund over say the next year or so. It doesn't have to be a super camera - these days ~ $200 US will buy you all the camera you need.

Perhaps look for a local photo club, or visit some of the hundreds of photo sites on the net. Digital does not change many of the basic concepts.

Many of your shots are fine, and I have no idea what caused the drift to yellow on the others. There is free photo editing software on the web. To get greater depth of field (more of the scene in focus), the lens needs to be "stopped down", i.e. something like 16 or 22 vs. 4.5, or even less. This usually means more light, and/or a longer exposure (or higher ASA, without giving up sharpness), which is why the camera needs to be steady.

I don't know how much manual control you have over your camera. Another thing you could try is taking some shots from the "tele" end of your lens - from farther away. This tends to put more of the scene in focus, as more of it is about the same distance from the lens, but again the camera needs to be more steady and you may need more light - try shooting outdoors.

If you don't have a tripod (or "mini-pod", which is all you need for shooting models), you can place the camera on anything solid at the right level. However, if you have a timed shutter release (mostly used for getting yourself in group portraits), it's good to use that so you don't jiggle the shot when you press the button.

Good luck

Charles


P.S. - try using the 3-D hair technique on the beards also, and keep the hair color between the two consistent. I'd say that if anything, the beard is usually lighter - not the hair.
velotrain
Visit this Community
Massachusetts, United States
Joined: December 23, 2010
KitMaker: 384 posts
Armorama: 320 posts
Posted: Tuesday, August 27, 2013 - 11:47 AM UTC
I just thought of one more thing you can do. Before any shot, think about what you want in sharpest focus. For example - in image #3, the belt buckle is in focus, but not the face. That's because the belt buckle is in the middle of the shot, and for most cameras that's the default focus location. Sophisticated cameras let you change that, but there's another way to adjust this.

I'll also mention that the fact these two areas aren't both in focus simultaneously indicates just how close the camera is to the figure, and/or what a low "f-stop / lens opening" the camera is using. In actuality, I can't imagine there's any more than 1/4" (if that) difference in how far they are from the lens.

"Most" cameras allow you to aim the center of the LCD screen at what you want in sharpest focus, press the shutter button half-way to lock the focus, then move the camera to re-compose the image. If your camera doesn't do this, then you should definitely save up for a new/better one.

In this case, aim the center of the screen at the face, press the shutter half-way to focus on the face (there should be a green light - or similar - to confirm focus), hold it half-way to lock focus, then move the camera to re-compose the image and press the shutter button all the way.

It can be difficult to learn how much pressure it takes to hold the focus, so practice it. It's not like you're burning up film! The other thing is, if you don't do this (confirm focus) every time, and just press the button all the way, nothing may be in sharp focus, but you don't realize it.

If you don't know it, some objects/patterns are harder for the autofocus system to recognize, so you may need to shift the camera a little to center on something it can use. You won't know this is happening unless you confirm focus before you press the button all the way down. Some cameras won't let you take the shot unless something is in focus, but it may not be what you wanted.
gerrysmodels
Visit this Community
Scotland, United Kingdom
Joined: September 13, 2012
KitMaker: 441 posts
Armorama: 429 posts
Posted: Sunday, September 01, 2013 - 02:14 PM UTC

Quoted Text

I just thought of one more thing you can do. Before any shot, think about what you want in sharpest focus. For example - in image #3, the belt buckle is in focus, but not the face. That's because the belt buckle is in the middle of the shot, and for most cameras that's the default focus location. Sophisticated cameras let you change that, but there's another way to adjust this.

I'll also mention that the fact these two areas aren't both in focus simultaneously indicates just how close the camera is to the figure, and/or what a low "f-stop / lens opening" the camera is using. In actuality, I can't imagine there's any more than 1/4" (if that) difference in how far they are from the lens.

"Most" cameras allow you to aim the center of the LCD screen at what you want in sharpest focus, press the shutter button half-way to lock the focus, then move the camera to re-compose the image. If your camera doesn't do this, then you should definitely save up for a new/better one.

In this case, aim the center of the screen at the face, press the shutter half-way to focus on the face (there should be a green light - or similar - to confirm focus), hold it half-way to lock focus, then move the camera to re-compose the image and press the shutter button all the way.

It can be difficult to learn how much pressure it takes to hold the focus, so practice it. It's not like you're burning up film! The other thing is, if you don't do this (confirm focus) every time, and just press the button all the way, nothing may be in sharp focus, but you don't realize it.

If you don't know it, some objects/patterns are harder for the autofocus system to recognize, so you may need to shift the camera a little to center on something it can use. You won't know this is happening unless you confirm focus before you press the button all the way down. Some cameras won't let you take the shot unless something is in focus, but it may not be what you wanted.


Charles

Thanks for the tips and the good advice.

Much appreciated

Gerry
jointhepit
Visit this Community
Oost-Vlaanderen, Belgium
Joined: May 14, 2006
KitMaker: 3,829 posts
Armorama: 881 posts
Posted: Sunday, September 01, 2013 - 08:43 PM UTC
looks good!


really like the beards!


1stjaeger
Visit this Community
Wien, Austria
Joined: May 20, 2011
KitMaker: 1,744 posts
Armorama: 1,727 posts
Posted: Saturday, September 07, 2013 - 10:13 AM UTC

photography is (nearly ) as difficult as modelling!!

Practice usually makes perfect (o.s.) and fortunately digital photos are not costing as much anymore!!

Get a better camera and get perfect!!

Cheers

Romain
 _GOTOTOP