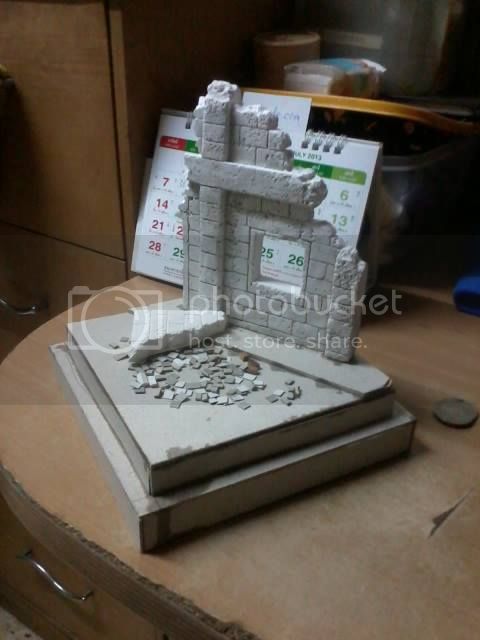
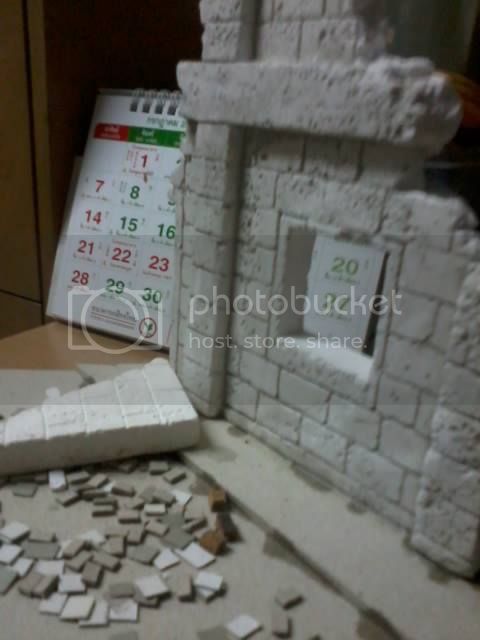
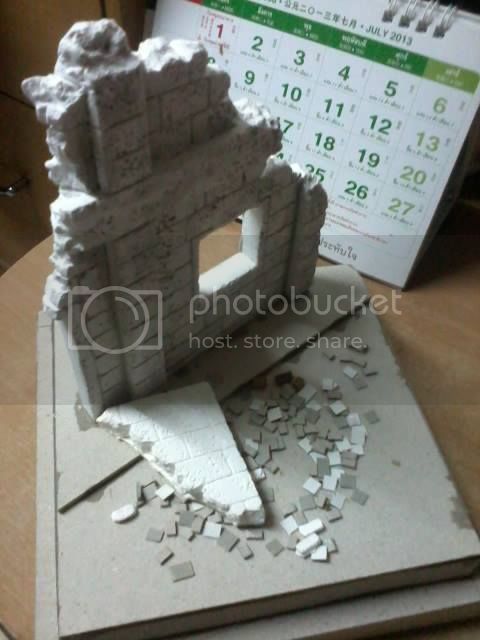
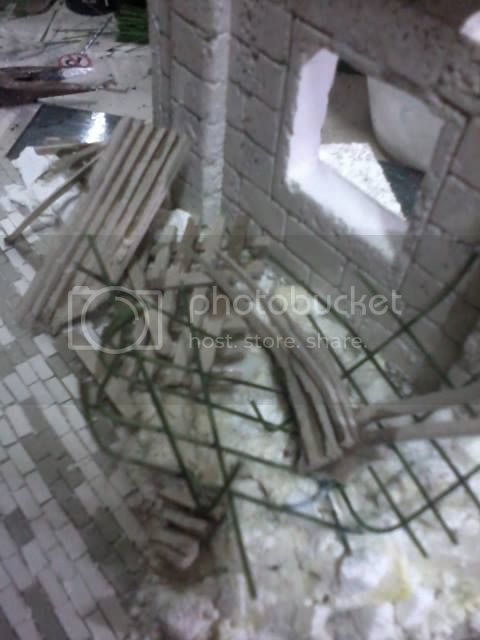
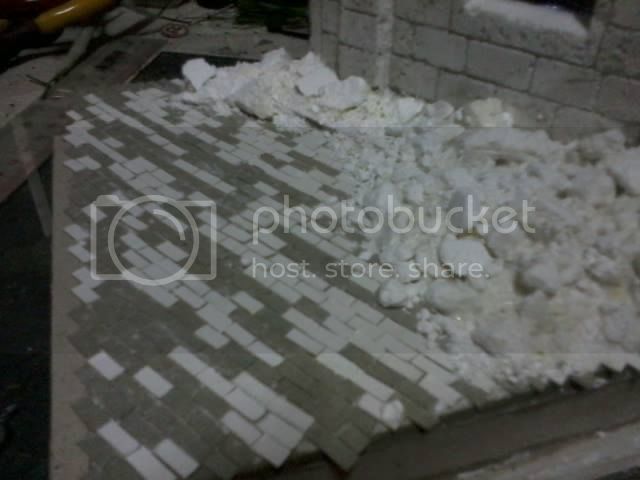
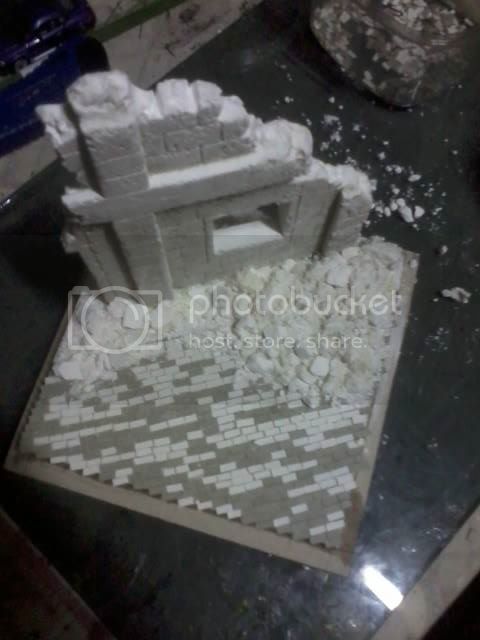
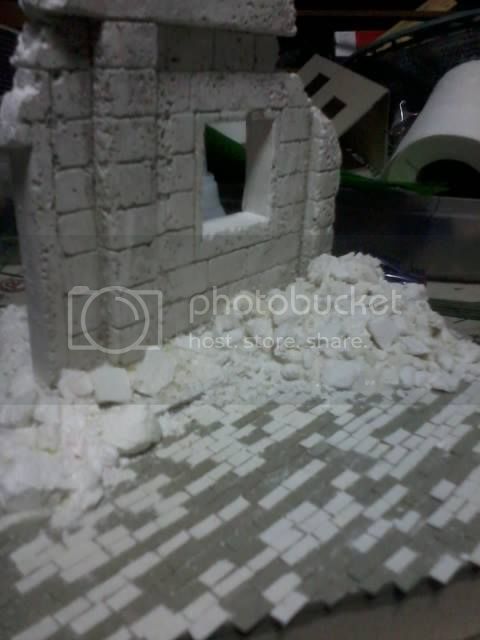
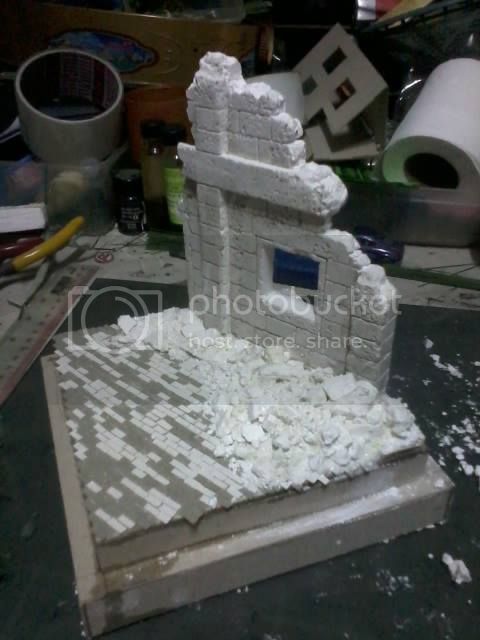
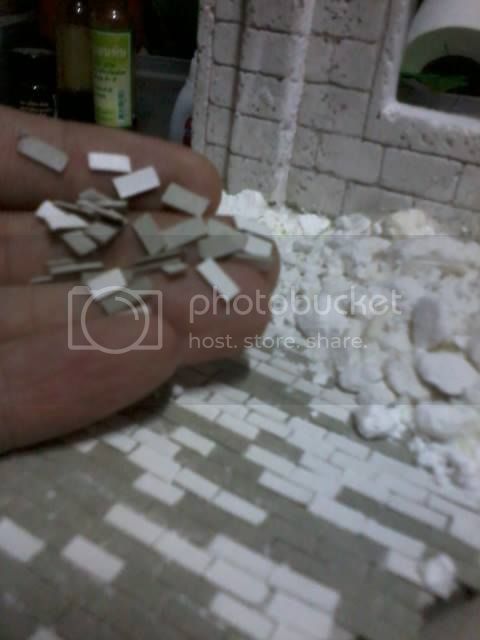
A little technique of making cobblestone that cut from paper.
Hosted by Darren Baker
Making cobblestone from paper.
thanan
Bangkok, Thailand / ไทย
Joined: March 15, 2010
KitMaker: 335 posts
Armorama: 331 posts
Joined: March 15, 2010
KitMaker: 335 posts
Armorama: 331 posts
Posted: Thursday, September 26, 2013 - 06:09 AM UTC
wychdoctor92394
California, United States
Joined: July 07, 2013
KitMaker: 219 posts
Armorama: 25 posts
Joined: July 07, 2013
KitMaker: 219 posts
Armorama: 25 posts
Posted: Thursday, September 26, 2013 - 06:12 AM UTC
A little more explanation would be in order... pictures are nice, but words help!
spartan01
California, United States
Joined: December 25, 2011
KitMaker: 314 posts
Armorama: 244 posts
Joined: December 25, 2011
KitMaker: 314 posts
Armorama: 244 posts
Posted: Thursday, September 26, 2013 - 11:23 AM UTC
what kind of paper
I would love how to know how to do this
thanan
Bangkok, Thailand / ไทย
Joined: March 15, 2010
KitMaker: 335 posts
Armorama: 331 posts
Joined: March 15, 2010
KitMaker: 335 posts
Armorama: 331 posts
Posted: Friday, September 27, 2013 - 04:45 PM UTC
Thanks so much about all suggests. I shall take a photos of how to step by step and more explanation about this topic again soon.
All_You_Can_Kit
Jakarta Raya, Indonesia
Joined: August 22, 2012
KitMaker: 599 posts
Armorama: 527 posts
Joined: August 22, 2012
KitMaker: 599 posts
Armorama: 527 posts
Posted: Saturday, September 28, 2013 - 04:07 AM UTC
Quoted Text
A little more explanation would be in order... pictures are nice, but words help!
Hello James, let allow me to share my similar experience into Mr. Prasert's very useful topic. I can simply say we can use any kind of paper, but I prefer for a thin carton sheet (no matter whether they're new or ex-used).
Assuming that the base was for 1/35 scale, draw your desired pattern onto the sheet (commonly rounded, rectangle, or squared) by using an assistance from a 1/35 figure's foot to make sure that they're logically fit (not under-size, also not over-size).
Cut them one by one carefully. If you prepare them in a large amount, do not forget to collect them in a safe container. On your ready-to-used ground base, glued them one-by-one carefully using a nipper. Let them dry for a couple minutes. After that, your cobblestones are ready to be fashioned!
Sorry for not using images, but I hope this link can also be useful for additional references: Build Log:"Komm und nimm es dir!"Diorama, just see directly to post #9. Since I also want to improve my techniques, can't wait also for Mr. Prasert's more representative illustration and explanation about making this cobblestones
Thank you all
Kind regards from Indonesia,
Garry
All_You_Can_Kit
Jakarta Raya, Indonesia
Joined: August 22, 2012
KitMaker: 599 posts
Armorama: 527 posts
Joined: August 22, 2012
KitMaker: 599 posts
Armorama: 527 posts
Posted: Saturday, September 28, 2013 - 04:13 AM UTC
Quoted Text
what kind of paper
I would love how to know how to do this
Hello Frank, I recommend to use a carton sheet, new one or ex-used, no problem. Not too thick, not too thin. Assuming you desired for a 1/35 diorama or vignette, make them logically 1/35 by using an aid from 1/35 figure's foot. The master key is: the weathering! If you do your fun and great feel for weathering, I guarantee that there will be no problem what kind of paper you got Have it your way!
Best regards from Indonesia,
Garry
wildsgt
Kentucky, United States
Joined: May 27, 2007
KitMaker: 327 posts
Armorama: 259 posts
Joined: May 27, 2007
KitMaker: 327 posts
Armorama: 259 posts
Posted: Saturday, September 28, 2013 - 04:25 AM UTC
Hello Thanan How about a up date on your book. Thank you
Posted: Saturday, September 28, 2013 - 02:50 PM UTC
Howdy Prasert
I have to agree with Bill. Show us an update. I'm very interested to see how it came out. Did you use primer on the paper? You can save a lot of modelers a ton of money with this technique.
Thanks for sharing,
Don "Lakota"
I have to agree with Bill. Show us an update. I'm very interested to see how it came out. Did you use primer on the paper? You can save a lot of modelers a ton of money with this technique.
Thanks for sharing,
Don "Lakota"
wychdoctor92394
California, United States
Joined: July 07, 2013
KitMaker: 219 posts
Armorama: 25 posts
Joined: July 07, 2013
KitMaker: 219 posts
Armorama: 25 posts
Posted: Saturday, September 28, 2013 - 04:16 PM UTC
Quoted Text
Quoted TextA little more explanation would be in order... pictures are nice, but words help!
Hello James, let allow me to share my similar experience into Mr. Prasert's very useful topic. I can simply say we can use any kind of paper, but I prefer for a thin carton sheet (no matter whether they're new or ex-used).
Assuming that the base was for 1/35 scale, draw your desired pattern onto the sheet (commonly rounded, rectangle, or squared) by using an assistance from a 1/35 figure's foot to make sure that they're logically fit (not under-size, also not over-size).
Cut them one by one carefully. If you prepare them in a large amount, do not forget to collect them in a safe container. On your ready-to-used ground base, glued them one-by-one carefully using a nipper. Let them dry for a couple minutes. After that, your cobblestones are ready to be fashioned!
Sorry for not using images, but I hope this link can also be useful for additional references: Build Log:"Komm und nimm es dir!"Diorama, just see directly to post #9. Since I also want to improve my techniques, can't wait also for Mr. Prasert's more representative illustration and explanation about making this cobblestones
Thank you all
Kind regards from Indonesia,
Garry
If you PM with your email address, I can send you a scale calculator for models. It has everything from 1:1 to 1:720 scale, and is graded in inches, millimeters, centimeters, almost any measurement you can think of...
All_You_Can_Kit
Jakarta Raya, Indonesia
Joined: August 22, 2012
KitMaker: 599 posts
Armorama: 527 posts
Joined: August 22, 2012
KitMaker: 599 posts
Armorama: 527 posts
Posted: Saturday, September 28, 2013 - 04:29 PM UTC
Quoted Text
If you PM with your email address, I can send you a scale calculator for models. It has everything from 1:1 to 1:720 scale, and is graded in inches, millimeters, centimeters, almost any measurement you can think of...
Hello James, thanks for your offering, I believe that it will be useful and interesting! I will PM to your email as you recommended. In my post, such explanation just to show my way to do cobblestone in a simple manner, especially for 1/35 scale, disregarding how much accurate in width and length, but still logical and fun. Again, many thanks for your offering of better accuracy in building a groundwork, I will learn a lot
Best regards,
Garry
thanan
Bangkok, Thailand / ไทย
Joined: March 15, 2010
KitMaker: 335 posts
Armorama: 331 posts
Joined: March 15, 2010
KitMaker: 335 posts
Armorama: 331 posts
Posted: Sunday, September 29, 2013 - 04:48 AM UTC
panzerconor
Massachusetts, United States
Joined: February 08, 2012
KitMaker: 1,271 posts
Armorama: 1,253 posts
Joined: February 08, 2012
KitMaker: 1,271 posts
Armorama: 1,253 posts
Posted: Sunday, September 29, 2013 - 01:39 PM UTC
Not much else to say other than that's brilliant. Awesome work.
-Conor
-Conor
All_You_Can_Kit
Jakarta Raya, Indonesia
Joined: August 22, 2012
KitMaker: 599 posts
Armorama: 527 posts
Joined: August 22, 2012
KitMaker: 599 posts
Armorama: 527 posts
Posted: Monday, September 30, 2013 - 03:18 AM UTC
Quoted Text
I'm thanks so much Garry_007. People you can follow as per his explanation...
...Thanks again for your explanation Garry_007.
You're welcome Sir! I see that your outstanding touch on such ruined buildings from your recent posted pictures give a thousand meanings and very helpful. Hope that will be useful for all of us, have a fun modelling time Sir Prasert S. and all of you guys!
Kind regards from Indonesia
Garry
1stjaeger
Wien, Austria
Joined: May 20, 2011
KitMaker: 1,744 posts
Armorama: 1,727 posts
Joined: May 20, 2011
KitMaker: 1,744 posts
Armorama: 1,727 posts
Posted: Tuesday, October 15, 2013 - 08:23 PM UTC
Wow!
Really impressive! This little scene (like most of your work) with its inherent balance has true artistic relevance!
Congratulations Sir!!
Cheers
Romain
thanan
Bangkok, Thailand / ไทย
Joined: March 15, 2010
KitMaker: 335 posts
Armorama: 331 posts
Joined: March 15, 2010
KitMaker: 335 posts
Armorama: 331 posts
Posted: Friday, October 18, 2013 - 06:58 PM UTC
Many thanks Romain for your praise message.
K-Tama
United States
Joined: December 07, 2012
KitMaker: 33 posts
Armorama: 24 posts
Joined: December 07, 2012
KitMaker: 33 posts
Armorama: 24 posts
Posted: Friday, October 18, 2013 - 09:46 PM UTC
Very nice thanan... I like it a lot.. One question though.. Do you fill the gaps between each brick with something? This would be very usefull
-Tama
-Tama
thanan
Bangkok, Thailand / ไทย
Joined: March 15, 2010
KitMaker: 335 posts
Armorama: 331 posts
Joined: March 15, 2010
KitMaker: 335 posts
Armorama: 331 posts
Posted: Friday, October 25, 2013 - 04:59 PM UTC
Quoted Text
Very nice thanan... I like it a lot.. One question though.. Do you fill the gaps between each brick with something? This would be very usefull
-Tama
Sorry to my late reply. Thanks so much for your praise message. For the question mostly I use wall putty and stopper to each gaps of the brick then wipe it by moistened with water sponge.
wychdoctor92394
California, United States
Joined: July 07, 2013
KitMaker: 219 posts
Armorama: 25 posts
Joined: July 07, 2013
KitMaker: 219 posts
Armorama: 25 posts
Posted: Friday, October 25, 2013 - 05:38 PM UTC
So, essentially, you used the standard method for laying tile on floors or walls by grouting in between the cobblestones...