

Mike: Wow! and Wow (again)....beautiful workmanship. Where did you find the vehicle manual--- the Armor School library?
DJ
Hosted by Darren Baker
M23 Ammo Trailer - Build Log

210cav

Joined: February 05, 2002
KitMaker: 6,149 posts
Armorama: 4,573 posts
Posted: Saturday, October 19, 2013 - 08:53 AM UTC

165thspc

#521
Joined: April 13, 2011
KitMaker: 9,465 posts
Armorama: 8,695 posts
Posted: Sunday, October 20, 2013 - 01:10 AM UTC
Thank you JD for your encouragement.
As to all the Tech Manual photos check out "Easy 1 Productions" online. They carry an ever expanding list of Tech Manuals copied to CD (Highly Recommended)
As far as the TM for the M23 that was not available electronically - I had to buy a copy of that one from England.
As to all the Tech Manual photos check out "Easy 1 Productions" online. They carry an ever expanding list of Tech Manuals copied to CD (Highly Recommended)
As far as the TM for the M23 that was not available electronically - I had to buy a copy of that one from England.

165thspc
#521
Joined: April 13, 2011
KitMaker: 9,465 posts
Armorama: 8,695 posts
Posted: Sunday, October 20, 2013 - 01:16 AM UTC

165thspc
#521
Joined: April 13, 2011
KitMaker: 9,465 posts
Armorama: 8,695 posts
Posted: Sunday, October 20, 2013 - 02:20 AM UTC
Link to the separate thread covering the build of the Mack NO6 arty tractor:
http://armorama.kitmaker.net/forums/196219&page=1
http://armorama.kitmaker.net/forums/196219&page=1
165thspc
#521
Joined: April 13, 2011
KitMaker: 9,465 posts
Armorama: 8,695 posts
Posted: Sunday, October 20, 2013 - 02:23 AM UTC
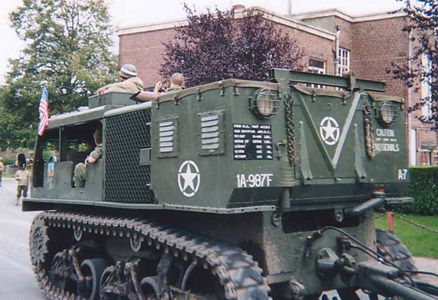
From a post war training film:


165thspc
#521
Joined: April 13, 2011
KitMaker: 9,465 posts
Armorama: 8,695 posts
Posted: Sunday, October 20, 2013 - 02:31 AM UTC
Found photo:


165thspc
#521
Joined: April 13, 2011
KitMaker: 9,465 posts
Armorama: 8,695 posts
Posted: Sunday, October 20, 2013 - 09:46 AM UTC
Right side view of trailer with landing gear lowered for parking the trailer.


165thspc
#521
Joined: April 13, 2011
KitMaker: 9,465 posts
Armorama: 8,695 posts
Posted: Sunday, October 20, 2013 - 09:49 AM UTC
The body mounts for the leaf springs: (Note the radius arm attached to the front mounting.)

Sorry to say but the TM nowhere contains a photo of the entire spring/mount/radius arm assembly with the wheels and tires removed.

Sorry to say but the TM nowhere contains a photo of the entire spring/mount/radius arm assembly with the wheels and tires removed.
165thspc
#521
Joined: April 13, 2011
KitMaker: 9,465 posts
Armorama: 8,695 posts
Posted: Monday, October 21, 2013 - 12:40 AM UTC
Loading boom detail. (Photo from the TM)

The assembled loading crane boom minus the chain hoist and boom tensioning crank:


The assembled loading crane boom minus the chain hoist and boom tensioning crank:


165thspc
#521
Joined: April 13, 2011
KitMaker: 9,465 posts
Armorama: 8,695 posts
Posted: Monday, October 21, 2013 - 01:06 AM UTC
Very complex ammo retainer plate. These fittings allow for the carrying of 155mm, 8 inch and 240mm ammo rounds by the M23. (F.Y.I. - Not at the same time, due to the height adjustable upper ammo retainer plates only one size ammo can be carried at any given time.)


165thspc
#521
Joined: April 13, 2011
KitMaker: 9,465 posts
Armorama: 8,695 posts
Posted: Monday, October 21, 2013 - 01:08 AM UTC
Upper ammo retainer plates:

Powder container tubes just lay on top of these retainer plates and are held in by the strapes you see here plus the tarp cover over that.

Powder container tubes just lay on top of these retainer plates and are held in by the strapes you see here plus the tarp cover over that.
165thspc
#521
Joined: April 13, 2011
KitMaker: 9,465 posts
Armorama: 8,695 posts
Posted: Monday, October 21, 2013 - 01:24 AM UTC
Quoted Text
Thank you JD for your encouragement.
As to all the Tech Manual photos check out "Easy 1 Productions" online. They carry an ever expanding list of Tech Manuals copied to CD (Highly Recommended)
As far as the TM for the M23 that was not available electronically - I had to buy a copy of that one from England.
Easy 1 Productions can be found on the web at:
http://easy1productions.com/1201.html
165thspc
#521
Joined: April 13, 2011
KitMaker: 9,465 posts
Armorama: 8,695 posts
Posted: Monday, October 21, 2013 - 04:31 AM UTC
Top ammo retainer plates in the open position. The base of the loading/unloading boom is on the left:


165thspc
#521
Joined: April 13, 2011
KitMaker: 9,465 posts
Armorama: 8,695 posts
Posted: Tuesday, October 22, 2013 - 12:42 AM UTC
MAKING THE TRAILER FLOOR PLATE:
(This is still a work in progress.)


I used a piece of ruled Evergreen plastic (1/16th inch on center) to layout a pattern of 96 holes as a drilling guide. I them temporarily laminated three oversized sheets of Evergreen plastic together with the drilling guide. (I glued just the over long ends of the plastic together so I could easily cut them apart later.) I again drilled the guide holes thru the laminated layers of plastic.

Glue only the ends of the over long sheet plastic together so they can be easily trimed and separated later.
165thspc
#521
Joined: April 13, 2011
KitMaker: 9,465 posts
Armorama: 8,695 posts
Posted: Tuesday, October 22, 2013 - 12:55 AM UTC
Now pick a dril bit the matches the SMALLEST size hole you need in your base plate and enlarge all the guide holes.


165thspc
#521
Joined: April 13, 2011
KitMaker: 9,465 posts
Armorama: 8,695 posts
Posted: Tuesday, October 22, 2013 - 12:59 AM UTC
Now its time to separate the three sheets:

Please Note: I only really needed two sheets of plastic but I thought it best to make a total of three in case one became damaged.

Please Note: I only really needed two sheets of plastic but I thought it best to make a total of three in case one became damaged.
165thspc
#521
Joined: April 13, 2011
KitMaker: 9,465 posts
Armorama: 8,695 posts
Posted: Tuesday, October 22, 2013 - 01:04 AM UTC
Now enlarge the holes in one of the sheets just slightly. I do not recommend using a drill bit at this point as you run the risk of tearing up the delicate plastic. A tapered grind stone in a motor tool is best for this operation.


165thspc
#521
Joined: April 13, 2011
KitMaker: 9,465 posts
Armorama: 8,695 posts
Posted: Tuesday, October 22, 2013 - 01:08 AM UTC
It is now time to clean up and permenently glue the two stepped hole sheets together.


165thspc
#521
Joined: April 13, 2011
KitMaker: 9,465 posts
Armorama: 8,695 posts
Posted: Tuesday, October 22, 2013 - 01:16 AM UTC
I am now experimenting with ways to accruately cut short lengths of thin wall plastic tubing to make the ammo retaining rings that stand up above the baseplate.


165thspc
#521
Joined: April 13, 2011
KitMaker: 9,465 posts
Armorama: 8,695 posts
Posted: Tuesday, October 22, 2013 - 01:37 AM UTC
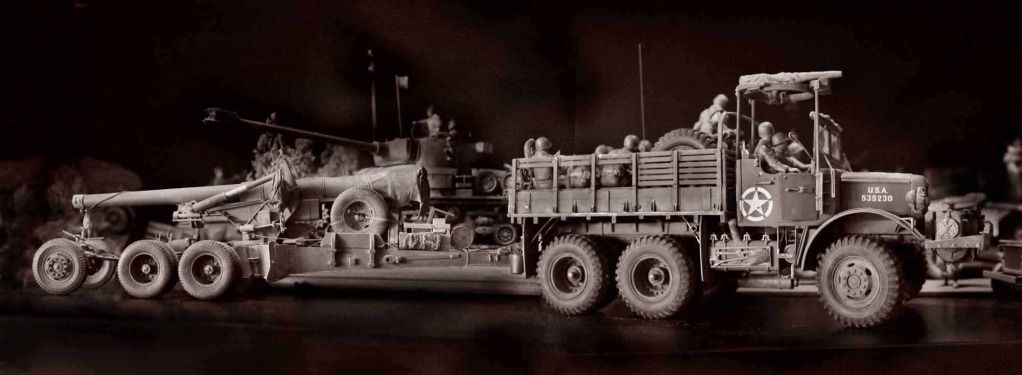
Someone asked to see the 155mm gun I built to go along with the Mack NO. Here it is being towed by the mack and attached to the rear is the M1/M2 Limber.

165thspc
#521
Joined: April 13, 2011
KitMaker: 9,465 posts
Armorama: 8,695 posts
Posted: Tuesday, October 22, 2013 - 02:47 AM UTC
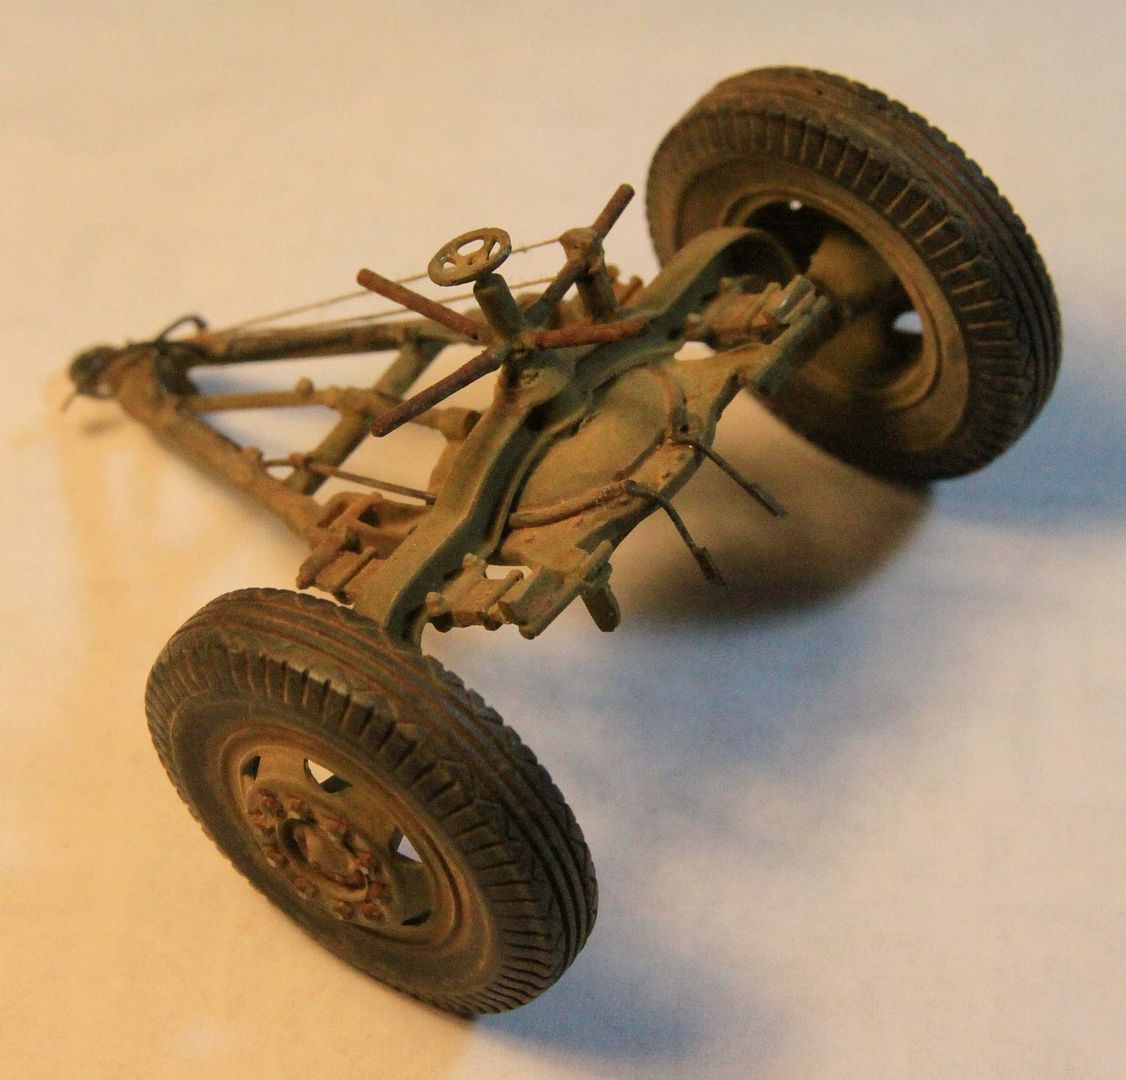
A close up of the back-dated AFV Club 155mm gun and the M1/M2 Limber from Scale-Link.
(The back dated wheels and tires are also from Scale-Link.)

(The back dated wheels and tires are also from Scale-Link.)

165thspc
#521
Joined: April 13, 2011
KitMaker: 9,465 posts
Armorama: 8,695 posts
Posted: Wednesday, October 23, 2013 - 01:06 PM UTC
An old hobby competition adage says; "He who has the best references wins!"
I can highly recommend the many Tech Manuals available from Easy 1 Productions. Great reference material at usually a much lower price than the paper Tech Manuals and in a much smaller package!

(Mike Koenig Photo)
p.s. This is an unsolicited endorsement. I have no business involvement in Easy 1 Productions.
165thspc
#521
Joined: April 13, 2011
KitMaker: 9,465 posts
Armorama: 8,695 posts
Posted: Saturday, October 26, 2013 - 05:48 AM UTC
Plan drawing from the TM: Darker gray represents leaf springs and lighter gray marks the walking beam arms that carry the wheels.


165thspc
#521
Joined: April 13, 2011
KitMaker: 9,465 posts
Armorama: 8,695 posts
Posted: Sunday, October 27, 2013 - 04:30 AM UTC
M1/M2 Limber kit from Masters Productions/Scale-Link. (Again the M1/M2 was NOT compatible with the M23 Ammo Trailer and I show it here for comparison only.)

Masters Productions has done an excellent job on this kit.


Masters Productions has done an excellent job on this kit.
165thspc
#521
Joined: April 13, 2011
KitMaker: 9,465 posts
Armorama: 8,695 posts
Posted: Tuesday, October 29, 2013 - 03:54 AM UTC
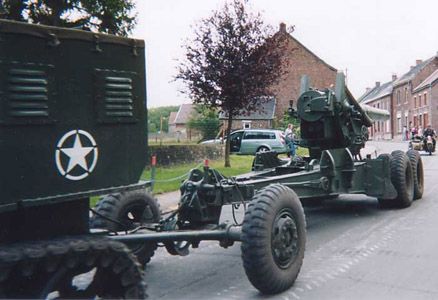
Some beautiful shots, found on the web of an M4 HST with M59 and M5 Limber. - Fantastic!
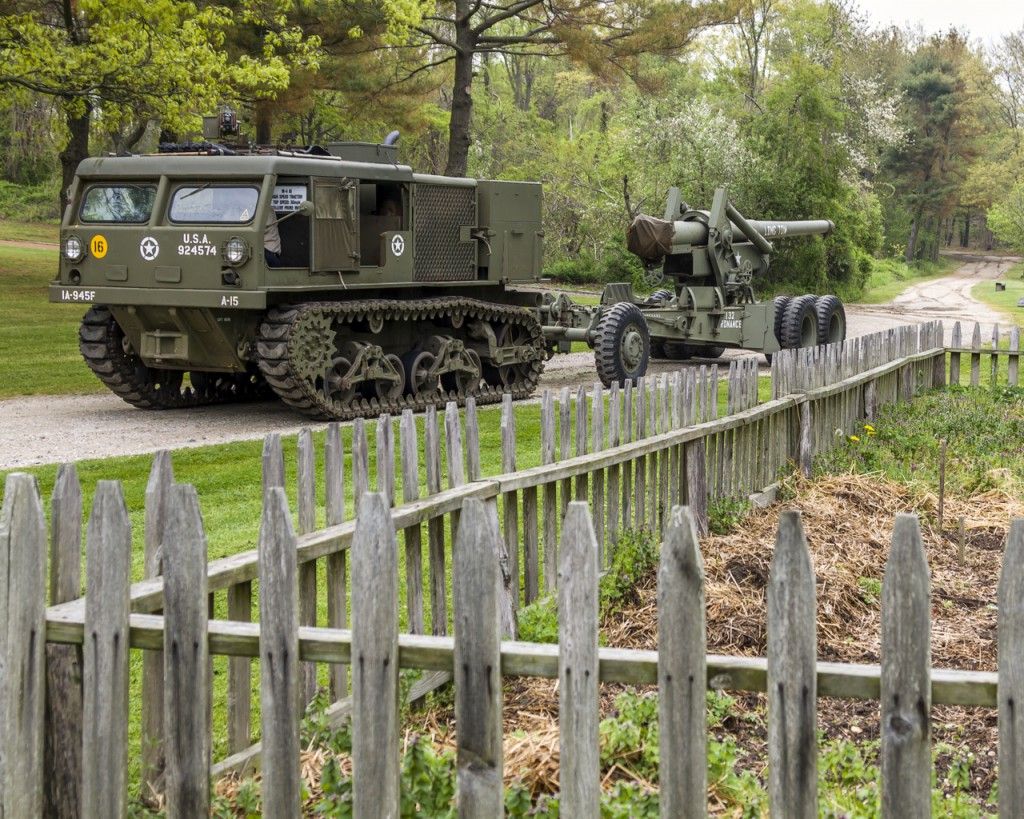
OK, post war tires on the gun anf the limber.

(Sorry to say but the Photographer and Owner were not Credited.)

OK, post war tires on the gun anf the limber.


(Sorry to say but the Photographer and Owner were not Credited.)
 |

WEB HOSTING BY


Copyright ©2021 Armorama and Kitmaker Network, a subsidiary of Silver Star Enterprises
All Rights Reserved. Please read our Conditions of Use and Privacy Policy.
All Rights Reserved. Please read our Conditions of Use and Privacy Policy.