England - North East, United Kingdom
Joined: June 22, 2010
KitMaker: 1,224 posts
Armorama: 1,207 posts
Posted: Thursday, October 24, 2013 - 07:31 PM UTC
Uusimaa, Finland
Joined: October 22, 2012
KitMaker: 1,194 posts
Armorama: 1,077 posts
Posted: Thursday, October 24, 2013 - 11:52 PM UTC
Will be keeping an eye on this, got one in the stash myself. Looks to be a nice little kit.
Kimmo
There is a time to laugh and a time not to laugh, and this is not one of them.
England - North East, United Kingdom
Joined: June 22, 2010
KitMaker: 1,224 posts
Armorama: 1,207 posts
Posted: Friday, November 01, 2013 - 10:04 AM UTC
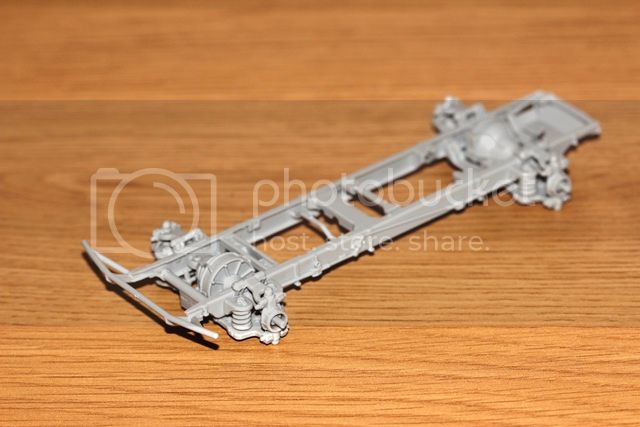
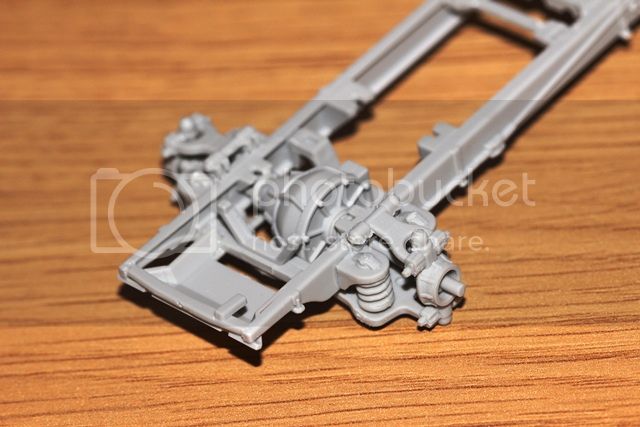
ok some progress... have to admit the small bits were fiddly and apart from an elementary mistake (rectified) so far so good....


i "think" it is a;; square...
England - North East, United Kingdom
Joined: June 22, 2010
KitMaker: 1,224 posts
Armorama: 1,207 posts
Posted: Saturday, November 02, 2013 - 04:59 AM UTC
done the first 3 steps (so up through all the hassis and engine/raiator). believe that setup will be painted as it is now (black) then detailed....
for the interior, it is nicely detailed and I want to do it justice... should i paint all the parts, then build then weather, or build then paint/weather all built? lots of smaller bits and corners... believe it will be a grey floor and then eifenbraun upper - is that correct (red primer)?
will get some cpis up later of where its at but any tips on the interior very much appreciated....
Louisiana, United States
Joined: March 06, 2010
KitMaker: 3,128 posts
Armorama: 2,959 posts
Posted: Saturday, November 02, 2013 - 09:45 AM UTC
Quoted Text
done the first 3 steps (so up through all the hassis and engine/raiator). believe that setup will be painted as it is now (black) then detailed....
for the interior, it is nicely detailed and I want to do it justice... should i paint all the parts, then build then weather, or build then paint/weather all built? lots of smaller bits and corners... believe it will be a grey floor and then eifenbraun upper - is that correct (red primer)?
will get some cpis up later of where its at but any tips on the interior very much appreciated....
Robert W.;
Hi!
"grey floor and then eifenbraun upper..."? Uh...
I'm thinking that you mean "elfinbein" (a sort of off-white / light ivory or light buff color)? Most of the sources I've come across suggest that the floor may have been a darkish green in most of these, and the rest of the cabin interior (walls and roof) the standard "German panzer" elfinbein. Radio racks were often "OEM" factory-painted in a sort of greenish gray - maybe like the "field gray" some paint companies market.
The turret inside surfaces were the outside base coat color. Same for those big cabin doors. The smaller service hatches around the engine probably could be red primer on the inside?
And yes, as you can see some stuff inside when those big hatches are open (and around the gun mount and stuff in that turret), and through that roof screen around the turret, do paint and weather it! It will look pretty super when all is assembled. Pardon me but the hilarious vision of someone putting it all together and THEN deciding to try doing that interior pops up!

Cheers!
Bob

England - North East, United Kingdom
Joined: June 22, 2010
KitMaker: 1,224 posts
Armorama: 1,207 posts
Posted: Saturday, November 02, 2013 - 10:03 AM UTC
Quoted Text
Quoted Text
done the first 3 steps (so up through all the hassis and engine/raiator). believe that setup will be painted as it is now (black) then detailed....
for the interior, it is nicely detailed and I want to do it justice... should i paint all the parts, then build then weather, or build then paint/weather all built? lots of smaller bits and corners... believe it will be a grey floor and then eifenbraun upper - is that correct (red primer)?
will get some cpis up later of where its at but any tips on the interior very much appreciated....
Robert W.;
Hi!
"grey floor and then eifenbraun upper..."? Uh...
I'm thinking that you mean "elfinbein" (a sort of off-white / light ivory or light buff color)? Most of the sources I've come across suggest that the floor may have been a darkish green in most of these, and the rest of the cabin interior (walls and roof) the standard "German panzer" elfinbein. Radio racks were often "OEM" factory-painted in a sort of greenish gray - maybe like the "field gray" some paint companies market.
The turret inside surfaces were the outside base coat color. Same for those big cabin doors. The smaller service hatches around the engine probably could be red primer on the inside?
And yes, as you can see some stuff inside when those big hatches are open (and around the gun mount and stuff in that turret), and through that roof screen around the turret, do paint and weather it! It will look pretty super when all is assembled. Pardon me but the hilarious vision of someone putting it all together and THEN deciding to try doing that interior pops up! 
Cheers!
Bob 
cheers bob - and yes that was the colour i meant - any suggestions on acrylic sources? i am going to build upper and lower hull separate, paint & weather at same time then join together... yes building it all then deciding to paint interior would be daft - i was more meaining around fixtures & fittings being painted before being glued in place.... some i might so i dont knock them off but thinking to mount the lower body now before adding anything so i can weight it square on to the chassis (again without fear of damage)
EDIT - yes on reading back i see i wrote not quite what i meant... build the 2 halves in their entireties , paint, weather then glue together or build main supoerstructure parts, rest painted on=utside... then assemble all then join 2 halves....
Louisiana, United States
Joined: March 06, 2010
KitMaker: 3,128 posts
Armorama: 2,959 posts
Posted: Saturday, November 02, 2013 - 02:10 PM UTC
Rob W.;
Not really blowing you smoke! I figured you really weren't planning on going down that awful road!

Folks do various things in the "elfinbein" department. I generally dark-prime my kits (usually a dark gray or weathered-black Floquil enamel - mostly a pre-shade), and use Tamiya "deck tan" (XF-55) mixed 1:2 or 1:3 with flat white when going "acrylic'. The Testor's enamel ModelMaster line has an "interior buff" - not bad straight on a lighter styrene background, IMO, but maybe better mixed with flat white. IF you are planning on staining it up and making it dingy and dirty overall with some brownish oil washes, you can actually just go with straight flat white - as it won't be white when you are done!

IF you have the chance and inclination, consider that German vehicles had lots of black interior stencils that labeled racks and hangers inside AFV for specific goods.
The floor boards can be done in some straight darker green.
Bob

England - North East, United Kingdom
Joined: June 22, 2010
KitMaker: 1,224 posts
Armorama: 1,207 posts
Posted: Saturday, November 02, 2013 - 07:56 PM UTC
Cheers bob. Am a way from painting anyway so will consider... Same for the stencils. Might be a good idea as I was intending to leave doors open.....
England - North East, United Kingdom
Joined: June 22, 2010
KitMaker: 1,224 posts
Armorama: 1,207 posts
Posted: Monday, November 04, 2013 - 09:00 PM UTC
England - South East, United Kingdom
Joined: January 09, 2010
KitMaker: 979 posts
Armorama: 959 posts
Posted: Monday, November 04, 2013 - 11:00 PM UTC
Your 222 is looking good so far. Dont go nuts on the engine, thanks to the radiator and the 20mm gun mount it cant be seen from the cab and unless you are going to leave the engine covers open (which will spoil the clean lines of the vehicle) it will never be seen.
Besides to fully detail all the wiring and petrol lines will take ages
England - North East, United Kingdom
Joined: June 22, 2010
KitMaker: 1,224 posts
Armorama: 1,207 posts
Posted: Monday, November 04, 2013 - 11:28 PM UTC
Quoted Text
Your 222 is looking good so far. Dont go nuts on the engine, thanks to the radiator and the 20mm gun mount it cant be seen from the cab and unless you are going to leave the engine covers open (which will spoil the clean lines of the vehicle) it will never be seen.
Besides to fully detail all the wiring and petrol lines will take ages
thanks Steve, i think that is what I am thinking - will close it up cos (a) you cant see much and (b) you are right, wiring it all would do my head in ;-))
England - North East, United Kingdom
Joined: June 22, 2010
KitMaker: 1,224 posts
Armorama: 1,207 posts
Posted: Wednesday, November 06, 2013 - 11:08 PM UTC
doing various pieces, interior I am adding all he components that will be painted the same colour - trying to be in a position that the off-white/grey is done and only things a completely different colour are added after (most like the seat + the 2 batteries - least that way I should not have glue marks on my paint ;-)
also been working on the gun mount... quite fiddly but coming on


England - South East, United Kingdom
Joined: January 09, 2010
KitMaker: 979 posts
Armorama: 959 posts
Posted: Wednesday, November 06, 2013 - 11:30 PM UTC
Good update, the HB 222 is certainly superior to the Tristar version
England - North East, United Kingdom
Joined: June 22, 2010
KitMaker: 1,224 posts
Armorama: 1,207 posts
Posted: Thursday, November 07, 2013 - 08:09 PM UTC
Quoted Text
Good update, the HB 222 is certainly superior to the Tristar version
thanks Steve, must say the interior comes together nicely. Think i am now in a position to start painting it. Have all the fittings that i wanted in-situ in so that leaves the batteries, pedals, steering wheel and gas mask holders to go in after - left it like that to make masking the floor easier to get the cream/grey split and to allow easier access to the sides ... whether that will work, of course, is another matter....
England - North East, United Kingdom
Joined: June 22, 2010
KitMaker: 1,224 posts
Armorama: 1,207 posts
Posted: Tuesday, November 12, 2013 - 10:12 PM UTC
need to redo my interior pain (the buff part anyway) as the xtracrylix was a faff and the finsih was not good... anyway, will get time to do that this evening I hope...
in the meantime, as I have explicit photos of the vehicle I am building (going off registration number) I have started on some field mods... the photos I have have 4 fuel cans mounted on the wheel arches. so this is what I will attempt. First go looks like:


which actually isnt too bad I dont think.. will do the same for the other side. will also look at what else I can add from the photos....
also, the gun mount is complete.. must say that while it looked fiddly in the instructions it went together fairly easily:


United Kingdom
Joined: September 06, 2013
KitMaker: 1,112 posts
Armorama: 938 posts
Posted: Wednesday, November 13, 2013 - 02:09 AM UTC
Can you cite any evidence for that? Terry Ashley reported that it compared well to the Doyle plans in Panzer Tracts so I'd be interested to hear what is wrong with it as I have one in the stash.
Here is Terry's review:
http://www.perthmilitarymodelling.com/reviews/vehicles/tristar/tri35043.htmlEngland - North East, United Kingdom
Joined: June 22, 2010
KitMaker: 1,224 posts
Armorama: 1,207 posts
Posted: Sunday, November 17, 2013 - 04:08 AM UTC
Severocesky Kraj, Czech Republic
Joined: October 18, 2013
KitMaker: 111 posts
Armorama: 101 posts
Posted: Sunday, November 17, 2013 - 04:52 AM UTC
a nice work

!!
Malvin
www.vt-models.cz England - North East, United Kingdom
Joined: June 22, 2010
KitMaker: 1,224 posts
Armorama: 1,207 posts
Posted: Monday, November 18, 2013 - 09:12 PM UTC
thanks Malvin
out of interest - does anyone have a better photo of a 222 sporting something akin to the box mounted on the rear engine hatch? any ideas on how it was fixed (I cant see any cable/rope tying it down so am thinking it could be welded directly on to the door?)
http://i3.photobucket.com/albums/y58/Jambock__39-Weiss/sd222.jpg(also thoughts on what is on the front wheel arch in this photo)
and today's update - body together, exterior taking shape... still need to build the 2nd fuel can frame and then add all the fiddly bits....


England - North East, United Kingdom
Joined: June 22, 2010
KitMaker: 1,224 posts
Armorama: 1,207 posts
Posted: Wednesday, November 27, 2013 - 09:02 AM UTC
due to domestic constraints over the Christmas period this will be the last update for this year... i think its in a pretty good place now - 2 side jerry can racks, one on the front right wheel arch and a stowage rack (note the box is not level rather than the rack)...
next update in the new year should see it painted


England - North East, United Kingdom
Joined: June 22, 2010
KitMaker: 1,224 posts
Armorama: 1,207 posts
Posted: Wednesday, January 01, 2014 - 10:37 AM UTC
ok, as its the New Year i am back in business. doors and turret gaps masked so i can start painting. planning gry primer (darker on lower half and slightly lighter on upper as pre-shade) then "in-field" sand colour....
England - North East, United Kingdom
Joined: June 22, 2010
KitMaker: 1,224 posts
Armorama: 1,207 posts
Posted: Thursday, January 02, 2014 - 05:17 AM UTC
well grey primer is on - at least it all looks like 1 thing rather than bits & pieces and a coke can ;-) next will be bas black & white painting. Going to try a technique i saw in MMI with black, white and 2 (possibly 3) shades of grey to give the basis for the dhading when i apply the sand coat... once i have the patch work effect on i will put some photos up
England - North East, United Kingdom
Joined: June 22, 2010
KitMaker: 1,224 posts
Armorama: 1,207 posts
Posted: Friday, January 03, 2014 - 05:01 AM UTC
Uusimaa, Finland
Joined: October 22, 2012
KitMaker: 1,194 posts
Armorama: 1,077 posts
Posted: Friday, January 03, 2014 - 05:42 AM UTC
That's looking the part. Raw umber may be a tad harsh for a desert vehicle if it's the browner hue. If it's the greener hue, maybe add a touch of ochre and white? And while on the topic, why does umber bounce around so much from manufacturer to manufacturer?
Kimmo
There is a time to laugh and a time not to laugh, and this is not one of them.
England - North East, United Kingdom
Joined: June 22, 2010
KitMaker: 1,224 posts
Armorama: 1,207 posts
Posted: Friday, January 03, 2014 - 05:50 AM UTC
Quoted Text
That's looking the part. Raw umber may be a tad harsh for a desert vehicle if it's the browner hue. If it's the greener hue, maybe add a touch of ochre and white? And while on the topic, why does umber bounce around so much from manufacturer to manufacturer?
Kimmo
thanks - this is W&N water-soluble oil... so could try raw sienna perhaps - thats more a yellow/brown (perhaps with white in it)?.....


