_GOTOBOTTOM
Armor/AFV: Softskins
Softskins group discussions.
Hosted by Darren Baker
1:35 Bronco Civilian Fiat Topolino
FAUST
#130
Visit this Community
Noord-Holland, Netherlands
Joined: June 07, 2002
KitMaker: 8,797 posts
Armorama: 4,190 posts
Posted: Thursday, October 31, 2013 - 07:54 AM UTC
Ola Guys

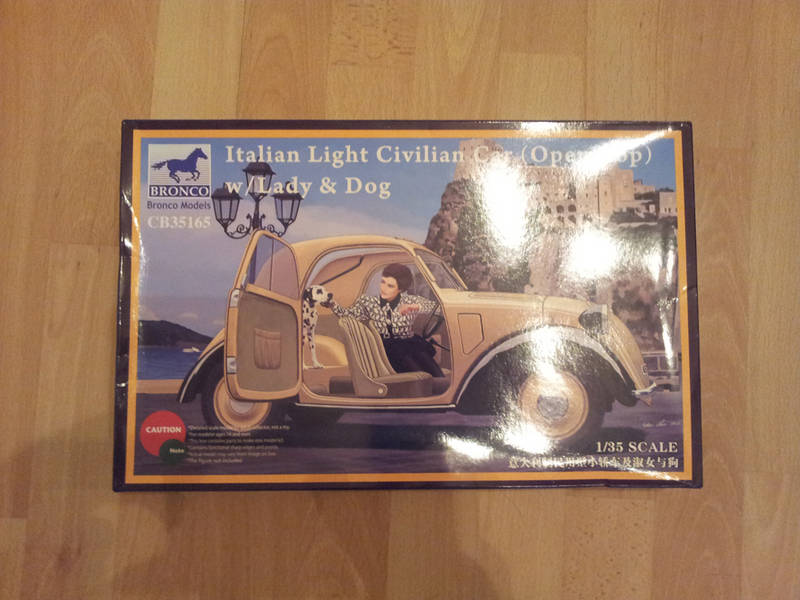
Time to start something new and fresh. Every now and then you look forward to a kit with great anticipation and when you get it you find out it was exactly the gem that you expected it to be. Well I had this with the Topolino serie from Bronco. And the civilian version (kit# CB-35165) as was reviewed by Rick Cooper see here

Now let's continue to the built. First let's start offwith the boxart showing a nice two tone Topolino with a nice lady and a dalmatian in it.


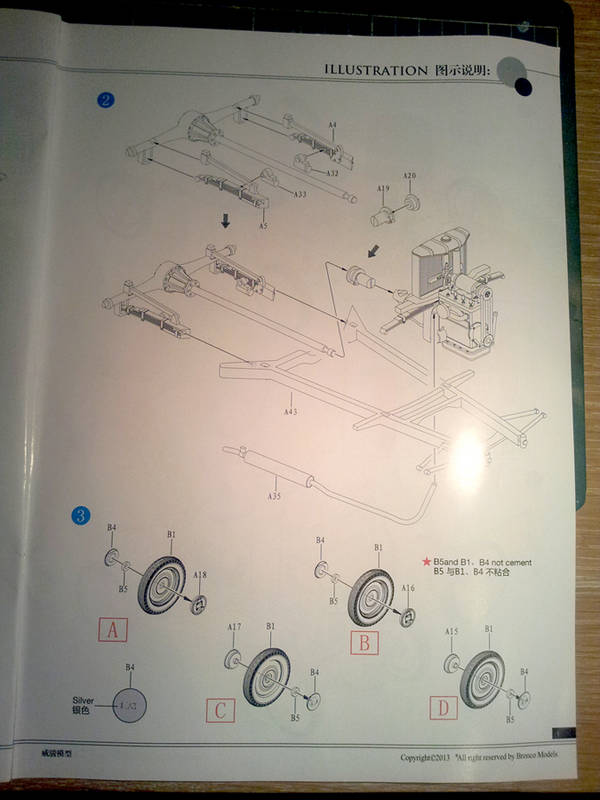
Check out the sprue shots in Rick's review. There is a lot to see. summing it up the kit "only" has 121 parts which seems a little amount by Bronco's standards but keep in mind this car was called the Topolino which is Italian for Little Mouse. And even in real life this vehicle was about the size of a tub of butter. This kit already has more then twice the part amount of the Tamiya Simca 5 (it has 50 parts) which is essentially the same vehicle but license built by the French. So yeah considering the size of the vehicle it definately has a lot of parts.
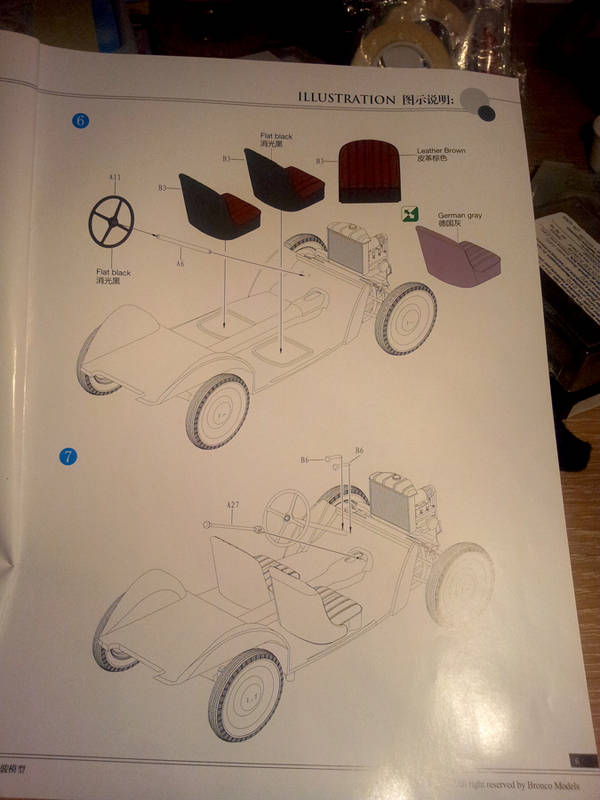
Following step 1


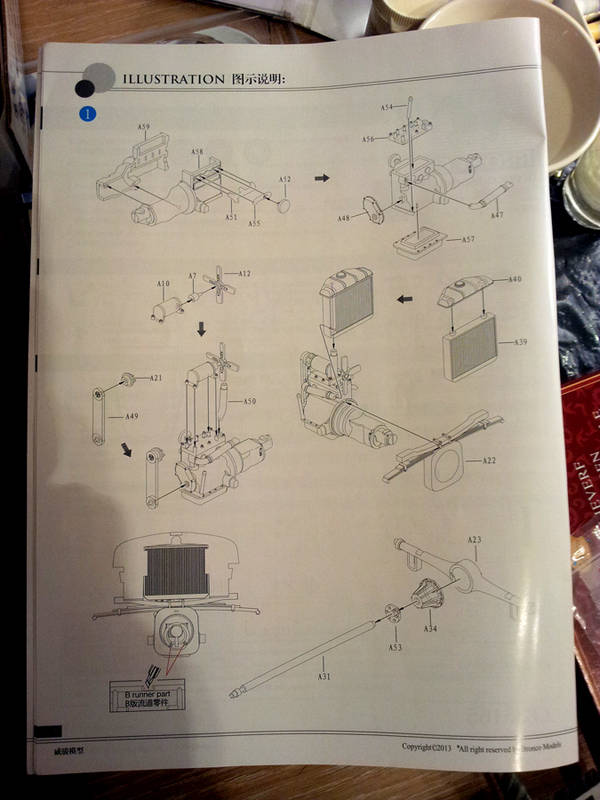
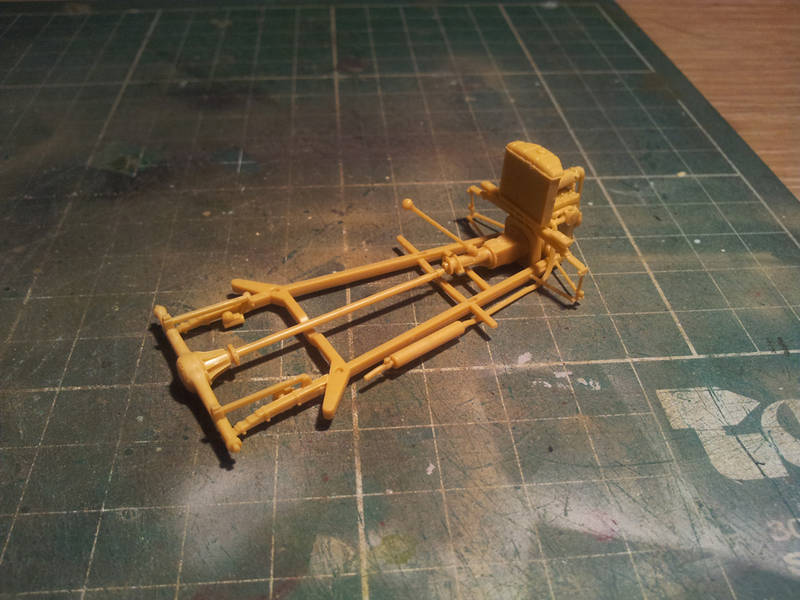
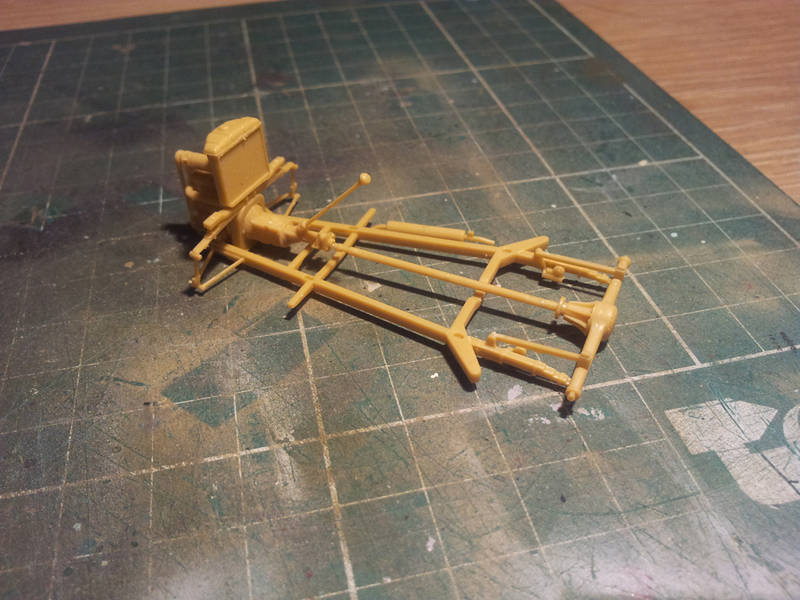
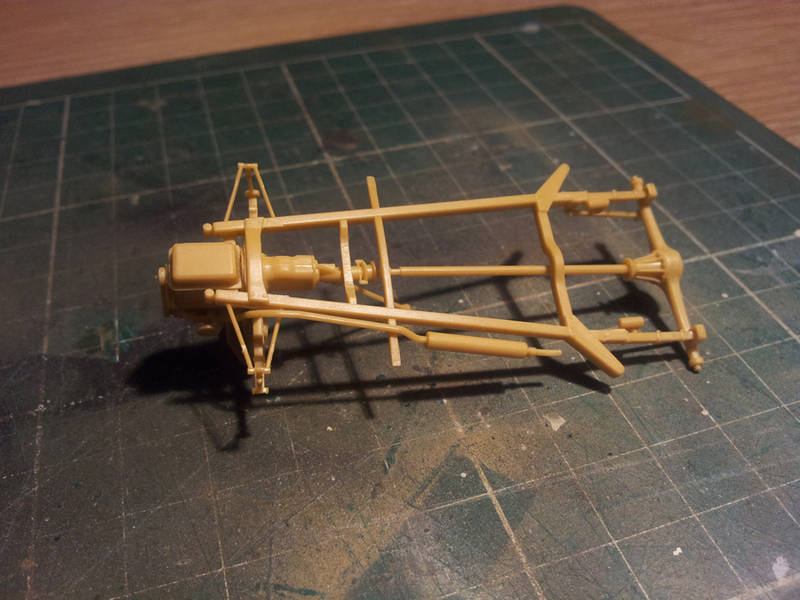
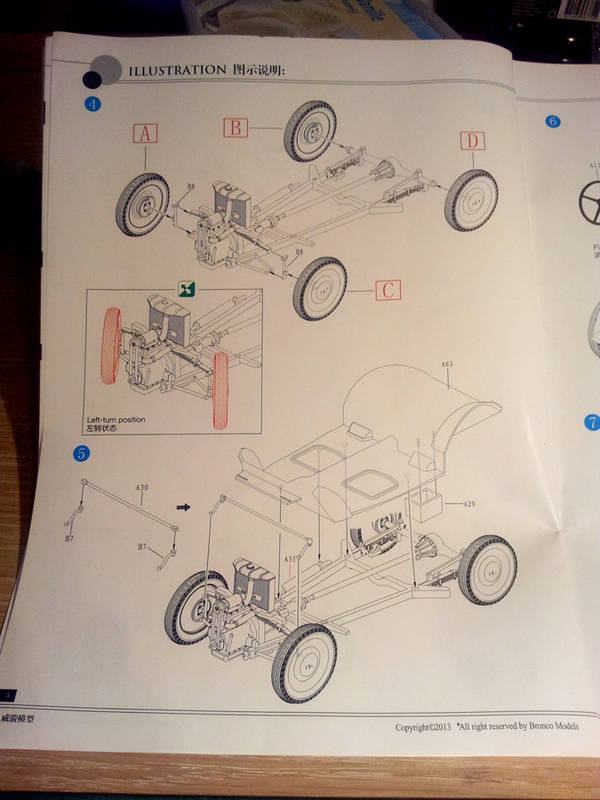
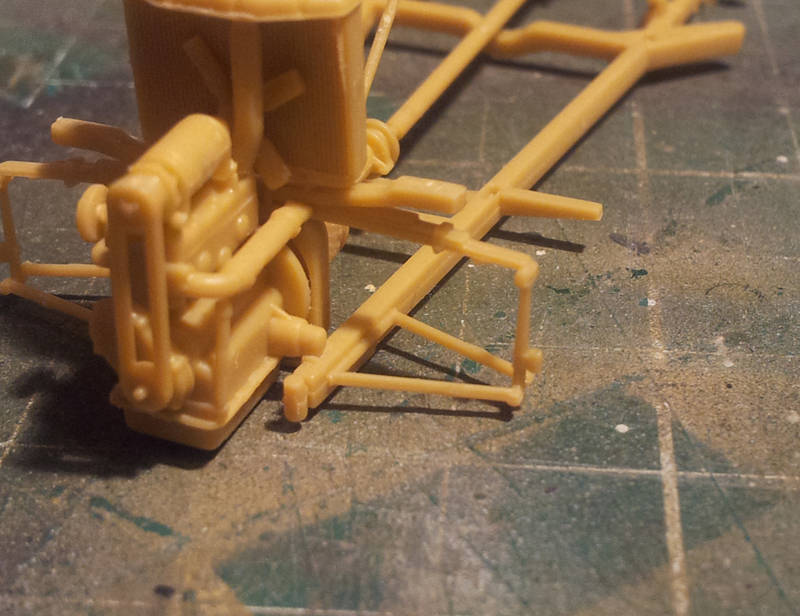
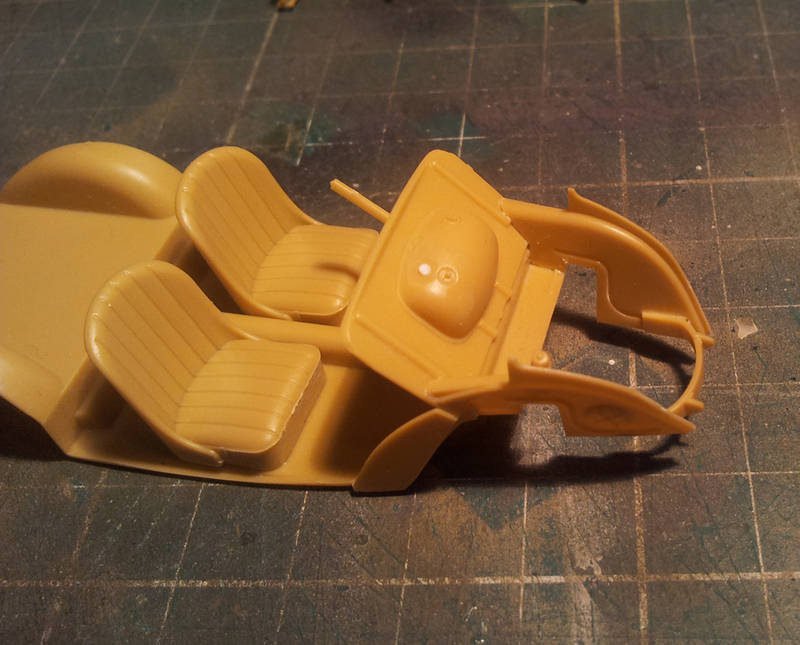
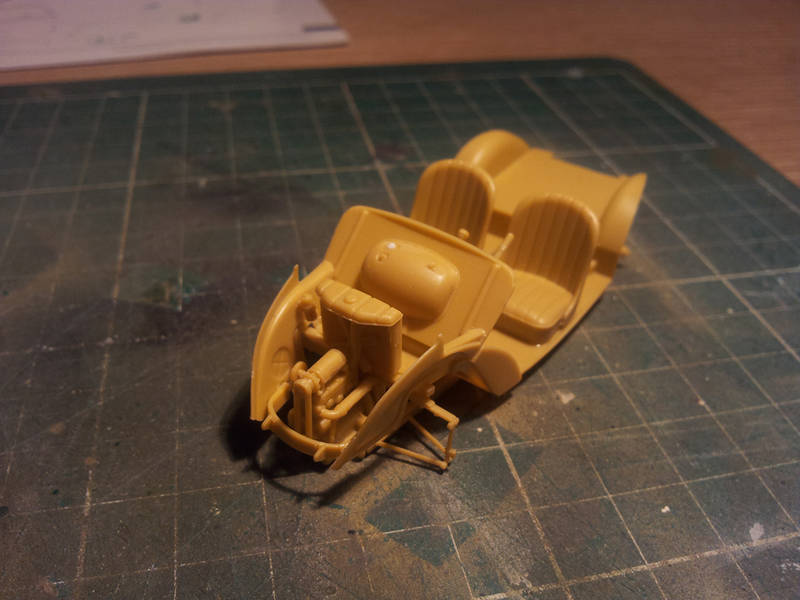
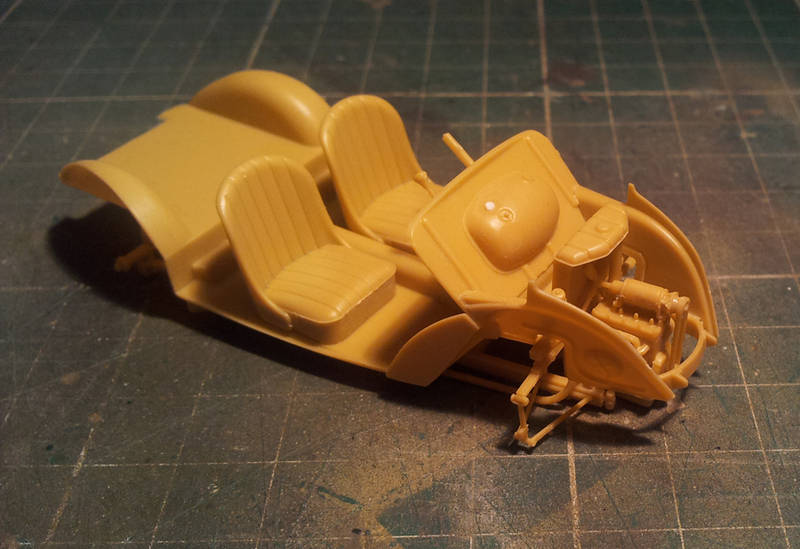
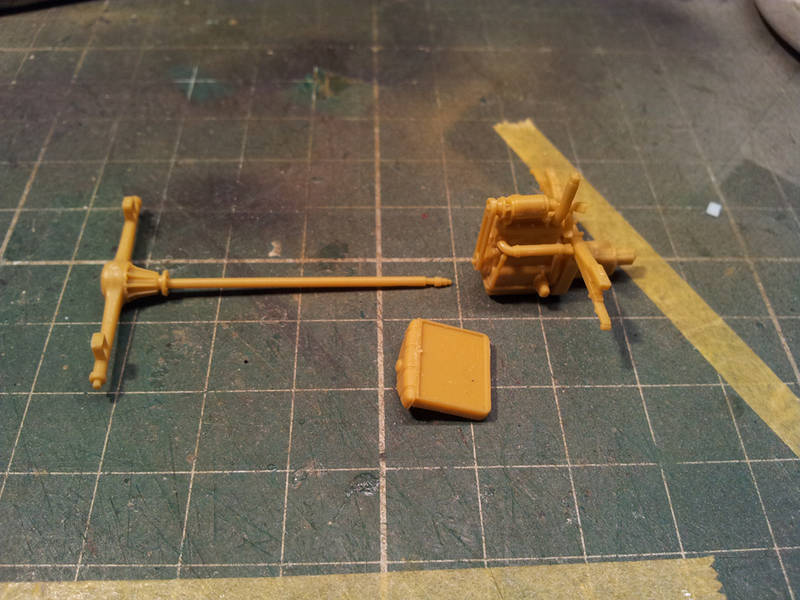
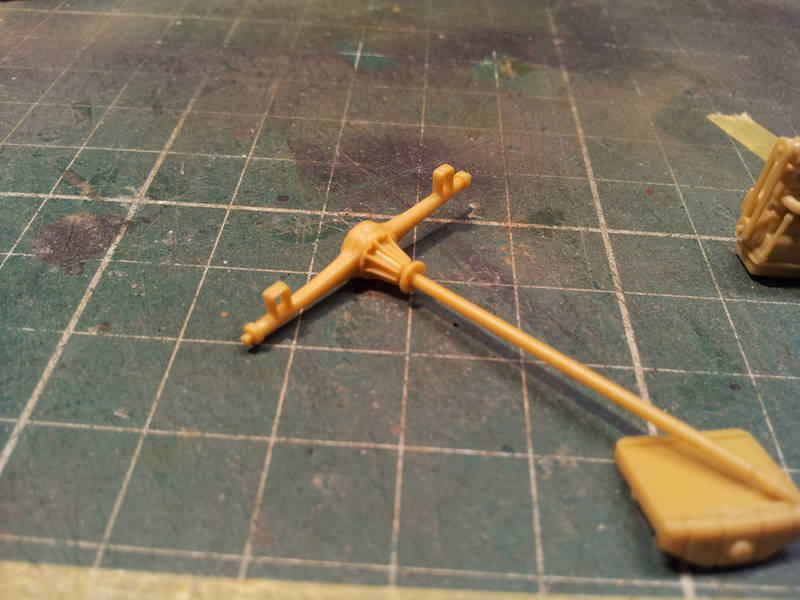
step 1 as you can see deals completely with the engine, radiator and parts of the suspension. And it will have you end up with this little collection of subassemblies:
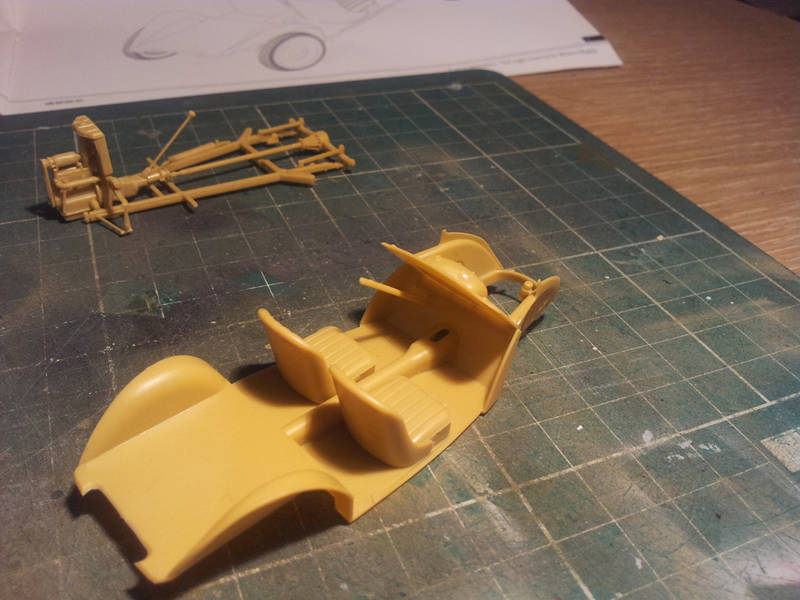
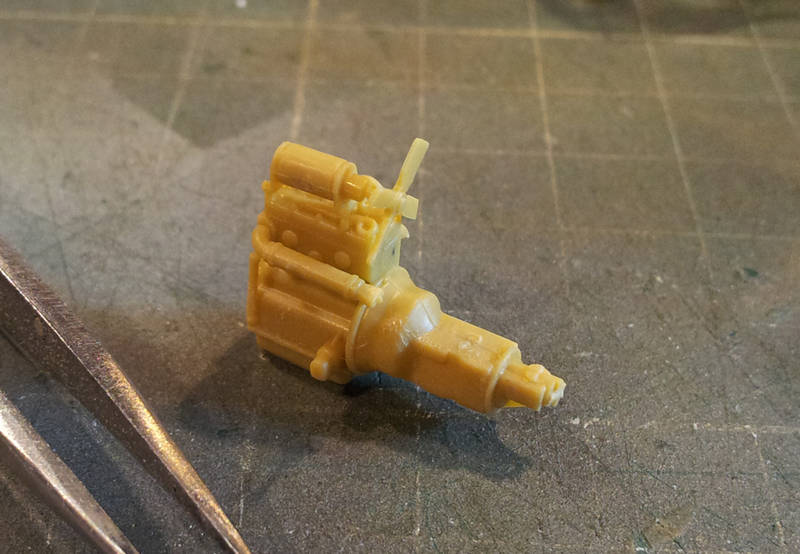
The engine


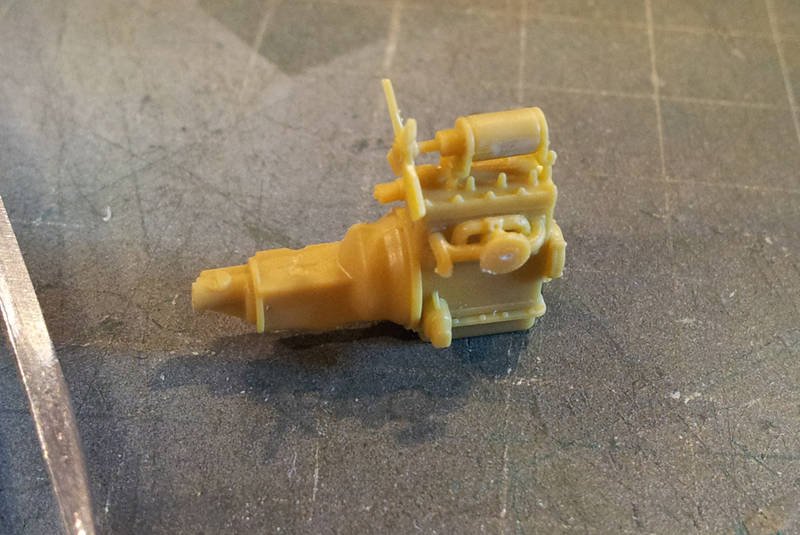
And engine with driveshaft and radiator. I try to leave as many parts separate for now as it will make my life easier in the painting stage.


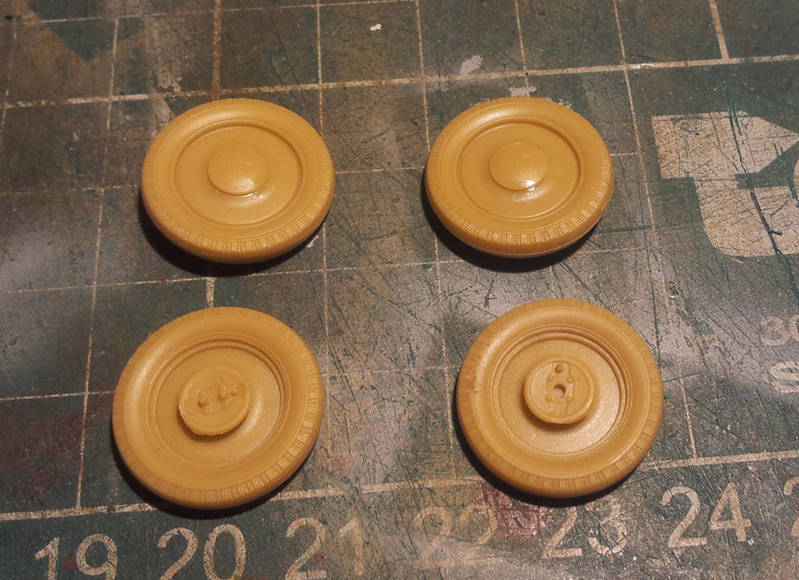
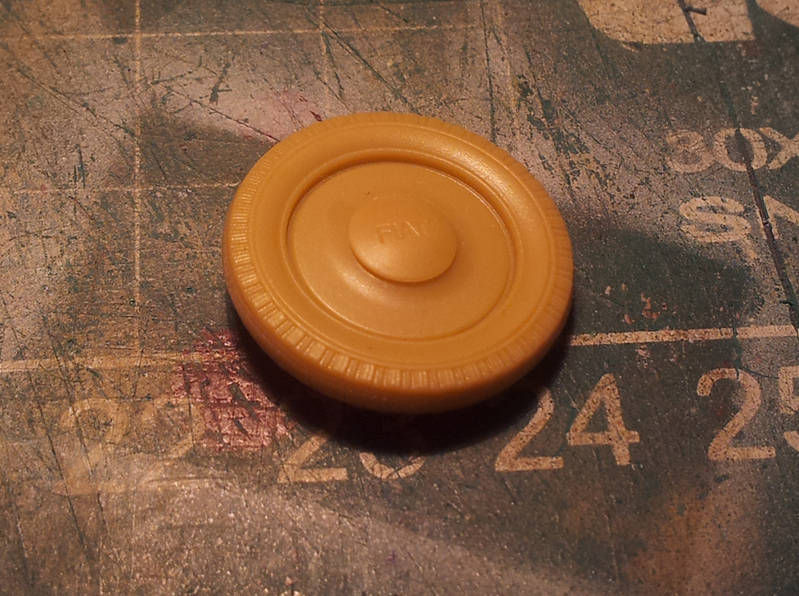
The details are extremely nice but keep in mind most of the parts are tiny. The squares on my cuttingmat are 1cm by 1cm and that engine is only 2 cm long. Fun fact: At 21 parts the used part count at this point is already nearly half that of the Tamiya Simca 5. And we are still dealing with the engine.

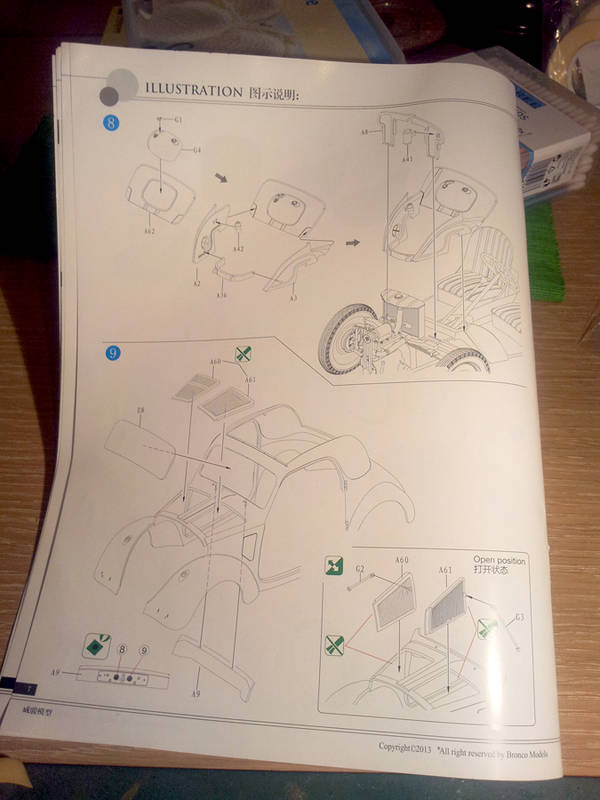
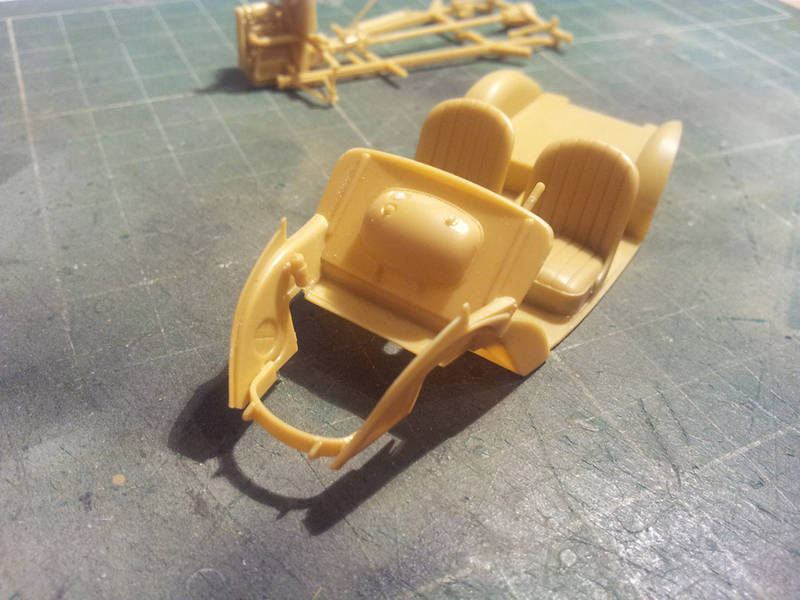
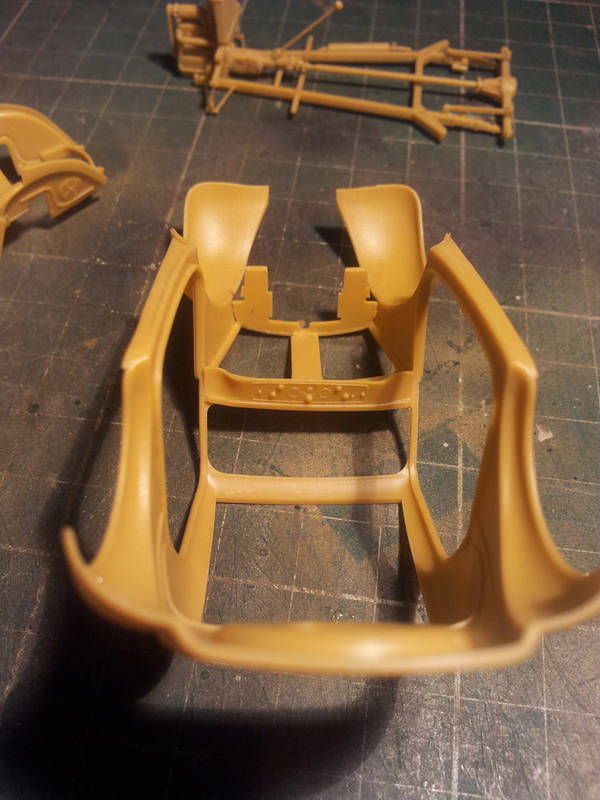
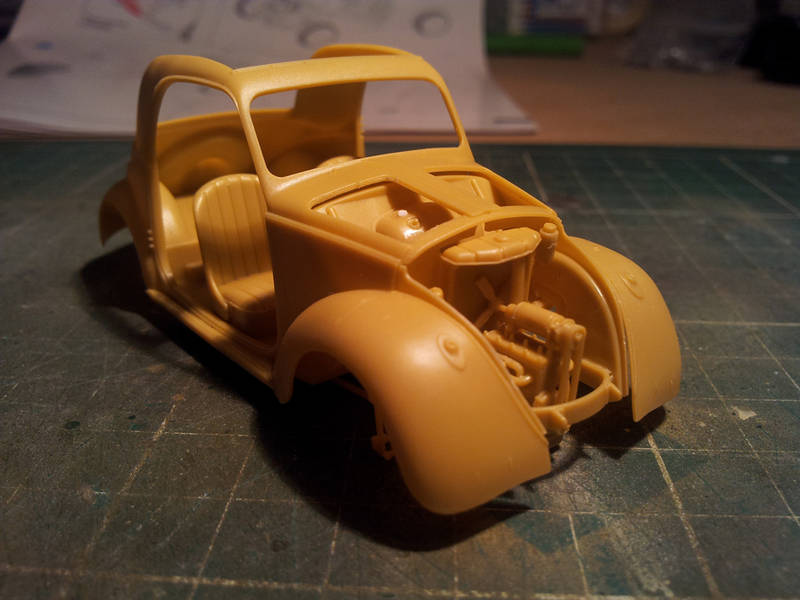
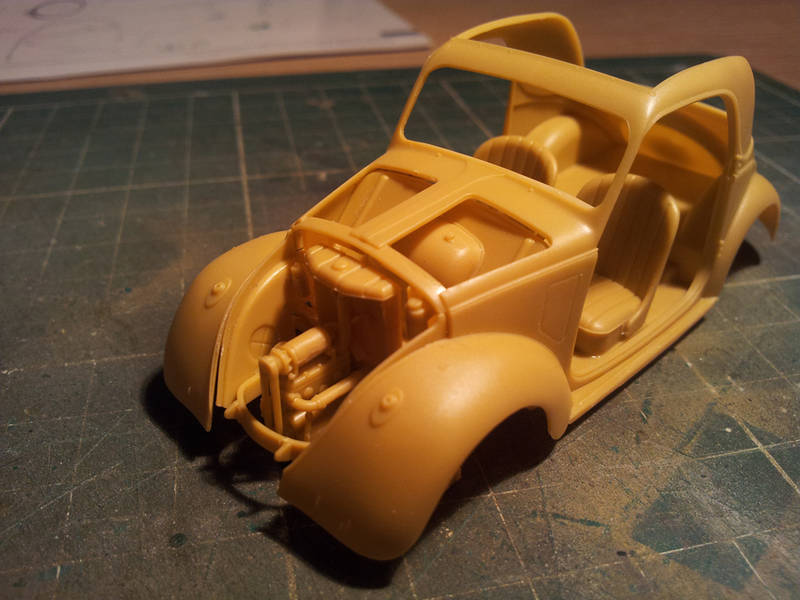
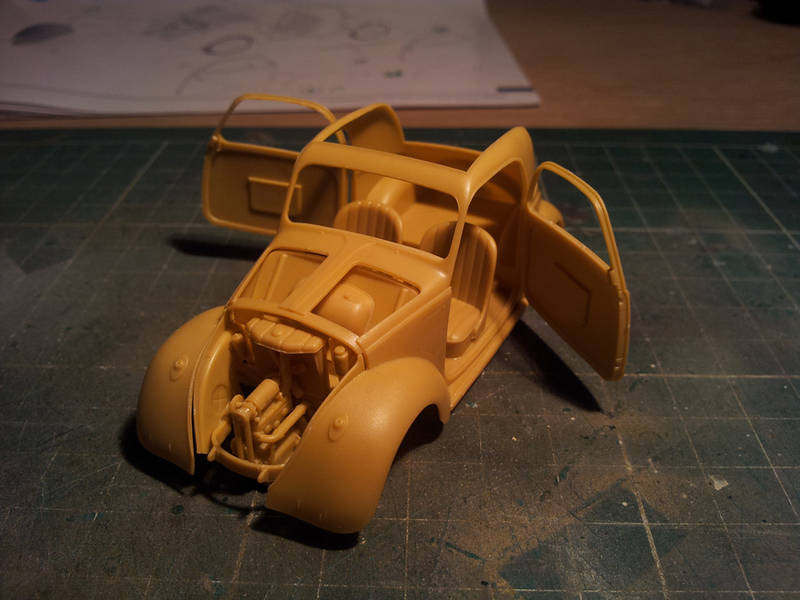
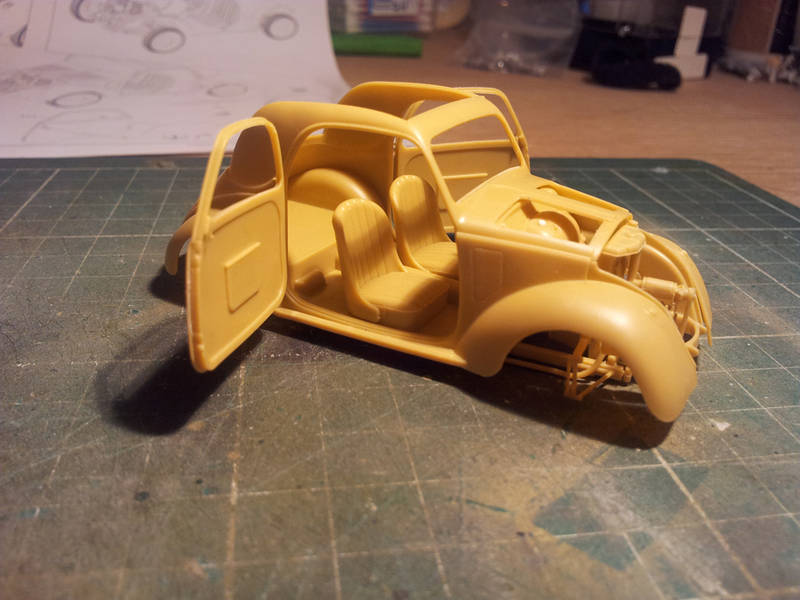
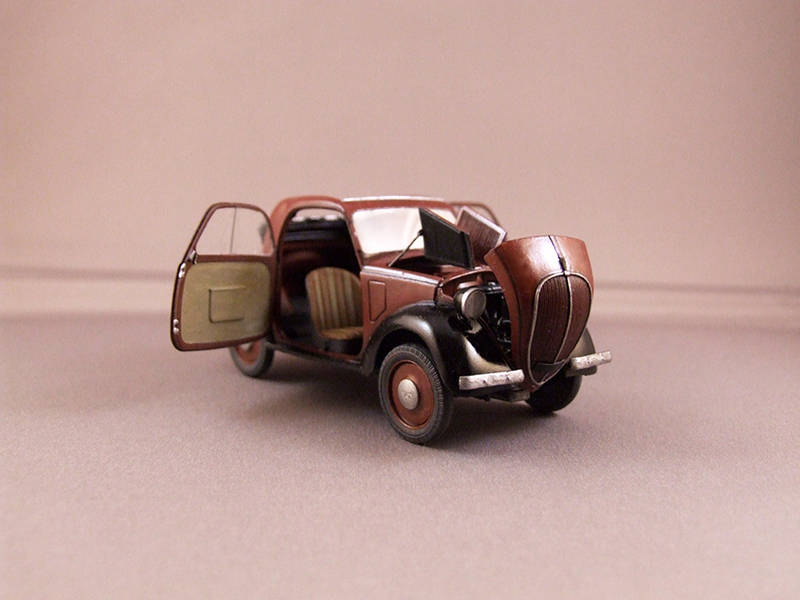
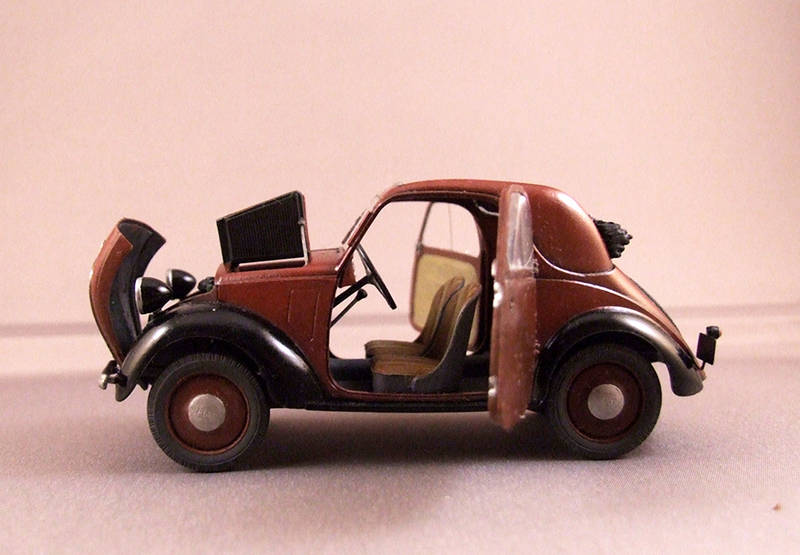
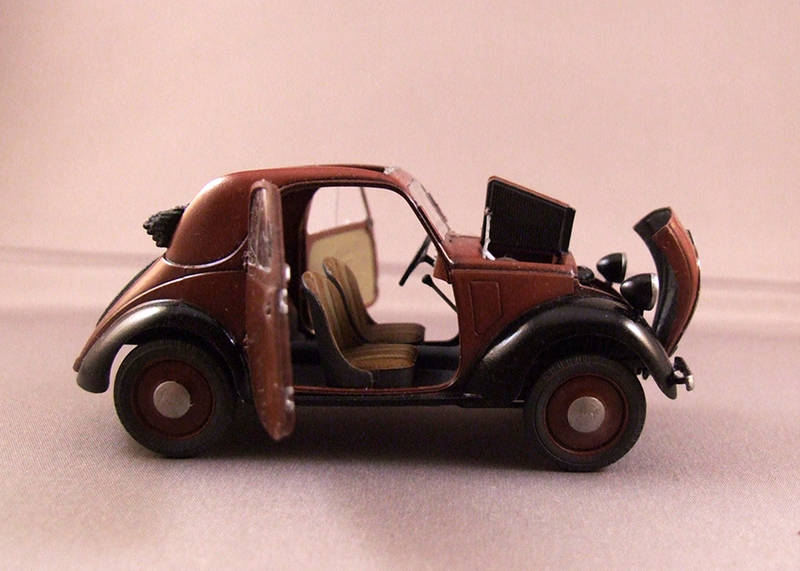
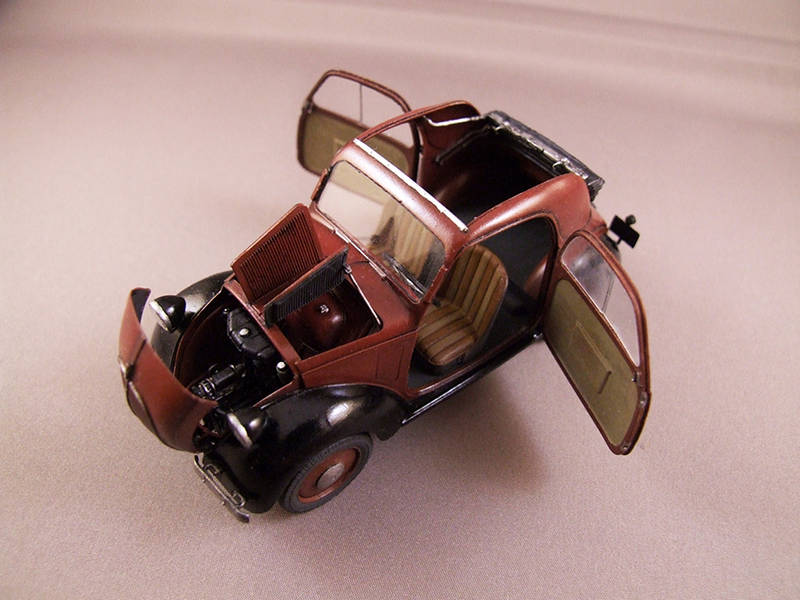
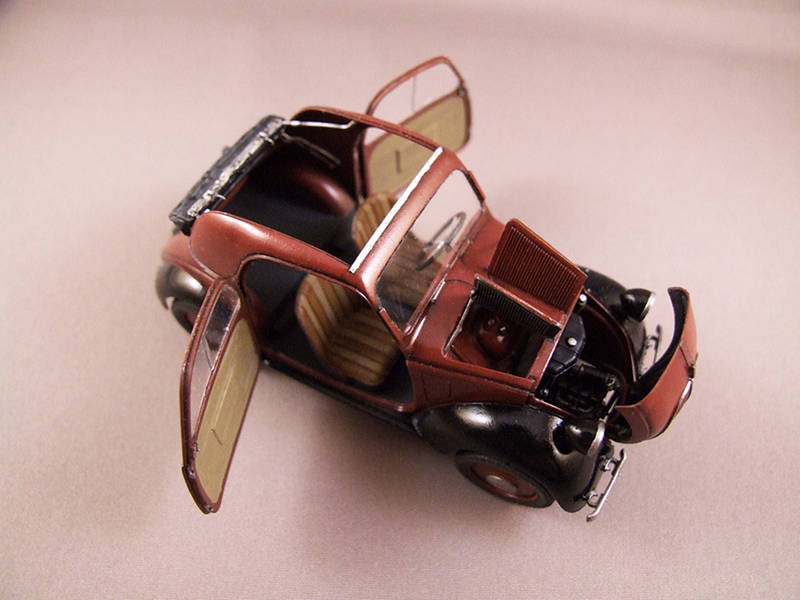
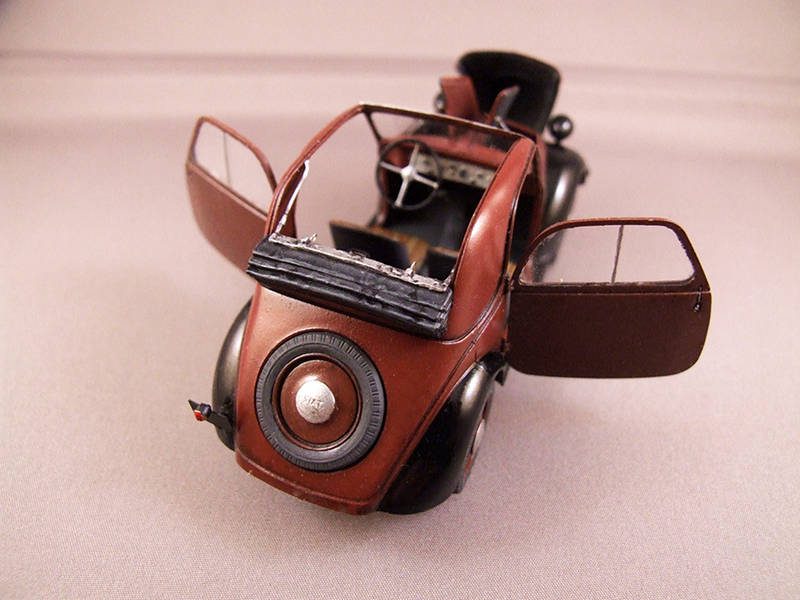
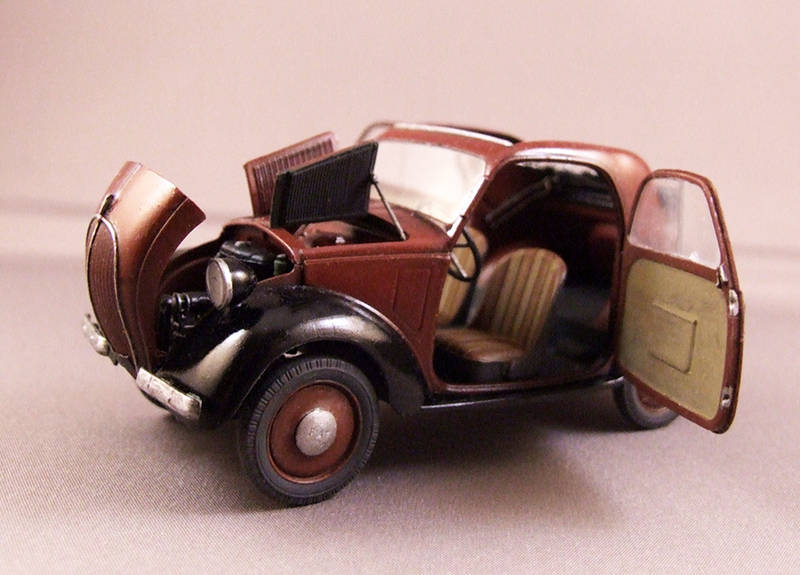
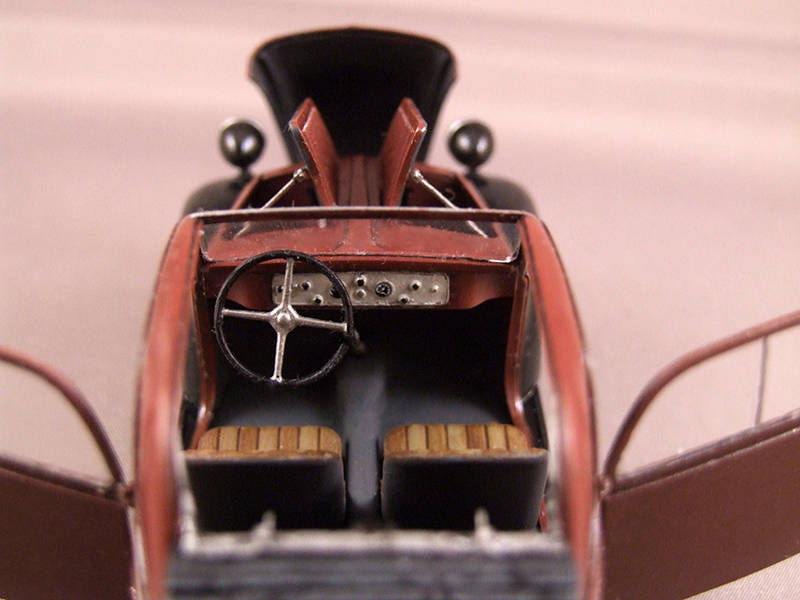
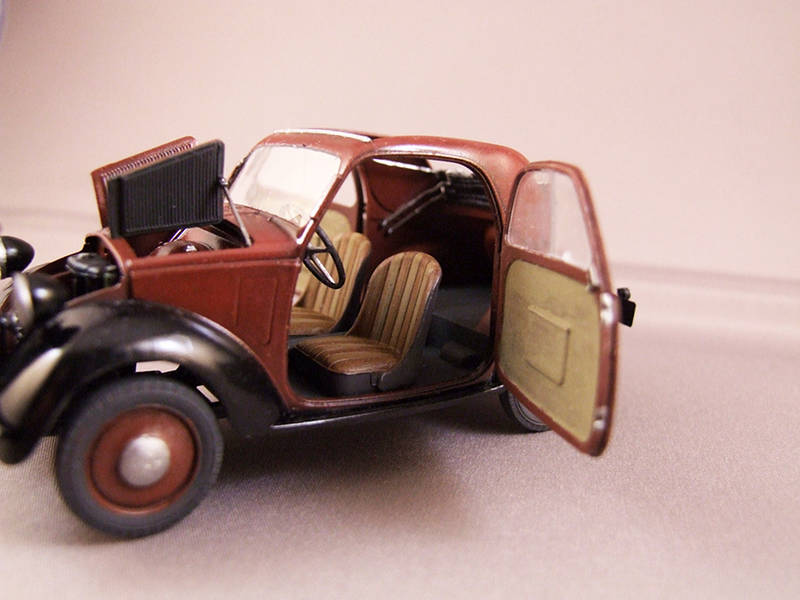
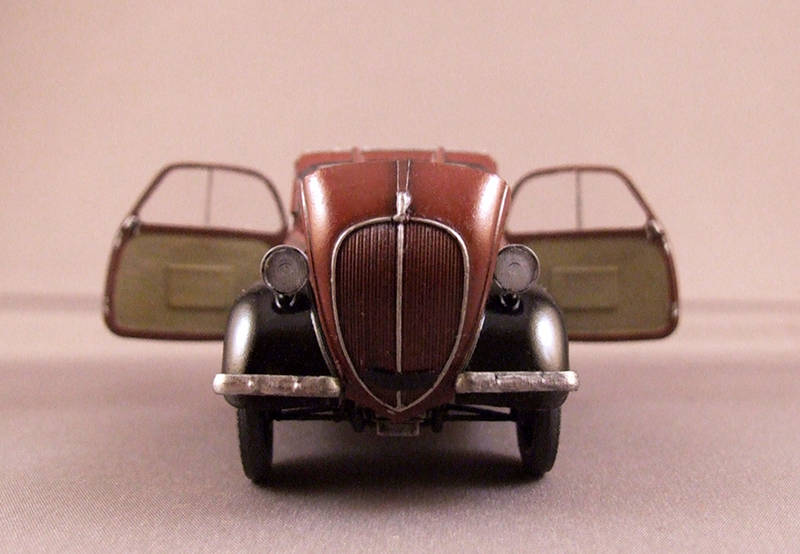
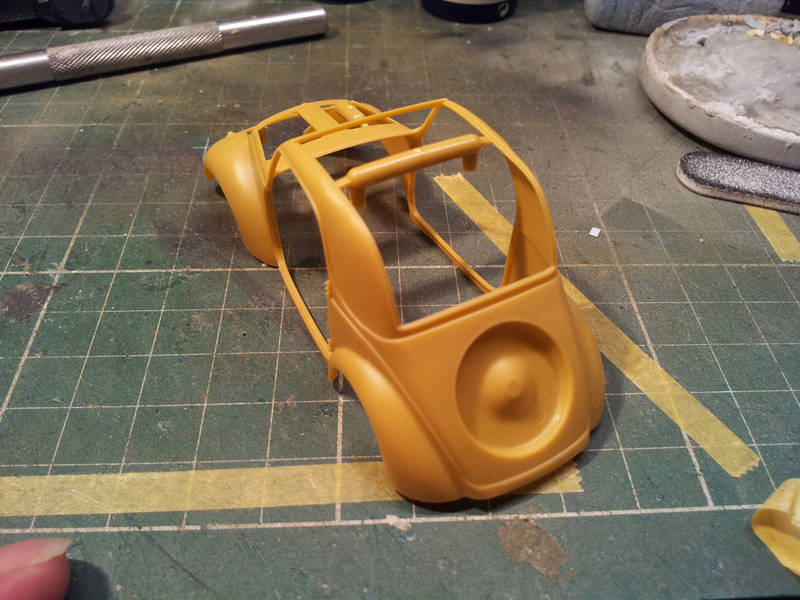
Some shots of the really nice bodyshell of the Topolino. All the hatches and doors can be posed open but more on that later


Let's also have a bit of a chat on accuracy. Something that is not mentioned in Rick's review. A friend of mine works at a fiat Garage and is a bit of an expert on classic cars. So I went to the garage and showed it to the guys there. Paperwork and manuals was pulled out of the archives and it was fun to see that bunch of mechanics pour over the kit. Their opinion was that the kit is as perfect as can be. The engine you see above is a perfect scale rendition of the 1936 0,6 litre side valve, 4 cilinder engine that the topolino was fitted out with. Pretty much matching in size and details. The only thing you need to add is wiring but that is really only a concern when you leave the engine hatches open. Otherwise the whole engine area will be unseen.
Dimension wise it is spot on as well. The 1:1 1936 Topolino is 321,5 cm long. Which translates to +/- 9,1 cm in 35th scale. And once the bumpers are added it is pretty much exactly that. In width it seems Bronco did their homework as well. 1:1 scale the width is 127,5 cm which is in scale 3,6 cm and again Bronco is spot on.

Next update more on the vehicle less boring talk.

With friendly greetz

Robert Blokker
CMOT
Staff MemberEditor-in-Chief
ARMORAMA
Visit this Community
England - South West, United Kingdom
Joined: May 14, 2006
KitMaker: 10,954 posts
Armorama: 8,571 posts
Posted: Thursday, October 31, 2013 - 08:07 AM UTC
It is good to see this get going Rob and perhaps more importantly that thus far you are happy with the model.
clovis899
#155
Visit this Community
California, United States
Joined: May 05, 2002
KitMaker: 774 posts
Armorama: 605 posts
Posted: Thursday, October 31, 2013 - 08:12 AM UTC
Robert,

It is good to see someone tackle this kit, it sure looks like a little gem in the box. The best news is that it is as dimensionally correct as it is, that knowledge alone is worth more than any review. Looking forward to watching your progress on the 'little mouse'

Cheers,
Rick
FAUST
#130
Visit this Community
Noord-Holland, Netherlands
Joined: June 07, 2002
KitMaker: 8,797 posts
Armorama: 4,190 posts
Posted: Thursday, October 31, 2013 - 11:56 AM UTC
Ola Guys

Yeah so far it has been an awesome kit. Everything fits perfectly to this point. Only problem was me spending some time on my knees on the floor in search of some tiny parts that I dropped.
@ Rick'
Absolutely I can appreciate an accurate kit and this is as good as they come. It is perfect. Already looking forward to continue this built
panamadan
Visit this Community
Minnesota, United States
Joined: July 20, 2004
KitMaker: 1,513 posts
Armorama: 1,449 posts
Posted: Thursday, October 31, 2013 - 12:14 PM UTC
I'll be watching. Love this car!
This might help? http://www.fantasyjunction.com/cars/1256-Fiat-Topolino 500A-500 c.c. Inline 4-Cylinder
Dan
PS-if the link doesn't work, use the search feature and type in Fiat.
FAUST
#130
Visit this Community
Noord-Holland, Netherlands
Joined: June 07, 2002
KitMaker: 8,797 posts
Armorama: 4,190 posts
Posted: Friday, November 01, 2013 - 04:21 AM UTC
Ola Dan
Glad you like it... It is a really nice designed car.
And thanks for that link. It is a great help for the wiring since I'm planning to have all the hatches open.
FAUST
#130
Visit this Community
Noord-Holland, Netherlands
Joined: June 07, 2002
KitMaker: 8,797 posts
Armorama: 4,190 posts
Posted: Sunday, November 17, 2013 - 04:19 AM UTC
Ola Guys

Continuing this built. Starting off with the next page of the instruction booklet. Here the Engine gets mated to the chassis. And the assembly of the wheels


Everything pretty straightforard and no problems encountered.


And the wheels. Check out the nice embossed FIAT on the hub caps


Following up with step 4 and 5. Allthough admittedly I only added the small parts labeled B8 on the front suspension. Most of it is either left off for ease of painting or still needs to be added.


And here is a pic of the part B8 connecting the leafspring to the bottom part of the front suspension. THe part is very thin so take care with cleaning the sprue attachment point.


Steps 6 and 7 makes you add the chairs, the steering column the gas pedals and the gearstick.


Again very straightforward assembly. I left the steeringwheel off again for ease of painting. The only thing you should keep in mind are the gas and break pedals. They are small, tiny and fragile and they have a nasty habit of forcing themselves out of the tweezers.


Steps 8 and 9 Here I kinda left the order of assembly because of the subassemblies that will make my life during painting much easier.


I did make the insides of the engine bay. Managed to loose one part... the fuel filler cap. It launched itself out of the tweezers and got away into infinity and beyond. So I replaced it with a disc cut from styrene rod.


And the dashboard


And here is everything done during the past few steps slowly coming together


So that is it for now... Very soon all the parts are added and I can start hitting it with primer. It so far has been a real joy to built. EVerything fits perfectly and even though some parts are tiny, thin and fragile it will look stunning once finished. And the detail is really good. That little engine just shouts for all the hatches in the hood to be opened.
FAUST
#130
Visit this Community
Noord-Holland, Netherlands
Joined: June 07, 2002
KitMaker: 8,797 posts
Armorama: 4,190 posts
Posted: Wednesday, December 18, 2013 - 04:02 AM UTC
Ola People

Last installment of this built. The Topolino is finished. I decided for the ladybug 2-tone as I think this is the most handsome way to show this vehicle and it was one of the factory colors that Fiat delivered these little cars in.

There are some steps missing from the built. My Phone died on me and with it taking the pictures of the last built stages and a lot of the smaller details that were attached to the end of the building process. I will give a run down from memory.
The canvas roof is well rendered with nice folds. Take care with the rods of the roof frame they are very thin and you have to take care cutting them off the sprue and cleaning them up. They break very easily.
Also the kit comes with a few PE bits that together form the clamps that hold the bonnet in place. I waited till the end to glue them on but due to handling it further along the way I managed to loose all 4 parts. Keep these off till after you have finished painting the little car to not end up in the same faith.
I left off the FIAT badge on the hood as well for the simple reaso that Bronco added the wrong PE plate in the kit. The instructions show it with a shield. On the Pe sheet however is a rectangular plate. Which is correct were it not for the fact that FIAT changed the rectangular plat with the tall letters to a tall shield with tall letters in 1931. So by the time they started producing the Topolino in 1936 these logo shields were already in full use for some years. I guess Bronco took the dimensions and details from a restored Topolino of which the owner used the rectangular plate. SO I decided to leave it off.

Well that is about it. Off to the showroom pics


Only thing I need to add are the PE windshield wipers. Which are very tiny. And the licenseplate numbers which will be a nice job since you get a sheet with separate numbers which allows you to make your own license plate. It also gives you the option to make it a militarised version as it gives you the letters to make it for Wehrmacht etc. I did assemble the figure of the woman and the dog but I am planning a little scene around this car. And I wait with those figures till I have scratched a bunch of Italian Garagistas.

I hope this built log gave a good idea of the detail of this kit and what it will look like once finished. It was a very enjoyable built. The detail is excellent. And it will end up as a very handsome car.
 _GOTOTOP