_GOTOBOTTOM
Armor/AFV: Allied - WWII
Armor and ground forces of the Allied forces during World War II.
Hosted by Darren Baker
Academy M18 - Medium level skill
HeavyD123
Visit this Community
United States
Joined: December 07, 2013
KitMaker: 8 posts
Armorama: 8 posts
Posted: Monday, December 09, 2013 - 10:45 AM UTC
Hello, this is my first post here but I've followed and used this site for years. I bought the Academy M-18 kit when it was first released after reading a good review about it in FSM. So there it has sat on the back burner for about 13 years now or so. I always wanted to get the two Verlinden upgrades but only managed to get a hold of the Eduard PE set. So I plan to use most of the PE and do a few tweaks to get a little more bang for the buck. I have researched and printed 50 some pictures and put a lot of thought into it over the years.

I do have one very good question that my research can't confirm including reading some WW2 army manuals. What color should the interior be beneath the turret? I mostly see built models with a white interior but all of the restored tanks I can find have green interiors which makes more sense. Also the green tends to look a bit darker than Olive drab. Does anyone have the right answer to this?

I am a little nervous about this build but I think the forum will keep me on my best game. I'm far from a contest level builder.

Thanks,

Chip

Still need to clean and fill these a little. thinned the inner solid idler wheels then drilled out matching slots.


Not perfect but will be tucked back away the molded-in half-rounds had no shot of staying.


Was thinking to save all the main frame but now I'm going to leave just a few core pieces and put the PE on top.


The interior sub-assemblies aren't glued in yet, going to paint and weather them first then put them back in.

Delbert
#073
Visit this Community
Pennsylvania, United States
Joined: October 05, 2002
KitMaker: 2,659 posts
Armorama: 1,512 posts
Posted: Monday, December 09, 2013 - 02:34 PM UTC
Hi Chip


I've found the general rule of thumb is, and this is only in general as there are always exceptions to the rules.

In U.S. Fighting vehicles the interior color was an off white to increase visibility. but on open top vehicles such as the M-10, M-18 and such the open part of the fighting compartment was painted the same colors as the exterior. the inner surfaces of the hatches were also painted the same as the exterior color so they wouldn't show brightly while the vehicle was being driven with them open.

I can't cite chapter and verse but this is what all my internet research on the subject has boiled down to over the years, and I must say it does make for nice models.


Delbert
HeavyD123
Visit this Community
United States
Joined: December 07, 2013
KitMaker: 8 posts
Armorama: 8 posts
Posted: Monday, December 09, 2013 - 03:43 PM UTC
My intent was always to go green and to that end go very light OD green as well inside to contrast the under coat. I am going to do a salt/ terpenoid weathering for the floor with a base gunmetal underneath but am now bebating should the side panels be primer red underneath or metal for weathering?
HeavyD123
Visit this Community
United States
Joined: December 07, 2013
KitMaker: 8 posts
Armorama: 8 posts
Posted: Wednesday, February 19, 2014 - 07:02 AM UTC
Need some feedback on salt weathering. Researched a bit and did some testing on an old 232. I used model master enamels for a gray and silver base coat then used table salt with distilled water and a top coat ot Tamiya acrylic thinned with distilled water. Effect is good for an interior and adds to it but I would not like the result for exterior paint. There are variations in color around where the salt was. Some kind of bleed effecting the acrylic.

The seat backs were just wrong so wrapped some stretched sprue around them. Did a little scratch work behind the driver's seat but it's hardly to scale. Makes it look better for a quick glance, especially covered up. Going to get a bit more accurate with some additions once I get to the turret inside.


I am using this as a reference and again no where near scale.


some paint work;

you can see on this one to the left where the OD green has clear discolor around where the salt was. It didn't do this to the white. the effect is passable but wouldn't want it outside. perhaps multiple coats with color? as I only did one.


you can see in this one where the white around the salt was more solid. I will brush touch the edges and it's out of site anyways. One thing I am thinking is that the distilled water got 'salty' and changed the density? just want to know how to fix it; alcohol, primer coat, multiple coats...


So the comment 'no where near scale' just didn't sit right. Scraped the oversized stuff and sanded down. used some wire from an old rotary phone circa 1960's, drilled two holes and left one piece that will represent some type of cap there (red.)


rfbaer
Visit this Community
Texas, United States
Joined: June 12, 2007
KitMaker: 1,866 posts
Armorama: 1,696 posts
Posted: Friday, February 21, 2014 - 04:32 AM UTC
New hoses look better, no doubt.
My opinion about chipping on the outside of US vehicles: Don't, or keep it to an absolute minimum. US paint was very good quality, didn't flake off, and normally didn't have a different color primer underneath. Showing high-traffic areas that are "buffed" is about all I do with US OD paint.
Interiors are different. Fluid stains, accumulated grunge, some wear from constant contact, all show up on paint. Just keep in mind that for a "chip" to be there means that area or part was struck by something hard and/or sharp enough to damage the paint.
All my opinion, in the end it's your model to enjoy, and it looks like you're off to a fine start. I've got the same kit in the stash, untouched in five years, only the suspension and running gear done. I'll be following.
HeavyD123
Visit this Community
United States
Joined: December 07, 2013
KitMaker: 8 posts
Armorama: 8 posts
Posted: Saturday, February 22, 2014 - 07:18 AM UTC
Thanks for the chipping advice for US paint, never really thought about it but the minute you said it, I realized you don't see much chipped paint on US armor.

I did the sides over again Olive drab but left the floor alone; I liked the effect there. 3 coats was the trick with good dry time between them. when you put the top on you can barely see any of the side work but I like the view through the hatches and the ammo racks came out much to my liking especially as scratch (free.) Will touch up the black on the radio seat. it's amazing what you can't see with eyes that shows up in the photos.

Might fill in some of the chipping before I close it up, not sure.

This site is a big reference for this build and this photo and the next 4 are why I am chipping so much up front.

http://svsm.org/gallery/m18/IMGP5591

http://svsm.org/gallery/m18

Also did a sludge wash of red/brown (Model Master acrylics) all over and spent some time putting it between the panels on the floor.


Removed by original poster on 03/27/14 - 17:26:31 (GMT).
Removed by original poster on 03/27/14 - 17:28:04 (GMT).
Removed by original poster on 03/27/14 - 17:40:32 (GMT).
HeavyD123
Visit this Community
United States
Joined: December 07, 2013
KitMaker: 8 posts
Armorama: 8 posts
Posted: Thursday, March 27, 2014 - 05:46 AM UTC
Spent a lot of time debating about how to close up the M18. I knew for certain I wanted to represent the top of the muffler and scratch build it somehow. I have seen a great completed model using the available resin muffler. But in pictures, the muffler seemed to 'pop out' the fact that the rest of the bay was empty.

I decided to represent the engine at a level similar to putting random 'plumbing' inside a submarine model to roughly represent innards. I did a too rough mock up engine but eventually got down to some scale conversions and stuck to them as tight as I could with easily available spares and such.


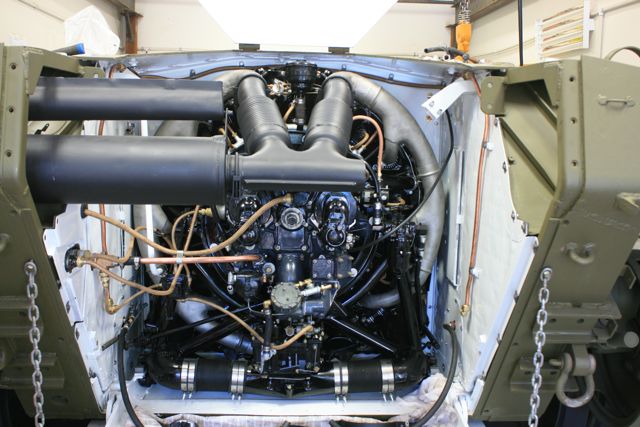
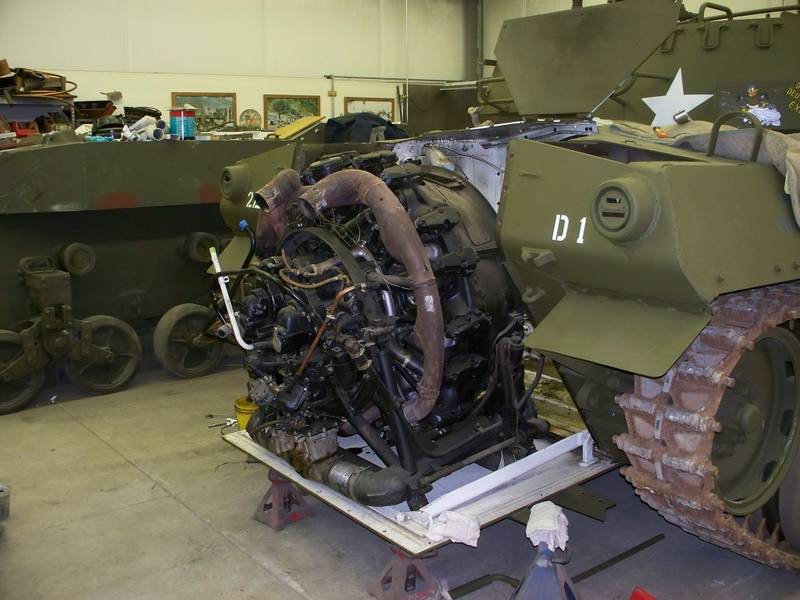
these 'vents' on the top of the muffler became a bit of an obsession...


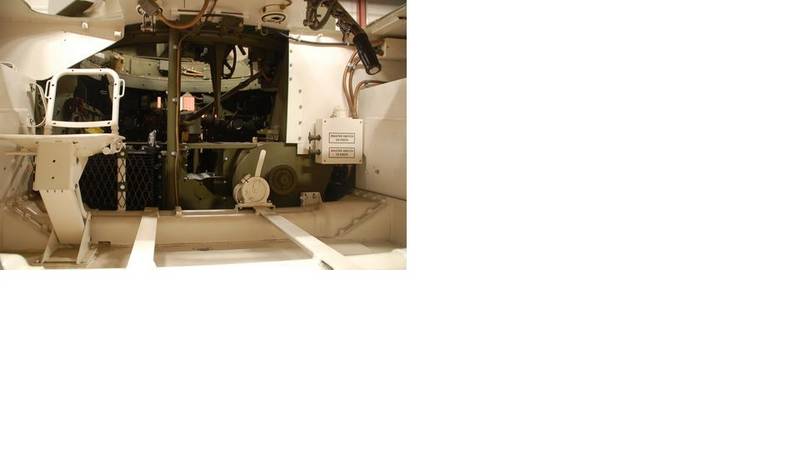
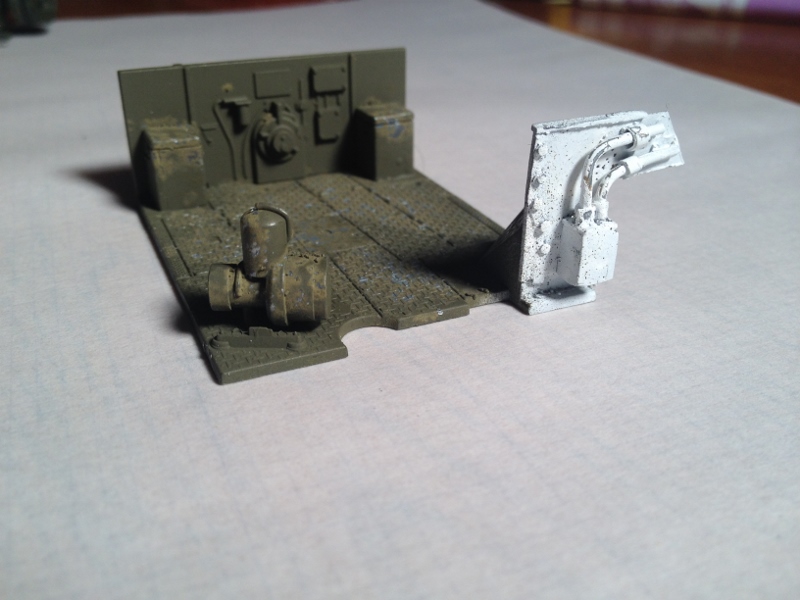
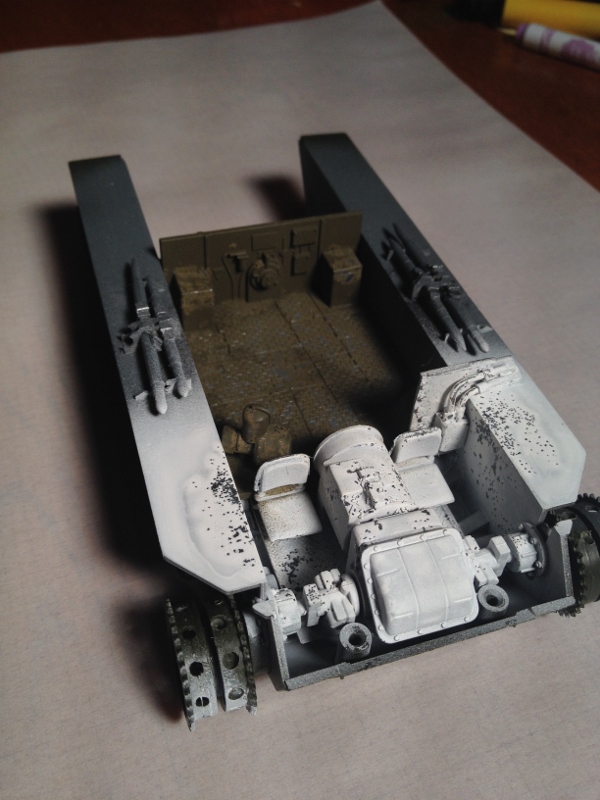
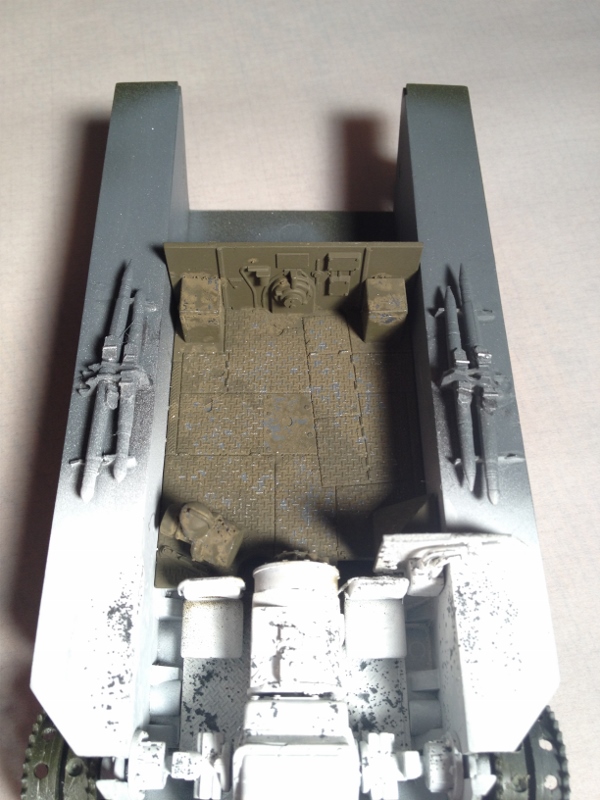
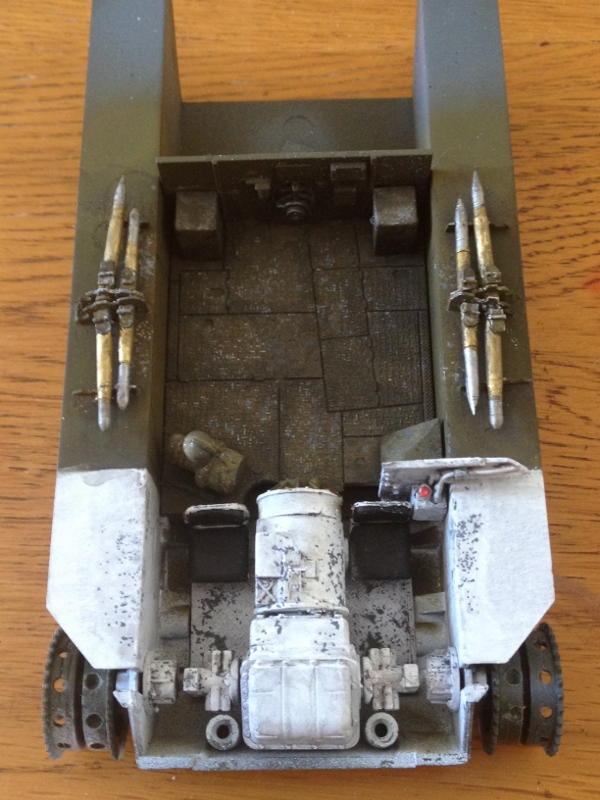
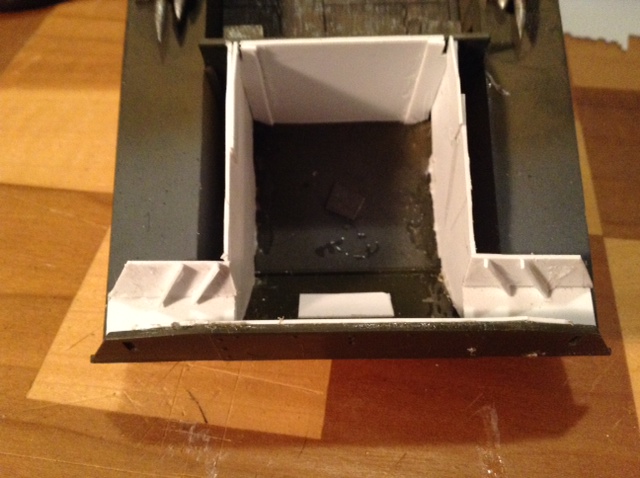
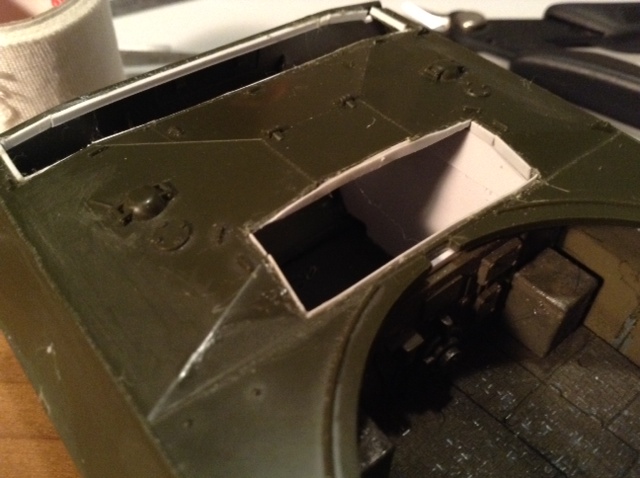
So I boxed off the engine bay to scale by measuring a printed photo from the back with the door open. Interestingly the engine compartment is pretty close to or exactly half the total width. There was no way to precisley measure side walls so I had to rough them at the top then put pieces in to shim flush with the top on. I also gave up on trying to precisely remove most of the deck venting; the kit's plastic is brittle plus it was too much work and looked far from pretty. I will scratch build some key support cross pieces after it's buttoned up and before laying down the PE.


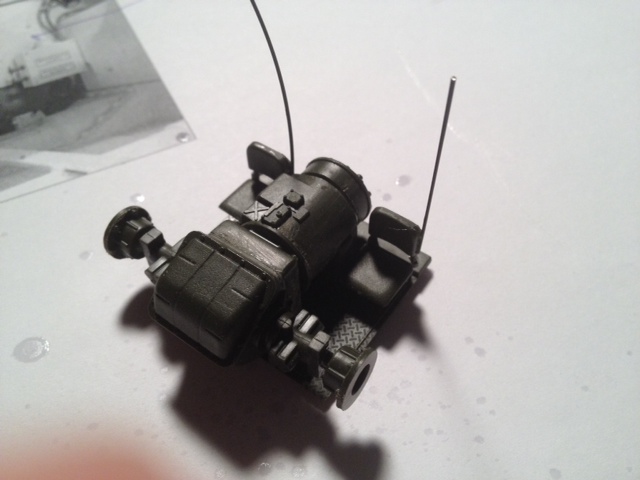
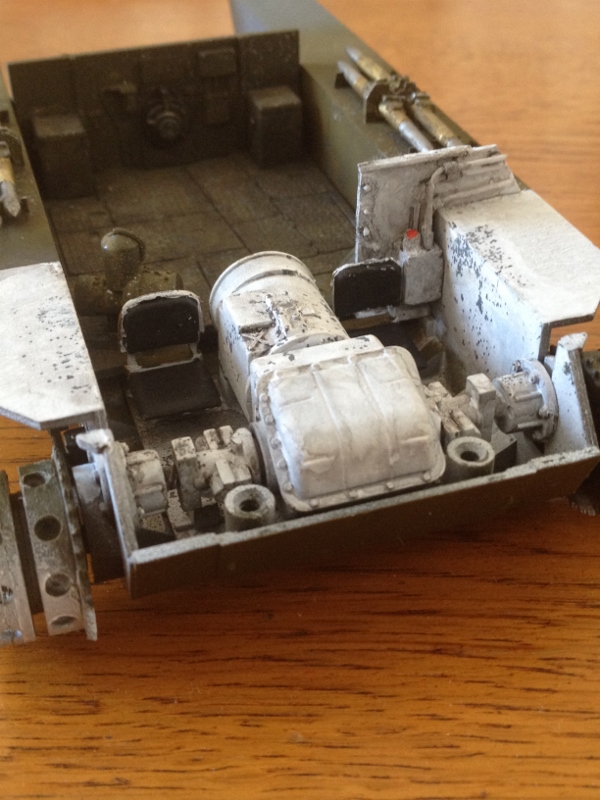
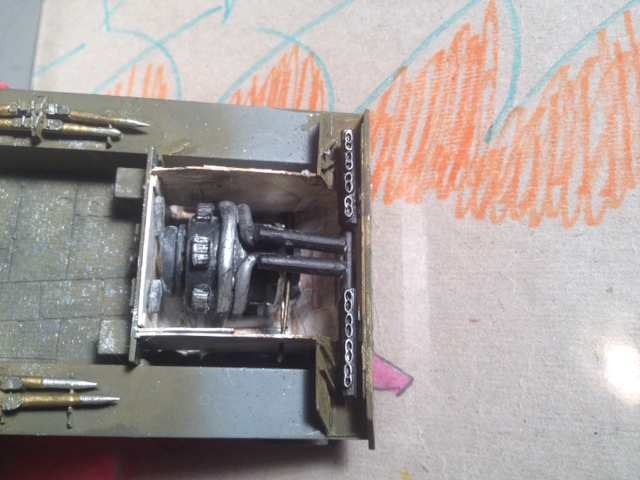
Engine foundation was a spare chrome wheel form a 1/24 Tamiya Skyline kit glued to a bow of sprue underneath for a base. Towards the front is a random armor half wheel and ditto on the back side except larger. The two bands accross are sprue heated and bent to shape. Later I draped sprue over the front wheel as well before painting. The Cylinder heads are each a pair of german WWII ammo pouches (3) glued on top of eachother. The back lower Muffler is two Abrams 120mm M830 rounds with the tips filed off then glued together.


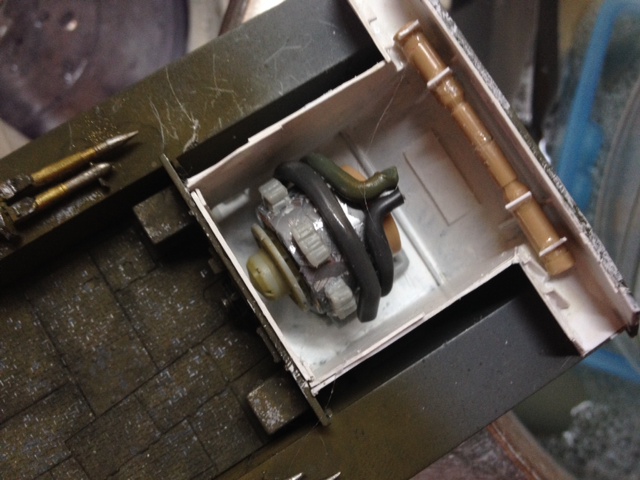
Simple sprue for the two top mufflers and another set of 120 mm tank rounds make the piping to the upper side of the engine but that area is not visible. I was initially going to line used staples along the top to represent the exhaust but a coffee stir stick caught my imagination so I shaved 8 slices and glued them in order. Got busy to the back with some tidbits and glued a flat strip of white styrene in a circle shape.


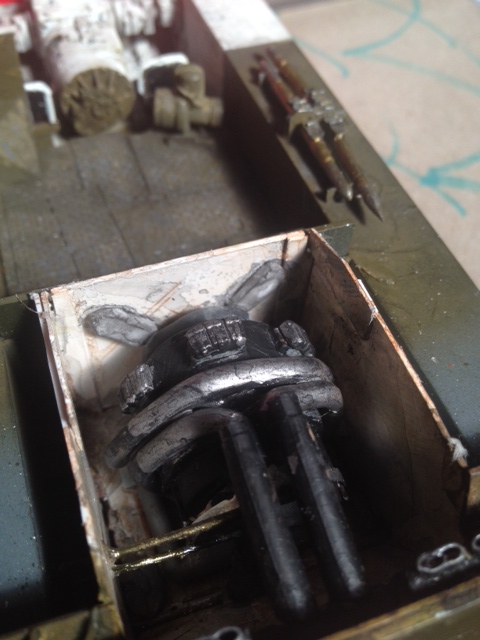
Painted, two angle views.


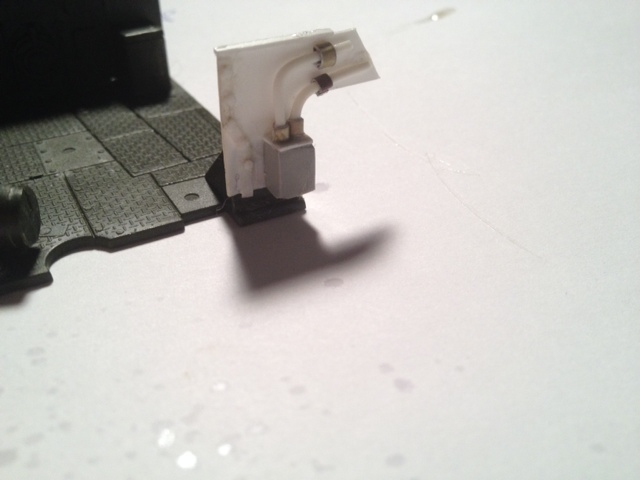
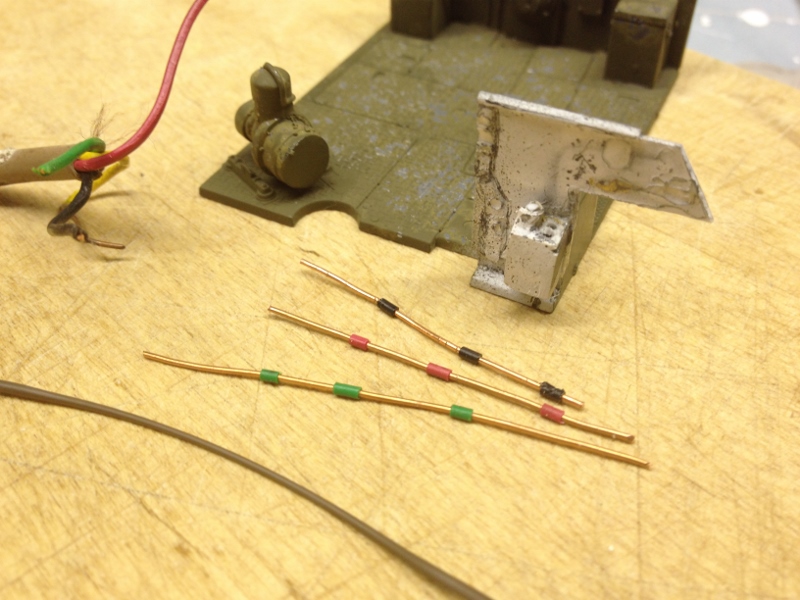
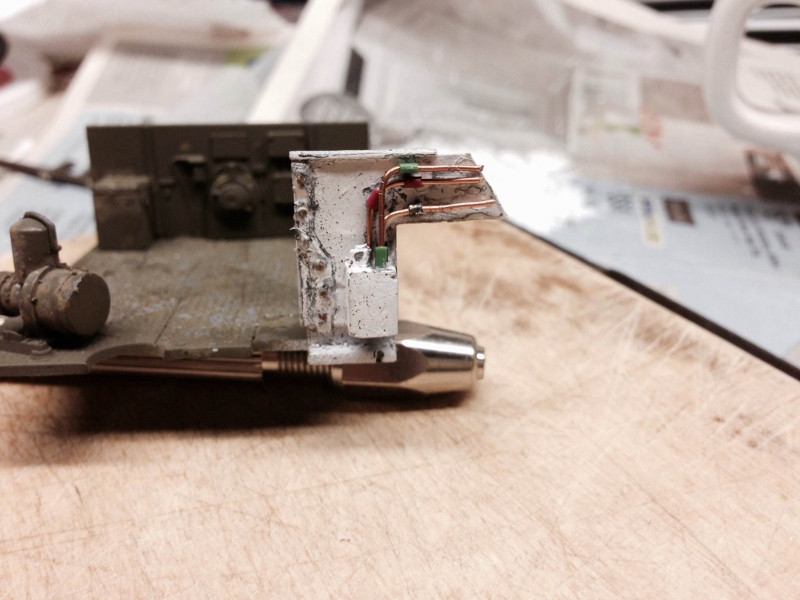
Time to button it up next. I will run some wire plumbing up in the driver compartment and have to put in the radio. I'll run a little plumbing in the engine bay too.
 _GOTOTOP