_GOTOBOTTOM
Dioramas
Do you love dioramas & vignettes? We sure do.
'Slum' - The other side of reality
ti
Visit this Community
Dalarnas, Sweden
Joined: May 08, 2002
KitMaker: 2,264 posts
Armorama: 1,763 posts
Posted: Thursday, December 26, 2013 - 01:03 PM UTC
Please forgive me if this is the wrong forum for this topic. If it is, would the Admin please moe it to the right one. Thanks.

Been working on this for a while. I have been looking at many pics of Slum areas from around the world and thought it would be 'different' to model something using this subject matter as an inspiration. I have not seen many or should I say, this subject matter, modelled before. As always, I try to be different and not follow a certain trend. So here is what I have modelled so far. Still need to add some details in the shanty and another figure in side the open door way.

The corrugated zinc, were done using foil paper and a mechanism that makes the corrugated design. I bought from some store. I do not remember but you can get a similar one from Panduro. I am cheap, so I will use anything possible. But I found another material. Use aluminum platter that bakers use to put cakes or food on. I found some cheaper ones at a cheap store for very little money. I cut out everything around it and use the bottom which was perfect. Thanks for looking.

BTW, if you type in Slum in Google's search window, you will see many different types from around the world. It is a shame, all governments do not put in the efforts to change this. With all the money they put into their military and such.

Apologies for the bad photos. My camera got smashed a couple of times and the plastic has lots of scratches which leaves a shadowy cloud at the bottom of the camera. So it is hard to adjust.


Tiger_213
Visit this Community
California, United States
Joined: August 10, 2012
KitMaker: 1,510 posts
Armorama: 1,443 posts
Posted: Thursday, December 26, 2013 - 02:02 PM UTC
It looks great Charles. It is technically 'armor' (from the weather) I guess and it shows a lot small components that could easily end up in many dioramas.

Where'd the figure and clutter (pots and pans etc.) come from?
roudeleiw
Visit this Community
Luxembourg
Joined: January 19, 2004
KitMaker: 2,406 posts
Armorama: 2,224 posts
Posted: Thursday, December 26, 2013 - 11:04 PM UTC
Hi Charles

This is a great little dio, I really like it all.
The only question could be why an unopened package is still on the Vespa.

The corrugate walls may also be painted a bit darker to look more depressing.

Congrats on your choice of theme and trying to deviate from the main stream

Greets
Claude
sltom44
Visit this Community
Canada
Joined: December 11, 2013
KitMaker: 15 posts
Armorama: 14 posts
Posted: Thursday, December 26, 2013 - 11:50 PM UTC
May I ask the scale? Where did you get all the pots and pans, the little bowls, and that clear bottle beside the car seat?
1stjaeger
Visit this Community
Wien, Austria
Joined: May 20, 2011
KitMaker: 1,744 posts
Armorama: 1,727 posts
Posted: Friday, December 27, 2013 - 02:50 AM UTC
Hi Charles,

congratulations on the choice of the theme!! Your motivation behind the project and its posting is definitely the right one!!

Claude may have a point as the corrugated sheets should perhaps look less "new".

IMHO the sheets maybe are bent and twisted a little too much on too little a space. Considering the material I find it hard to believe!

All in all a great show!!

Cheers

Romain
Biggles2
Visit this Community
Quebec, Canada
Joined: January 01, 2004
KitMaker: 7,600 posts
Armorama: 6,110 posts
Posted: Friday, December 27, 2013 - 03:14 AM UTC

Quoted Text


The only question could be why an unopened package is still on the Vespa.


Drug delivery!
russamotto
Visit this Community
Utah, United States
Joined: December 14, 2007
KitMaker: 3,389 posts
Armorama: 2,054 posts
Posted: Friday, December 27, 2013 - 03:42 AM UTC
I've been in huts like that. Very realistic. I would also suggest weathering the siding more, or different colors of paint as sourced from different locations as that was what I saw.
roudeleiw
Visit this Community
Luxembourg
Joined: January 19, 2004
KitMaker: 2,406 posts
Armorama: 2,224 posts
Posted: Friday, December 27, 2013 - 04:52 AM UTC

Quoted Text


Quoted Text


The only question could be why an unopened package is still on the Vespa.


Drug delivery!


LOL, I see, I only realized now that the back wheel is still on, I thought it was missing, that's why my question


ti
Visit this Community
Dalarnas, Sweden
Joined: May 08, 2002
KitMaker: 2,264 posts
Armorama: 1,763 posts
Posted: Friday, December 27, 2013 - 08:15 AM UTC

Quoted Text

It looks great Charles. It is technically 'armor' (from the weather) I guess and it shows a lot small components that could easily end up in many dioramas.

Where'd the figure and clutter (pots and pans etc.) come from?


The figure is from Meng Eastern figure set. The cookery items are from Diopark. These Dio parks accessories are awesome.
Tiger_213
Visit this Community
California, United States
Joined: August 10, 2012
KitMaker: 1,510 posts
Armorama: 1,443 posts
Posted: Friday, December 27, 2013 - 08:23 AM UTC
I was thinking Meng for the figure, wasn't sure though.
ti
Visit this Community
Dalarnas, Sweden
Joined: May 08, 2002
KitMaker: 2,264 posts
Armorama: 1,763 posts
Posted: Friday, December 27, 2013 - 08:33 AM UTC
My inspirations comes from various pics on the net. Both with lots and less heavy weathering on the zincs. But of course, I can add more weathering... Here is one of the main reference photos I used as reference:


---------------------------------


1stjaeger
Visit this Community
Wien, Austria
Joined: May 20, 2011
KitMaker: 1,744 posts
Armorama: 1,727 posts
Posted: Friday, December 27, 2013 - 08:49 PM UTC

That's what I call reference! All the info you need is there!
The situation of these poor people is appalling! Not so much the shacks, rather the garbage and its inherent dammage to the health of (primarily) children!

Sorry, couldn't hold back in view of such misery!!

Regarding the dio, I must admit that the real panels look pretty crumpled, more than I would have thought!!
And if they are galvanised, I can live with the (overall) silvery look.
On the other hand, I stand by my comment that in miniature the panels are a tad too shiny/new. This is obvious when you consider where the material comes from. Such platters are supposed to look good as they are used in connection with food.
Maybe a coat of matt lacquer is enough to reduce the shine!

Thanks for building this little scene and (above all) posting it here!!

Cheers

Romain
ti
Visit this Community
Dalarnas, Sweden
Joined: May 08, 2002
KitMaker: 2,264 posts
Armorama: 1,763 posts
Posted: Friday, December 27, 2013 - 09:44 PM UTC
So true Romain. I will dull the panels more. Thanks for the tip.
1967er
Visit this Community
Nordrhein-Westfalen, Germany
Joined: March 12, 2012
KitMaker: 224 posts
Armorama: 201 posts
Posted: Friday, December 27, 2013 - 09:59 PM UTC
Hello Charles,

great capture of reality in your diorama.
The groundwork and the rubbish around the hut are very realistic, only the corrugated plates are to shiny for me - but as you said, you are working on that.

Cheers
Thomas
SOYDIOS
Visit this Community
Granada, Spain / España
Joined: August 24, 2007
KitMaker: 98 posts
Armorama: 56 posts
Posted: Friday, December 27, 2013 - 10:59 PM UTC
... You tell the reality on a smaller scale, is a way to assert the reality of the real scale, which we are so accustomed. ..:
http://zurribulli.ucoz.com/index.html
kurnuy
Visit this Community
West-Vlaaderen, Belgium
Joined: August 22, 2009
KitMaker: 1,491 posts
Armorama: 997 posts
Posted: Friday, December 27, 2013 - 11:52 PM UTC
Hello Charles ,

lots of congratulations for that very realistic diorama you have made . Excellent work !

Greetings,
Kurt .
ti
Visit this Community
Dalarnas, Sweden
Joined: May 08, 2002
KitMaker: 2,264 posts
Armorama: 1,763 posts
Posted: Saturday, December 28, 2013 - 03:58 AM UTC
Thank you guys. Will post an update when i have made some changes.
aralviar
Visit this Community
Philippines
Joined: November 20, 2013
KitMaker: 26 posts
Armorama: 26 posts
Posted: Saturday, December 28, 2013 - 11:28 PM UTC
Hi Charles.
Your "slum" is a common site here in our country

Aside from shiny corrugated sheet, I really love your dio. The way pans and other small items was placed or should I say scattered, CONVINCING! The color rendering, REALISTIC!
Almost looks like our neighbor's house.
'love it
panorama
Visit this Community
Germany
Joined: January 18, 2013
KitMaker: 254 posts
Armorama: 253 posts
Posted: Saturday, December 28, 2013 - 11:46 PM UTC
Very convincing little dio. I like to deviate from the trodden pathes occationally too and your subject really touches. The points I would have made have been addressed by others, so no reason to repeat it. Love it.
Keep up the good and inspirational work and show us the update when the touch ups are made.

Happy new year

Michael
ti
Visit this Community
Dalarnas, Sweden
Joined: May 08, 2002
KitMaker: 2,264 posts
Armorama: 1,763 posts
Posted: Saturday, January 04, 2014 - 11:20 PM UTC
I thought I'd do a write up on how and what I used to build this dio. Included new updated pics. So here it is:

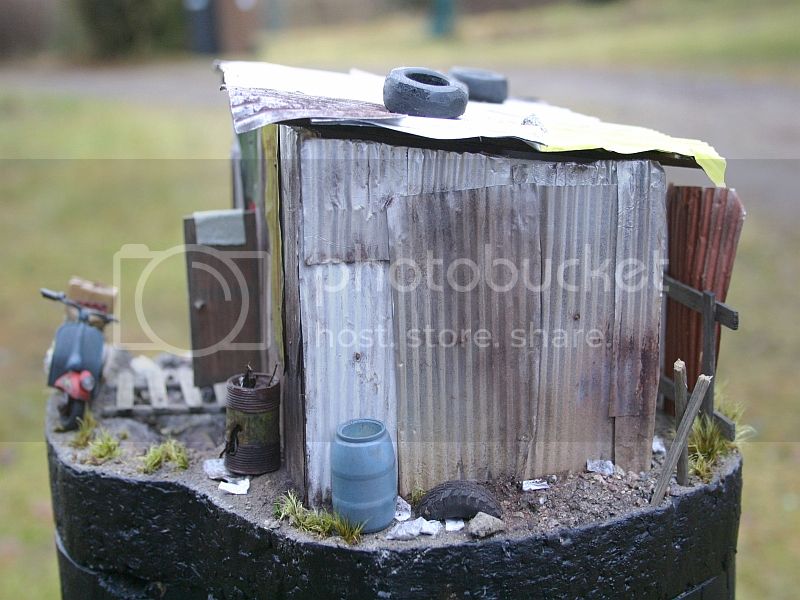
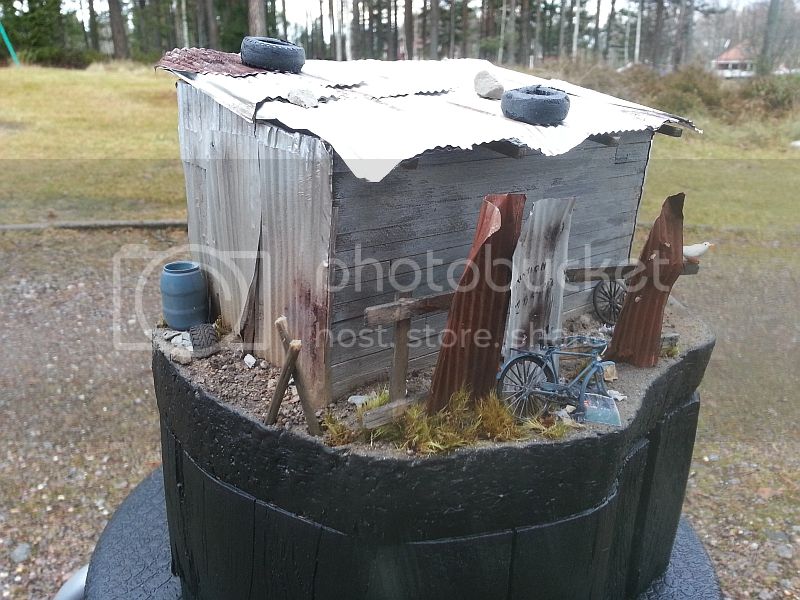
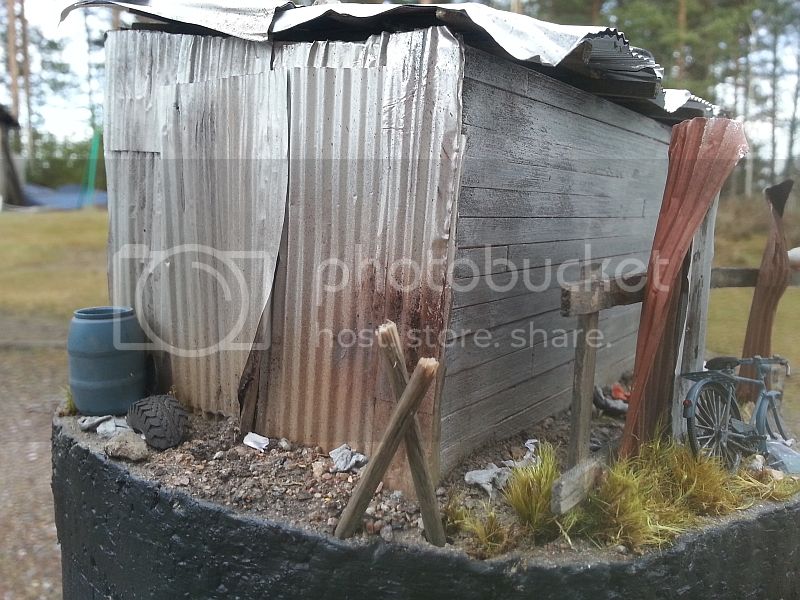
Since this was to be a slum or kind of derelict subject matter, I decided to use a wood stump as the base of the diorama. The ground work was done on a white foam board (never did like this brand but it was the easiest to come by at the time. Low funds, in short). The frame work of the shanty was an ordinary cardboard used by artist. Nothing special about it. As I mention, cheap was the main theme for me not spending too much on materials. The corrugated zinc individual pieces were done using foil sheets and a tool that gives it the corrugated design. Again, I will use anything possible to keep cost down. But I found another material. I Used aluminum platter, that bakers use to put cakes or food on. I found some cheaper ones at a cheap store for very little money. I cut out everything around it and use the bottom which was perfect.

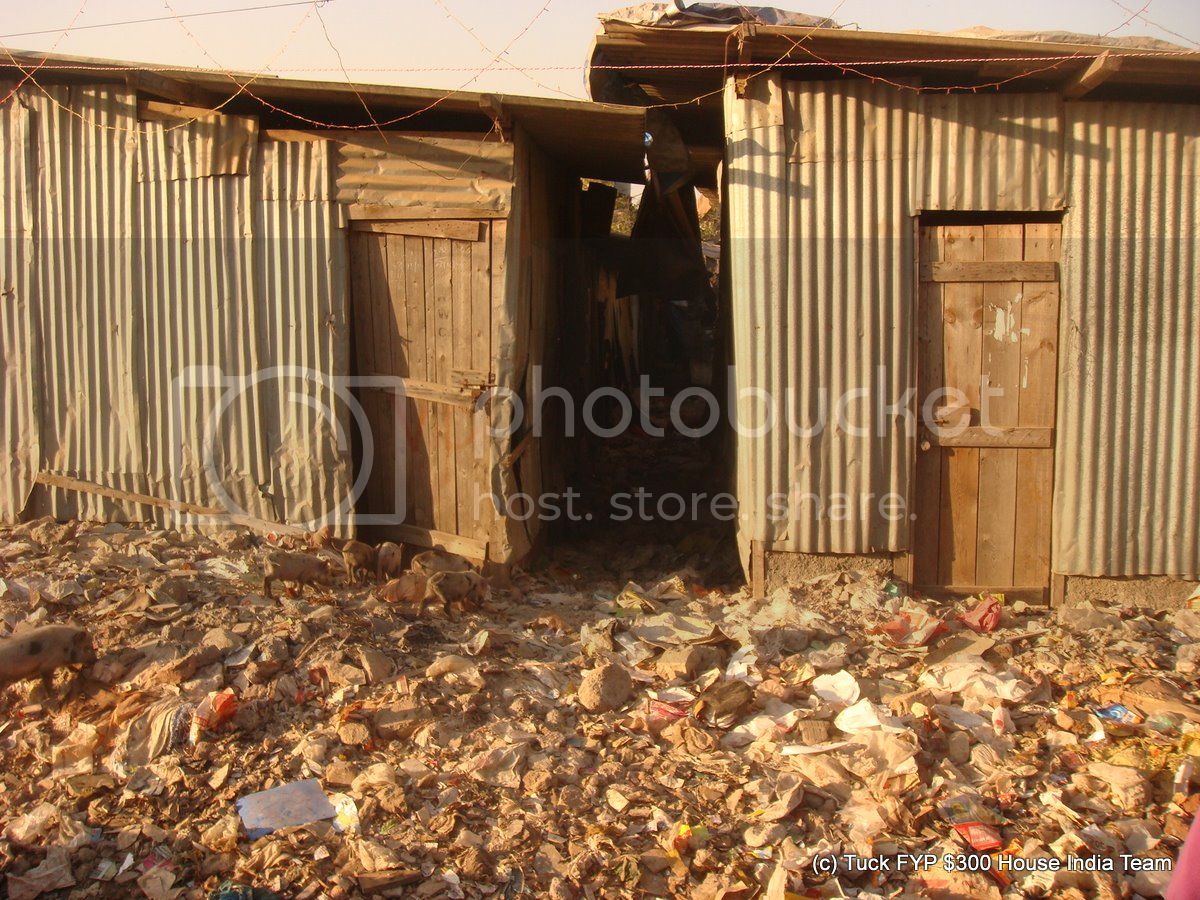
After the individual sheets were made they were glued directly onto a cross frame made from balsa, after it was painted. At the back of the shanty, I used scale wood painted first in diluted white paint and gone over in a much diluted green color. Then I went over it with a medium size brush to give it that worn look. Prior to painting the sheets I poked small holes and deformed them in various forms to give them that really old neglected and battered look. I painted most of the corrugated sheets a different color as this is done in most slum areas; at least in some of my reference pictures. I used random colors, such as orange, green, oxide Red, yellow, purple and white.

Now, for some of you, this might come as a shock to you but I still use spray cans. Yes, I know. I am stuck in time. I will buy one but have been scared off by the amount of painting you have to do between each paint job. But I will buy one for its flexibility. And of source it is cheaper in the long run.
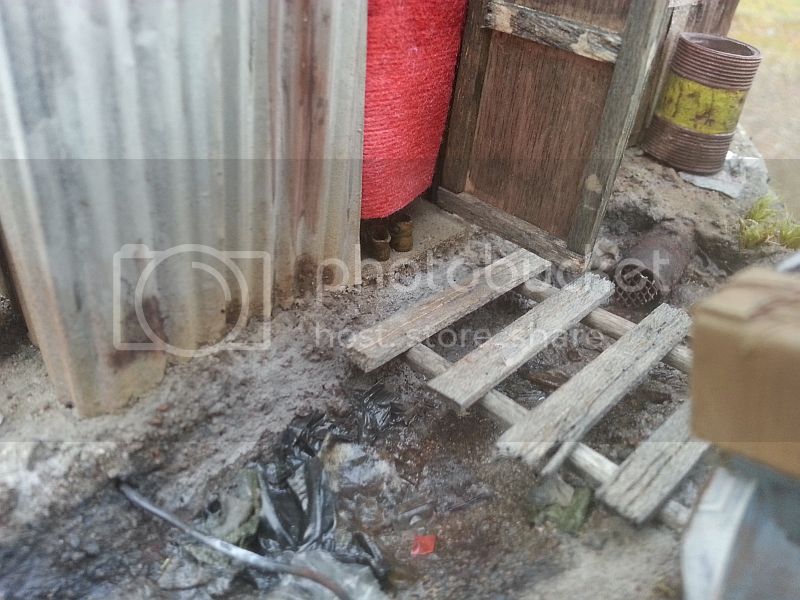
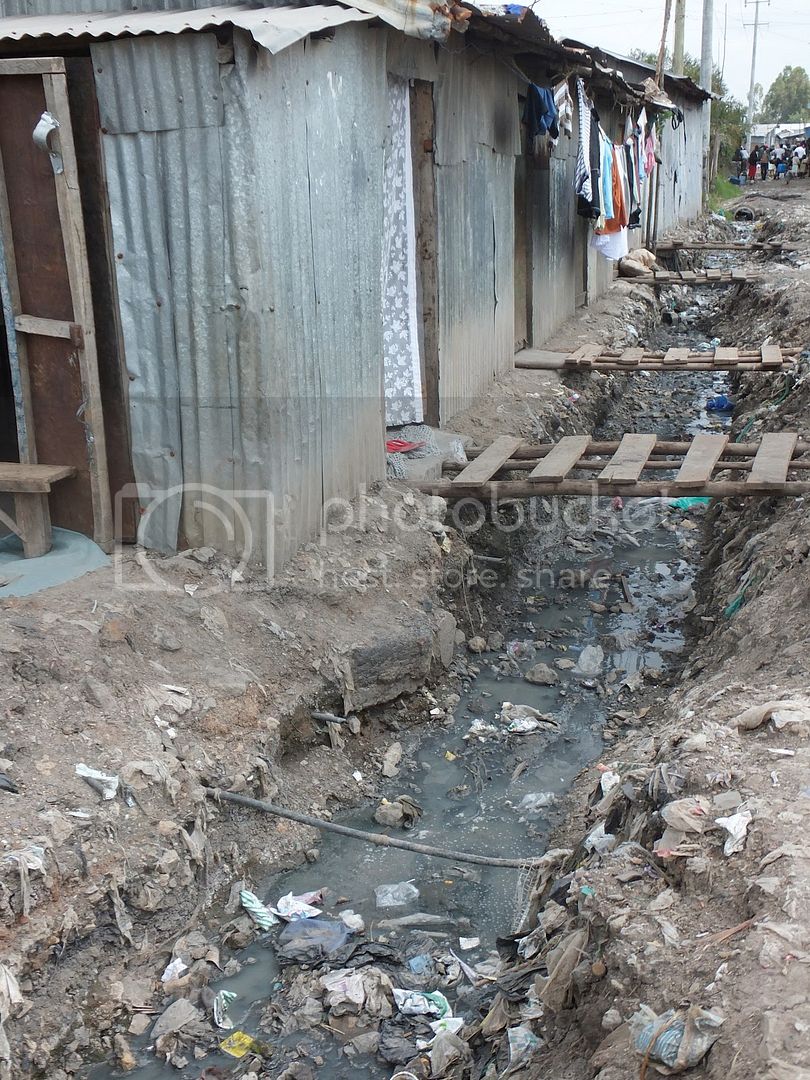
For the rusty look I used a mixture of Mig’s rust, real dirt and black pigments. The drainage ditch just outside the shanty was simply done by carving out pieces and adding miscellaneous scrap. I added everything from crumpled up paper to plastic(cellophane).

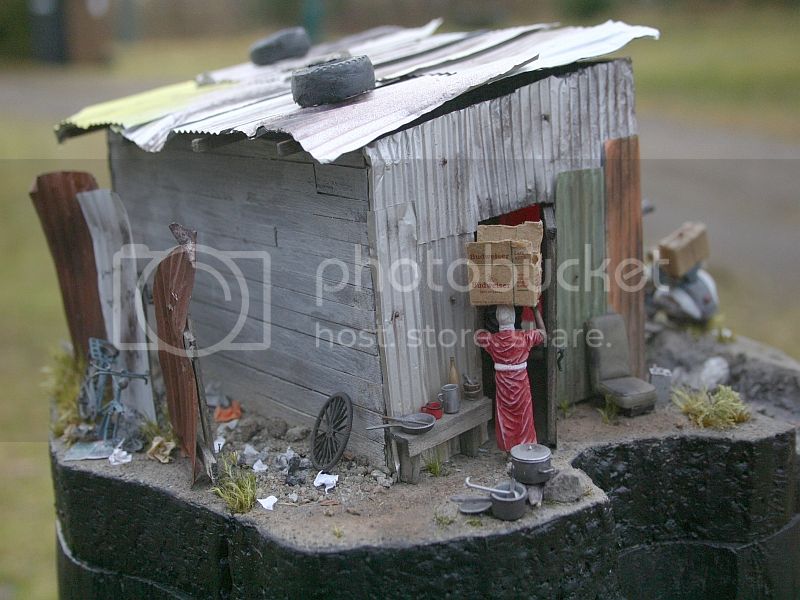
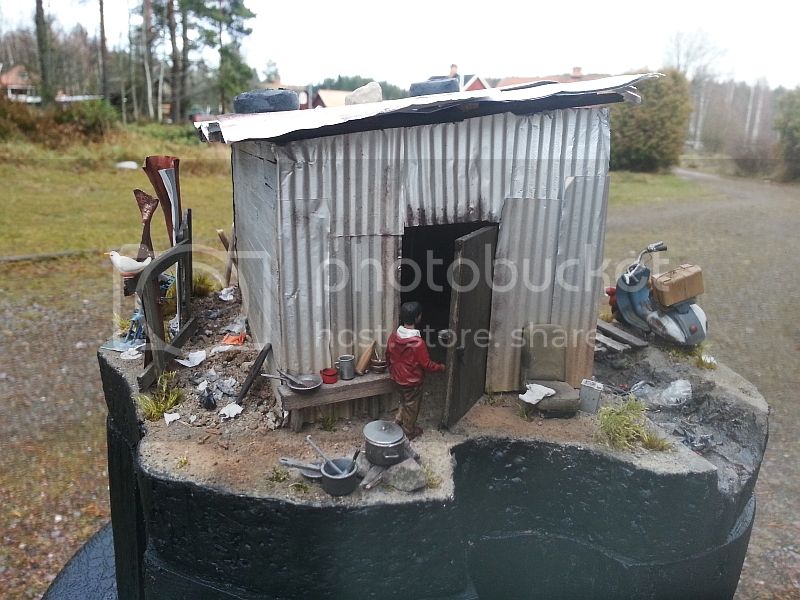
The ground is mainly done using real dirt and Mig’s pigments. I also used some no-name brand pigments such as black, grey and amber. The doors on both sides of the shanty were made from Balsa and aged by simply painting them with a diluted black paint. I then hung a red piece of cloth at the front entrance of the doorway, as usually seen in these shanties. The pair of shoes on the ground just in the doorway was taken from the same Meng figure set. I sawed off the feet and hand drilled holes in them and painted them using Citadel Leather color.

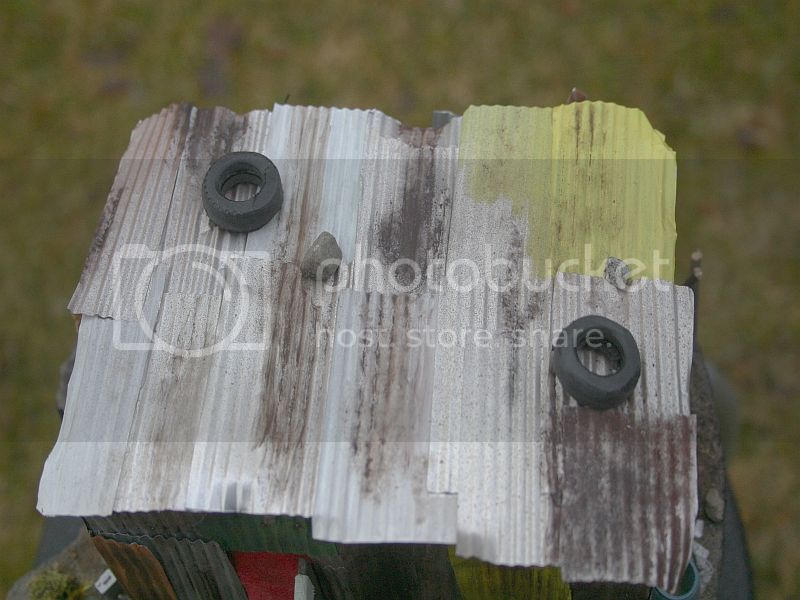
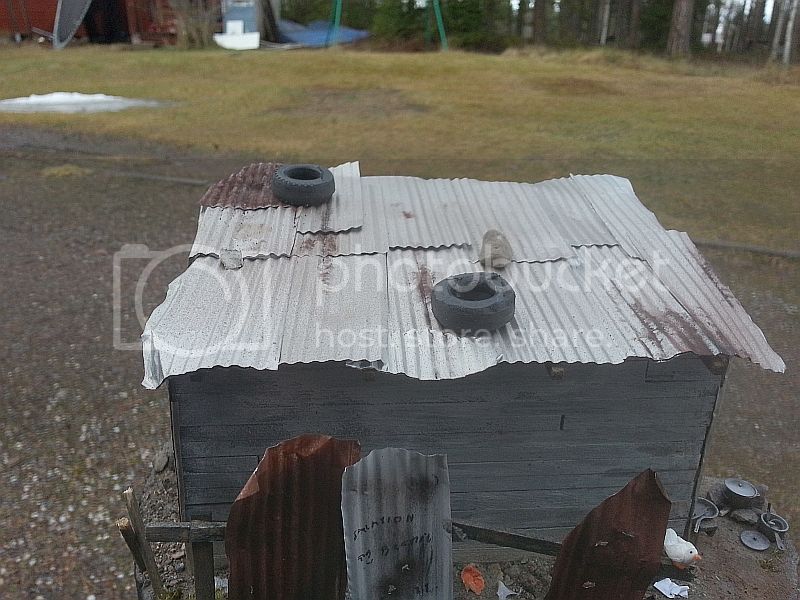
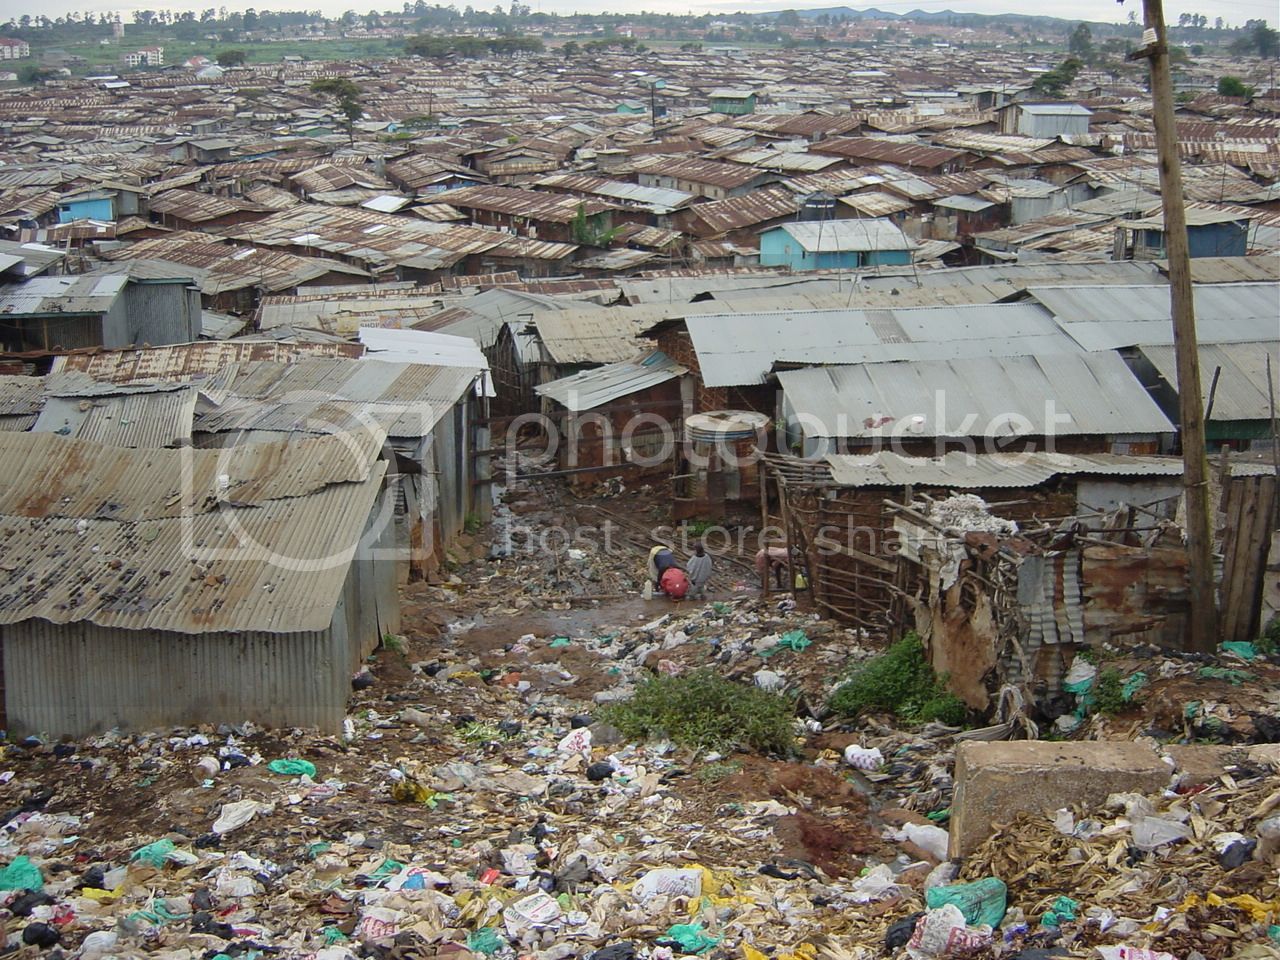
BTW, these Citadel brands are very good. If you have not tried them, give them a try. The tires on top of the shanty are used to help hold the corrugated sheets down so they won’t blow away after a storm or strong wind.

In most cases they do not help very much. But the effect on the shanty gives the model authenticity. The tires are 1/24 tires taken from another kit. I just used a grinder and removed the threads.

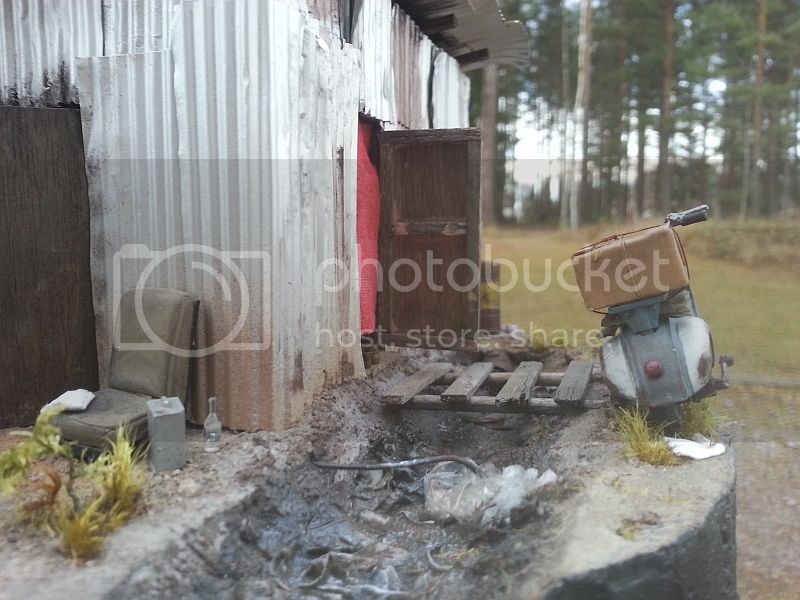
The vegetation is nothing more than finely selected moss and small plant branches I got from outside. If picked and placed right it does look the part. The figures are from Meng. The pots, pans and cutlery accessories as well as the broken down bicycle are from Diopark. I must say, that Diopark as some really nice kits. If you have not bought anything from them, then wait no longer. You will not regret.

In the cooking area, I used balsa wood, broken up in small pieces to represent fire wood; weathered with black and grey pigments to give the impression that it has been used. The pot sitting on the top of the stones has been scorch due to it being used many times over. The car seat or truck is a resin replacement seat used for the Italeri HEMTT kit. The old bench was scratch built using balsa and stained the same way using the dilute black paint method. The vespa at the front of the shanty is a 1/32 (could not find a 1/32 at the time) scale die-cast model which I modified by adding brake cables and damaged the seat to give the worn look. The modeled was then painted in different colors, red, blue, white and rusted up to create the used worn effect that would fit the scene. Added a resin box painted with a light sand color from Humbrol and weathered using pigments.

All-in-all it has been a wonderful learning experience and something to honor those less fortunate human beings around the world living in such poor conditions. We are all human beings. Let’s be kind to one another. BTW, if you type in Slum in Google's search window, you will see many different types from around the world. Peace.


1stjaeger
Visit this Community
Wien, Austria
Joined: May 20, 2011
KitMaker: 1,744 posts
Armorama: 1,727 posts
Posted: Saturday, January 04, 2014 - 11:37 PM UTC

Congratulations Charles!!!
Really superb!! I love it!!
Something special very well executed!!

The only comment is related to the dress of the figure. Drybrushing can be OK, but it should be in the same colour lighter in tone. Yours looks different, almost white, but red does not produce white when highlighted!

Cheers

Romain

ti
Visit this Community
Dalarnas, Sweden
Joined: May 08, 2002
KitMaker: 2,264 posts
Armorama: 1,763 posts
Posted: Sunday, January 05, 2014 - 01:22 AM UTC

Quoted Text


Congratulations Charles!!!
Really superb!! I love it!!
Something special very well executed!!

The only comment is related to the dress of the figure. Drybrushing can be OK, but it should be in the same colour lighter in tone. Yours looks different, almost white, but red does not produce white when highlighted!

Cheers

Romain


Thank you. Will fix it.
 _GOTOTOP