_GOTOBOTTOM
Dioramas
Do you love dioramas & vignettes? We sure do.
Warehouse Dio W.I.P
Yeti01012001
Visit this Community
England - North West, United Kingdom
Joined: July 28, 2005
KitMaker: 360 posts
Armorama: 334 posts
Posted: Sunday, January 05, 2014 - 03:32 AM UTC
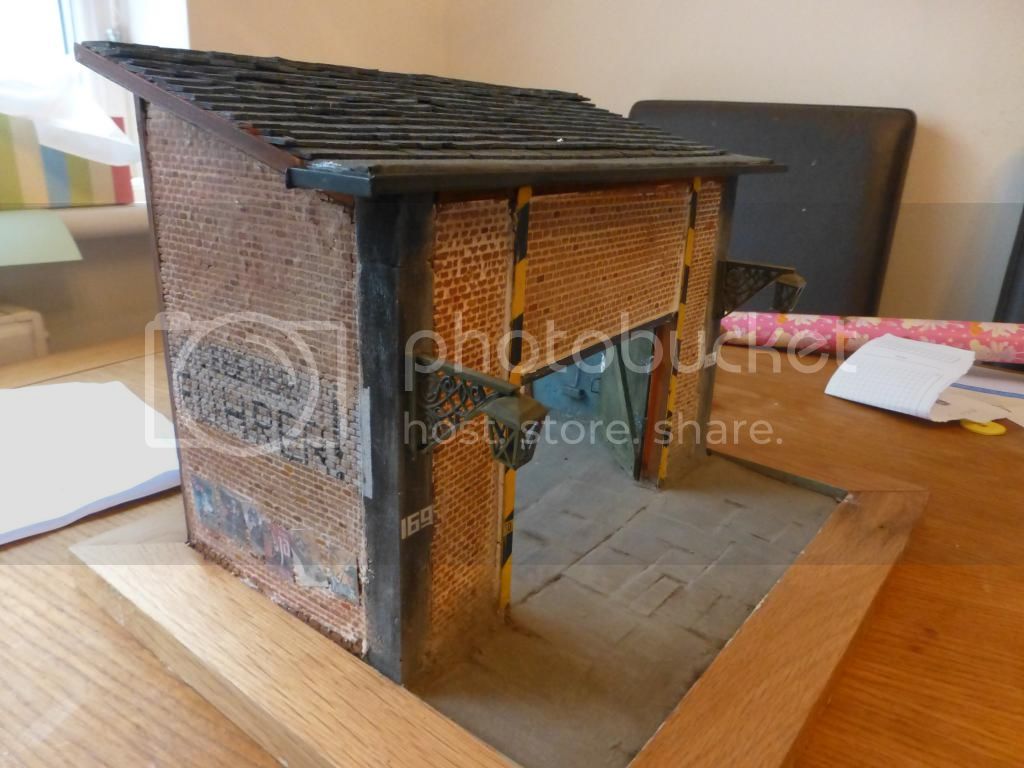
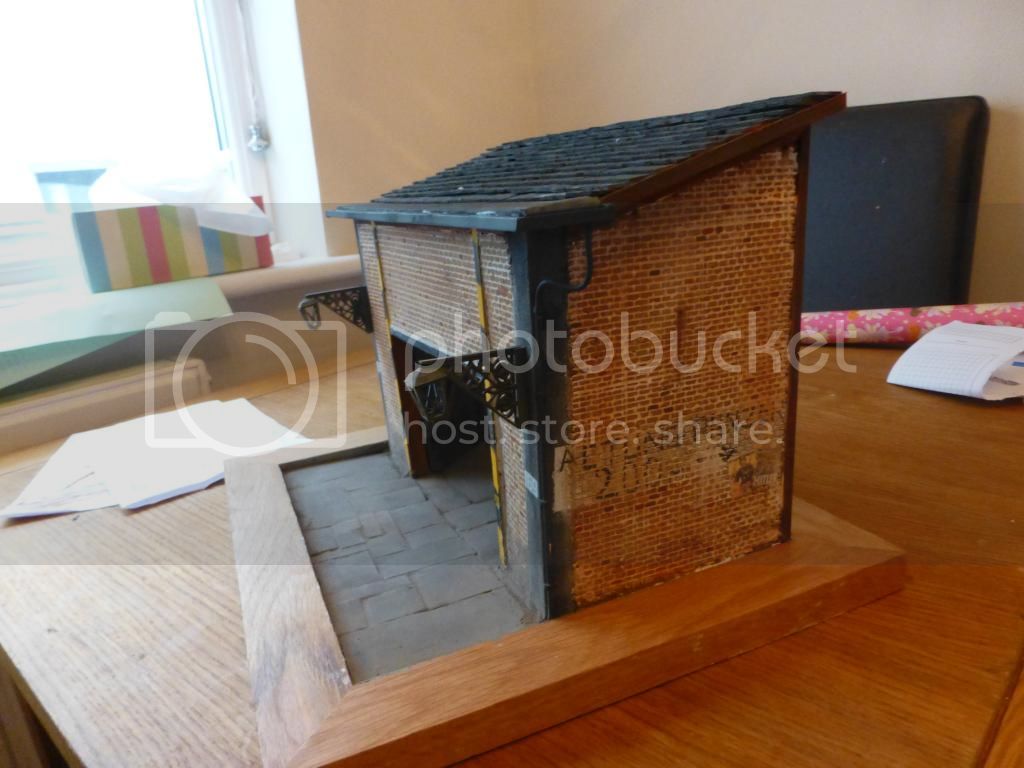
This is my W.I.P dio. It is going to be a warehouse that will house an 88 flak in the door way.

The building is conmpletely built from scratch. The walla are made from plaster of paris after I made a moulds for them.

The roof is made from balsa wood and also the doors. I will then paint some slogans in the wall add posters etc...


roudeleiw
Visit this Community
Luxembourg
Joined: January 19, 2004
KitMaker: 2,406 posts
Armorama: 2,224 posts
Posted: Sunday, January 05, 2014 - 04:20 AM UTC
Hi Gary

Overall this is not to bad and I applaud you for scratching the building.The walls are good, so are the doors.

Is the roof covering supposed to be slate? You made it of Balsa? The thinnest Balsa I know is 1 mm and is out of scale but yours does not look like that.

You did very well at the beginning but the last 4 rows, well, you lost patience a bit.

The alignment should be straighter overall.

What is that part in front of the 1st row? Shouldn't there not be at least a gutter? Where is your rainwater flowing?

Next time perhaps you should take a bit more time dir it and it will be perfect.

Greets
Claude
Yeti01012001
Visit this Community
England - North West, United Kingdom
Joined: July 28, 2005
KitMaker: 360 posts
Armorama: 334 posts
Posted: Friday, January 10, 2014 - 01:43 AM UTC

Quoted Text

Hi Gary

Is the roof covering supposed to be slate? You made it of Balsa? The thinnest Balsa I know is 1 mm and is out of scale but yours does not look like that.

You did very well at the beginning but the last 4 rows, well, you lost patience a bit.

The alignment should be straighter overall.

What is that part in front of the 1st row? Shouldn't there not be at least a gutter? Where is your rainwater flowing?


Claude

You were right I lost my rag a bit, I have taken your advice and added a gutter looks a better, just need to tidy it up a bit and add a drain pipe.


Yeti01012001
Visit this Community
England - North West, United Kingdom
Joined: July 28, 2005
KitMaker: 360 posts
Armorama: 334 posts
Posted: Friday, January 10, 2014 - 01:47 AM UTC
Can anyway one tell me how to paint the mortar white.

I tried with a white oil paint and mixed it with trups. I then smothered the wall in white, however the wall were stained white and had to repaint it again.

Will it be a pin wash style.

thankd in adavnce
165thspc
#521
Visit this Community
Kentucky, United States
Joined: April 13, 2011
KitMaker: 9,465 posts
Armorama: 8,695 posts
Posted: Friday, January 10, 2014 - 01:54 AM UTC
Could you please show a figure standing in that doorway to see the relative height? I am confused by the height of that door. One does not usually build a high bay warehouse (1.5 to 2 stories) and then hamper the ability to move large equipment into and out of that building with an low doorway only 8 to 10 feet high.

Also it is unusual to have that much brick area directly over a doorway as it would require a massive stone or steel lintel (not seen here) over the door to support that much weight. (Another practical reason the doors of a high bay warehouse usually go all the way to the roof line.) If not using tall doors then the more common pre-1940's solution in this sort of application would be a stone keystone arch to transfer the weight of the top brick down through the side hinge posts of the doors. And of course arched topped doors would be needed to go with it.

Sorry
SpeedyJ
Visit this Community
Bangkok, Thailand / ไทย
Joined: September 17, 2013
KitMaker: 1,617 posts
Armorama: 1,150 posts
Posted: Friday, January 10, 2014 - 02:20 AM UTC
I agree with Michael. Tip: Count the bricks at your own doorstep, knowing a door is about 2.2m. . So 2.2 x 1.8 makes 3.96m. I think for warehouse door that is realistic.
About the concrete. I often use a very thin filler for tiles in bathrooms. After it's dry, sanding and a little drybrush makes it a real concrete.
Keep up the good work.
Regards,

Robert Jan
Yeti01012001
Visit this Community
England - North West, United Kingdom
Joined: July 28, 2005
KitMaker: 360 posts
Armorama: 334 posts
Posted: Friday, January 10, 2014 - 02:58 AM UTC

Quoted Text

Could you please show a figure standing in that doorway to see the relative height? I am confused by the height of that door. One does not usually build a high bay warehouse (1.5 to 2 stories) and then hamper the ability to move large equipment into and out of that building with an low doorway only 8 to 10 feet high.

Also it is unusual to have that much brick area directly over a doorway as it would require a massive stone or steel lintel (not seen here) over the door to support that much weight. (Another practical reason the doors of a high bay warehouse usually go all the way to the roof line.) If not using tall doors then the more common pre-1940's solution in this sort of application would be a stone keystone arch to transfer the weight of the top brick down through the side hinge posts of the doors. And of course arched topped doors would be needed to go with it.

Sorry


Mike

I do not really build to accuracy not that skilled, this is an experiment, I will be adding a lintel very soon. The hieght has been measured as I have just build an 88 flak which will in protruding out of the doorway in an firing position

gary
jrutman
Visit this Community
Pennsylvania, United States
Joined: April 10, 2011
KitMaker: 7,941 posts
Armorama: 7,934 posts
Posted: Friday, January 10, 2014 - 03:09 AM UTC
For the mortar in between the bricks I would paint it a buff color. You can do it as a wash or paint the whole wall that color. Then dry brush the bricks,adding different tones when it's dry in different bricks. There is a lot of random color in bracks and a brick wall. Check out a real one.
Others have pointed out the lintle so I won't pile on!! I am not into rugby,
J
1stjaeger
Visit this Community
Wien, Austria
Joined: May 20, 2011
KitMaker: 1,744 posts
Armorama: 1,727 posts
Posted: Saturday, January 11, 2014 - 10:25 PM UTC

Quoted Text


Others have pointed out the lintle so I won't pile on!! I am not into rugby,
J


Yeti01012001
Visit this Community
England - North West, United Kingdom
Joined: July 28, 2005
KitMaker: 360 posts
Armorama: 334 posts
Posted: Sunday, January 12, 2014 - 09:02 AM UTC
photo's again, I moved them to a library in my photobucket, I think that why they were lost.


Stickframe
#362
Visit this Community
California, United States
Joined: December 01, 2013
KitMaker: 1,661 posts
Armorama: 1,202 posts
Posted: Sunday, January 12, 2014 - 09:40 AM UTC
Hi Gary - nice to see your scratch build! And it's really good for an early attempt!

As for your mortar, it certainly can make the bricks "read" better. I've come across two ways to do it :

one, is literally scale mortar mix - it's big within the model railroad community - I can't remember the name of the stuff, but it's avail, and my guess is with a web search you could find it. For this, you mix with water and paint on (Over Painted plaster bricks) with your finger - trying to get the "mortar" between the bricks, then rub off the excess with a damp towel - it looks awful when you're doing it, but fine when done - there is a bit of a gray color "tint" left, but it can either be left as is, or you can modify with dry brush over.

Another choice is to use "spackle" - this is a product avail in the US to patch small holes in walls - it comes in a little tub - you'll know it because the tub is heavier than it looks. You also apply this directly, over painted bricks - I find it easiest to do with my finger - and maybe a little piece of flat wood or two to level and clean. Same as above, apply and wipe off excess with a damp towel - this method works better for brick on brick, than on carved brick tho - it's a bit thick/dense? And might obscure carved bricks - I'm not sure....

Now, the downside to each - while you do want to do either with the bricks/wall already painted or sealed, you don't want to once the wall is assembled and detailed. I'm sure you can, but it might become a real challenge controlling what you're doing and keeping it looking the way you want.

I've got a build under way now - the. 1/35 truck shop - and if you look, I think there's a shot or two of the spackle method shown.

Ok - sorry to go on and on - but hope this is helpful - if not this time, maybe you can give either method a go next time!

Cheers
Nick

Yeti01012001
Visit this Community
England - North West, United Kingdom
Joined: July 28, 2005
KitMaker: 360 posts
Armorama: 334 posts
Posted: Tuesday, January 14, 2014 - 07:31 AM UTC
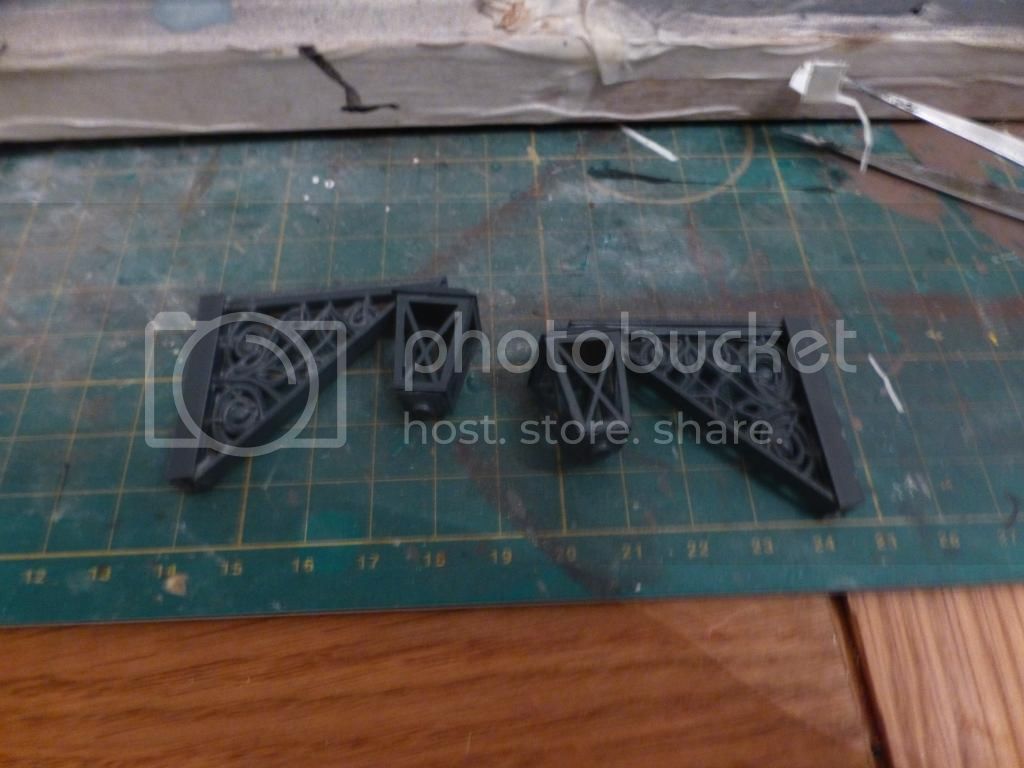
Just some progress shots. The lamp holders are spare parts from a Miniart kit that I have not built yet. They will be attached to the grey pillars.

I have added a drain pipe, by melting a platic rod into shape and have added the lintel.

Robert - took yout avdice and used tile grit between the bricks

michael - here is an AFV in the doorway to show the height, to give a feel for height


1stjaeger
Visit this Community
Wien, Austria
Joined: May 20, 2011
KitMaker: 1,744 posts
Armorama: 1,727 posts
Posted: Tuesday, January 14, 2014 - 08:09 AM UTC

Hi Gary,

a little more variety still in the bricks (the odd one here and there a tad darker/dark) ...and please don't put the 88mm in the opening!! Why would it be there???? Nothing to defend really, no privileged defensive position, only limitations as to setting the thing up. Such a gun is a heavy piece of hardware and is usually towed by a SdKfz8 (which is a huge thing as well ).

What about showing a nice tank in either camo or else just primed being wawed out by a mechanic, o.s.!??!??!!

Just my 2c worth!

Cheers

Romain

165thspc
#521
Visit this Community
Kentucky, United States
Joined: April 13, 2011
KitMaker: 9,465 posts
Armorama: 8,695 posts
Posted: Tuesday, January 14, 2014 - 09:26 AM UTC
Very nice. The structure is much larger than I had thought. I can see that now with a vehicle in the doorway.
Yeti01012001
Visit this Community
England - North West, United Kingdom
Joined: July 28, 2005
KitMaker: 360 posts
Armorama: 334 posts
Posted: Friday, January 31, 2014 - 05:16 AM UTC
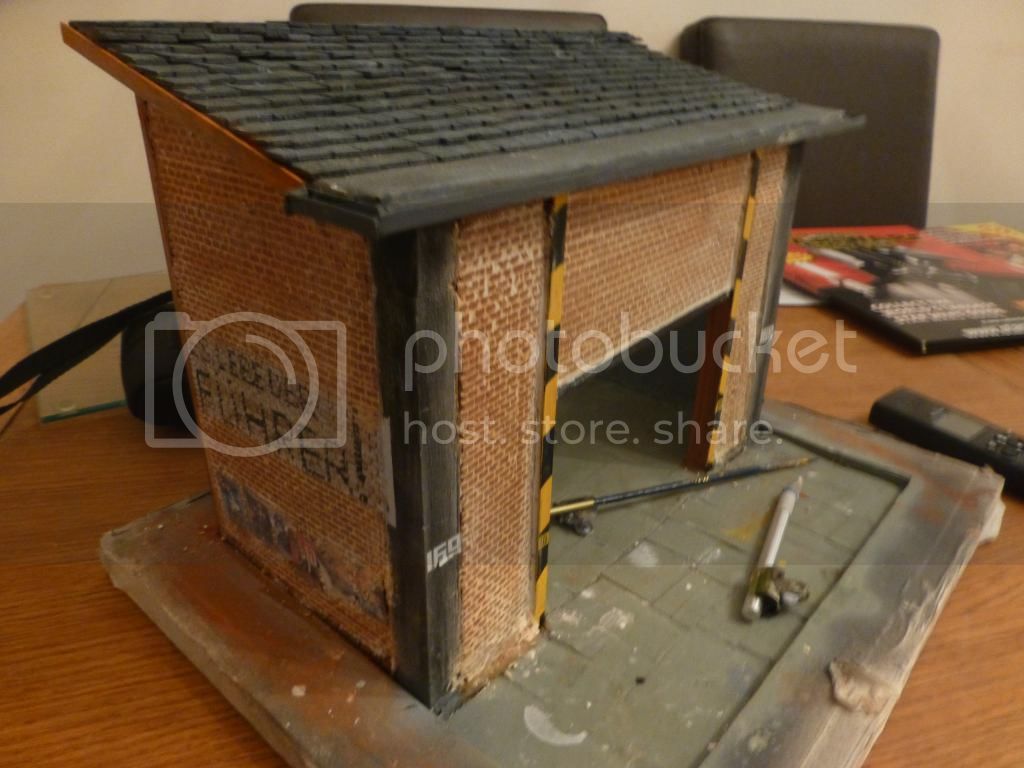
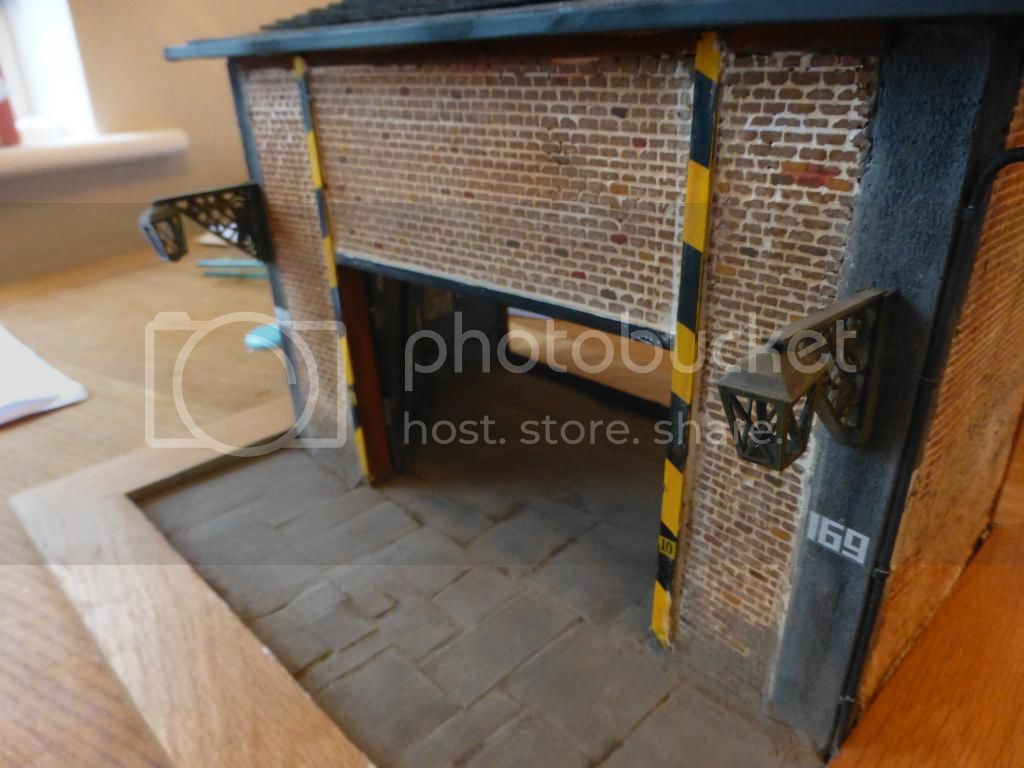
I have made a little more progress on this warehouse

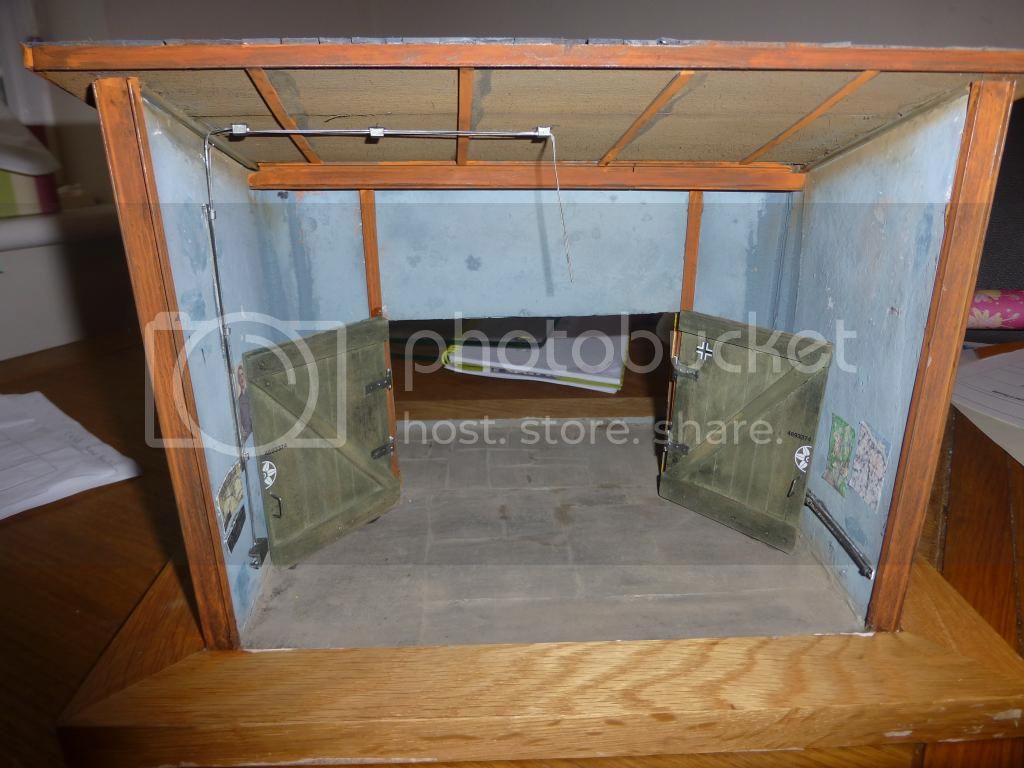
I have painted some bricks different colours. fixed the doors and added the wall lamps and started to add items on the inside.


The next step is to added foliage down the side of the building walls, make some streaks on the walls. Then boxes and other items alongs the front of the walls

I want to add a sign post in the middle of the wall above the door way saying something like WORKSHOP. My question is what word font do you use on WORD for the old style german writting so I can print it and add on the wall


comments welcome
jrutman
Visit this Community
Pennsylvania, United States
Joined: April 10, 2011
KitMaker: 7,941 posts
Armorama: 7,934 posts
Posted: Friday, January 31, 2014 - 05:20 AM UTC
I am liking the way this thing is developing.
J
Paulinsibculo
Visit this Community
Overijssel, Netherlands
Joined: July 01, 2010
KitMaker: 1,322 posts
Armorama: 1,239 posts
Posted: Friday, January 31, 2014 - 05:28 AM UTC
Hi Gary,

Nice build.
But the blog shows that you are a bit 'wandering' between several set ups!
No issue, it happens to all of us. One starts with an idea and ends up in a totally different direction.

But:
Pls., though it is defenitly YOUR build, don't overdo it.
You added on both walls faded warnings and political slogans. And now you want to write at the front as well.
If you use the building as a part of a barrack's maintenance area, the warning for "Panzerfahrzeuge" oder, in 'other' military language "Kettenfahrzeuge" would surely be fresh and very eye catching (at the end of the day it is a warning!).
Also, military buildings tend to have codes more often than names. So instread of "Werkstatt" there would be e.g "A21" or alike. Though, not impossible, but just less likely.
Also, the use of the German cross is not very common on a door.

I guess, Romain made a good proposal by adding some mechanics and crew members, who see their vehicle driven by a test driving mechanic.

But, as sad, it's YOUR build...........

Looking forward to see more.

P
1stjaeger
Visit this Community
Wien, Austria
Joined: May 20, 2011
KitMaker: 1,744 posts
Armorama: 1,727 posts
Posted: Friday, January 31, 2014 - 08:39 PM UTC
Hi Gary,

brickwork looks much better now! Well done that!!

As much as I like your flooring (really looks like solid concrete...and that colour, perfect!!), I must point out that the view from the "rear/inside" shows the weakness of the roof construction! Enough for the model build, definitely not enough for the real world (certainly not in Germany ).

Regarding signs, it is a matter of logic IMHO. Noone paints "church" on the village church building...simply because everyone knows what it is!

Paul is right regarding codes like "A" or "B" etc followed by a 1-2 digit number.

Not even our officers' casino had a name-tag painted on!

But no harm done that cannot be mended!

Just keep going!!

Cheers

Romain

P.S.: have you ever considered "transforming" this into a Bundeswehr site?? No "Führer" and other nazi crap of course, but the buildings were still the same!
Yeti01012001
Visit this Community
England - North West, United Kingdom
Joined: July 28, 2005
KitMaker: 360 posts
Armorama: 334 posts
Posted: Friday, March 14, 2014 - 04:27 AM UTC
I have finished my warehouse dio.

I got rid of the flak88 idea and will use it for something else and went with the workshop idea instead


ignore the cat on the last 2 pictures did not realise it fell over when I took the pictures


comment welcome
spoons
Visit this Community
England - East Anglia, United Kingdom
Joined: January 09, 2008
KitMaker: 527 posts
Armorama: 500 posts
Posted: Friday, March 14, 2014 - 09:24 AM UTC
The cat is dead! (sorry but im allergic to cats and dont think they like me either) nice build by the way very call of duty!
1stjaeger
Visit this Community
Wien, Austria
Joined: May 20, 2011
KitMaker: 1,744 posts
Armorama: 1,727 posts
Posted: Saturday, March 15, 2014 - 09:00 AM UTC
Hi Gary,

congrats on the figures and their "story"!

There is one question mark though! The ammo carried by the mechs does not look like 150mm..!!?!!

And I have troubles with the slogans!!!

Otherwise, let me just add a tip for further projects: choose your detail accessories carefully. Barracks/workshops would f.ex. not show such lanterns. Wrought iron etc is way too expensive, and armies are not much into stylish items!

Cheers

Romain

 _GOTOTOP