The Dragon Wagon is now 95% done, and no more work can be done on it until its added to the diorama base, so its on to the LCM3!
First off, lets start with the available kits. There are two LCM3 kits on the market nowadays, one from Trumpeter and one from Italeri. For obvious reasons detailed on PMMS, I chose the Italeri LCM3 over the Trumpeter one. In case you havent read the comparison review, the Trumpeter kit is dimensionally wrong in a way thats almost impossible to correct (the hull is too tall), and frankly has several other accuracy flaws which Ive found in my research that the review didnt mention. These include the machine gun mount bases, the size of the steering cabin, the ramp lowering mechanism, etc etc. Frankly, unless you already have the trumpeter one or get it for free, go for the Italeri if you want an accurate LCM3.
There arent many aftermarket add-ons for the LCM3 available these days. The only ones available are the Eduard photoetch sets for the Trumpeter and Italeri kits (sets 35735 and 35739 respectively), their structural support framework set, a thatchweave bumper set, and a U-models French indochine conversion set.

Since I didnt have the trumpeter kit, and didnt plan to build the French Indochine version, I settled on the thatchweave bumper set, the Eduard Italeri-specific photoetch set and their structural support framework set. I also found an interesting source for a replacement propellor, which I'll detail in an upcoming post.
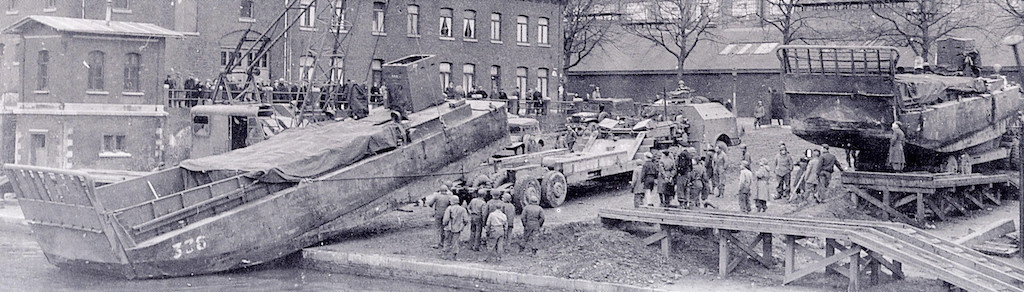
As far as books and research goes, I got really lucky. Clear close-up images of an LCM3 in operation are pretty rare it seems, but it turns out Thatchweave products is based in my hometown, and the owner is part of my local AMPS chapter! When I purchased the bumpers from him, he mentioned he had assembled as many images of the LCM3 as he could find and gave me a CD filled with them. Most are pretty low resolution, but some were worth their weight in gold. At the next local meeting Ill ask him if its okay for me to upload the archive of them for you guys.
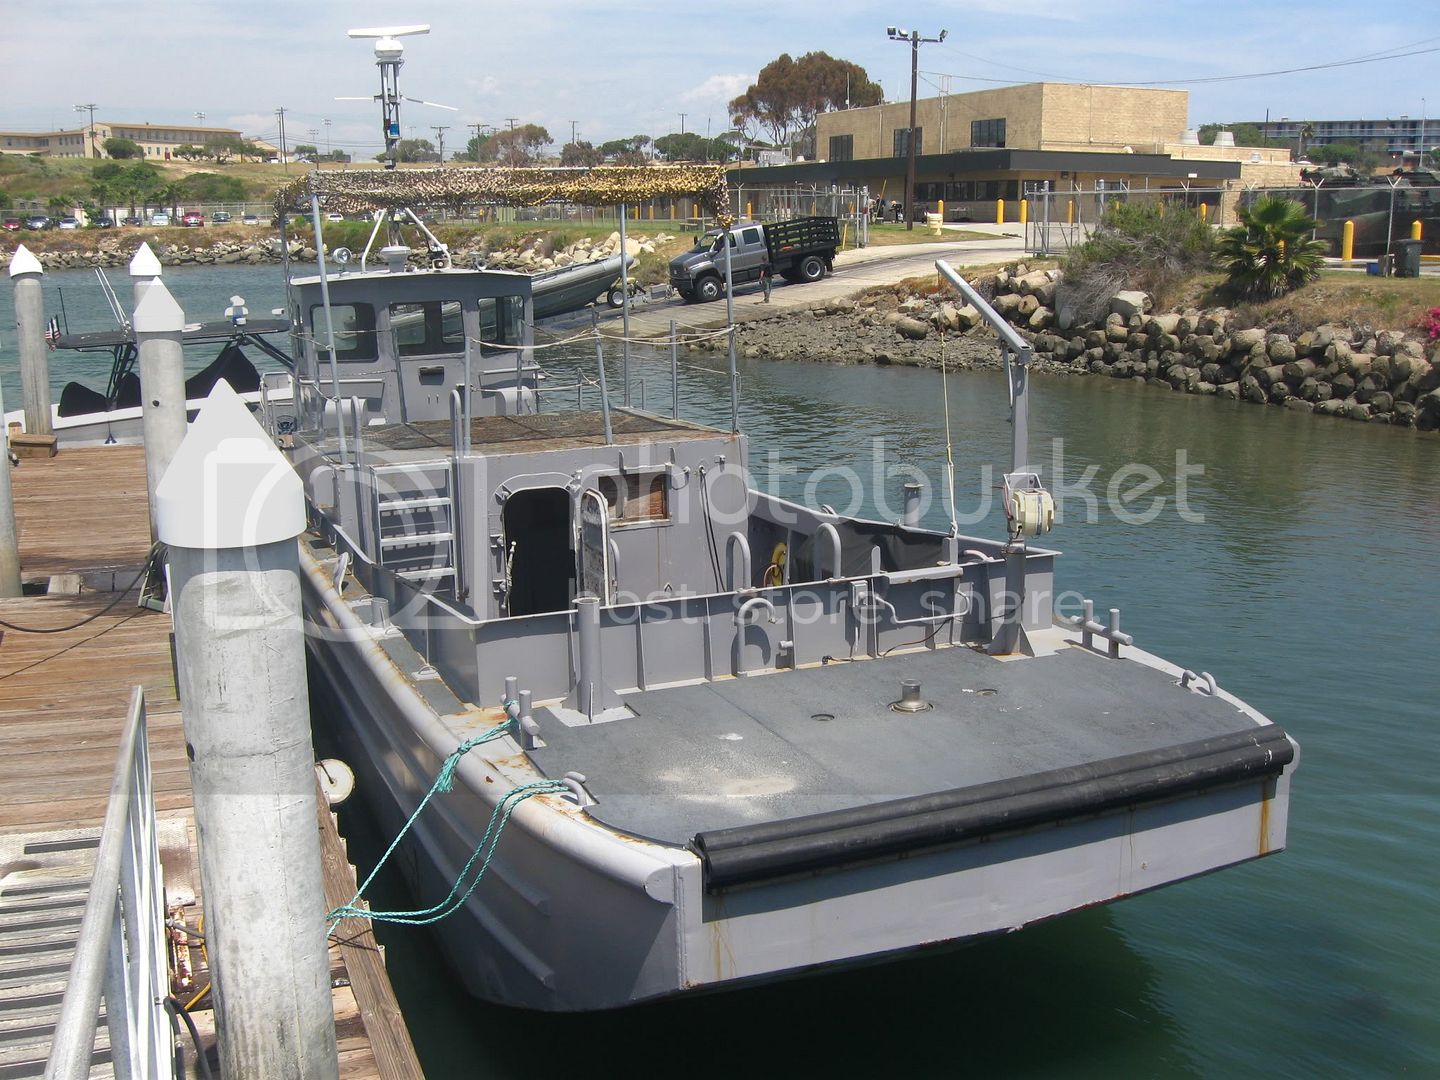
Entertainingly, another source of info worth its weight in gold was the Dragon Wagon books I purchased, in particular the ampersand book. It has several close-ups of the Dragon Wagon with an LCM3 loaded on it, and the images are beautifully clear and helped clear up a lot of details.

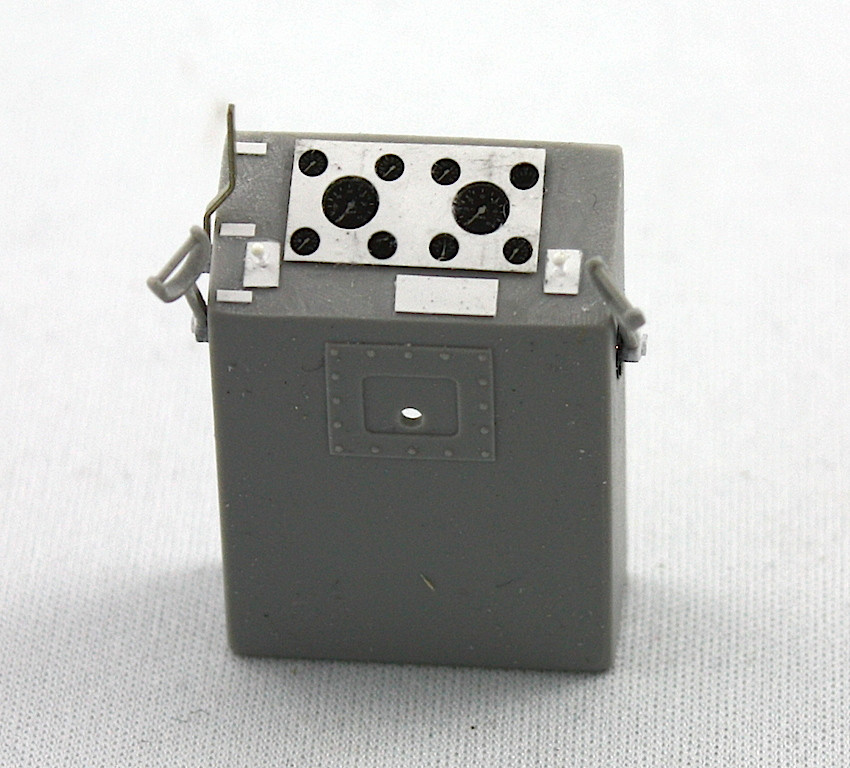
Finally, I downloaded a copy of Skill in the Surf, a 1945 WW2 navy training manual detailing the operation of the LCVP and LCM3. Thus far its the only source Ive ever seen which has a semi-clear view of the control console for an LCM3.
Lastly, I got the Squadron/Signal WW2 US landing craft in action book, but honestly, it turned out to be crap as an LCM3 reference. It only has two pages of actual LCM3 images, several of which are the pre-production models and none of which added anything to my build. Dont waste your money on that one.
So to the Build!
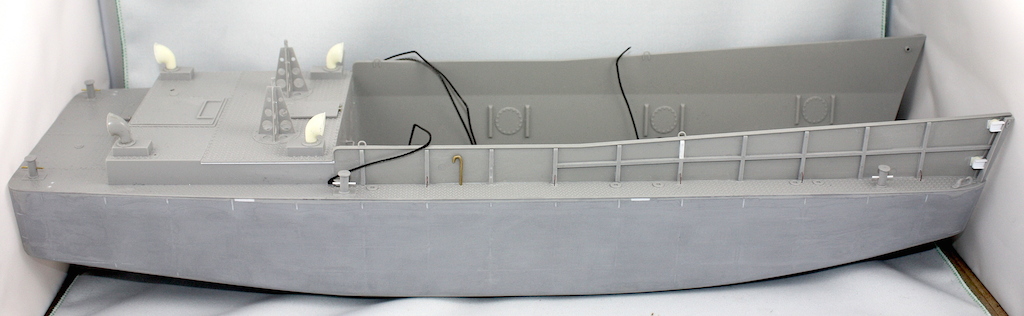
The Italeri kit has surprisingly few parts, but what large parts some of them are! As you can see the hull barely fits in my photo tent!


I began by tracing the ribs on the lower hull with a pencil. The LCM3 has a thin steel hull stretched over underlying support ribs, and depending on the age, wear and tear, etc, these ribs show through. In some images theyre barely visible, in some they are moderately visible, and in some images theyre so pronounced the hull looks like a waffle.

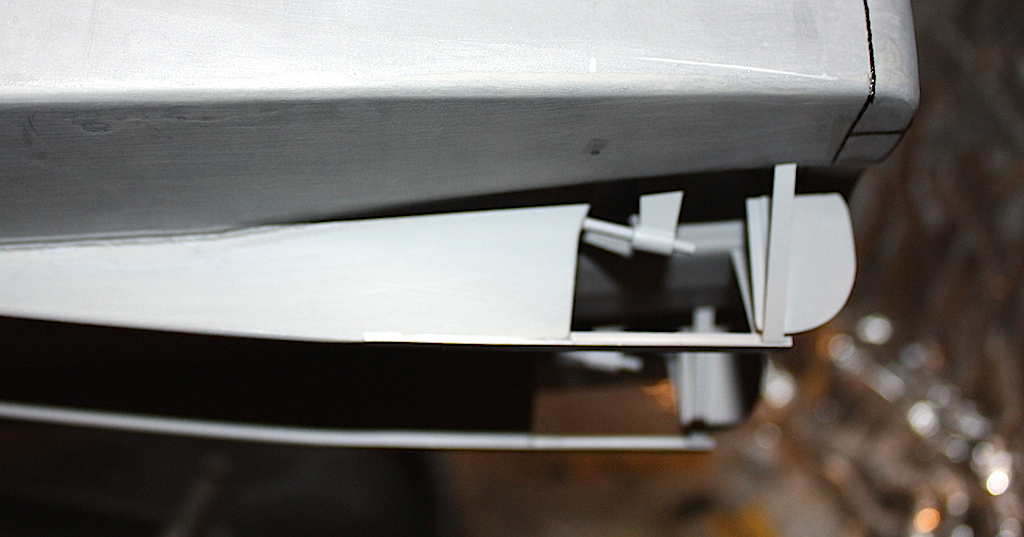
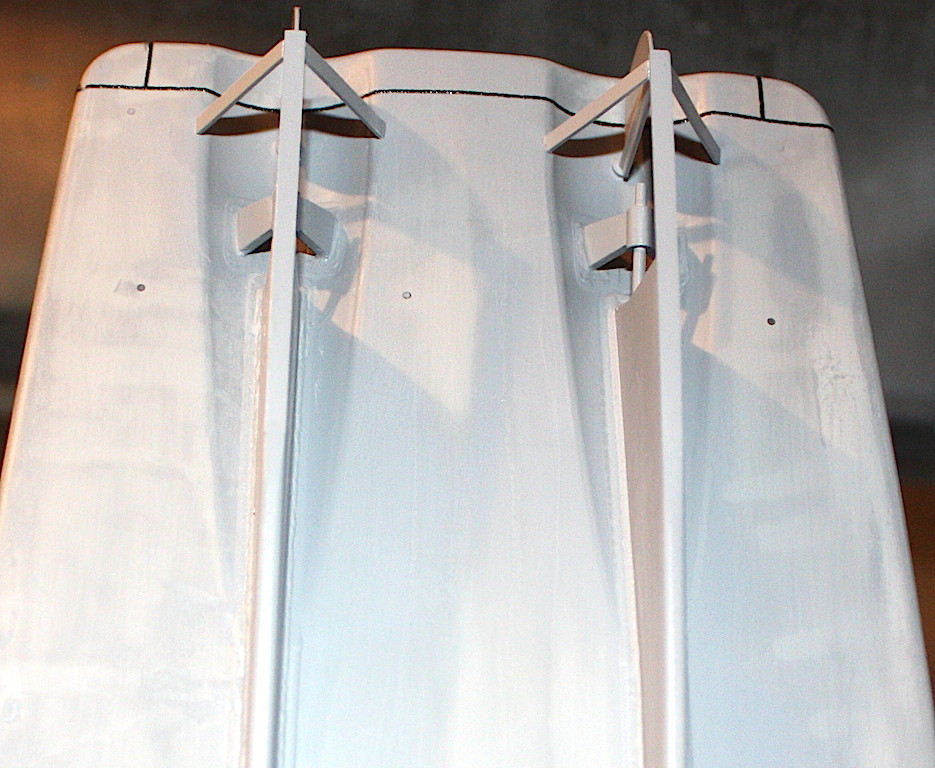
I decided to go for a mild or moderately-stretched look, so I traced on the pattern of the ribs as accurately as I could based on the images I had (at maximum these should be three horizontal ribs, no including the top and bottom of the hull) and four spaced between them. Ive seen some modelers add five or more, but the Dragon Wagon images, and several others are very clear in this regard). The white evergreen styrene filled the locating slots for the lifting plates, which I plan to replace with the Eduard photoetched ones later.
Once that was done 0.010 x 0.030 strip was glued on top of the pencil lines and allowed to dry.
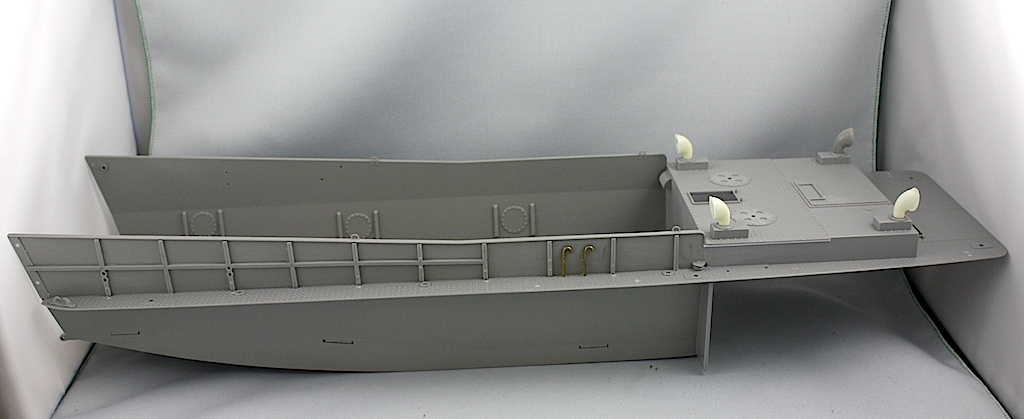
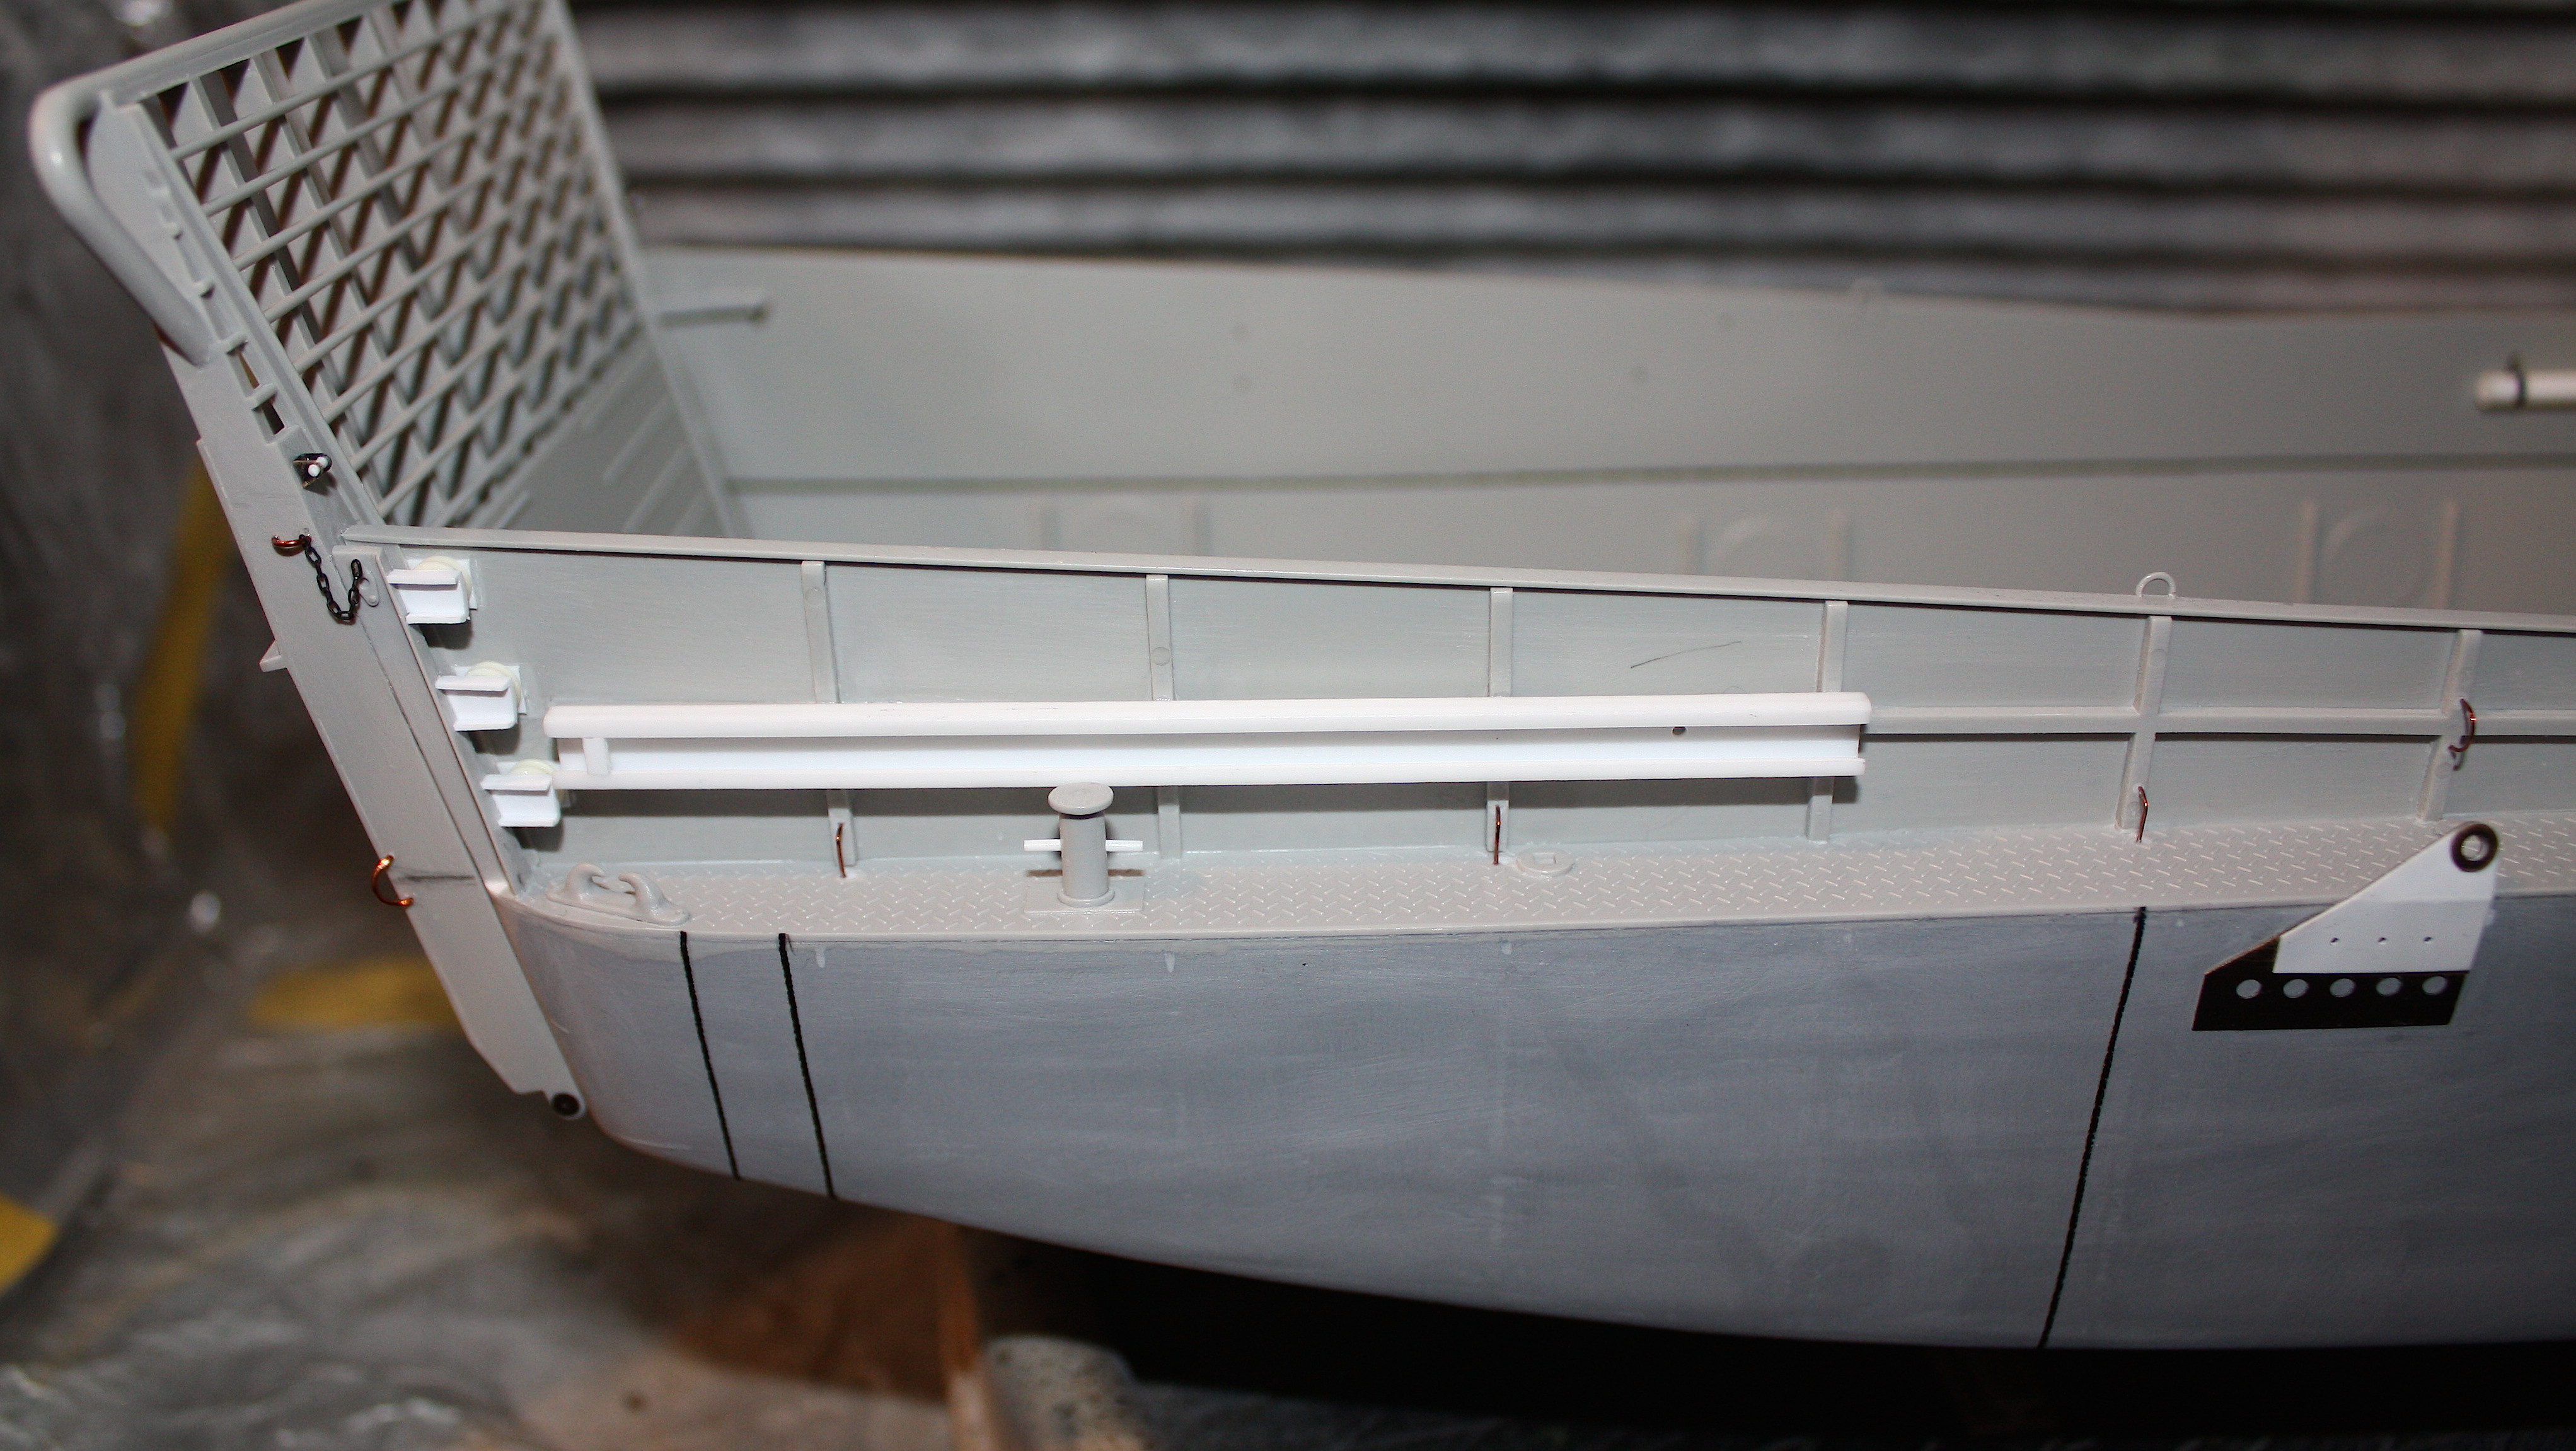
While that was setting I moved on to the top and loading area of the hull. This might look like a lot of work but its actually only about 5 large pieces glued together, and then a few of the smaller details added.
This is one area where Italeri amazed me. When I saw these large pieces I thought Id have to do huge amounts of seam filling and sanding, but amazingly there was almost none. As long as you go slowly the pieces all line up perfectly and I think I had to fill a total of maybe half an inch worth of seam. I was truly shocked. Well done Italeri!
After the main pieces of the deck were dry, I began detailing them. You can see the brass candy-cane shaped fuel tank vents which I made simply by bending brass rod to replace the molded on ones. These are actually an interesting source of variation amongst LCM3s. On the italeri kit there are two on the left side and one on the right side. On most LCM3s this is the pattern for them. But I have images showing two on the right side as well, an addition to some showing additional vents further forward.
You can also see the four large funnel vents spaced around the upper area of the deck. Italeri provides them in two halves. This means the outside seam is very easy to remove, but the inner one is in a complex three dimensional curve inside the vent which you can see because of the size of the vent openings. Also the vents themselves were made from thin sheetmetal and often seen dented or damaged in images, which means the Italeri ones are very overly thick. I dont blame Italeri for this, as this is likely the best their molding machines could do, but it still leaves an ugly, overly thick, seam-filled part.
I spent about 6 hours cleaning and thinning a single one down to my satisfaction. I then realized what Id done, said screw this and resin cast the remaining three! I may never use this mold again, but at least it saved me several days worth of work.
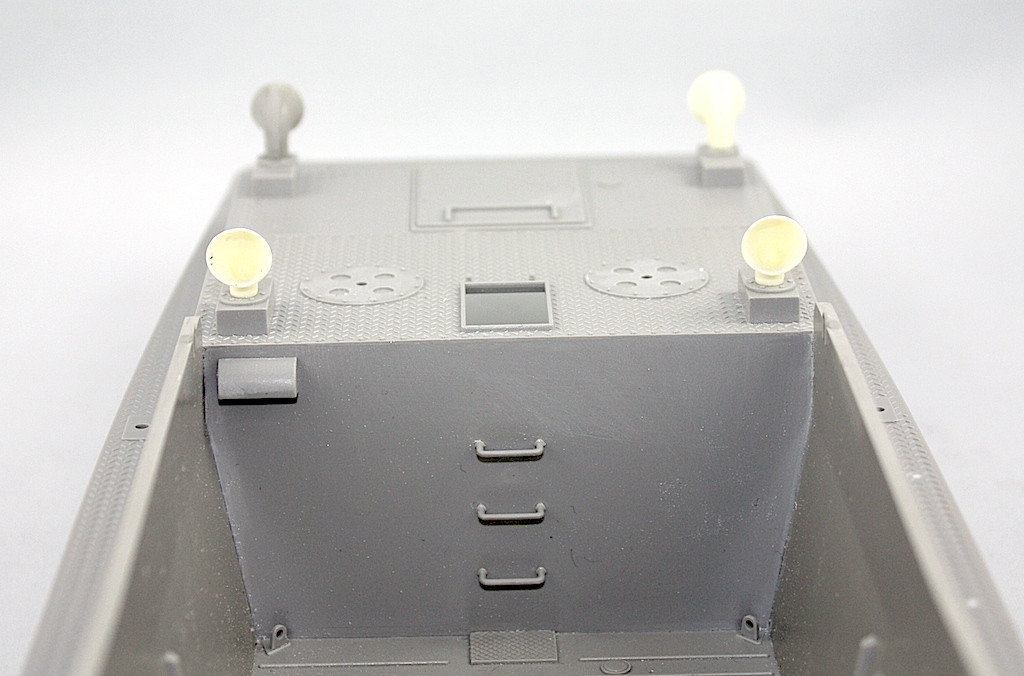
Also as a side note, the vents are not standard on all LCM3s. These vents are smooth in the kit and in the LCM3 Loading image I have, but on several other LCM3 Ive seen these vents square, rectangular, or round and segmented. If youre doing a generic LCM3 then the kit ones will be fine, but if you want to build a specific one be sure to check what style that particular ship used.
Once the evergreen strips had set on the hull, I added a smooth, uniform coat of Tamiya Basic putty over them and left this to dry for a week. This technique was detailed in Tamiya Model Magazine issue 102. I also tried the technique they used in issue 109, which was to just tape over the strips instead, but found this produced ribs which were too pronounced for my liking. They would match some of the more weathered ships Ive seen in some images, but it was too much for the LCM3 loading image I was basing my model off of, so putty it was!
Once the putty was dry I was left with a hull that looked like this:
Next up: The LCM3 pulley and propellor system!