The saying of "You ain't seen nothin' yet" definitely applies to to this suspension build!
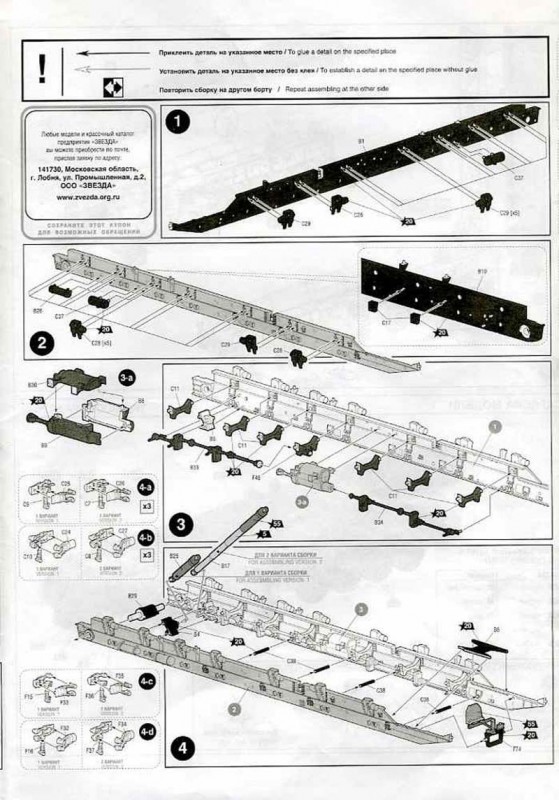
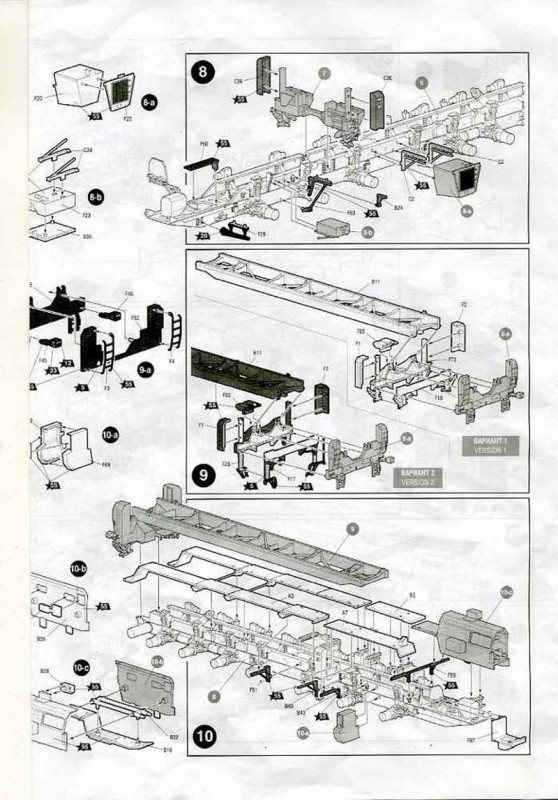
 I'm afraid that there is still a fair amount of pieces to add to the frame before the wheels can be attached. What you see in the last images is most of step 8 done of the 18 step construction process. The wheels need to wait until the completion of step 16.
Up to this point and in the review I have been saying that this model's suspension was on a par with that of the Revel Eight wheeled Luchs armoured car. At this point I retract that statement. This kit is closer to being (in my mind) multiple times more difficult and even at times tedious to construct.

As for the underbelly details, they are quite visible when the erector is in the launch position (fully raised). Even in a semi-raised position you can see quite a lot. With the rest of the items to attach to the frame (fuel tank, fenders etc) I think that one might not see too much of what's on the exterior frame sides, at least that is my guess for now.
Cheers,
Jan