_GOTOBOTTOM
Figures
Military figures of all shapes and sizes.
Getting figgy with it
Thudius
Visit this Community
Uusimaa, Finland
Joined: October 22, 2012
KitMaker: 1,194 posts
Armorama: 1,077 posts
Posted: Sunday, April 20, 2014 - 07:55 AM UTC
No rest for the wicked. Fresh off my latest build, I thought I'd tackle a figure, something I haven't done in well over 10 years. I'll be doing Figure A from Tristar's Mamaev Hill set
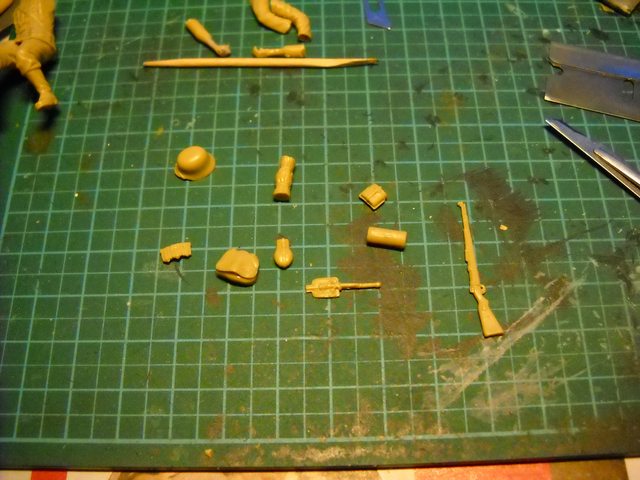
http://www.tristar-model.com/products35024.html

It's not a bad set with some interesting poses and nobody pointing at anything 
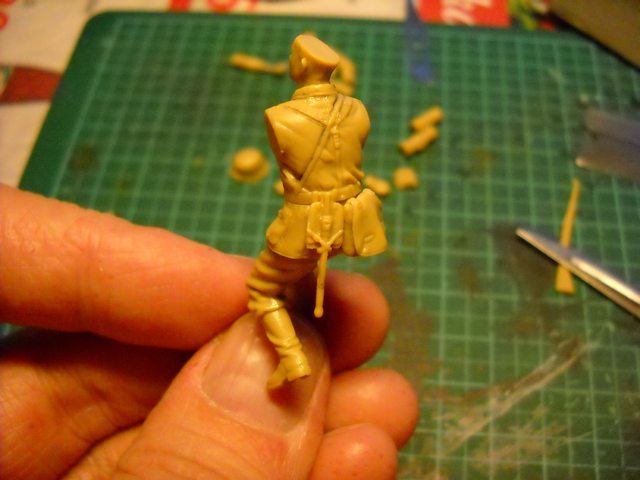
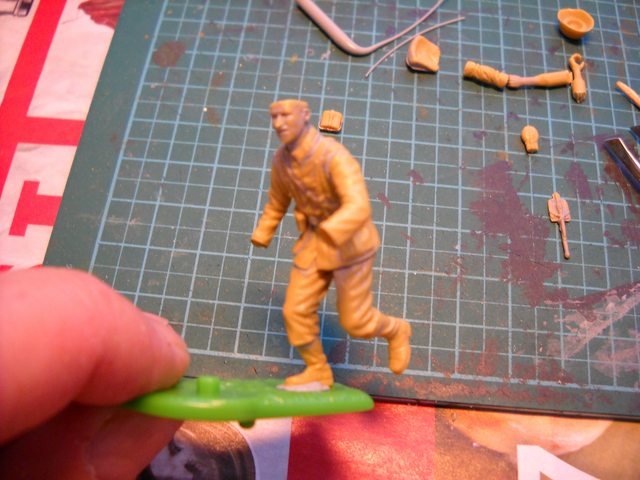
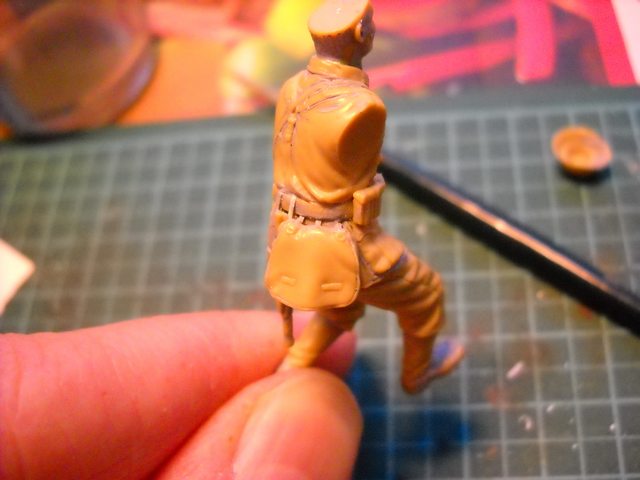
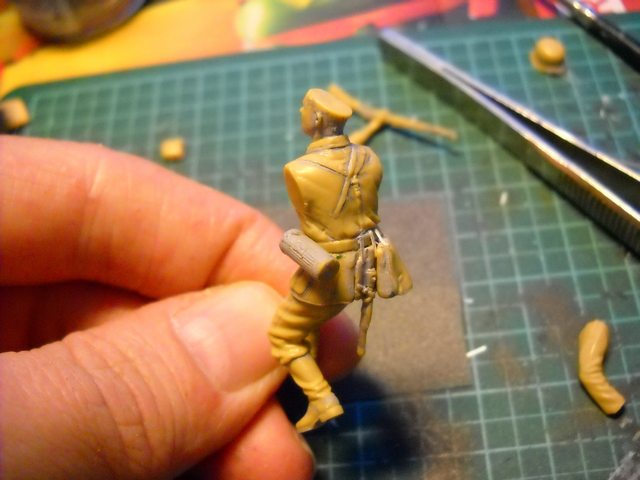
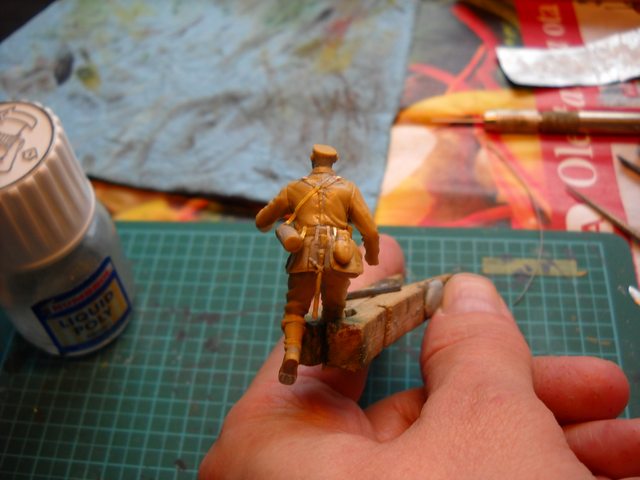
The guy I'm doing is a good basic figure to start with, nothing complicated or obstructed to practice on. I had actually started this a few weeks ago when I was in a holding pattern waiting for tracks to set so I could move on. I didn't think to grab any pics so we'll jump in as it sits today.


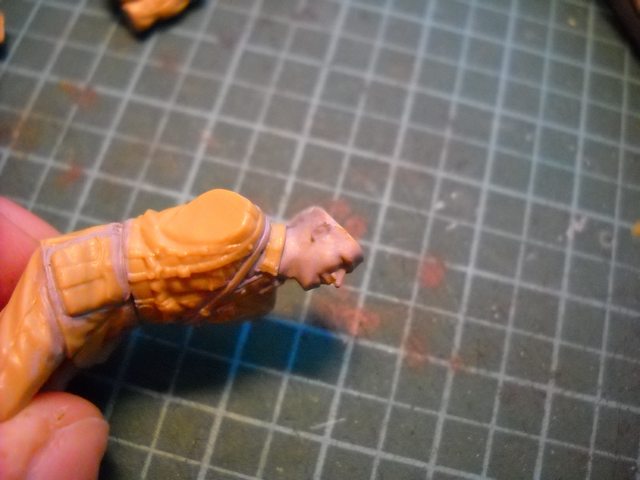
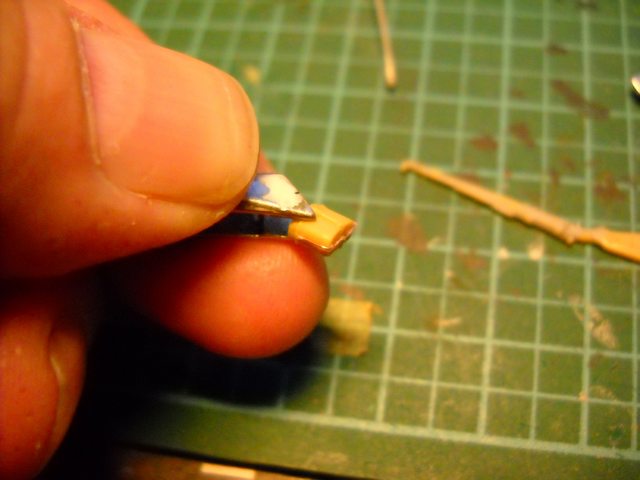
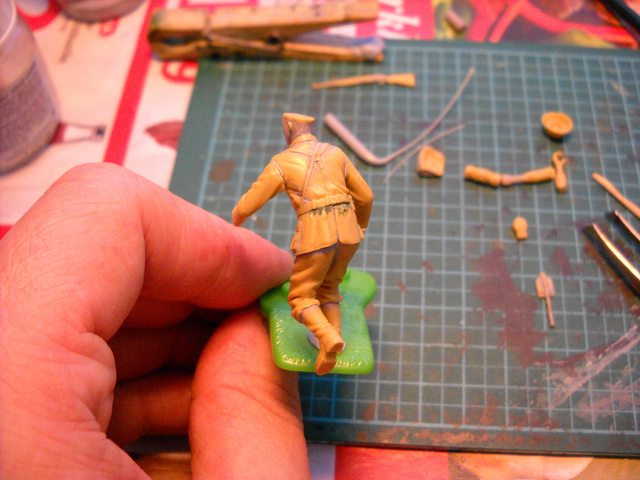
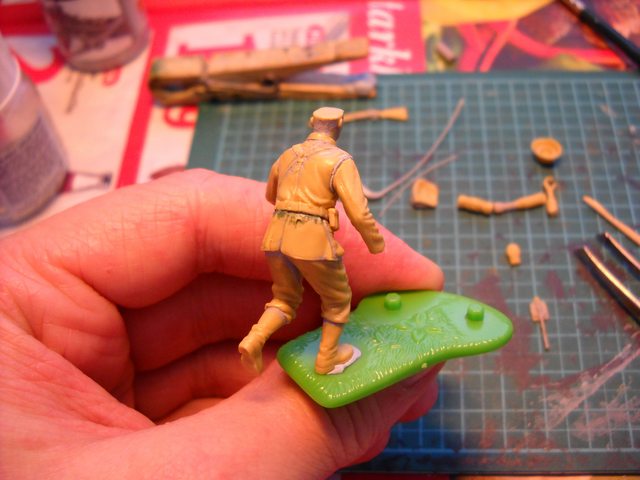
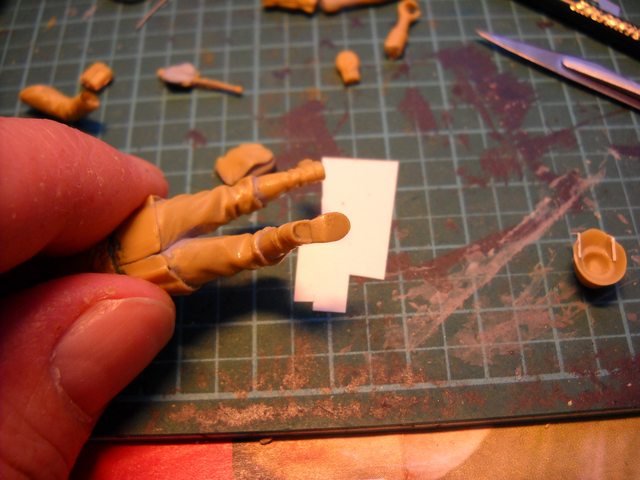
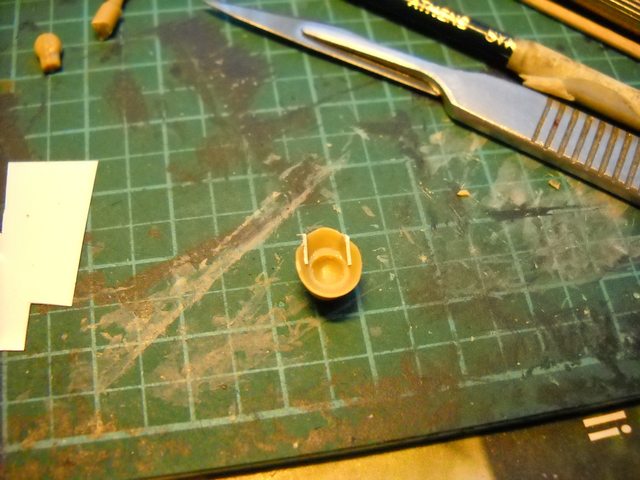
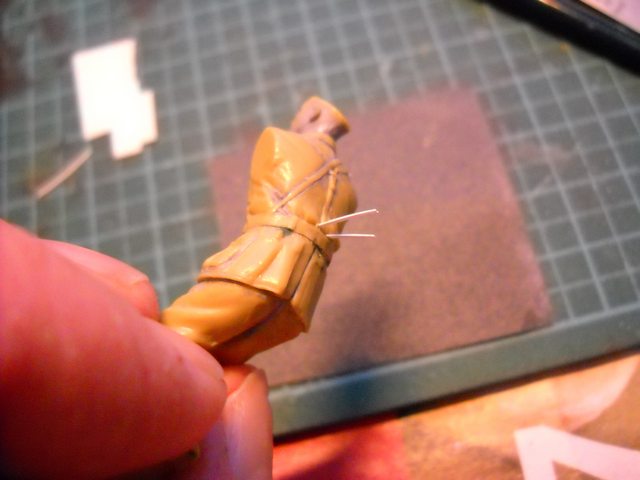
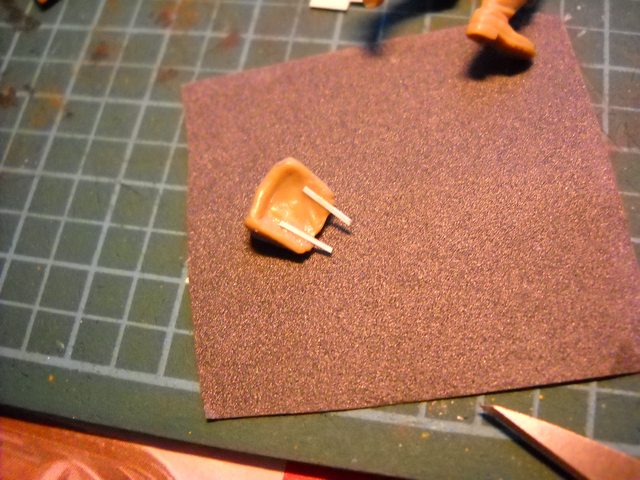
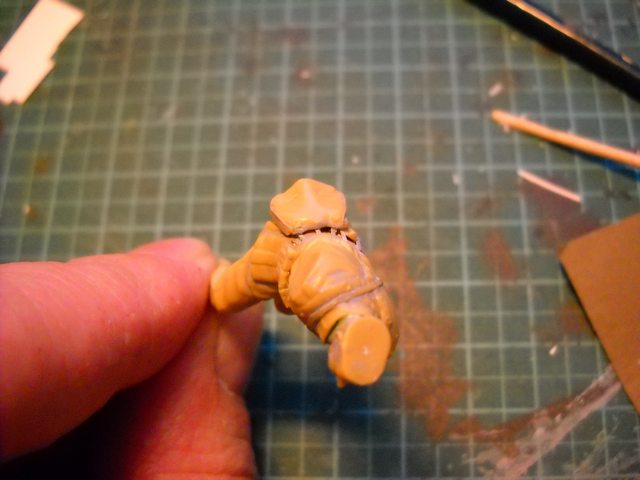
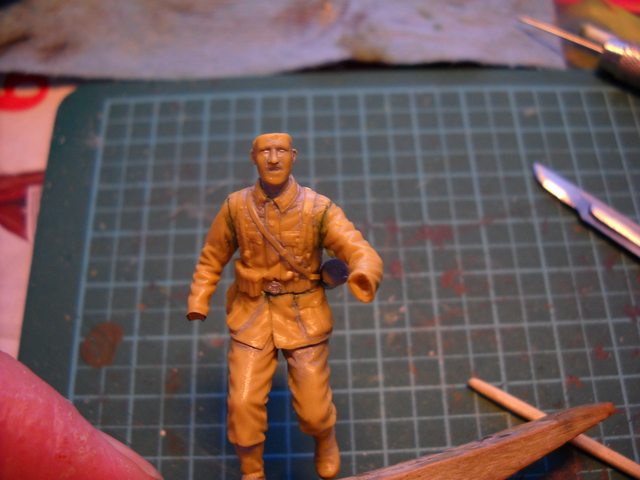
The torso, legs and arms have been removed from the sprue and the seams cleaned up and the legs glued. I also did quite a bit of undercutting and scribing to get some depth and sharpness to belts, overhangs etc. As you can see, I cut of the hands and glued them to lengths of sprue and hollowed out the ends of the arms.


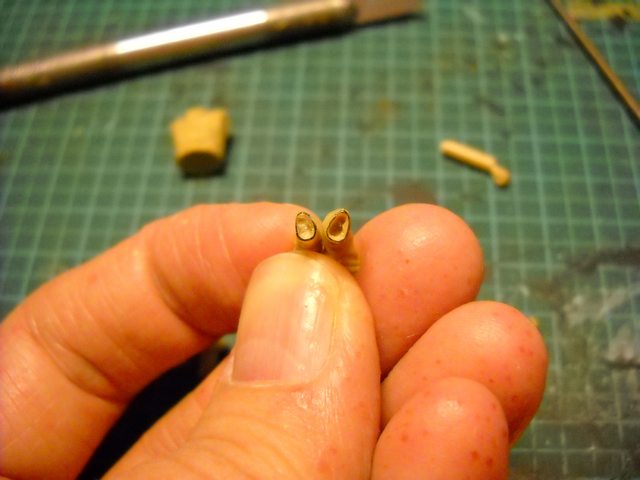
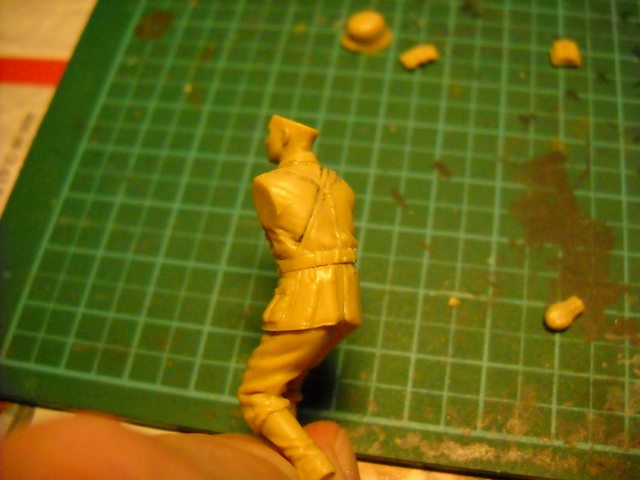
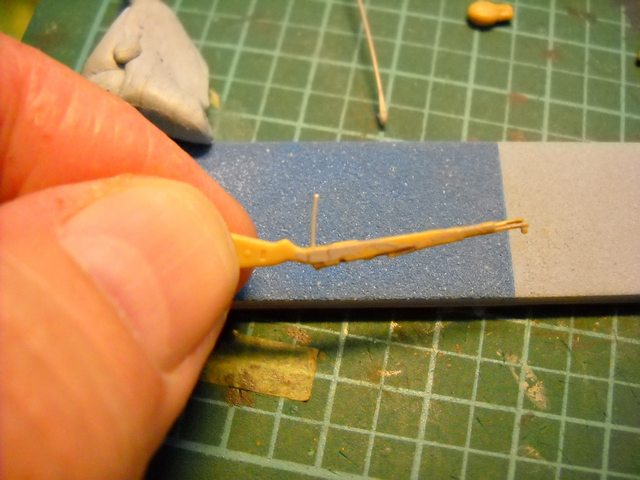
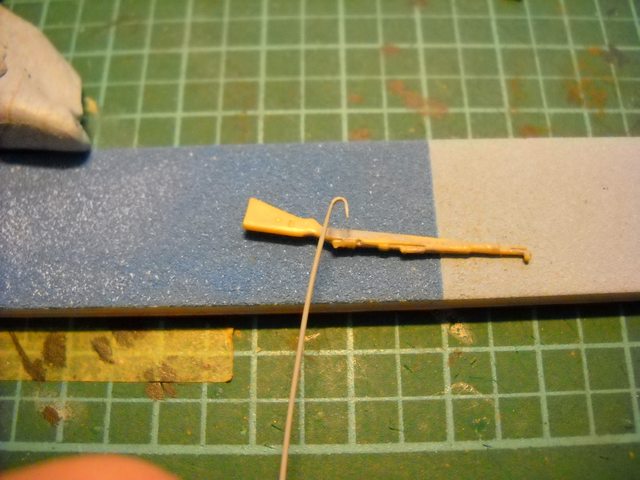
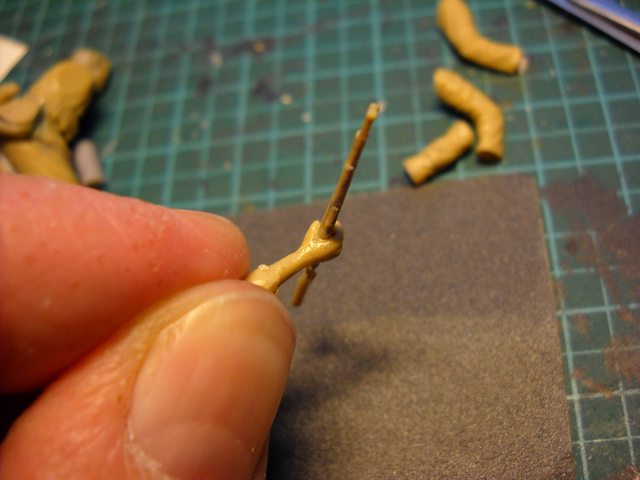
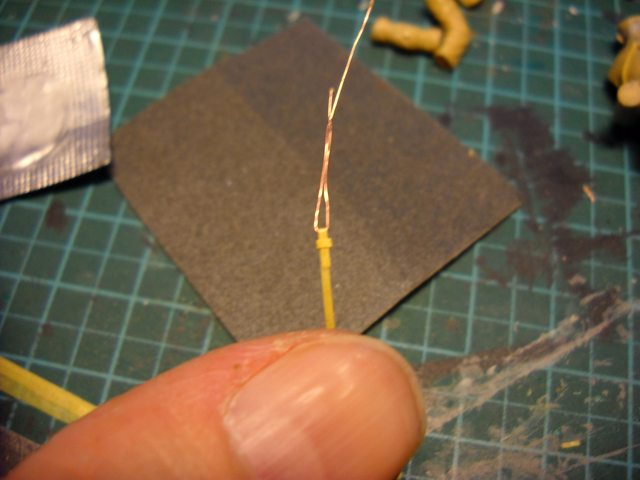
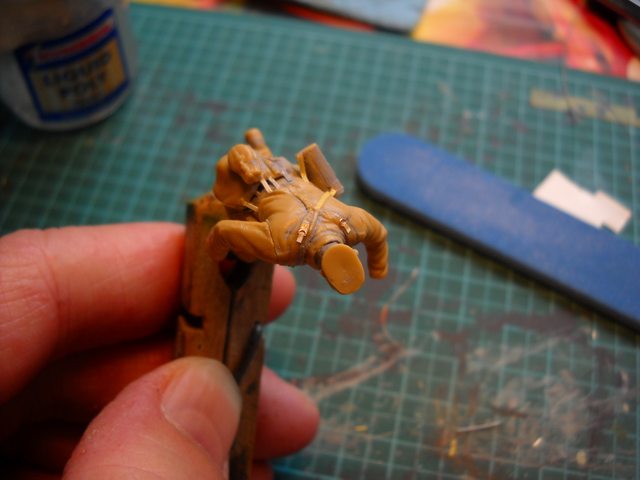
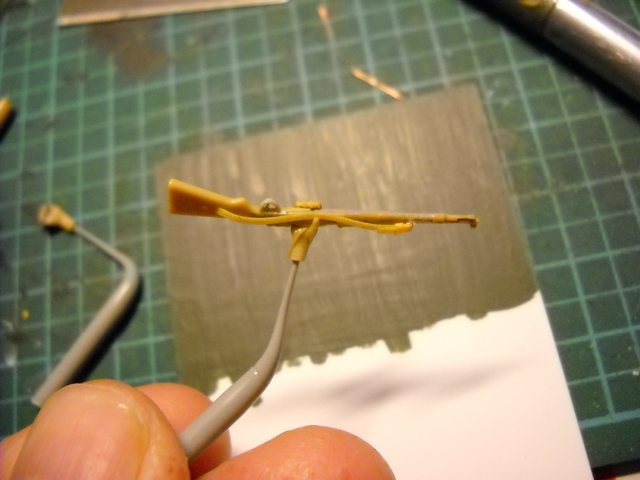
I started to shape the sprue forearms and clean up the hands.


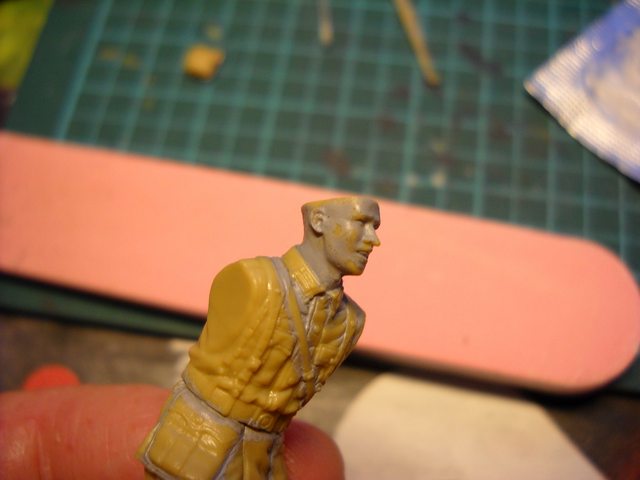
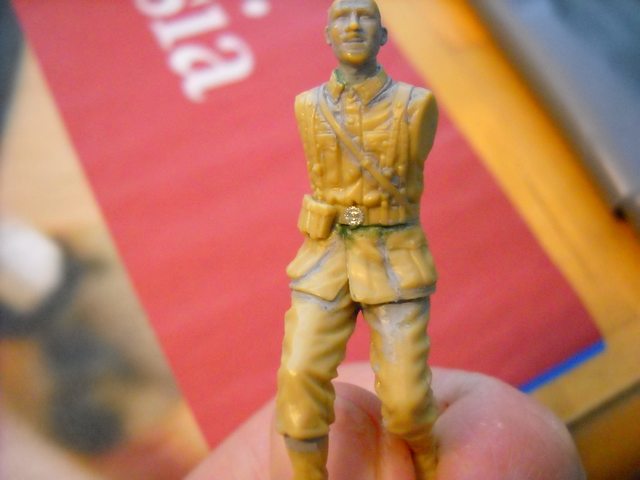
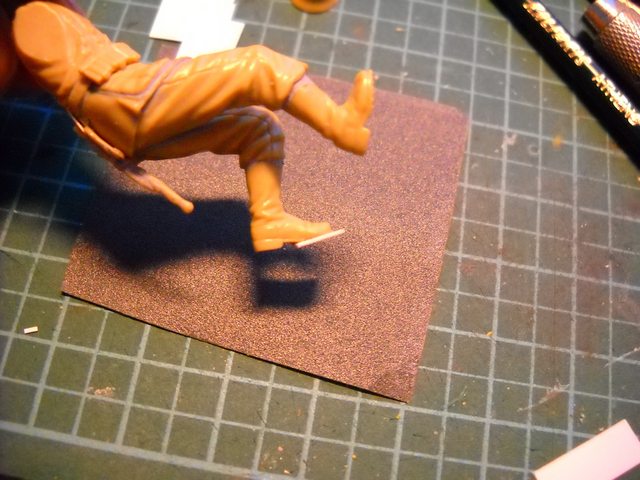
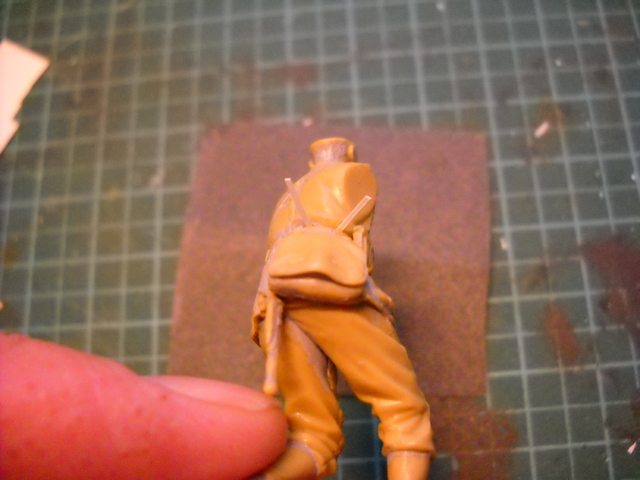
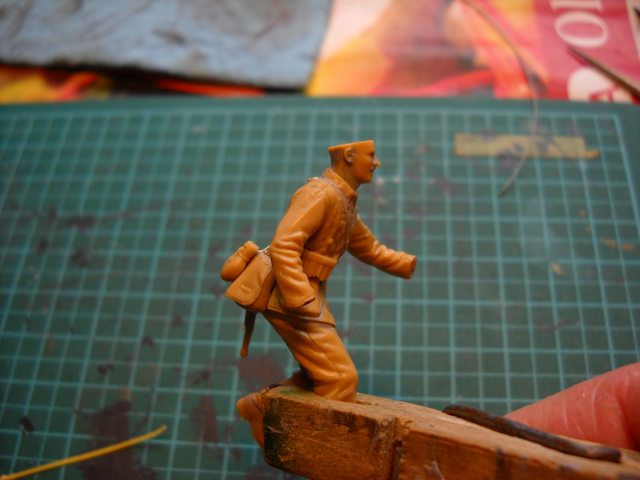
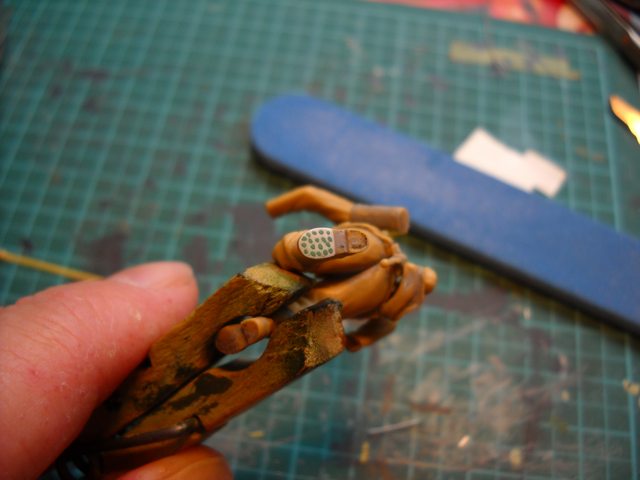
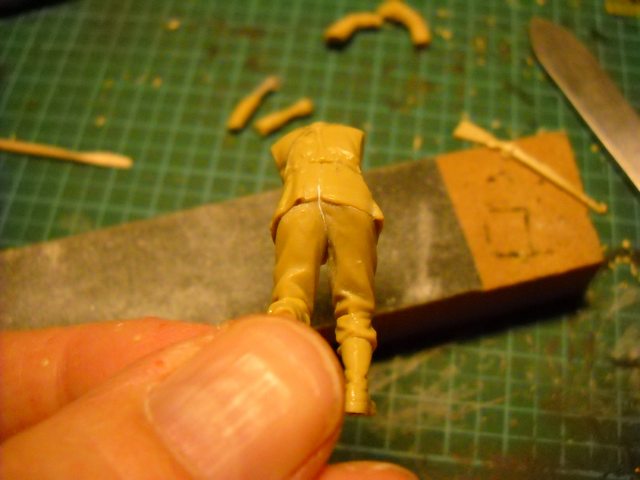
Filled the seam in the legs with Perfect putty, water soluble putties are great for this kind of work, and glued the torso on.


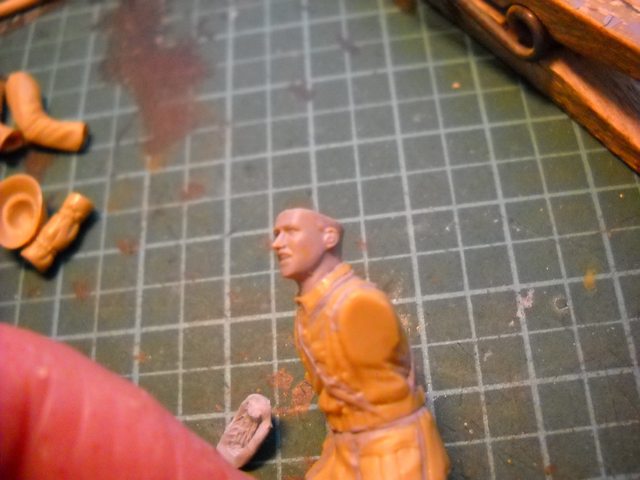
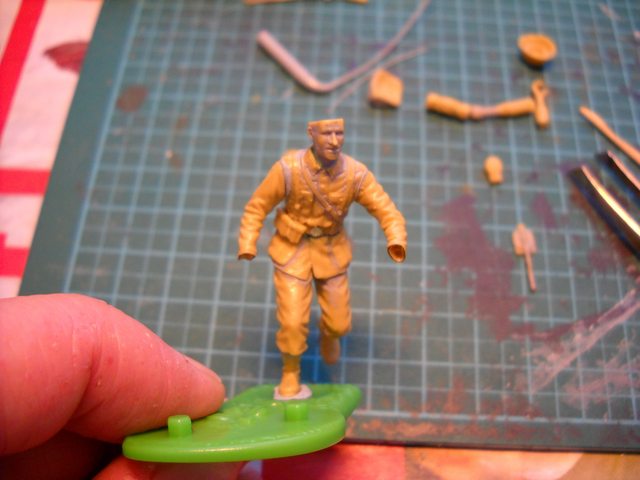
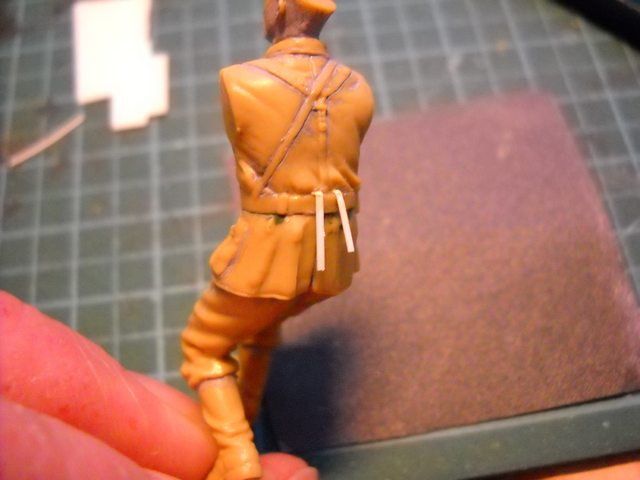
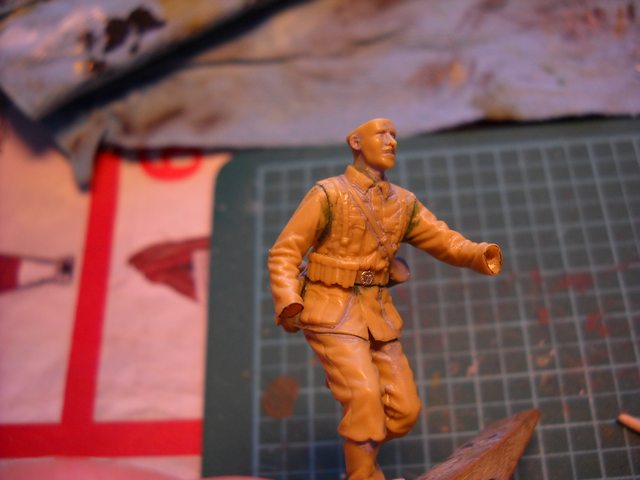
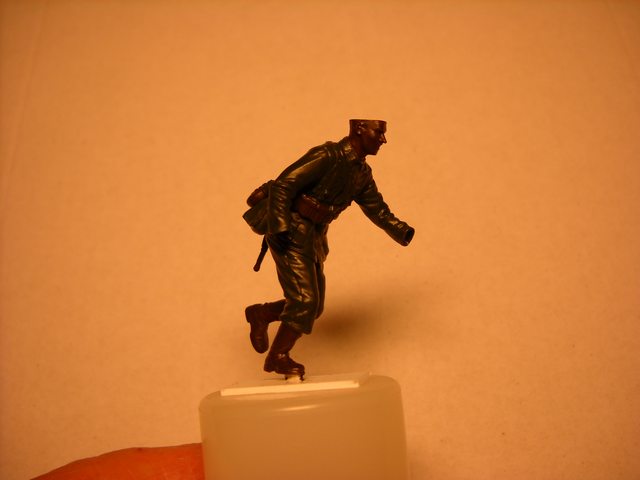
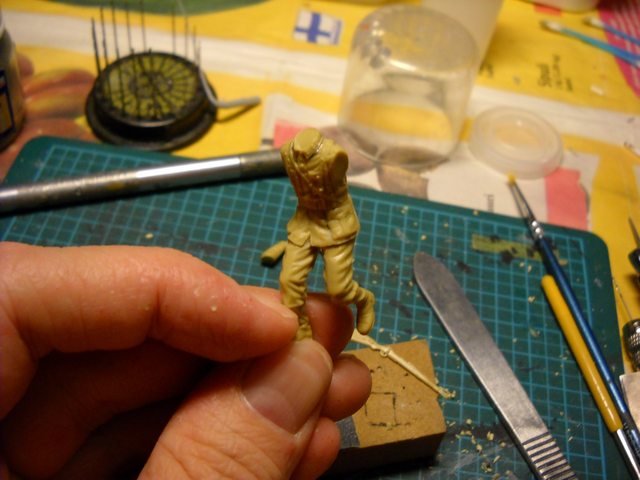
This is a good shot of how the figure will be "lit". I'm going for your basic high noon look so as not to over complicate shadows and highlighting. You can see the upper torso will be much darker than the trousers give the leaning pose.


I've been itching to do a figure for the last month or so and now I finally get a chance to practice and have some fun. Feel free to comment or add your 2 cents on the progress.

Kimmo
1stjaeger
Visit this Community
Wien, Austria
Joined: May 20, 2011
KitMaker: 1,744 posts
Armorama: 1,727 posts
Posted: Sunday, April 20, 2014 - 09:49 AM UTC

Hi Kimmo,

interesting start into this project!

Eager to see more..!!!!

Cheers

Romain
Thudius
Visit this Community
Uusimaa, Finland
Joined: October 22, 2012
KitMaker: 1,194 posts
Armorama: 1,077 posts
Posted: Sunday, April 20, 2014 - 10:06 AM UTC
Thanks Romain, should be more this week.

Kimmo
Thudius
Visit this Community
Uusimaa, Finland
Joined: October 22, 2012
KitMaker: 1,194 posts
Armorama: 1,077 posts
Posted: Tuesday, April 22, 2014 - 06:50 AM UTC
Everything is now basically cleaned up and parts have been test fitted. Got the head glued on and will continue with the hands over the next couple of days. The head is surprisingly well done, there was just a little bit of scraping around the neck and ears and a minor bump on the lower lip. I did scratch in some more hair texture as this was on the light side. The helmet seemed a touch large, but I can live with it. The ears will need a little work.


The bread bag got some serious under cutting, the bottom/flap had little definition and was molded as a blob at the bottom.


I also smoothed out a bump on the back after realising the shelter half roll wouldn't sit high enough to cover it.


Now I need to study some photos to see how all this equipment sits on the belt and how the straps are supposed to attach to them.

Kimmo
milvehfan
Visit this Community
North Carolina, United States
Joined: June 26, 2007
KitMaker: 2,116 posts
Armorama: 1,080 posts
Posted: Tuesday, April 22, 2014 - 07:20 AM UTC
Hi,
Figure Looking Good, Very Cool.

mil
Thudius
Visit this Community
Uusimaa, Finland
Joined: October 22, 2012
KitMaker: 1,194 posts
Armorama: 1,077 posts
Posted: Tuesday, April 22, 2014 - 07:34 AM UTC
Thank you good sir.

Kimmo
1stjaeger
Visit this Community
Wien, Austria
Joined: May 20, 2011
KitMaker: 1,744 posts
Armorama: 1,727 posts
Posted: Tuesday, April 22, 2014 - 07:38 PM UTC

Hi Kimmo,

this is getting better and better!! You definitely think along the right lines and that shows in the details and improvements you area adding! These figures will be an example of what quality you can produce out of injection plastic figures!!

Thanks for "letting us watch"!

Cheers

Romain

Thudius
Visit this Community
Uusimaa, Finland
Joined: October 22, 2012
KitMaker: 1,194 posts
Armorama: 1,077 posts
Posted: Tuesday, April 22, 2014 - 09:29 PM UTC
Thanks Romain. It's always a little more fun when someone's watching I have to admit that doing little things like this to improve figures didn't hit me (with the exception of cutting off the hands) until I read a recent blog on an other site and sort of slapped my forehead and yelled DOH! We do this sort of thing with our vehicles and aircraft all the time yet we forget that figures can be improved with minor tweaks and paying attention to how things actually sit. The beauty of the internet is we can pass on all sorts of information and then its up to the individual to decide what to implement or to come up with a better/different way.

Kimmo
Thudius
Visit this Community
Uusimaa, Finland
Joined: October 22, 2012
KitMaker: 1,194 posts
Armorama: 1,077 posts
Posted: Wednesday, April 23, 2014 - 12:52 AM UTC
Decided to fix the ears, they didn't really look right so I scraped down the bumps and drilled a hole for the canal and the sort of drilled/scraped/filed the upper indentations. I ran some liquid cement over the work to smooth it out and the n a bit of primer to build up areas. I think it looks a lot more ear like now.

Before


After


After trying to thin down the trigger and guard, I ended up cutting them off and going with some stretched sprue. Drill a hole for the trigger, insert a length and trim. I need the glue to dry before I shape it a little more. The guard is stretched sprue that was flattened with tweezers. I'll trim it to length and glue it after the trigger is done.


The mess tin got a new wire handle


I also started to plan out how the equipment will hang. Refs show that there was some variation in how things were carried so that sort of helps/hinders. The canteen and mess tin had hook clasps on the back side that just hung on whatever D ring was available. The gas mask canister had a loop strap and a hook clasp. Still need to figure out the shelter half.

Kimmo
Thudius
Visit this Community
Uusimaa, Finland
Joined: October 22, 2012
KitMaker: 1,194 posts
Armorama: 1,077 posts
Posted: Thursday, April 24, 2014 - 12:35 AM UTC
Today I did a little selective filling and continued with details. The ammo pouch was glued in place and I stuck the arms on with blu-tack to see how things are looking. I decided to scrape the buckle down and use a pe embossing, the kit part was just a circle. The pe looks a little over sized but really adds some nice detail. I might add a thin strip to the bottom of the buckle, not sure yet.


I started work on the sole of the boot, the stud detail was so-so and partially missing so off it all came and I also did some scraping for the heel cleat. I still need to decide whether to go nuts with the studs or just use drops of white glue. The canteen got a small piece of strip added to replicate the seam/cover. I glued a thicker piece than need and then sanded down. The trigger and guard are now more or less done. The helmet also got some strap extensions, they'll get trimmed when the glue sets.


I've sorted out the rest of the gear in my mind, so now it's a case of removing the molded on straps on the belt and making new straps for the various pieces of kit. The trickiest one to do will be the gas mask canister. With some luck, I'll be able to start painting this weekend, at the very least I should get the base coat down then.

Kimmo


1stjaeger
Visit this Community
Wien, Austria
Joined: May 20, 2011
KitMaker: 1,744 posts
Armorama: 1,727 posts
Posted: Thursday, April 24, 2014 - 07:09 AM UTC
Kimmo, you are moving along Jerry's paths....and that is sure to produce real beauties! Your ears are definitly a lot better!!!

Did you know that stretched plastic keeps the basic form it had before....so if you take a flat piece insteat of a round one (runner o.s.), you have a flat stretched piece at the end of the process.

I'm sure you knew, but maybe you forgot!?

Cheers

Romain

Thudius
Visit this Community
Uusimaa, Finland
Joined: October 22, 2012
KitMaker: 1,194 posts
Armorama: 1,077 posts
Posted: Thursday, April 24, 2014 - 07:26 AM UTC

Quoted Text

Kimmo, you are moving along Jerry's paths....and that is sure to produce real beauties! Your ears are definitly a lot better!!!

Did you know that stretched plastic keeps the basic form it had before....so if you take a flat piece insteat of a round one (runner o.s.), you have a flat stretched piece at the end of the process.

I'm sure you knew, but maybe you forgot!?

Cheers

Romain


Thanks again for the compliments. I haven't forgotten the shape thingy. For the trigger guard it was just easier to flatten a piece that was the right width than to muck about. I could have used strip, but most of my stock is old and might not bend and retain shape as well. I found during my last build that recently stretched sprue is quite pliable, I got seriously tight bends without breakage.

Kimmo
Thudius
Visit this Community
Uusimaa, Finland
Joined: October 22, 2012
KitMaker: 1,194 posts
Armorama: 1,077 posts
Posted: Friday, April 25, 2014 - 01:15 AM UTC
A small update today. Got the entrenching tool attached and started on the bread bag straps. I noticed the sole of the boot was a little thin on one side so I sanded it even and glued a piece of styrene, I'll sand to shape and thickness tomorrow.

The loops for the entrenching tool were done in two pieces. First I glued some strip to the back side, trimmed to fit after it had set. The front was glued into a groove at the belt, left to set for a bit, then with a knife blade holding the upper "loop" in place, I bent the rest down and glued the tool in place and then the strips to the tool. Trimmed when it had dried. Now you have the impression of loops rather than dangling on a strap. The bread bag will get the same sort of treatment.


More tomorrow.

Kimmo
jrutman
Visit this Community
Pennsylvania, United States
Joined: April 10, 2011
KitMaker: 7,941 posts
Armorama: 7,934 posts
Posted: Friday, April 25, 2014 - 02:33 AM UTC
I am liken' these little improvements you are coming up with. Looks like your ammo pouch is too low however. You may have to shave some plastic from the shirt at the top of the belt to get the pouch up more. The real pouches had loops in the back for the belt to pass through and then they hung also from the front y-straps,exactly like the modern USArmy gear.
Very cool mod to the rifle trigger.
J
Thudius
Visit this Community
Uusimaa, Finland
Joined: October 22, 2012
KitMaker: 1,194 posts
Armorama: 1,077 posts
Posted: Friday, April 25, 2014 - 03:08 AM UTC

Quoted Text

I am liken' these little improvements you are coming up with. Looks like your ammo pouch is too low however. You may have to shave some plastic from the shirt at the top of the belt to get the pouch up more. The real pouches had loops in the back for the belt to pass through and then they hung also from the front y-straps,exactly like the modern USArmy gear.
Very cool mod to the rifle trigger.
J


Thanks! Should have paid more attention to how it sat, I figured it was ok. I should be able to move it without any lasting damage.

Kimmo
Biggles2
Visit this Community
Quebec, Canada
Joined: January 01, 2004
KitMaker: 7,600 posts
Armorama: 6,110 posts
Posted: Friday, April 25, 2014 - 03:44 AM UTC
Tri Star figures are much under-rated. They can be every bit as good as any Dragon set (my favorite is the SP crew #2). It is too bad they did not make more figure sets.
EvilKiwi436
Visit this Community
Alberta, Canada
Joined: February 11, 2012
KitMaker: 15 posts
Armorama: 15 posts
Posted: Friday, April 25, 2014 - 10:56 AM UTC
I'm sure you mentioned this somewhere above, but I was just wondering, how did you make the straps for the gear?

Is it just simple paper, or something else? I've been debating whether or not to do rifle straps for my figures, but I'm not sure how.
Thudius
Visit this Community
Uusimaa, Finland
Joined: October 22, 2012
KitMaker: 1,194 posts
Armorama: 1,077 posts
Posted: Friday, April 25, 2014 - 12:29 PM UTC

Quoted Text

I'm sure you mentioned this somewhere above, but I was just wondering, how did you make the straps for the gear?

Is it just simple paper, or something else? I've been debating whether or not to do rifle straps for my figures, but I'm not sure how.


So far just using good old 5 thou styrene. For the rifle sling I'll use tape or maybe lead foil.

Kimmo
Thudius
Visit this Community
Uusimaa, Finland
Joined: October 22, 2012
KitMaker: 1,194 posts
Armorama: 1,077 posts
Posted: Saturday, April 26, 2014 - 06:08 AM UTC
Got some more time in today. Finished off the bread bag, the gas mask canister, reworked the boot sole and continued with the hands.

The bread bag was done the same way as the entrenching tool. I added a third strip to represent the small hooked strap. A bit of filler was need on the right side and the tunic fold was shaved down a little. I also repositioned the ammo pouch, glued on the canteen. The mess tin is just blu-tacked on, that will get painted separately. I might just leave the shelter half off.


The gas mask canister proved to be a bit of a pain. In the end I used strips of tape with tie downs made of wire. I had to shave off more of the strap detail on the back than hoped and rework some creases.


The right hand is actually quite well done. The rifle almost sits perfectly, just a little shave here and there. A bit of sanding to clean up the finger tips and we're good to go. I think I could just barely make out finger nails, a coat of paint will reveal all.


And the sling started


Should be another short update tomorrow. I just might get the primer coat on.

Kimmo
Thudius
Visit this Community
Uusimaa, Finland
Joined: October 22, 2012
KitMaker: 1,194 posts
Armorama: 1,077 posts
Posted: Sunday, April 27, 2014 - 01:09 AM UTC
The figure is armed, I repeat, armed. No hands yet though. Didn't have as much time as hoped today so a minor update. The arms are on and I started with blending seams and reworking some folds, till needs filler at the joins. I also noticed that the seam on the left arm is basically missing, and since the right arm already has one that I went and cleaned up, I'll attempt to scribe one in. I also replaced the molded on D rings on the shoulders, they weren't really well defined. I wrapped some wire around a piece of stretched sprue as if I were making springs and sliced the whole thing to give me a couple of rings, then trimmed the top third off and glued them on to straps made from 5 thou. Useful stuff that 5 thou. I just used liquid cement, the plastic softens enough for the wire to get grabbed. A coat of Vallejo primer will make sure they aren't going anywhere.
The boot got some studs from pvc glue with a drop of paint added to see what I was doing. I may end up redoing it, it's kind of too subtle and the studs are a bit too big.


Hopefully I'll get another session in tomorrow.


Kimmo


Thudius
Visit this Community
Uusimaa, Finland
Joined: October 22, 2012
KitMaker: 1,194 posts
Armorama: 1,077 posts
Posted: Monday, April 28, 2014 - 05:57 AM UTC
Got the joins blended and it looks like I managed to get the seam scribed in decently. I slapped a bit of NATO green primer on to see what was what. The pics look rather horrible, but show you how translucent greens can be. I plan on darkening it with panzer grey to get a good, dark green base for the uniform.


I need to give it he once over for blemishes and so on, but I think it looks pretty good.

Kimmo
1stjaeger
Visit this Community
Wien, Austria
Joined: May 20, 2011
KitMaker: 1,744 posts
Armorama: 1,727 posts
Posted: Monday, April 28, 2014 - 11:34 AM UTC

Wow! The extensive detailing is making a huge difference!!

Impatient to see how you handle the brush!!

Well done Sir!!

Cheers

Romain

Thudius
Visit this Community
Uusimaa, Finland
Joined: October 22, 2012
KitMaker: 1,194 posts
Armorama: 1,077 posts
Posted: Monday, April 28, 2014 - 10:33 PM UTC

Quoted Text


Wow! The extensive detailing is making a huge difference!!

Impatient to see how you handle the brush!!

Well done Sir!!

Cheers

Romain


You aren't the only one who's curious about how the painting will go I'll have to go over my training material this week.

Kimmo
Thudius
Visit this Community
Uusimaa, Finland
Joined: October 22, 2012
KitMaker: 1,194 posts
Armorama: 1,077 posts
Posted: Friday, May 02, 2014 - 07:49 AM UTC
And so it begins. Got some dark green and dark reddish brown primer down. Pretty self explanatory, and quite dark.


The sling got added and the hands were chopped to size. They also got the brown mix.


Here's the base colours. I thought it might be a good idea to have a scrap piece handy to see how colours will play out.


And the first session with the head. There's just a hint of shading and highlighting on right now. I just played with some paint to get a nice fleshy tone rather than use something straight from the bottle. The keen eyed among you can decipher what I used by looking at the palette


The next step is to build up the highlights and shadows and so on. I think I'll try a wet palette for this. I find that the paints tend to dry out too soon unless you add retarder, and that sort of affects the way the paint reacts. Not a negative thing necessarily, just different. I may also try using glaze medium to thin the paints, this should give some extra working time to blend.

Stay tuned.

Kimmo
1stjaeger
Visit this Community
Wien, Austria
Joined: May 20, 2011
KitMaker: 1,744 posts
Armorama: 1,727 posts
Posted: Friday, May 02, 2014 - 08:17 AM UTC

This is now getting even more interesting Kimmo!!!

Good idea to show the colours on a piece of card!

I like your basic skin tone already!!

Let's see how this will develop!! But I trust you will do nicely!

Good luck!

Cheers

Romain

 _GOTOTOP