Joined: May 12, 2014
KitMaker: 68 posts
Armorama: 58 posts
Posted: Monday, May 12, 2014 - 12:29 AM UTC
Hello,
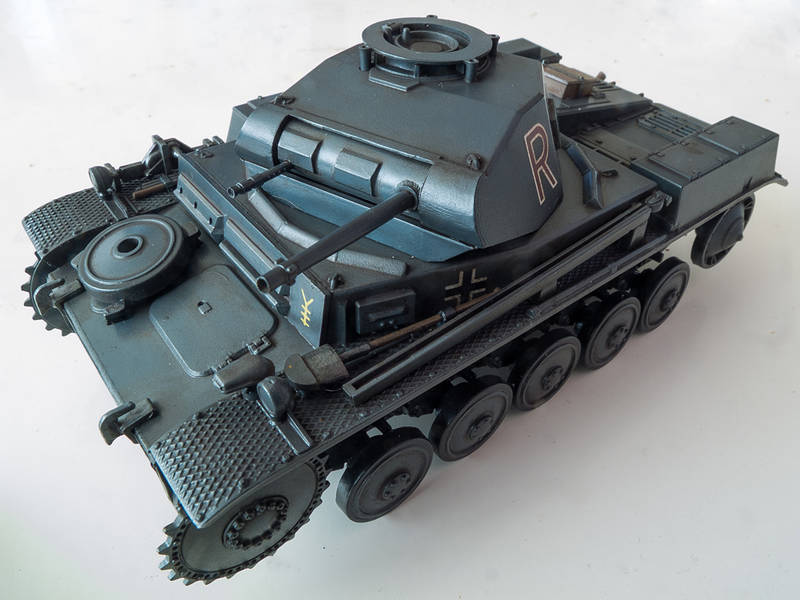
I'm new to this forum. I haven't been building models for 35 years but decided to start again. I bought an old revell airbrush, old Tamiya Panzer II kit and some paint. So these are the first results since 35 years, still have to do weathering so it's not finished yet. Would appreciate some comments, hope you like it!


Thanks
RobinNilsson
 TOS Moderator
Stockholm, Sweden
Joined: November 29, 2006
KitMaker: 6,693 posts
Armorama: 5,562 posts
Posted: Monday, May 12, 2014 - 01:07 AM UTC
Welcome back to modelling ! And Welcome aboard :-)
Depending on your ambition level with this build it might be worthwhile to consider replacing the original tracks in the kit, there are aftermarket options (not cheap ....).
That Pz II will look good with some weathering/dirt.
Remember that painting/weathering techniques can be practiced on any old piece of "non-greasy" plastic, broken CD-cases are perfect (has various surface structures ....)
/ Robin
In memory of Al Superczynski:
"Build what YOU want, the way YOU want to....
and the critics will flame you every time"
Arkansas, United States
Joined: June 29, 2009
KitMaker: 11,610 posts
Armorama: 7,843 posts
Posted: Monday, May 12, 2014 - 01:09 AM UTC
Welcome back. Nice, clean build and a smooth, even paint job. If you decide to replace the kit tracks, you should be able to find some for ~$20.
Ideals are peaceful. History is violent.
Joined: May 12, 2014
KitMaker: 68 posts
Armorama: 58 posts
Posted: Monday, May 12, 2014 - 01:21 AM UTC
Thanks,
I know it's possible to replace the tracks but I don't think it's worth to spend more money on tracks than on the model itself. I already weathered a bit by washing the model with Van Dyck brown oil paint. Is it wise to varnish with a matt finish next (for now it has a satin varnish) and go further with the weathering stages?
Colorado, United States
Joined: February 24, 2014
KitMaker: 3,033 posts
Armorama: 2,492 posts
Posted: Monday, May 12, 2014 - 04:06 AM UTC
Ditto, welcome back! Like you, I got started up again last November after approximately 30 years.
Nice job on the Panzer. I do like the clean out-of-the-factory look. However, I can never stop there; I must weather!

Stick to this site "like glue;" these guys are knowledgeable and most of all very helpful. The builds I've seen displayed here are simply outstanding!
I look forward to seeing your completed Panzer.
--mike
Aarhus, Denmark
Joined: January 02, 2006
KitMaker: 258 posts
Armorama: 121 posts
Posted: Tuesday, May 13, 2014 - 10:48 PM UTC
Welcome back Schwartzadler, a really good comeback. At this stage I would leave the satin/gloss varnish, for further weathering, as any washes, filters ect. will adhere much better to a matt surface, and hence much more difficult to remove/control. Whether you'll ad a matt varnish at the end is up to you, it's a matter of taste. One could argue, on the real vehicles, at least the running would be covered in dust/mud and appear matt, while the finish of the upper part is a bit of a controversy, some swear to a matt finish others to a satin finish. I would go for a satin finish though, as the vehicles in real life might be dusted up, there still the size difference in play. Just my 5 cents.
Erik
Joined: May 12, 2014
KitMaker: 68 posts
Armorama: 58 posts
Posted: Wednesday, May 14, 2014 - 10:31 AM UTC
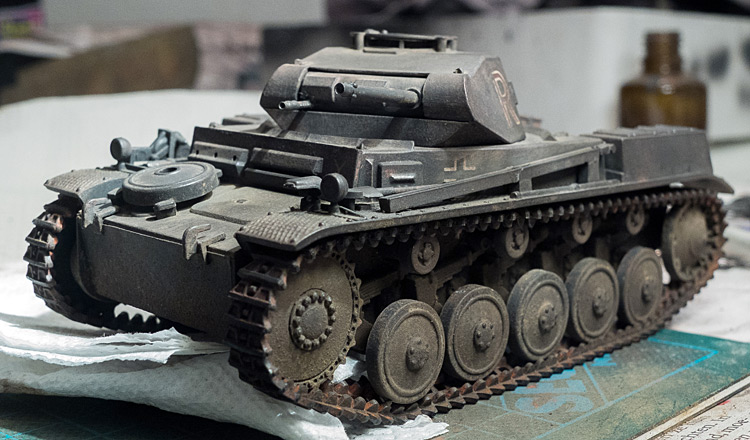
I tried some weathtering the first time in my "career".

Joined: May 12, 2014
KitMaker: 68 posts
Armorama: 58 posts
Posted: Thursday, May 15, 2014 - 03:01 AM UTC
California, United States
Joined: April 29, 2014
KitMaker: 18 posts
Armorama: 14 posts
Posted: Thursday, May 15, 2014 - 04:22 AM UTC
I just built this kit as my first kit ever but haven't been able to paint it.
I think your painting and weathering looks great, and I can't wait to try my hand at painting.
Joined: May 12, 2014
KitMaker: 68 posts
Armorama: 58 posts
Posted: Thursday, May 15, 2014 - 09:05 AM UTC
Quoted Text
I just built this kit as my first kit ever but haven't been able to paint it.
I think your painting and weathering looks great, and I can't wait to try my hand at painting.
T(h)anks!
England - East Anglia, United Kingdom
Joined: March 16, 2014
KitMaker: 78 posts
Armorama: 68 posts
Posted: Friday, May 16, 2014 - 01:00 AM UTC
Nice work - particularly like the weathering on the wheels.
The correct number models required for your stash to remain in equilibrium should be N+1, N being the number currently within the said stash.
Joined: May 12, 2014
KitMaker: 68 posts
Armorama: 58 posts
Posted: Friday, May 16, 2014 - 01:27 AM UTC
Quoted Text
Nice work - particularly like the weathering on the wheels.
To be honest, I think on the wheels it's too much, I can't see any color no more. I weathered with pastel chalk and white glue, I don't know if I can remove it?
Stockholm, Sweden
Joined: October 15, 2013
KitMaker: 444 posts
Armorama: 428 posts
Posted: Friday, May 16, 2014 - 06:39 PM UTC
Did you varnish the base coat so that it is protected?
Water and a stiff brush should be able to remove some of the pastels (depending on how hard the glue cured i guess)
Pastels can be scraped off also but be careful not to damage that nice base coat!
Either way, to me it looks great! It has a simple yet authentic look
North Carolina, United States
Joined: June 06, 2006
KitMaker: 4,691 posts
Armorama: 3,509 posts
Posted: Friday, May 16, 2014 - 11:31 PM UTC
Very nice work on this one.The wheels look great as they are.
For next project consider some chipping and streaking,not a criticism,just encouragement to keep trying new techniques.
Colorado, United States
Joined: February 24, 2014
KitMaker: 3,033 posts
Armorama: 2,492 posts
Posted: Saturday, May 17, 2014 - 01:01 AM UTC
I don't think the weathering is overstated at all. Your Panzer III would look great in a diorama vignette -- just add some figures and watch the magic unfold. Nice one!
--mike
Joined: May 12, 2014
KitMaker: 68 posts
Armorama: 58 posts
Posted: Monday, January 12, 2015 - 09:09 PM UTC
Connecticut, United States
Joined: November 02, 2003
KitMaker: 984 posts
Armorama: 846 posts
Posted: Monday, January 12, 2015 - 09:18 PM UTC
I like it. Good job.
Move on to the next kit. You now have this PzII to see if your skills improve.
Solothurn, Switzerland
Joined: August 06, 2014
KitMaker: 70 posts
Armorama: 69 posts
Posted: Monday, January 12, 2015 - 10:03 PM UTC
it's a fine job... by the way, tracks and turned barrel are the only things I consider good value, even for a cheaper kit.
Iowa, United States
Joined: May 12, 2014
KitMaker: 542 posts
Armorama: 539 posts
Posted: Monday, January 12, 2015 - 10:04 PM UTC
looks good to me; great weathering job; cool effects
North Carolina, United States
Joined: May 17, 2012
KitMaker: 1,980 posts
Armorama: 1,571 posts
Posted: Monday, January 12, 2015 - 10:56 PM UTC
Looks good, barring a couple items (1 fixable, 1 for future reference). I've added a pic for reference:

First, the headlights need lenses. At this point the easiest thing would be to just paint them silver. In the future you might think about drilling out the housing, paint the interior silver, and finish up by filling the housings with future, micro crystal clear, or some similar product.
The second item is the fender thickness. During construction it's easy to file the plastic thinner on the edge to show this.
Hope this helps.

Joined: May 12, 2014
KitMaker: 68 posts
Armorama: 58 posts
Posted: Monday, January 12, 2015 - 11:51 PM UTC
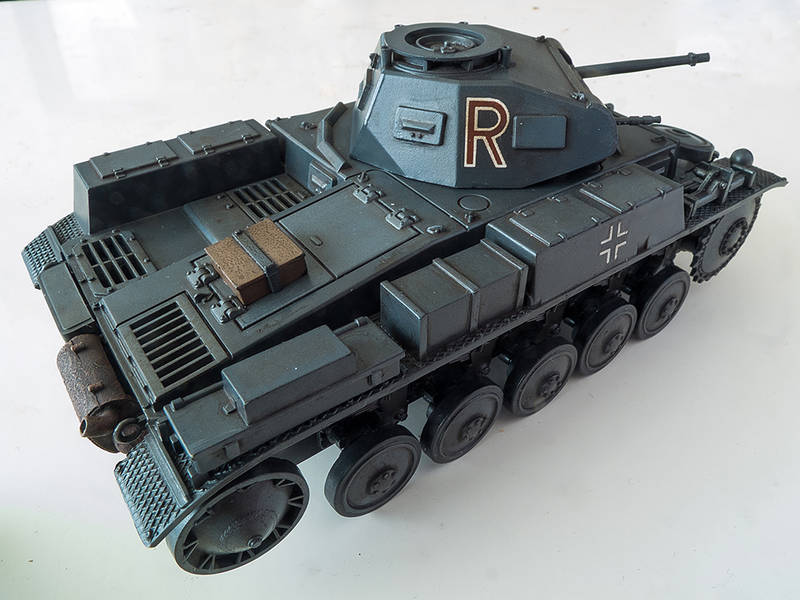
Thank you all for your kind remarks and advise, btw the backside:

Arkansas, United States
Joined: June 29, 2009
KitMaker: 11,610 posts
Armorama: 7,843 posts
Posted: Tuesday, January 13, 2015 - 03:39 AM UTC
Excellent finish! Don't sweat the small stuff, learn from it.
Ideals are peaceful. History is violent.
Texas, United States
Joined: April 07, 2009
KitMaker: 1,063 posts
Armorama: 1,049 posts
Posted: Tuesday, January 13, 2015 - 04:09 AM UTC
Welcome back to building! This site is the best for discussion, discovery, constructive aid, and just all-round good folks. Pretty nice results on this one. One item I'd have done, is to add a bit of metallic highlights to the cleats on the tracks. Look at the tracks on most any bulldozer and you'll see some shiny metal under all that dirt.
Even my pick-up is panzer grey.


