Auckland, New Zealand
Joined: February 03, 2014
KitMaker: 1,042 posts
Armorama: 871 posts
Posted: Monday, May 19, 2014 - 05:51 AM UTC
Parma, Italy
Joined: February 09, 2014
KitMaker: 241 posts
Armorama: 241 posts
Posted: Monday, May 19, 2014 - 06:55 AM UTC
Compliments for your work.You did a great job of detail!!!!
Cheers Luigi
Texas, United States
Joined: June 12, 2007
KitMaker: 1,866 posts
Armorama: 1,696 posts
Posted: Monday, May 19, 2014 - 06:59 AM UTC
Looks great! The louvers on the new engine deck are exceptionally nice.
Indiana, United States
Joined: June 10, 2005
KitMaker: 6,188 posts
Armorama: 5,960 posts
Posted: Monday, May 19, 2014 - 07:31 AM UTC
Yeah, same here! Lot's of detail!
It's beginning to be more fun LOOKING at all the builds instead of building myself!

Almost.

Jeff
Removed by original poster on 05/14/19 - 00:21:42 (GMT).
Auckland, New Zealand
Joined: February 03, 2014
KitMaker: 1,042 posts
Armorama: 871 posts
Posted: Monday, May 19, 2014 - 01:33 PM UTC
Thank you gentlemen

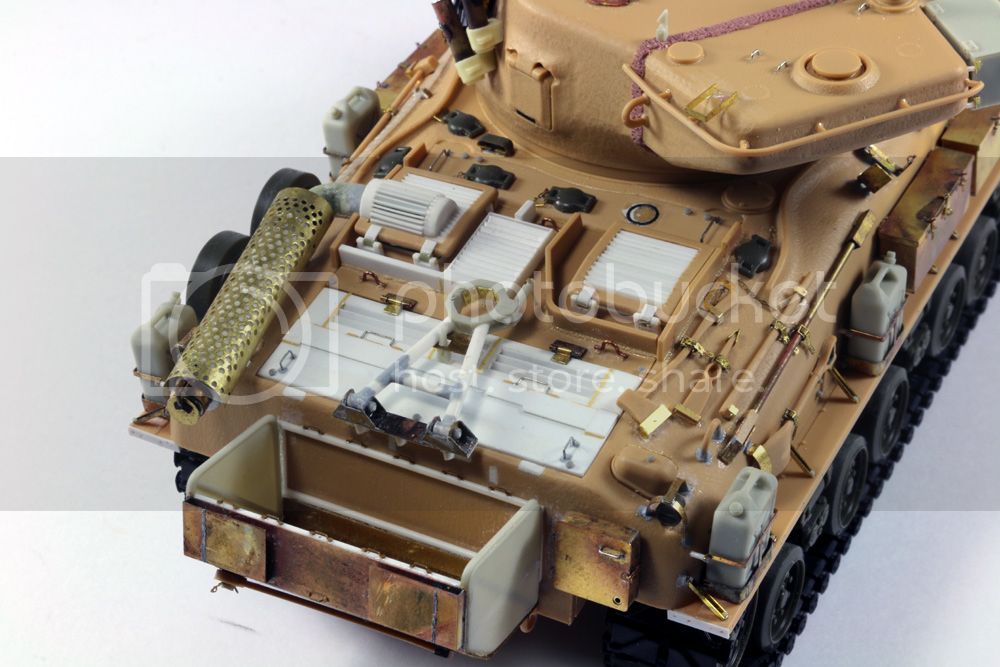
Matt - the exhaust was the fun part to get right. Especially the heat shield as I had nothing suitable in my spares box so had to drill out all those holes on some brass sheet

Took a while but was worth the effort

Gary
Auckland, New Zealand
Joined: February 03, 2014
KitMaker: 1,042 posts
Armorama: 871 posts
Posted: Monday, May 19, 2014 - 08:55 PM UTC
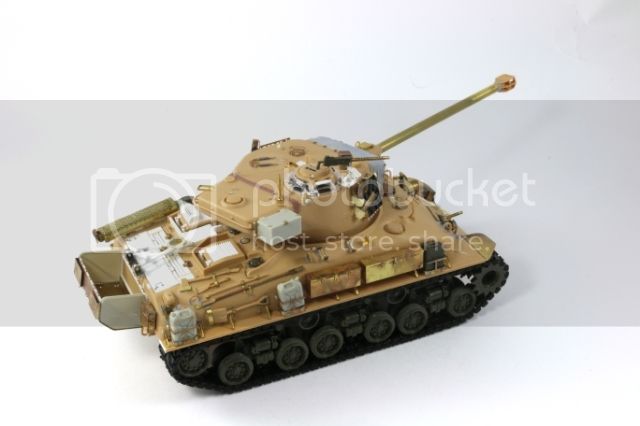
Managed to start laying down some primer this evening....


Gary
Georgia, United States
Joined: January 31, 2010
KitMaker: 2,191 posts
Armorama: 1,814 posts
Posted: Tuesday, May 20, 2014 - 01:30 AM UTC
Where did you get the perforated brass sheet for the exhaust heat shield?
Travel lock and rear bin look a bit like the Legends pieces?
Join AMPS.
http://www.amps-armor.org/ampssite
Auckland, New Zealand
Joined: February 03, 2014
KitMaker: 1,042 posts
Armorama: 871 posts
Posted: Tuesday, May 20, 2014 - 06:14 AM UTC
Jesse
As I mentioned above, the perforated brass is scratch built. I had, nor could I find anything suitable so had to drill out the holes to suit.
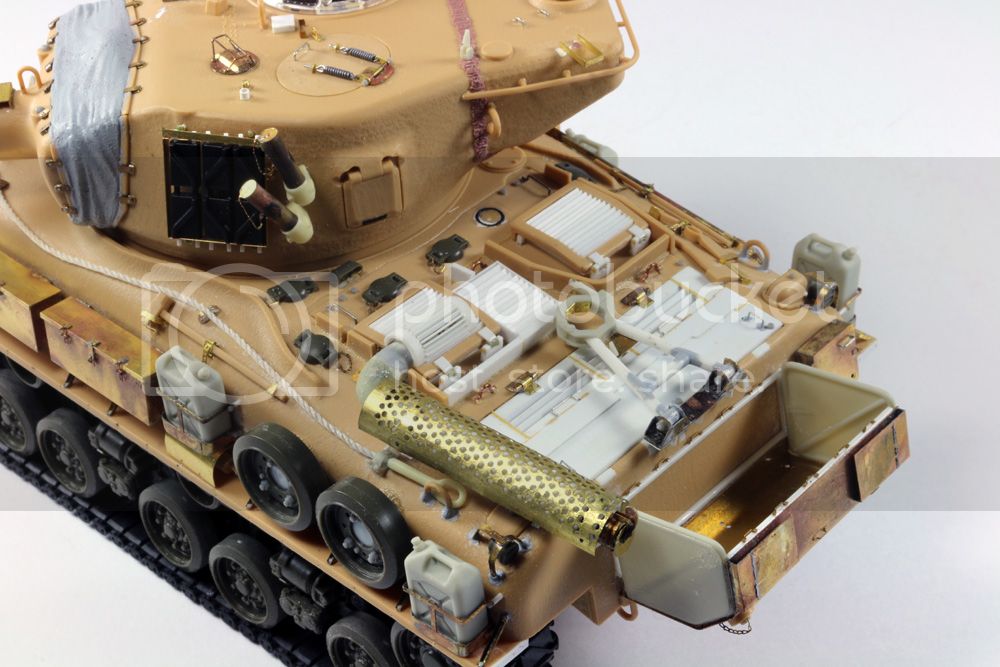
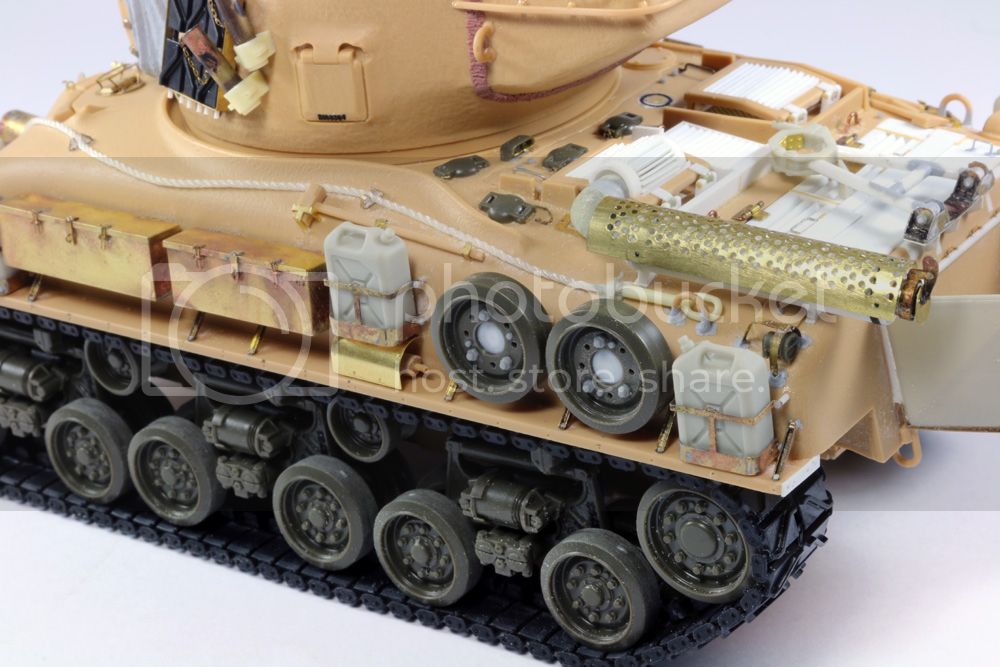
The clamp part of the travel lock is indeed from Legend with new styrene rod arms and Voyager PE mounting base. Stowage bin is mostly Legend - substituting the supplied brass rod for styrene.
Gary
New Jersey, United States
Joined: September 26, 2006
KitMaker: 857 posts
Armorama: 811 posts
Posted: Tuesday, May 20, 2014 - 06:52 AM UTC
That PE and scratch work was so nice its almost ashame you had to paint over it.
But I'm sure the end result though will be 10 times more beautiful!!
Wisconsin, United States
Joined: April 05, 2007
KitMaker: 2,023 posts
Armorama: 1,234 posts
Posted: Tuesday, May 20, 2014 - 07:06 AM UTC
WOW !!!! Thank you for sharing this awesome build !
On the bench :
A whole bunch of figures, Too many half built kits and a (gasp) wing thing
Removed by original poster on 05/14/19 - 00:22:07 (GMT).
Auckland, New Zealand
Joined: February 03, 2014
KitMaker: 1,042 posts
Armorama: 871 posts
Posted: Thursday, May 22, 2014 - 08:36 PM UTC
Thanks guys.
I only have a rudimentary painting guide for Chilean M51s which come with a Bison decal set. While the instructions describe colours, 'Sand' and 'Dark Khaki' have many, many connotations so I'm having to guess the best I can here.
After searching through my paint selection, I came up with these two colours which I feel will best represent what I'm after....

I'm certainly happy with the base colour at this stage....


Gary
Arkansas, United States
Joined: June 29, 2009
KitMaker: 11,610 posts
Armorama: 7,843 posts
Posted: Thursday, May 22, 2014 - 09:26 PM UTC
Ideals are peaceful. History is violent.
ColinEdm
 Associate Editor
Alberta, Canada
Joined: October 15, 2013
KitMaker: 1,355 posts
Armorama: 1,229 posts
Posted: Friday, May 23, 2014 - 02:21 AM UTC
The voices are back.....excellent....
California, United States
Joined: December 24, 2013
KitMaker: 20 posts
Armorama: 16 posts
Posted: Friday, May 23, 2014 - 03:23 AM UTC
That is one awesome build you did. Can't wait to see the finish product.
Auckland, New Zealand
Joined: February 03, 2014
KitMaker: 1,042 posts
Armorama: 871 posts
Posted: Friday, May 23, 2014 - 12:35 PM UTC
Auckland, New Zealand
Joined: February 03, 2014
KitMaker: 1,042 posts
Armorama: 871 posts
Posted: Friday, May 23, 2014 - 04:27 PM UTC
A splash more colour courtesy of Bison Decals....


Gary
Skåne, Sweden
Joined: May 14, 2010
KitMaker: 749 posts
Armorama: 743 posts
Posted: Friday, May 23, 2014 - 05:05 PM UTC
Fantastic build so far, Gary, super scratchbuilding.
I have the resin conversion for this M51 version, my fingers are itching to build it now.
Is the perforated cover for the exhaust custom etch, or have you used a standard etched plate cut to shape?
Auckland, New Zealand
Joined: February 03, 2014
KitMaker: 1,042 posts
Armorama: 871 posts
Posted: Saturday, May 24, 2014 - 12:05 PM UTC
Thanks Sven.
I bought a resin conversion kit too initially but wasn't really impressed at all with the parts so that's why I went down the scratch built route.
I mentioned earlier in this thread that the heat shield is made from thin brass sheet and the holes were drilled out individually. I had no suitable PE in my spares box and couldn't find anything proprietary so homemade was the only solution for me.
Gary
Auckland, New Zealand
Joined: February 03, 2014
KitMaker: 1,042 posts
Armorama: 871 posts
Posted: Saturday, May 24, 2014 - 05:51 PM UTC
So, some detail painting done today. Tools - handles are painted Vallejo Iraqi Sand and I then add Windsor and Newton Raw Sienna. After a few hours, the excess oil paint is 'dragged' off with a brush leaving the wood effect. Metal parts are painted metal.
Tow cable end received a coat of silver mixed with Lifecolor TSC 212 White Oxide while the cable itself received silver with a thinned gunmetal coat over the top.
Finally, for this stage, the entire vehicle received a coat of flat clear. This is to seal in the decals and prepare the surface for a filter - the Khaki Green has a slight sheen to it so wouldn't take the filter too well....


Gary
Removed by original poster on 05/14/19 - 00:22:36 (GMT).
Skåne, Sweden
Joined: May 14, 2010
KitMaker: 749 posts
Armorama: 743 posts
Posted: Monday, May 26, 2014 - 03:43 AM UTC
Quoted Text
Thanks Sven.
I bought a resin conversion kit too initially but wasn't really impressed at all with the parts so that's why I went down the scratch built route.
I mentioned earlier in this thread that the heat shield is made from thin brass sheet and the holes were drilled out individually. I had no suitable PE in my spares box and couldn't find anything proprietary so homemade was the only solution for me.
Gary
Oops, sorry for making you repeat (yet again) the info about the perforated cover, totally missed it in the earlier posts :-)
United States
Joined: August 14, 2008
KitMaker: 60 posts
Armorama: 59 posts
Posted: Wednesday, May 28, 2014 - 11:33 AM UTC
Excellent work!!! I assume that the perforated burn guard will be added back later. For what it's worth, the exhaust and guard are standard commercial truck parts, per my friend in Chile, Fernando Wilson. Looking forward to the finished version. I have one of these about 90% complete, and you've inspired me to finish it. :-)
Tom
United Kingdom
Joined: August 31, 2010
KitMaker: 365 posts
Armorama: 351 posts
Posted: Wednesday, May 28, 2014 - 11:49 AM UTC
One of the earlier posts mentioned an unimpressive resin conversion. I have the Greg Buechler Enterprises Chilean M51 and M50/M60 conversions and I think they look really good in the box and in Greg's photos. I know Greg has done his research. Haven't had a chance to start building either yet. Am waiting for his Argentinian Repotenciado (Firefly fitted with the M51's gun & new engine) conversion for my Tasca VC.