_GOTOBOTTOM
Figures
Military figures of all shapes and sizes.
Newbie here, first built and painted figure
92ndArmourDiv
Visit this Community
Alberta, Canada
Joined: May 25, 2014
KitMaker: 6 posts
Armorama: 6 posts
Posted: Saturday, May 24, 2014 - 04:20 PM UTC
Hello there,

I decided to dabble in figure painting (I get commission vehicles done but they never have crews/dioramas, looking to change that). Started off with the DML Barbarossa infantry, figured it would be straight forward.

My concerns mainly are getting the uniform details painted, de-glossing him (I have vallejo matt varnish on order) and any tips or tricks to avoid eye painting.

I tried applying a heavy wash in and around his eyes to create almost a B&W photo shadow but it only works under particular lighting.

Thoughts?


1stjaeger
Visit this Community
Wien, Austria
Joined: May 20, 2011
KitMaker: 1,744 posts
Armorama: 1,727 posts
Posted: Saturday, May 24, 2014 - 06:02 PM UTC


Hi there P (Peter or Paul or 3,1429..??)

first of all, welcome to the asylum! Wish you get as much fun out of it as we do!

Now, regarding the figure:

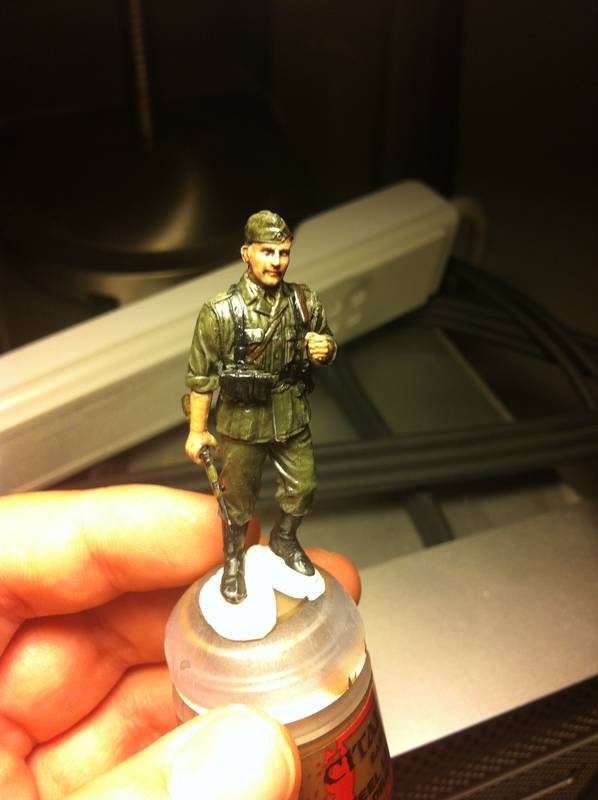
of course, the sheen is the main problem. I have the feeling that the lighting might be responsible for some of it (too strong, too direct (look at the bright spot on his right shoulder!), but you must get rid of all of it!

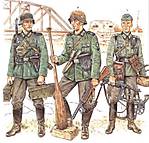
Get inspiration and help from the web o.s.! This is primordial!

I would personally suggest to tone the uniform coulour more towards the greyish side (if we talk 1940/1941). For that I send you a PM (check your inbox!)

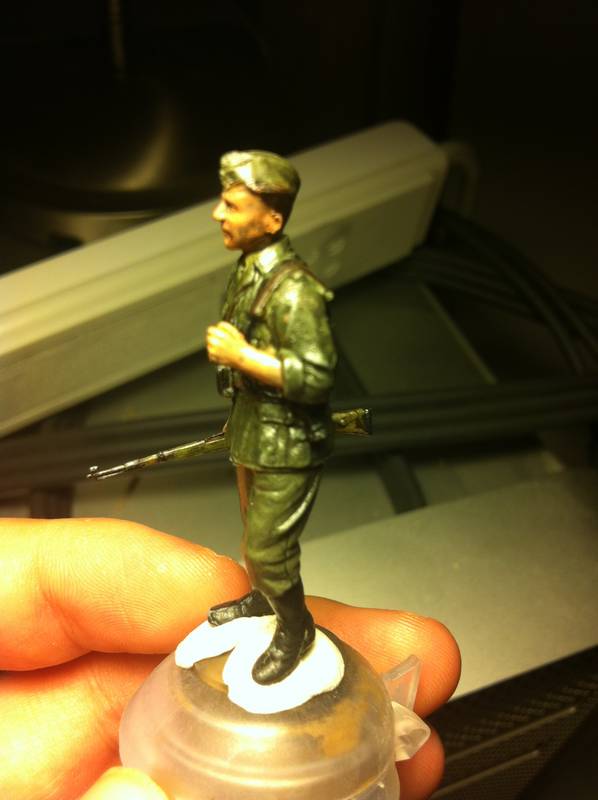
As far as eyes are concerned, I left a comment recently, based on Shep Paine's opinion that you hardly see more than a dark line when people squint in the sun.

Don't believe anything...go and verify! Look at people so far away they become "1/35"...and see for yourself!

I like the lower half of your face a lot!! Well done indeed!!

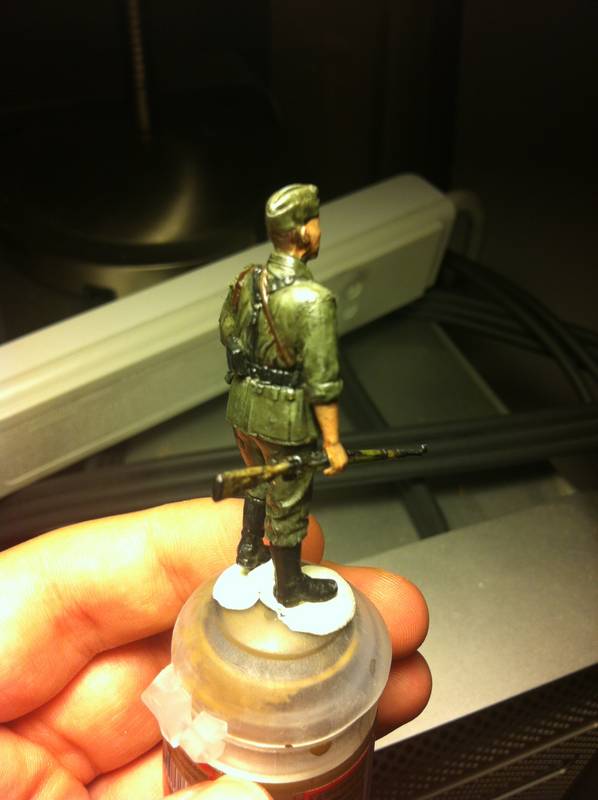
I don't know what is responsible for the odd colour on the K98 stock, but the greenish tint is not recommended!

And the K98 must have a Gewehrriemen!

When you do figures, there is more to it then just brush-strokes. Look at the right hip of the guy...and you see the molded on straps+buckles for the Brotbeutel....but the Brotbeutel is not there!!

It reminds me of a friend who put brilliantly executed and wonderfully realistic rust...on a M113!

You must know your topic! Otherwise you get into troubles!

No german soldier would have been without Muntaschen, Brotbeutel, water canteen, Essgeschirr, Spaten, Seitengewehr, Zeltbahn and respirator container. These elements were part of the minimum gear suspended on the Trageriemen (Y-webbing) and Koppel.

Hope that helps!

Cheers

Romain


Biggles2
Visit this Community
Quebec, Canada
Joined: January 01, 2004
KitMaker: 7,600 posts
Armorama: 6,110 posts
Posted: Sunday, May 25, 2014 - 03:10 AM UTC
Painting is better than the average figure I've seen here. But you might spend a little more time cleaning up mould lines. Sometimes they are so faint you can hardly see them, but after painting they jump right out and scream at you! Another easy improvement is to use a sharp blade and carefully under cut areas like collars, shoulder straps, belts and straps, and sleeves - anywhere there should be a definite separation between items of clothing. The reason for this is that the moulded separation between items has rounded corners - undercutting just slightly, leaves a cut mark you add shading to, to give more depth and definition. With a bit of work, a good plastic figure could look like a resin one.
92ndArmourDiv
Visit this Community
Alberta, Canada
Joined: May 25, 2014
KitMaker: 6 posts
Armorama: 6 posts
Posted: Sunday, May 25, 2014 - 04:53 AM UTC
Thanks for the replay Romain.

I intentionally left him without equipment so I could just practice on the uniform more.

As for the uniform, I used Vallejo German Field Grey, which is a green. It seems to match the boxart and some early unifroms:


I'll try and dry brush some grey onto him and see how that works.
Giovanni1508
Visit this Community
Napoli, Italy
Joined: April 17, 2014
KitMaker: 652 posts
Armorama: 600 posts
Posted: Sunday, May 25, 2014 - 10:42 AM UTC

Quoted Text

Thanks for the replay Romain.

I intentionally left him without equipment so I could just practice on the uniform more.

As for the uniform, I used Vallejo German Field Grey, which is a green. It seems to match the boxart and some early unifroms:


I'll try and dry brush some grey onto him and see how that works.


Dear P Fall,
First of all, welcome in this wonderful world of building / painting soldiers. Hope you will enjoy ! Just because you're dealing with wehrmacht soldier, let me say that quite often the box art is a very nice reference, but you should have your knowledge of uniform.

Please give a look to this picture, which is self explicative:


You're right about the feldbluse (feldgrau), but at early stage of the war, trousers are still steingrau.

Hope it helps

Regards

Giovanni
1stjaeger
Visit this Community
Wien, Austria
Joined: May 20, 2011
KitMaker: 1,744 posts
Armorama: 1,727 posts
Posted: Monday, May 26, 2014 - 01:05 AM UTC

Hi P,

colours are a real can of worms and I was reluctant to open it believe me!

Colours are also determined by so many factors...printing f.ex., fading, lighting, etc.

I tend to adopt the following rule as a rough guidance:

the colour should "look right", i.e. show what is commonly associated with the item.

So, if asked, you would perhaps "see" GIs or Brits in "warmer" colours than their german counterparts, bearing in mind that "grau" indeed means "grey".

In fact, this might not be 100% true.

Moreover, Giovanni is right in so far as trousers in early WW were "stone grey", so a common colour for both Rock and Hose would not really fit!

Cheers

Romain
 _GOTOTOP