_GOTOBOTTOM
Яusso-Soviэt Forum: WWII Soviet Armor
For discussions related to WW2 era Soviet armor.
Trumpeter KV-1 Small Turet
Armored76
Visit this Community
Bayern, Germany
Joined: September 30, 2013
KitMaker: 1,615 posts
Armorama: 1,500 posts
Posted: Saturday, June 28, 2014 - 09:00 AM UTC
Hey everyone,

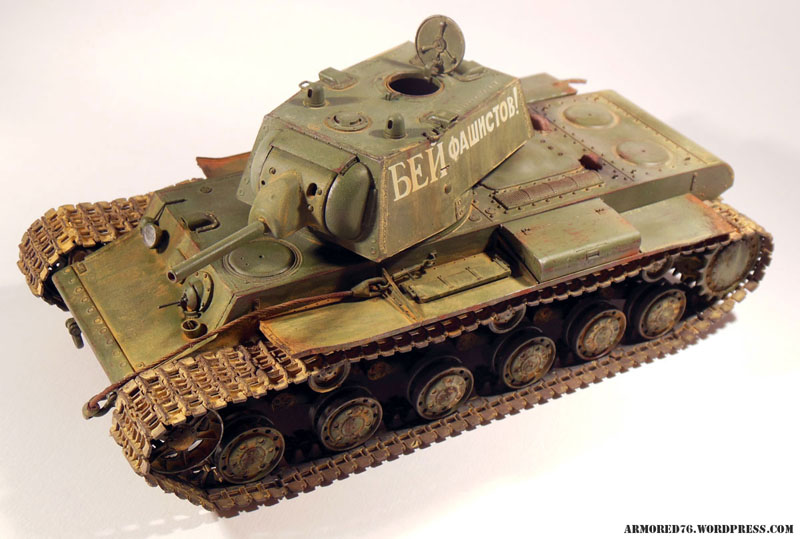
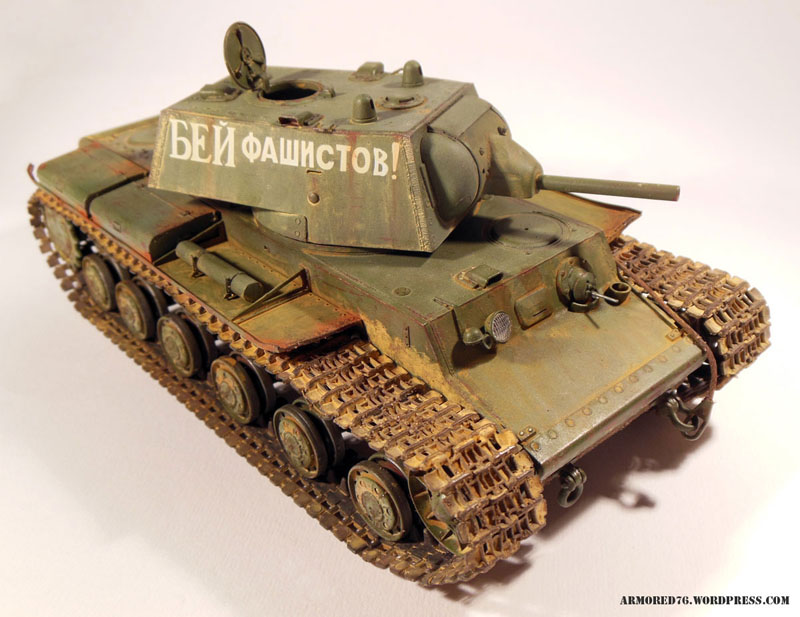
I wanted to share a few images of my finished KV-1 Small Turret.
Any feedback is greatly appreciated!
A build log and further images are available on my blog at http://armored76.wordpress.com/2014/06/28/building-trumpeters-135-kv-1-small-turret/.
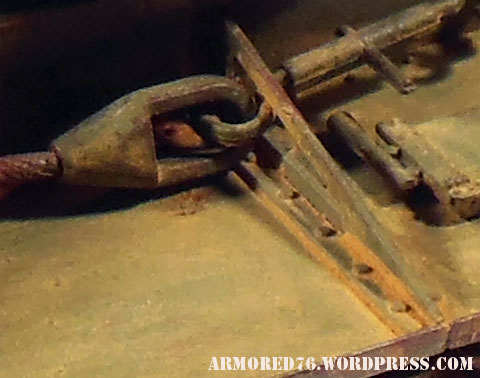
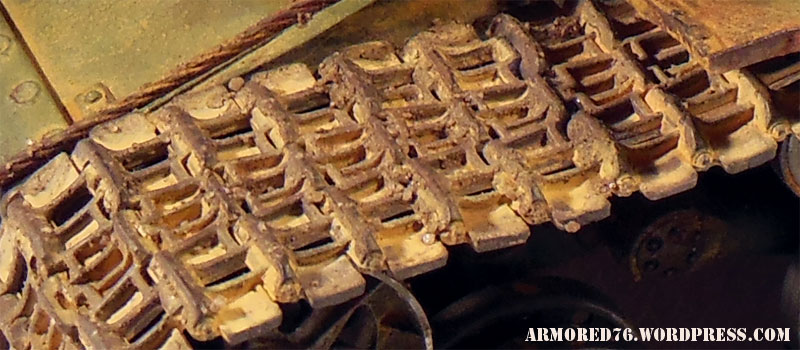
dvarettoni
Visit this Community
South Carolina, United States
Joined: September 28, 2005
KitMaker: 778 posts
Armorama: 763 posts
Posted: Saturday, June 28, 2014 - 09:15 AM UTC
nice work is this the Trumpeter kit ???
nice build
dave
Armored76
Visit this Community
Bayern, Germany
Joined: September 30, 2013
KitMaker: 1,615 posts
Armorama: 1,500 posts
Posted: Saturday, June 28, 2014 - 09:54 AM UTC
Thanks, Dave! Yes, it is the Trumpeter kit.
KoSprueOne
Visit this Community
Myanmar
Joined: March 05, 2004
KitMaker: 4,011 posts
Armorama: 1,498 posts
Posted: Sunday, June 29, 2014 - 02:59 AM UTC
Nice paint and weathering. Looks realistic


justsendit
Visit this Community
Colorado, United States
Joined: February 24, 2014
KitMaker: 3,033 posts
Armorama: 2,492 posts
Posted: Sunday, June 29, 2014 - 03:08 AM UTC
Hi Cristian,
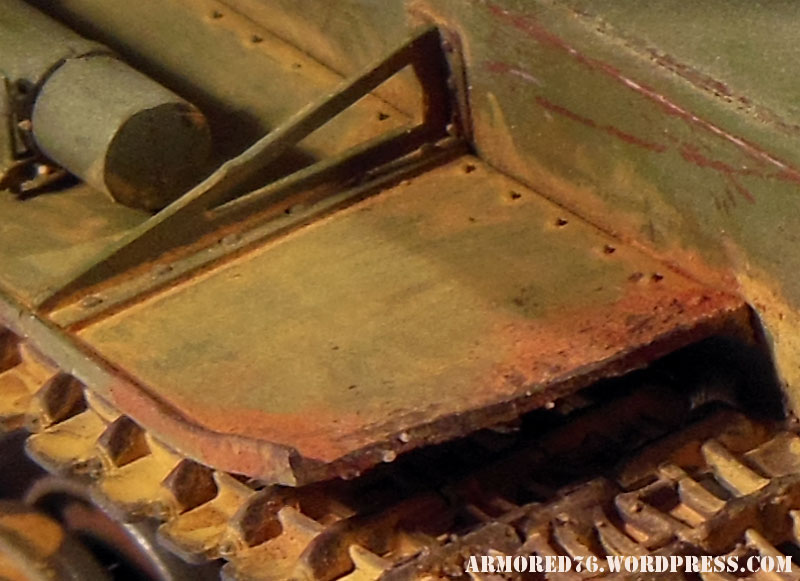
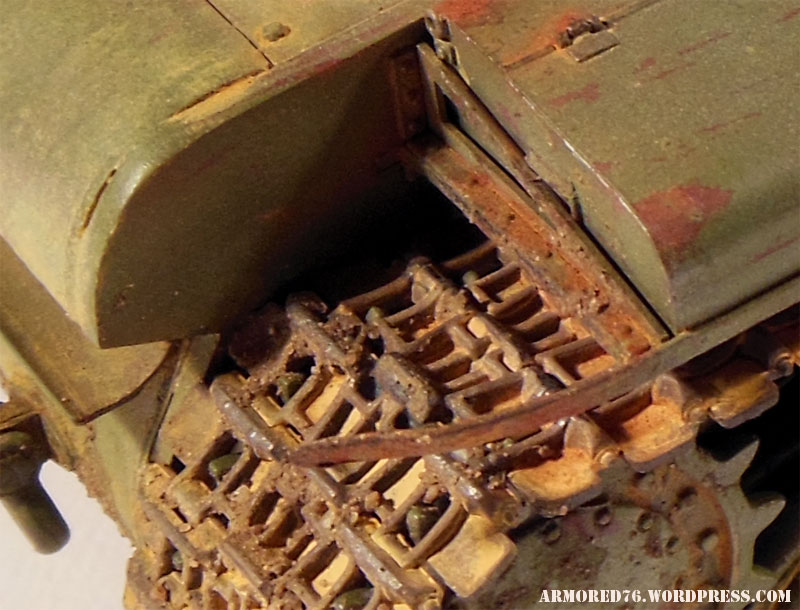
My focus went immediately to the tracks and damaged fenders -- outstanding job!

--mike
Vista85
Visit this Community
Bergamo, Italy
Joined: January 03, 2014
KitMaker: 118 posts
Armorama: 112 posts
Posted: Sunday, June 29, 2014 - 03:13 AM UTC
Very nice work and realistic rust effects!
retiredyank
Visit this Community
Arkansas, United States
Joined: June 29, 2009
KitMaker: 11,610 posts
Armorama: 7,843 posts
Posted: Sunday, June 29, 2014 - 04:01 AM UTC
The word "immaculate" comes to mind. Really over the top on weathering. Do you plan on adding a figure, to account for the open hatch and lack of interior?
Armored76
Visit this Community
Bayern, Germany
Joined: September 30, 2013
KitMaker: 1,615 posts
Armorama: 1,500 posts
Posted: Sunday, June 29, 2014 - 05:08 AM UTC
Thanks everyone for your kind words!

Actually, I left the hatch open hoping to add a commander figure, indeed. It's just that I haven't done any figure yet nor do I have any in my stash. Any suggestions?

Thanks again!
justsendit
Visit this Community
Colorado, United States
Joined: February 24, 2014
KitMaker: 3,033 posts
Armorama: 2,492 posts
Posted: Sunday, June 29, 2014 - 05:53 PM UTC

Quoted Text

Actually, I left the hatch open hoping to add a commander figure, indeed. It's just that I haven't done any figure yet nor do I have any in my stash. Any suggestions?


Here's something a little different:
MasterBox: Bail Out! Soviet Tankmen Kursk 1943
http://www.scalehobbyist.com/catagories/Scale_Figures/bail-out-soviet-tankmen-kursk-1943/MBL00003532/product.php?s=0&t=5&u=0&micr=122&pg=1&ppp=48&sb=stocknumber&so=a&era=6&ct=6&sc=35

--mike
Sandy
Visit this Community
England - East Anglia, United Kingdom
Joined: June 24, 2002
KitMaker: 628 posts
Armorama: 405 posts
Posted: Sunday, June 29, 2014 - 07:51 PM UTC
Hi I like what I see , very good on the weathering of the whole tank job well done cheers ian
Armored76
Visit this Community
Bayern, Germany
Joined: September 30, 2013
KitMaker: 1,615 posts
Armorama: 1,500 posts
Posted: Sunday, June 29, 2014 - 11:44 PM UTC
Thank you!

That kit is indeed something a bit more unusual. I'll bookmark it for my next models in case I'll decide to built a freshly hit vehicle. Thanks for sharing!
justsendit
Visit this Community
Colorado, United States
Joined: February 24, 2014
KitMaker: 3,033 posts
Armorama: 2,492 posts
Posted: Monday, June 30, 2014 - 03:51 AM UTC

Quoted Text

That kit is indeed something a bit more unusual. I'll bookmark it for my next models in case I'll decide to built a freshly hit vehicle. Thanks for sharing!


I was thinking you could use the tanker climbing out of the turret instead of the usual standing, posing, pointing tanker. Remove the pistol if needed and save the other three figures for later.

--mike
JPTRR
Staff MemberManaging Editor
RAILROAD MODELING
#051
Visit this Community
Tennessee, United States
Joined: December 21, 2002
KitMaker: 7,772 posts
Armorama: 2,447 posts
Posted: Monday, June 30, 2014 - 04:14 AM UTC
Cristian,

Excellent work! I appreciate how the dust looks days old yet also simulates moisture and vibration (at least to me). And your tracks look like they weight a ton - nice dirty metal effects.
alewar
Visit this Community
Canelones, Uruguay
Joined: December 27, 2006
KitMaker: 773 posts
Armorama: 765 posts
Posted: Monday, June 30, 2014 - 04:18 AM UTC
Nice work!

One of my future works, someday!

Regards

Alvaro
Armored76
Visit this Community
Bayern, Germany
Joined: September 30, 2013
KitMaker: 1,615 posts
Armorama: 1,500 posts
Posted: Monday, June 30, 2014 - 05:08 AM UTC
What a great idea, Mike!!! One thing, tough... The kit name says Kursk 1943 while my KV-1 is 1941. Are the uniforms still representative/matching?

@Frederick: The tracks are indeed very nicely molded. One of the main reasons for going for them instead of the rubber ones. Plus the fact that I'm never able to melt/glue rubber track ends together

@Alvaro: The Trumpeter kit has very nice details OOB at an unbeatable price.
Armored76
Visit this Community
Bayern, Germany
Joined: September 30, 2013
KitMaker: 1,615 posts
Armorama: 1,500 posts
Posted: Monday, June 30, 2014 - 06:22 AM UTC
I also laid my eyes on this one: http://www.tamiyausa.com/items/plastic-model-series-20/1-35-scale-military-miniature-12000/russian-army-tank-crew-35214
justsendit
Visit this Community
Colorado, United States
Joined: February 24, 2014
KitMaker: 3,033 posts
Armorama: 2,492 posts
Posted: Monday, June 30, 2014 - 06:40 AM UTC

Quoted Text

The kit name says Kursk 1943 while my KV-1 is 1941. Are the uniforms still representative/matching?


I've found that many companies design their figures with some leeway in mind. Paint color selection may actually be a very simple answer. However, I am no expert on timelines (research required) I'm certain that somebody in the forum has a quick answer.


MHO: A little too "posed" -- my personal taste. However, if "you" like them, go for it. Whatever you decide, I'm certain the end result will be great!

--mike
PantherF
Visit this Community
Indiana, United States
Joined: June 10, 2005
KitMaker: 6,188 posts
Armorama: 5,960 posts
Posted: Tuesday, July 01, 2014 - 02:11 AM UTC
I like the use of rust and rusty scratches... any secrets you want to share on how this was done?


I can't help it but some of those figures look as if they are about to start break dancing! LOL At least they're not like what we had in the 70's!


Jeff
Armored76
Visit this Community
Bayern, Germany
Joined: September 30, 2013
KitMaker: 1,615 posts
Armorama: 1,500 posts
Posted: Tuesday, July 01, 2014 - 07:11 AM UTC
The scratch and rust effects are no magic, really

For the rust effects, the steps are:

  • apply Vallejo German red Brown primer (or any other preferably dark, rust color)
  • apply a not-too-thin-not-too-thick layer of hairspray. I always apply this with the airbrush and not directly from the spray for better control
  • apply a thin layer of Vallejo Russian Green
  • when all dry, apply a thin film of warm water over the green
  • let it soak for about 20 seconds
  • apply scratches with a toothpick (thin lines) or a stiff brush (larger scratches)
  • let it dry before further handling to avoid unwanted scratches


The next step was applying the rust streaking marks:

  • protect the layer(s) of color with either dull or gloss ACRYLIC (VERY important!) clear coat
  • put some burnt sienna oil paint on a piece of cardboard so it soaks out the oils preventing it from being glossy when applied
  • mix a small amount of thinner if needed to make the oil more "creamy"
  • apply a small dot preferably over a larger rusty spot on the edges
  • using a thinner-damp brush, streak the paint vertically trying to thin the streak width towards the bottom
  • if not happy with the result, remove using a bit more thinner
  • protect with a clear coat


The layering rust is done with pigments (Vallejo burnt sienna in my case) using these steps:

  • apply a thin, irregular layer of dull coat with a brush
  • apply the dry pigments using a large brush drumming off the excess
  • let dry for a couple of minutes then apply another thin, irregular layer of dull coat ON TOP of the previous layer of pigments followed by pigments again
  • repeat step above until happy


For the rust dusting:

  • apply dry pigments on the surface
  • rub with a large, soft brush
  • remove excess that is not sticking
  • fix with pigment fixer, alcohol or clear coat


That's all! Hope this helps!
Removed by original poster on 07/01/14 - 19:32:10 (GMT).
Armored76
Visit this Community
Bayern, Germany
Joined: September 30, 2013
KitMaker: 1,615 posts
Armorama: 1,500 posts
Posted: Tuesday, July 01, 2014 - 07:36 AM UTC
I have also added this description to my blog with some images picturing the achieved results: How to: Rust Effects
MrNeil
Visit this Community
New Jersey, United States
Joined: November 01, 2005
KitMaker: 266 posts
Armorama: 262 posts
Posted: Tuesday, July 01, 2014 - 02:16 PM UTC
Hi Christian,

First of all, congratulations on a beautiful model. As others have said, your weathering effects are exemplary.

I'm going to get crazily nit-picky on the combination of production features in your model, and let me say that is by no means a criticism of your modeling, but simply a statement for the record...

You have the KV mounting the L-11 gun, which occurred until the end of 1940. You also have two stowage boxes on the right-hand fender and one on the left-hand fender, which was a configuration adopted in mid- to late-January 1941. At the same time, the saw and it's mounting bracket were moved to the inside of the rearmost stowage box on the right-hand fender.

So for historical accuracy and an 'out of the factory' vehicle, you could have an L-11 armed KV with two stowage boxes on the left-hand fender, one on the right-hand fender and the saw bracket on the left-hand fender, or an F-32 armed KV with two stowage boxes on the right-hand fender, one on the left-hand fender and no saw/bracket.

Of course, there were loads of rebuilds so there's nothing to say that a KV couldn't have existed as you depict it...and it's a damn beautiful model so let's all just enjoy it

Neil
alewar
Visit this Community
Canelones, Uruguay
Joined: December 27, 2006
KitMaker: 773 posts
Armorama: 765 posts
Posted: Tuesday, July 01, 2014 - 02:54 PM UTC
Cristian, thanks for the link and explanation

Regards from the South

Alvaro
Armored76
Visit this Community
Bayern, Germany
Joined: September 30, 2013
KitMaker: 1,615 posts
Armorama: 1,500 posts
Posted: Wednesday, July 02, 2014 - 06:16 AM UTC
Thank you, Neil for taking the time to point this out! This is the kind of detail I would probably never be able to get on my own It's greatly appreciated!
 _GOTOTOP