I've been working on converting the 1/48th Gasoline M1A2 resin kit into a USMC M1A1HC and finally think it's finished. Ok, so there are things I'd like to improve and adjust (aren't there always?) but for now I'm calling it done. It's a gaming model and hopefully it'll get a run out on the table next weekend at Wellingtons Call to Arms convention.
It's brush finished with Humbrol enamels and GW acrylics and I used oils for the lining and weathering. Pigments are MIG and homemade and everything's sealed with Testors Dullcoat. Markings are hand painted and from the spares box and yeah I know one of the Chevrons is back to front, that's what happens when you're trying to finish it at 11.30pm ..... it's a bit tricky to fix but I might attack it at a later stage as I have a couple more to build also.
cnc welcome .........
cheers
Brent
Turret details .....
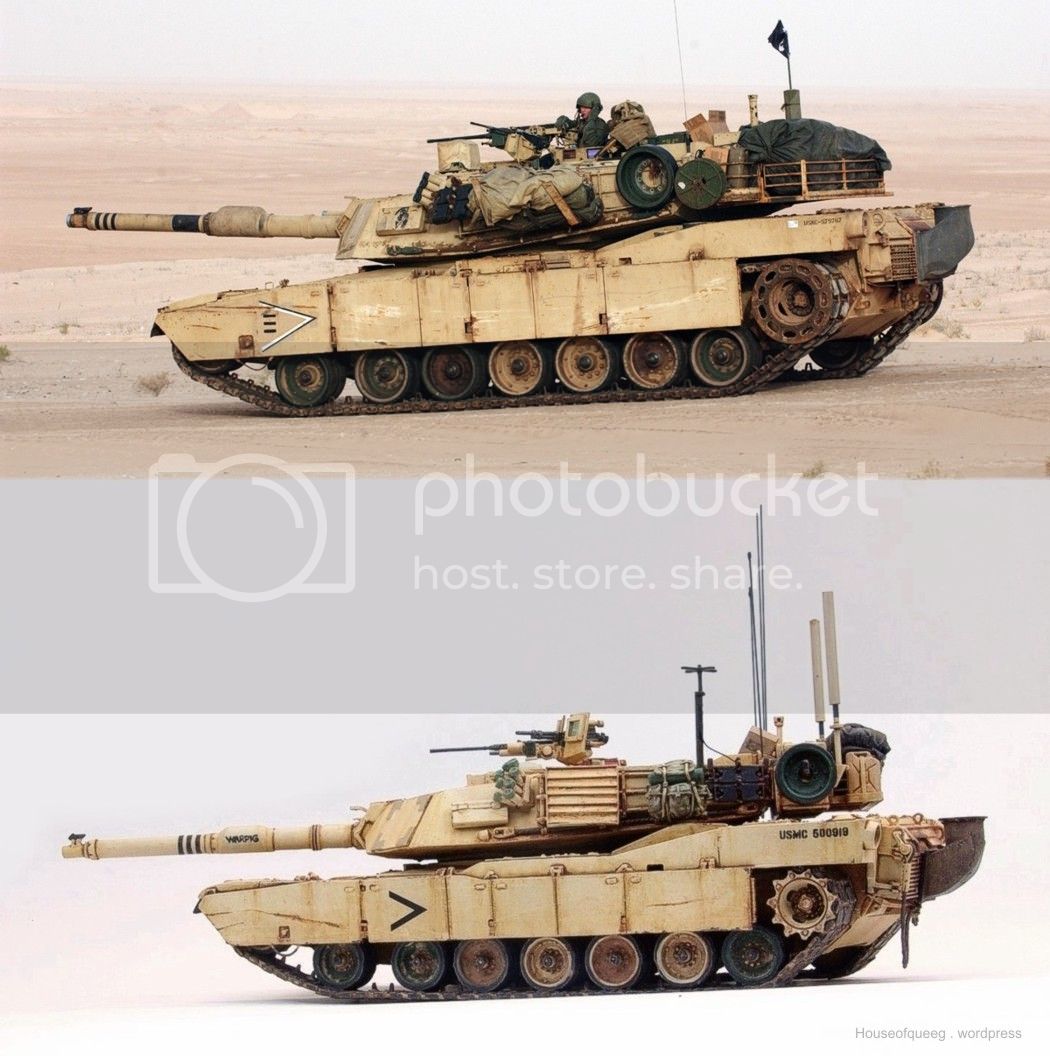
And here's the tank that inspired the finish with a side shot of mine, not quite the same but pretty close I think .......
What I started with and some mods later......
Hosted by Darren Baker
1/48th M1A1 finished
DaGreatQueeg
Napier, New Zealand
Joined: August 01, 2005
KitMaker: 1,049 posts
Armorama: 841 posts
Joined: August 01, 2005
KitMaker: 1,049 posts
Armorama: 841 posts
Posted: Saturday, August 09, 2014 - 10:39 AM UTC
justsendit
Colorado, United States
Joined: February 24, 2014
KitMaker: 3,033 posts
Armorama: 2,492 posts
Joined: February 24, 2014
KitMaker: 3,033 posts
Armorama: 2,492 posts
Posted: Saturday, August 09, 2014 - 11:48 AM UTC
Very close comparison to the 1:1 image! Nice work!
--mike
--mike
Posted: Saturday, August 09, 2014 - 12:11 PM UTC
Brent,
Awesome quarterscale Abrams! That figure is top-notch, too.
DaGreatQueeg
Napier, New Zealand
Joined: August 01, 2005
KitMaker: 1,049 posts
Armorama: 841 posts
Joined: August 01, 2005
KitMaker: 1,049 posts
Armorama: 841 posts
Posted: Saturday, August 09, 2014 - 12:43 PM UTC
Tojo72
North Carolina, United States
Joined: June 06, 2006
KitMaker: 4,691 posts
Armorama: 3,509 posts
Joined: June 06, 2006
KitMaker: 4,691 posts
Armorama: 3,509 posts
Posted: Saturday, August 09, 2014 - 12:57 PM UTC
Fantastic work on the smaller scale,great looking figures also
majjanelson
South Carolina, United States
Joined: December 14, 2006
KitMaker: 1,355 posts
Armorama: 979 posts
Joined: December 14, 2006
KitMaker: 1,355 posts
Armorama: 979 posts
Posted: Saturday, August 09, 2014 - 01:28 PM UTC
Brent,
Your Quarter Scale Abrams came out VERY nice. The added details really set it off, and the paint and weathering match your reference photo quite well.
Unfortunately, the incomplete top run of the tracks at the Drive Sprockets is pretty noticeable. That's more of a shortcoming of the kit, though.
Otherwise, well done!
DaGreatQueeg
Napier, New Zealand
Joined: August 01, 2005
KitMaker: 1,049 posts
Armorama: 841 posts
Joined: August 01, 2005
KitMaker: 1,049 posts
Armorama: 841 posts
Posted: Saturday, August 09, 2014 - 04:39 PM UTC
Quoted Text
Brent,
Unfortunately, the incomplete top run of the tracks at the Drive Sprockets is pretty noticeable. That's more of a shortcoming of the kit, though.
Otherwise, well done!
Thnx Jeff, appreciate the CC. They're on my tidy up list but I'm rushing a bit now as I have three vehicles to finish before next Thursday. A poor excuse I know lol. The plan is to drill and pin plasticard blocks so the edges are visable. I wanted cut one of the front guards off too but with no track underneath I would have had to try and cast some, which meant too steep a learning curve .....
cheers
Brent
majjanelson
South Carolina, United States
Joined: December 14, 2006
KitMaker: 1,355 posts
Armorama: 979 posts
Joined: December 14, 2006
KitMaker: 1,355 posts
Armorama: 979 posts
Posted: Wednesday, August 13, 2014 - 04:49 AM UTC
Brent,
You could use Green Stuff, Milliput or such to make a squash mold of the track end connectors. Once you got about a dozen good "cast" end connectors, you could add them to your plastic blocks to create the missing track sections.
Just a suggestion.
You could use Green Stuff, Milliput or such to make a squash mold of the track end connectors. Once you got about a dozen good "cast" end connectors, you could add them to your plastic blocks to create the missing track sections.
Just a suggestion.
DaGreatQueeg
Napier, New Zealand
Joined: August 01, 2005
KitMaker: 1,049 posts
Armorama: 841 posts
Joined: August 01, 2005
KitMaker: 1,049 posts
Armorama: 841 posts
Posted: Wednesday, August 13, 2014 - 10:18 AM UTC
Yeah unfortunately my squash moulding ability is zero. I originally had the idea to make track sections so I could remove one of the front guards so I tried making press moulded wheels. Just couldn't get the detail into the centre of the wheels so in the end brought more from Gasoline ..... wish I could mould as it would be so useful.
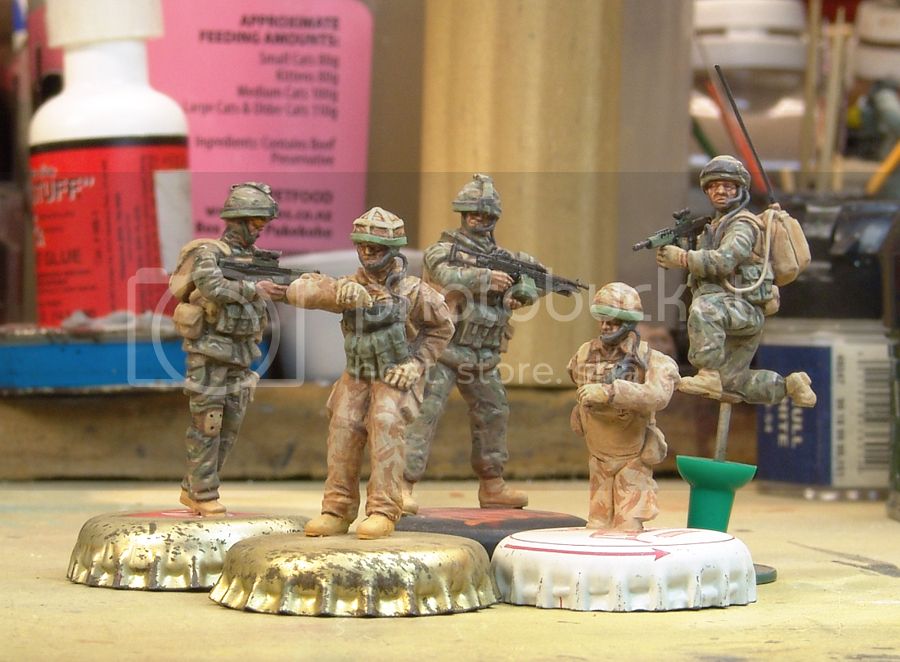
I'll figure something out. Here's the Abrams in with the other finished vehicles, got the last bits n pieces finished about 11pm last night. More pics when I get back from the convection ......
cheers
Brent
I'll figure something out. Here's the Abrams in with the other finished vehicles, got the last bits n pieces finished about 11pm last night. More pics when I get back from the convection ......
cheers
Brent