_GOTOBOTTOM
Figures
Military figures of all shapes and sizes.
Jeff Shiu SS Untersturmfuhrer Western Front 1
Rompy77
Visit this Community
Singapore / 新加坡
Joined: December 07, 2013
KitMaker: 97 posts
Armorama: 91 posts
Posted: Saturday, August 30, 2014 - 06:29 PM UTC
The next figure i am working on Starting out on the leather trench coat

All_You_Can_Kit
Visit this Community
Jakarta Raya, Indonesia
Joined: August 22, 2012
KitMaker: 599 posts
Armorama: 527 posts
Posted: Saturday, August 30, 2014 - 09:43 PM UTC
Your basic painting is very excellent, especially on the flesh! Can't hardly wait for the finished one ^^
Rompy77
Visit this Community
Singapore / 新加坡
Joined: December 07, 2013
KitMaker: 97 posts
Armorama: 91 posts
Posted: Sunday, September 07, 2014 - 12:38 PM UTC
WIP shot of the leather jacket.

Maki
Staff MemberSenior Editor
ARMORAMA
Visit this Community
Croatia Hrvatska
Joined: February 13, 2002
KitMaker: 5,579 posts
Armorama: 2,988 posts
Posted: Sunday, September 07, 2014 - 06:52 PM UTC
Nice! It would be great to hear how did you paint the leather.

Mario
Rompy77
Visit this Community
Singapore / 新加坡
Joined: December 07, 2013
KitMaker: 97 posts
Armorama: 91 posts
Posted: Wednesday, September 10, 2014 - 12:10 PM UTC

Quoted Text

Nice! It would be great to hear how did you paint the leather.

Mario


Hi Mario,

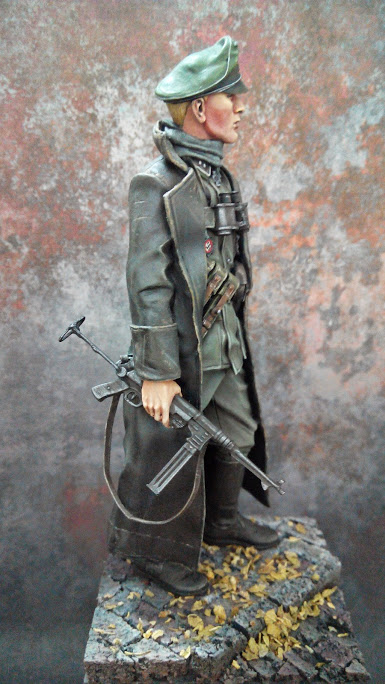
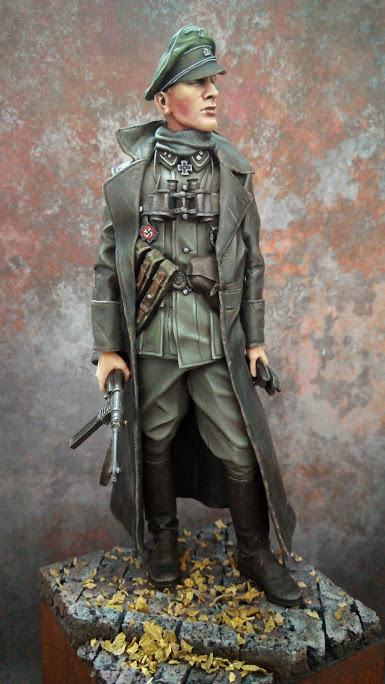
I extracted the following from my blog and attached a more recent photo. Hope this helps

URL : 
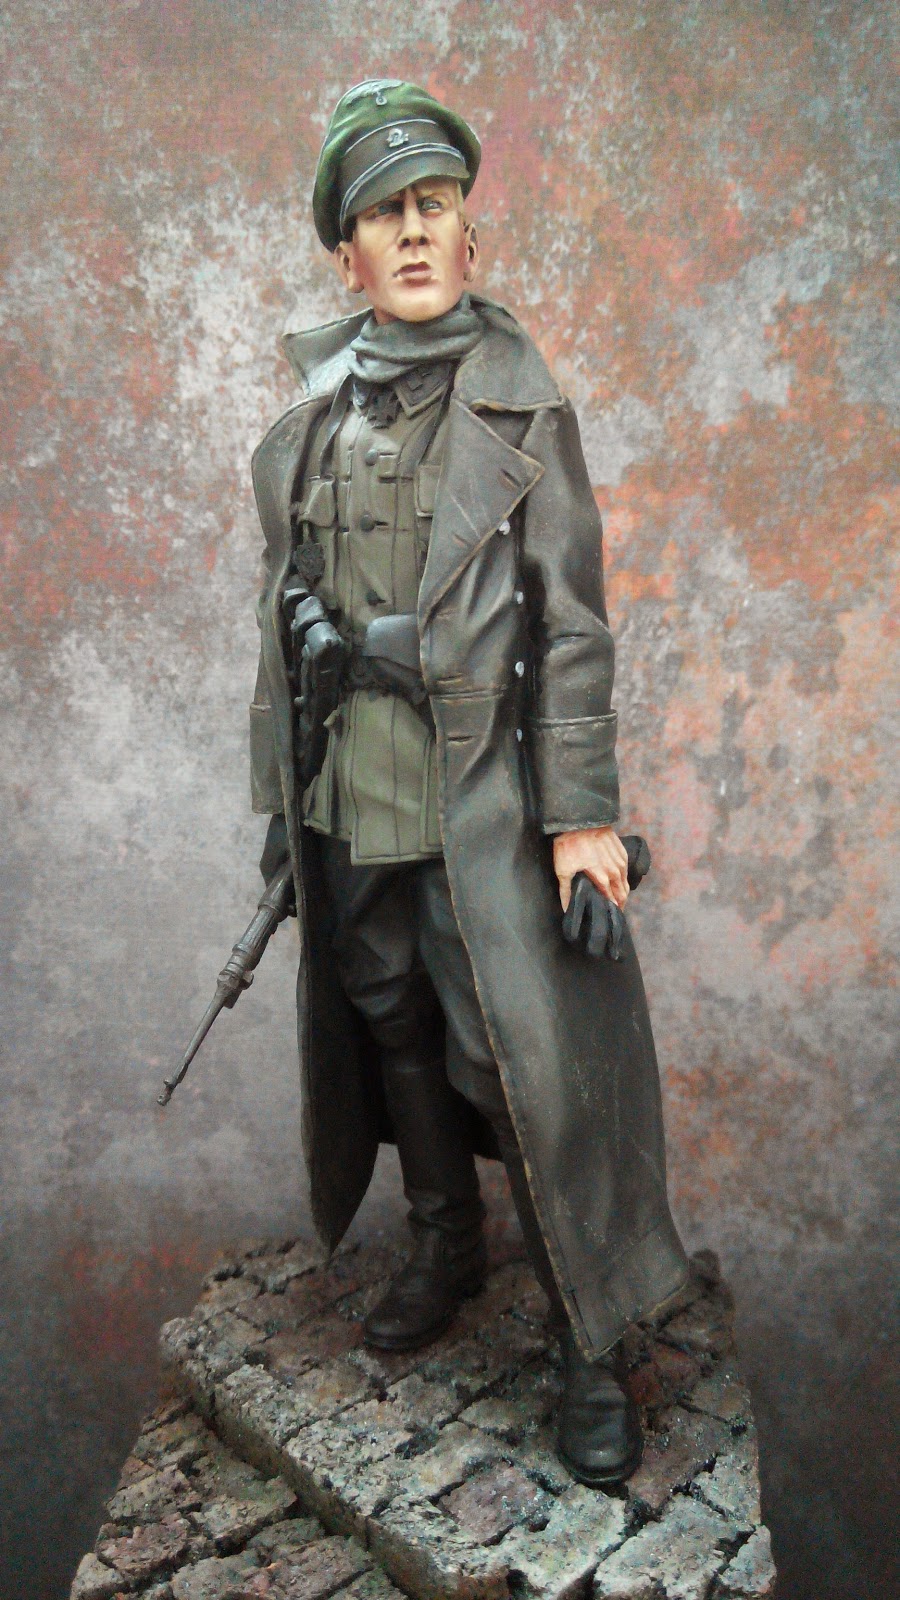
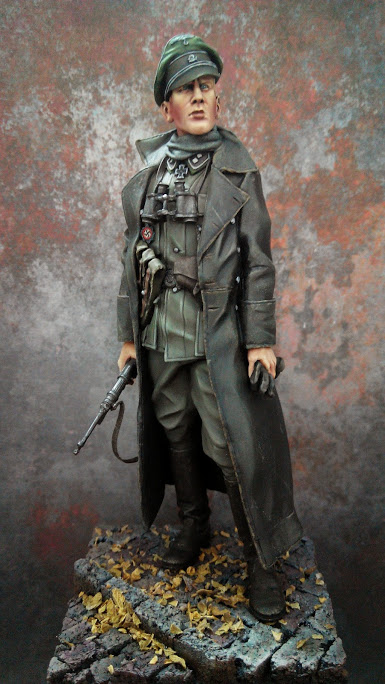
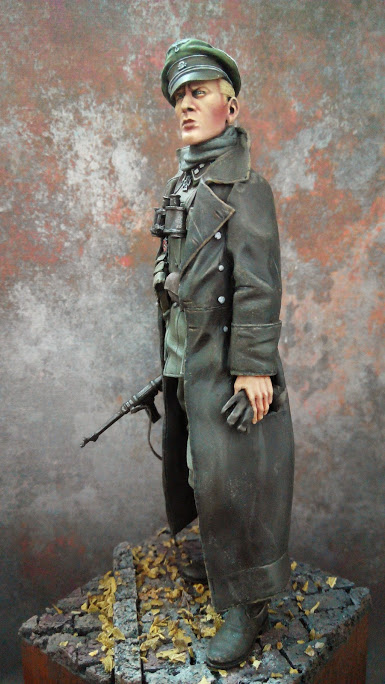
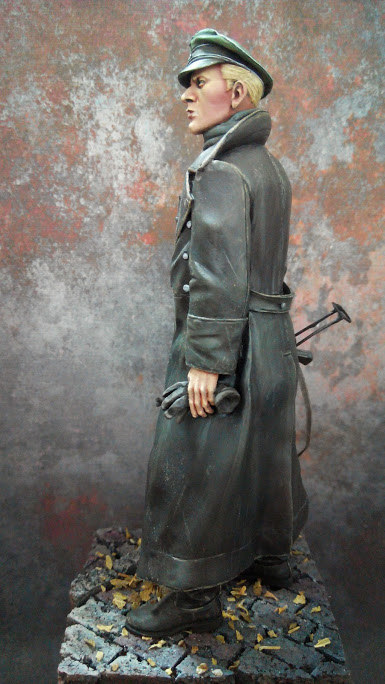
http://rompy77.blogspot.com/2014/09/wip-2-jeff-shiu-ss-untersturmfuhrer.html

Painting the black leather trenchcoat on the subject is a trial and error process.

Initially I started out with a Prussian Blue + Burnt Sienna base. However this was too blue for my likely and a think coat of Burnt Umber was painted over. The highlights on the trenchcoat was picked out by light drybushing with a mixture of Yellow Orche & Burnt Umber. (Buff works as well). This helped me to visualise the fall of light and identify the subsequent areas I want to empahsise. Matt Black was painted into the shadow areas to give it depth.

Given the limited range of colours to work with, the weathering effects of trenchcoat gave it an addition dimension to an otherwise rather monotone area. It also allowed additional colours to be introduced. (Burnt Sienna, Yellow Orche, Fawn etc...)

Drawing on references, emphasis was given to the edges, joints and contact areas of the trenchcoat. Scratches were also introduced for a worn look.

Maki
Staff MemberSenior Editor
ARMORAMA
Visit this Community
Croatia Hrvatska
Joined: February 13, 2002
KitMaker: 5,579 posts
Armorama: 2,988 posts
Posted: Wednesday, September 10, 2014 - 09:51 PM UTC
Thanks for the explanation, the results are very impressive.

Mario
Rompy77
Visit this Community
Singapore / 新加坡
Joined: December 07, 2013
KitMaker: 97 posts
Armorama: 91 posts
Posted: Sunday, September 14, 2014 - 01:07 AM UTC
about 80% done

easyco69
Visit this Community
Ontario, Canada
Joined: November 03, 2012
KitMaker: 2,275 posts
Armorama: 2,233 posts
Posted: Sunday, September 14, 2014 - 01:21 AM UTC
That is MINT.
Rompy77
Visit this Community
Singapore / 新加坡
Joined: December 07, 2013
KitMaker: 97 posts
Armorama: 91 posts
Posted: Monday, September 15, 2014 - 10:01 PM UTC
Hi all,

Here are photos of the completed figure


 _GOTOTOP