_GOTOBOTTOM
Яusso-Soviэt Forum
Russian or Soviet vehicles/armor modeling forum.
Xact Scale Models Gaz Tiger Russian Jeep
adampolo13
Visit this Community
Rhode Island, United States
Joined: July 30, 2013
KitMaker: 43 posts
Armorama: 43 posts
Posted: Wednesday, October 01, 2014 - 10:39 AM UTC
Hi guys,

So it's been a little while since I actually started a build blog here and thought it was about time I did so. Up for the challenge, I've taken on Xact Scale Models Gaz Tiger Russian Jeep. I've already done a quick in-box review of the kit here on Armorama.
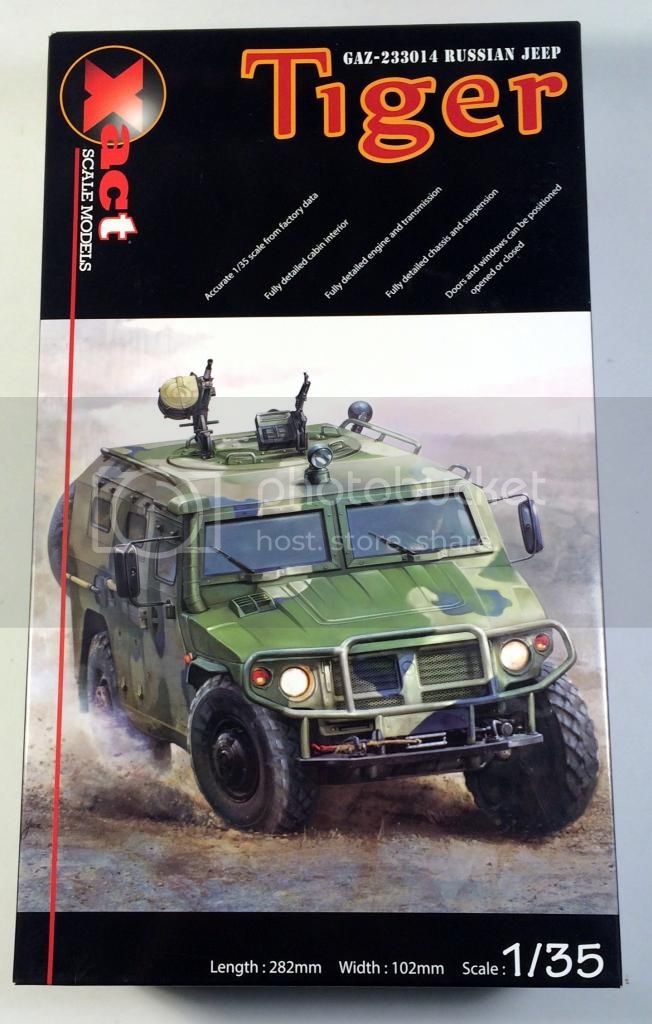


There are plenty of parts in the box...
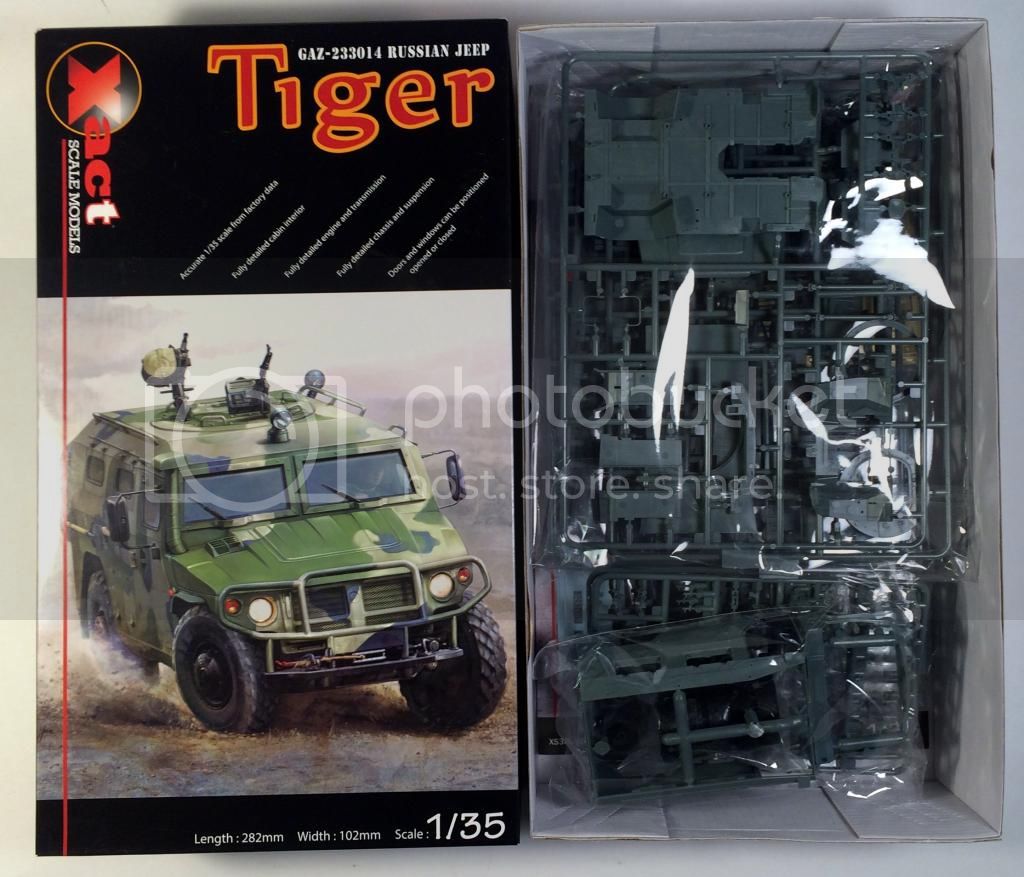
 photo Tiger2_zps51e81a86.jpg

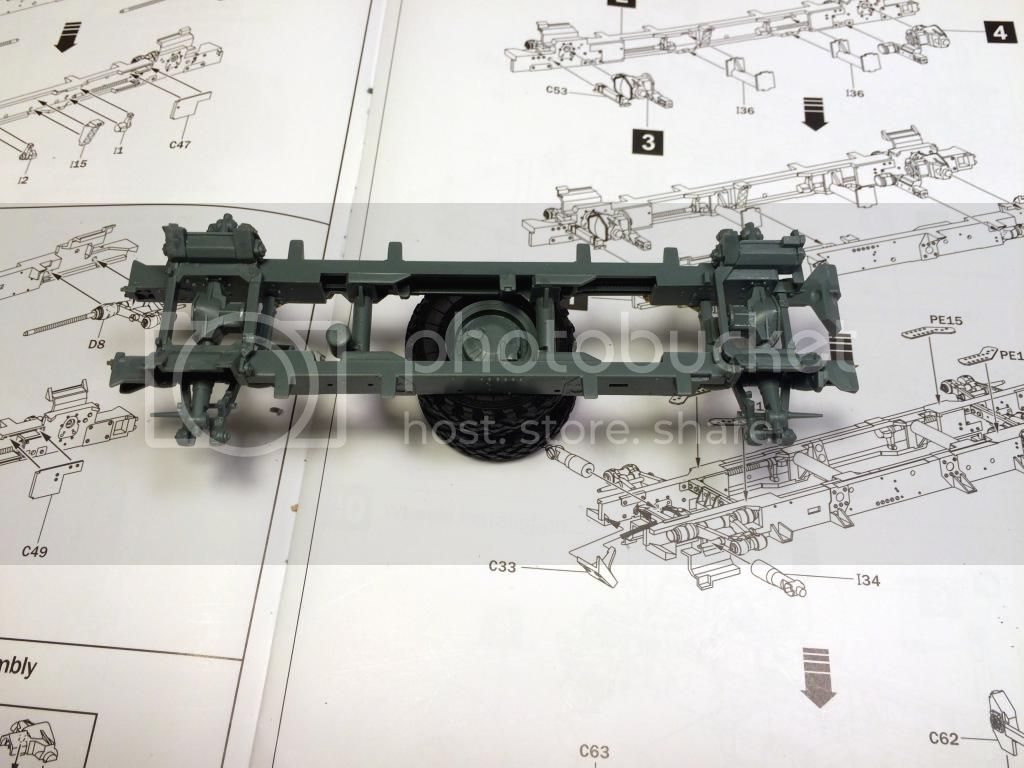
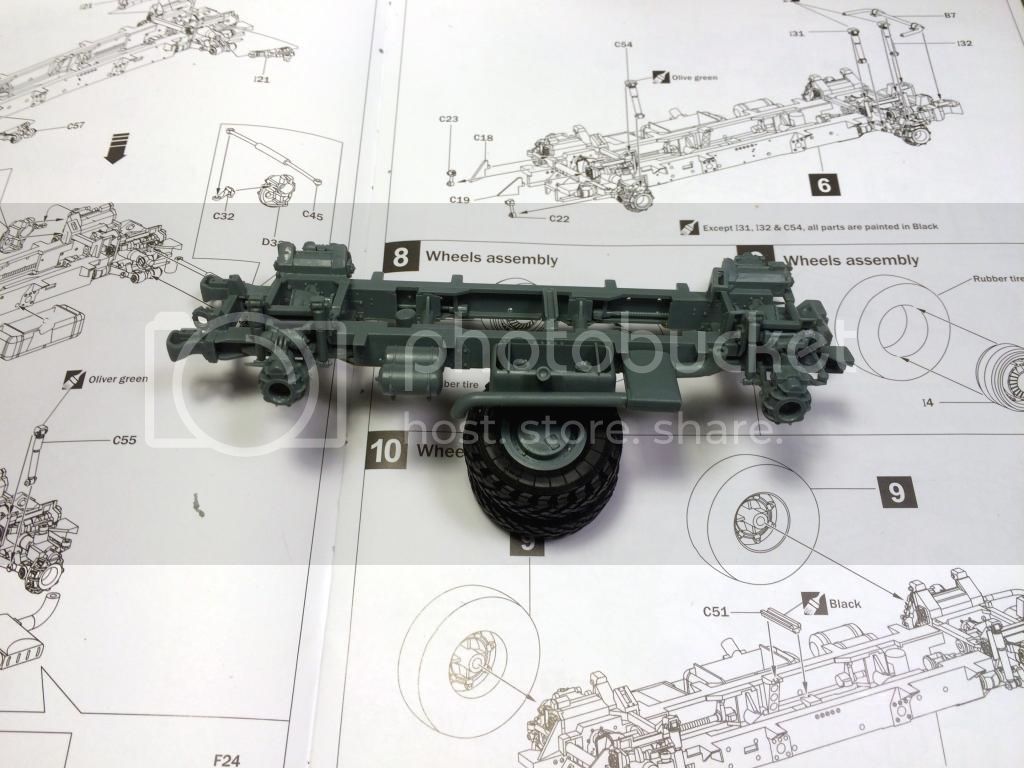
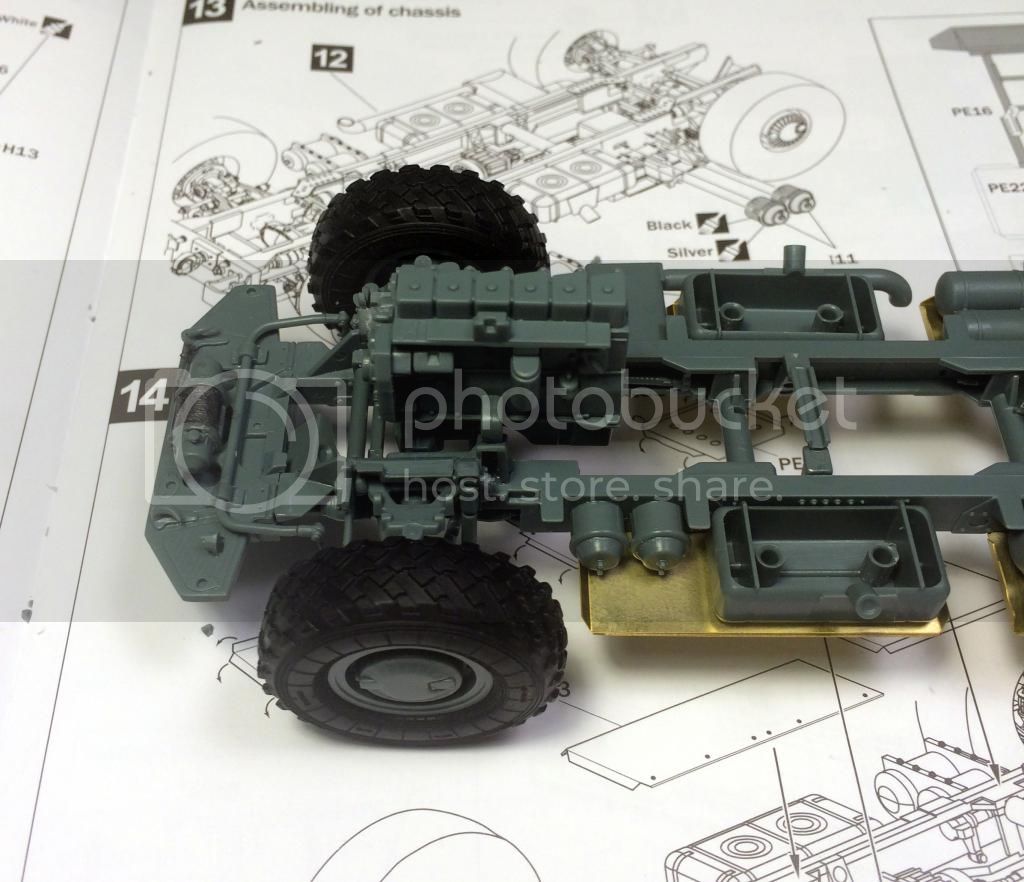
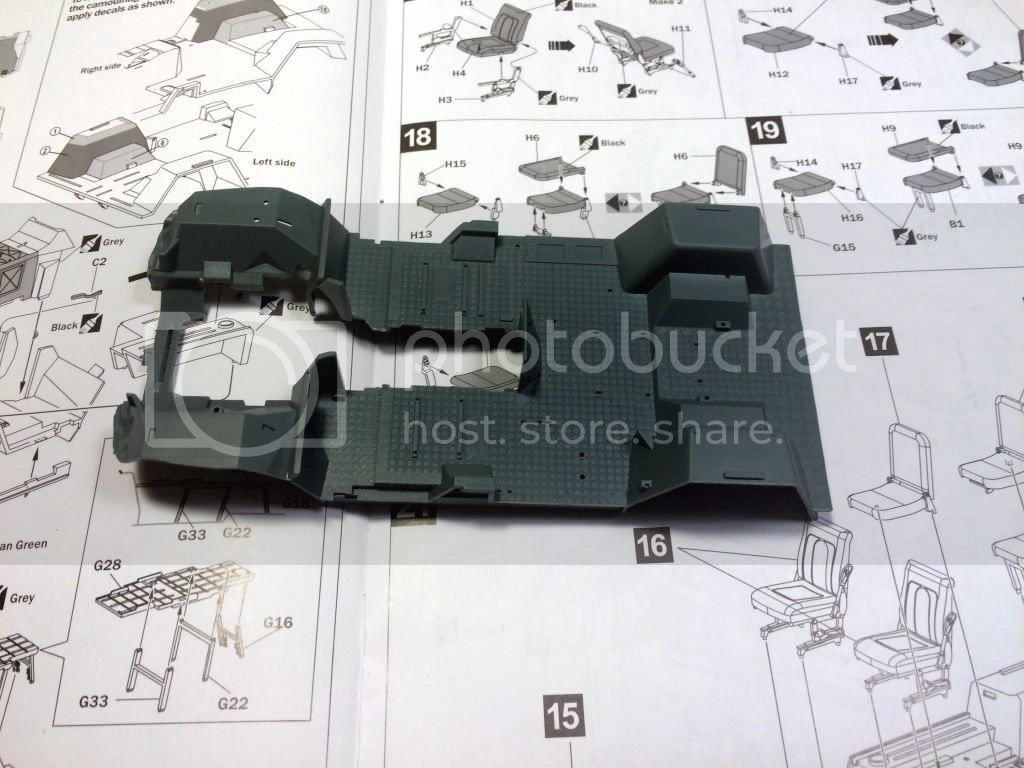
The build starts with the construction of the frame and all the various little details that go with it.
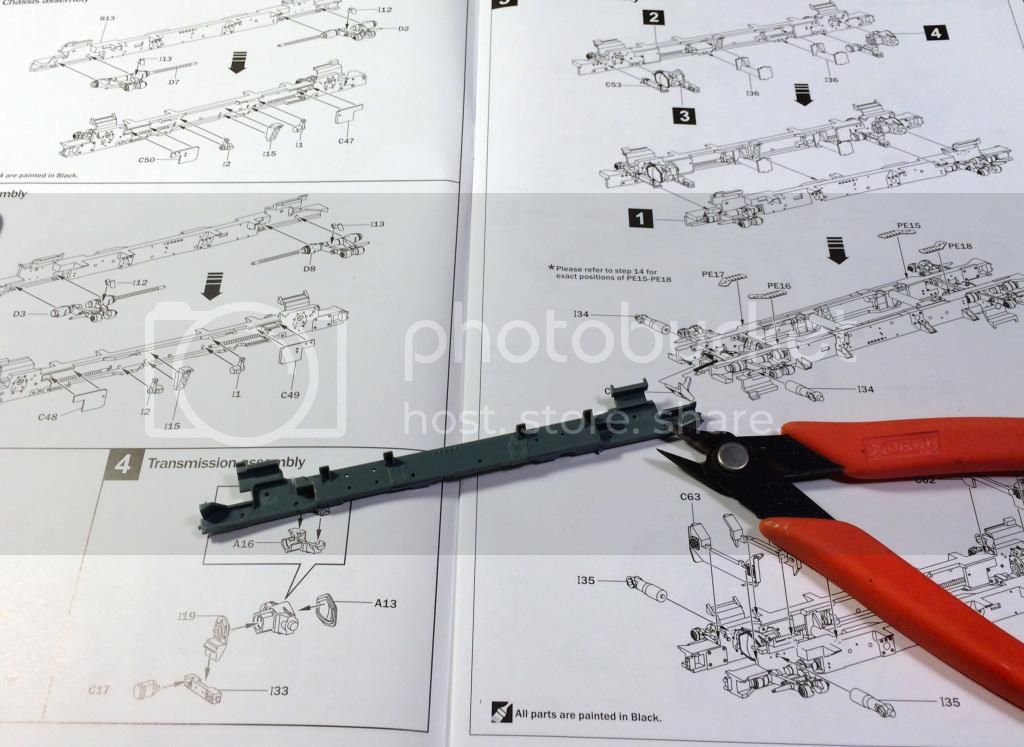
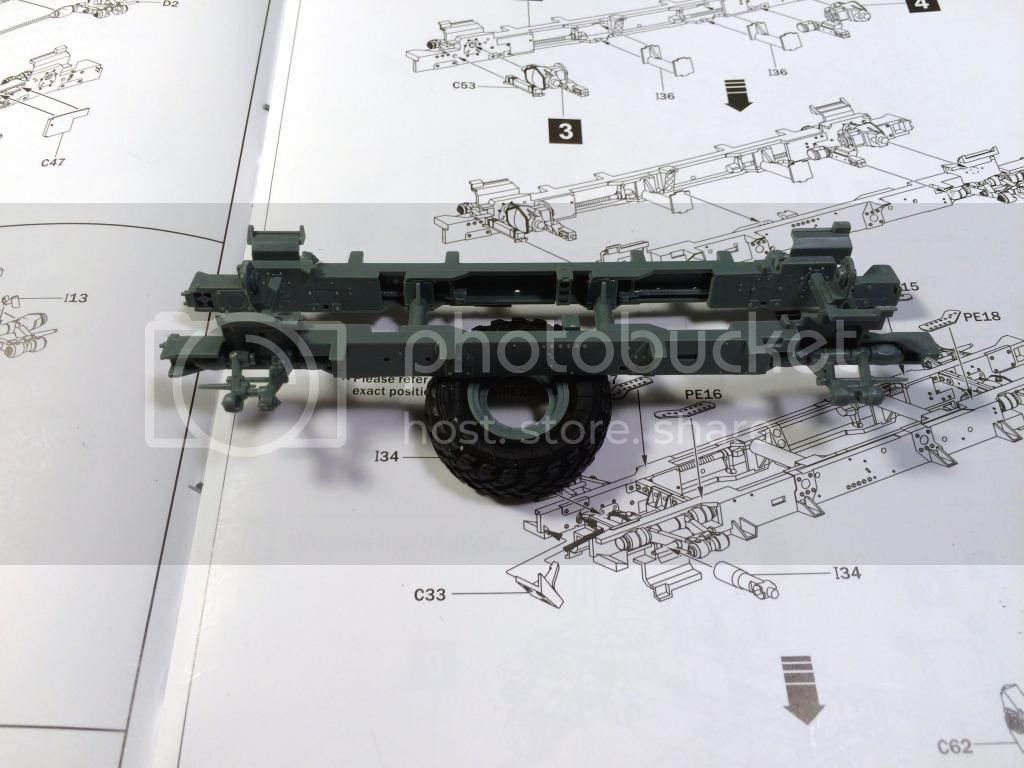
 photo IMG_2772_zps634c3b12.jpg


I wish I had more progress to share with you but just this took me 5 hours over the course of two nights. Now, it could just be because I am a slow builder or, and I think more likely, it was because there's around 30 parts in this section alone. There are a lot of very small parts that go into this which leaves a lot of room for error. What I found worked very well for me, I tacked the parts in with CA glue and once the fit was right I used extra thin to secure in place. There were more than a few times were I had to remove the pieces and then preposition and re-glue. My goal for the next update is to have this in a rolling chassis and a dry fit of the body etc.

Thanks for checking out my build.

terminators
Visit this Community
France
Joined: February 20, 2012
KitMaker: 1,932 posts
Armorama: 1,907 posts
Posted: Wednesday, October 01, 2014 - 05:11 PM UTC
Good start.

I didn't know the model was already available.
Hisham
Visit this Community
Al Qahirah, Egypt / لعربية
Joined: July 23, 2004
KitMaker: 6,856 posts
Armorama: 6,363 posts
Posted: Wednesday, October 01, 2014 - 09:36 PM UTC
I got this very nice kit a few weeks ago, so I'll be watching with interest to see if there's anything in the build I need to watch out for

Hisham
Karl187
#284
Visit this Community
Northern Ireland, United Kingdom
Joined: October 04, 2006
KitMaker: 3,094 posts
Armorama: 2,942 posts
Posted: Wednesday, October 01, 2014 - 10:28 PM UTC
This is the first build log of the Xact kit I've seen and so far it looks incredibly well detailed- seemingly more than the Meng kit. I'll be watching this closely. Best of luck Adam and thanks for sharing with us!
adampolo13
Visit this Community
Rhode Island, United States
Joined: July 30, 2013
KitMaker: 43 posts
Armorama: 43 posts
Posted: Thursday, October 02, 2014 - 08:51 AM UTC
Hi guys,

Thanks following the build and commenting. From what I can tell from this portion of the build, Xact went to great lengths to give is modelers a very detailed kit. That being said, lots of parts does leave more room for error. I'm a pretty slow and cautious builder so I have no problem test fitting 10 times. But, someone who may be a little more inexperienced or impatient may not want to jump into this. In terms of how it stacks up to the Meng, I believe the details on this are better but that is at the cost of a longer build process. It really is the case of the same subject provided in 2 very different style kits.

On another note, I picked up a few Black Dog Crimea figures last weekend and built them up the other day. You guys don't mind if I share pictures of them here right? I should have those up soon as well.

Thanks again for following along.
pgb3476
Visit this Community
Texas, United States
Joined: March 11, 2007
KitMaker: 977 posts
Armorama: 976 posts
Posted: Thursday, October 02, 2014 - 09:07 AM UTC
Yes, plz share the figures pictures.
adampolo13
Visit this Community
Rhode Island, United States
Joined: July 30, 2013
KitMaker: 43 posts
Armorama: 43 posts
Posted: Thursday, October 02, 2014 - 02:21 PM UTC

Quoted Text

Yes, plz share the figures pictures.


I already have the figures built and under some primer, I just need to get some good photos of them. I should have those up tomorrow!
Karl187
#284
Visit this Community
Northern Ireland, United Kingdom
Joined: October 04, 2006
KitMaker: 3,094 posts
Armorama: 2,942 posts
Posted: Thursday, October 02, 2014 - 09:36 PM UTC
Yeah definetly share the figures. When I did my Meng Tiger I got three Blackdog figures including the Gunner figure for the hatch. They are really nice casts and fantastic to paint.
adampolo13
Visit this Community
Rhode Island, United States
Joined: July 30, 2013
KitMaker: 43 posts
Armorama: 43 posts
Posted: Friday, October 03, 2014 - 02:53 AM UTC

Quoted Text

Yeah definetly share the figures. When I did my Meng Tiger I got three Blackdog figures including the Gunner figure for the hatch. They are really nice casts and fantastic to paint.


Man, I have to agree with you, on the cast part at least, as I haven't painted yet. Strait out of the box I was blown away.

Pictures inbound for this evening.
adampolo13
Visit this Community
Rhode Island, United States
Joined: July 30, 2013
KitMaker: 43 posts
Armorama: 43 posts
Posted: Sunday, October 12, 2014 - 10:27 AM UTC
Hey guys,

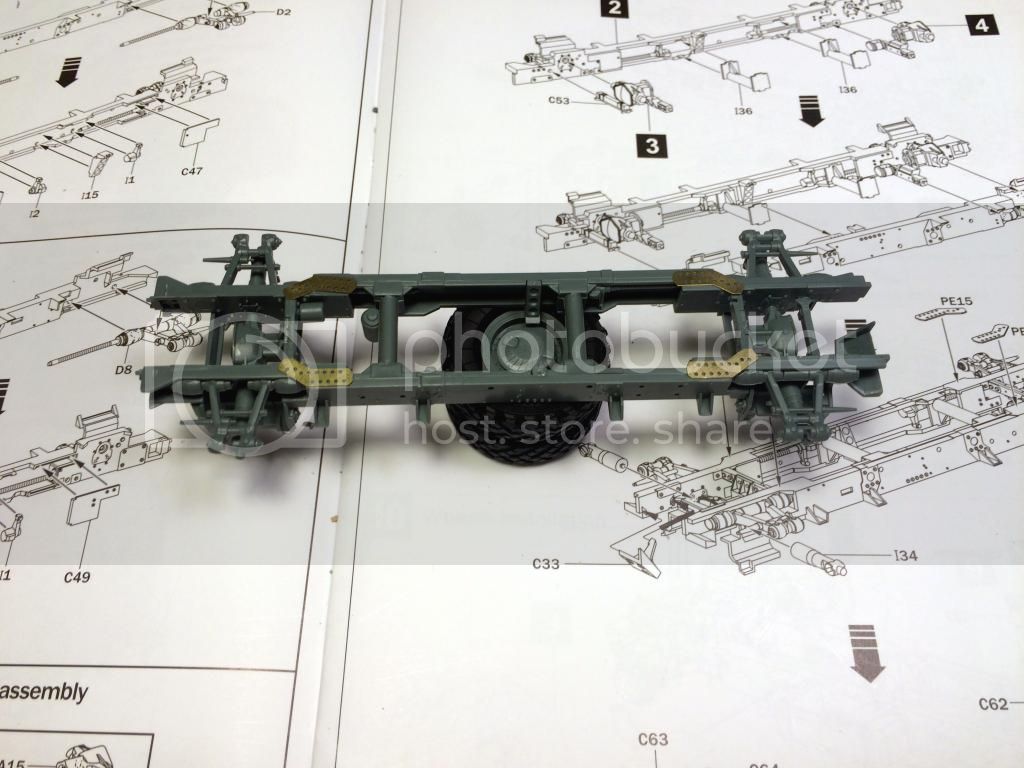
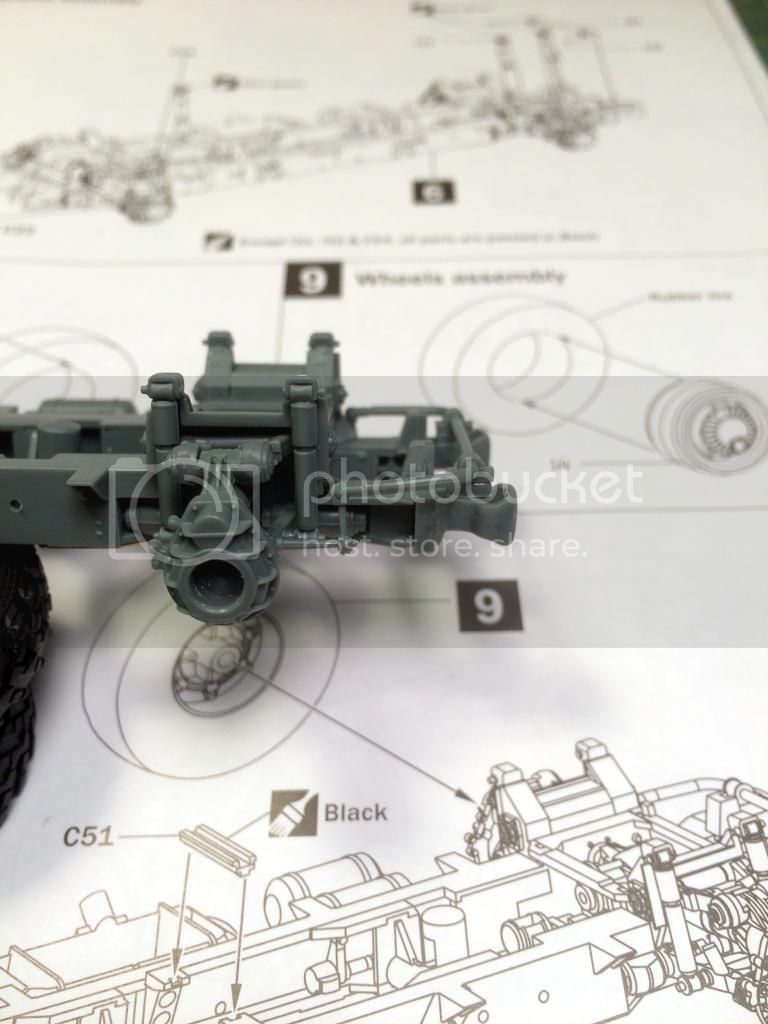
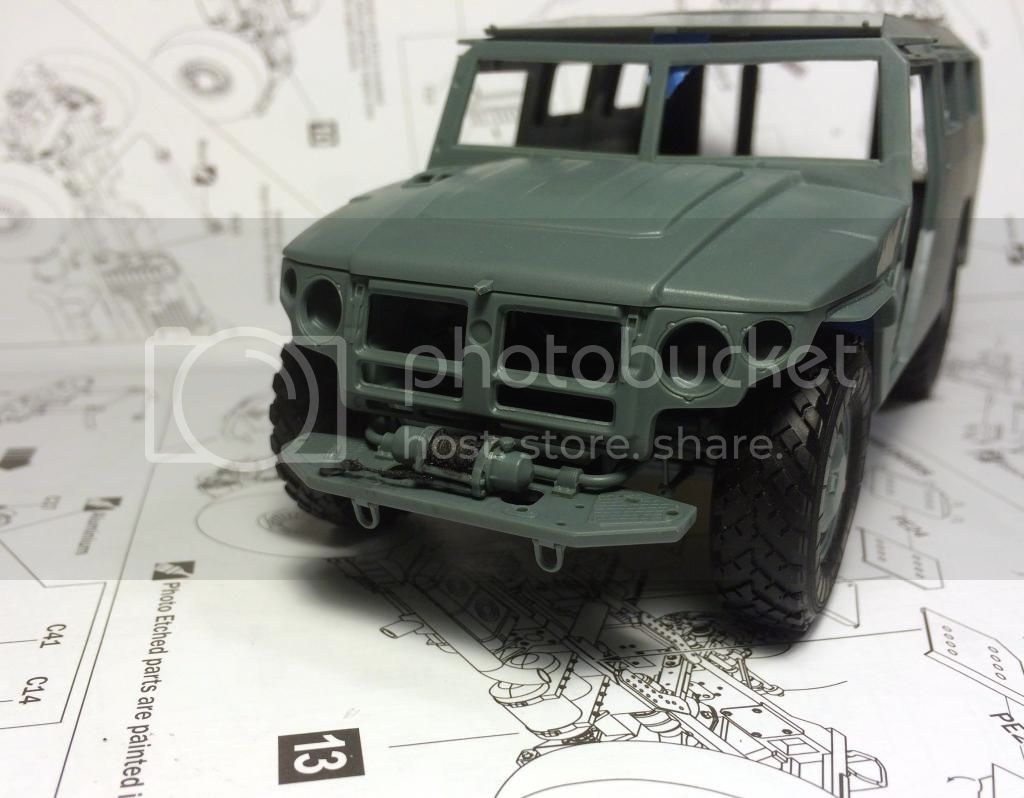
Sorry for the delay in getting this next update done. After getting this back on the bench I was able to get this into a rolling chassis. A bit more photo etch:

 photo IMG_2777_zps10a1c7a1.jpg

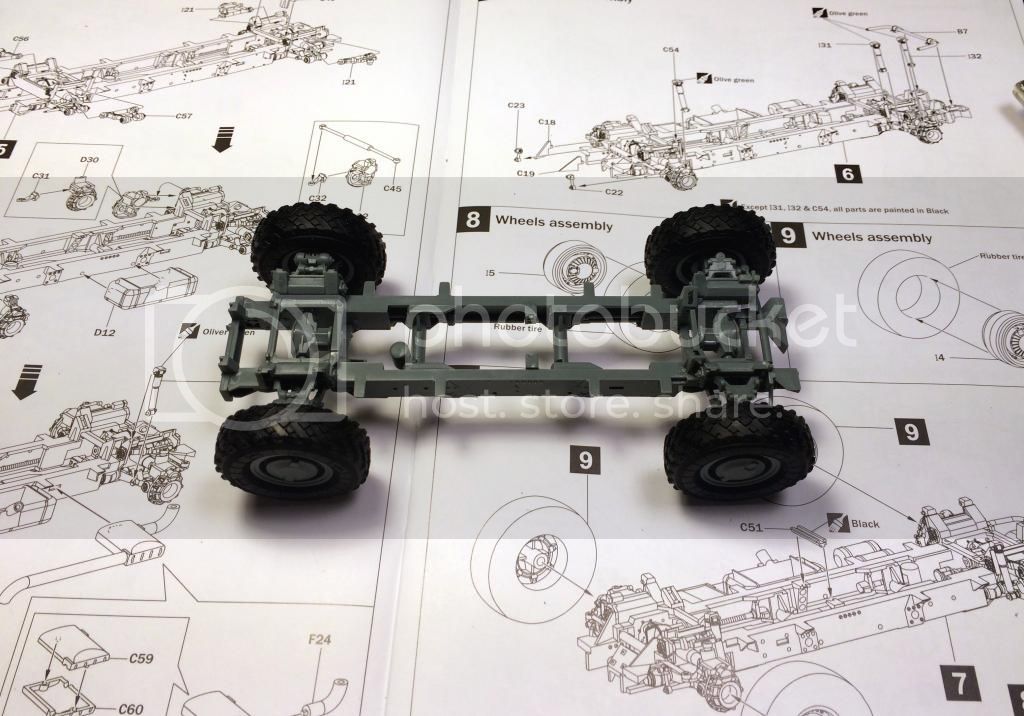
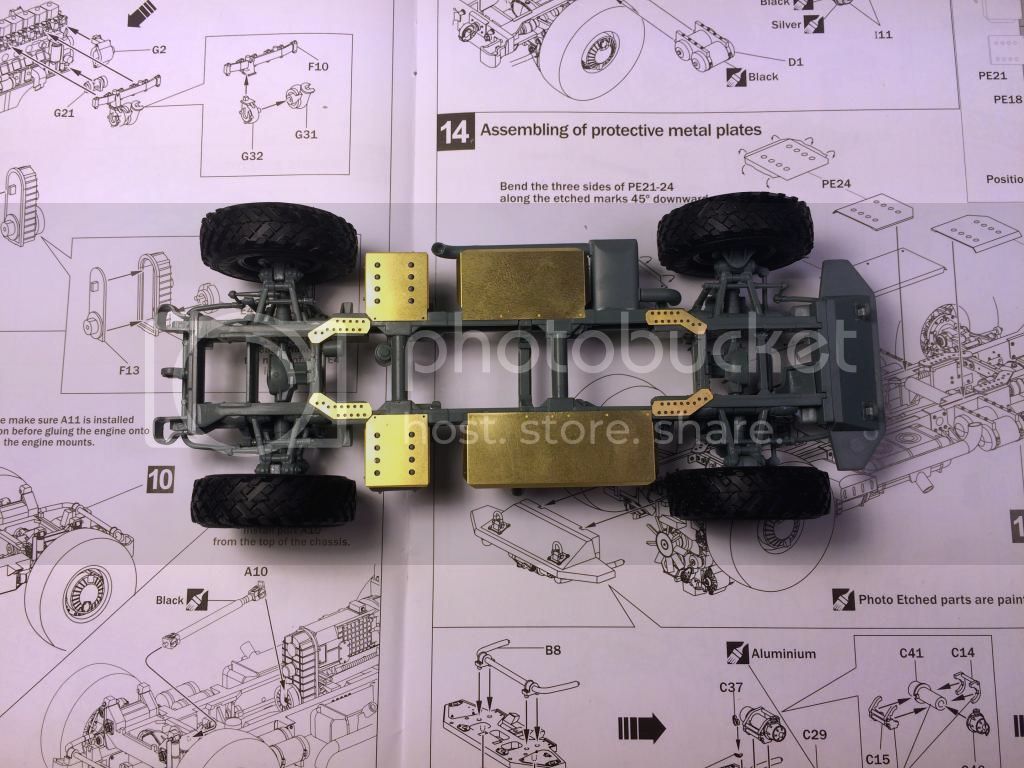
Then the wheels...

 photo IMG_2779_zpsec197a44.jpg

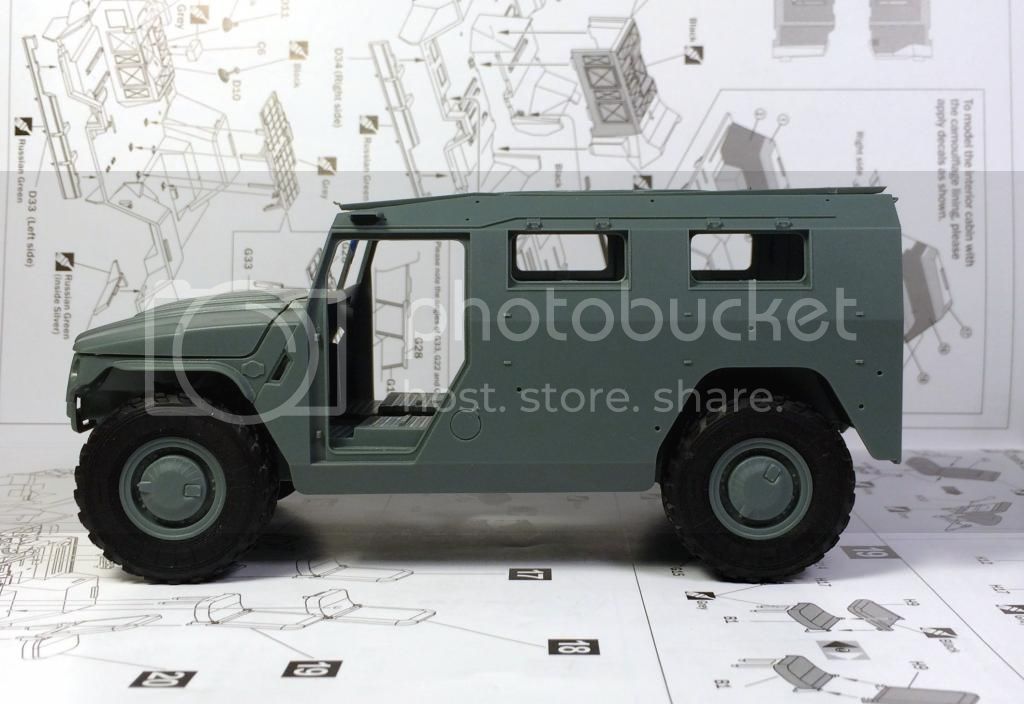
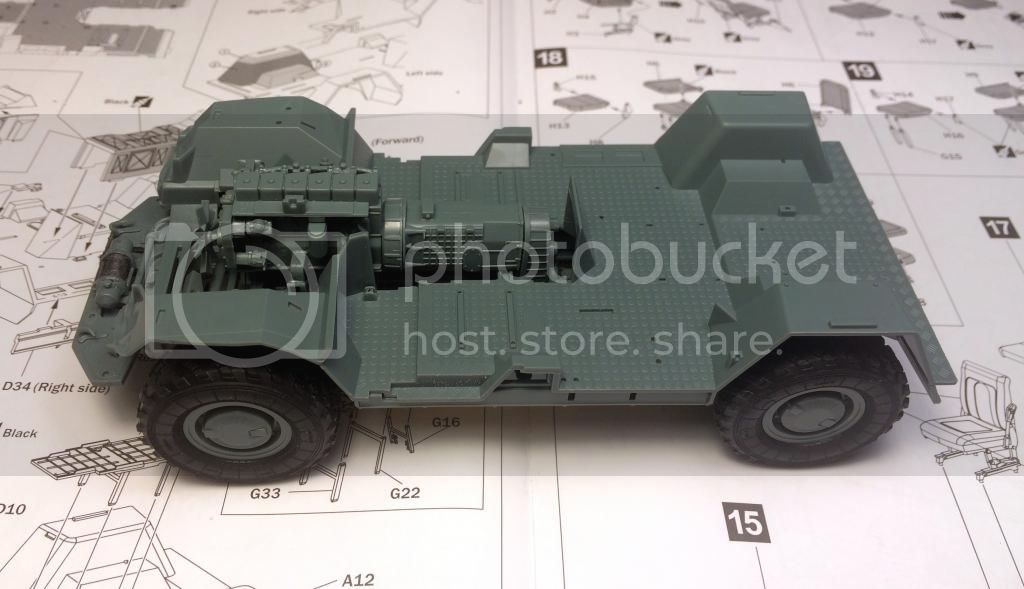
After that I couldn't help but mocking up a dry fit of everything.

 photo IMG_2781_zpscb5f47a6.jpg

I had to be very careful during the dry fit as the body itself really isn't too sturdy. Over all, no major issues to speak of.

Thanks for following along.
adampolo13
Visit this Community
Rhode Island, United States
Joined: July 30, 2013
KitMaker: 43 posts
Armorama: 43 posts
Posted: Monday, October 27, 2014 - 11:06 AM UTC
Hey everybody, I'm sorry to say, I still haven't gotten around to taking photos of the Black Dog figures but I did manage to get some more done on the Tiger.


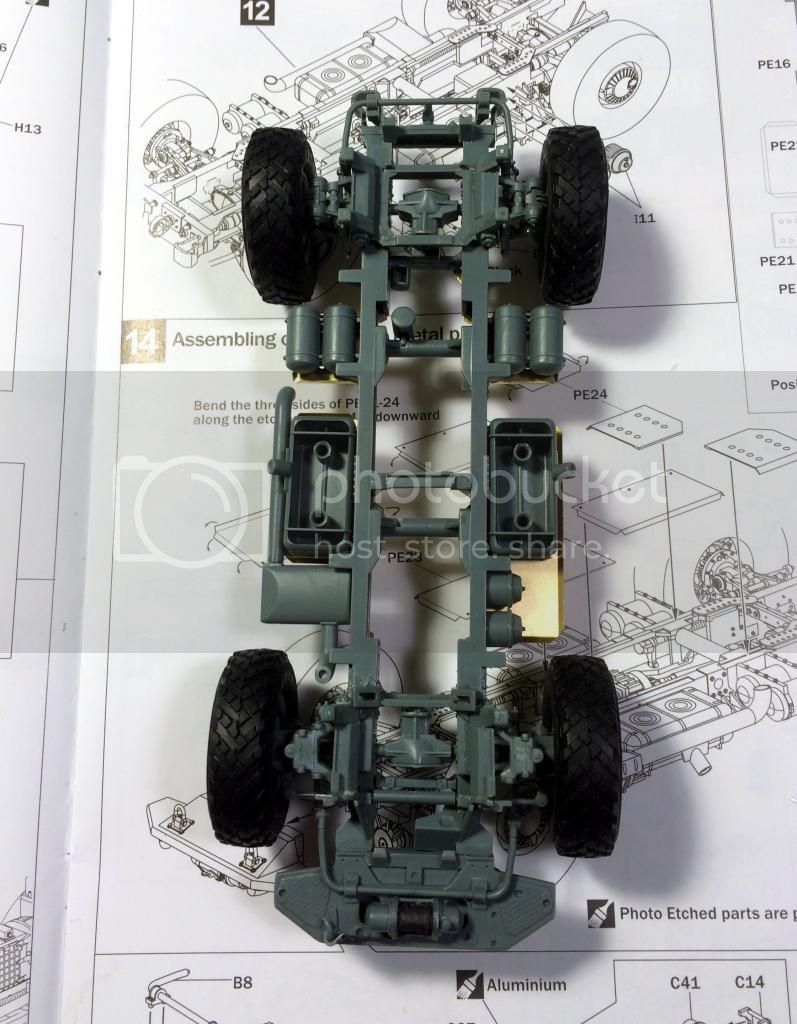
I was able to get the rest of the suspension sorted out, the fuel tanks added, as well as the exhaust system. The only thing I found here was that some of the locating tabs and pins needed to be shaved/sanded down but nothing too difficult. Just standard dry fitting.


 photo IMG_0210_zpsd047248c.jpg

After the tanks were added to both sides I moved on to what I think is some type of stabilizer/anti roll bar. There's one on the front and back. The bars themselves aren't too bad, but the little parts that go on the end that connect to the suspension can be a pain.

 photo IMG_0211_zps7ab1bf1a.jpg

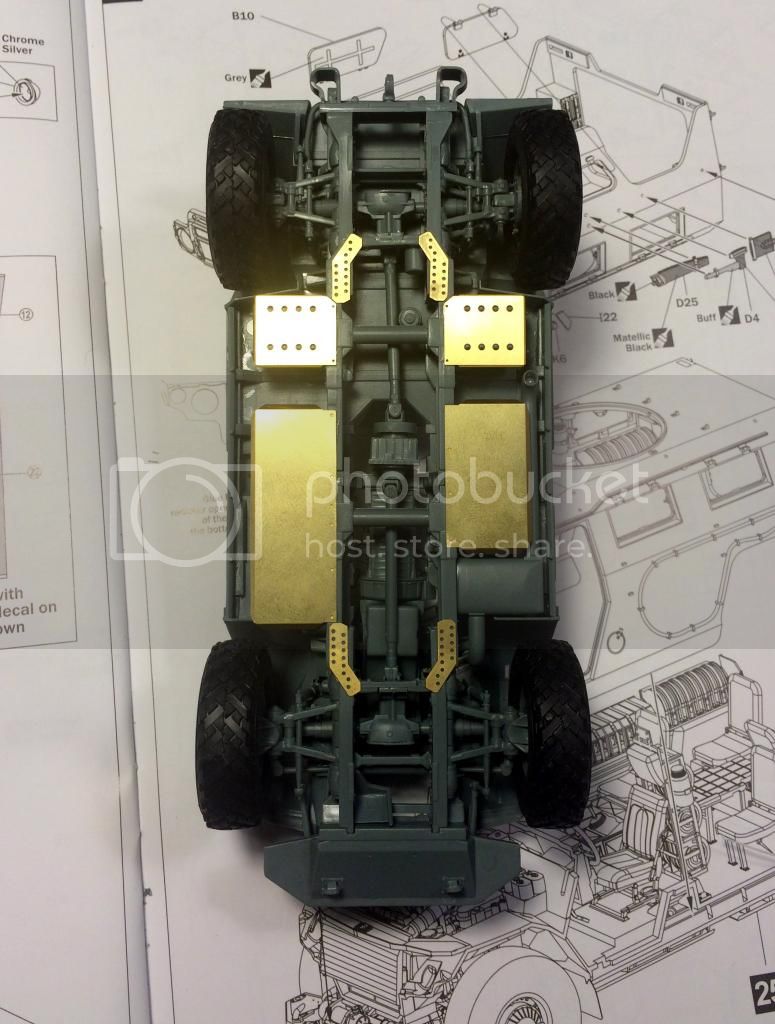
After that a few more bits of photo etch were added to the bottom. I have to say, I found the PE very easy to deal with, strong enough to hold a good shape but the fold lines were well defined and easy to bend.

 photo IMG_0213_zps4dc0dea0.jpg

Then, to move things along I did a little work on the winch. I went ahead and added some string for the wire cable and then glued everything in place.

 photo IMG_0215_zps872f3b11.jpg

 photo IMG_0214_zps1fe4f51e.jpg

That's it for this update. The next update should include the build up of the engine. Thanks for following along!
Hisham
Visit this Community
Al Qahirah, Egypt / لعربية
Joined: July 23, 2004
KitMaker: 6,856 posts
Armorama: 6,363 posts
Posted: Monday, October 27, 2014 - 12:16 PM UTC
Nice clean work! The chassis has lots of detail

By the way, do the front wheels turn left and right?

Looking forward to see the engine update

Hisham
BLACKWATER
Visit this Community
Yunnan, China / 简体
Joined: August 05, 2010
KitMaker: 449 posts
Armorama: 441 posts
Posted: Monday, October 27, 2014 - 07:22 PM UTC
Good start. Pretty
adampolo13
Visit this Community
Rhode Island, United States
Joined: July 30, 2013
KitMaker: 43 posts
Armorama: 43 posts
Posted: Tuesday, October 28, 2014 - 12:48 AM UTC

Quoted Text

Nice clean work! The chassis has lots of detail

By the way, do the front wheels turn left and right?

Looking forward to see the engine update

Hisham


Hi Hisham,

Thanks for the comments. Unfortunately the front wheels do not turn. Maybe there is a way to modify the kit, but with the massive parts count I didn't want to try to take that on.
adampolo13
Visit this Community
Rhode Island, United States
Joined: July 30, 2013
KitMaker: 43 posts
Armorama: 43 posts
Posted: Wednesday, October 29, 2014 - 01:05 PM UTC
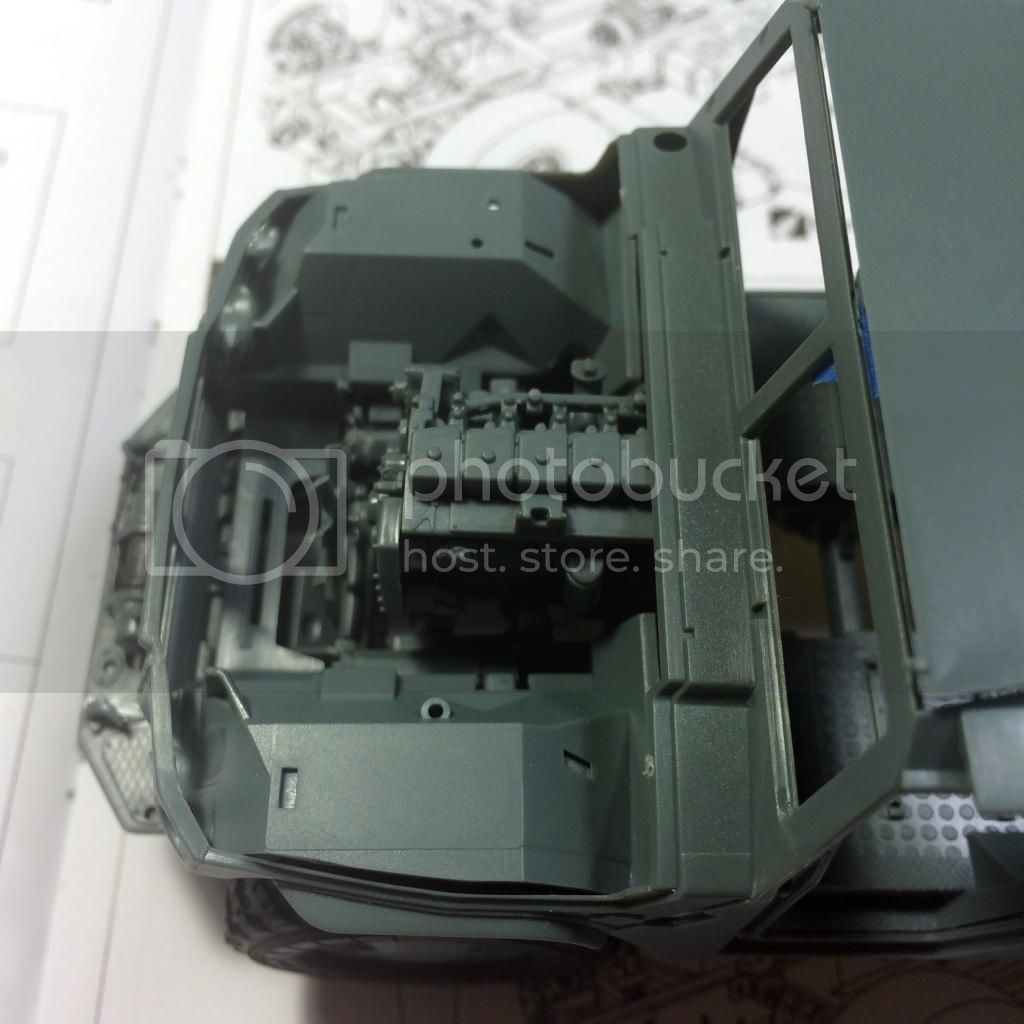
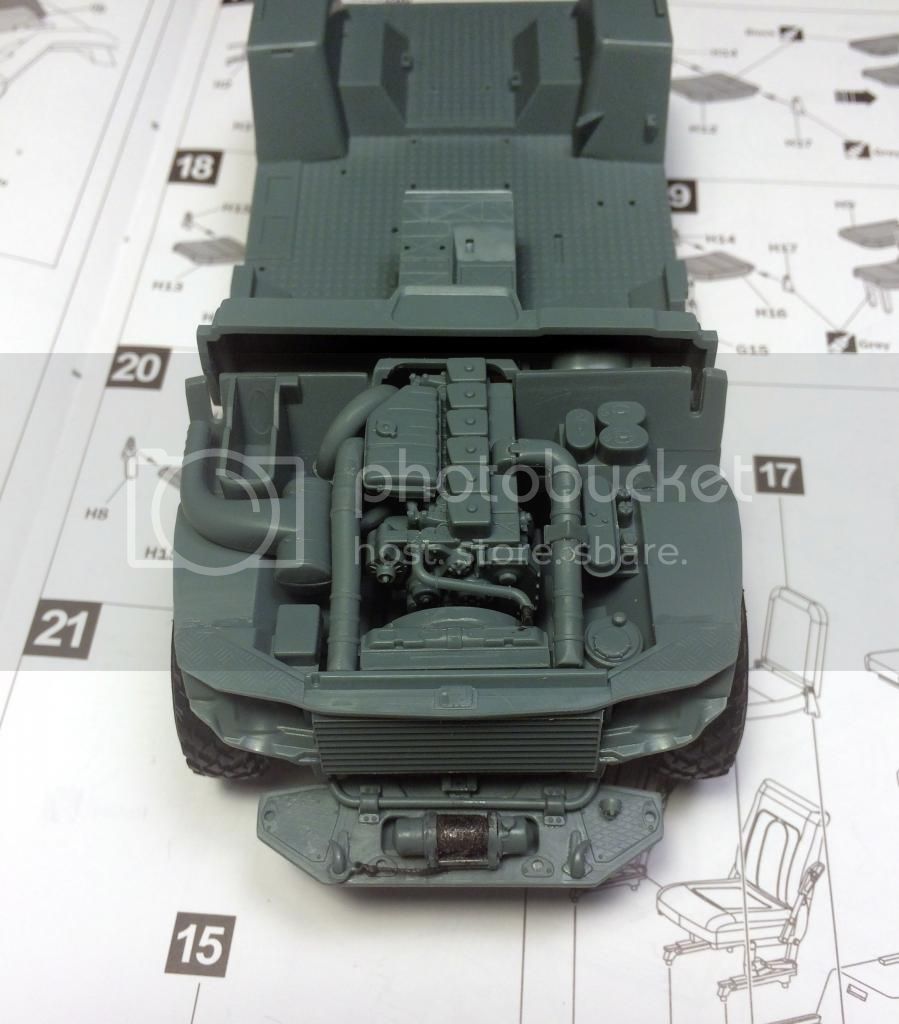
Hey everybody, thanks again for checking things out and following along. I've got a little bit more of an update for you guys in the way of an engine.

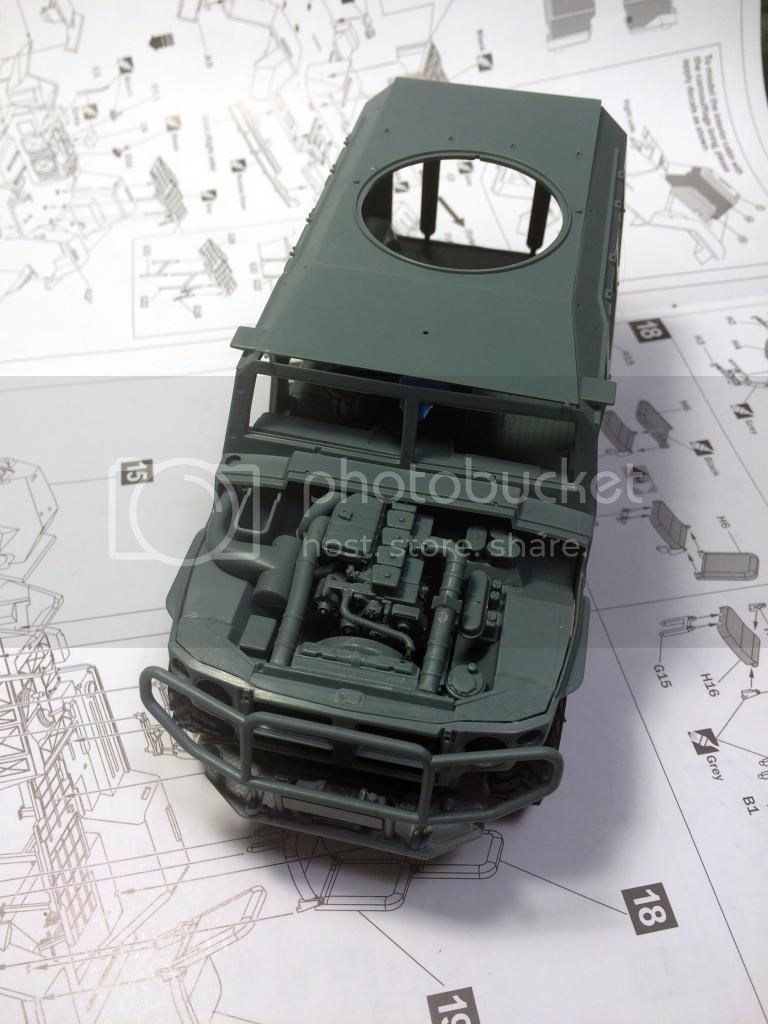
First off, I have to admit, when I started building the engine I had no real desire to have the hood open, it just wouldn't fit into my dio idea but after seeing whats in there I may just have to do it up. Painting may be be of a challenge but oh well. You'll see why later.

The block starts off with a couple of pieces and the engine mounts. Just by looking at this you can see why making sure everything is square as you go along is important.

 photo IMG_0252_zps601e96c5.jpg

 photo IMG_0253_zpsb8245e6d.jpg

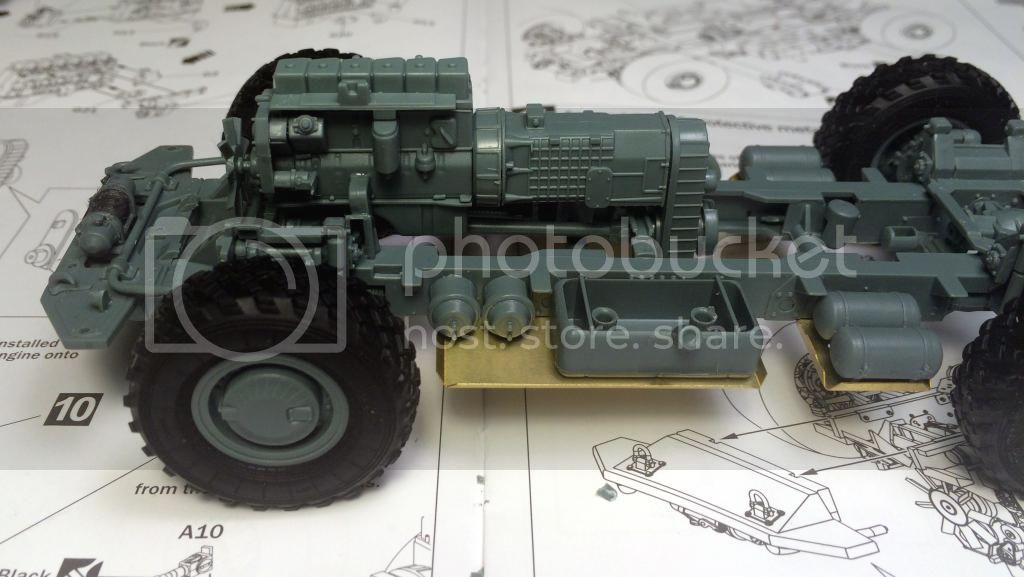
As you can see, X-Act left (almost) no details out, even where they wont be seen there is detail. Here's a picture of the engine block and transmission. Defiantly one of those "At least I know it's there" type of things

 photo IMG_0254_zpsd32ac506.jpg

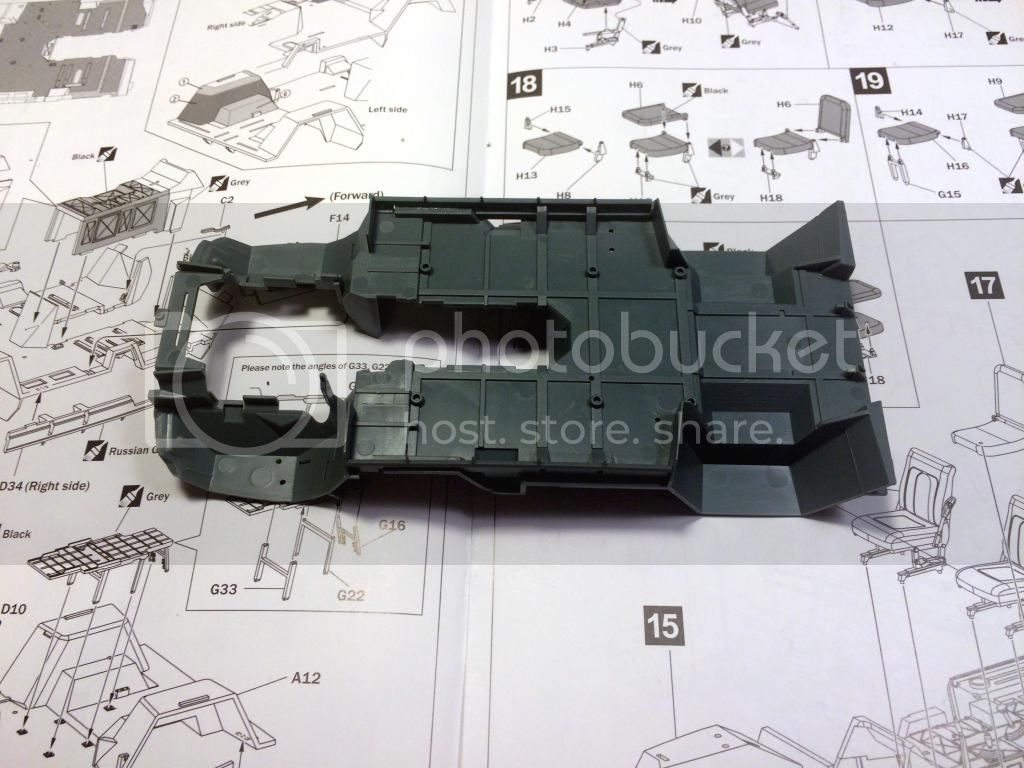
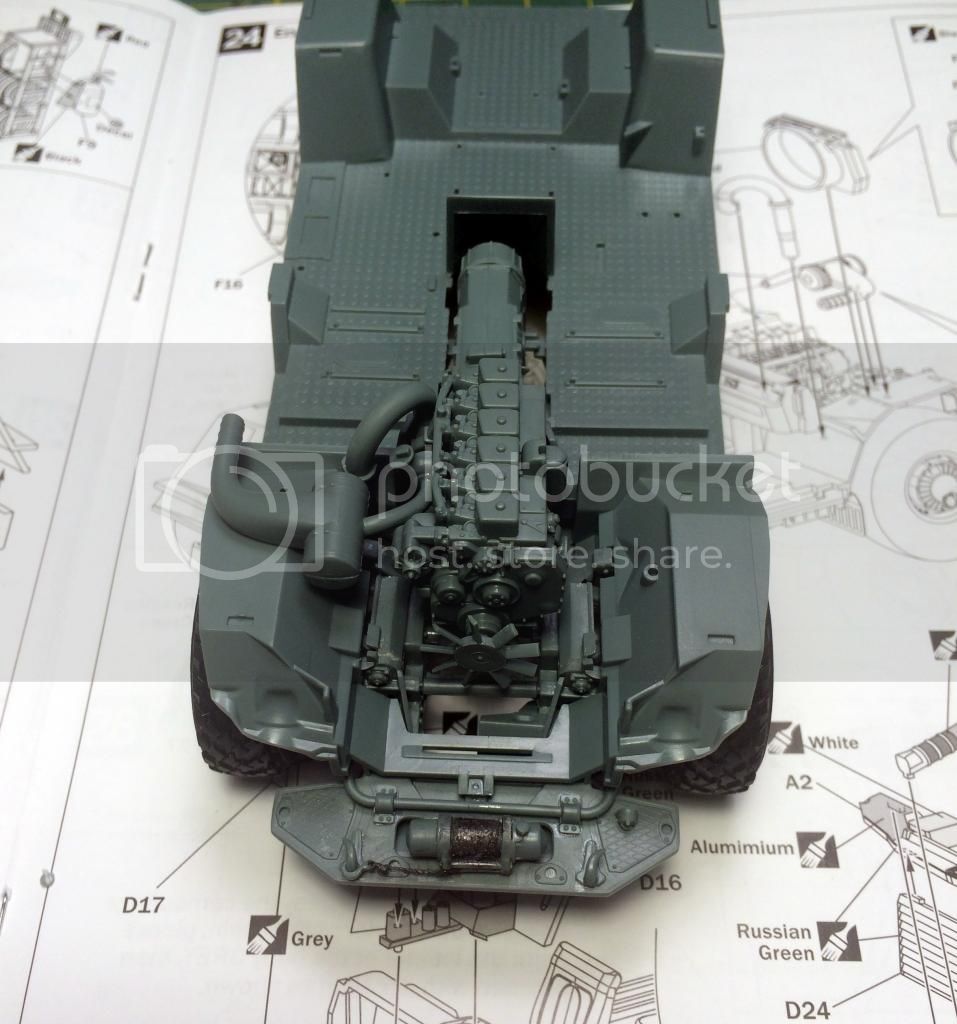
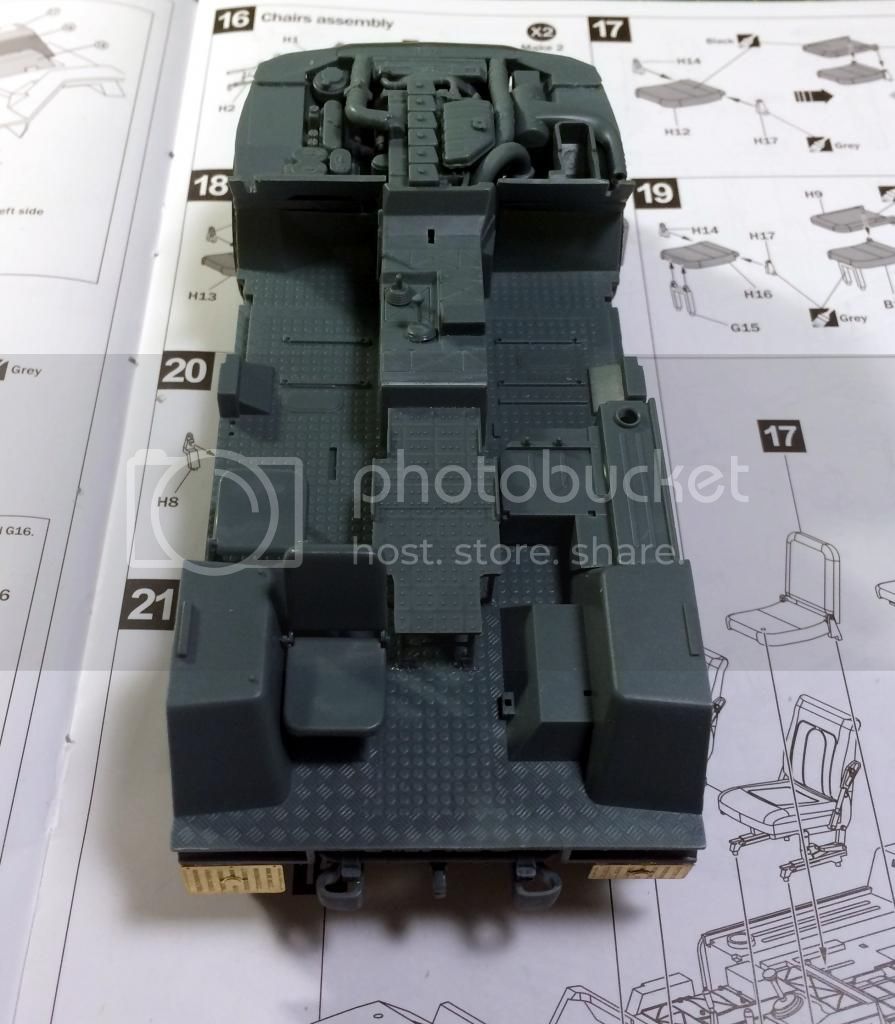
Next up is where I went out of order from the instructions. The instructions have you add a hole lot more details to the engine and slide the lower half of the body over later. I decided to do it a little differently so I got the lower half of the body put together and attached to the frame.

 photo IMG_0255_zps49c11d22.jpg

 photo IMG_0256_zps6800d167.jpg

 photo IMG_0257_zps6fed3087.jpg

A quick shot of the underside.

 photo IMG_0258_zps9ea61672.jpg

a few more details added.

 photo IMG_0262_zps696c1afa.jpg

 photo IMG_0264_zps77cefe1e.jpg

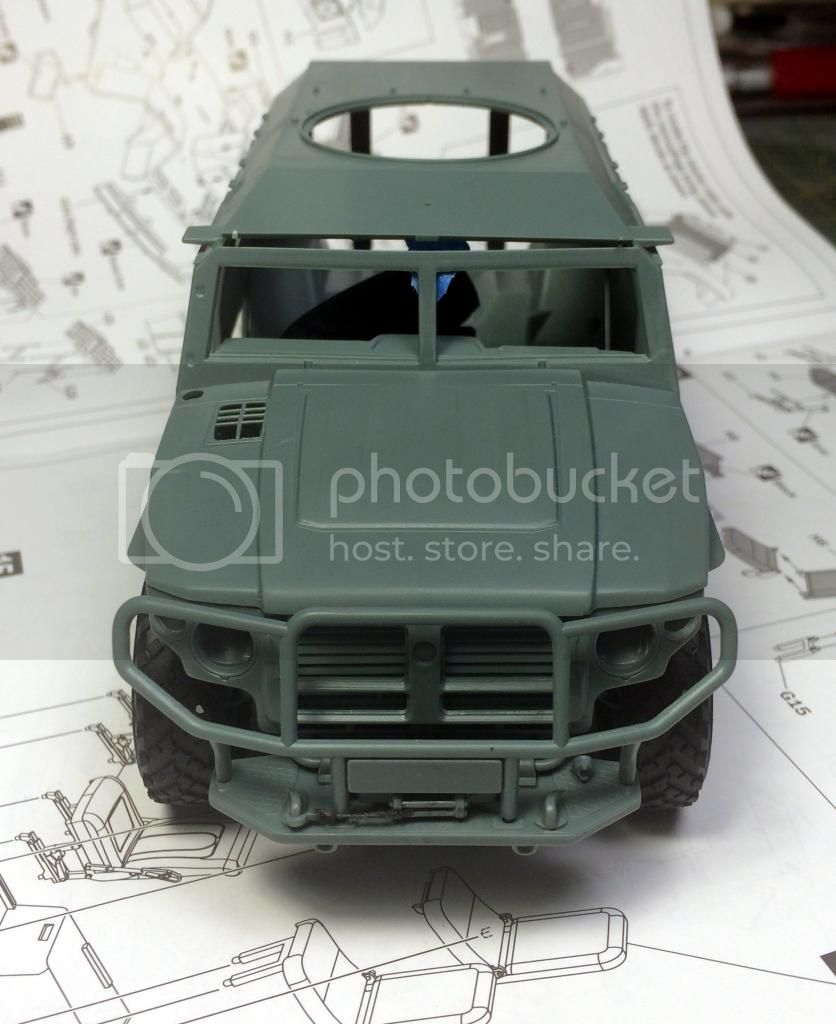
A dry fit with the hood on.

 photo IMG_0267_zps2bcb33b9.jpg

Hood Up:

 photo IMG_0270_zps5f80c050.jpg

Just to end the update with a little teaser of the inside detail:

 photo IMG_0271_zpsf365c0ee.jpg

Now, to my earlier point about painting the engine... The instructions give very clear call outs for individual parts and assemblies but when I put it together I didn't have the intention of painting it. Now that it's all done and glued in I'm thinking I might want to. Right now, my plan is to have the hood on the model but only a loose fit so I can take it off when I want to. What do you guys think? Hood on or off?
TRM5150
Visit this Community
Massachusetts, United States
Joined: January 03, 2010
KitMaker: 2,159 posts
Armorama: 707 posts
Posted: Wednesday, October 29, 2014 - 01:19 PM UTC
Nice work here Adam!! This kit has some decent detailing. Of course the downside is the hi part count!! Making some great progress...looking forward to more!
Hisham
Visit this Community
Al Qahirah, Egypt / لعربية
Joined: July 23, 2004
KitMaker: 6,856 posts
Armorama: 6,363 posts
Posted: Wednesday, October 29, 2014 - 01:45 PM UTC
You're doing a great job so far.. the engine really looks nice. I think it would be a shame to keep the hood down and hide all that detail

Looking forward to the next update

Hisham
Karl187
#284
Visit this Community
Northern Ireland, United Kingdom
Joined: October 04, 2006
KitMaker: 3,094 posts
Armorama: 2,942 posts
Posted: Wednesday, October 29, 2014 - 11:24 PM UTC
Adam- if you need some engine bay pictures let me know, I have a few.

Also- build is coming along fantastic. Xact have really done the details nicely- much more so than the Meng version.
adampolo13
Visit this Community
Rhode Island, United States
Joined: July 30, 2013
KitMaker: 43 posts
Armorama: 43 posts
Posted: Thursday, October 30, 2014 - 03:25 AM UTC

Quoted Text

Adam- if you need some engine bay pictures let me know, I have a few.

Also- build is coming along fantastic. Xact have really done the details nicely- much more so than the Meng version.


Hi Karl,

Thank you so much for your comments! If you have a picture of the engine bay that'd be great!

In terms of the details by X-Act, there are a ton which is great but this is certiainly not a quick and easy build. I can see how the Meng kit could appeal to someone that is less expereienced or simply wants an easy "shake n' bake" type kit.
Karl187
#284
Visit this Community
Northern Ireland, United Kingdom
Joined: October 04, 2006
KitMaker: 3,094 posts
Armorama: 2,942 posts
Posted: Saturday, November 01, 2014 - 12:41 AM UTC
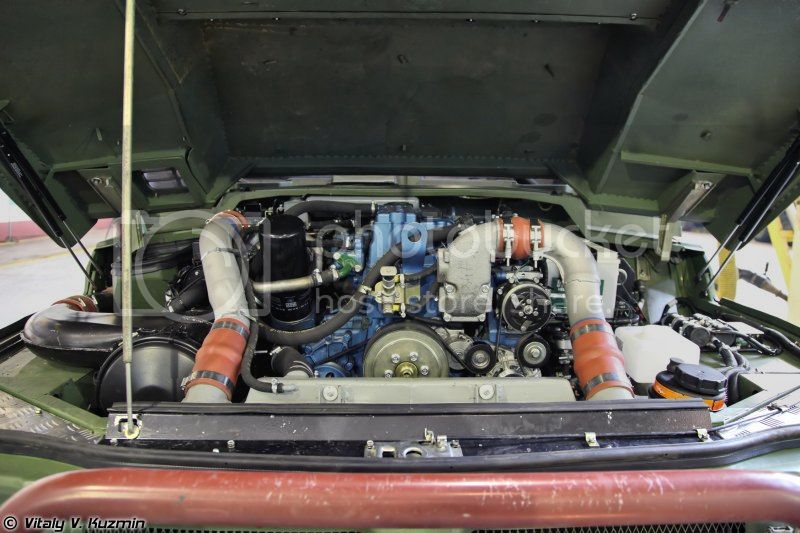
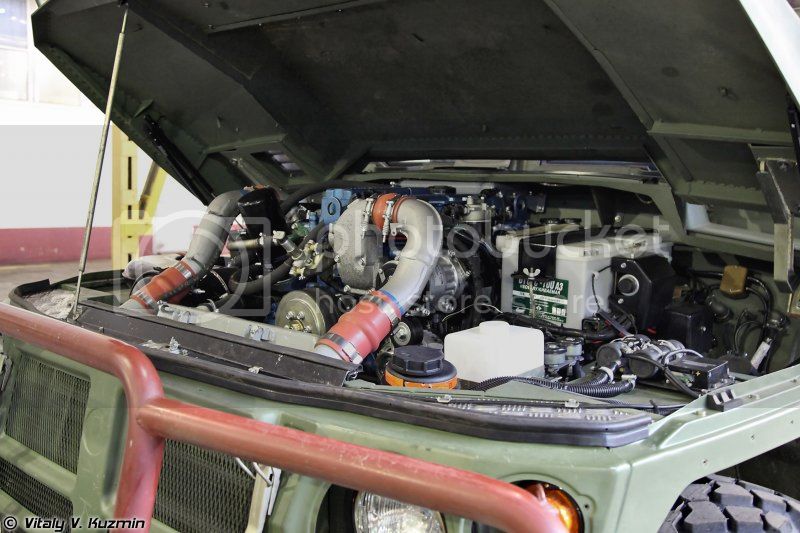
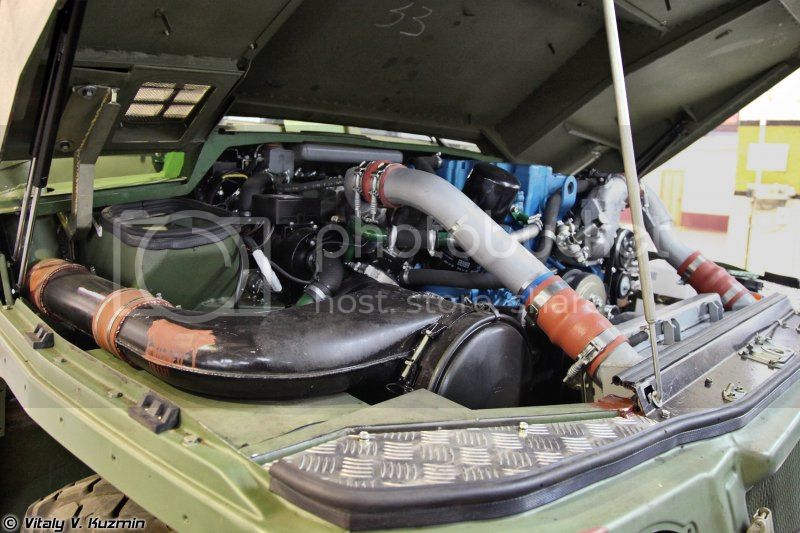
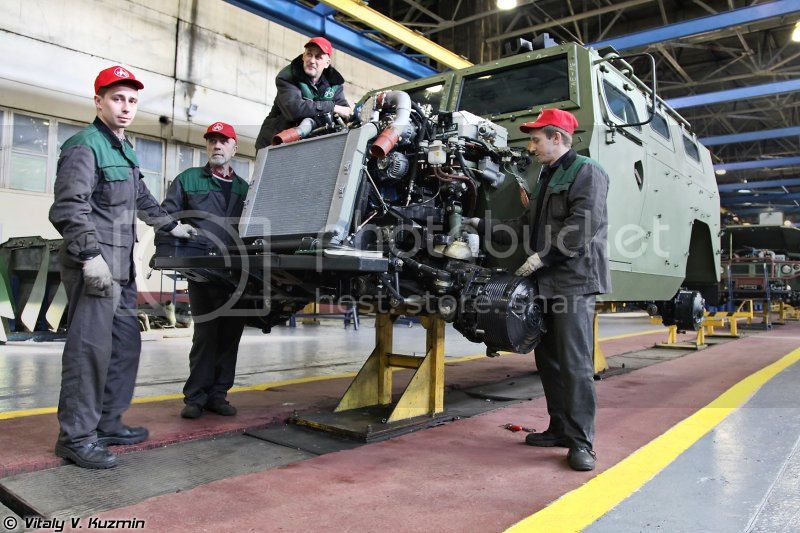
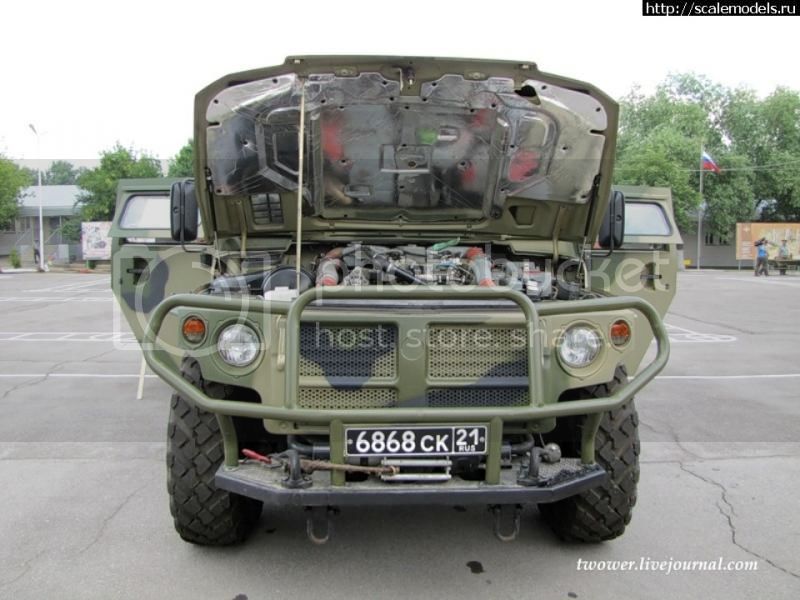
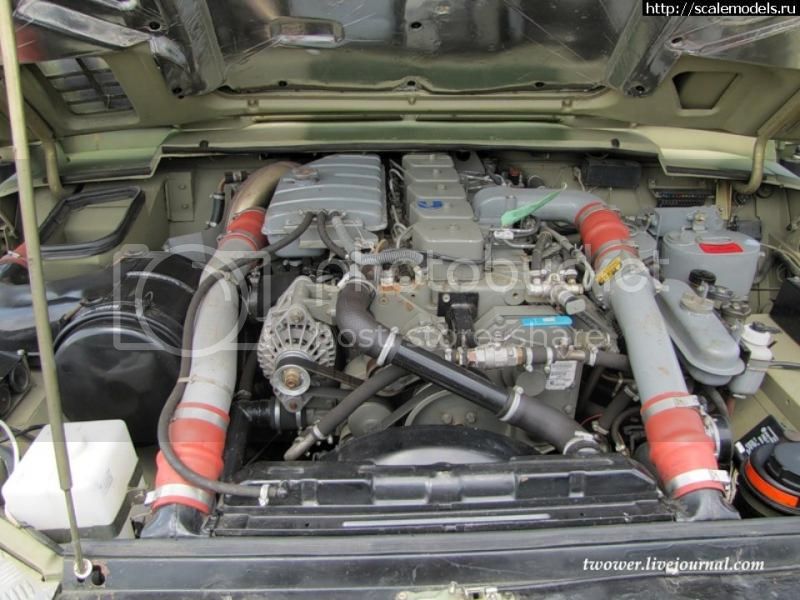
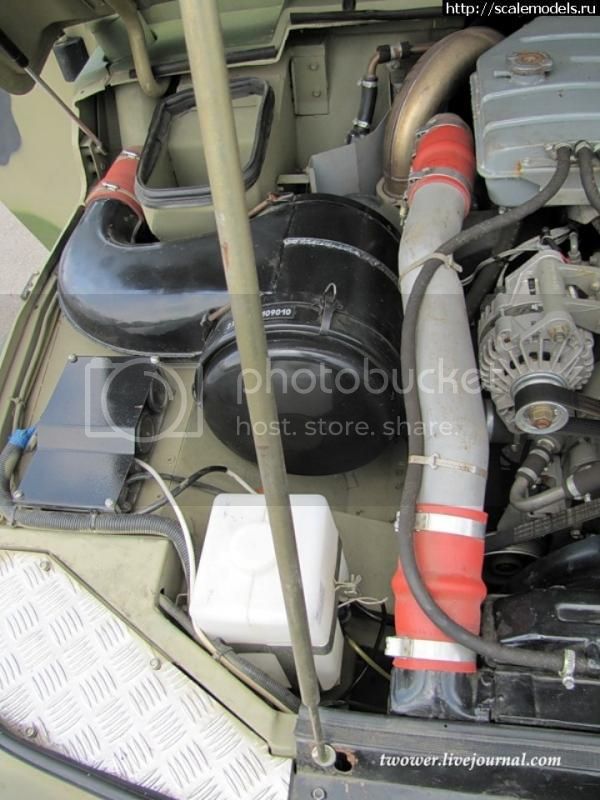
Hi Adam- here are some pictures of the engine bay.

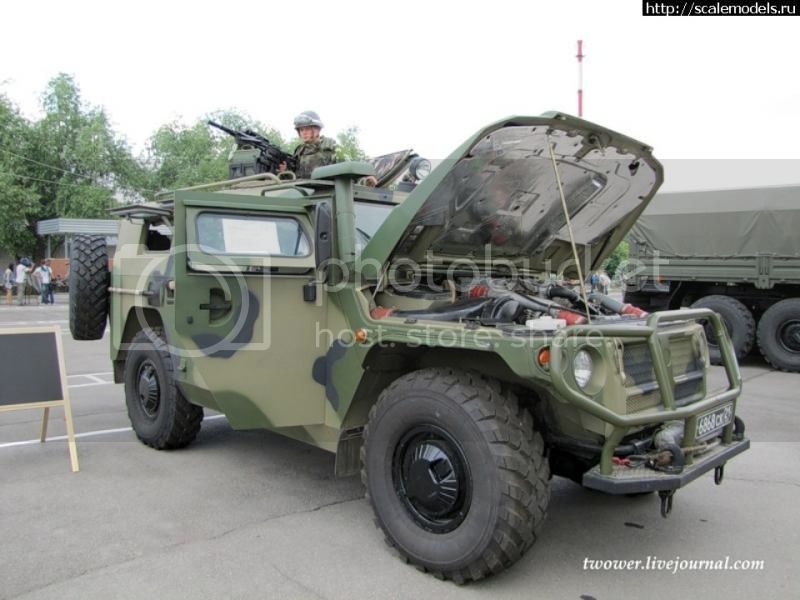
First up are some pictures of a vehicle which I think were taken while it was on the production line.


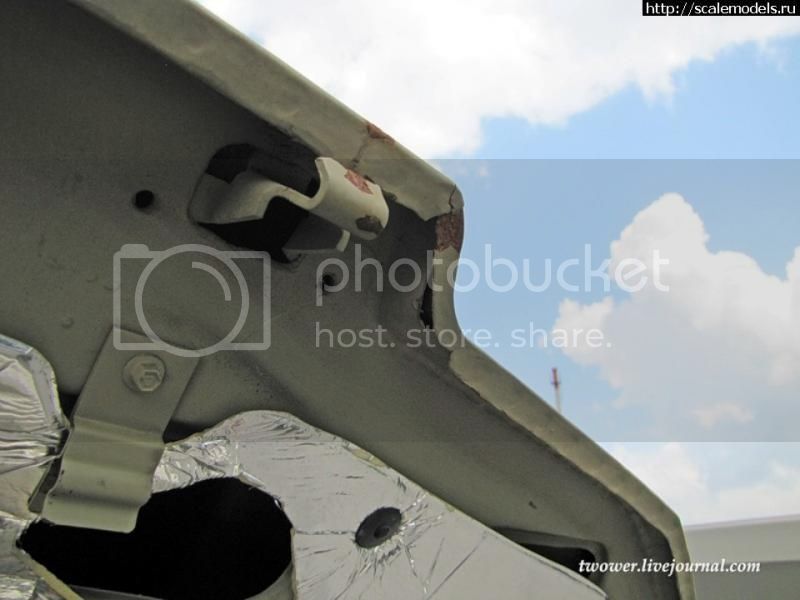
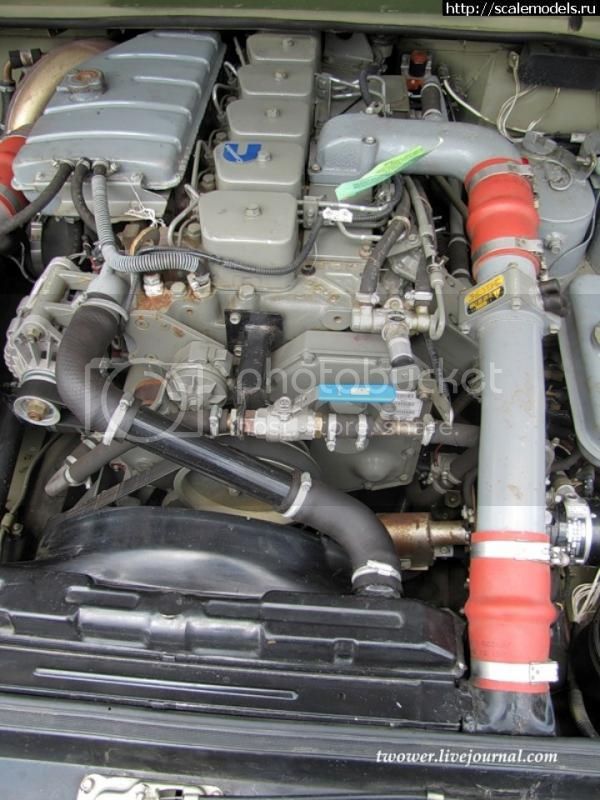
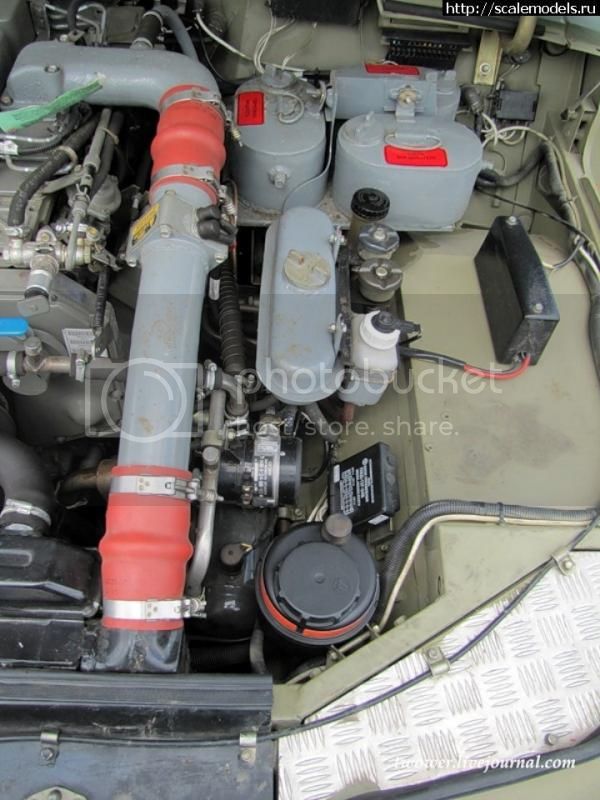
And these next ones are from a walkaround I found posted on a Russian scale model website.


I hope these help.

I have some interior pics as well- if you want them just let me know.

Hisham
Visit this Community
Al Qahirah, Egypt / لعربية
Joined: July 23, 2004
KitMaker: 6,856 posts
Armorama: 6,363 posts
Posted: Sunday, November 02, 2014 - 11:31 AM UTC
Great pics, Karl.. thanks a lot for posting them

Hisham
adampolo13
Visit this Community
Rhode Island, United States
Joined: July 30, 2013
KitMaker: 43 posts
Armorama: 43 posts
Posted: Monday, November 03, 2014 - 03:22 AM UTC

Quoted Text

Great pics, Karl.. thanks a lot for posting them

Hisham


Great pictures indeed!!!!

Hope to have another update for you guys a little later this week. I've made some good progress to construction of the interior.

panamadan
Visit this Community
Minnesota, United States
Joined: July 20, 2004
KitMaker: 1,513 posts
Armorama: 1,449 posts
Posted: Thursday, July 26, 2018 - 05:37 AM UTC
Just got this kit-any chance that you’ve got any more build photos of the kit?
Dan
 _GOTOTOP