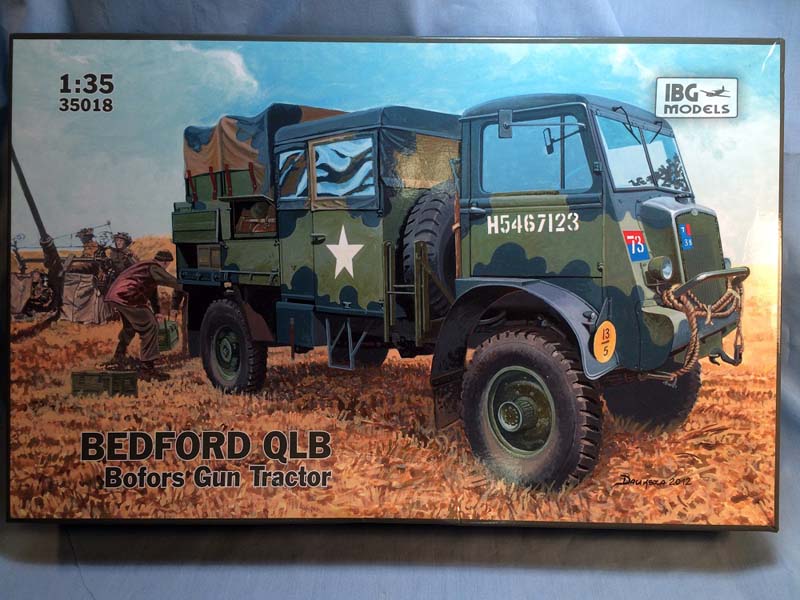
The next in IBG Models impressive line of Bedford QL trucks. This version is the QLB Bofors Gun Tractor.
Link to Item
If you have comments or questions please post them here.
Thanks!
Armor/AFV
For discussions on tanks, artillery, jeeps, etc.
Hosted by Darren Baker, Mario Matijasic
REVIEW
Bedford QLBPosted: Saturday, November 22, 2014 - 01:18 PM UTC
easyco69
Ontario, Canada
Joined: November 03, 2012
KitMaker: 2,275 posts
Armorama: 2,233 posts
Joined: November 03, 2012
KitMaker: 2,275 posts
Armorama: 2,233 posts
Posted: Saturday, November 22, 2014 - 10:33 PM UTC
lol those crew weapons look like muskets.
The kit looks great.
Paulinsibculo
Overijssel, Netherlands
Joined: July 01, 2010
KitMaker: 1,322 posts
Armorama: 1,239 posts
Joined: July 01, 2010
KitMaker: 1,322 posts
Armorama: 1,239 posts
Posted: Saturday, November 22, 2014 - 11:01 PM UTC
hi Darren, Thanks for the extensive review.
Mine came in last Friday!
A very well filled carton box, which offers a lot of fun for an acceptable price.
Young modellers: IBG gives you value for pocket money!
Though The first thing I had to do is emailing IBG for a better instruction leaflet ( to be received via email to avoid weeks of waiting!) since there is absolutely no detail visible.
Using the indtructions for the QLR I build, I could get started this weekend with the cabin and the crew compartment.
With the help of the Part of Poland etch set for the QLT, this model becomes an eye catcher, espessialy the cabin, since the engine will be partially visible.
Hopefully, the etch sets for the various QL versions do show up soon so we can improve the typical parts such as, for this version, the business part.
The lack of detail at the inside does not botter me too much. Artillery crews tended to cramp their trucks with all sorts of stuff that could turn out handy at some moment. Not only military goods, but also crates with food, stoves, clothing and alike. I found quite some stuff in my spart part box which finally will be drafted into service.
One thing is a pitty, the slided roof cover is fixed closed. Nothing unchangable, with Evergreen L shaped strip and some flat sheet this part can be build open to give better sight into the crew part.
Does anybody know which version of decals the Bronco Bofors, English version, requires?
All together a nice model with quite some potential and for sure hours of fun.
And maybe we can convince IBG to build the aircraft tanker version in 1:35 so we get some other colours in our show cases!!!!!! (IBG crew, please, get started !!!!)
Posted: Saturday, November 22, 2014 - 11:24 PM UTC
This is the one I've been waiting on the most. I was checking Eduard's site to see if they had gotten around to any PE upgrades yet but nothing from them so far.
Paul, how was the Part Set?
Thanks
Al
Paul, how was the Part Set?
Thanks
Al
Paulinsibculo
Overijssel, Netherlands
Joined: July 01, 2010
KitMaker: 1,322 posts
Armorama: 1,239 posts
Joined: July 01, 2010
KitMaker: 1,322 posts
Armorama: 1,239 posts
Posted: Sunday, November 23, 2014 - 02:00 AM UTC
Quoted Text
This is the one I've been waiting on the most. I was checking Eduard's site to see if they had gotten around to any PE upgrades yet but nothing from them so far.
Paul, how was the Part Set?
Thanks
Al
Hi Alan,
The Part of Poland set is very usefull for the cab. Though the fenders do take some time to get right.
I have used the open windows for my QLR. It takes ages to get the fiddely openers on the right spot!
Also, the wheel hubs are better looking, also it has the , in the box missing, direction indicator.
But, as stated before, quite some parts are not used since the biggest part is intended to super detail the cargo box of the QLD
In general, it is worth the money, but a model typical set would be much better.
For my QLB I intend to purchase resin wheels and a resin driver.
Anyone already used one?
Posted: Sunday, November 23, 2014 - 02:49 AM UTC
Thanks Paul.
Al
Al
Paulinsibculo
Overijssel, Netherlands
Joined: July 01, 2010
KitMaker: 1,322 posts
Armorama: 1,239 posts
Joined: July 01, 2010
KitMaker: 1,322 posts
Armorama: 1,239 posts
Posted: Thursday, November 27, 2014 - 05:58 PM UTC
My build is going forward rather well.
However, the plastic sometimes drives one crazy since it is very soft and cures rather slow, which creates challenges in the construction of e.g. the multi part axles. One has to watch very carefully that all remains in one line.
My experience is that it is wiser to wait a whole day with relevant parts, such as the frame, the axles and the springs before continuing. (which makes it all really a patience test )
Which leaves one time to find reference on the web about colors and details.
Some questions which turn up are:
1. Does anyone know if there were tractors without the manhole in the roof?
2. Did the cabin doors have (other colored) panels?
3. How was the wooden box in the crew compartment secured?
Enjoy your weekend,
P.
Paulinsibculo
Overijssel, Netherlands
Joined: July 01, 2010
KitMaker: 1,322 posts
Armorama: 1,239 posts
Joined: July 01, 2010
KitMaker: 1,322 posts
Armorama: 1,239 posts
Posted: Thursday, December 11, 2014 - 07:30 PM UTC
Hi guys,
Anybody out there, who is willing to send me an email copy of the building instructions of the QLB?
Mine are very dark copies, not showing any detail.
I mailed IBG but after weeks not respond.
Thanks in advance,
Paul
Anybody out there, who is willing to send me an email copy of the building instructions of the QLB?
Mine are very dark copies, not showing any detail.
I mailed IBG but after weeks not respond.
Thanks in advance,
Paul
Paulinsibculo
Overijssel, Netherlands
Joined: July 01, 2010
KitMaker: 1,322 posts
Armorama: 1,239 posts
Joined: July 01, 2010
KitMaker: 1,322 posts
Armorama: 1,239 posts
Posted: Saturday, December 27, 2014 - 05:15 PM UTC
After some days of "fighting" with the specialties of the plastic used by IBG, it dries very slowly and remains soft very long I have finished the frame, the cabin and both the crew compartment and the load box.
All together, it results in a fine model, certainly worth the money. Though IBG should pay a bit more attention to some missing items like the direction indicator, window whipers and towing shackles. Maybe an improvement on their next version!?
Time to start detailing.
I purchased some PanzerArt 40 mm Bofors ammo boxes. However, I could not find the colour for these boxes.
Who can advise me about it? Are there pictures on the web, since I believe to have seen some yellow text on them as well?
Thanks in advance,
Paul