CMOT
 Editor-in-Chief
England - South West, United Kingdom
Joined: May 14, 2006
KitMaker: 10,954 posts
Armorama: 8,571 posts
Posted: Sunday, December 14, 2014 - 12:23 PM UTC
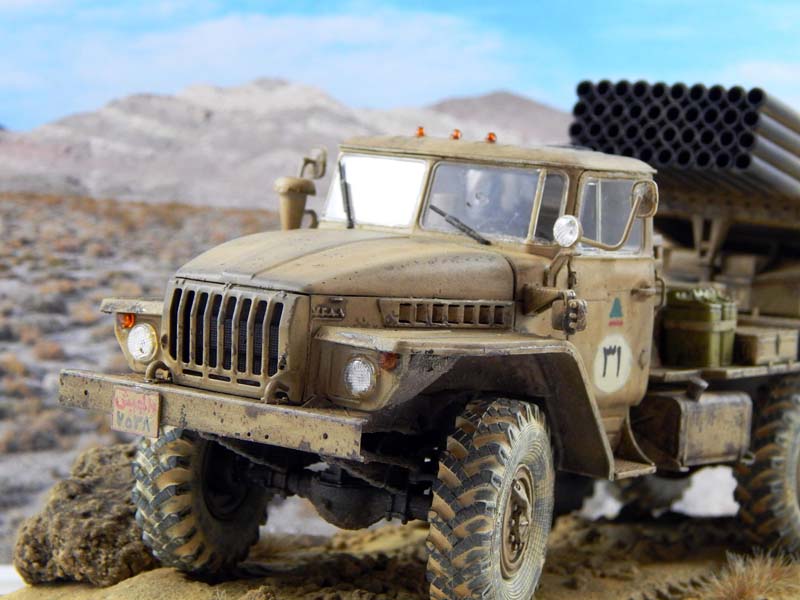
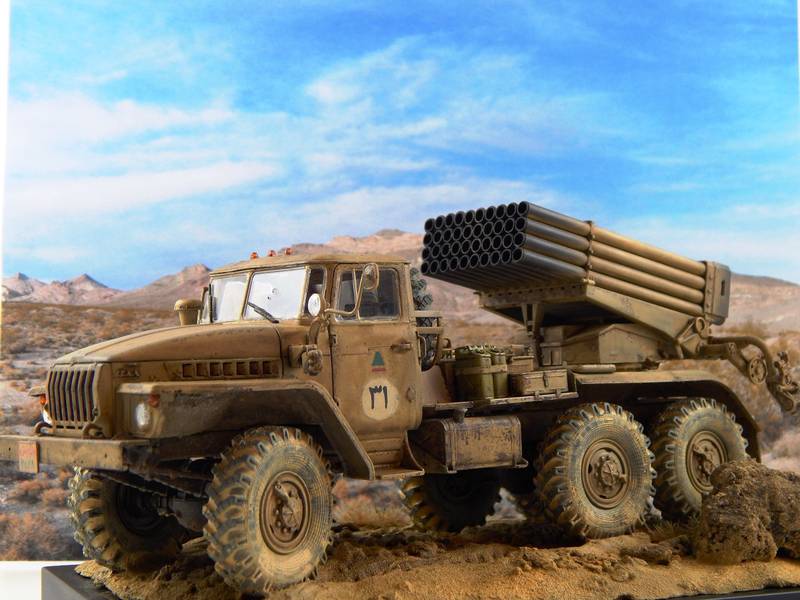
Hussein El Kaissy shares with us a series of images of his Egyptian BM21 Grad Launcher, built using the 1/35th scale offering from Trumpeter.
Link to Item
If you have comments or questions please post them here.
Thanks!
Iran / فارسى
Joined: April 16, 2013
KitMaker: 131 posts
Armorama: 131 posts
Posted: Sunday, December 14, 2014 - 01:52 PM UTC
Florida, United States
Joined: May 16, 2002
KitMaker: 17,694 posts
Armorama: 13,742 posts
Posted: Sunday, December 14, 2014 - 03:47 PM UTC
The truck looks great. Very good weathering and finish as well. There is an issue with the base though. The tire tracks are going in the opposite direction as the truck. Also, not all the wheels touch the ground, but are floating a bit. If the truck isn't attached, you could turn it around to match the tire track direction.
Field Artillery --- The KING of BATTLE!!!
"People sleep peaceably in their beds at night only because rough men stand ready to do violence on their behalf." -- George Orwell
Showcase
Al Qahirah, Egypt / لعربية
Joined: October 06, 2013
KitMaker: 244 posts
Armorama: 180 posts
Posted: Sunday, December 14, 2014 - 04:05 PM UTC
Good point HeavyArty, its good that the truck is not actually attached to the base. I will reverse it

I'd rather regret doing some things in my life than to regret having done nothing with my life...
Germany
Joined: January 18, 2013
KitMaker: 254 posts
Armorama: 253 posts
Posted: Sunday, December 14, 2014 - 09:46 PM UTC
I second HeavyArty: the truck is very convincing. Hussein, when you turn the truck you might add some pigments to base and wheels/lower frame to blend truck and base a bit more together. A figure would add too.
But again: the truck is a pearl!
Gauteng, South Africa
Joined: July 03, 2014
KitMaker: 82 posts
Armorama: 77 posts
Posted: Tuesday, December 16, 2014 - 10:05 PM UTC
Very nice. Like the weathering.
Indiana, United States
Joined: June 10, 2005
KitMaker: 6,188 posts
Armorama: 5,960 posts
Posted: Tuesday, December 16, 2014 - 11:02 PM UTC
I had to 'torque' my chassis as it was a bit off.
Then when I added some AM tires/wheels and I had to sit a heavy weight on top and relaxed the chassis (frame) with a hair dryer repeatedly to get all tires to touch the surface.
Now if I can just finish it! Yours looks great Hussein!!

Jeff
Idaho, United States
Joined: March 09, 2010
KitMaker: 557 posts
Armorama: 217 posts
Posted: Thursday, December 18, 2014 - 09:41 AM UTC
Very nice work especially the weathering on the tires. How do you guys get all four wheels to touch down? I had fits with a I.E.D gun truck, I ended up tossing the model for that and other quality issues with the model.
War is cruelty.There is no use trying to reform it.The crueler it is, the sooner it will be over.
Al Qahirah, Egypt / لعربية
Joined: October 06, 2013
KitMaker: 244 posts
Armorama: 180 posts
Posted: Thursday, December 18, 2014 - 03:07 PM UTC
I corrected the truck placement
i reversed the truck position to adjust the track direction and i added sand putty to the base so that each wheel would touch the ground, it was better to modify the base height than to modify the wheels height
Here is the photo:

I'd rather regret doing some things in my life than to regret having done nothing with my life...


