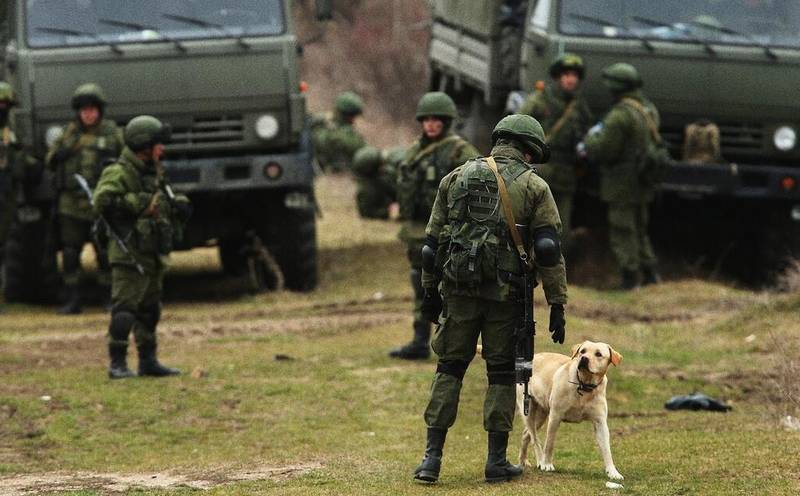
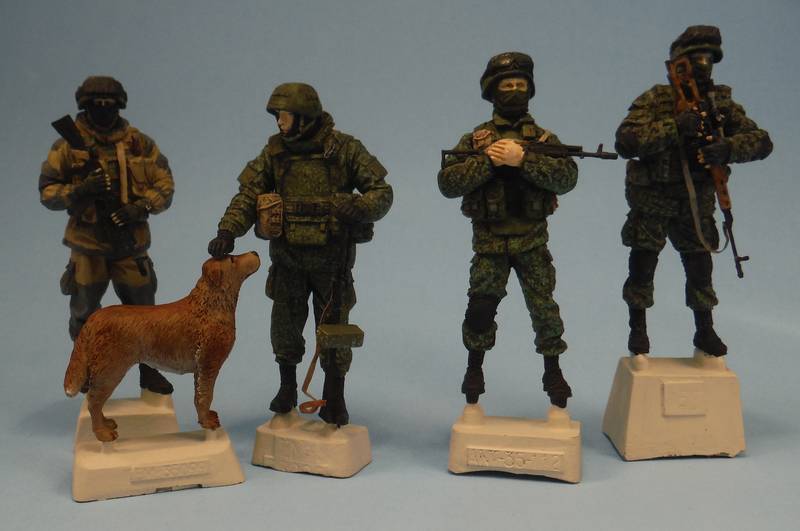
Polite Green Men and a dog

#192
Kentucky, United States
Joined: November 25, 2009
KitMaker: 1,383 posts
Armorama: 1,281 posts
Posted: Thursday, January 29, 2015 - 03:04 AM UTC
#192
Kentucky, United States
Joined: November 25, 2009
KitMaker: 1,383 posts
Armorama: 1,281 posts
Posted: Thursday, January 29, 2015 - 03:11 AM UTC
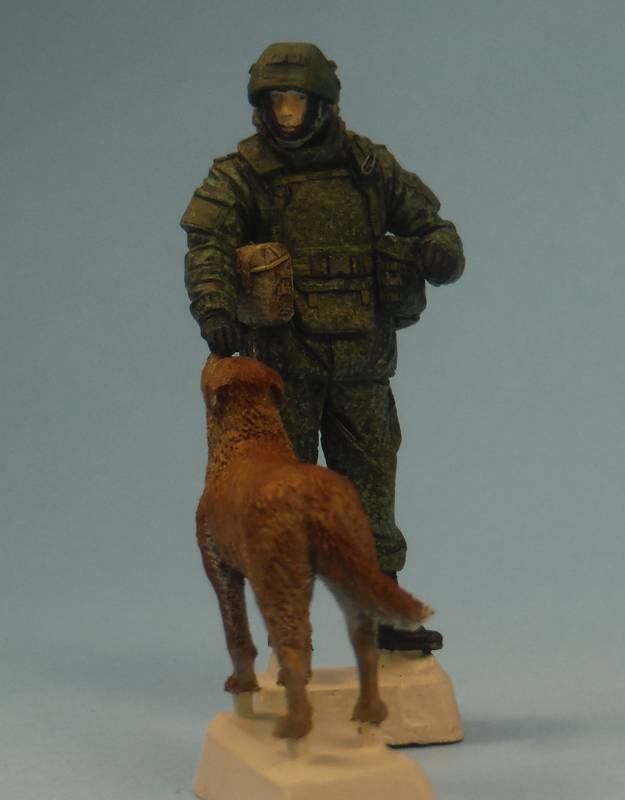
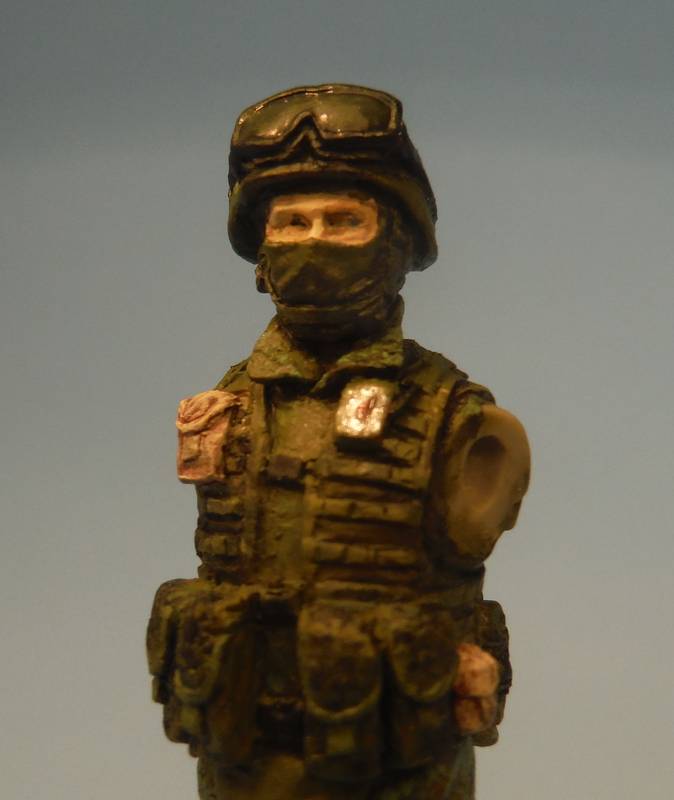
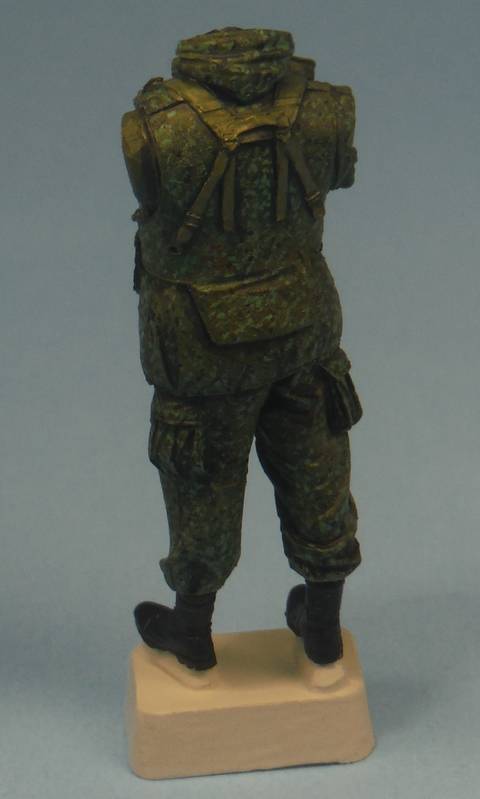
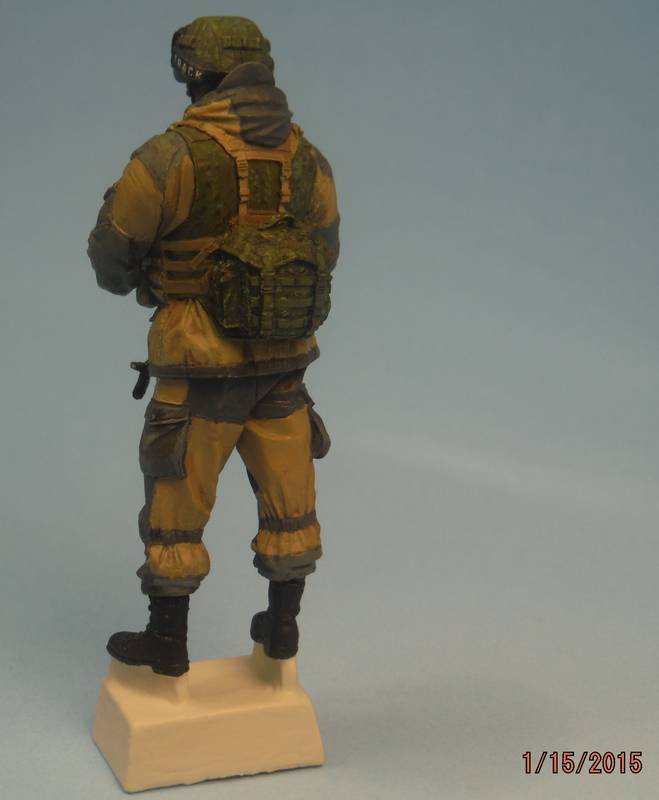
I was learning on this first figure. Many references on the web (and eBay) for the digital camo patterns. Oh well first attempt was still fun...
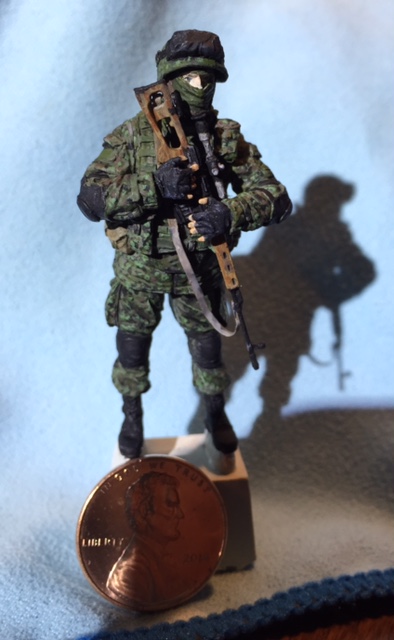
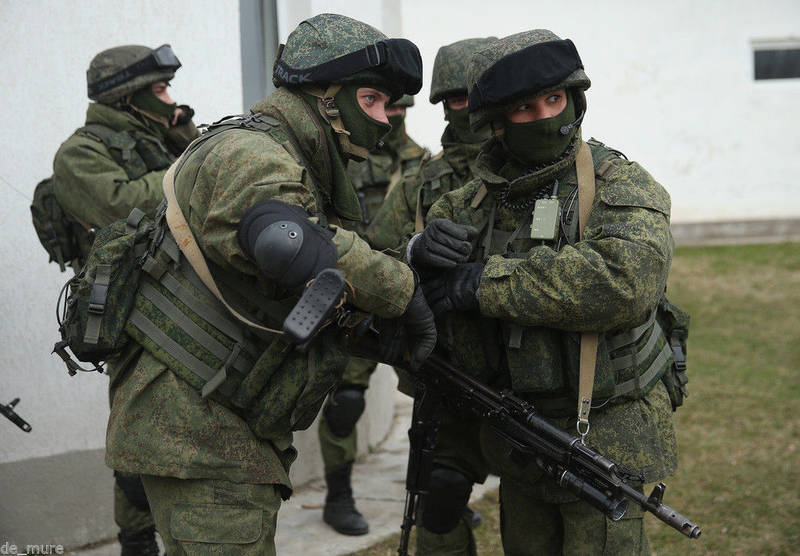
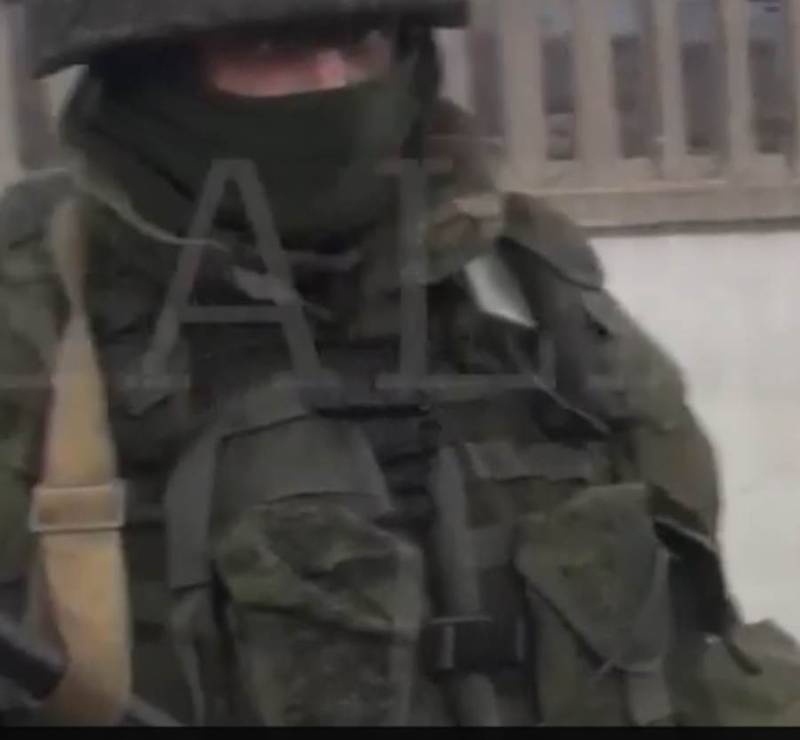
Reference
#192
Kentucky, United States
Joined: November 25, 2009
KitMaker: 1,383 posts
Armorama: 1,281 posts
Posted: Thursday, January 29, 2015 - 03:14 AM UTC
Al Qahirah, Egypt / لعربية
Joined: July 23, 2004
KitMaker: 6,856 posts
Armorama: 6,363 posts
Posted: Thursday, January 29, 2015 - 03:32 AM UTC
I think the result you got on the digital cammo pattern is actually pretty good... I'm still dreading the day I get the time to sit down and try it

And the Gorka looks nice!
Hisham
#192
Kentucky, United States
Joined: November 25, 2009
KitMaker: 1,383 posts
Armorama: 1,281 posts
Posted: Thursday, January 29, 2015 - 03:53 AM UTC
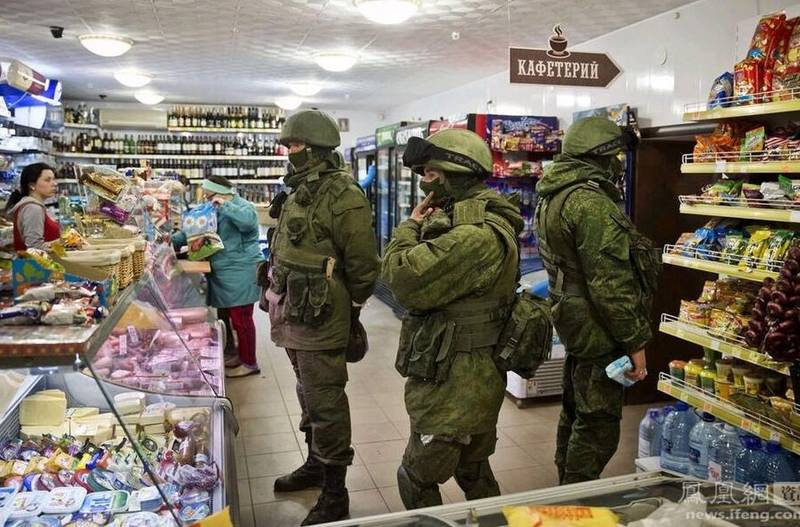
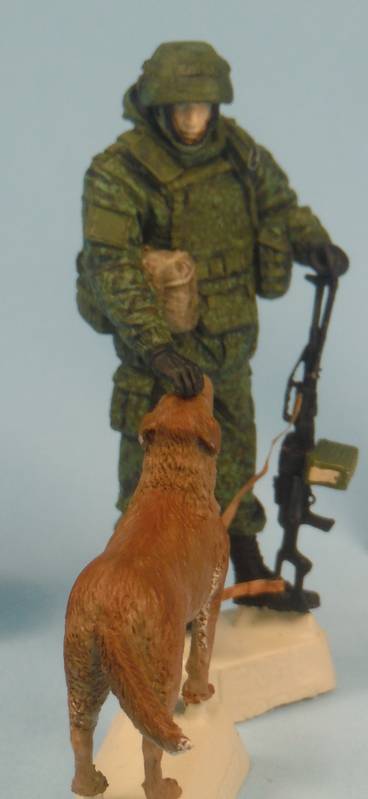
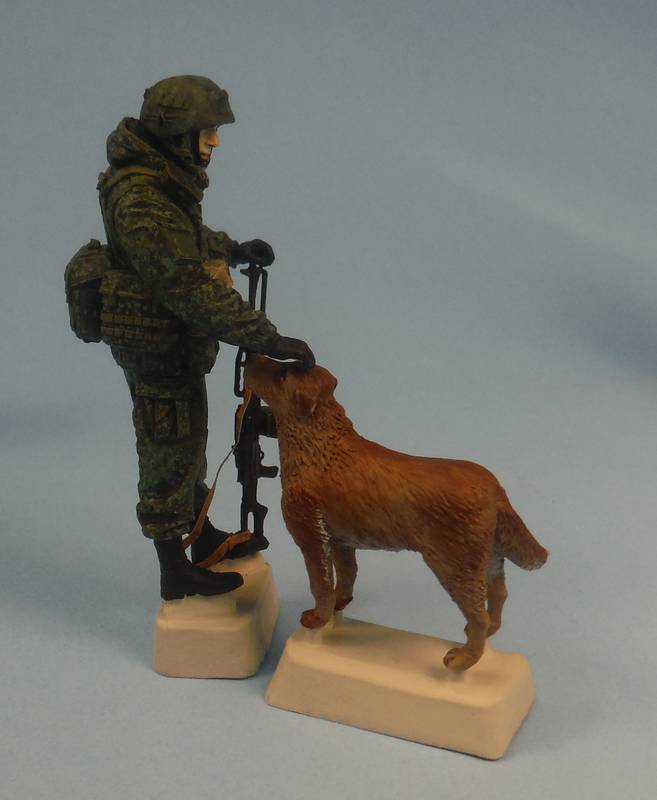
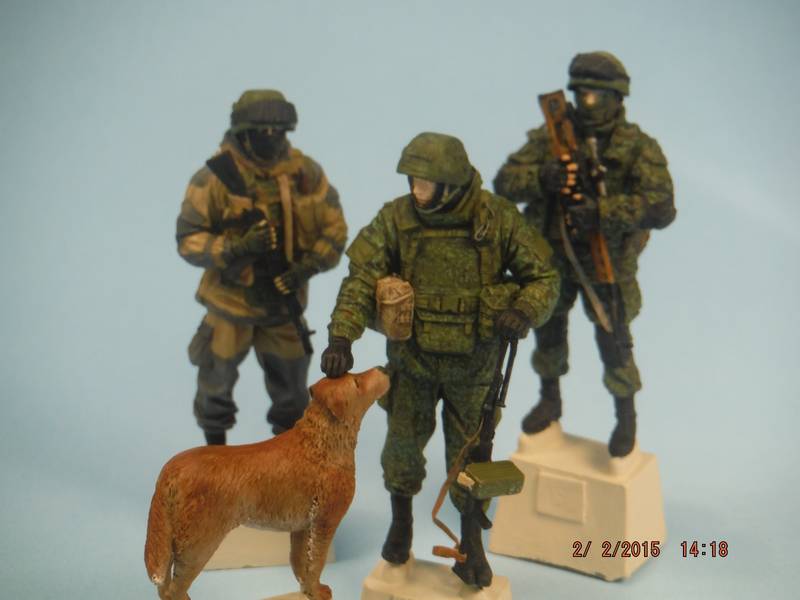
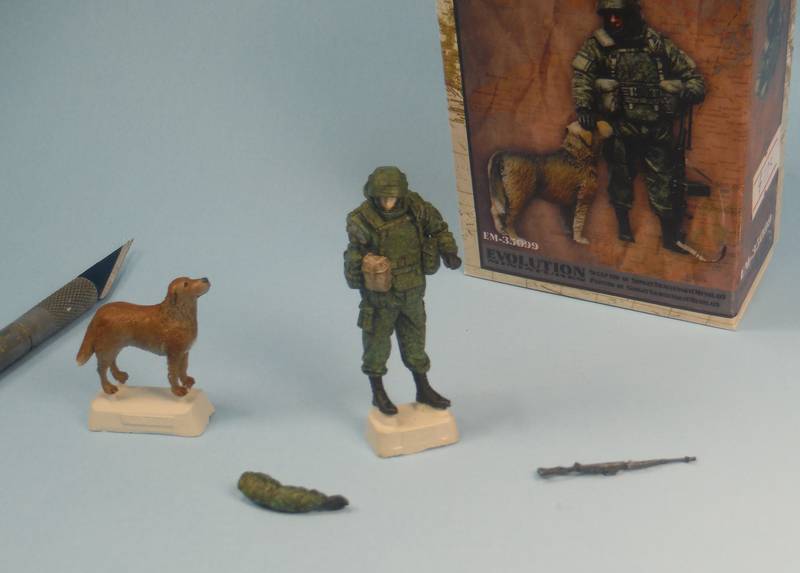
Thank you Hisham for the kind remarks. I am sure you will do excellent work painting and looking forward to seeing your figures! I started trying to match to floral digital with lots of little dots, but now see that the little dots are grouped to form wide light and dark patterns with some smaller brown patches. Much to learn on summer vs. spring vs. winter patterns seen in the photos. So many opportunities for odd dioramas! Please see photo of deli shopping here (are those grenades in the pockets??!).
#284
Northern Ireland, United Kingdom
Joined: October 04, 2006
KitMaker: 3,094 posts
Armorama: 2,942 posts
Posted: Thursday, January 29, 2015 - 10:17 PM UTC
Fantastic work there amoz. I think you have got the digital pattern done very nicely, it certainly looks the part. How did you go about applying it?
On The Bench:
Ethiopian BMP-1 (Trumpeter 1/35)
AMX-13/75 (Takom 1/35)
#192
Kentucky, United States
Joined: November 25, 2009
KitMaker: 1,383 posts
Armorama: 1,281 posts
Posted: Thursday, January 29, 2015 - 10:49 PM UTC
Quoted Text
Fantastic work there amoz. I think you have got the digital pattern done very nicely, it certainly looks the part. How did you go about applying it?
Thank you Karl for the nice words as the encouragement is appreciated! No secret to this technique...a very small brush. and lots of dots. I use Master Model enamels- Med field green, pale green, NATO brown, and flat black. Base coat of medium green, and then dots. I use a small brush with a ragged tip and if the paint is not too dry and not too wet, it leaves a dot or even a subtle dry brush mark. Patterns of pale green, less black dots, patterns of med green mixed with black for a darker green, small local patterns of brown. And of course darker in the creases and highlights at the top. Go with more pale green. I am still learning myself what looks okay, but it is fun to look at the references and sit and paint. Hope to see other methods here to use as well. Looking forward to the new "Girls" coming out from Evolution Miniature to add to the soldiers. Thanks!

North Carolina, United States
Joined: June 06, 2006
KitMaker: 4,691 posts
Armorama: 3,509 posts
Posted: Thursday, January 29, 2015 - 11:22 PM UTC
Really nice job on the camo,need to bookmark this one for the future.
#284
Northern Ireland, United Kingdom
Joined: October 04, 2006
KitMaker: 3,094 posts
Armorama: 2,942 posts
Posted: Friday, January 30, 2015 - 04:17 PM UTC
Thanks for the info on the technique amoz.
On The Bench:
Ethiopian BMP-1 (Trumpeter 1/35)
AMX-13/75 (Takom 1/35)
#192
Kentucky, United States
Joined: November 25, 2009
KitMaker: 1,383 posts
Armorama: 1,281 posts
Posted: Saturday, January 31, 2015 - 12:01 AM UTC
#192
Kentucky, United States
Joined: November 25, 2009
KitMaker: 1,383 posts
Armorama: 1,281 posts
Posted: Saturday, January 31, 2015 - 10:00 AM UTC
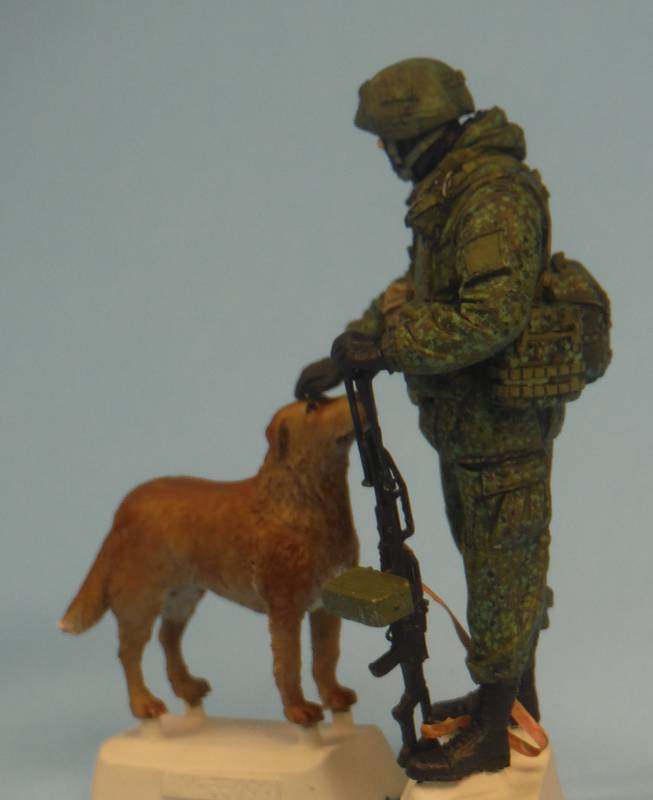
Now to finish up the PKM, bipod, and sling.
Thank you for looking in on a work in progress.
#192
Kentucky, United States
Joined: November 25, 2009
KitMaker: 1,383 posts
Armorama: 1,281 posts
Posted: Sunday, February 01, 2015 - 05:10 AM UTC
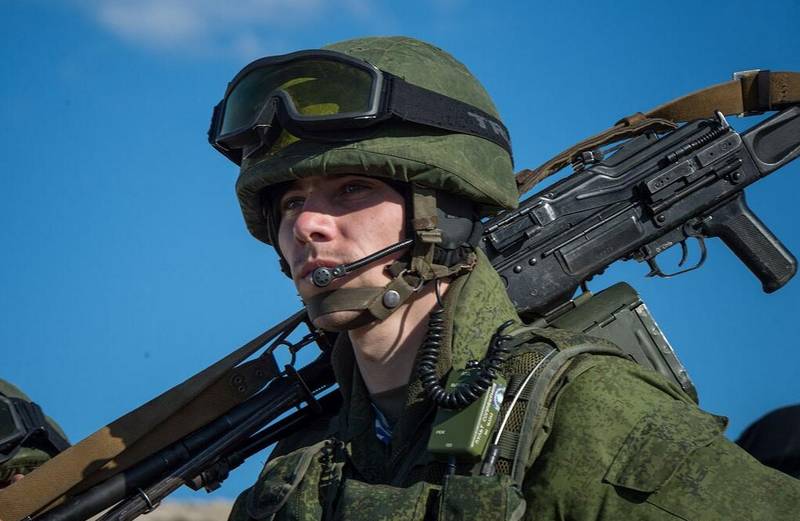
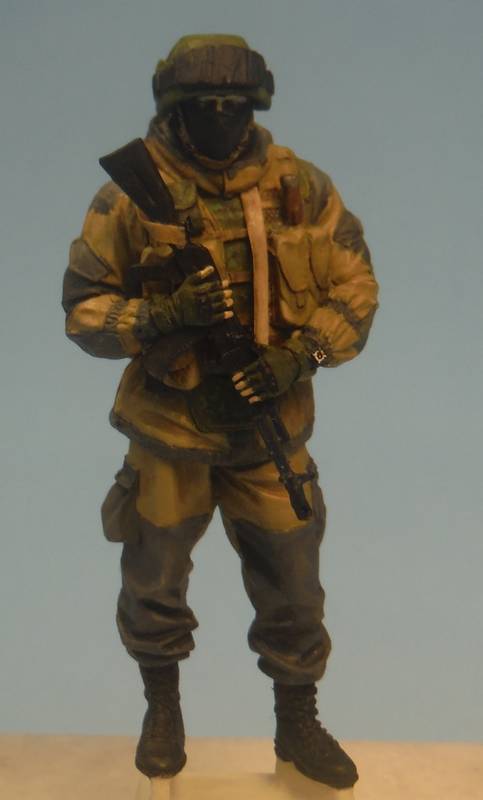
I was wrong on the included MG. Not a PKM, but the newer PKP Pecheneg...
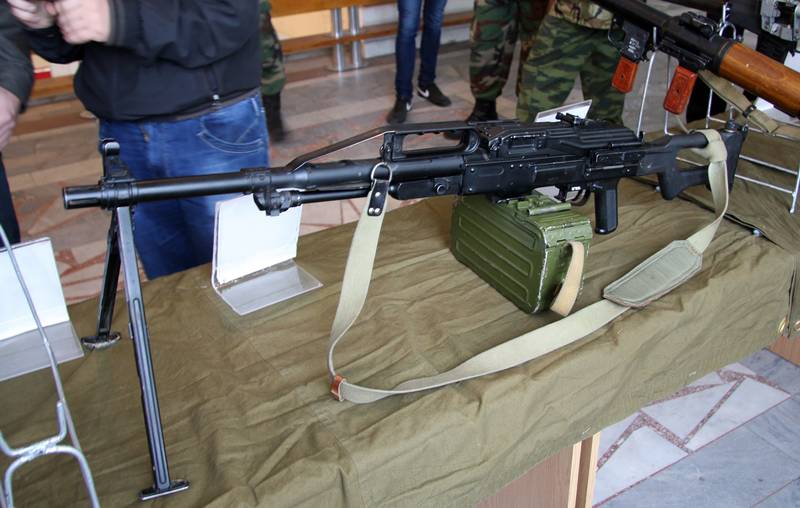
PKP Pecheneg in Conscript day 2011
photo from Vitaly V. Kuzmin Copyright Policy - Vitalykuzmin.net

Wien, Austria
Joined: May 20, 2011
KitMaker: 1,744 posts
Armorama: 1,727 posts
Posted: Sunday, February 01, 2015 - 06:11 PM UTC
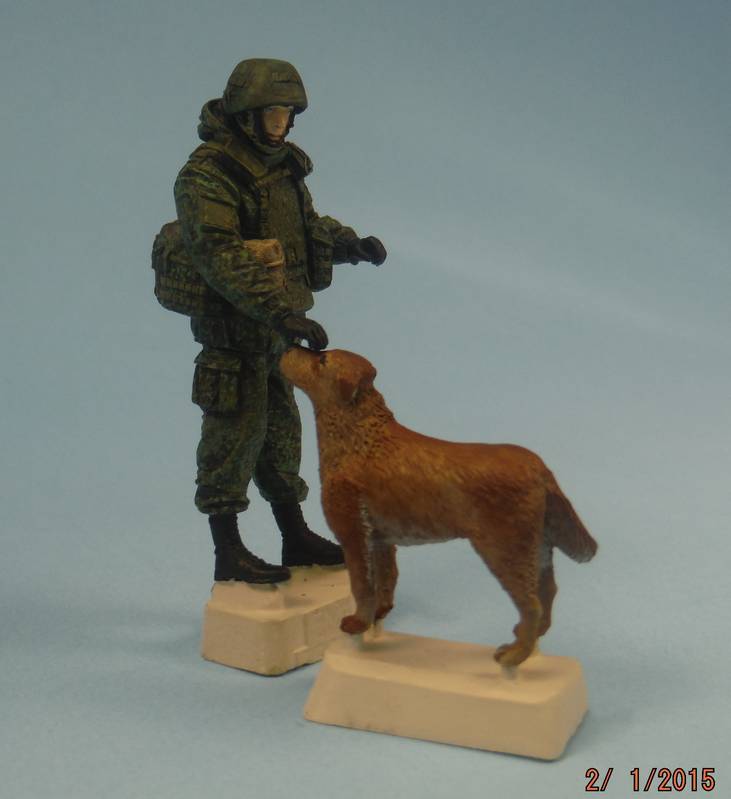
Superb job on that camo Sir!! Congratulations!!
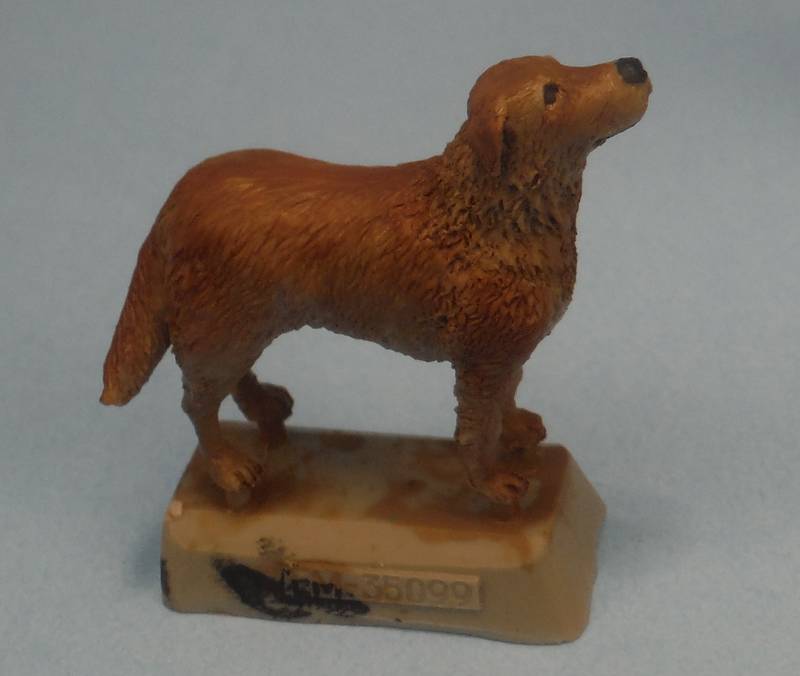
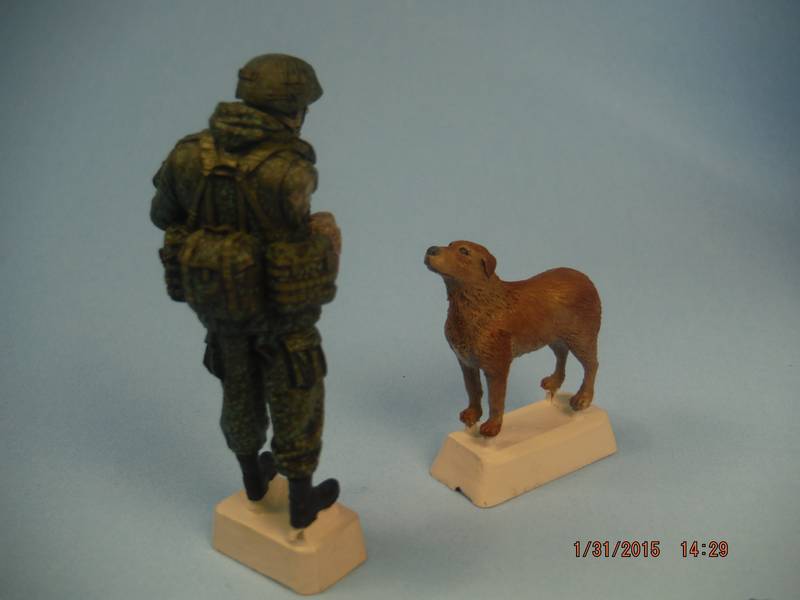
And I like the way you've painted the dog too (i.e. no weathering!!)!
Great show indeed!!
Cheers
Romain
un pour tous et tous pour un!
#192
Kentucky, United States
Joined: November 25, 2009
KitMaker: 1,383 posts
Armorama: 1,281 posts
Posted: Monday, February 02, 2015 - 03:44 AM UTC
Danke schön Romain! You are most kind. The muddy feet on the dog would be considered weathering perhaps? LOL
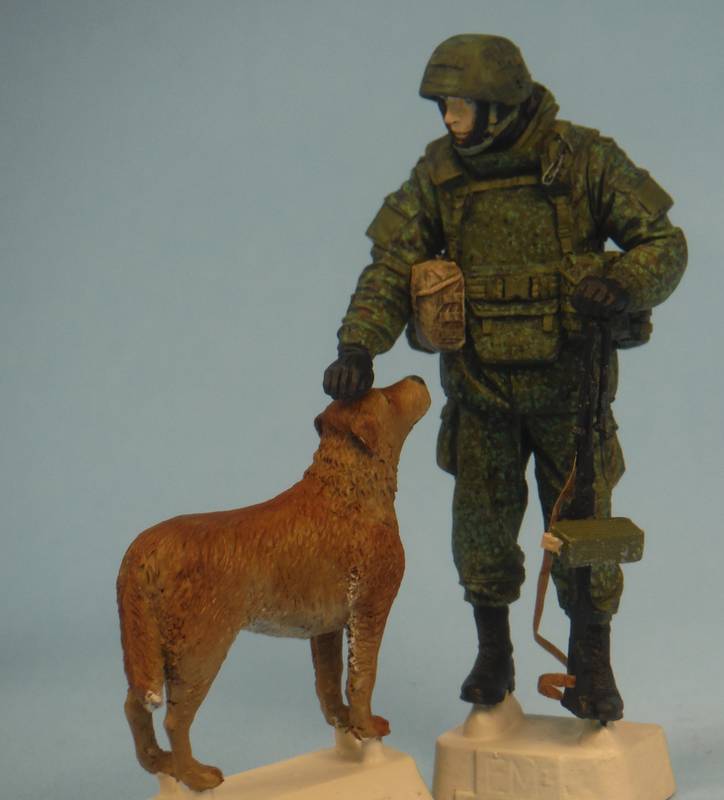
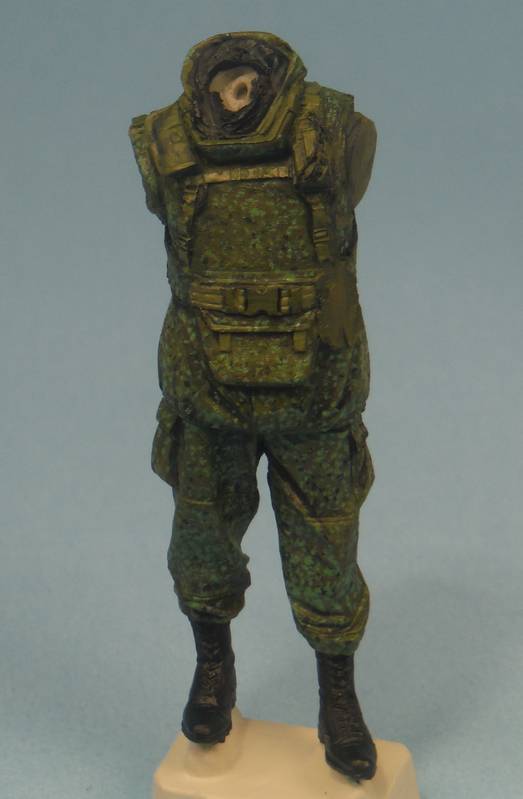
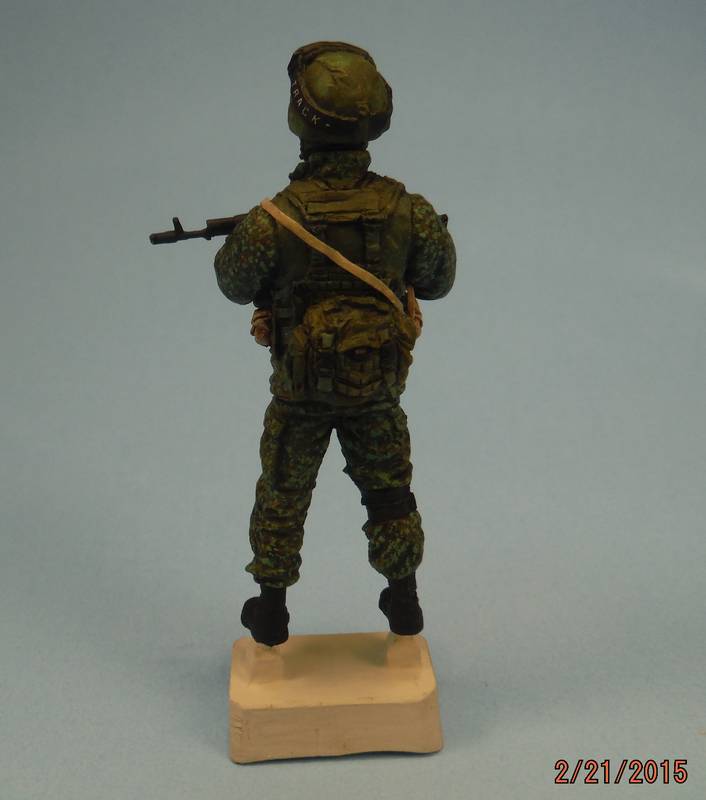
Here is the final result with the PKP added. The PKP sling will be arranged when I decide on a base for display as it is foil. It would look better with "gravity" and the look of weight applied to the sling shape. This figure was fun and I highly recommend it! Thanks for looking in.
Perhaps displayed as part of a group...looking forward to the new set with "Girls" from Evolution Miniatures.
Cheers,
Stuart
#192
Kentucky, United States
Joined: November 25, 2009
KitMaker: 1,383 posts
Armorama: 1,281 posts
Posted: Monday, February 02, 2015 - 05:05 PM UTC
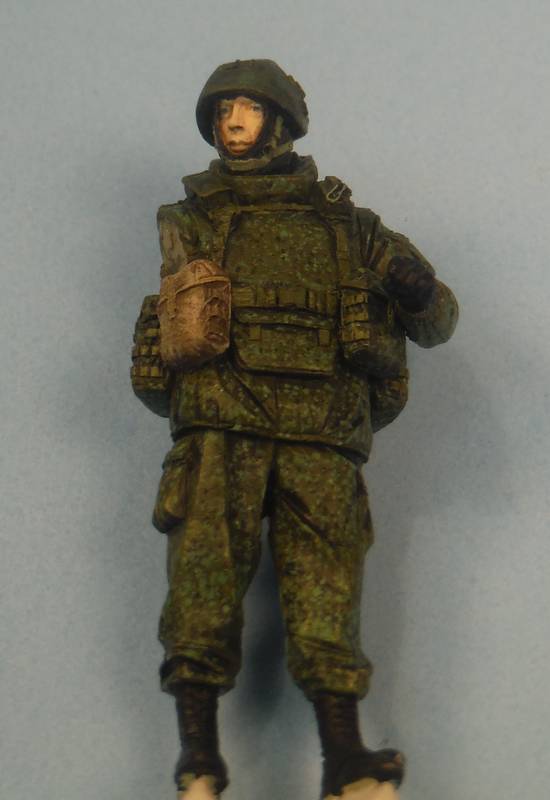
Well a small update. While looking at the photos of the PKP, I noticed that the strap on the ammo can under the MG is on the wrong side! Photos do not lie. The can is mounted to the gun correctly with the feed on the starboard side, but the pull strap (per the photo) goes on the port side of the box. Easy fix, but just caught that and learned something new!

All the best.
Nova Scotia, Canada
Joined: July 26, 2012
KitMaker: 454 posts
Armorama: 281 posts
Posted: Monday, February 02, 2015 - 11:24 PM UTC
Hey nice paint job. Only thing I would suggest, it to re paint the plastic bucklets a black colour. They were molded in the low gloss black while they're in production.
Cheers,
Tom
#192
Kentucky, United States
Joined: November 25, 2009
KitMaker: 1,383 posts
Armorama: 1,281 posts
Posted: Tuesday, February 03, 2015 - 12:12 AM UTC
Quoted Text
Hey nice paint job. Only thing I would suggest, it to re paint the plastic bucklets a black colour. They were molded in the low gloss black while they're in production.
Cheers,
Tom
Thank you Tom! Good to know as I had not noticed the buckles. Are these are on the vest and the pouches? Looking at my photos some more to understand. Good eye much appreciated!
#192
Kentucky, United States
Joined: November 25, 2009
KitMaker: 1,383 posts
Armorama: 1,281 posts
Posted: Tuesday, February 03, 2015 - 12:46 AM UTC
...and the helmet chin strap buckles? Those are black plastic as well?
#192
Kentucky, United States
Joined: November 25, 2009
KitMaker: 1,383 posts
Armorama: 1,281 posts
Posted: Wednesday, February 04, 2015 - 11:37 PM UTC
Nova Scotia, Canada
Joined: July 26, 2012
KitMaker: 454 posts
Armorama: 281 posts
Posted: Sunday, February 08, 2015 - 06:40 PM UTC
For the finer pieces in black, I would suggest using a very fine black perament marker. Just make sure you are nice and relax while painting.
What paints are you using for the camoflague? I would really like to know. I'm currently painting the same figures right now for an up coming diorama. I got him primed with Vallejo German Dark Green for now. I won't post pictures until I'm done. But it's going to be a very nice piece once completed.
Cheers,
Tom
#192
Kentucky, United States
Joined: November 25, 2009
KitMaker: 1,383 posts
Armorama: 1,281 posts
Posted: Sunday, February 08, 2015 - 08:17 PM UTC
Quoted Text
For the finer pieces in black, I would suggest using a very fine black perament marker. Just make sure you are nice and relax while painting.
What paints are you using for the camoflague? I would really like to know. I'm currently painting the same figures right now for an up coming diorama. I got him primed with Vallejo German Dark Green for now. I won't post pictures until I'm done. But it's going to be a very nice piece once completed.
Cheers,
Tom
Thank your for the marker idea Tom. I will try that after my morning coffee! The enamel paints I used are Master Model Medium Green as a base, Med Green mixed with flat black for darker, flat black, and the "pale green" straight from the bottle. NATO brown for small regions. I need to read the FS numbers and repost. A lot of it is done with combining colors to get shadows and highlights. Now working one of the ANT Minature figures and will post soon. I agree that all of these resin figures are great moldings.
Cheers!
#192
Kentucky, United States
Joined: November 25, 2009
KitMaker: 1,383 posts
Armorama: 1,281 posts
Posted: Sunday, February 08, 2015 - 08:48 PM UTC
Sorry for the delay. Had to run for numbers. Follow up from last post with references...
Enamels MM Medium Field Green 1786 like FS 34095
MM Pale Green FS 34227
Flat black and NATO brown
link
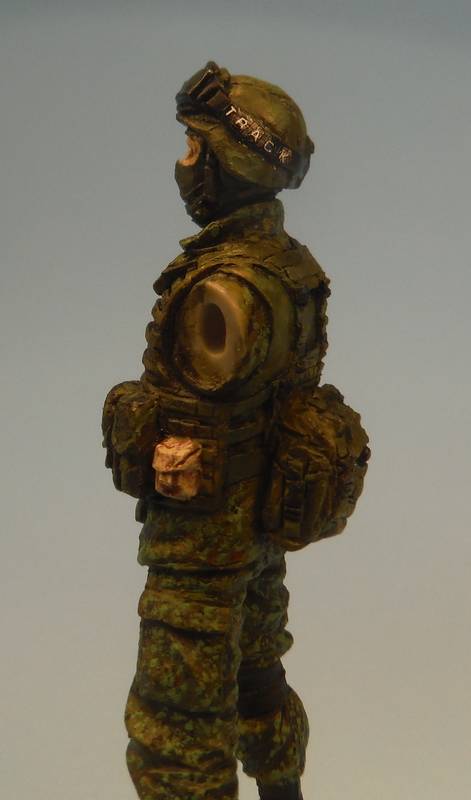
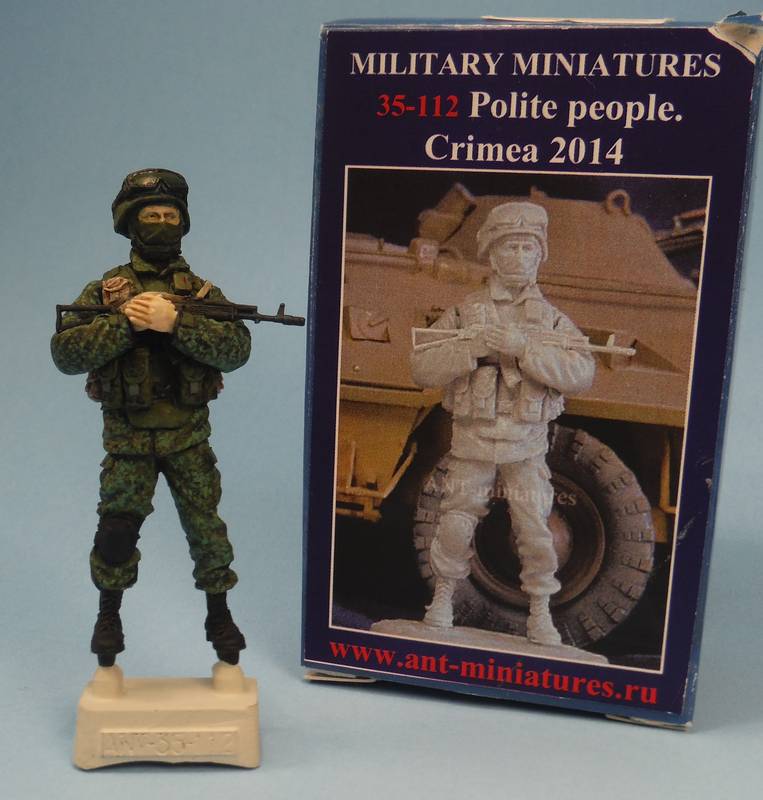
http://scalemodeldb.com/paintcharts/modelmaster The new figure in process (that is really well done by ANT) is ANT Miniatures Crimea 2014 ANT 35-112. Photos soon.
Nova Scotia, Canada
Joined: July 26, 2012
KitMaker: 454 posts
Armorama: 281 posts
Posted: Wednesday, February 11, 2015 - 02:41 AM UTC
Here is my little project I've just started.

Best of luck!
Cheers
Tom
#192
Kentucky, United States
Joined: November 25, 2009
KitMaker: 1,383 posts
Armorama: 1,281 posts
Posted: Tuesday, February 17, 2015 - 04:26 AM UTC
Thanks Tom! Great stuff there. Looking forward to seeing your figures! Please post photos as you can.
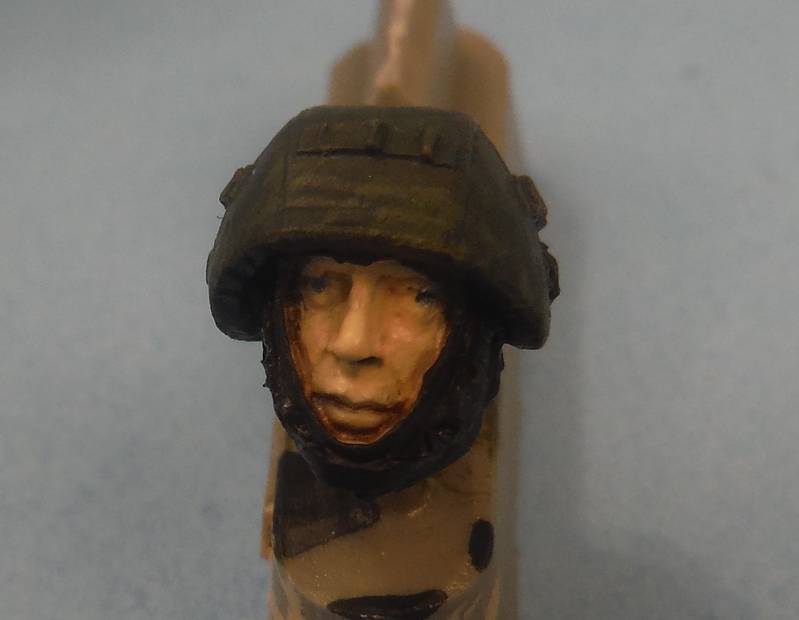
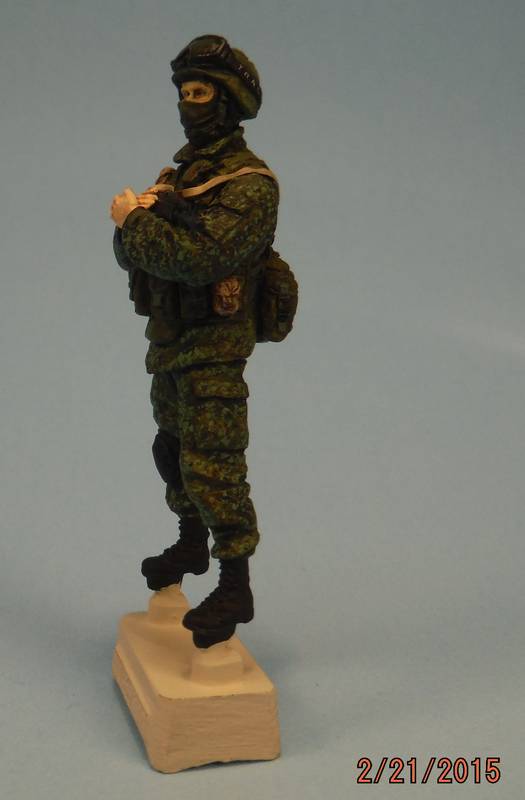
This is the ANT figure as a work in progress. Really enjoying all the variations. This figure has the head set.

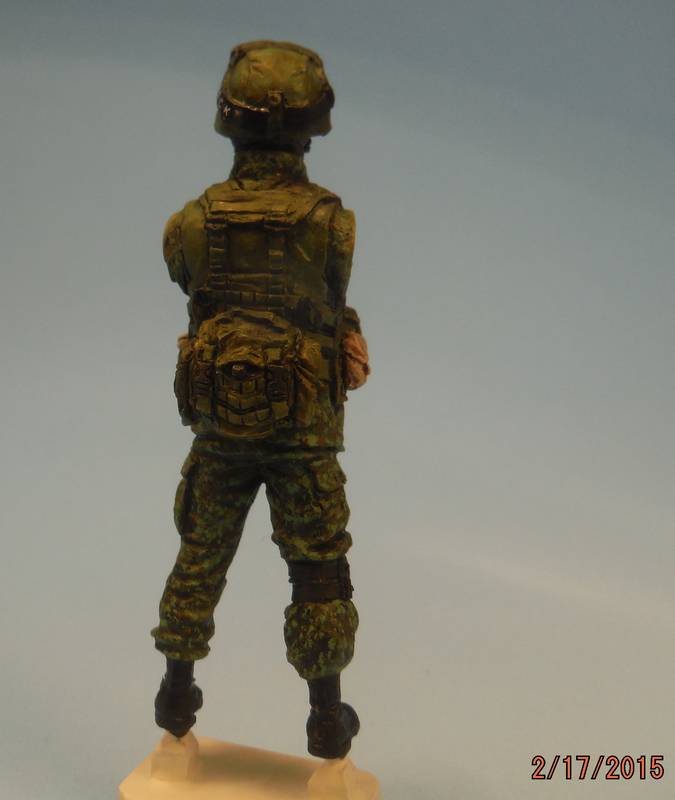
Thanks for looking!
Cheers - Stuart
#192
Kentucky, United States
Joined: November 25, 2009
KitMaker: 1,383 posts
Armorama: 1,281 posts
Posted: Saturday, February 21, 2015 - 02:37 AM UTC


