Quoted Text
Hey, thanks a lot for all the interest in that thread !
Steve: If you could know how many hours I spent on those pair of blue eyes ! Maybe they are oversized, I didn't have this impression though. Maybe it's the blue on the pic that make the eyes much bigger than they are.
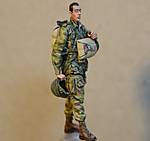
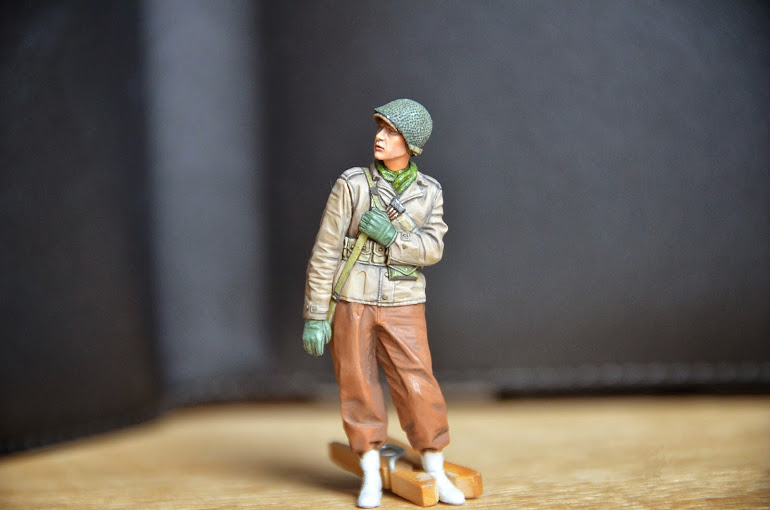
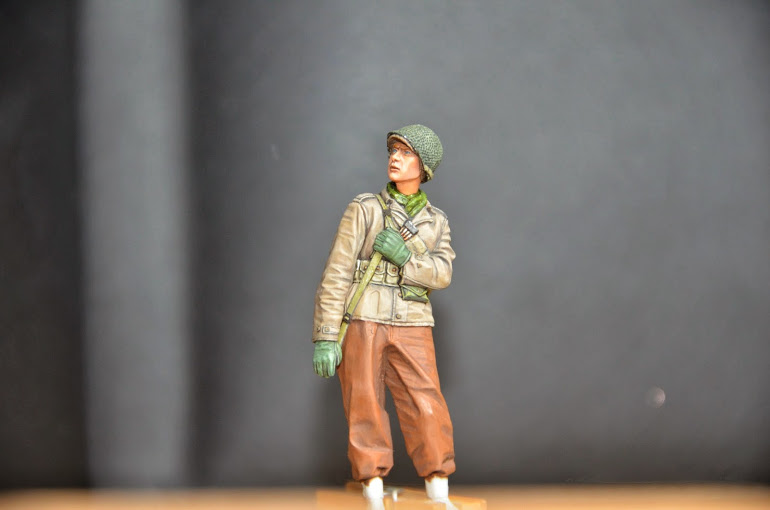
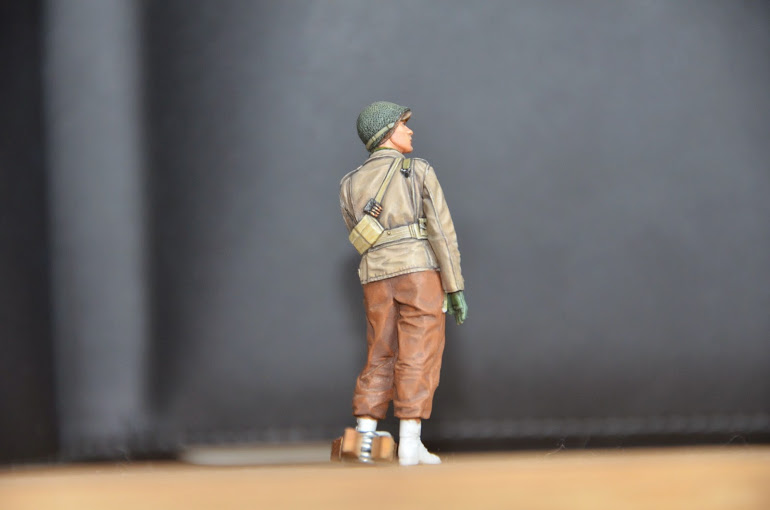
Denis:wow, that's a collection ! Would it be possible that you have the real stuff equipement for the Bar Gunner that goes with the Alpine Pair ? I'm very bad at referencing, clothing etc and a little help would be more than welcomed. Here is the guy:

and don't worry, absolutely no offense taken ! As far as inspiring book, Bill Horan made me dream when I was kid. But I never followed anyone technique (find it too boring), only mine, made of tests, fails (a lot) and learn (very slow).
James: again a deep thanks for your very nice comments. I'm very productive those days eventhough I'm a newbie dad.. It's comments like yours that push me to improve and make more figures  . I had the same thinking about the E Trench tool. Dangerous for Men jewels
  . But in addition I found it covers a great part of the figure front, which is too bad..
Frederick, I guess you mixed up Gary and I as the author of the little fellow  . I guess everyone confuse names in this thread as Jerry calls James "Jim". You would be very disappointed if I would explain the oil filters "technique". You take oil, thinner, dilute a lot and then apply shade. As simple as that. No magic trick. Sorry...
All the very best guys,
Raoul
Hi, Julien! Re: Your BAR Gunner- This figure's uniform colors are "spot-on" in depicting the M1943-series clothing AFTER they have faded to a degree. The colors of the M1943-series faded to gray-ish hues, as did the HBT )Herringbone Twill) uniforms. Herringbone Twill was used by the US Army, US Marines, and the US Navy Corpsmen and Beachmasters. These were made in single-piece coveralls and two-piece versions. The color of the US HBT material was a medium GRAY-ISH GREEN, which faded VERY quickly. I like to use TESTORS MODEL MASTER II Enamel "British Interior Green" as a base color, highlighted with "RAF Sky Type-S". For D-Day, 6 June, 1944, US Paratroopers were issued "Jump Uniforms" in a color that was quite unique, when compared to the rest of WWII GI clothing. I replicate this color by lightening my acrylic "SOVIET KHAKI" with a little bit of a "basic" TAN color. I highlight this color by adding a little bit of OFF-WHITE or very pale GRAY to the mix...
I like to do my "shadow-effects" with weathering powders, which are in essence, crushed Artist's Chalk Pastels; I buy GRUMBACHER's ARTIST's CHALK PASTELS, which offer me a MUCH GREATER range of colors than what is generally available in the "established" standard range of weathering powders. (MIG, AK, etc) I use these different pastels, and judicious use of my various airbrushes, in lieu of messy washes and bogus "streaking-effects". This gives me A LOT more control over what I'm trying to achieve, which goes for my figures, armor, aircraft, HO Steam Locomotives and cars...
It should be remembered that the M1943 articles of clothing, including the M1943 Service Shoes, ("Combat Boots") didn't really start to go into service until late summer/early autumn of 1944. If you're going to be doing US Army ETO figures prior to the above-stated date, the GIs, infantry, tankers, artillery, etc, would have, for the most part, been issued the M1938 Canvas Leggings, used with the Russet Service Shoes. This is often overlooked by US figure modellers. Many US servicemen in the ETO and elsewhere were still using their Russet Service Shoes and Leggings by war's end. Later-issue Service Shoes were also manufactured with the "rough" outside finish, commonly referred to as "flesh side out". (See below)
Also, the M1943 Service Shoes were made in 2 styles- that with the "Russet" smooth leather exteriors, referred to as "flesh side in" and the "rough" exterior, referred to as "flesh side out". Being aware of this will give you some more variety in depicting US WWII Foot Gear.
The US Marines were issued the Russet Service Shoes and M1938 Canvas Leggings right up to the end of the war. Due to the scorching heat of the Pacific Theatre, many Combat Marines dispensed with the Leggings, wearing their HBT Trousers "un-bloused". GIs in the African Campaign, MTO and ETO also did this quite often, until ordered to resume wearing the Leggings. In Patton's Third Army, fines were often imposed upon GIs' non-conformance to Uniform Regulations...
I like to use FLOQUIL/POLLY SCALE or MODEL MASTER ACRYLIC "SOVIET KHAKI" as my base color for the OD Shade 33 woolen articles of clothing, adding acrylic "DEPOT OCHRE YELLOW" to the "SOVIE KHAKI" for highlighting, and my own mix of Artist's Pastel Chalks for "shadow-effects". I even use very lightly-applied BLACK pastel chalks for deep shadows-effects, with great results. A light hand is required in order to not "over-do"...
BTW, I use a technique for the eyes that many of the pros use- You don't even have to bother with the whites of the eyes and various colors of the iris'... Shep Paine pointed out that soldiers, and civilians, for that matter, tend to "squint" slightly out-of-doors, reducing the eyes to slits. I don't use WHITE AT ALL for my figures' eyes, leaving the eyeball itself in my base FLESH color. This is to depict s slightly "bloodshot" appearance, and avoids that "pop-eyed" look that plagues many figure-painters. I use a "DARK" or "SHADOW" FLESH (UMBER works fine) above the eyeball and below the eyebrow to depict "shadow".
Using DARK UMBER, I "draw" the upper and lower eyelashes in a single line over and under the eyeball, keeping the distance between the lashes VERY NARROW. To depict the iris and the pupil of the eye, I "draw" a very thin, simple, single line in the center of the eyeball, or offset to the right or left in both eyes, if I want to depict my subject looking in any other direction. Don't worry about leaving too much DARK UMBER above or below the eyball, because you're going to be using your "shadow" color to correct for this. I "clean up" my shadow area with an "eyebrow" above the upper eye shadow, and below the eyeball's lower shadow, I'll paint on a little bit of my highlighted "bright cheek color", blending as I go on to paint the rest of my figure's face.
It's generally accepted that there are about 9 steps that go into "properly" painting a face. It's been my personal experience that there are probably a dozen steps to accomplish the job, not including the special nuances of color, very gently blending DRY Artist's pastels to further enhance the subtleties of the human face.
Any other questions, feel free to ask...


 [/quot


