Evening Folks,
Now, following on from my new years resolution....
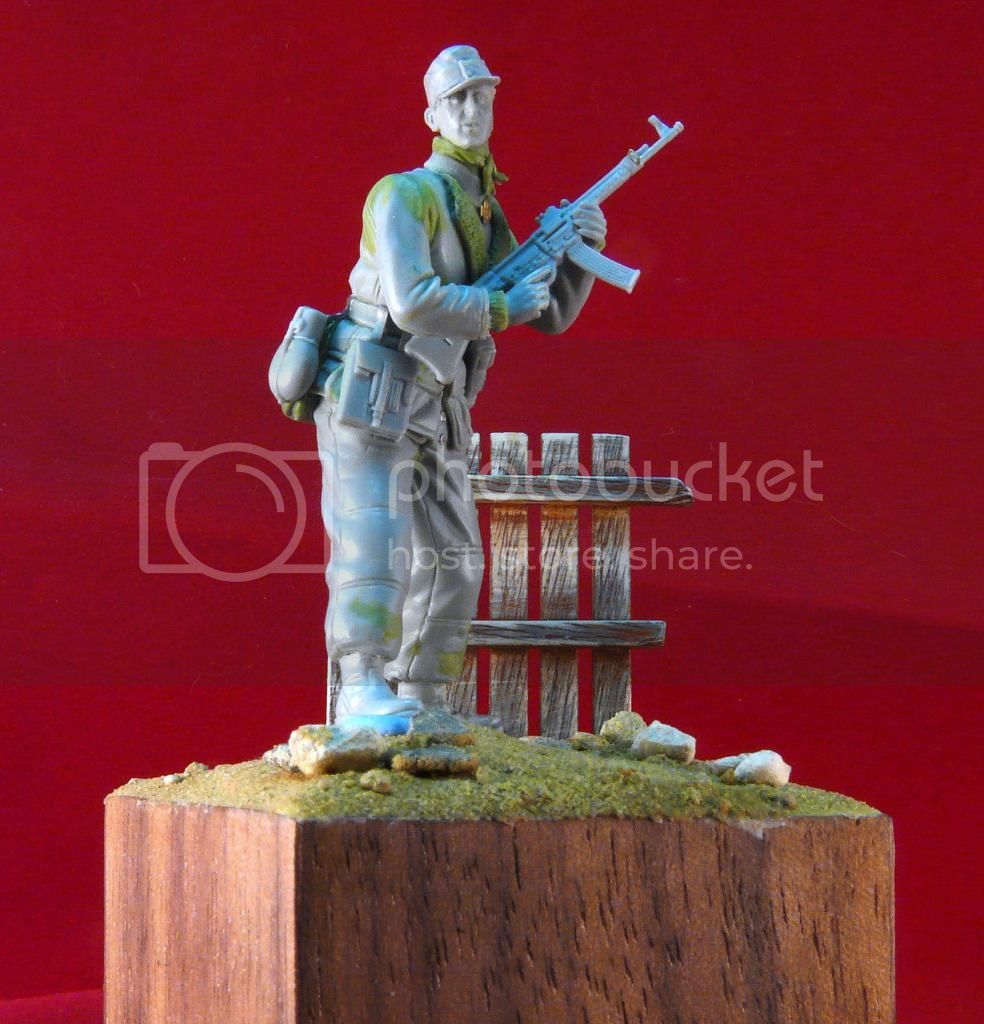
A very simple adaption of a figure from the DML Korsun Pocket set. This one in fact...
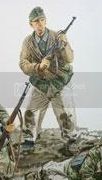
Now, I wanted to do this one as much "Out of the box" as possible so, the only additions were a Hornet head and a different map case (I always thought the Gen2 one was too small).
I decided to depict him as a NCO of the Totenkopf division in the defence of Vienna just before the final capitulation so, just a very few modifications...
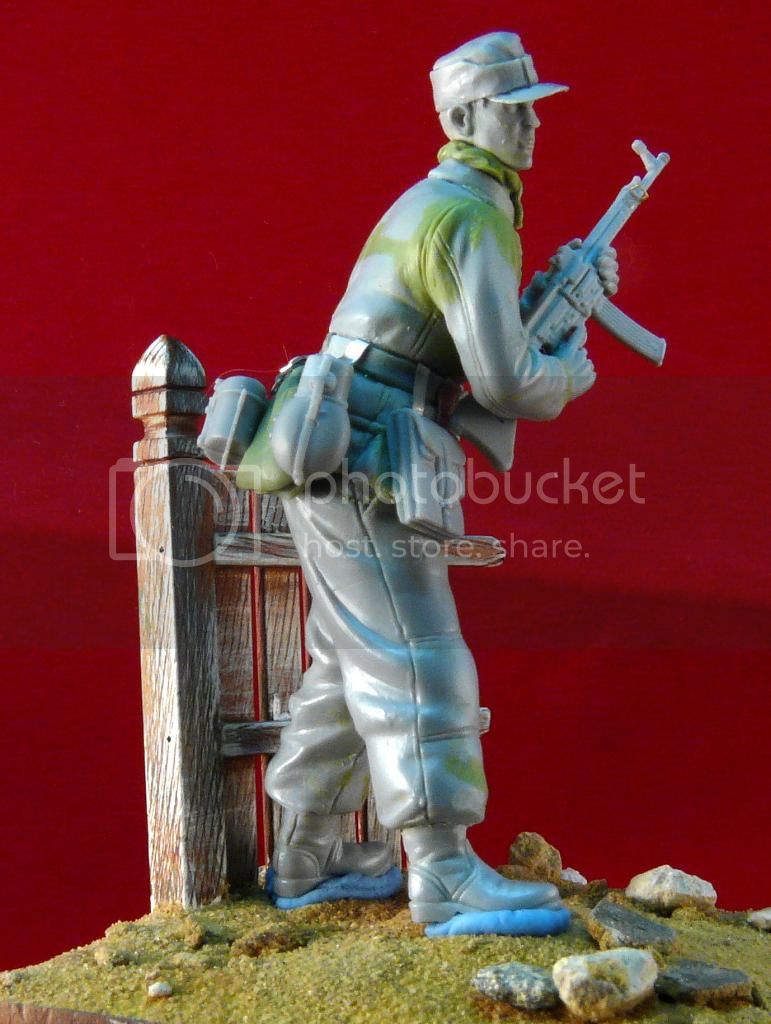
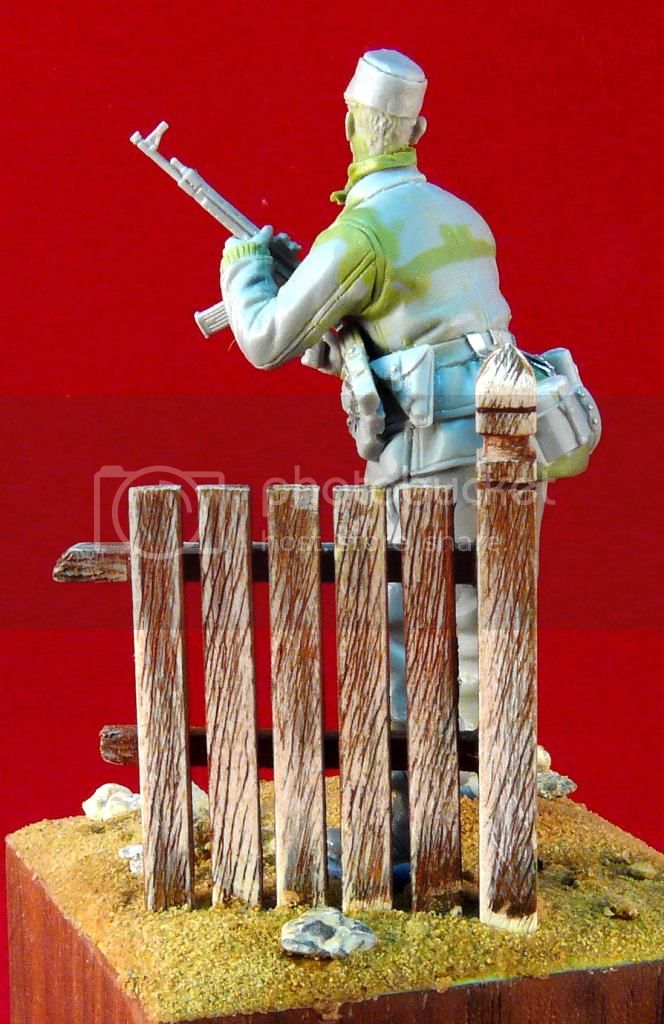
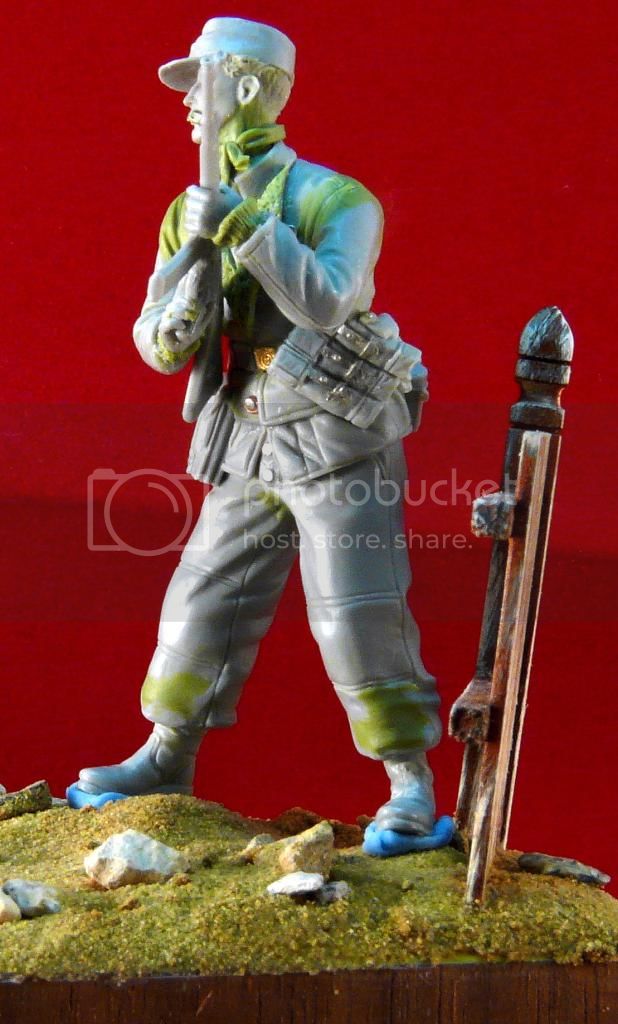
The fur lapels were reworked, along with a few other detail bits. Most of the figure was rescribed to enhance the detail. The seams on the sheepskin jacket were done by using a trianguar file to remove the kit seams, then filling with putty and impressing new seams with a sharp blade.
Now, as the kit pose has him holding a MP40, I thought a Stg44 would be more appropriate for the time period so, this was changed. However, there was a gap at the left wrist. Thankfully, a bit of research showed that the German army issued wrist warmers. Just the thing to cover up embarrassing gaps...
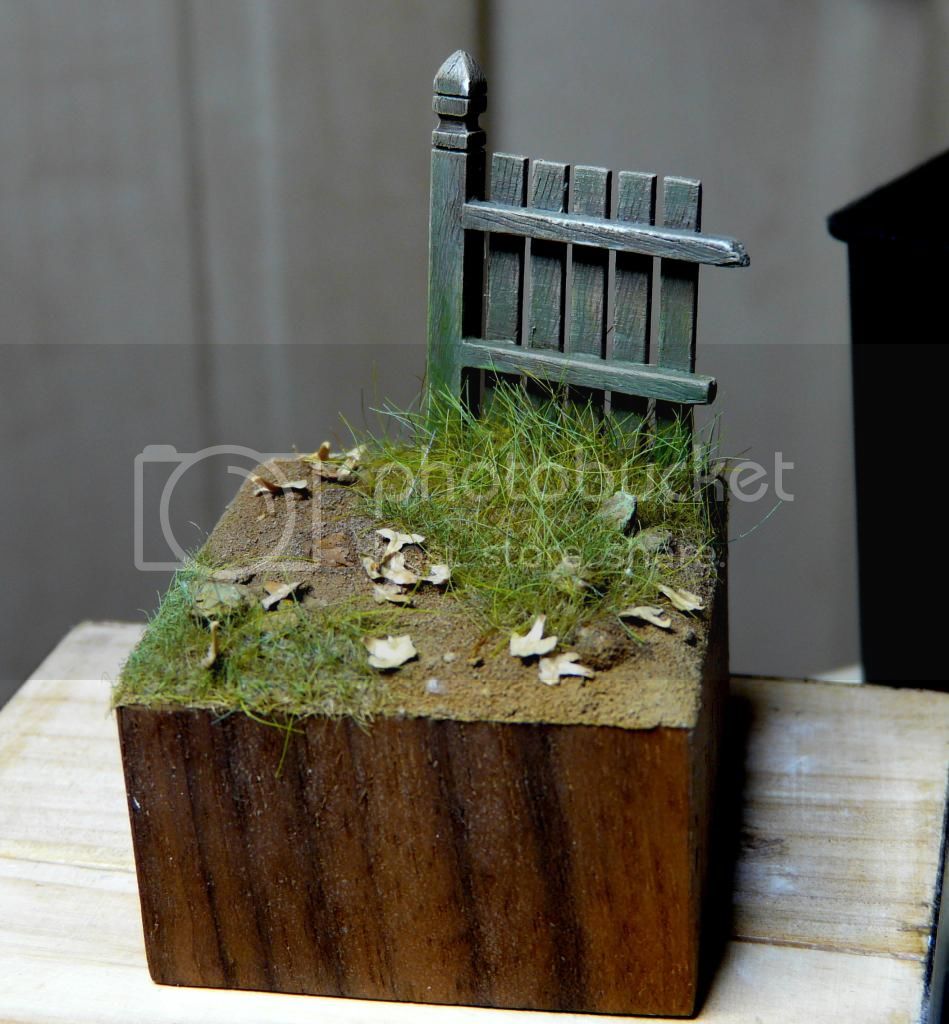
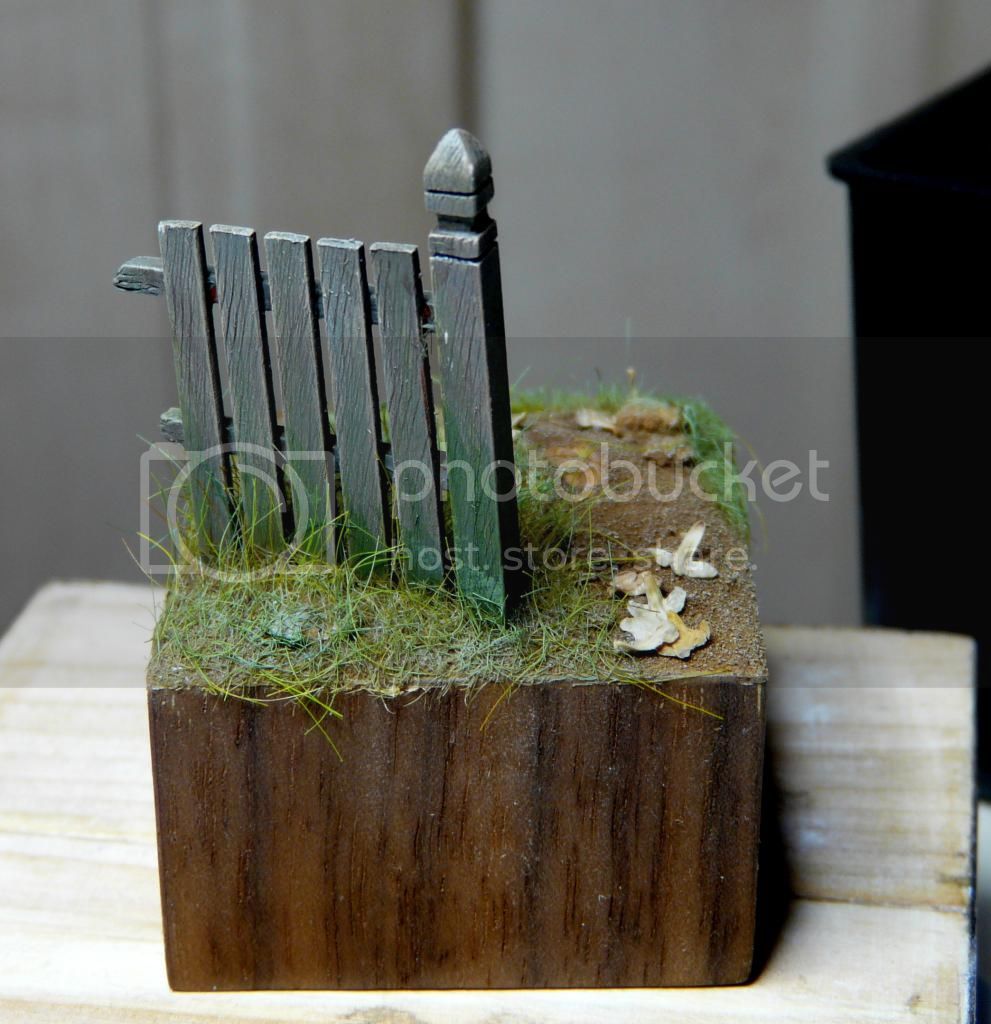
The fence was scratchbuilt from styrene strip and the groundwork is sand mixed with a bit of cat litter over a Milliput core. The Stg44 sling is still to be made from lead foil.
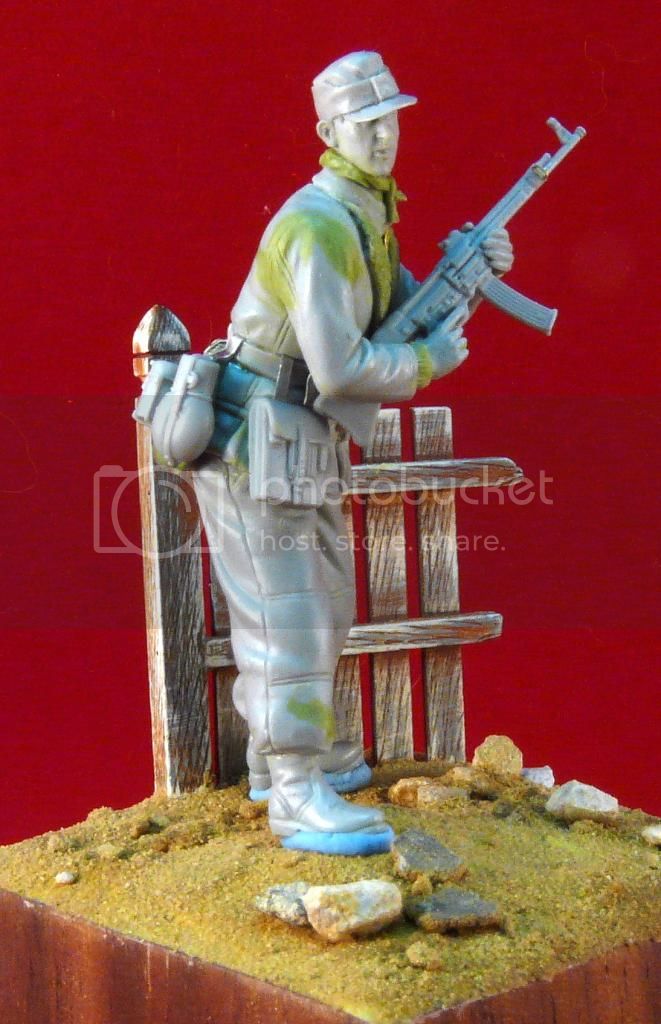
Overall, a pretty quick build but, the alterations make it very different from the original kit. Painting to follow soon.....
All the best,
Gary
Figures
Military figures of all shapes and sizes.
Hosted by Darren Baker, Mario Matijasic
The Gates of Vienna 1945
rossgary
England - North East, United Kingdom
Joined: July 12, 2011
KitMaker: 184 posts
Armorama: 107 posts
Joined: July 12, 2011
KitMaker: 184 posts
Armorama: 107 posts
Posted: Tuesday, February 17, 2015 - 01:45 AM UTC
iowabrit
Iowa, United States
Joined: November 06, 2007
KitMaker: 585 posts
Armorama: 557 posts
Joined: November 06, 2007
KitMaker: 585 posts
Armorama: 557 posts
Posted: Tuesday, February 17, 2015 - 01:55 AM UTC
Don't you just hate it when you step on gum??
Looking good so far.
Maki
Senior Editor
Croatia Hrvatska
Joined: February 13, 2002
KitMaker: 5,579 posts
Armorama: 2,988 posts
Joined: February 13, 2002
KitMaker: 5,579 posts
Armorama: 2,988 posts
Posted: Tuesday, February 17, 2015 - 01:56 AM UTC
Looking real good. You really know how to work with that green stuff. The only thing that catches my eye is the long neck... it seems a bit too long. Perhaps it seems like this because of the scarf, but I would try getting the head a bit more into the torso.
Cheers,
Mario
PS Steve...
Cheers,
Mario
PS Steve...
rossgary
England - North East, United Kingdom
Joined: July 12, 2011
KitMaker: 184 posts
Armorama: 107 posts
Joined: July 12, 2011
KitMaker: 184 posts
Armorama: 107 posts
Posted: Tuesday, February 17, 2015 - 02:07 AM UTC
Steve, Didn't you know mate, that American chewing gum got everywhere...
Could have been a lot worse though...After all, he is stood in a cow field.....
Mario, I see what you mean about the neck. I did try to give him that stiff-necked arrogant appearance typical of a lot of Officers and NCO's. from some angles it does look long but, from others it looks ok. Lets see how it looks painted (now there's another story... )
All the best lads,
Gary
Kinggeorges
Barcelona, Spain / España
Joined: August 31, 2005
KitMaker: 1,380 posts
Armorama: 845 posts
Joined: August 31, 2005
KitMaker: 1,380 posts
Armorama: 845 posts
Posted: Tuesday, February 17, 2015 - 02:32 AM UTC
Hello Gary,
A fine piece again coming from Gary's plant
i would agree with Mario in the neck lenght. I did notice too the nice rendering you achieved by just positioning the head.
one question: how do you do the buttons ? They look pretty neat ! I used putty but it's a pain the .ss process and in the end you are very lucky if two buttons look the same...
And now on to the painting !
Julien
jrutman
Pennsylvania, United States
Joined: April 10, 2011
KitMaker: 7,941 posts
Armorama: 7,934 posts
Joined: April 10, 2011
KitMaker: 7,941 posts
Armorama: 7,934 posts
Posted: Tuesday, February 17, 2015 - 02:37 AM UTC
Nice to see you onto another great fig so soon. You usually make us wait!
Nice touch with the fur lined jacket and ritter kruetz.
J
Nice touch with the fur lined jacket and ritter kruetz.
J
rossgary
England - North East, United Kingdom
Joined: July 12, 2011
KitMaker: 184 posts
Armorama: 107 posts
Joined: July 12, 2011
KitMaker: 184 posts
Armorama: 107 posts
Posted: Tuesday, February 17, 2015 - 03:00 AM UTC
Hi Jerry,
New years resolution remember.. Then again, if I ever get as prolific as you, my friend I will be a very happy man!
Julien, I have seen people on here use commercial button/rivet makers costing anything up to £80! Here's how I do it..
Now, all this is is a piece of sheet aluminium folded over, with a few matchsticks glued to the bottom of it to hold it away from the surface you place it on (I use an old ceramic tile). Just drill holes through it of your chosen diameter, using a pin vice to hold the drill. Reverse the drill bit to use the flat end as a punch. You can use lead foil or 0.010 styrene sheet for the buttons. Drills like these are what I use http://www.ebay.co.uk/itm/Tiny-Very-Small-Micro-HSS-Twist-Drill-Bit-Set-0-3mm-1-6mm-Model-Craft-NEW-UK-/111003382143?pt=LH_DefaultDomain_3&hash=item19d851317f
Total cost: About £5-6.
Hope this helps,
Gary
P.S. Looks like we'll be meeting on the "Improve your figures" Campaign...
New years resolution remember.. Then again, if I ever get as prolific as you, my friend I will be a very happy man!
Julien, I have seen people on here use commercial button/rivet makers costing anything up to £80! Here's how I do it..
Now, all this is is a piece of sheet aluminium folded over, with a few matchsticks glued to the bottom of it to hold it away from the surface you place it on (I use an old ceramic tile). Just drill holes through it of your chosen diameter, using a pin vice to hold the drill. Reverse the drill bit to use the flat end as a punch. You can use lead foil or 0.010 styrene sheet for the buttons. Drills like these are what I use http://www.ebay.co.uk/itm/Tiny-Very-Small-Micro-HSS-Twist-Drill-Bit-Set-0-3mm-1-6mm-Model-Craft-NEW-UK-/111003382143?pt=LH_DefaultDomain_3&hash=item19d851317f
Total cost: About £5-6.
Hope this helps,
Gary
P.S. Looks like we'll be meeting on the "Improve your figures" Campaign...
jrutman
Pennsylvania, United States
Joined: April 10, 2011
KitMaker: 7,941 posts
Armorama: 7,934 posts
Joined: April 10, 2011
KitMaker: 7,941 posts
Armorama: 7,934 posts
Posted: Tuesday, February 17, 2015 - 03:12 AM UTC
That is a great tip!!
I just perused your new fig again and I have to say the pistol holster is too low. Looks like it is hanging from the belt instead of the belt passing through the loops on the back.
Small thing but just in case you wanted to know.
J
I just perused your new fig again and I have to say the pistol holster is too low. Looks like it is hanging from the belt instead of the belt passing through the loops on the back.
Small thing but just in case you wanted to know.
J
panzerconor
Massachusetts, United States
Joined: February 08, 2012
KitMaker: 1,271 posts
Armorama: 1,253 posts
Joined: February 08, 2012
KitMaker: 1,271 posts
Armorama: 1,253 posts
Posted: Tuesday, February 17, 2015 - 11:02 AM UTC
Well this is a pleasant surprise! I'm used to waiting months and months like Jerry mentioned. I always liked that figure, but found it frustrating trying to get the arms/hands/gun to line up right with each other- but now, in the world of greenstuff/milliput, I don't think I've got anything to worry about! My only gripe would be that his neck seems ever so slightly too long? Might just be me though. I find that when I add a scarf to the necks I tend to overcompensate and end up with a half man, half giraffe figure. It's really just the 2nd picture where I think his neck is a bit out of proportion.
Keep it up!
-Conor
Keep it up!
-Conor
Posted: Tuesday, February 17, 2015 - 04:02 PM UTC
Great to see more of your work so soon Gary! IMHO the neck looks just fine- it sits into the uniform and the scarf just right. The subtle things like the wrist warmers and the buttons on the side of the canteen are extremely well done- the kind of small thing that bring a figure to life. Great tip on how to do rivets as well!
panzerconor
Massachusetts, United States
Joined: February 08, 2012
KitMaker: 1,271 posts
Armorama: 1,253 posts
Joined: February 08, 2012
KitMaker: 1,271 posts
Armorama: 1,253 posts
Posted: Thursday, February 19, 2015 - 06:03 AM UTC
For what it's worth, the neck thing isn't something I'd bother to fix either- too complicated of a thing to rework and really something that would even stand out. Just threw the observation out there
1stjaeger
Wien, Austria
Joined: May 20, 2011
KitMaker: 1,744 posts
Armorama: 1,727 posts
Joined: May 20, 2011
KitMaker: 1,744 posts
Armorama: 1,727 posts
Posted: Thursday, February 19, 2015 - 10:10 AM UTC
Hi Gary,
nice job on that greenstuff! I love it too. Easy to mix, nice smooth surface..!
Apart from the giraffe neck, I had long looks at the second pic......and the guy is leaning over! He would topple. My first reaction was....sit his left elbow on a wall o.s. Et voilà!
Just my 5c worth!
Cheers
Romain
P.S.: and Jerry is right about the holster
P.P.S.: I simply had to comment....with that title!!!!!! :-)
rossgary
England - North East, United Kingdom
Joined: July 12, 2011
KitMaker: 184 posts
Armorama: 107 posts
Joined: July 12, 2011
KitMaker: 184 posts
Armorama: 107 posts
Posted: Saturday, February 21, 2015 - 04:36 AM UTC
Evening gents,
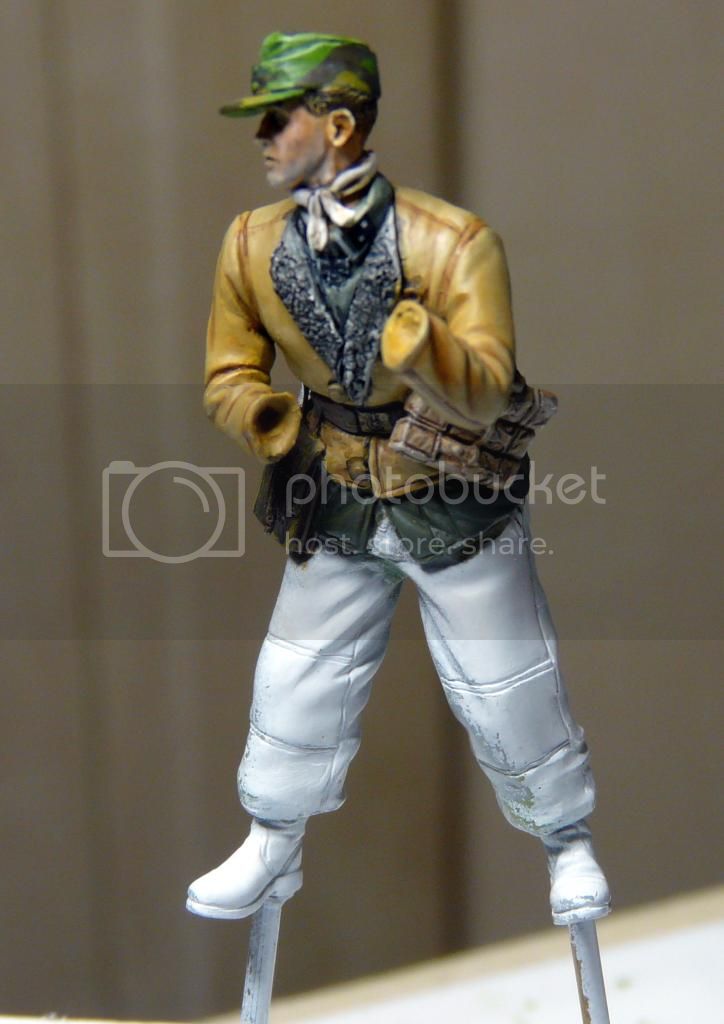
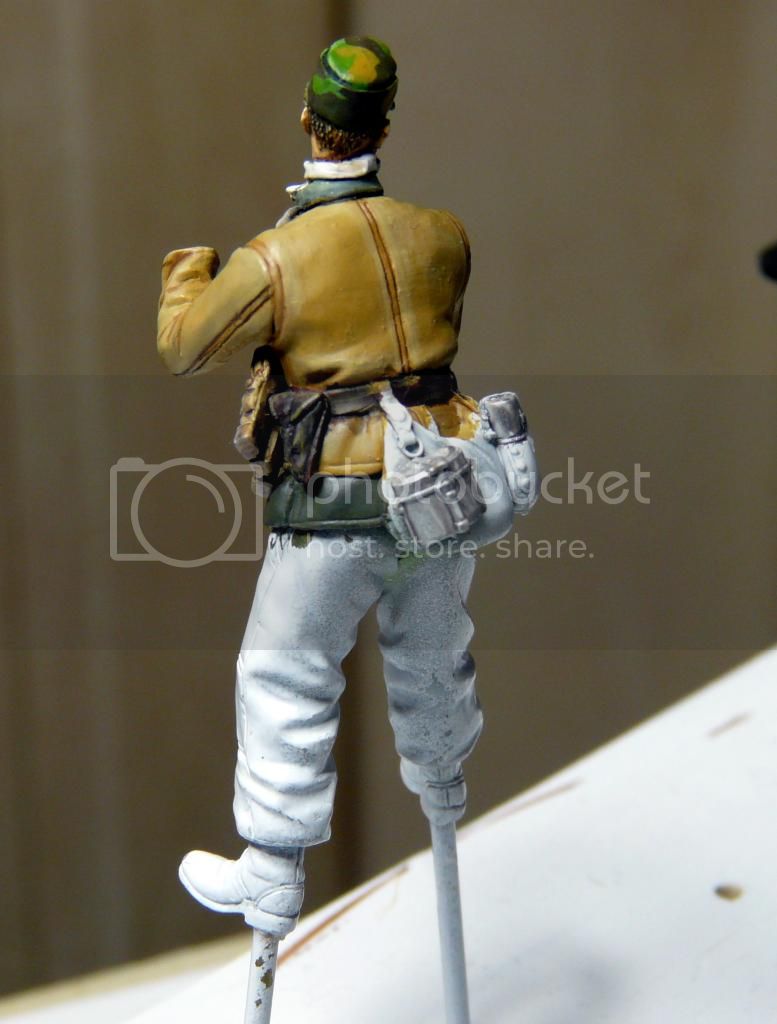
Finally started painting - Don't all laugh at once!
Just a few pics...
So, that's where I'm at so far. Hope to get it done by next week with a bit of luck.
Hi Romain, I had an idea you might look in on this one
All the best lads,
Gary
BTW, I'm Doing a 3-Fig vignette on the "Improve your figures "Campaign, if anyone's interested...
panzerconor
Massachusetts, United States
Joined: February 08, 2012
KitMaker: 1,271 posts
Armorama: 1,253 posts
Joined: February 08, 2012
KitMaker: 1,271 posts
Armorama: 1,253 posts
Posted: Tuesday, February 24, 2015 - 10:31 AM UTC
That was quick! I'm used to waiting weeks and months between your updates hahaha. Nice to see some in-progress pics. Nice choice of camo on the hat, don't see that done very often.
The vignette in the figures campaign looks great as well, makes me want to knick that idea for myself Next time maybe! This has the potential to be a dumb question, but what do you use for the twisted wire? And where do you get it? I usually mix and match parts from other kits for my figures but I've been wanting to give it a try your way. And what tool do you use to drill holes for the wires? Just figured I'd post here as opposed to having the comment get lost in the campaign thread.
Keep it up!
-Conor
Kinggeorges
Barcelona, Spain / España
Joined: August 31, 2005
KitMaker: 1,380 posts
Armorama: 845 posts
Joined: August 31, 2005
KitMaker: 1,380 posts
Armorama: 845 posts
Posted: Tuesday, February 24, 2015 - 02:00 PM UTC
Looking good Gary.
Did you try the oil wash technique on the sheepskin jacket ?
The pin hole stuff looks very ingenious ! thanks for that.
If I may suggest, I would recommend to use warm shades on the face. For very diluted cadnium on the cheek
Best,
Julien
Did you try the oil wash technique on the sheepskin jacket ?
The pin hole stuff looks very ingenious ! thanks for that.
If I may suggest, I would recommend to use warm shades on the face. For very diluted cadnium on the cheek
Best,
Julien
1stjaeger
Wien, Austria
Joined: May 20, 2011
KitMaker: 1,744 posts
Armorama: 1,727 posts
Joined: May 20, 2011
KitMaker: 1,744 posts
Armorama: 1,727 posts
Posted: Wednesday, February 25, 2015 - 02:05 PM UTC
Hi Gary,
that base looks fantastic with its fence and vegetation! Well done Sir!!
He can lean on the fence then!!
Are you going to tone down the colours on the cap a little? They seem a little "harsh" IMHO.
The camoed caps were not that prominent anyway, and these colours do not quite correspond.
Cheers
Romain
rossgary
England - North East, United Kingdom
Joined: July 12, 2011
KitMaker: 184 posts
Armorama: 107 posts
Joined: July 12, 2011
KitMaker: 184 posts
Armorama: 107 posts
Posted: Thursday, February 26, 2015 - 02:53 AM UTC
Hi lads,
sorry but no update yet. I'm still waiting for some paints to be delivered so the finish on this one will be a bit delayed.
Conor, told you mate, new year's resolution (let's see how long I stick to it...)!
Now, the wire? Just odd bits of electrical wire picked up over the years. Just twist it together until it's pretty tight but, retains flexibility. You'll soon get the hang of getting it to the right amount of twist. I think the gauge I use is about 0.5 mm but I can't really swear to it. Now, what I use to drill the hole is, believe it or not, a drill (Yep, sarcastic old git that I am....)! If you check the ebay link above, you'll find what I use. I think it's about 0.8 mm. To be honest mate, I never really check the sizes. I just go with what 'looks' right.
Hi Julien, Thanks for commenting. I'm not going to use your oil wash technique on this one, i've got a lot of practice to do first before I show it on the forum The face does still need a bit of work yet to liven it up a bit.
Romain, how are you mate? Hope you are OK? Thanks for the comments on the base. Still got a bit to do on it yet. I got hold of some Silflor Ivy, so I'm going to try and incorporate this somehow. Now, the cap, it's supposed to be a field-made one in Italian camo. I've still got a lot of shading and glazing to do yet so, it will be toned down somewhat.
next update when I have something for you all.
All the best lads,
Gary
panzerconor
Massachusetts, United States
Joined: February 08, 2012
KitMaker: 1,271 posts
Armorama: 1,253 posts
Joined: February 08, 2012
KitMaker: 1,271 posts
Armorama: 1,253 posts
Posted: Thursday, February 26, 2015 - 05:28 AM UTC
Yes! Exactly what I was hoping you'd say. I've ordered the US equivalent of the drillbit set off eBay. I think I've got a scheme together for a tiny vignette more or less inspired from your Korsun one No way I'm finishing my Stalingrad diorama in time for the local IPMS show at the end of March. So thanks for starting that, it was the boost I needed to get back at the bench!
-Conor
-Conor
rossgary
England - North East, United Kingdom
Joined: July 12, 2011
KitMaker: 184 posts
Armorama: 107 posts
Joined: July 12, 2011
KitMaker: 184 posts
Armorama: 107 posts
Posted: Thursday, February 26, 2015 - 05:53 AM UTC
Conor,
Just a thought but, if you take a look at the dead guy on the other thread, you'll see I'll only be resculpting his upper arms. I used the lower part of the kit arm to save a bit of effort. Might be worth a try to get a bit more practice before you go for sculpting the full arm?
You feel free to take any part you want mate! We're all here to help each other
All the best buddy,
Gary
panzerconor
Massachusetts, United States
Joined: February 08, 2012
KitMaker: 1,271 posts
Armorama: 1,253 posts
Joined: February 08, 2012
KitMaker: 1,271 posts
Armorama: 1,253 posts
Posted: Thursday, February 26, 2015 - 06:14 AM UTC
I did indeed notice that...probably a good idea seeing as I've not tried the armature method yet. As much as I like exactly the scene you're doing, I'm planning on taking that and a scene from "Platoon" and more or less mixing it. Probably using the Gen2 Hohenstaufen set and a couple Fallschirmjagers, and that basically gives away the time and place doesn't it?
Thanks for the tips sir
-Conor
Thanks for the tips sir
-Conor
rossgary
England - North East, United Kingdom
Joined: July 12, 2011
KitMaker: 184 posts
Armorama: 107 posts
Joined: July 12, 2011
KitMaker: 184 posts
Armorama: 107 posts
Posted: Thursday, February 26, 2015 - 06:41 AM UTC
Hmm.. SS & Fj's... Carentan maybe? or Stoumont later in the year? Looking forward to this!
If I can be any help, let me know mate!
Gary
If I can be any help, let me know mate!
Gary