British 60pdr Howitzer Mk I
England - East Anglia, United Kingdom
Joined: August 12, 2005
KitMaker: 14,499 posts
Armorama: 11,675 posts
Posted: Wednesday, April 22, 2015 - 09:28 PM UTC
Hi folks,
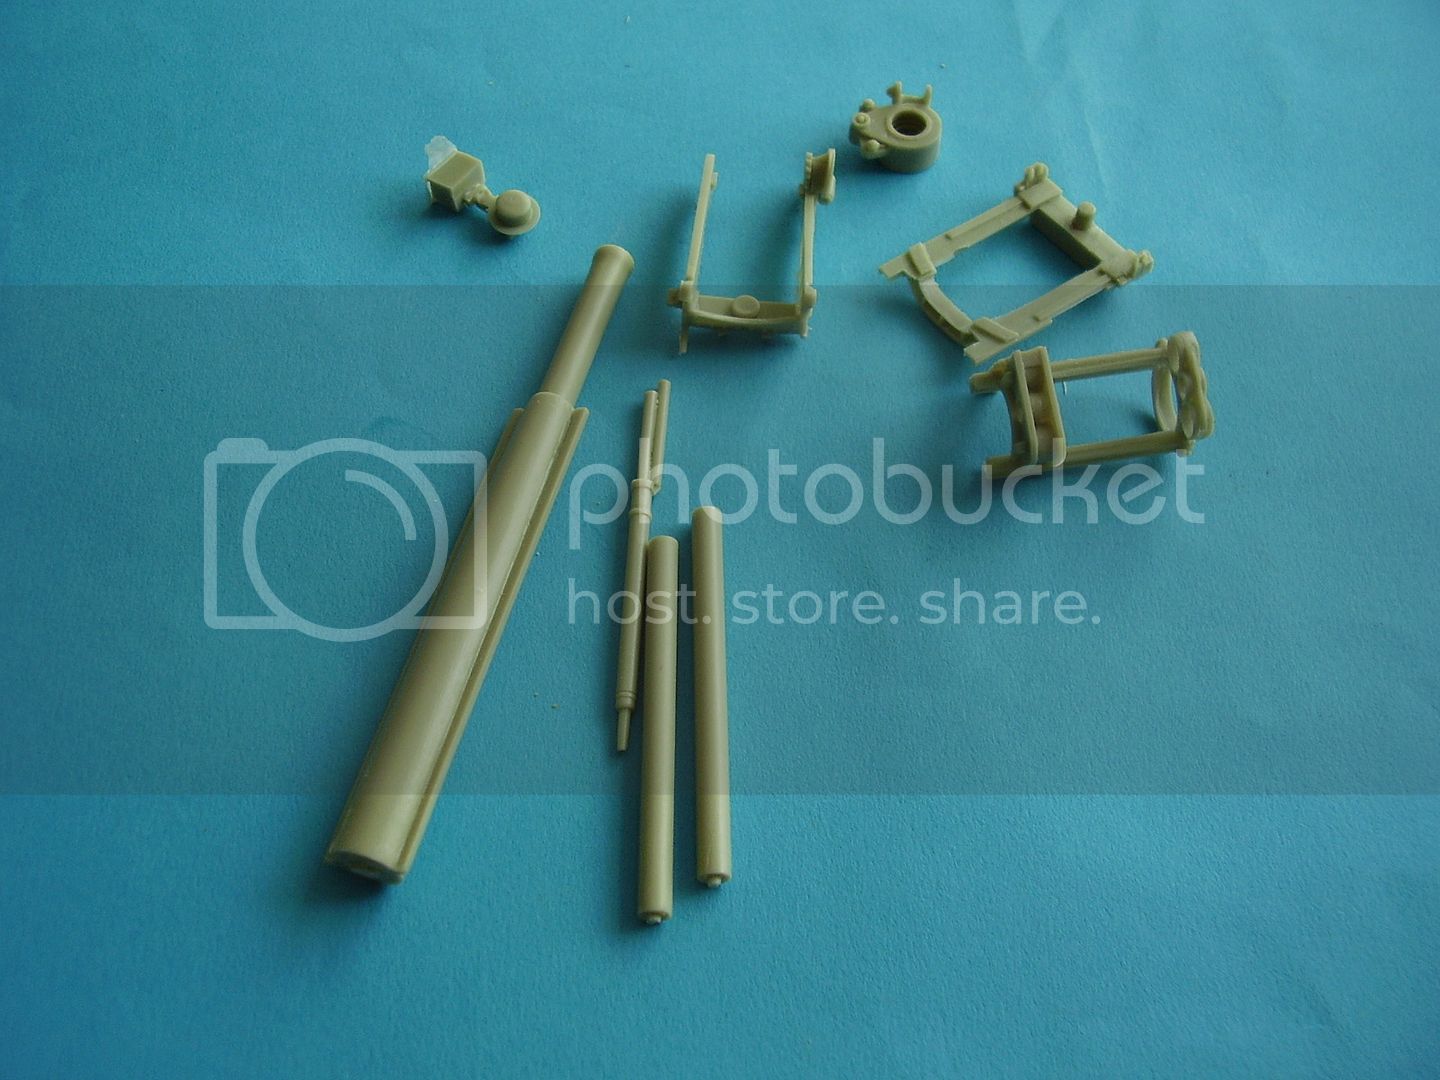
Well after almost a 5 month break I though I'd get underway with the Resicast 60pdr.
Al

'Action this Day'
Winston Spencer Churchill
England - East Anglia, United Kingdom
Joined: August 12, 2005
KitMaker: 14,499 posts
Armorama: 11,675 posts
Posted: Friday, April 24, 2015 - 09:56 PM UTC
How folks,
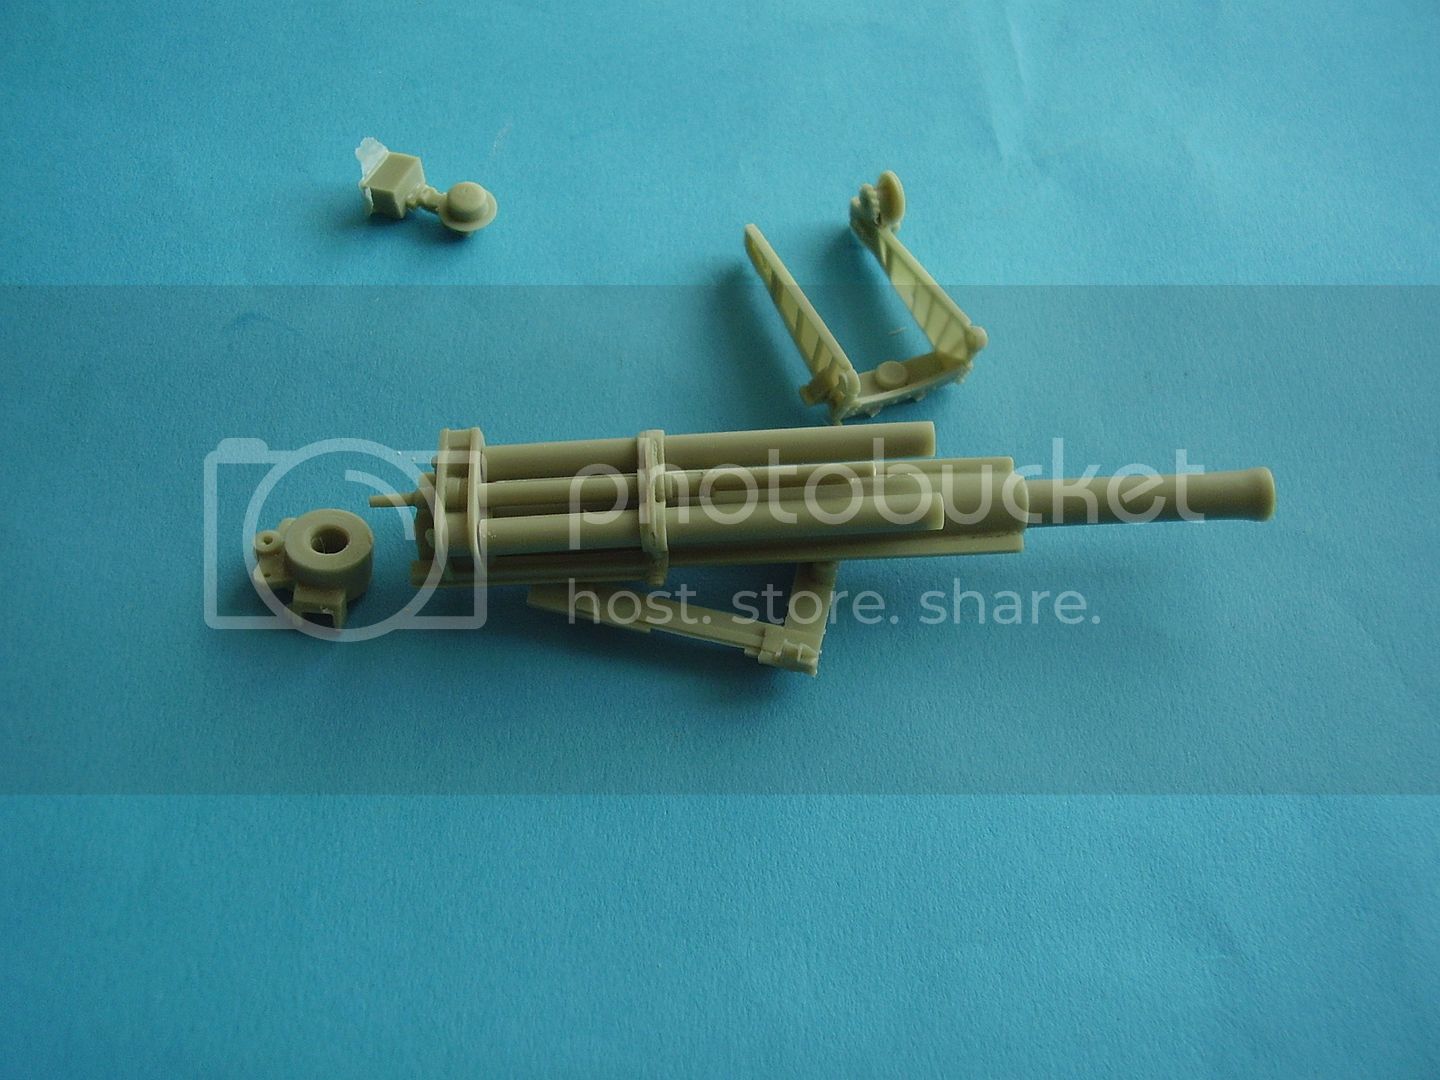
Clean up and test fitting underway. You need ro remove the flast from the inside of the cradle and drill a central hole for the spring unit. Be careful when you remove the pour plugs from cradle as one of the attachments is the lug that fits into the Saddle.
Cheers
Al

'Action this Day'
Winston Spencer Churchill
England - East Anglia, United Kingdom
Joined: August 12, 2005
KitMaker: 14,499 posts
Armorama: 11,675 posts
Posted: Thursday, May 14, 2015 - 08:40 PM UTC
Hi folks,
got a bit more work done.
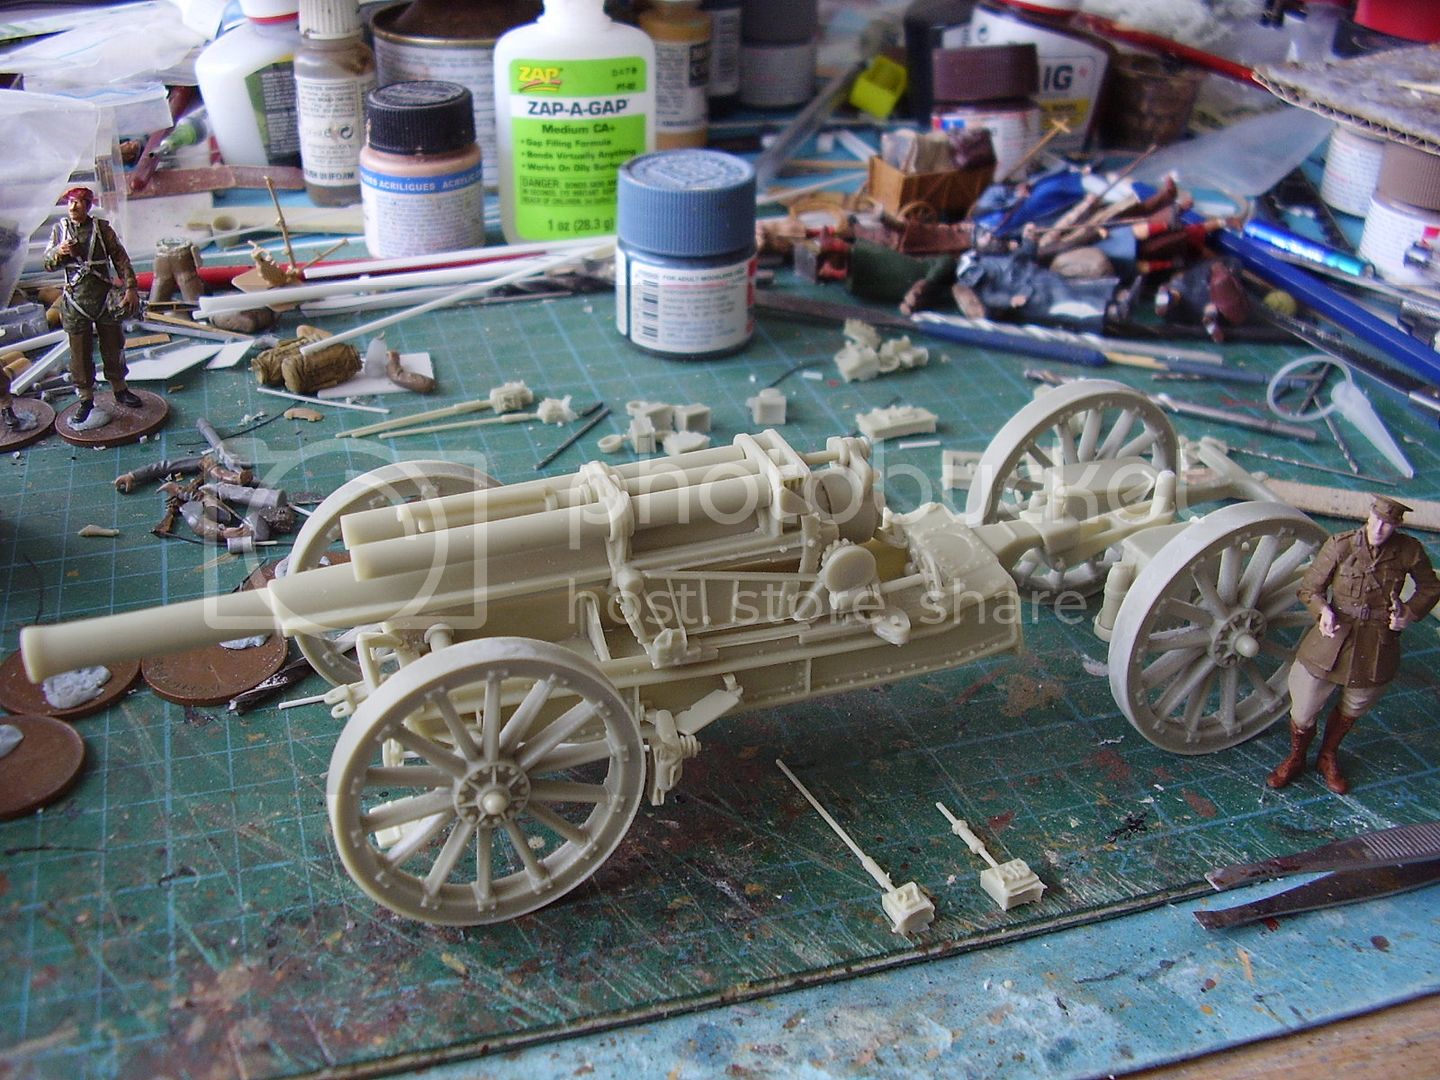


Bit more to do yet.
Al
'Action this Day'
Winston Spencer Churchill
Georgia, United States
Joined: May 09, 2014
KitMaker: 273 posts
Armorama: 270 posts
Posted: Friday, May 15, 2015 - 01:08 AM UTC
Thanks for the update, has the kit been fighting you at all?
Queensland, Australia
Joined: October 07, 2002
KitMaker: 3,856 posts
Armorama: 2,984 posts
Posted: Friday, May 15, 2015 - 02:19 AM UTC
very nice looking kit Alan.

England - East Anglia, United Kingdom
Joined: August 12, 2005
KitMaker: 14,499 posts
Armorama: 11,675 posts
Posted: Friday, May 15, 2015 - 02:43 AM UTC
Hi Alan,
Only issue I had was that the CA glue I started to use must have gone off and I had a bugger of a time getting the first few parts to stick, which caused a bit fo delay. I then switched from Medium CA glue to Thin CA glue which has its own issues as it makes an instant contact lol.
Build wise I hadn't realised break rods were included and use some of the plastic rod by mistake. The only build issue was the placement of part A28 as it needs to sit on top of A26 and I set mine too low so had to make a fix there as there was no chance of getting the part off.
The build itself is fairly straight forward with only drilling the through hole for the break roads likely to be tricky.
Hi Cliff,
Thanks, lots of interesting WW1 stuff coming along. Nice to see you around.
Cheers
Al
'Action this Day'
Winston Spencer Churchill
SgtRam
 Contributing Writer
#197
Ontario, Canada
Joined: March 06, 2011
KitMaker: 3,971 posts
Armorama: 2,859 posts
Posted: Friday, May 15, 2015 - 02:49 AM UTC
Alan
That is looking amazing, can't wait to see it done. Keep up the great work, and I have had that issue with CA in the past. I tend to never get through have a bottle before it starts to do that.
Kevin
England - East Anglia, United Kingdom
Joined: August 12, 2005
KitMaker: 14,499 posts
Armorama: 11,675 posts
Posted: Sunday, May 17, 2015 - 02:33 AM UTC
Hi Kevin,
Thanks for looking in. It is a nice kit.
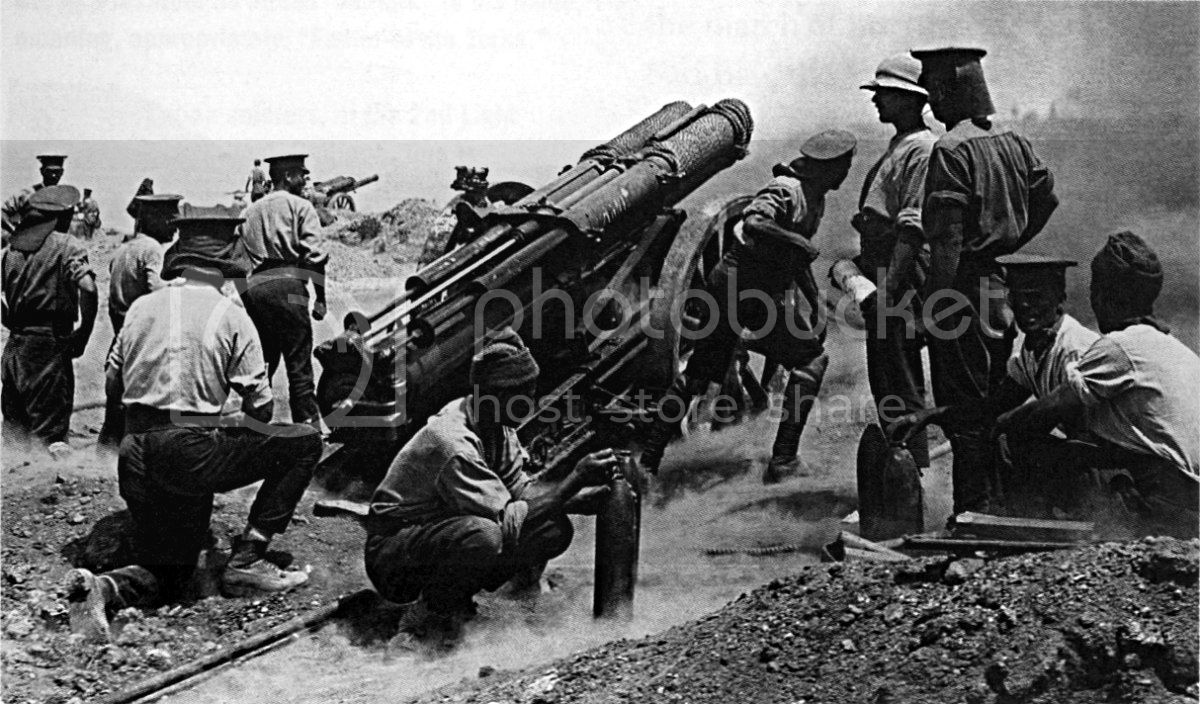
This an interesting photograph which might lead to something, more thought required.
Cheers
Al
'Action this Day'
Winston Spencer Churchill
England - East Anglia, United Kingdom
Joined: August 12, 2005
KitMaker: 14,499 posts
Armorama: 11,675 posts
Posted: Sunday, May 17, 2015 - 08:11 PM UTC
Hi folks,
build is almost done. Point to note: Parts A26 are the brackets for the Lifting bar Part A23 which go onto the rear of the trail. I dont see this step in the instructions.
Parts A18 Securing segnment and parts A19 Tie Rod sit above this fitting.

With some paint on.
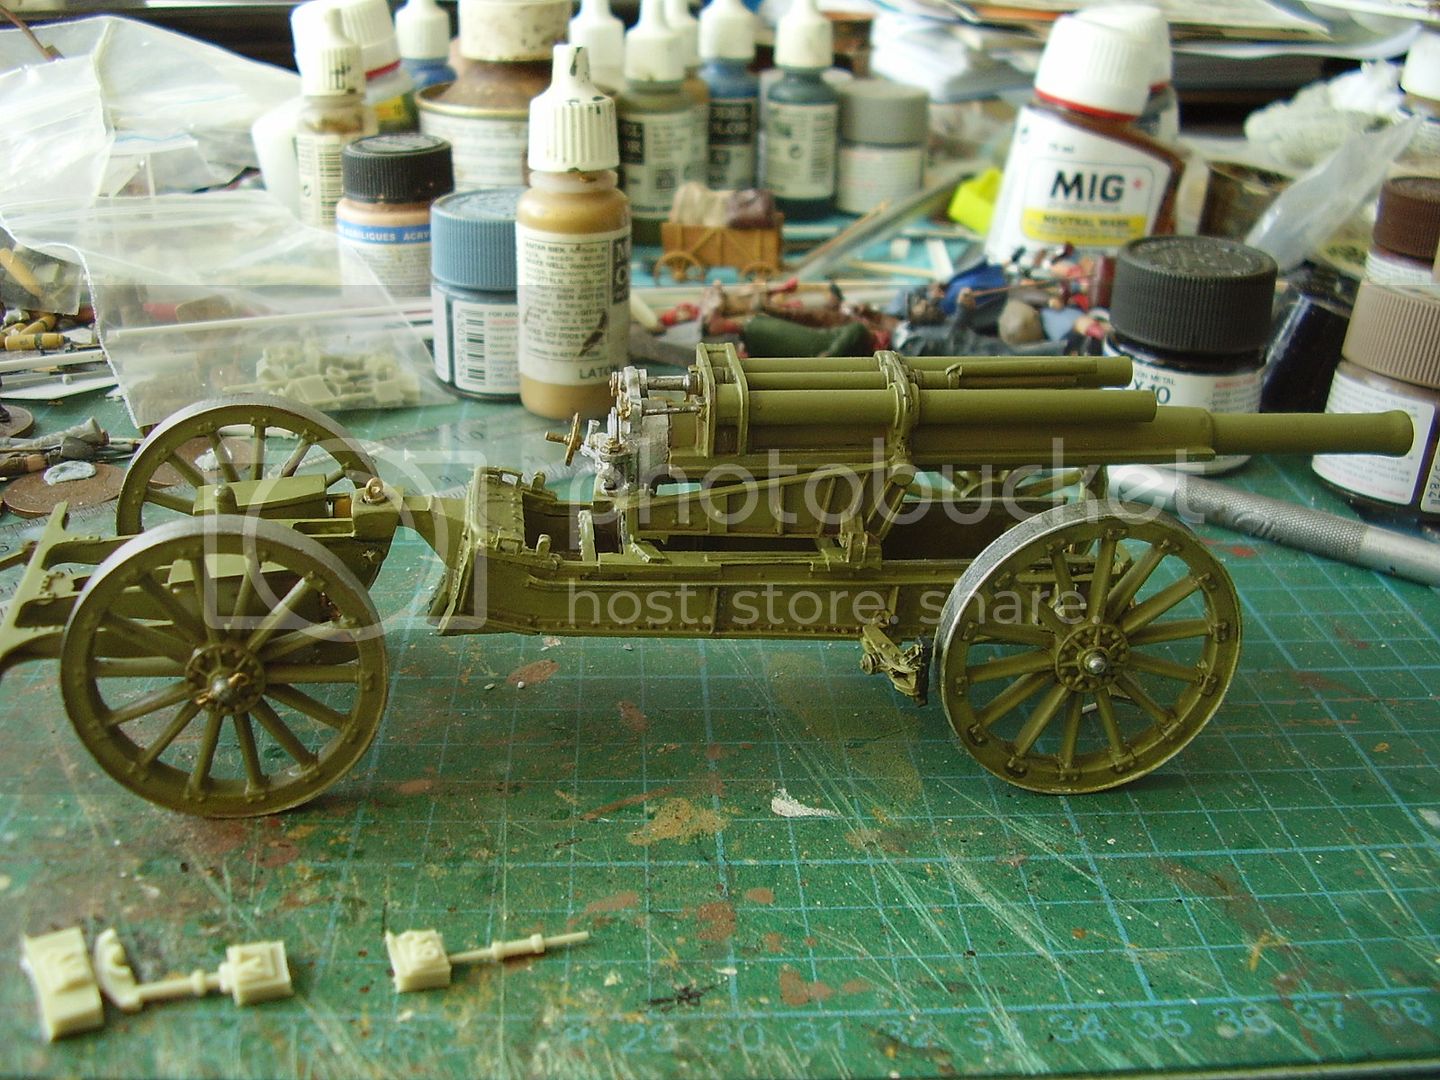

Still a couple of small fixings to add.
Al
'Action this Day'
Winston Spencer Churchill
#521
Kentucky, United States
Joined: April 13, 2011
KitMaker: 9,465 posts
Armorama: 8,695 posts
Posted: Sunday, May 17, 2015 - 08:53 PM UTC
Excellent work, excellent model!
England - East Anglia, United Kingdom
Joined: August 12, 2005
KitMaker: 14,499 posts
Armorama: 11,675 posts
Posted: Sunday, May 17, 2015 - 09:57 PM UTC
Thanks Michael.
Al
'Action this Day'
Winston Spencer Churchill
Stockholm, Sweden
Joined: October 15, 2013
KitMaker: 444 posts
Armorama: 428 posts
Posted: Sunday, May 17, 2015 - 10:18 PM UTC
Great stuff Alan, thanks for sharing
England - South West, United Kingdom
Joined: September 02, 2013
KitMaker: 93 posts
Armorama: 91 posts
Posted: Sunday, May 17, 2015 - 11:17 PM UTC
Looking good Al, glad there were not any issues with assembly, we do try to make assembly as easy as possible.
See you at Duxford, the 9.2" should have its official release.
George.

England - East Anglia, United Kingdom
Joined: August 12, 2005
KitMaker: 14,499 posts
Armorama: 11,675 posts
Posted: Monday, May 18, 2015 - 03:02 AM UTC
Hi Johan,
Thanks for looking in and the comments.
Hi George,
Yip, nice build. Looking forward to the 9.2 inch howitzer and catching up with you at Duxford. I've a few bits to finish off and then some weathering.
Cheers
Al
'Action this Day'
Winston Spencer Churchill
Arizona, United States
Joined: February 25, 2007
KitMaker: 1,066 posts
Armorama: 789 posts
Posted: Monday, May 18, 2015 - 03:11 AM UTC
That's a very interesting subject and you've gone a fine job. What pulled it? A big steam tractor? A team of Clydesdales? It looks very heavy.
What are you going to do with it? Are you going to put it in a diorama, being pulled out of the mud, or something?
England - East Anglia, United Kingdom
Joined: August 12, 2005
KitMaker: 14,499 posts
Armorama: 11,675 posts
Posted: Monday, May 18, 2015 - 03:16 AM UTC
Hi JP,
I built it with a view to linking it up with the Holt Tracator and at some point truning it into a small dio.
Thanks.
Cheers
Al
'Action this Day'
Winston Spencer Churchill
Iowa, United States
Joined: November 06, 2007
KitMaker: 585 posts
Armorama: 557 posts
Posted: Monday, May 18, 2015 - 04:20 AM UTC
Looking really nice Al, good work !!!
Have you tried the Gel superglue? I find it works really well, giving you enough time to position a part.
My short term memory is getting really bad....and so is my short term memory.
England - East Anglia, United Kingdom
Joined: August 12, 2005
KitMaker: 14,499 posts
Armorama: 11,675 posts
Posted: Monday, May 18, 2015 - 09:25 AM UTC
Hi Steve,
Thanks, I'll check out the glue you suggest.
Cheers
Al
'Action this Day'
Winston Spencer Churchill
Kobenhavn, Denmark
Joined: June 29, 2004
KitMaker: 6,760 posts
Armorama: 1,339 posts
Posted: Monday, May 18, 2015 - 10:52 AM UTC
On the workbench:
MPC: 1972 Pontiac GTO
Revell: 1965 Mustang
Verlinden 120mm guard of the marine.
Revell: 2010 Camaro
Monogram: 1931 Rolls Royce
Italeri: LVT2 Amtrac
England - East Anglia, United Kingdom
Joined: August 12, 2005
KitMaker: 14,499 posts
Armorama: 11,675 posts
Posted: Monday, May 18, 2015 - 07:22 PM UTC
Hi Jespar,
Many thanks.
Al
'Action this Day'
Winston Spencer Churchill
England - East Anglia, United Kingdom
Joined: August 12, 2005
KitMaker: 14,499 posts
Armorama: 11,675 posts
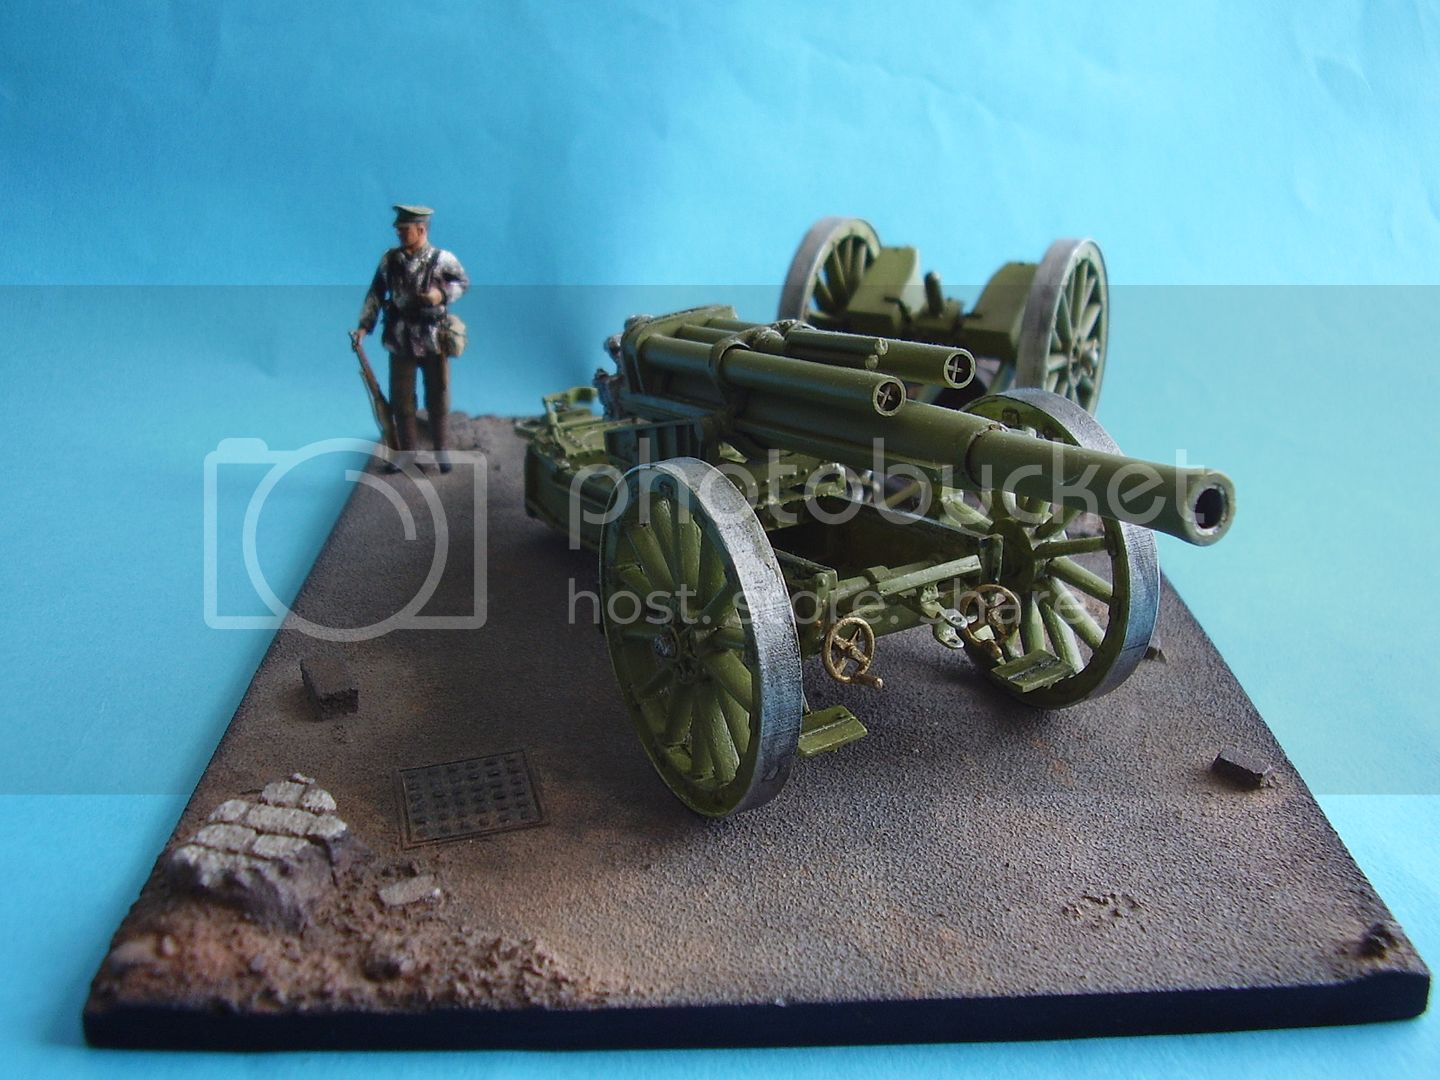
Posted: Saturday, July 11, 2015 - 07:48 PM UTC
Hi folks,
Finished off the build, no mud yet, for a later date, Figure for scale.
Cheers
Al


'Action this Day'
Winston Spencer Churchill
Colorado, United States
Joined: February 24, 2014
KitMaker: 3,033 posts
Armorama: 2,492 posts
Posted: Saturday, July 11, 2015 - 08:26 PM UTC
England - East Anglia, United Kingdom
Joined: August 12, 2005
KitMaker: 14,499 posts
Armorama: 11,675 posts
Posted: Saturday, July 11, 2015 - 09:16 PM UTC
Thanks Mike, this one is to go with the Holt and I'll leave the mud and weathering until I have both kits built.
Cheers
Al
'Action this Day'
Winston Spencer Churchill
SgtRam
Contributing Writer #197
Ontario, Canada
Joined: March 06, 2011
KitMaker: 3,971 posts
Armorama: 2,859 posts
Posted: Saturday, July 11, 2015 - 09:27 PM UTC
Al
That looks great, very nice work on the assembly and painting. Makes it a very tempting kit for arty fans.
Kevin
Overijssel, Netherlands
Joined: July 01, 2010
KitMaker: 1,322 posts
Armorama: 1,239 posts
Posted: Saturday, July 11, 2015 - 10:16 PM UTC
Hi Alan,
Beautiful build. Thanks for showing.
Since you have the ordnance completely backbards on the carriage, I wonder about two things:
1. Is the support, near to the front, intended to keep the barrel down. It seems to have only a top part. Am I right?
2. How was the ordnance shifted foward to enable the firing position?
Looking forward to see the Holt tractor coming. Hopefully we do not have to wait too long.
P.


