

Sorry to see that this conversion isn't workable,
I purchased this conversion when it first came out and had no dramas with shrinkage, that said where's the quality control For this expensive set that is about $70 I think that's realy poor of legend to do this it's inexcusable I would be emailing them demanding a replacement.
Cheers Ben
Hosted by Darren Baker
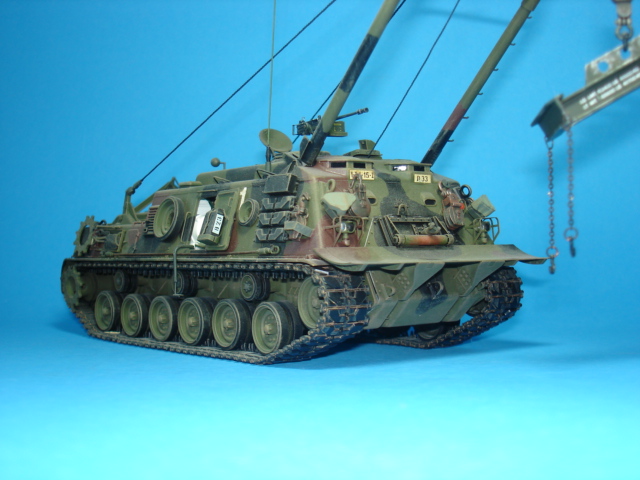
Converting a M88 A1 to A M88 A2 Hercules

Cuny12

Joined: April 04, 2010
KitMaker: 378 posts
Armorama: 348 posts
Posted: Monday, August 24, 2015 - 04:03 PM UTC
M4A1Sherman

Joined: May 02, 2013
KitMaker: 4,403 posts
Armorama: 4,078 posts
Posted: Monday, August 24, 2015 - 04:03 PM UTC
Quoted Text
Some final thoughts, The prototype parts of this conversion may have been made to the correct size it's obvious that the producers of this conversion never built it. Every thing is too short from the resin shrinking after it cured. I have had this happen before, that's why I usually don't do resin conversions.
If you have this conversion in your stash I would sell it if I were you. If you really have to have to have a M88A2 you could salvage the side hatches & right side details and scratch build the rest.
This whole thing is going into the garbage.
Donald
DON! Don't throw it away! If you've got your heart set on an M88A2, maybe you could fabricate your own parts to the correct dimensions and just use the LEGEND parts as a guide. Yes, it's tedious, but it'll be worth it in the end, and you'll be proud of your accomplishments!


165thspc

#521
Joined: April 13, 2011
KitMaker: 9,465 posts
Armorama: 8,695 posts
Posted: Wednesday, September 02, 2015 - 12:37 AM UTC
I totally agree with Dennis, you shouldn't give up on this project. Most of these resin parts represent slab sided appliqué armor plates. Use the resin parts as guides and cut correctly sized parts from the proper thickness Evergreen plastic sheet. After this step is complete remove what details you need from the resin parts and apply them to the new plastic "armor" plates.
You can do it!
You can do it!


Kenaicop

#384
Joined: August 23, 2005
KitMaker: 1,426 posts
Armorama: 1,316 posts

Posted: Wednesday, September 02, 2015 - 02:18 AM UTC
Quoted Text
I totally agree with Dennis, you shouldn't give up on this project. Most of these resin parts represent slab sided appliqué armor plates. Use the resin parts as guides and cut correctly sized parts from the proper thickness Evergreen plastic sheet. After this step is complete remove what details you need from the resin parts and apply them to the new plastic "armor" plates.
You can do it!
I did that with this M88 interior. Built it about 15 years ago. I ordered the interior from France, can't remember the company. It was crap, unusable. I used the resin parts as templates to build the interior from scratch and it's much nicer then the resins parts. The only resin I used was the floor, seats, control panels and air cleaners, the rest is all me, tool racks, cabling, etc. Soooo, don't give up!

junglejim

Joined: February 18, 2003
KitMaker: 1,728 posts
Armorama: 1,629 posts

Posted: Wednesday, September 02, 2015 - 10:15 AM UTC
Typical Legend, overuse their molds too much. The resin itself doesn't shrink, what happens is that the rubber molds expand due to the reaction of the curing resin, so the resulting resin parts get smaller and smaller. Now I'm worried about mine!
Jim
Jim
Cuny12
Joined: April 04, 2010
KitMaker: 378 posts
Armorama: 348 posts
Posted: Wednesday, September 02, 2015 - 09:57 PM UTC
Legend Privately messaged me regarding the faults with this conversion though they mixed up who the actual builder was.
At least they went to the effort to acknowledge their customers though I'm interested to know if they managed to get in touch with the correct
person on this one.
At least they went to the effort to acknowledge their customers though I'm interested to know if they managed to get in touch with the correct
person on this one.

18Bravo
Joined: January 20, 2005
KitMaker: 7,219 posts
Armorama: 6,097 posts
Posted: Wednesday, September 02, 2015 - 10:36 PM UTC
I met with Lee a few days ago after emailing him this thread. He said he had tried to get in touch with the OP but had not heard back. This explains why. He did ask me to contact him when I got back to the states to insure he received replacement parts. It didn't even require any "demanding". I do have my own comments which I'll post later.

OldWarloke
Joined: October 14, 2012
KitMaker: 2,663 posts
Armorama: 2,649 posts
Posted: Wednesday, September 02, 2015 - 11:25 PM UTC
Quoted Text
I met with Lee a few days ago after emailing him this thread. He said he had tried to get in touch with the OP but had not heard back. This explains why. He did ask me to contact him when I got back to the states to insure he received replacement parts. It didn't even require any "demanding". I do have my own comments which I'll post later.
I sent them my E mail address, I havent heard back from them yet.
Donald
OldWarloke
Joined: October 14, 2012
KitMaker: 2,663 posts
Armorama: 2,649 posts
Posted: Wednesday, September 02, 2015 - 11:28 PM UTC
Hey Guys, for all of you that have this conversion and havent started it yet. Here are the Pics. with the sizes of the parts that I have. You might want to check the sizes of the parts in your set before you start cleaning off the pieces.
Donald
Donald
18Bravo
Joined: January 20, 2005
KitMaker: 7,219 posts
Armorama: 6,097 posts
Posted: Thursday, September 03, 2015 - 12:05 AM UTC
If those are the parts you need to have replaced I'll have Lee send them to you.

AikinutPGH
Joined: April 25, 2015
KitMaker: 45 posts
Armorama: 31 posts
Posted: Thursday, September 03, 2015 - 12:13 AM UTC
can you post some drawing for the motor lift frame? Or pictures and the measurements?
OldWarloke
Joined: October 14, 2012
KitMaker: 2,663 posts
Armorama: 2,649 posts
Posted: Thursday, September 03, 2015 - 12:30 AM UTC
Quoted Text
If those are the parts you need to have replaced I'll have Lee send them to you.
Yes , Thank you. How do I get my mailing address to you.
Donald.
18Bravo
Joined: January 20, 2005
KitMaker: 7,219 posts
Armorama: 6,097 posts
Posted: Thursday, September 03, 2015 - 12:36 AM UTC
Just PM me.
OldWarloke
Joined: October 14, 2012
KitMaker: 2,663 posts
Armorama: 2,649 posts
Posted: Thursday, September 03, 2015 - 01:41 AM UTC
Quoted Text
can you post some drawing for the motor lift frame? Or pictures and the measurements?
I hope this helps you.
Donald
I don't know how accurate this is, but it matches prety close the boom from the AFV Club kit.
Donald
18Bravo
Joined: January 20, 2005
KitMaker: 7,219 posts
Armorama: 6,097 posts
Posted: Thursday, September 03, 2015 - 06:17 AM UTC
I have given Lee your address. Your parts do measure a tad shorter than mine, but I also wonder if while you await your parts you might check a few things.
The rear armor plate does not extend all the way to the rear of the hull, as seen here:

And the large armor pice on the side does not extend all the way to the edge, as seen here:

The gap is very noticeable on the lower portion. The upper part of the kit piece appears to need a slight extension, but even that does not reach all the way back. I'm wondering if you can't slide everything rearward a tad. It'll leave a gap at the front, but it may well be hidden by the 90 degree PE pieces at the corners. Just a thought.
At any rate you've inspired me to do mine, but that'll be a different thread. No hijacks here.
Edit:
One other thing has me baffled. Theres's a split in your plate where indicated. Did yours come in two pieces like that or did you split it? Mine only came in one piece.

I think by cutting it the kerf may well lose you a milimeter.
OldWarloke
Joined: October 14, 2012
KitMaker: 2,663 posts
Armorama: 2,649 posts
Posted: Thursday, September 03, 2015 - 10:29 PM UTC
Hi Robert,
I scored and removed the last panel I was going to fill in the gap where I cut it and the small one between it and the rear section
the skirt is still short and I cant see how to fix it.
I hope the new parts will be the right size.
There was a 5mm. gap. If I moved the panel to the correct position then there is a 2mm. gap on the rear and a 3mm. gap in the front of the panel .
But you still get a 6mm. gap on the front end of the skirt if its rear is positioned correctly .
If you have this in the front.
You get this in the rear.
OldWarloke
Joined: October 14, 2012
KitMaker: 2,663 posts
Armorama: 2,649 posts
Posted: Thursday, September 03, 2015 - 10:41 PM UTC
On the left side it's the same story, a 6mm. gap if the panels are positioned correctly .
If this end is correct
Then this end is wrong, and the small access hatch is in the wrong position.
This is very frustrating, when this is all over it helps some of you reading this.
Donald
If this end is correct
Then this end is wrong, and the small access hatch is in the wrong position.
This is very frustrating, when this is all over it helps some of you reading this.
Donald
 |

WEB HOSTING BY


Copyright ©2021 Armorama and Kitmaker Network, a subsidiary of Silver Star Enterprises
All Rights Reserved. Please read our Conditions of Use and Privacy Policy.
All Rights Reserved. Please read our Conditions of Use and Privacy Policy.