Hosted by Darren Baker
Building Tamiya Leopard 2A6
Corporal_PL

Joined: November 01, 2011
KitMaker: 116 posts
Armorama: 109 posts

Posted: Tuesday, September 08, 2015 - 08:20 PM UTC
Well, huge work but for me (tank commander) it is only science fiction. At real vehicles you dont see similar shadows.

catdude01

Joined: December 05, 2013
KitMaker: 314 posts
Armorama: 253 posts

Posted: Tuesday, September 08, 2015 - 08:57 PM UTC
Quoted Text
Well, huge work but for me (tank commander) it is only science fiction. At real vehicles you don't see similar shadows.
I can only agree with you! this is just for the fun of the art, making an illusion of colors, lights and shadows to make a kit appearance more attractive to the eye, very similar of what you can see in figures.


catdude01

Joined: December 05, 2013
KitMaker: 314 posts
Armorama: 253 posts

Posted: Thursday, October 08, 2015 - 09:43 PM UTC
Back again with the Leopard 2, I applied the first camo pattern using Tamiya German Grey.


chnoone

Joined: January 01, 2009
KitMaker: 1,036 posts
Armorama: 1,033 posts

Posted: Friday, October 09, 2015 - 12:11 AM UTC
Better check your refs again if your camo is intended to be authentic 
Cheers
Christopher

Cheers
Christopher


catdude01

Joined: December 05, 2013
KitMaker: 314 posts
Armorama: 253 posts

Posted: Sunday, October 11, 2015 - 10:33 PM UTC
Quoted Text
Better check your refs again if your camo is intended to be authentic
Cheers
Christopher
Hi Chris!
Just using the camo that the Tamiya box offers ,nothing more!


catdude01

Joined: December 05, 2013
KitMaker: 314 posts
Armorama: 253 posts

Posted: Sunday, October 11, 2015 - 10:35 PM UTC
The the second camo patteern using tamiya Linoleum deck brown. I put a dot of white as well for a lighter color. Also started the painting of the periscopes first with a chrome color then with tamiya clear red.


catdude01

Joined: December 05, 2013
KitMaker: 314 posts
Armorama: 253 posts

Posted: Wednesday, October 14, 2015 - 09:36 PM UTC
Hey again fellas! here with some new update on this fantastic, and easy to build kit from tamiya. Next? Chipping! I was looking all over the internet for references for the Leopard family, but its seems that they are well maintained until, bingo! I found at least this, so lets try it!


catdude01

Joined: December 05, 2013
KitMaker: 314 posts
Armorama: 253 posts

Posted: Thursday, October 15, 2015 - 04:51 PM UTC
Here is how far is the kit, still need some washes then dust & mud part, but I'm thinking to do it very lightly.


fuzzhead

Joined: April 18, 2013
KitMaker: 71 posts
Armorama: 61 posts

Posted: Thursday, October 15, 2015 - 06:00 PM UTC
absolutely beautiful
mshackleton

Joined: December 16, 2007
KitMaker: 559 posts
Armorama: 517 posts

Posted: Thursday, October 15, 2015 - 06:06 PM UTC
Quoted Text
Better check your refs again if your camo is intended to be authentic
Cheers
Christopher
Agreed. All the glassware is totally wrong. There are plenty of internet references on the internet.

catdude01

Joined: December 05, 2013
KitMaker: 314 posts
Armorama: 253 posts

Posted: Thursday, October 15, 2015 - 08:03 PM UTC
its seem you are correct on the anti glare reflection color on the glass, my reference doesn't show it in red.
So probably this aftermarket is wrong!

No worries, time to mend this mess!!! thank for the tips and the support!!!!!
So probably this aftermarket is wrong!

No worries, time to mend this mess!!!
 thank for the tips and the support!!!!!
chnoone

Joined: January 01, 2009
KitMaker: 1,036 posts
Armorama: 1,033 posts

Posted: Thursday, October 15, 2015 - 11:25 PM UTC
Hi Marcin
your camo should really look more like this:


The heavy front skirt section differ because I am trying to replicate the left tank 712 in the pic:

Cheers
Christopher
your camo should really look more like this:


The heavy front skirt section differ because I am trying to replicate the left tank 712 in the pic:

Cheers
Christopher


catdude01

Joined: December 05, 2013
KitMaker: 314 posts
Armorama: 253 posts

Posted: Friday, October 16, 2015 - 12:49 AM UTC
Hi!
You are doing the freehand style with the airbrush, really great job! there is a lot of reference for that version.
The one I'm doing is based on reference from primeportal.net as you can see this use some kind of template to achieve the camouflage.


chnoone

Joined: January 01, 2009
KitMaker: 1,036 posts
Armorama: 1,033 posts

Posted: Friday, October 16, 2015 - 02:20 AM UTC
Quoted Text
Hi!
You are doing the freehand style with the airbrush, really great job! there is a lot of reference for that version.
The one I'm doing is based on reference from primeportal.net as you can see this use some kind of template to achieve the camouflage.

That is not quite the case ... all LEOs get the identical camo pattern applied at the factory. There will be "touch ups" applied by the troops and/or local maintenance store either by brush or sprayed (depending on overall damaged areas). At this point one will find minor differences to the individual camo spot in size & shape and a more "hard-edged" appearance when brushed . But the original camo pattern layout will generally be persevered ... so even from a relatively short distance the tanks will still all look very much alike in their appearance.
When their time comes to get their major overhaul the individual tank will be pulled and sent to one of the major repair & refurbish facilities or back to the manufacture KMW ... and maybe replaced by a new tank from the "Umlaufreserve" (Rotation-reserve).
At this stage the maintenance/replacement of all relevant items will be conducted, possible upgrades installed and a fresh paint job according to the factory standards/layout applied.
Once finished the tank is either assigned directly to a specific unit .... depending if it's an M version for example ... or put in stock with the "Umlaufreserve" ... or what ever.
There will be some visible changes depending in what year the upgrade from 2A4s to A5 / A6s was conducted. On the early 2A5s the anti-skid surface stopped just before the lower row of bolts on the new front turret amour ... later the texture was appalled over the complete area covering the bolts and right down to the rim.
With the introduction of the 2A6 the factory applied camo was more "soft" and the individual camo spots appeared less "complex" now.
One can see that on the left side of the turret that the black spot covering both add-on armor panels changed in shape and size, when compared to the original 2A5 layout.
What can also be seen on some tanks is that on the lower side of the frontal wedge-shaped turret armor the original black camo spots are repainted in brown color ... either just on one side or even both.
I stand to be corrected but I would exclude the use of any kind of templates with the German army ... what you are seeing here would be brush applied touch-ups on the barrel and on the lower hull armor plate (brown color).
Cheers
Christopher

Beobachtungsbereich

Joined: August 26, 2012
KitMaker: 19 posts
Armorama: 19 posts

Posted: Saturday, October 17, 2015 - 04:59 PM UTC
The brush marks are from a crew that scrubbed the tank and did a poor job washing it. It's not from the tank being repainted by the crew.
Speaking from personal experience of doing a conversion course and teaching in Munster at the Panzertrüppenshule, seen plenty come back from the range or driving circuit and come out of the wash racks looking the same, then being sent back through them again because they weren't clean enough.
Regards
Paulinsibculo

Joined: July 01, 2010
KitMaker: 1,322 posts
Armorama: 1,239 posts

Posted: Saturday, October 17, 2015 - 05:20 PM UTC
Hi Pedro,
First of all: your model skills are no subject for discussion. Your Leo looks, in that perspective, great!
However, having been an arti lso in a leo2 unit, thus knowing the leo from very close, I want to add a few things:
A. The camo on the leo is based on scientific studies by the producers. From several studies and tests the present camo scheme appeared to give the best "break" in northern European settings. So, as stated above, they all look the same. Furthermore, minor "corrections" by the crews can be seen. However, in case a tank ends up in a higher echelon for adaptations or overhaul, the original scheme is (re)sprayed again.
B. Your tank is too much bleached on the green parts! Though colours do fade, you went a bit too far!
Nevertheless, you showed us a very good build and painted leo, of which you can be proud of.
I hope you accept my adds!
Looking forward to see your next build, thanks for sharing this beautiful monster!


catdude01

Joined: December 05, 2013
KitMaker: 314 posts
Armorama: 253 posts

Posted: Sunday, October 18, 2015 - 05:58 PM UTC
Hi guys, thanks Christoper, Frank and Paul!
Thank you very much for your comments, I Do like this kind of stuff, since this always helps us improve in our hobby. Well, I need to rework all the camo with the airbrush with no edge templates, thank you for clearing that out for me.
From this I learn that :
1. Reflective glass on periscope is not Red. (suggestions?)
2. Chipping or worn out paint its almost none on this type of German Tanks and almost all European vehicle.
3. About Camo, got it! I will correct it to show it more round and no sharp edges, thank for guide me on that!
4. The fadeout green parts its not in his final stage, Still need 2-3 brown washes to make it more darker. The real idea is to finish a more eye-catching colored kit.
5. About lenses, anyone now where this ones go?

First of all: your model skills are no subject for discussion. Your Leo looks, in that perspective, great!
However, having been an arti lso in a leo2 unit, thus knowing the leo from very close, I want to add a few things:
A. The camo on the leo is based on scientific studies by the producers. From several studies and tests the present camo scheme appeared to give the best "break" in northern European settings. So, as stated above, they all look the same. Furthermore, minor "corrections" by the crews can be seen. However, in case a tank ends up in a higher echelon for adaptations or overhaul, the original scheme is (re)sprayed again.
B. Your tank is too much bleached on the green parts! Though colours do fade, you went a bit too far!
Nevertheless, you showed us a very good build and painted leo, of which you can be proud of.
I hope you accept my adds!
Looking forward to see your next build, thanks for sharing this beautiful monster!
 [/quote]
Thank you very much for your comments, I Do like this kind of stuff, since this always helps us improve in our hobby. Well, I need to rework all the camo with the airbrush with no edge templates, thank you for clearing that out for me.
From this I learn that :
1. Reflective glass on periscope is not Red. (suggestions?)
2. Chipping or worn out paint its almost none on this type of German Tanks and almost all European vehicle.
3. About Camo, got it! I will correct it to show it more round and no sharp edges, thank for guide me on that!
4. The fadeout green parts its not in his final stage, Still need 2-3 brown washes to make it more darker. The real idea is to finish a more eye-catching colored kit.
5. About lenses, anyone now where this ones go?

First of all: your model skills are no subject for discussion. Your Leo looks, in that perspective, great!
However, having been an arti lso in a leo2 unit, thus knowing the leo from very close, I want to add a few things:
A. The camo on the leo is based on scientific studies by the producers. From several studies and tests the present camo scheme appeared to give the best "break" in northern European settings. So, as stated above, they all look the same. Furthermore, minor "corrections" by the crews can be seen. However, in case a tank ends up in a higher echelon for adaptations or overhaul, the original scheme is (re)sprayed again.
B. Your tank is too much bleached on the green parts! Though colours do fade, you went a bit too far!
Nevertheless, you showed us a very good build and painted leo, of which you can be proud of.
I hope you accept my adds!
Looking forward to see your next build, thanks for sharing this beautiful monster!
 [/quote]
 Thirian24

Joined: September 30, 2015
KitMaker: 2,493 posts
Armorama: 2,344 posts

Posted: Sunday, October 18, 2015 - 08:06 PM UTC
I think your work looks great! Keep up posted with progress!
Cheers?
Dustin
Cheers?
Dustin

chnoone

Joined: January 01, 2009
KitMaker: 1,036 posts
Armorama: 1,033 posts

Posted: Sunday, October 18, 2015 - 10:18 PM UTC
Not so fast young man:

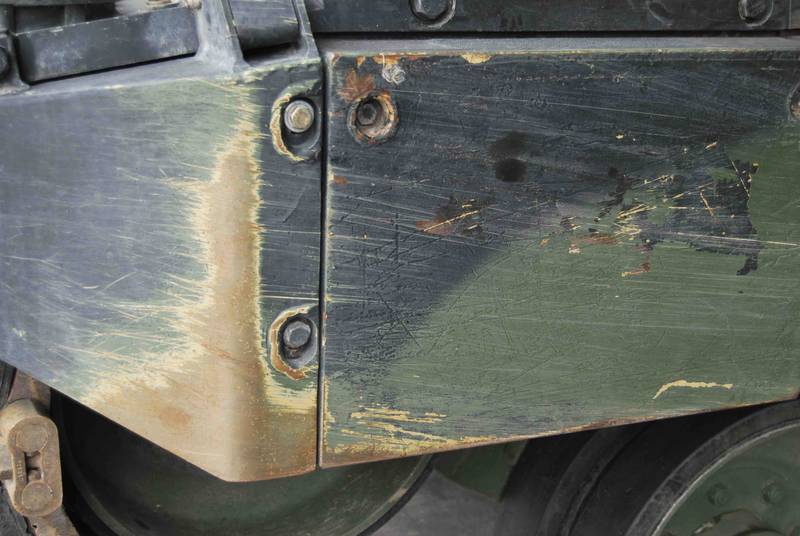
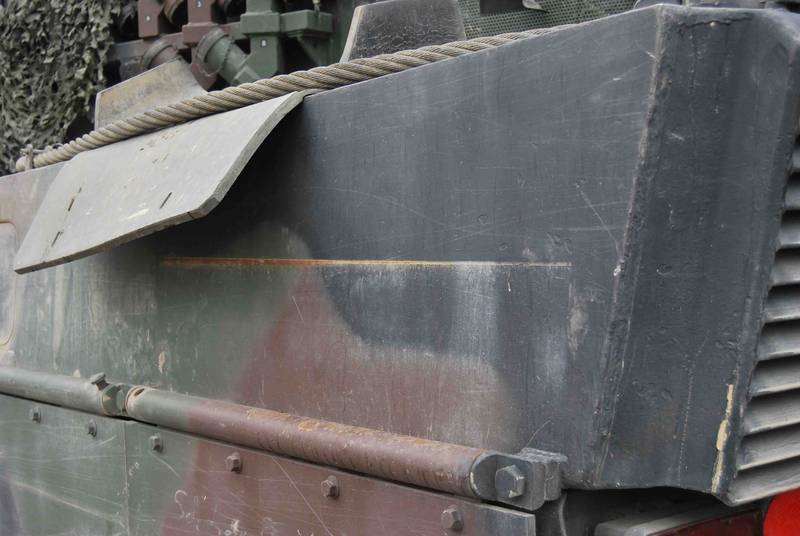
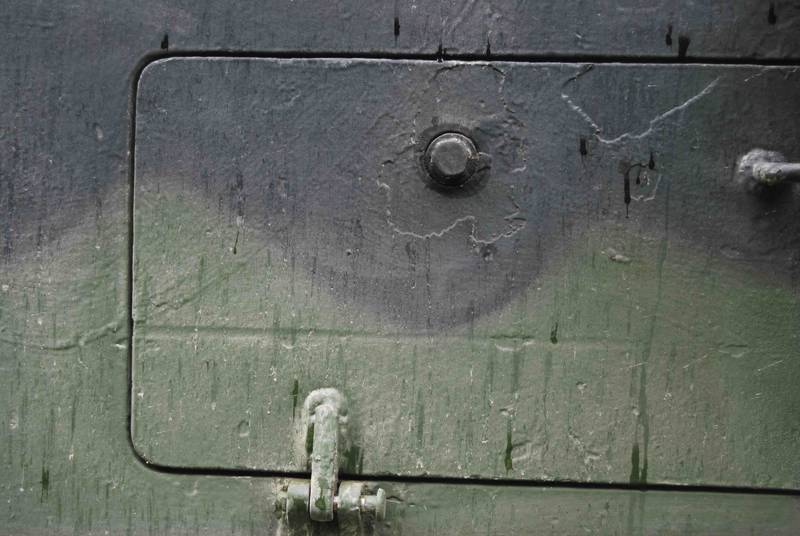
Modern tanks do get "banged up" a bit.
Cheers
Christopher


Modern tanks do get "banged up" a bit.
Cheers
Christopher


catdude01

Joined: December 05, 2013
KitMaker: 314 posts
Armorama: 253 posts

Posted: Monday, October 19, 2015 - 02:12 AM UTC
Awesome Pictures! thank you for sharing it, If anyone have more, keep it coming! chipping/scratchs step back in business!! 


Quoted Text
Not so fast young man:
Modern tanks do get "banged up" a bit.
Cheers
Christopher


PiperDan

Joined: January 02, 2004
KitMaker: 180 posts
Armorama: 154 posts

Posted: Monday, October 19, 2015 - 08:23 AM UTC
Quoted Text
5. About lenses, anyone now where this ones go?
It looks as if those lenses are meant to fit the square headlights found on the Strv 122 and 2A5DK.
mshackleton

Joined: December 16, 2007
KitMaker: 559 posts
Armorama: 517 posts

Posted: Monday, October 19, 2015 - 01:19 PM UTC
Quoted Text
[/quote]From this I learn that :
1. Reflective glass on periscope is not Red. (suggestions?)
Periscopes (hull and turret) are tinted, but this is hardly visible. Mostly, they look black.
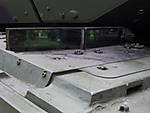
The windows in the gunners sight - The outside (shorter) window is tinted black and you cannot see anything behind it. The inside (taller) window is clear, no tint and on the real thing you can see two lenses behind it - difficult to portray, I know.
The commander's sight of the roof is also clear with a lens behind it.
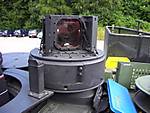
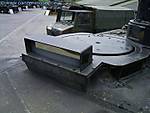
The glass block in front of the commanders hatch is clear with a slight green tinge. It is NOT a periscope, just a block of armoured glass.

catdude01

Joined: December 05, 2013
KitMaker: 314 posts
Armorama: 253 posts

Posted: Monday, October 19, 2015 - 04:34 PM UTC
Periscopes have no color! men...that's sucks..
I'm not late to change the color for something like this.

just kidding jejeje

Beobachtungsbereich

Joined: August 26, 2012
KitMaker: 19 posts
Armorama: 19 posts

Posted: Tuesday, October 20, 2015 - 04:51 AM UTC
Quoted Text
The glass block in front of the commanders hatch is clear with a slight green tinge. It is NOT a periscope, just a block of armoured glass.
Actually, it is a periscope for the commander, you are just able to see through it for protection while under fire.
Regards

catdude01

Joined: December 05, 2013
KitMaker: 314 posts
Armorama: 253 posts

Posted: Tuesday, October 27, 2015 - 05:32 PM UTC
Well here is some progress on the cat, some rust and scratches in progress, more to come!


 |


