Hosted by Darren Baker
101AD M1043 Humvee circa 2003, Mosul, Iraq

jwest21

Joined: October 16, 2006
KitMaker: 3,374 posts
Armorama: 3,126 posts

Posted: Sunday, August 14, 2016 - 05:24 AM UTC
Stunning work!
youngtiger1

Joined: May 14, 2008
KitMaker: 534 posts
Armorama: 344 posts

Posted: Sunday, August 14, 2016 - 09:46 AM UTC
Nice thread Eric. Glad you brought this one up again otherwise I would have not seen it. Boy, you do some clean work bro. The detail is sharp and everything looks as if it was professionally done.
Btw, i send you pm and missing pic few post above is what I was taking about. That's the reason for my word doc idea
Btw, i send you pm and missing pic few post above is what I was taking about. That's the reason for my word doc idea

Posted: Thursday, August 18, 2016 - 10:41 AM UTC
Hello all, I just finished up one more small detail so I figured I better post a small update. I will try to be more consistent and post at least weekly updates. The front bumper/hood mount, while well-defined on the kit was molded solid. I decided to hollow them out. I did all of this with a drill bit in my pin vise and a #1 x-acto knife with a #17 blade that I filed until it was narrower by almost half. I feel I can better control the narrower blade. I know there are plenty of purpose made tools out there. I even have one of Mission Model’s chisels. The tip doesn’t stay sharp enough for me. I noticed as I was fitting the bumper that I filed the front of the mounts a bit too much and they hit the bumper at an angle. I also caught too late that Tamiya made the mount shape different against the frame for the position lug on the bumper. Next time I will fix that as I am hollowing it out. Oh well…


kubisz

Joined: February 18, 2007
KitMaker: 978 posts
Armorama: 977 posts

Posted: Thursday, August 18, 2016 - 12:17 PM UTC
Hardcore job 


Posted: Thursday, September 01, 2016 - 03:36 AM UTC
Hello everyone. Here is a very small update on my progress. I have almost finished the bolt and flange detail on the rear end of the frame. Soon I need to start the surgery on the front end.
Regards,
Eric
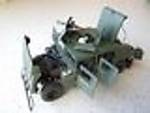
Here is the detail on the rear of the frame. I added a pintle hook which is by Piotr Samofalov from his Shapeways store. It really is a nice little upgrade. After cleaning the parts they turned whitish. I added the upper shock towers and still need to add the shock detail. I added the tie down point that is between the mounts for the upper “A” arm. I still need to add the bolt heads to the “A” arm mounts. I also need to add the rear tie down point.


Here are the rear tie rods. The top tie rod is unmodified while the bottom one has been hacked apart and opened up and articulated. I only did the articulation so that it will be easier to install.

Here is the first of the four geared axles. I have reshaped the tie rod mount, and added the access cover and bolts. I still need to add the cover over the hole on the inner face where the tie rod mount bolts on.

Regards,
Eric
Here is the detail on the rear of the frame. I added a pintle hook which is by Piotr Samofalov from his Shapeways store. It really is a nice little upgrade. After cleaning the parts they turned whitish. I added the upper shock towers and still need to add the shock detail. I added the tie down point that is between the mounts for the upper “A” arm. I still need to add the bolt heads to the “A” arm mounts. I also need to add the rear tie down point.


Here are the rear tie rods. The top tie rod is unmodified while the bottom one has been hacked apart and opened up and articulated. I only did the articulation so that it will be easier to install.

Here is the first of the four geared axles. I have reshaped the tie rod mount, and added the access cover and bolts. I still need to add the cover over the hole on the inner face where the tie rod mount bolts on.

MakiWawa

Joined: December 17, 2014
KitMaker: 448 posts
Armorama: 448 posts

Posted: Thursday, September 01, 2016 - 11:43 PM UTC
Ups... 
Amazing job

Amazing job

youngtiger1

Joined: May 14, 2008
KitMaker: 534 posts
Armorama: 344 posts

Posted: Friday, September 02, 2016 - 04:14 AM UTC
Nice work. I love the extra bolts/nuts you added but as Brent said, it's shame most of it will not be seen., but it looks awesome.
As for the rear hook, I have that set from shapeway. It was one of the first items i ordered from them just to see how there quality of printing was. I didn't realize Piotr did the CAD work...no wonder it is very nice.
As for the rear hook, I have that set from shapeway. It was one of the first items i ordered from them just to see how there quality of printing was. I didn't realize Piotr did the CAD work...no wonder it is very nice.

Posted: Monday, May 01, 2017 - 02:42 AM UTC
I know it’s been quite a while since I added some updated photos here. So much for those weekly updates! I have been around, but just not building. I finally got bit by the bug again and have made some progress with this truck. I finished up most of the rear suspension. I got everything stable and glued together. I annealed the springs but there is still a bit of spring in them. I had to clamp the whole thing just to keep it in place while the glue set. I didn't glue on the tie rods because they will need to be added later. The drivetrain is just set in place for the photos with no glue. I did that for ease of painting. Once I have the chassis complete, I will paint everything separately and then glue it all together. The one thing in the photos that still needs work are the e-brake cylinders. They are in the early stages. I also need to figure out how to remove the e-brake disc on the drive shaft since that is an early design that wasn’t in use by 2003. Please let me know if you have any comments or suggestions.


Thanks for looking everyone!


Thanks for looking everyone!
MakiWawa

Joined: December 17, 2014
KitMaker: 448 posts
Armorama: 448 posts

Posted: Tuesday, May 02, 2017 - 01:22 AM UTC
I'm impressed...
Maki


Joined: February 13, 2002
KitMaker: 5,579 posts
Armorama: 2,988 posts

Posted: Tuesday, May 02, 2017 - 12:12 PM UTC
Wow! Looking good!
Mario
Mario
Posted: Tuesday, May 02, 2017 - 12:34 PM UTC
Hi Eric - your build looks great! Thanks for posting the work in process - really nice. Looking forward to your next update -
Cheers
Nick
Cheers
Nick

Bricksy1969

Joined: September 19, 2006
KitMaker: 262 posts
Armorama: 251 posts

Posted: Tuesday, May 02, 2017 - 01:53 PM UTC
Great work you will to mount this on a mirror!
Keep it up
Keep it up
Posted: Tuesday, May 02, 2017 - 08:26 PM UTC
Thanks everyone for your feedback. I really do value it. You guys are some of the best builders on the site. I still have a lot going on, but I feel a renewed interest in building, not just researching! I've scaled back my ambition a bit just to speed up the build. If I need my Optivisor just to see it, I am not going to add the detail!
Regards,
Eric
Regards,
Eric

kubisz

Joined: February 18, 2007
KitMaker: 978 posts
Armorama: 977 posts

Posted: Tuesday, May 02, 2017 - 08:49 PM UTC
Great details. It's worth to wait so long for updates 

 |


