Quoted Text
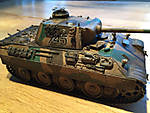
Question 1: I used a primer black spray paint. But after painting the first beige layer the effect was that the beige was quite dark and look hard. Is it better to use a lighter primer if I''m going to paint a light main colour?
There is a wide ranging discussion on light versus dark primers or no primer at all. The best way is to look at painting articles and decide for your self which works best for you, Try painting several ways. Practice.
There really is no "best" way. It all depends on what method works best for you.
And, for the record, I never prime.
Quoted Text
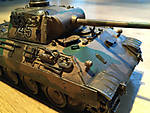
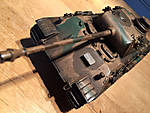
Question 2: The painting of the chipping was tricky ot do with my pencil brush, are there other ways to do that? Or just a finer pencil?
YouTube has a number of tutorials on chipping and most involve exceptionally fine brushes or, in some cases fine sponges to achieve the look. Personally, I find that chipping on WW II armour is far overdone to be realistic. Remember, the lifespan on these vehicles was measured in days and weeks. There was virtually no time for paint to chip or rust. Most of them would have looked showroom new. Dirty, yes, but not beat up.
Post war armour, especially that in poorer countries, really does start to look beat up and rusted out, but armour in 1st and 2nd world armies generally doesn't.
Use photos to guide you as opposed to other models. Models go through "fashions" and "fads" and may not be representative of the real thing.
Quoted Text
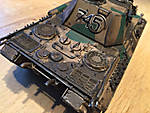
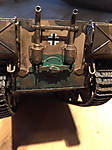
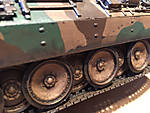
Question 3: I had a major challenge gluing the tracks to the wheels so the looked tight. The model glue as the super glue would stick it. They would just dissolve the plastic. I ended up using normal hobby glue, but the fit isn't very strong. Any suggestions for the next tracks?
If the track is the old school vinyl "rubber band" style, then nothing will really glue them to anything else. There are a number of tricks to get the sag on a Panther or T-55 and they include the use of thread to sew the tracks down to the road wheel axles and fine pins or wire located to force the track down to the correct position. None are really effective. The best for that kind of saggy track are one of the separate link or length and link style tracks available nowadays.
For tanks with taut tracks, like Shermans, or Abrams, the rubber band style works well and you attach the two ends of the rubber band by heating a screwdriver in a flame and melting the ends of the pins over. Old school, but it works well. You can hide the join under a road wheel or with some muck from the base's groundwork.
HTH
Paul