_GOTOBOTTOM
Armor/AFV
For discussions on tanks, artillery, jeeps, etc.
Meng Kids' Egg-Type99 (New Chinese MBT)
firstcircle
Visit this Community
England - South East, United Kingdom
Joined: November 19, 2008
KitMaker: 2,249 posts
Armorama: 2,007 posts
Posted: Tuesday, January 12, 2016 - 04:47 AM UTC
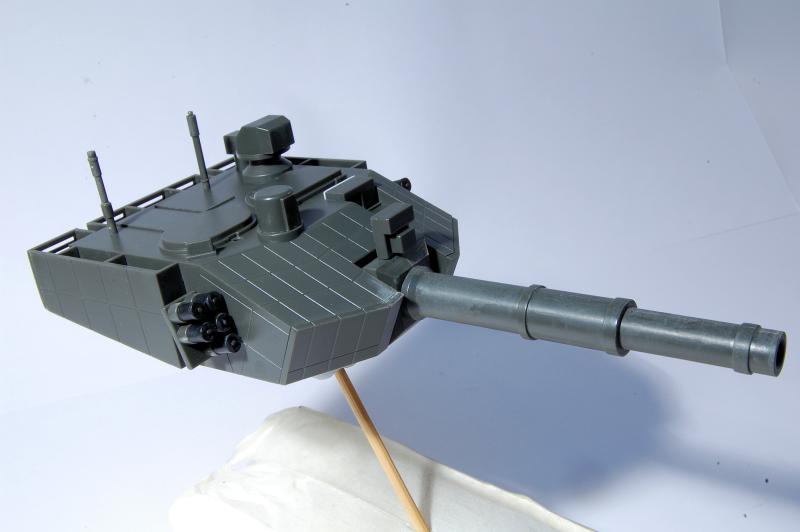
For those that care for this kind of thing, and following up on the review, over the holiday I started to put Meng Kids' "Egg"-Type99 together.

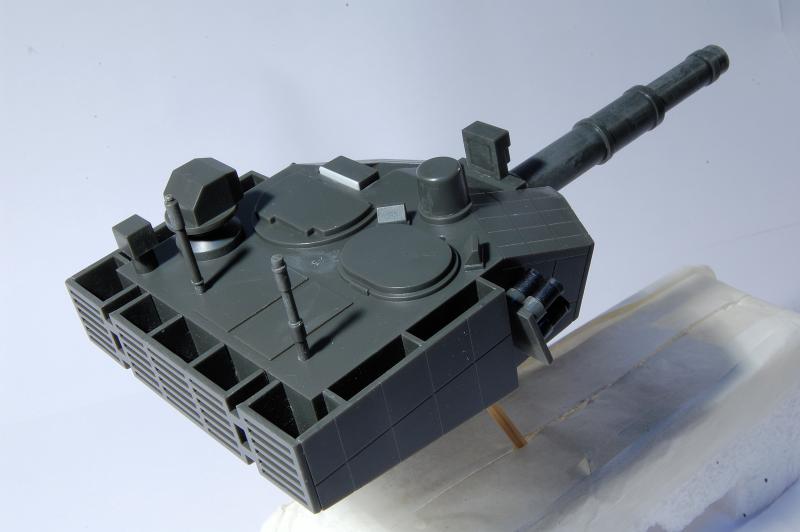
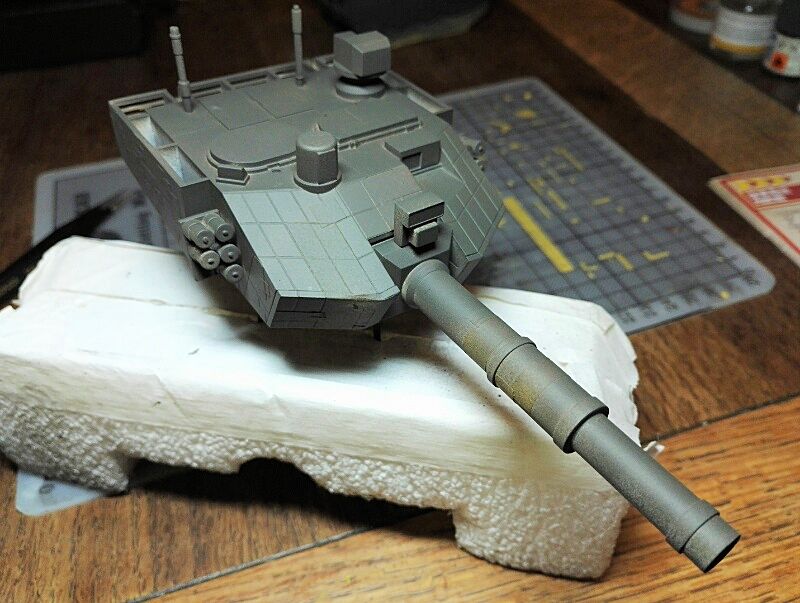
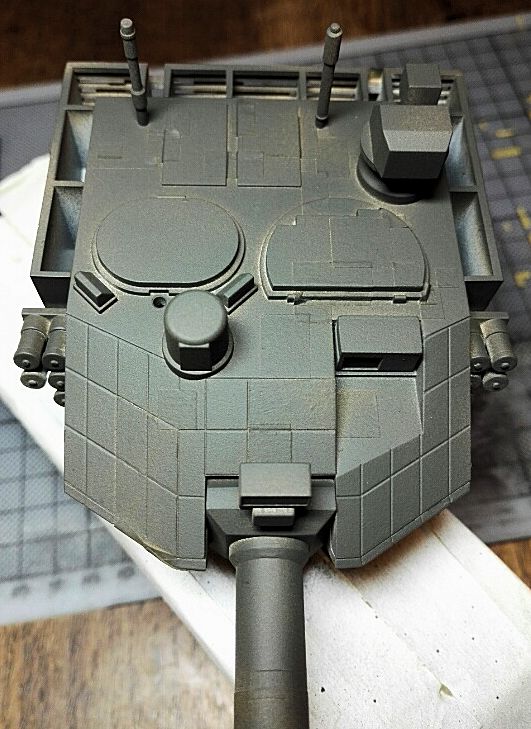
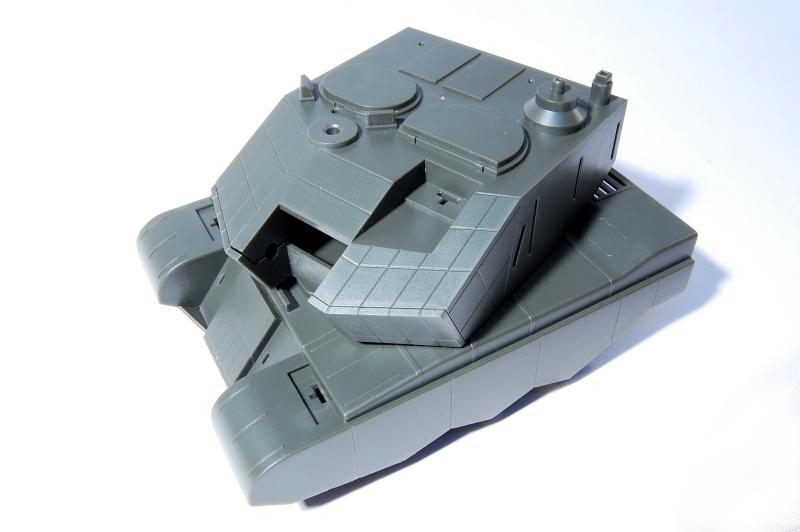
The turret is almost as big as the body of the tank, as can be seen from the first photo, then gets even bigger once the racks and armour are added to the back and sides. The added details of the range finder, periscopes etc. are cleanly moulded and well shaped, albeit simplified. A couple of relatively fiddly bits were the smoke launchers, where each grenade had to have seams removed and the sprue connector sanded down consistently for the end cap; note they are all pointing in the same direction. The gun also required a bit of work to get the lengthways join acceptably hidden. It does elevate a little, and stays where it is put, i.e. it doesn't droop.

Visible is a bit of white styrene inserted to block the open back of one of the turret details, and this was also done with the front lamps on the hull.

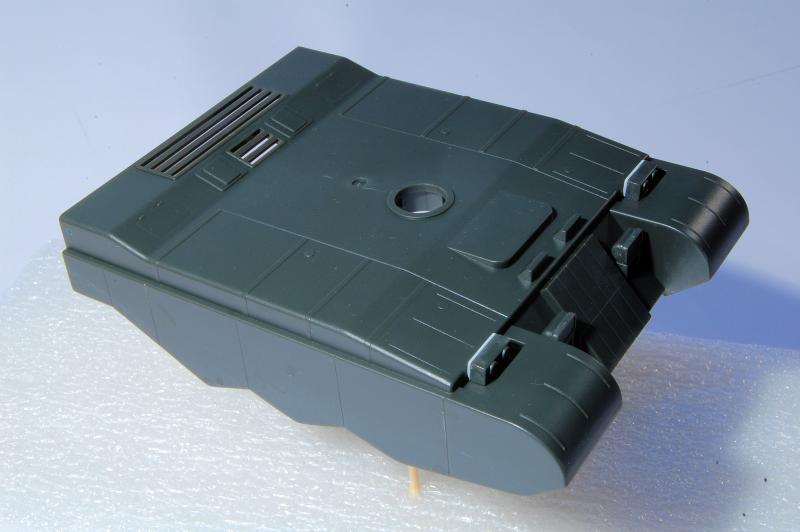
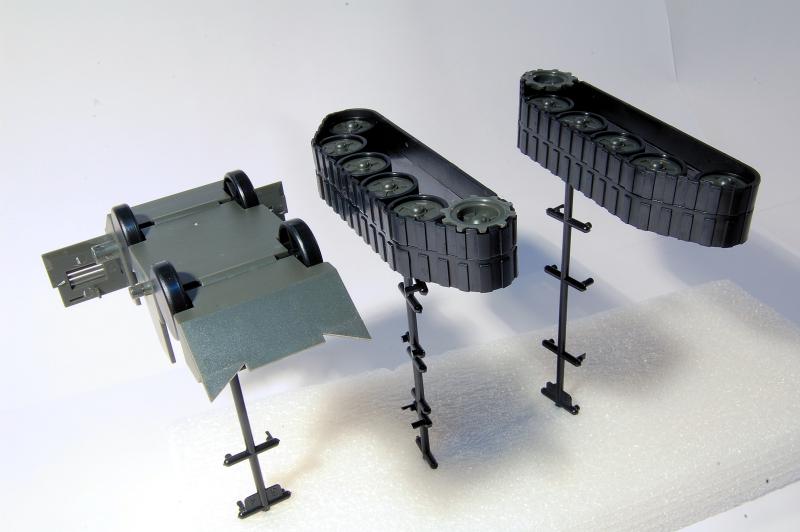
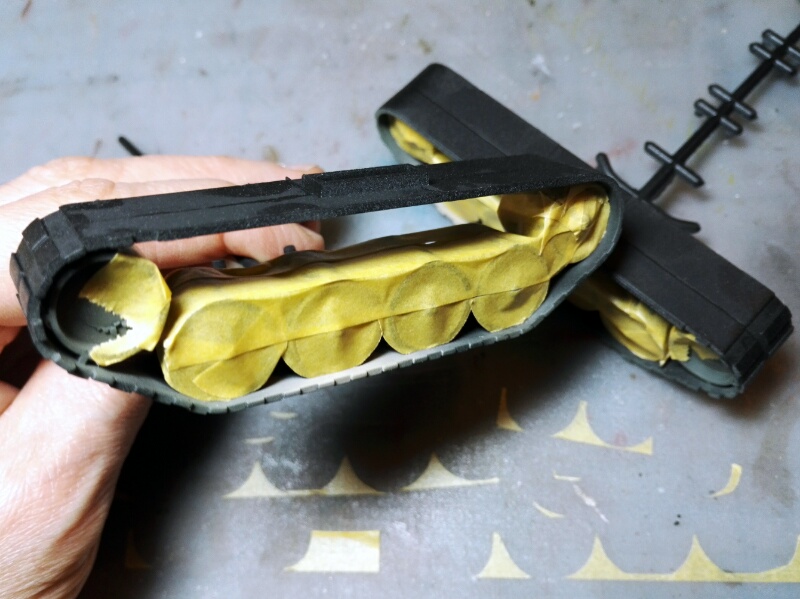
Note the inner "toy wheels" attached to the hull bottom, and the width of the back plate already attached. A mistake I made was to pop the wheel centres into the track units before painting - I was just trying it out and had assumed I could easily pop them back out again so that I could paint the track and tyre unit separately, then insert the painted wheels in. I realised however that prising the wheel centre back out risked noticeable damage being done to the rim or tyre, so I had to leave them in and mask them for painting, much more time consuming. The sprocket on the other hand does come off quite easily.

Another error was to just try out of the fit of the turret onto the hull by pushing the connector in the hull bottom into the turret hole - getting it back off took considerable force and leverage as the connector spreads out once it goes through the turret hole, and part of the connector cracked, though it seems to be have been rescued by some cement (yeah, the problems even a kids' kit can create...)

Note that the lengthways join of the track units is visible, but I have left it like that. The tracks aren't - obviously - at all accurate, so I'm just going with how they came out. Any ideas of superdetailing a model like this have to be kind of put to one side, I think. I am looking for some alternative proper decals, as opposed to the provided stickers however, but haven't found any suitable yet.

I'll post further photos of it being painted later.


firstcircle
Visit this Community
England - South East, United Kingdom
Joined: November 19, 2008
KitMaker: 2,249 posts
Armorama: 2,007 posts
Posted: Thursday, January 14, 2016 - 02:52 AM UTC
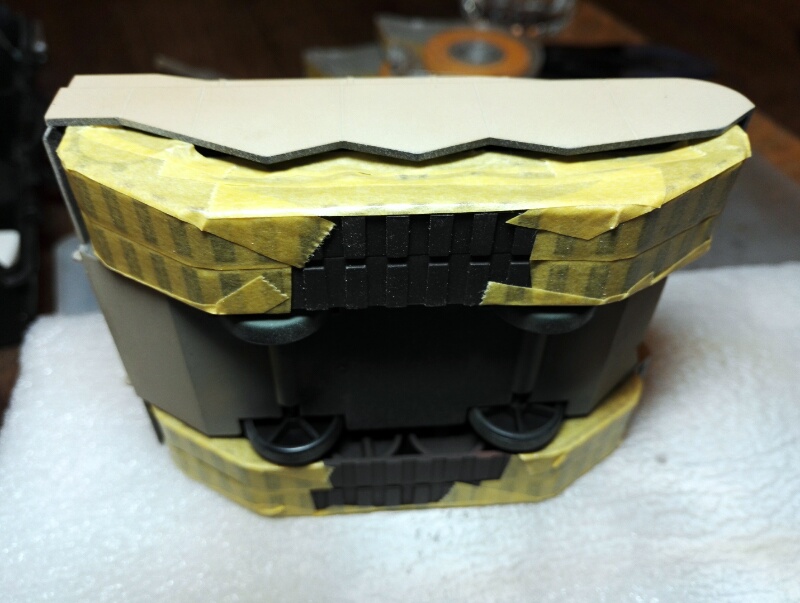
First photo shows the track units after the wheels have been sprayed and masked off so the tracks can be painted - all wrong, as I said above.... should have just painted the track/wheel unit then put the painted wheel centres in.

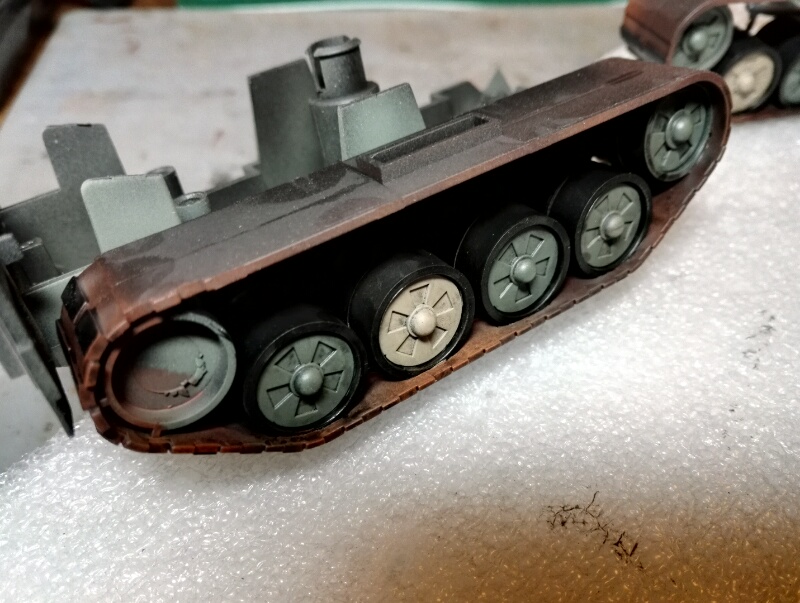
Then we can see the masking tape removed. One road wheel on each side is painted in Tamiya Buff, the rest is some Tamiya green, I forget which. In photos the tracks seem to be oxidised brown with black rubber track pads.

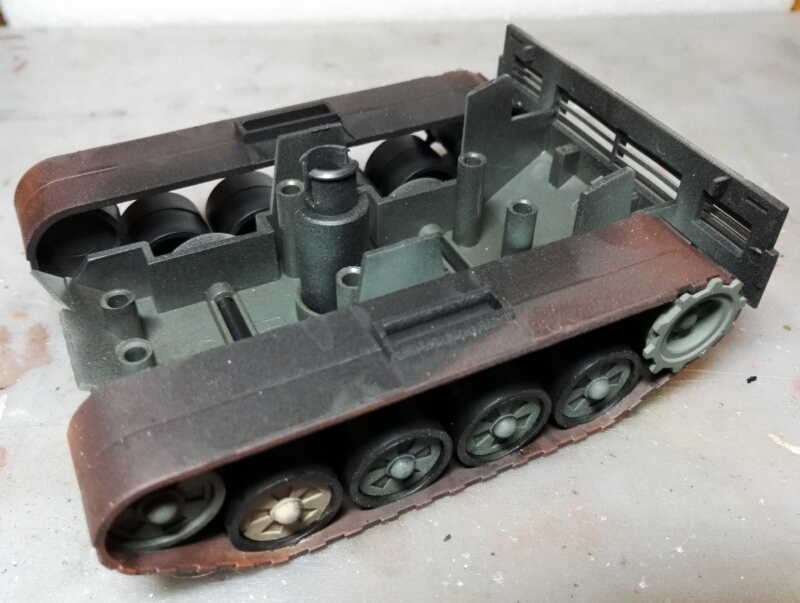
Track units then attached to the hull bottom.

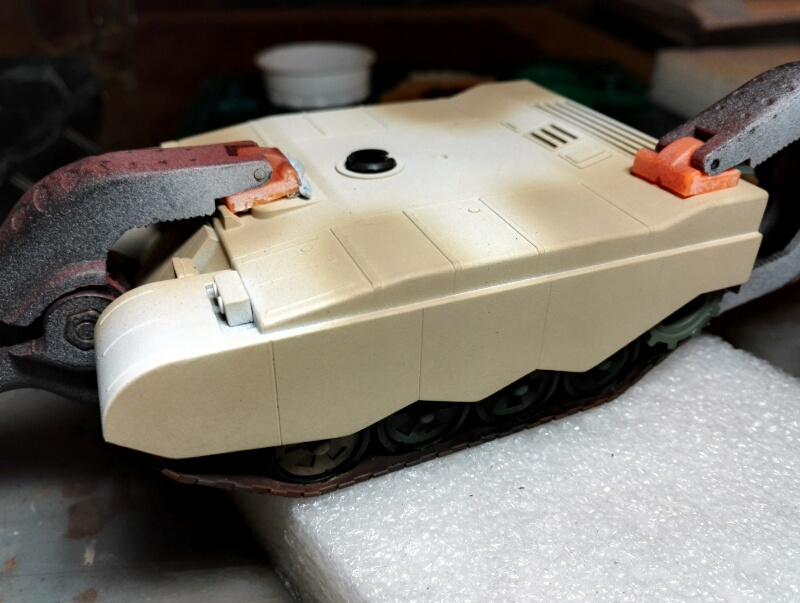
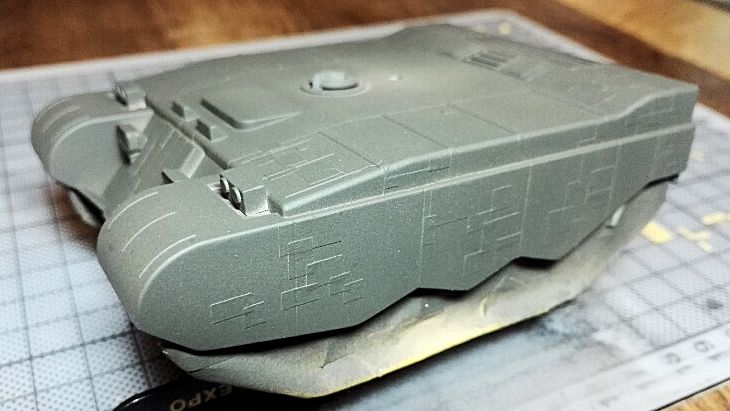
The hull top, pointlessly partially painted already (I lost track of what I was doing on this build for some reason), is then glued in place and clamped. The top and bottom have a tendency to push apart a little, and the join at the back is quite long and visible, so I gave it quite a lot of cement... It isn't possible to add the track units after the top and bottom are joined.

The now painted track / wheel units were then masked off again in preparation for painting the completed hull.

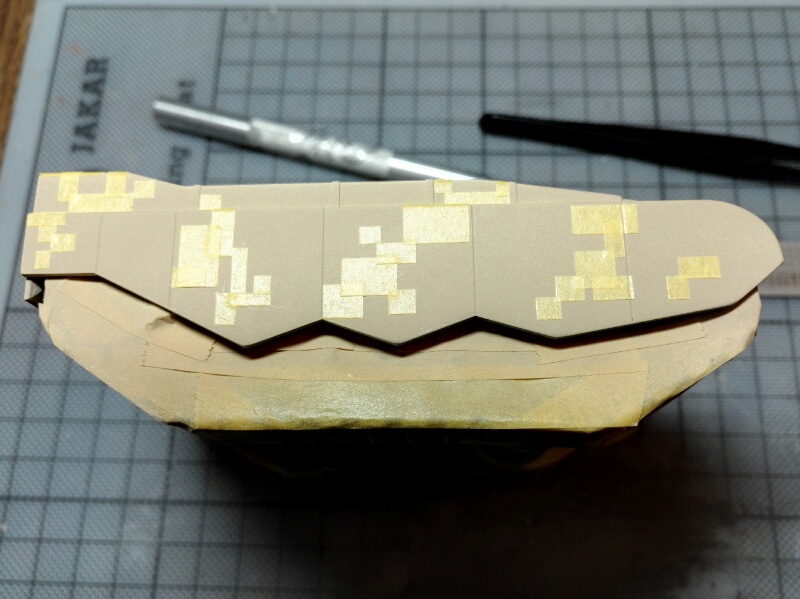
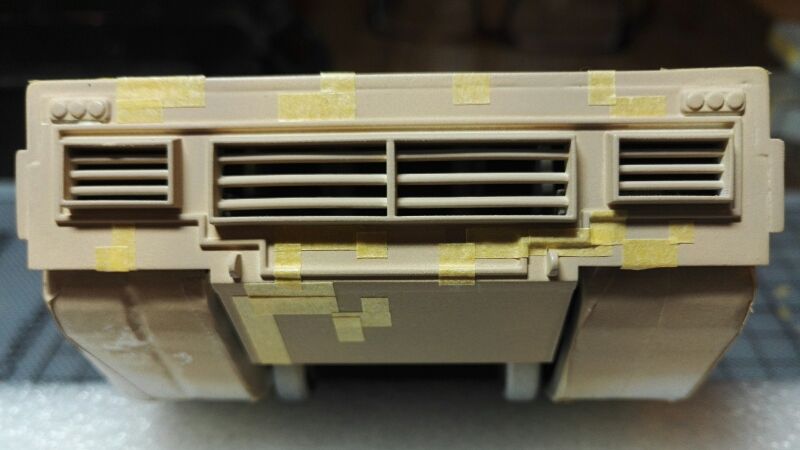
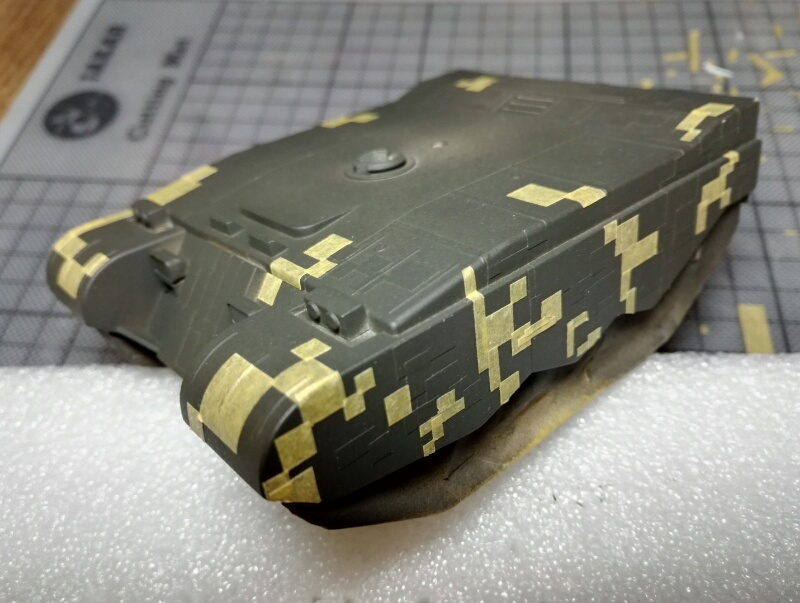
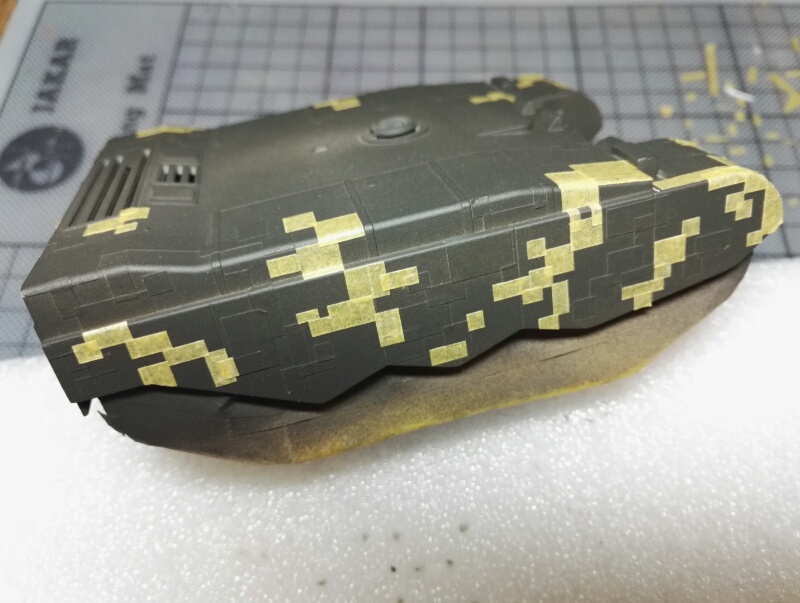
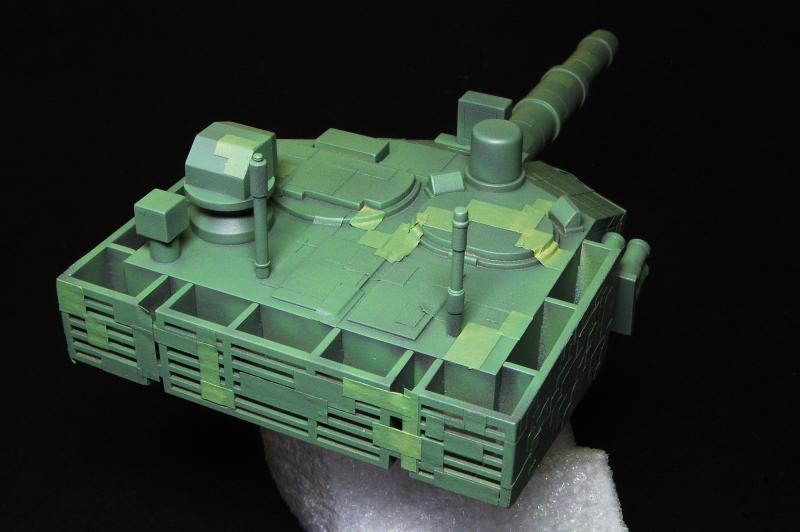
Two or three hours were then spent cutting various squares and rectangles from Tamiya masking tape and sticking them on, in preparation for the three colour "digital" camouflage, following the painting guide supplied. So far the hull has received the first layer of tape, now I have the turret to do. Then will come the next colour to be painted, dark green, then I'll start again cutting and sticking the tape squares...


SpaceXhydro
Visit this Community
England - South West, United Kingdom
Joined: March 13, 2015
KitMaker: 418 posts
Armorama: 235 posts
Posted: Thursday, January 14, 2016 - 11:47 PM UTC
that looks unusual.
firstcircle
Visit this Community
England - South East, United Kingdom
Joined: November 19, 2008
KitMaker: 2,249 posts
Armorama: 2,007 posts
Posted: Monday, January 18, 2016 - 03:54 AM UTC

Quoted Text

that looks unusual.


I know you're just being polite.

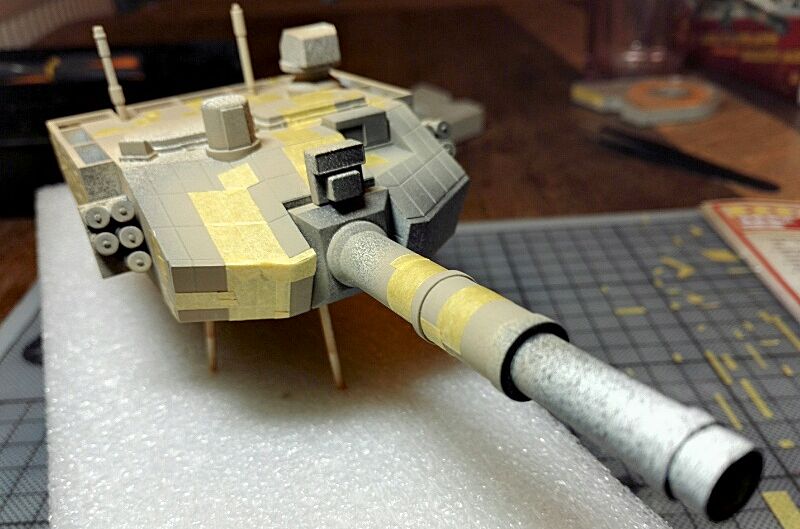
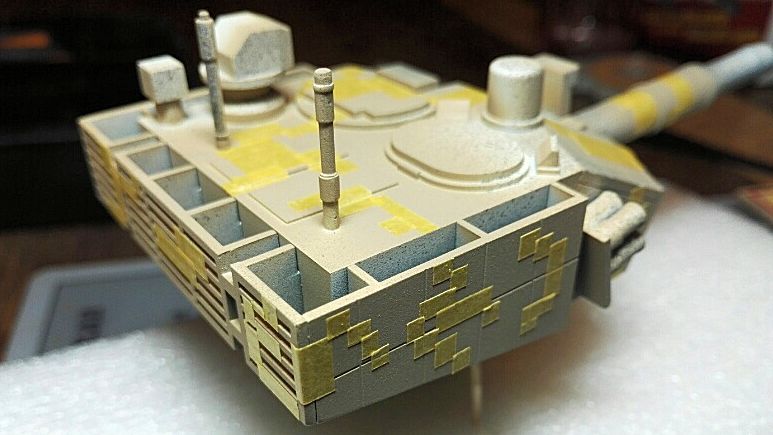
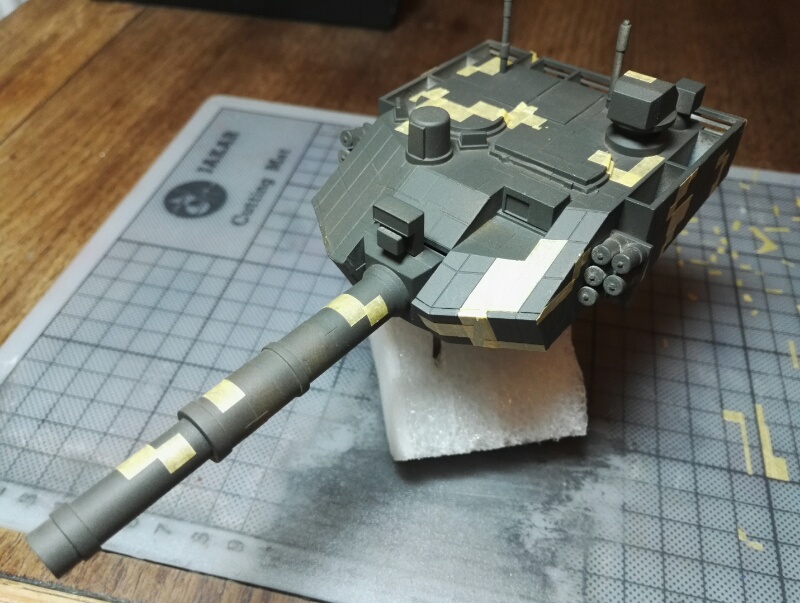
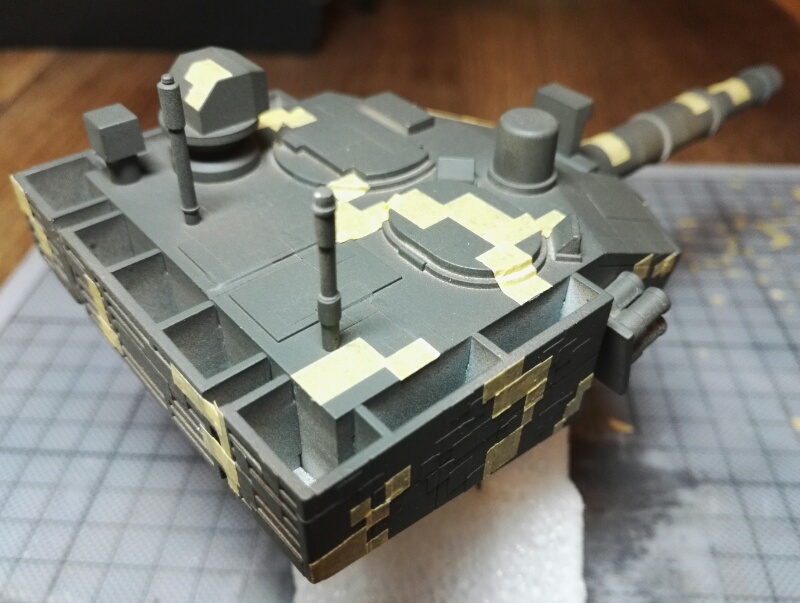
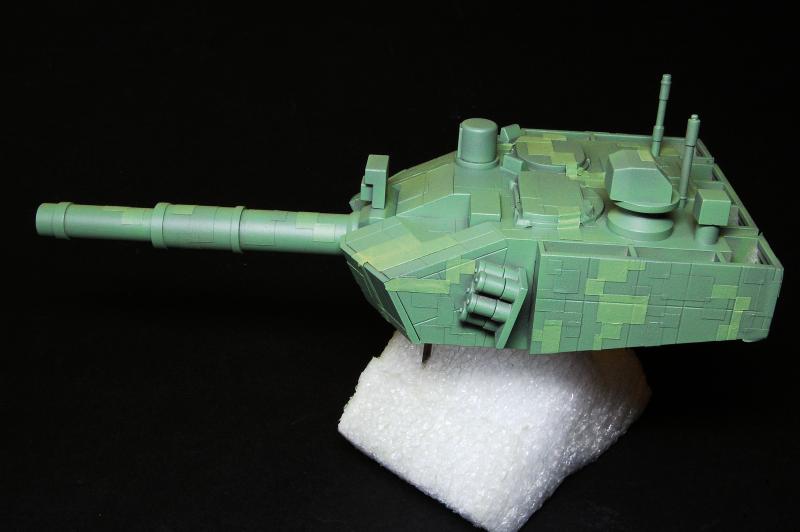
So after the first two or three hours of cutting and sticking little squares and rectangles on the hull, came two or three hours of the same thing on the turret. It's one of those things that most modellers know about, of just relaxing and getting into the repetitive task, that all the while takes concentration, and of course you still have your ears free to listen to some music or chat or some such thing. The main difficulty is trying to keep them all straight.


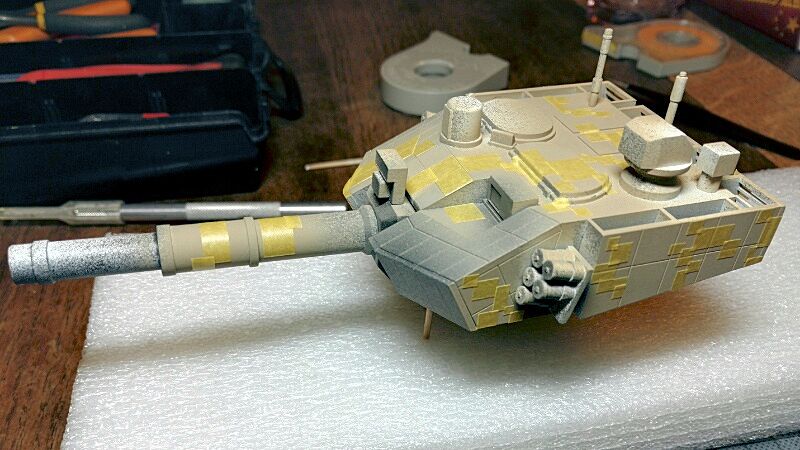
On top of the Tamiya Buff went Tamiya Dark Green XF-61. Unfortunately the old jar turned out to not really be enough; I drained it to the bottom and filtered out the gloopy bits with a piece of tea bag paper in the airbrush cup, and just about got enough coverage so that the next several hours of little squares and rectangles can go ahead. First I want to give it 48 hours to fully cure to minimise the danger of the tape lifting the paint when it is removed.


I then realised I didn't have a light enough shade of green for the next layer anyway; I have many greens but mostly pretty similar and none in light shades. So I had to put in an order for some more XF-61 and several shades of light green, one of which will turn out to be the correct colour...
firstcircle
Visit this Community
England - South East, United Kingdom
Joined: November 19, 2008
KitMaker: 2,249 posts
Armorama: 2,007 posts
Posted: Sunday, January 31, 2016 - 02:48 AM UTC
So the XF-61 cured over the time it took the new paints to arrive, and several other model related diversions, so a few more hours was spent cutting little s and rectangles and sticking them on the body.


Sudzonic
Visit this Community
Scotland, United Kingdom
Joined: December 07, 2007
KitMaker: 2,096 posts
Armorama: 1,983 posts
Posted: Sunday, January 31, 2016 - 03:22 AM UTC
Really like this, looks like a good fun build
dvarettoni
Visit this Community
South Carolina, United States
Joined: September 28, 2005
KitMaker: 778 posts
Armorama: 763 posts
Posted: Sunday, January 31, 2016 - 06:20 PM UTC
just got this for my son he can't wait to start it he is going to enter at AMPSNATS but only after he finishes his pinewood derby car
Dave
firstcircle
Visit this Community
England - South East, United Kingdom
Joined: November 19, 2008
KitMaker: 2,249 posts
Armorama: 2,007 posts
Posted: Sunday, January 31, 2016 - 07:50 PM UTC
Sounds great Dave - remember what I said above about not test fitting either the turret or the wheel hubs until you're sure you're ready for final assembly. Believe me, they fit, but are hard / impossible to get apart again without damage.
tatbaqui
Staff MemberNews Writer
ARMORAMA
#040
Visit this Community
Metro Manila, Philippines
Joined: May 06, 2007
KitMaker: 2,713 posts
Armorama: 2,451 posts
Posted: Monday, February 01, 2016 - 04:16 AM UTC
Nice build, thanks for sharing. I must say that you also do a very good job of masking -- quite neat!
firstcircle
Visit this Community
England - South East, United Kingdom
Joined: November 19, 2008
KitMaker: 2,249 posts
Armorama: 2,007 posts
Posted: Tuesday, February 16, 2016 - 04:27 AM UTC

Quoted Text

Nice build, thanks for sharing. I must say that you also do a very good job of masking -- quite neat!


Thanks Tat, it is helped by the model being very flat. Only problem area is the top of the turret.

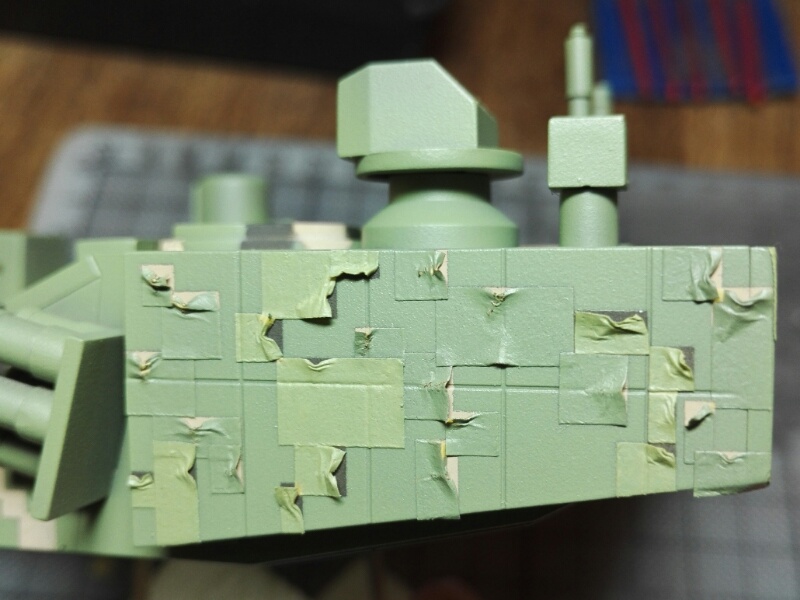
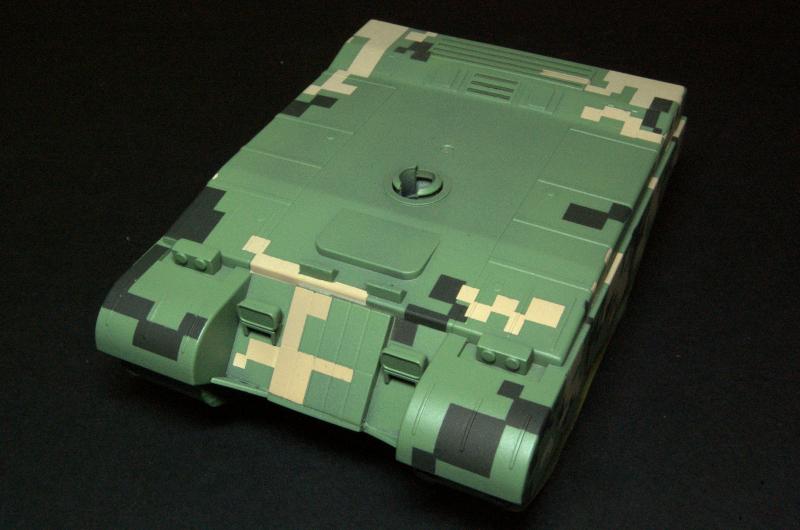
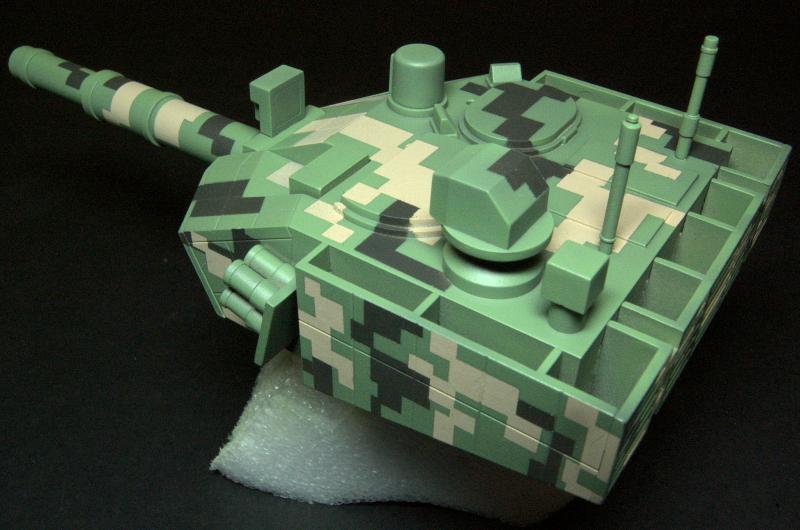
Final bits of tape went on the turret a couple of weeks ago:


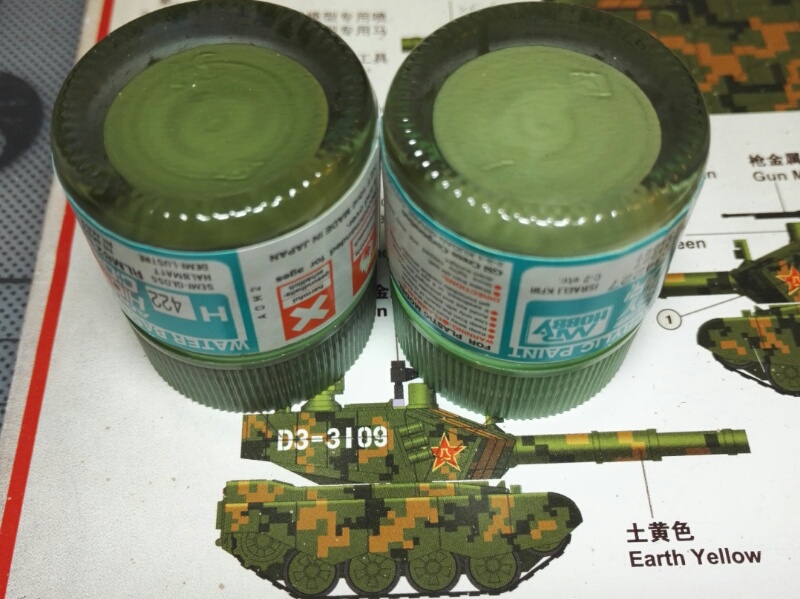
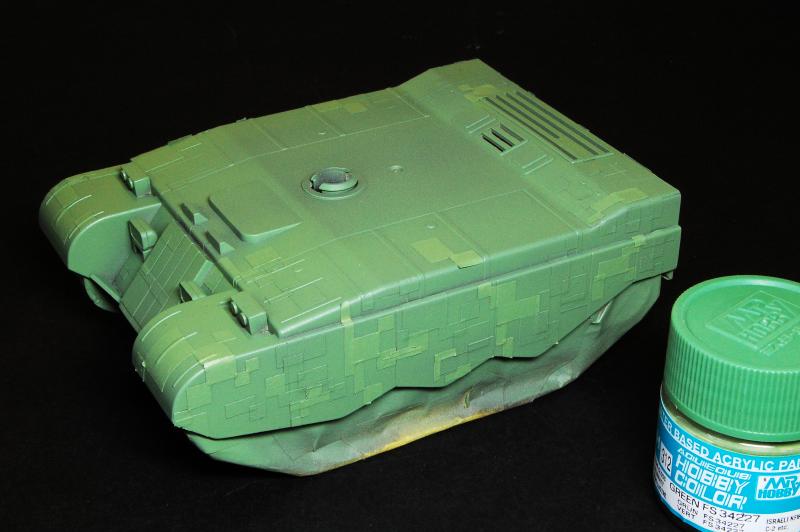
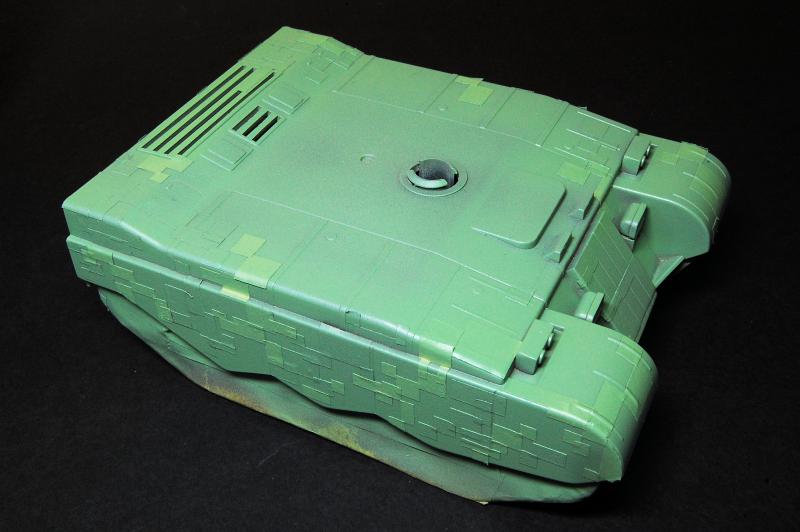
Two MrHobby Aqueous greens arrived, probably the darker one (H422 Light Green) matches best in the photo but I decided to go for the brighter toy-like one (H312 Green) like on the box top and get more contrast with the dark green.


Mixed the paint with about 30-40% cellulose thinners and it sprayed nicely:


Namabiiru
Staff MemberAssociate Editor
MODEL SHIPWRIGHTS
#399
Visit this Community
Rhode Island, United States
Joined: March 05, 2014
KitMaker: 2,888 posts
Armorama: 1,920 posts
Posted: Tuesday, February 16, 2016 - 06:18 AM UTC
Brilliant build! I want to see it naked (mask removed).

firstcircle
Visit this Community
England - South East, United Kingdom
Joined: November 19, 2008
KitMaker: 2,249 posts
Armorama: 2,007 posts
Posted: Friday, February 19, 2016 - 10:23 PM UTC

Quoted Text

I want to see it naked (mask removed).


OK. No music for the striptease though...

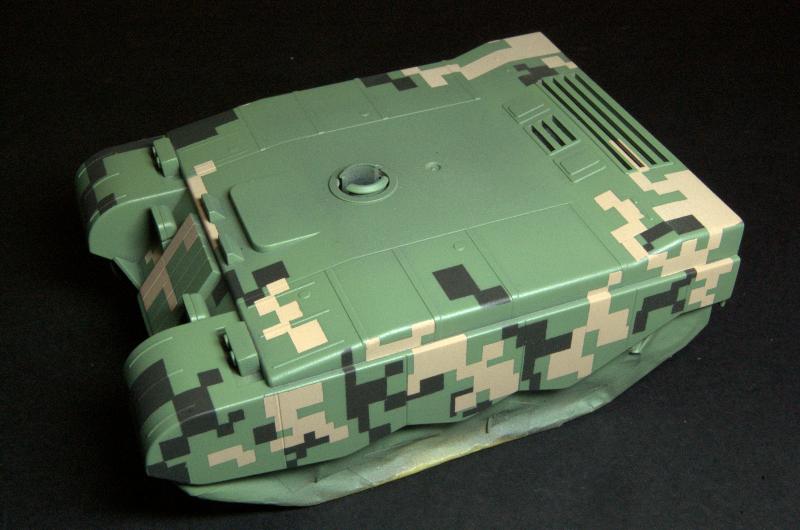
Lifted up the corners of the masking tape with a wooden cocktail stick to avoid scratches, before peeling them off with tweezers.


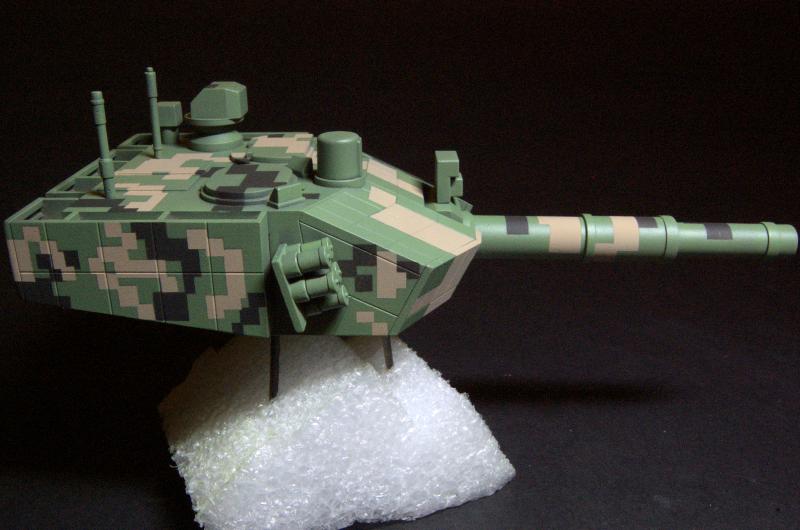
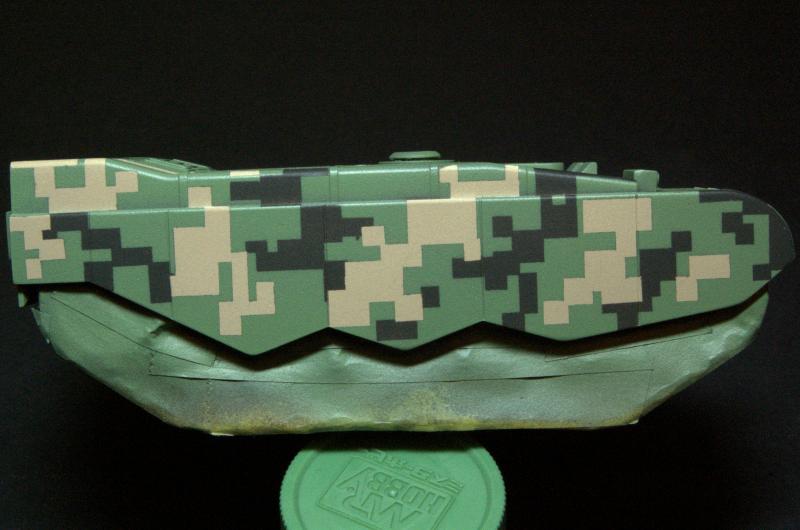
This is as it came; it needs to be smoothed down with some very fine emery paper before I give it a coat of clear, but virtually all of it came out as intended, partly thanks to the surfaces being almost all flat and , making the placing of the masking much easier than it might otherwise be.


Sudzonic
Visit this Community
Scotland, United Kingdom
Joined: December 07, 2007
KitMaker: 2,096 posts
Armorama: 1,983 posts
Posted: Saturday, February 20, 2016 - 01:34 AM UTC
Fantastic
tatbaqui
Staff MemberNews Writer
ARMORAMA
#040
Visit this Community
Metro Manila, Philippines
Joined: May 06, 2007
KitMaker: 2,713 posts
Armorama: 2,451 posts
Posted: Saturday, February 20, 2016 - 02:29 AM UTC
Nicely executed Matthew!
SpaceXhydro
Visit this Community
England - South West, United Kingdom
Joined: March 13, 2015
KitMaker: 418 posts
Armorama: 235 posts
Posted: Saturday, February 20, 2016 - 03:58 AM UTC
The camo looks so crisp and clean. great job on that type-99.
firstcircle
Visit this Community
England - South East, United Kingdom
Joined: November 19, 2008
KitMaker: 2,249 posts
Armorama: 2,007 posts
Posted: Monday, February 22, 2016 - 05:19 AM UTC
Thanks for the compliments


Quoted Text

The camo looks so crisp and clean


I think I just might become a fan of MrHobby paints mixed with cellulose thinners - that light green was a totally trouble free painting session, and the finish came out nice and smooth and satin.

I've now given it a coat of satin varnish to level off the different layers a bit in preparation for the decals.
firstcircle
Visit this Community
England - South East, United Kingdom
Joined: November 19, 2008
KitMaker: 2,249 posts
Armorama: 2,007 posts
Posted: Saturday, July 30, 2016 - 10:02 PM UTC
Despite the gap in posting, this hasn't been abandoned.
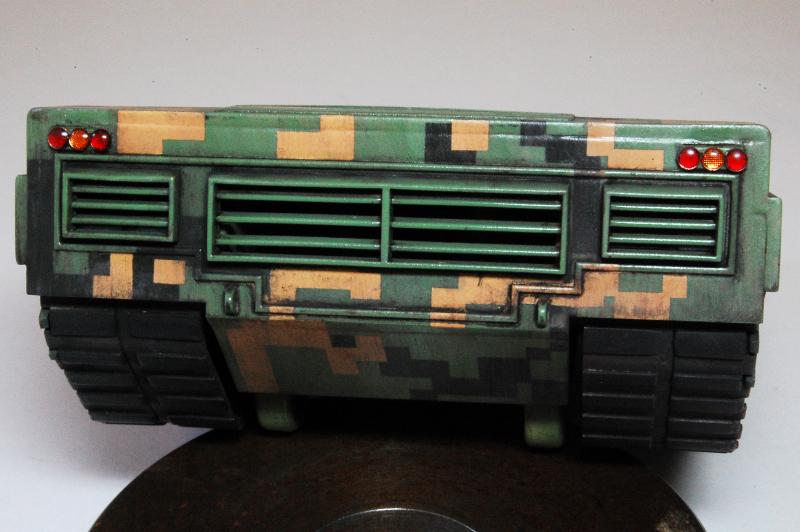
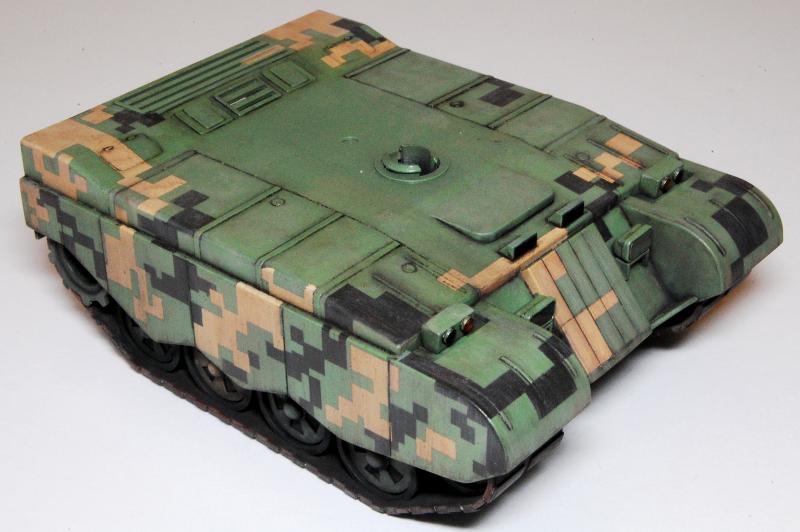
In one of the photos above you can see that the small rear and front lamps are just moulded on disks, and painting them in produced disappointing results (unsurprisingly). So with no specific aftermarket parts made for this kit I tried to find something in the SKP Model range that might suit and found that their set for the M1070 (SKP154) contains ten small (approx 3mm dia) lenses each of orange and red. I think you can see in the photo that they just about fit on the rear lamp panel:

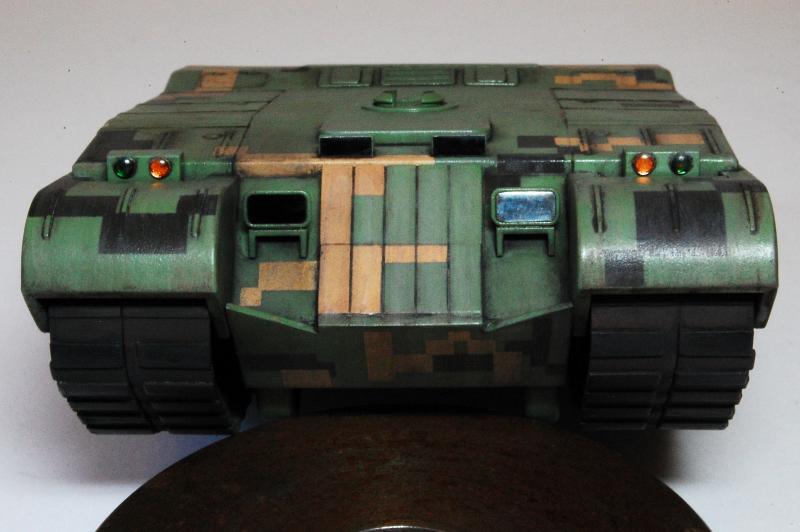
For the front I also needed two greens, and found that a green Sharpie permanent marker was able to turn amber into green well enough:

There is also the issue of the two big rectangular headlamps. Photos show the left one having some sort of dark lens, while the right appears to be more like an ordinary plain lens. Obviously no way was I going to find a ready made object to fit into those rectangles, so the left one is cut from a piece of the end of a 35mm film roll, the right one was cut from some tiny aluminium cap I found. The two driver's periscope lenses were also cut from the film, as were the laser range finder, periscope and whatever that other gizmo on the turret is.

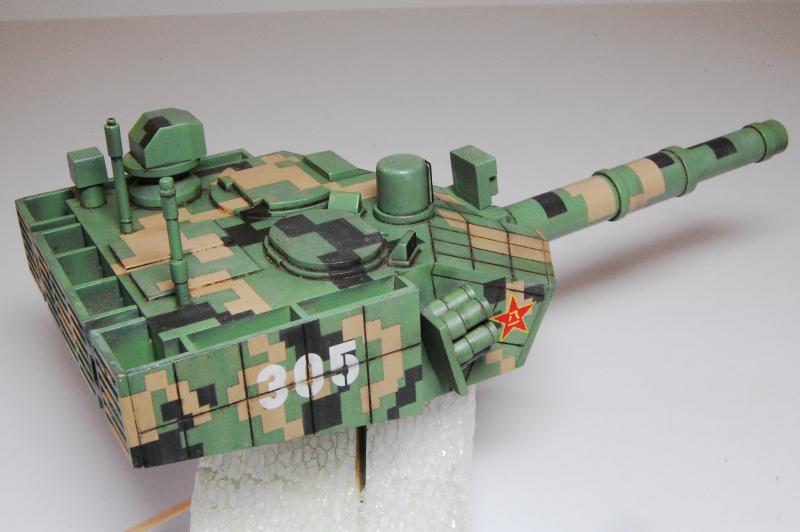
Decals also needed to be addressed as those in the kit are actually paper stickers, not water slide decals. While obviously there are no aftermarket decals for this kit, I was surprised that I couldn't even find any offered for modern Chinese PLA vehicles. If you want decals for a Sherman or a King tiger there's about 3million to choose from... I found one set of PLA stars on eBay only to find, once they'd arrived from China, that they were poor quality, and in any case it would have meant only using the stars, and still having to find numbers. So I started browsing some more and eventually came across the very inexpensive Hobby Boss ZSL-92A kit, which has six PLA stars as well as a whole series of white numbers - so more than enough for my purposes and I'll still be able to build that too.


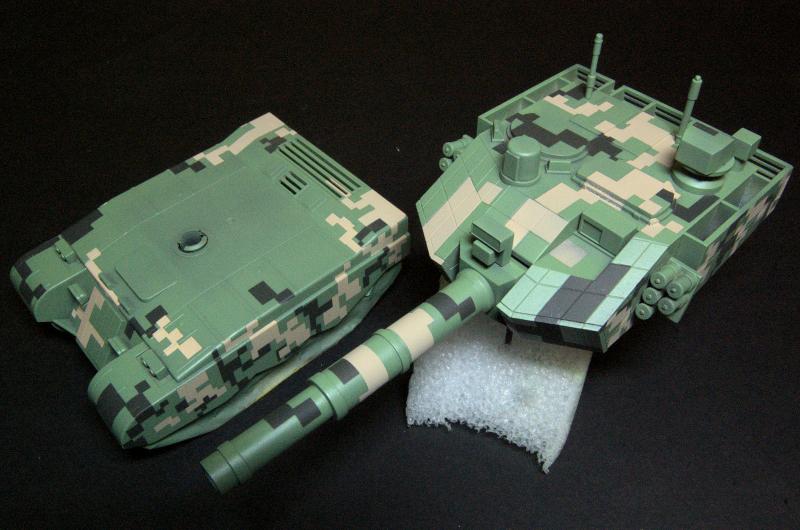
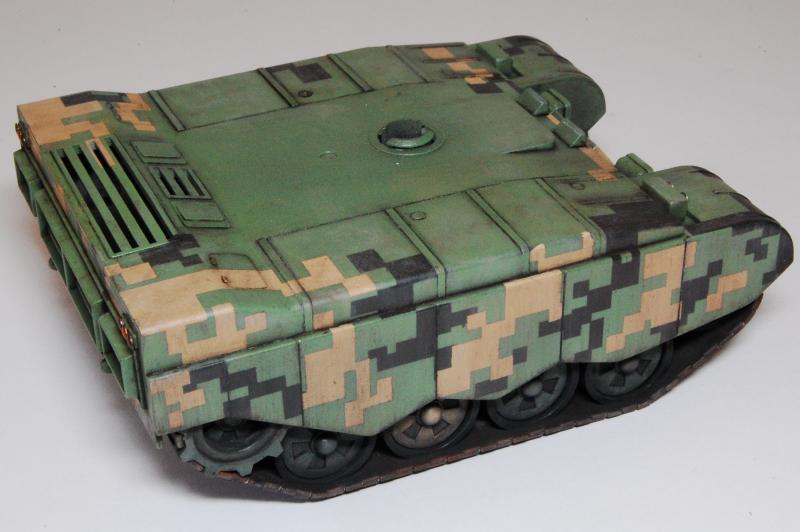
The turret has had a few applications of pin wash and some fairly minor weathering, while the hull has has a bit more in terms of weathering and highlighting etc. The wheels and tracks have been considerably darkened down with dark grey pigment; because of the way that the wheels are moulded into the tracks, and the tracks have this vertical seam running through them, I thought this pigment improved them, made them a bit less toy like.

Still some final weathering to be done, the turret needs something to pull it together and reduce the contrast, I think, some form of dust effect.

firstcircle
Visit this Community
England - South East, United Kingdom
Joined: November 19, 2008
KitMaker: 2,249 posts
Armorama: 2,007 posts
Posted: Thursday, October 13, 2016 - 03:31 AM UTC

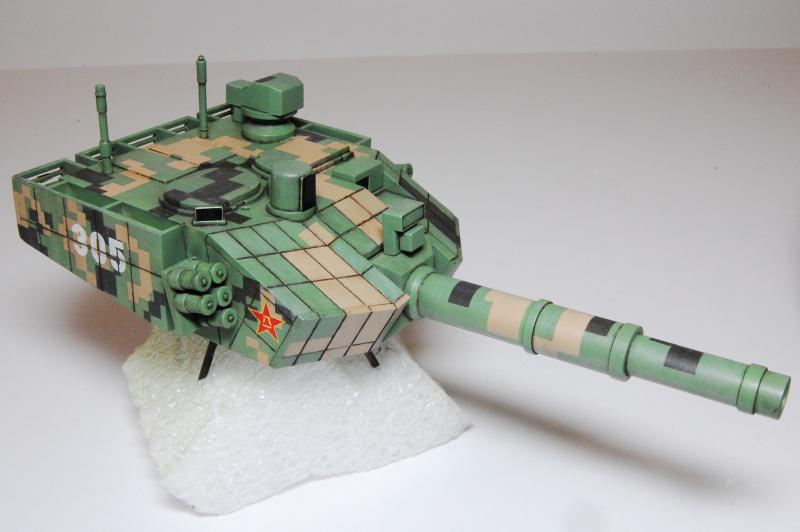
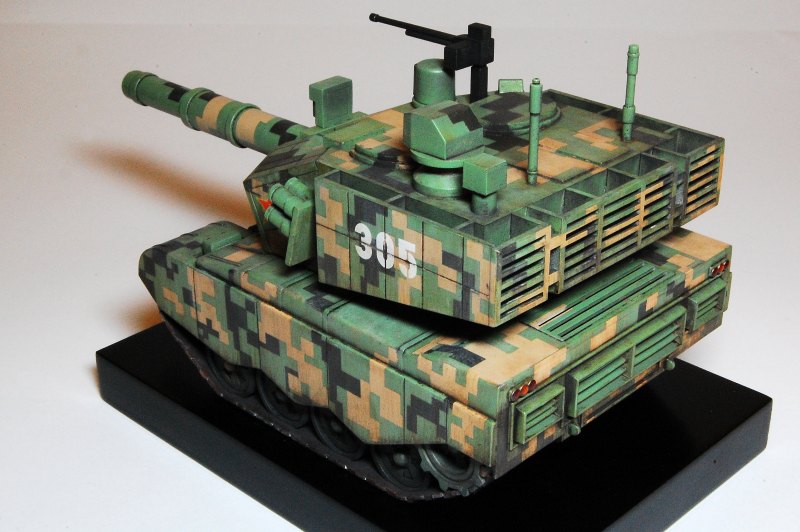
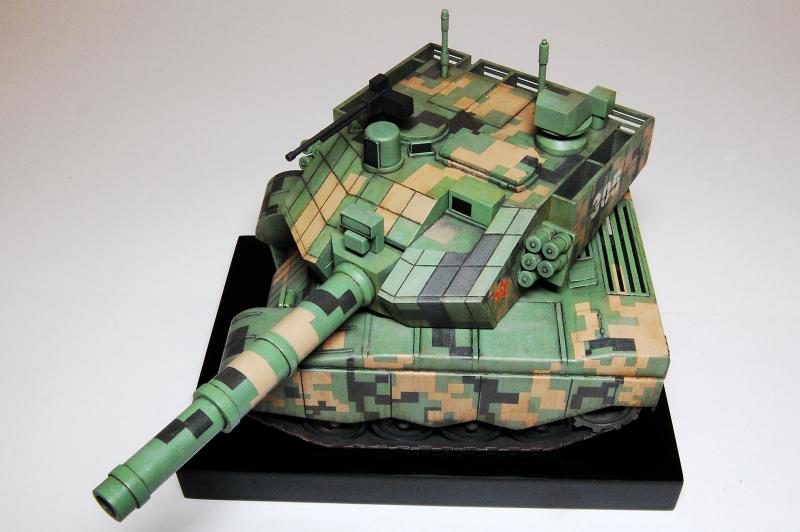
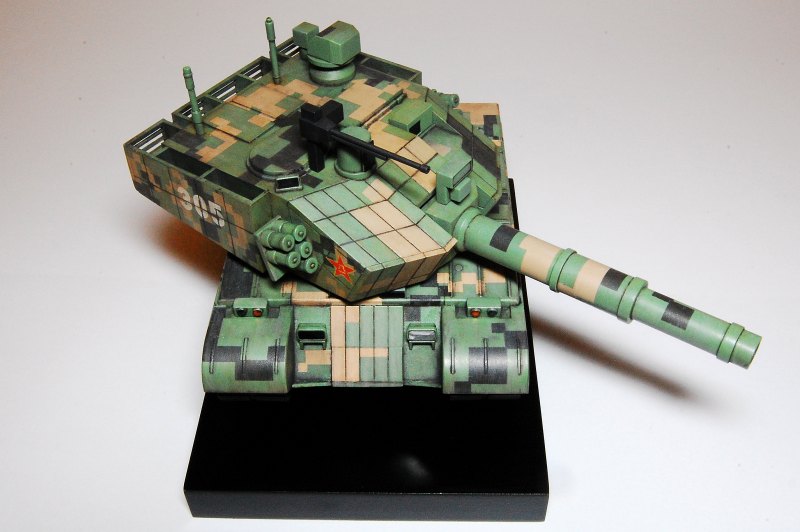
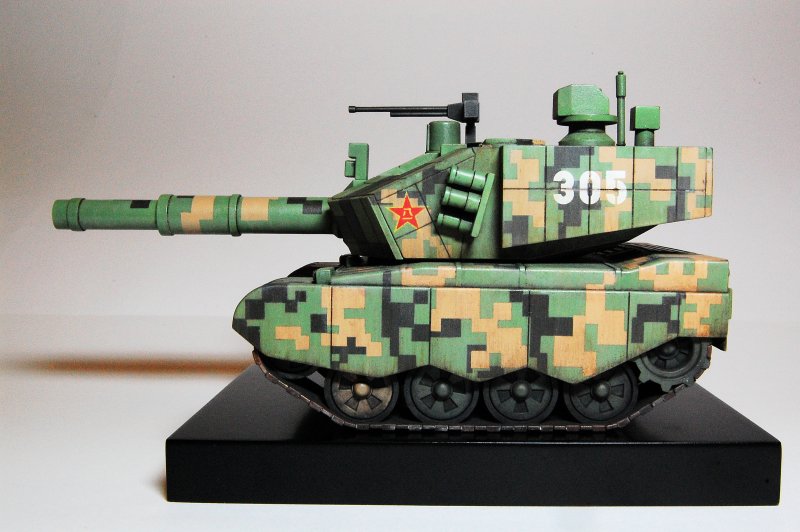
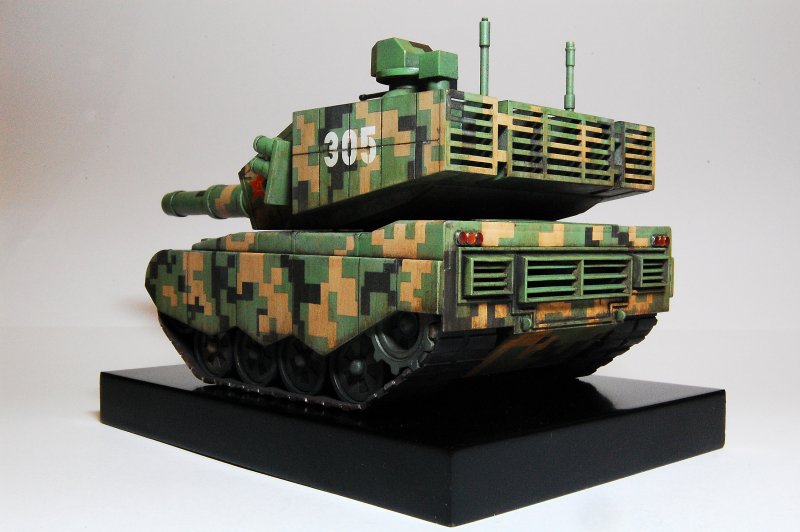
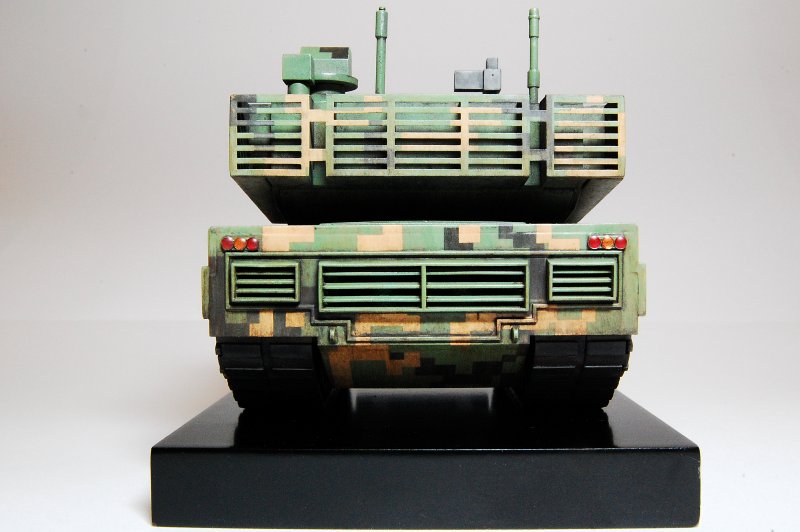
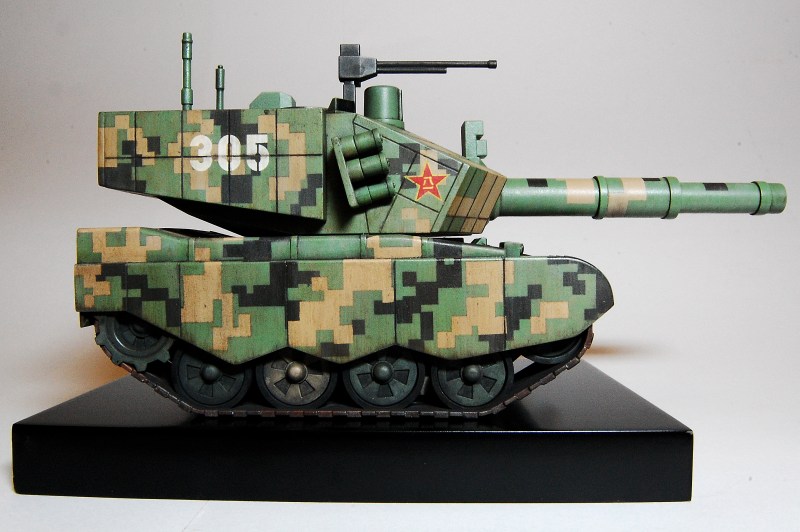
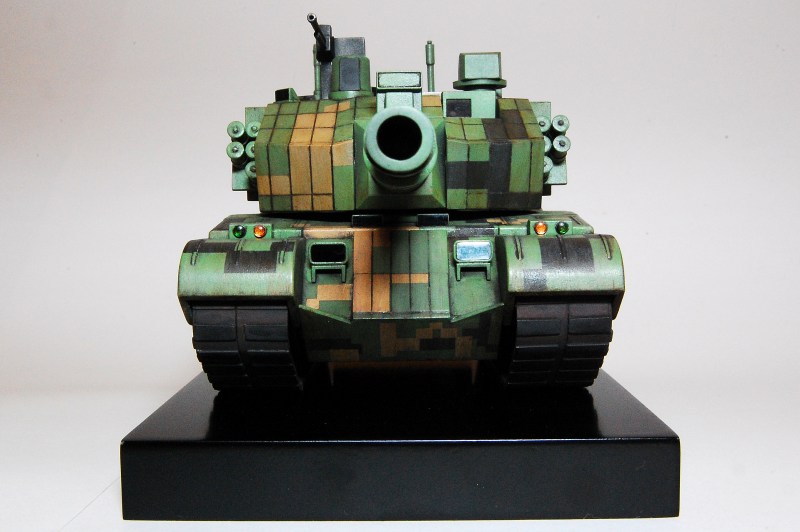
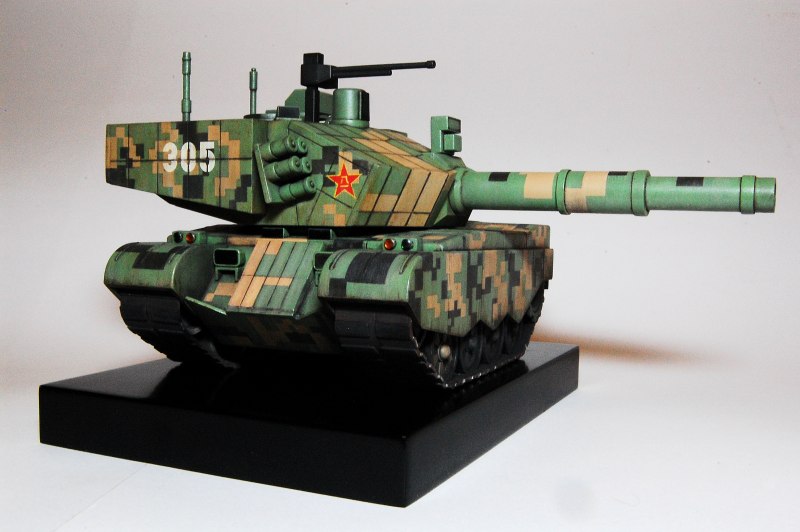
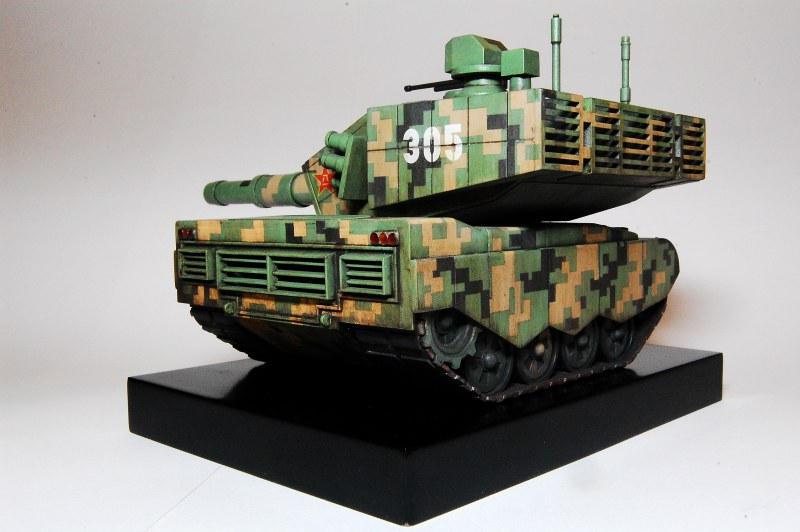
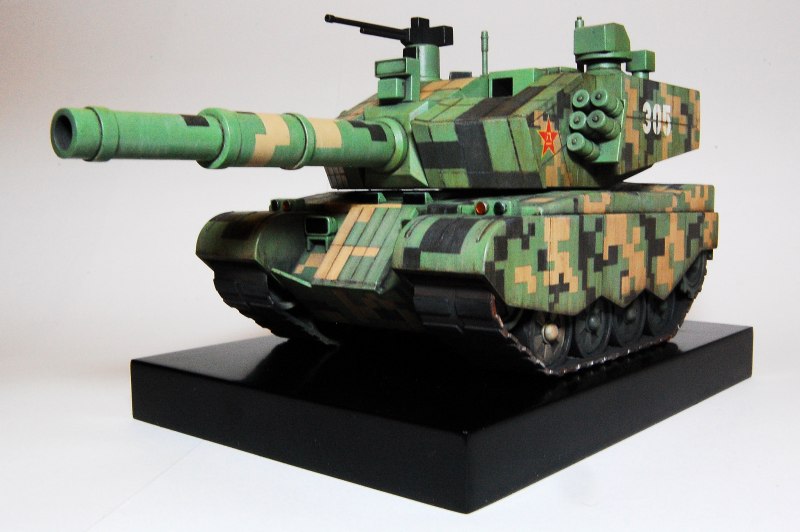
To wrap up this project... I spent quite a while adding more weathering effects with pin washes, filters, oils etc., all the while trying to keep it from getting too dark, and referring to my favourite photo of the real thing, attempting to get this dusty, subtly grimy look:


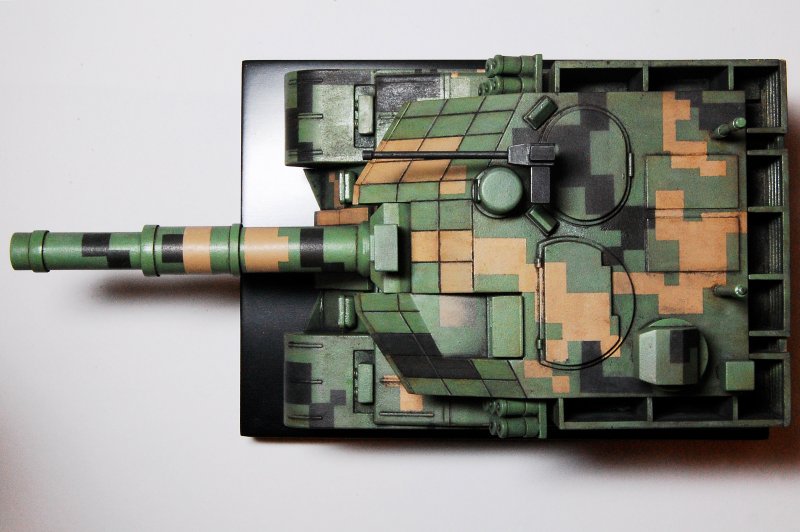
With that complete, I obtained a plain black display base from eBay; it was sold as "Ideal for Japanese Kokeshi Dolls", but it seems even more ideal for smallish plastic tank models. It is just a block of finished mdf with satin black paint. To fix the model to it, I decided that I'd remove the "toy wheels" from underneath as they were stopping the tracks from making contact with the ground. Bits of the cut up axle were inserted as pins into a couple of holes drilled in the track and then epoxied into two holes drilled into the base.

Once that was set I went to attach the turret and found I needed to reduce the thickness of the plastic around the hole on the turret underside in order for it to clip into place on the locating peg - see the very first post above about how I damaged the turret mounting peg, so maybe that's why this adjustment was needed. Once in place, the turret sits nice and low on the body of the tank, and rotates easily. The machine gun had previously been painted plain black, and was finished off with just some graphite powder, then fixed to the turret. A final adjustment was made to the box-like periscope, or whatever it is, that is set into the turret, to remove some flaw in the painting; after rubbing smooth, the surrounding area and the dark insert were masked and it was then resprayed with the H312 Green. Once the masking was off I thought I'd just leave it like that, new paint.

So a great fun kit, easy and quick to build, not too many piddly bits to attach, break off and struggle with painting, instead lots of nice surfaces to paint instead. Only real let down is the provision of stickers instead of decals, and then the apparent - someone correct me if I am wrong - impossibility of getting a decent set of aftermarker PLA tank decals. Otherwise, it's perfect for kids - of all ages.


Armored76
Visit this Community
Bayern, Germany
Joined: September 30, 2013
KitMaker: 1,615 posts
Armorama: 1,500 posts
Posted: Thursday, October 13, 2016 - 03:57 PM UTC
Great idea and an excellent finish!
 _GOTOTOP