_GOTOBOTTOM
Figures
Military figures of all shapes and sizes.
Corporate peacekeeper w/ dog
yeahwiggie
Visit this Community
Dalarnas, Sweden
Joined: March 24, 2006
KitMaker: 2,093 posts
Armorama: 1,359 posts
Posted: Thursday, February 18, 2016 - 01:18 AM UTC
The story:
The year is 2031 and little over 5 years ago the often ridiculed and laughed at theory of peak oil and its aftermath have become a grim reality. Cheap fossil fuel production and supplies have virtually ceased to exist and as a result global logistics, economies and the production of food and products have collapsed. Shortages of clothing, food and fuel quickly had the modern world in a stranglehold, forcing all but the largest, wealthiest and most ruthless of institutions to their knees. Ever expanding and intensifying social unrests and upheavals were commonplace, contributing in the total collapse of the world's social structures. In many places anarchy or even civil wars broke out and governments the world over were absolutely unable to gain any form of control, which made the already minimal trust of the public in governments, vanish for good.
It was in this era that those large corporations stepped forward and openly seized control over all branches of government and because law enforcement and the military were equally involved and divided by the unrests, they deemed unreliable and thus were disbanded. As a substitute to safeguard their interests and properties the major corporations created their own armed forces; corporate peacekeepers.
Recruited at random these troops were nothing more than hired guns, mercenaries. Men and women with low social standards or a desperate disposition, paid to mercilessly do their master's bidding. They were issued with military surplus and left to their own devices to supplement their own equipment. Due to all the shortages, hitech wasn't going to save the day, since that depended totally on the access to cheap and plentiful energy.

The idea behind the figure;
It is a brutal, small, scrawny man, underfed, malnutritioned, bitter and hard, but kept functioning by being issued with a daily supply of synthetic food supplements to enhance his otherwise meager diet...


Did I wet your appetite?
If so, then scroll down and see the rest of how it came to be this way....
yeahwiggie
Visit this Community
Dalarnas, Sweden
Joined: March 24, 2006
KitMaker: 2,093 posts
Armorama: 1,359 posts
Posted: Thursday, February 18, 2016 - 01:23 AM UTC
The idea behind the figure;
It is a brutal, small, scrawny man, underfed, malnutritioned, bitter and hard, but kept functioning by being issued with a daily supply of synthetic food supplements to enhance his otherwise meager diet...

The actual figure is from Grey matter figures and later turned out to be app. 100mm high. Too small to be a real 1:16 figure, but I found the overall look quite interesting. Level of detail is good as is the casting quality, but I will (hopefully) enhance the overall appearance by adding more or adapting details.


Quite early on I decided to do something extra to the figure, besides detailing it. His stance really lends itself to him holding a dog on a leash! That would mean that hs weapon would not be held in his right hand, so it needed to be completed by adding grip and trigger arrangement. And while I was at it I also added some forward sights and a drum magazine. Looks much better than the tiny, flimsy standard magazine.


I then started adding some extra details to the helmet and chest first. Some badges were required as a unit identification. It is a small disk with extensions to the sides and the nr.8 added. 8, because that is not a number regularly seen in military units and/or modelling.
A batteryunit, an antenna and some wiring were next and I added some extra optics using p.e. intended for a 1/35 taillight. All p.e. is from the sparesbox or scraps.


The rear needed attention too, since the figure had a hose running from the facemask down and toward the back. But there wasn't anything anymore, because it obviously was meant to "attach" to the backpack and that one I wanted to leave off. So an airfilter had to be made. A piece of tube, a meshscreen and 2 pieces of copperwire made up the lot and connected to the original hose.
Some buckles and straps and that was that..


As said I wanted a dog to go with the figure and I started searching the net.... Couldn't find anything untill, through the planet figure-forum, I was offered one by Gary of CGS Military Figures.... free of charge!!
It was a doberman in 1/16th scale, since at that time I still thought this figure was compatible, even if it was a little small. But when I got the dog the difference in scale became all too apparent!!
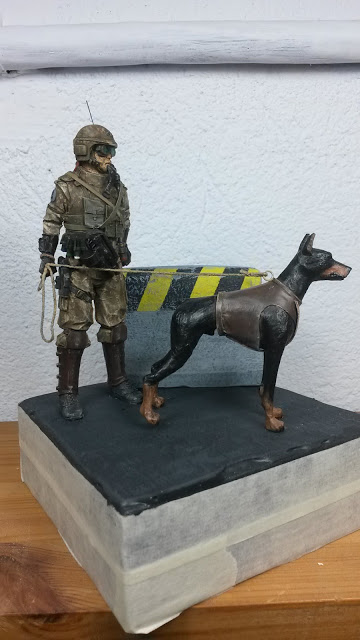
Nevertheless I proceeded and such a fierce guarddog needs to be kept on a leash. At first I thought of using a small chain, but thought that was too dramatic. A lowcost solution, but in the model and in real life, would be to use a rope.... And so did I. I hollowed out the fist a little and fastened the rope and a loop. The cyano-glue affected the rope, causing it to warp, but I think that gives the whole thing a less static appearance.

The general idea;
the image actually distorts the proportions even more, since the dog is more in the forefront.
yeahwiggie
Visit this Community
Dalarnas, Sweden
Joined: March 24, 2006
KitMaker: 2,093 posts
Armorama: 1,359 posts
Posted: Thursday, February 18, 2016 - 01:26 AM UTC
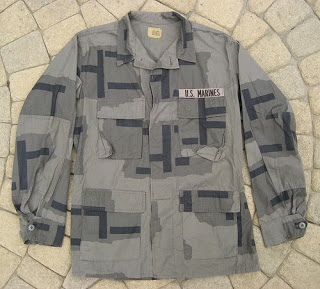
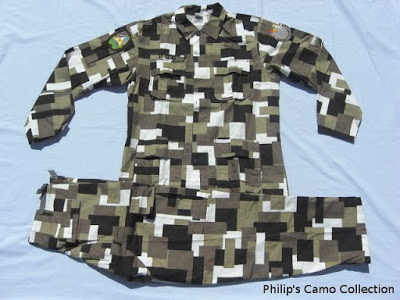
By now I have come a long way in the painting process. I have been thinking a long time on how to paint this one. At first I thought on using a sort of angular pattern, like the Swedish M90, but with different colors; more greys and browns. However looking at the figure I abandoned that idea. It would be far to complicated to achieve, since painting this one, with all the cast on gear and details would prove hard enough as it was. I studied a number of experimental patterns and one caught my attention; An experimental US Marines pattern. However I also like some others and since I did not want to copy any particular one, I decided to mix some patterns and colors and come up with one on my own.


The base is a light sandy colour (Tamiya Buff), over which light grey (Andrea confederate grey) angular patterns were applied, a bit as shown. Then I proceeded with dappling on a pattern in green and brown (vallejo Russian uniform and English uniform), a bit in the fashion of the modern German Bundeswehr-pattern, but in bigger patches.
The reason for the choice sand/grey/brown and green was that it seemed more urban to me than the usual camo-patterns.
During the basic painting I added white to all the colors on the shirt, grey to the colors for the pants and I kept the colors as they were for the helmet and bodyarmour. This way I wanted to show fading through wear and differences in production.
I enhanced those differences by adding a neutral wash to the shirt, a brown one to the pants and a dark one to helmet and armour.


The facemask and the pistolholster I panted vallejo's panzergrey, replicating rubber, the pouches a variation in greens, like Tamiya olive drab, khaki drab, the grenades Tamiya JN green and the straps in a free mix of buff and one of the mentioned greens. The leather elbow protectors are a base of Andrea Red leather with a drybrush of medium flesh and a dark wash and the leather leg- and kneeprotectors are Lifecolour German camouflage brown with a drybrush of red leather and flesh and a dark wash.
yeahwiggie
Visit this Community
Dalarnas, Sweden
Joined: March 24, 2006
KitMaker: 2,093 posts
Armorama: 1,359 posts
Posted: Thursday, February 18, 2016 - 01:29 AM UTC
The next steps in this build/paint was to add more details and of course the dog! One of the details was the red rag or headwrap and another were the green goggle glasses; 2 opportunities to add some color to an otherwise drab figure. The red is Andrea's basic red with a darker wash and some light drybrushing with a light fleshtone and the glasses were 2 heavily thinned down drops of Tamiya deep green, followed by 2 drops of Vallejo gloss varnish. Each layer was allowed to dry before the next one was added. I previously did add some touches of color to the grenades. For some reason I kept hearing the phrase :"pop some purple smoke", whilst looking at them. So I added a band of purple to one. Then you'd need some green smoke too. And the grenades are to small to be real ones, so I though 2 with a white band would make some good flashbangs. The gloves were repainted with Tamiya flatblack with drybrushed in red leather and flesh topped with a layer of satin varnish to represent black leather gloves.


The other grenades were tipped in red (incendiary) and yellow (HE). I also added the weapon, being painted in flatblack, drybrushed in gunmetal and pure steel with a touch of satin varnish on the nonmetal parts, like the pistolgrip, the drum magazine and the launchertube.
The next step was to paint the dog.
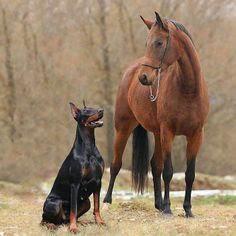
The issue with the dog is that he is really big compared to the figure. The differences in scale (1/18 and 1/16) being quite apparent. However I figured that some sort of crossbreed would be used for these warrior dogs and there are some similar dogs today, known as doberdanes.
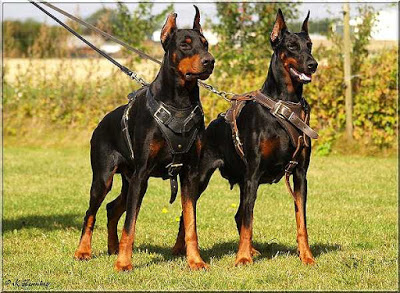
I did not want to leave him "naked", so decided to give him a non-standard issue, leather suite of bodyarmour. It seemed to me that in a state of chaos and near anarchy as I described in the first post of this series it would seem quite plausible that dogs would be used and had to be protected against by thrown projectiles and rudimentary handheld "weapons".
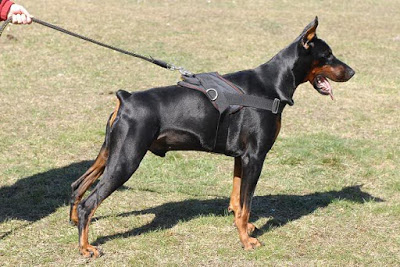
I used images of Dobermanns as a guide; Tamiya flat black for the base and Andrea's wood for the browns. A wash of dark brown and a coat of semigloss to finish things off.

Some of the images I used as inspiration and guide;


yeahwiggie
Visit this Community
Dalarnas, Sweden
Joined: March 24, 2006
KitMaker: 2,093 posts
Armorama: 1,359 posts
Posted: Thursday, February 18, 2016 - 01:30 AM UTC
I finally got around to make a start on the base for the figure and dog.
Nothing fancy, just a wooden block with plaster representing asphalt. Painted a very dark grey and then drybrushed in ever slightly lighter hues.
The roadblock has a bluefoam basic shape, covered with plaster and then sanded down to shape. The same technique for painting was used, but in much lighter tones. When dried, I marked off the area for applying the yellow and black, using painters tape. A first heavy drybrush and chipping with grey was applied after the yellow and black had dried.

The figure and dog are glued in place and now I can work on bringing it all together and adding details. I need to find a solution for the floating paw, though...... I think I will slip under a newspaper under it.
Details will include sand, urban debris like soda cans, said newspaper, things like that.

yeahwiggie
Visit this Community
Dalarnas, Sweden
Joined: March 24, 2006
KitMaker: 2,093 posts
Armorama: 1,359 posts
Posted: Thursday, February 18, 2016 - 01:32 AM UTC
I added a good deal of washes and pastelchalk powders to the lot, all the while thinking on how to bring more life to the street. I thought about adding a newspaper, but could not get that right. Neither did I get a decent representation of a sodacan or something like that. I thought of plastic bottles or maybe even an empty oil can, but found nothing suitable or useful. So I went for debris of a fight; some rocks that had been thrown, a boken batton, a spent shellcase from a (gas)grenadelauncher and a puddle of suggestive, dark liquid in a corner. And still there was something missing. So at the very last I added some roadmarkings in white. The sand is used to mask glue spills. Now it looks good....
The powders I used are ground up pastelchalk, using browns for the street/tarmac and greys for the concrete roadblock. With the browns I brought the figure into the scene too, by dusting up the lower half of it.
A problem I faced was the dog's floating right hindleg. I shoved an old "plastic bag" underneath it, so the dog has a reason to lift its paw. The plastic bag adds a nice touch to the messy overall look.


 _GOTOTOP