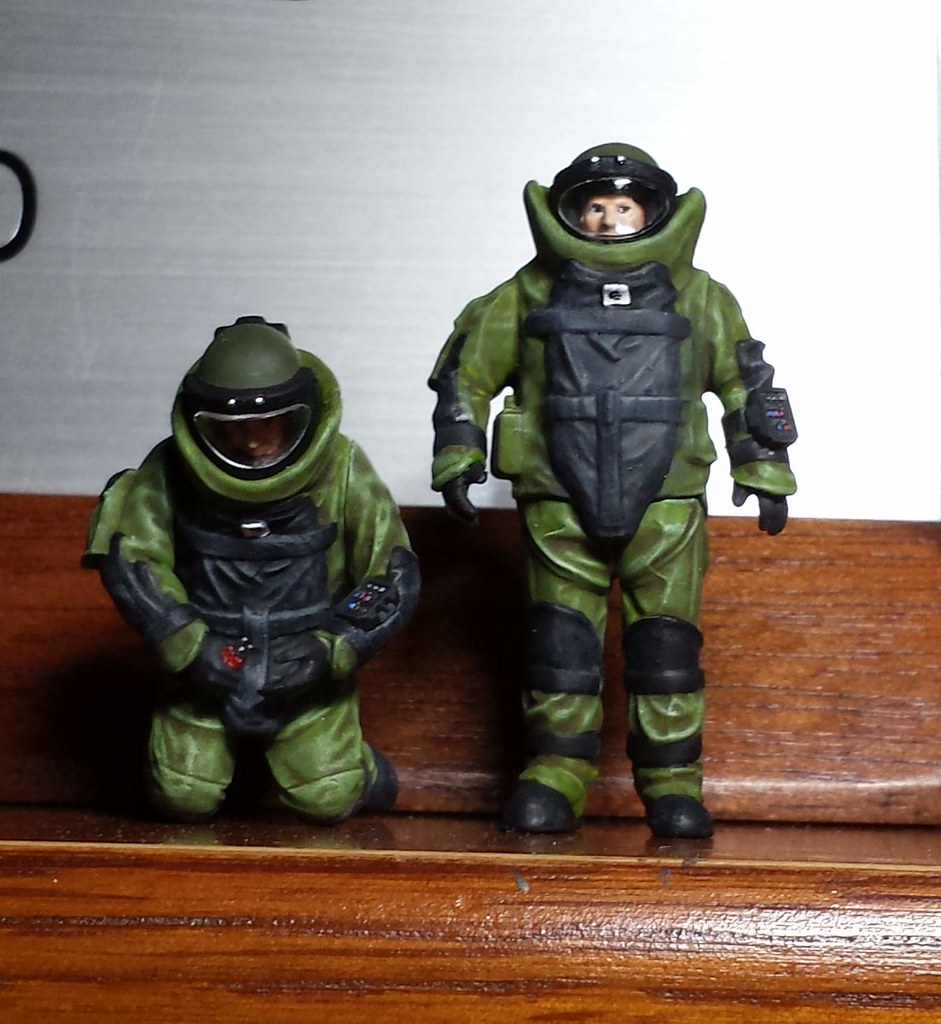
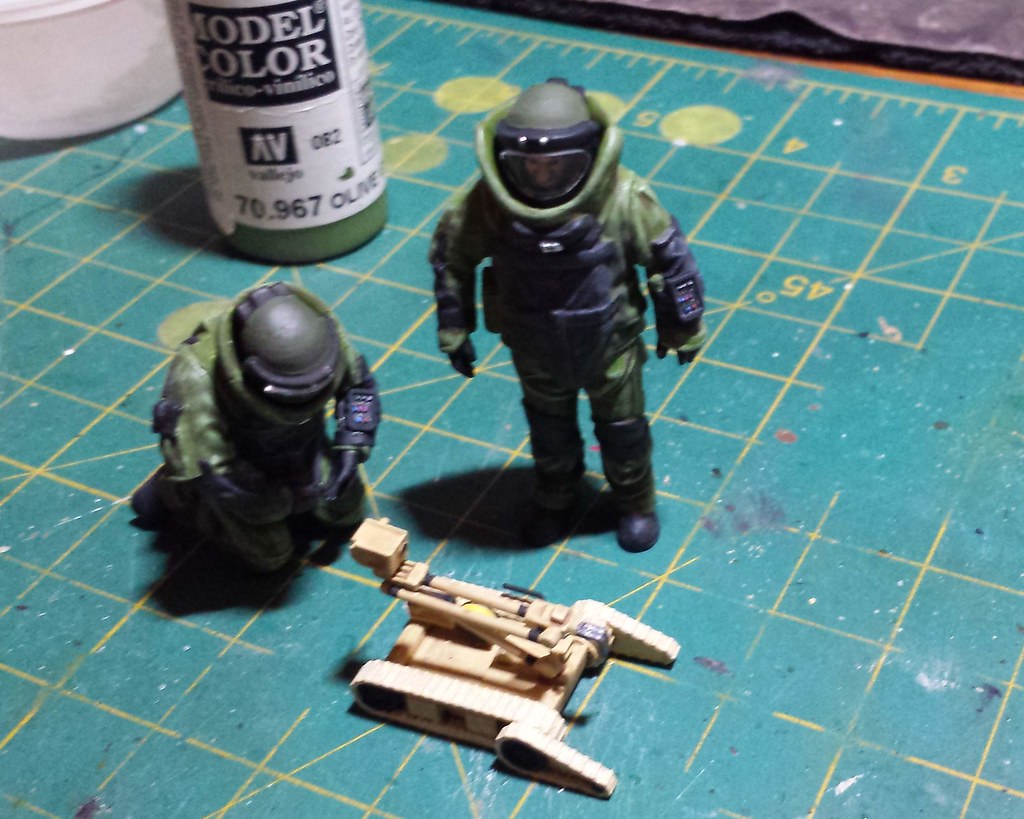
IED and US explosive disposal specialists
Distrito Federal, Mexico
Joined: May 31, 2013
KitMaker: 1,457 posts
Armorama: 1,440 posts
Posted: Tuesday, April 12, 2016 - 12:39 AM UTC
Hi there!
My brother gave me the US explosive ordinance disposal specialists & robots kit from Memg and has been asking me to do something with them. So here it goes:
I will be using the following kits:
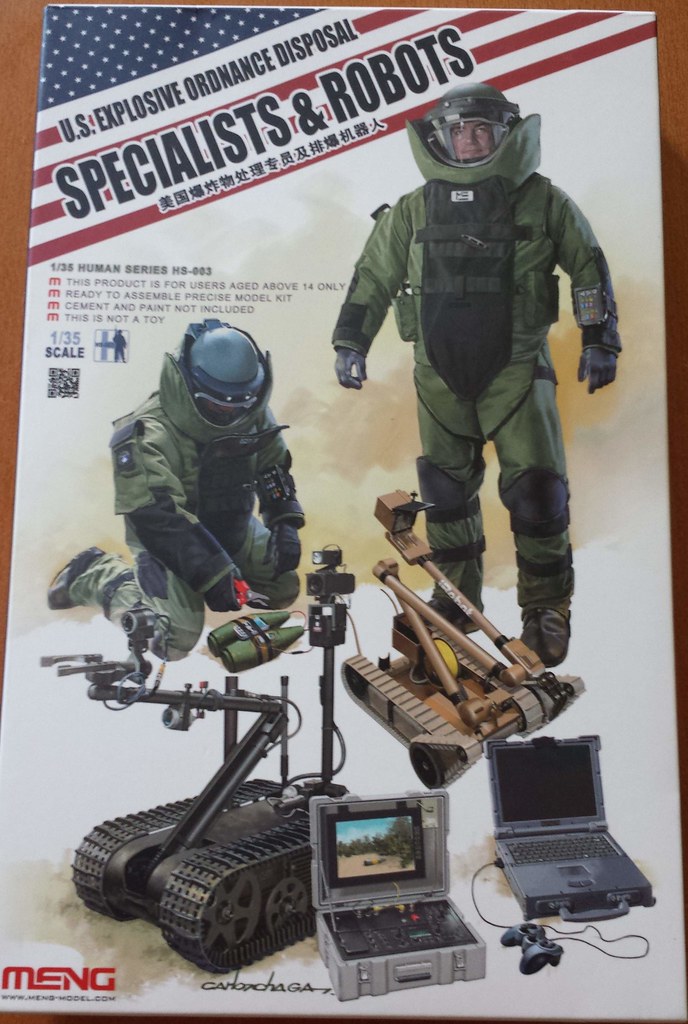

The idea would be to do a small diorama/vignette, probably in Iraq ( I have in mind a scene in "The hurt locker" movie) with a car bomb the two figures and probably one of the robots.
Distrito Federal, Mexico
Joined: May 31, 2013
KitMaker: 1,457 posts
Armorama: 1,440 posts
Posted: Tuesday, April 12, 2016 - 12:45 AM UTC
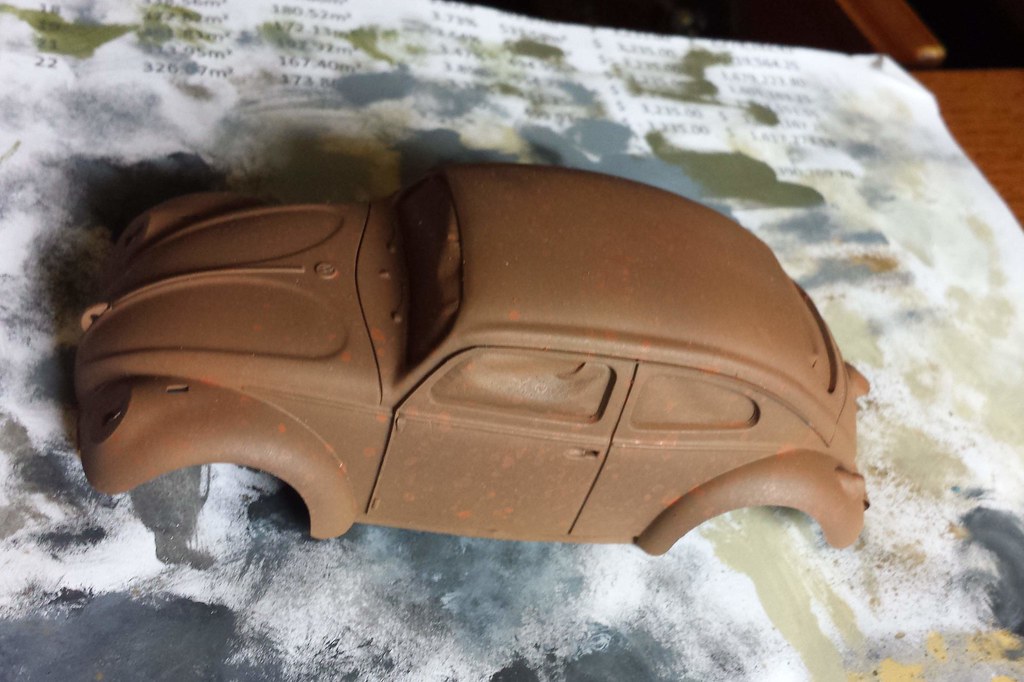
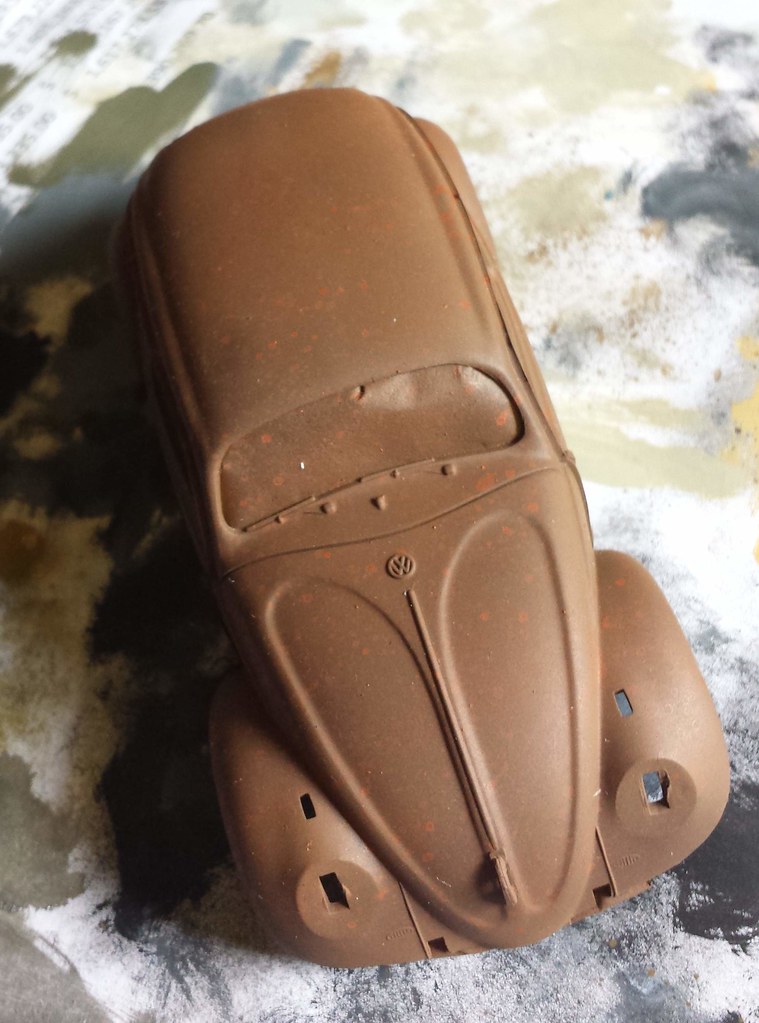
I started with the VW. Thinking of doing an old rusted clunker. So I will also try using the salt method for rust. we'll see how that goes.
Started priming the VW:

Then do the rust base:

Distrito Federal, Mexico
Joined: May 31, 2013
KitMaker: 1,457 posts
Armorama: 1,440 posts
Posted: Tuesday, April 12, 2016 - 01:27 AM UTC
Here goes the salt:
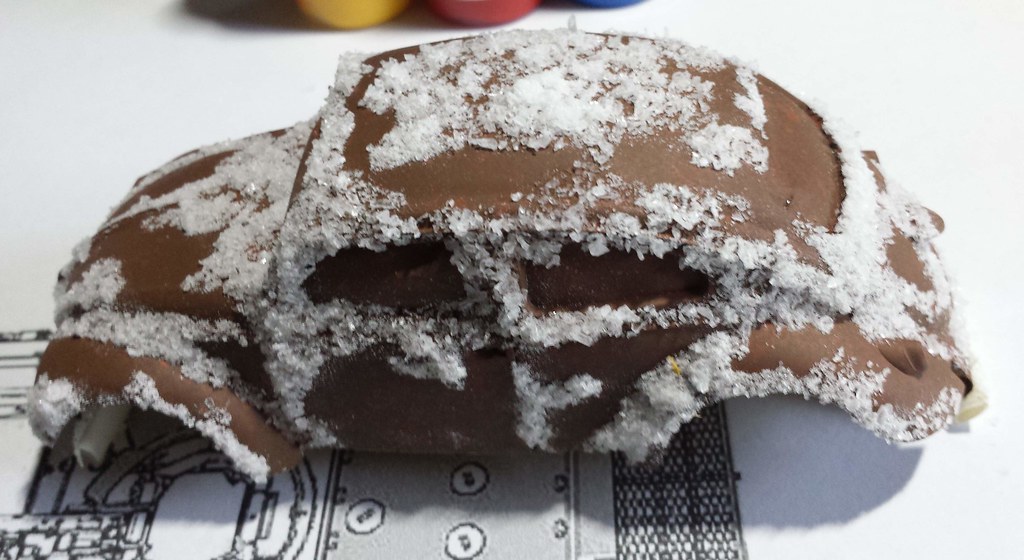
Next the base color for the VW. I went with blue (Vallejo 70930 Dark Blue) and a drop of white. I will add a tad more white once the base is solid and go over the upper parts to simulate sun fading.
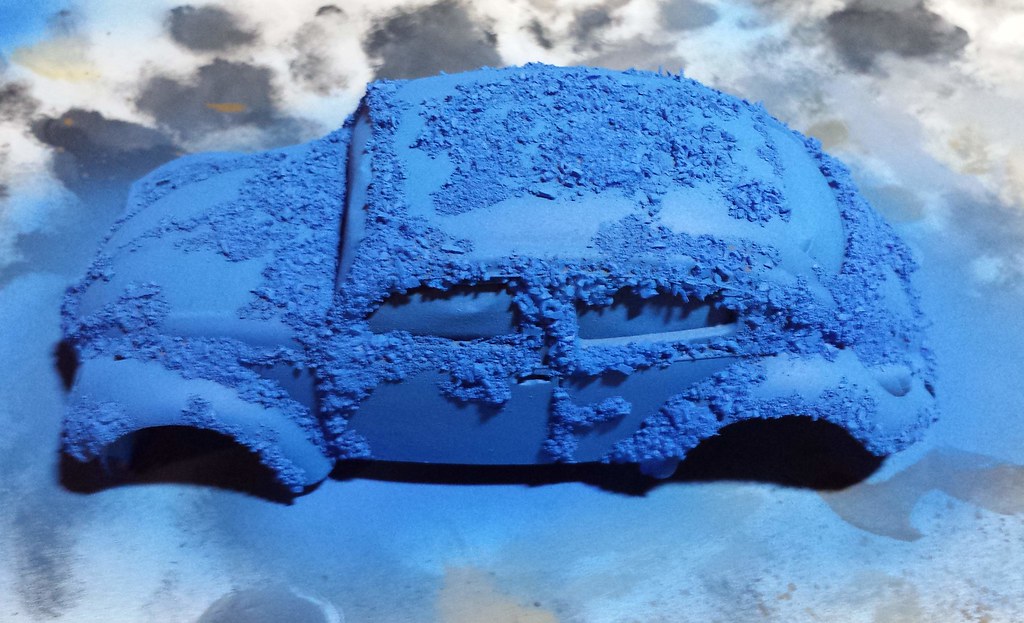

Starting with the process to remove the salt:
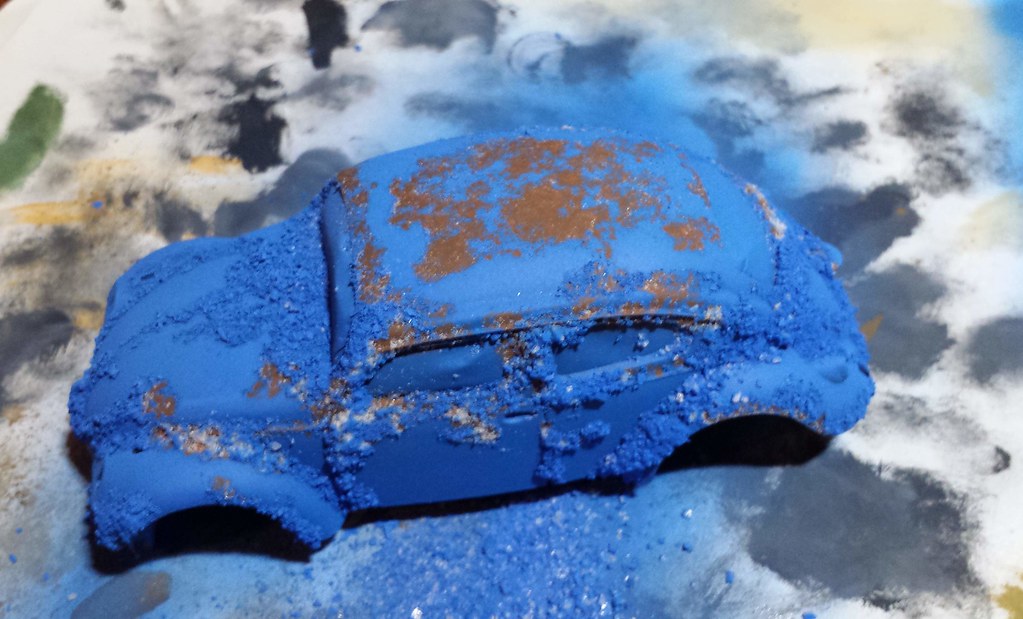
After removing all the salt:

Distrito Federal, Mexico
Joined: May 31, 2013
KitMaker: 1,457 posts
Armorama: 1,440 posts
Posted: Tuesday, April 12, 2016 - 01:30 AM UTC
Next I gave it a coat of flat clear (Humbrol for acrilics) and started with some of the details:


#159
Massachusetts, United States
Joined: April 07, 2008
KitMaker: 803 posts
Armorama: 564 posts
Posted: Tuesday, April 12, 2016 - 01:49 AM UTC
You are off to one HECK of a great start!
Membership Secretary
www.amps-armor.org
Distrito Federal, Mexico
Joined: May 31, 2013
KitMaker: 1,457 posts
Armorama: 1,440 posts
Posted: Tuesday, April 12, 2016 - 03:21 AM UTC
Thank you Brian. I am having fun with it!
Next I added a filter to tone down the blue and add to the faded effect. I used white and yellow oils.

Next I used AK streaking effects and Rainmarks for NATO Tanks:
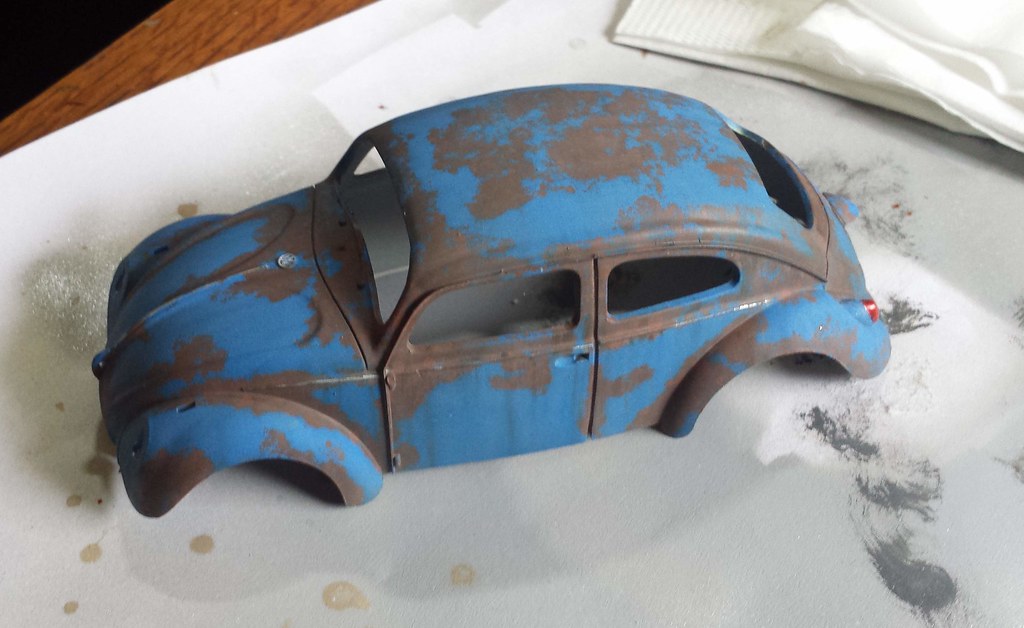
Also working on interior:

California, United States
Joined: January 22, 2016
KitMaker: 766 posts
Armorama: 518 posts
Posted: Tuesday, April 12, 2016 - 03:29 AM UTC
Marcos... off to an awesome beginning and thanks for really making the "salt/rust" process understandable...
Will be rethinking my methodology for the tank!
Just completed-
1/24th Tamiya Porsche 956 Skoal Bandit
In the works:
1/12th Protar Ferrari 312T2 (shelved for time being)
ERTL D-8 Caterpillar Bulldozer
Distrito Federal, Mexico
Joined: May 31, 2013
KitMaker: 1,457 posts
Armorama: 1,440 posts
Posted: Tuesday, April 12, 2016 - 06:29 AM UTC
Thanks Patrick. It is the first time I use the salt method and found it very easy. I also found a couple of videos on you tube that explain it very well. This one is particularly clear:
https://www.youtube.com/watch?v=-0EWdr6t8m0Florida, United States
Joined: July 19, 2014
KitMaker: 249 posts
Armorama: 249 posts
Posted: Tuesday, April 12, 2016 - 09:24 AM UTC
Marcos, nice work so far on the VW. I really like how your rust effects are turning out. Something that I have also wanted to try in the past but have not yet. Maybe my next project... I am currently making real rust using steel wool by placing in a cup with water and letting it naturally rust over time. Then I will crush the steel wood into fine dust to be utilized on various modeling applications. It takes time for the steel wool to rust (about 4 weeks) but the end result should be worth the wait.
JGphins

Distrito Federal, Mexico
Joined: May 31, 2013
KitMaker: 1,457 posts
Armorama: 1,440 posts
Posted: Tuesday, April 12, 2016 - 12:12 PM UTC
California, United States
Joined: January 22, 2016
KitMaker: 766 posts
Armorama: 518 posts
Posted: Tuesday, April 12, 2016 - 07:27 PM UTC
Quoted Text
Thanks Patrick. It is the first time I use the salt method and found it very easy. I also found a couple of videos on you tube that explain it very well. This one is particularly clear:
https://www.youtube.com/watch?v=-0EWdr6t8m0
What color are you using for the rust base? Is Tamiya Hull Red too dark?
I printed out directions for the salt/rust and can't wait to use it.
BTW, just watched "The Hurt Locker" again the other day and saw a completely different movie from the first time I viewed it... powerful statement against war and what happens to our military once they get that "adrenaline rush" from doing their job... would we had a place for all of them here at home so they didn't feel as though they had to go back... end of rant.
Just completed-
1/24th Tamiya Porsche 956 Skoal Bandit
In the works:
1/12th Protar Ferrari 312T2 (shelved for time being)
ERTL D-8 Caterpillar Bulldozer
California, United States
Joined: January 22, 2016
KitMaker: 766 posts
Armorama: 518 posts
Posted: Tuesday, April 12, 2016 - 08:03 PM UTC
Marcos, what is the purpose of the white and yellow? Just highlights? I saw the spots of color but did you just blend them into the blue? What was the effect?
Thanks in advance!
Just completed-
1/24th Tamiya Porsche 956 Skoal Bandit
In the works:
1/12th Protar Ferrari 312T2 (shelved for time being)
ERTL D-8 Caterpillar Bulldozer
Distrito Federal, Mexico
Joined: May 31, 2013
KitMaker: 1,457 posts
Armorama: 1,440 posts
Posted: Wednesday, April 13, 2016 - 11:12 AM UTC
Patrick, the rust color I used was Vallejo Panzer Aces dark rust 301, Panzer aces light rust 302, and Vallejo Model Color 70.953 flat yellow. I started with a base coat of dark Rust and then added little by little small amounts of light rust, and then yellow varying the tone in different parts of the model with very light coats.
The yellow and white dots are oils that I used as a filter to tone down the blue and give it a "faded" look
Distrito Federal, Mexico
Joined: May 31, 2013
KitMaker: 1,457 posts
Armorama: 1,440 posts
Posted: Wednesday, April 13, 2016 - 11:21 AM UTC
Adding some more details:


California, United States
Joined: January 22, 2016
KitMaker: 766 posts
Armorama: 518 posts
Posted: Wednesday, April 13, 2016 - 07:29 PM UTC
When you say "oils", are you talking oil paints such as you could get at Michael's? How well do they react with a matte finish coat? What colors does a person need in their paint box?
I am learning a lot from your build!
Just completed-
1/24th Tamiya Porsche 956 Skoal Bandit
In the works:
1/12th Protar Ferrari 312T2 (shelved for time being)
ERTL D-8 Caterpillar Bulldozer
Distrito Federal, Mexico
Joined: May 31, 2013
KitMaker: 1,457 posts
Armorama: 1,440 posts
Posted: Wednesday, April 13, 2016 - 09:49 PM UTC
Yes Patrick, they are regular artist oil paint. And if you do your base in acrylic, then you can work all you want over it with oils and oil solvents without affecting it. That is the beauty of it, you can go over them as many times as you need and acheive the result you want. I use a local bran of oil paint and this is my basic stock:
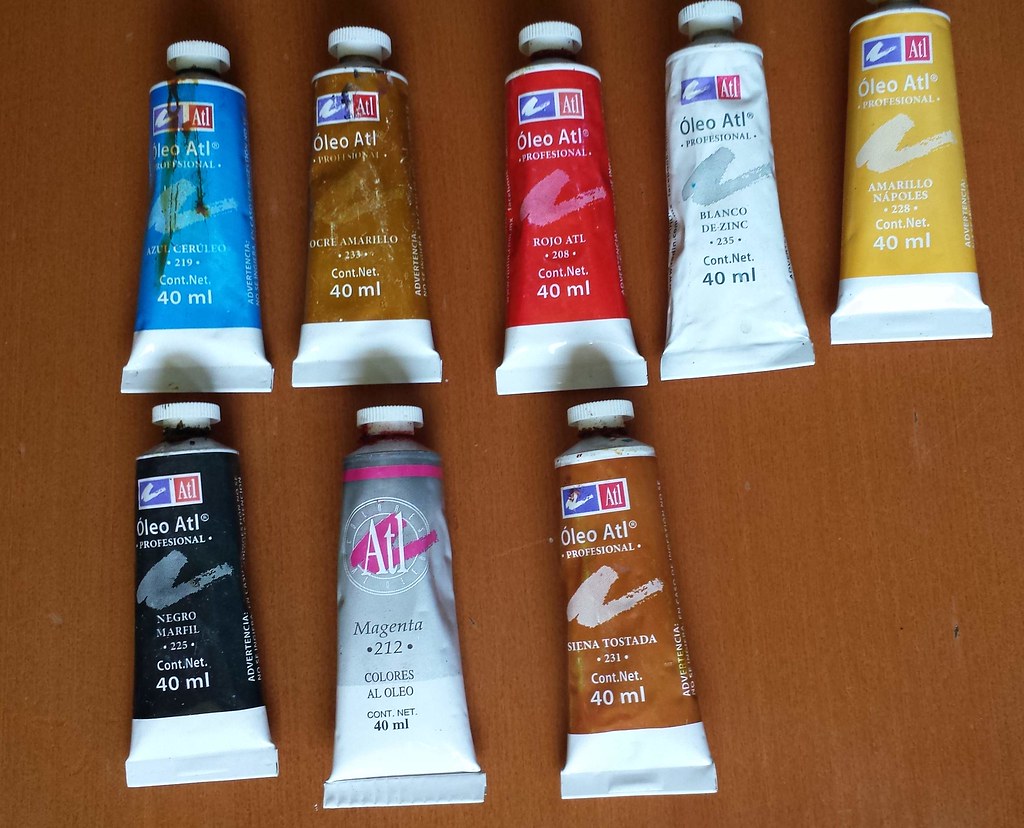
The primary colors, black and white to darken or light the base; dark sienna for rust streaks, magenta for reddish tones in flesh areas (figures) and ochre for dust and dirt.
Plus I also like AK and some Mig enamel effects to work over the acrilic base.
I am glad this build is helping you!


Haute-Alpes, France
Joined: June 27, 2012
KitMaker: 80 posts
Armorama: 80 posts
Posted: Wednesday, April 13, 2016 - 10:05 PM UTC
Distrito Federal, Mexico
Joined: May 31, 2013
KitMaker: 1,457 posts
Armorama: 1,440 posts
Posted: Wednesday, April 13, 2016 - 11:30 PM UTC
Wisconsin, United States
Joined: July 30, 2013
KitMaker: 584 posts
Armorama: 525 posts
Posted: Wednesday, April 13, 2016 - 11:58 PM UTC
nice work!!! looks great!
The awesome thing about weathering and rust, is that you can't really do it wrong, who's to say a car or tank or whatever, could and or wouldn't weather a certain way. You can't go too dark, and you can't go too light.
can't wait to see more!
California, United States
Joined: January 22, 2016
KitMaker: 766 posts
Armorama: 518 posts
Posted: Thursday, April 14, 2016 - 07:07 PM UTC
That looks just great! I am so stoked with all the info I am getting from all of you and all the things I am learning from the ArmoramA group. I had no idea that there were so many other things that could and can be done. I am glad that a little goes a long way as well.
And when I get the new workshop up and running, I am going to have put in a cot so I don't ever have to leave! LOL!
Just completed-
1/24th Tamiya Porsche 956 Skoal Bandit
In the works:
1/12th Protar Ferrari 312T2 (shelved for time being)
ERTL D-8 Caterpillar Bulldozer
Distrito Federal, Mexico
Joined: May 31, 2013
KitMaker: 1,457 posts
Armorama: 1,440 posts
Posted: Thursday, April 14, 2016 - 09:50 PM UTC
Wow, I just realized that I have been promoted to lt. Colonel. Thanks Armorama staff!
Scotland, United Kingdom
Joined: May 11, 2015
KitMaker: 768 posts
Armorama: 12 posts
Posted: Thursday, April 14, 2016 - 10:09 PM UTC
The VeeDub is looking great, really very nice indeed! Great work with the rust and the oil filter to tie it all together.
Pax & Pallets: Revell 1/48 Dakota
Terrible Teens : Revell 1/48 F15E Strike Eagle
Airfix IV : Airfix 1.72 Vulcan
Pennsylvania, United States
Joined: April 10, 2011
KitMaker: 7,941 posts
Armorama: 7,934 posts
Posted: Friday, April 15, 2016 - 07:26 PM UTC
That bug is crackin!! Love it. I need to get off my butt one day and learn how to do that technique.
J
Distrito Federal, Mexico
Joined: May 31, 2013
KitMaker: 1,457 posts
Armorama: 1,440 posts
Posted: Saturday, April 16, 2016 - 04:19 AM UTC
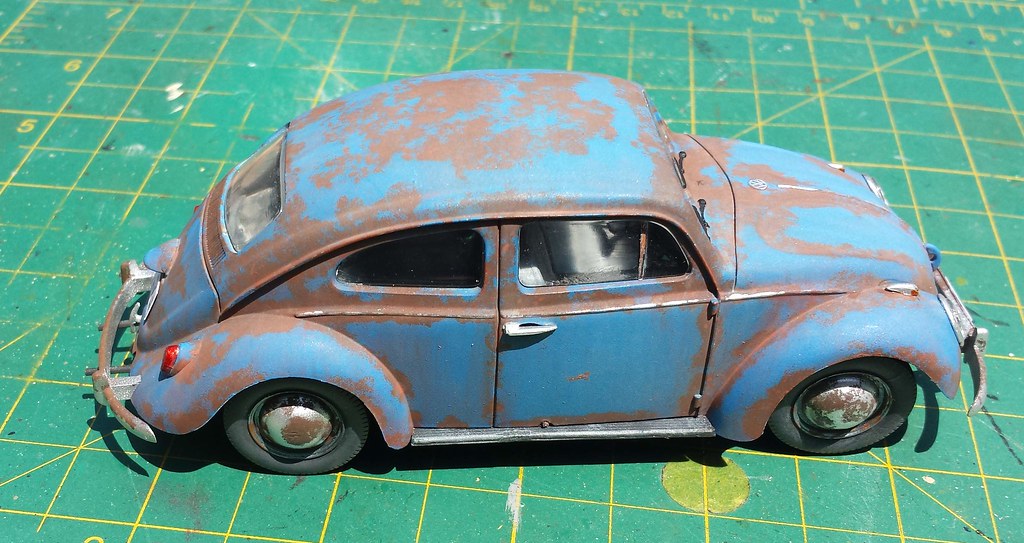
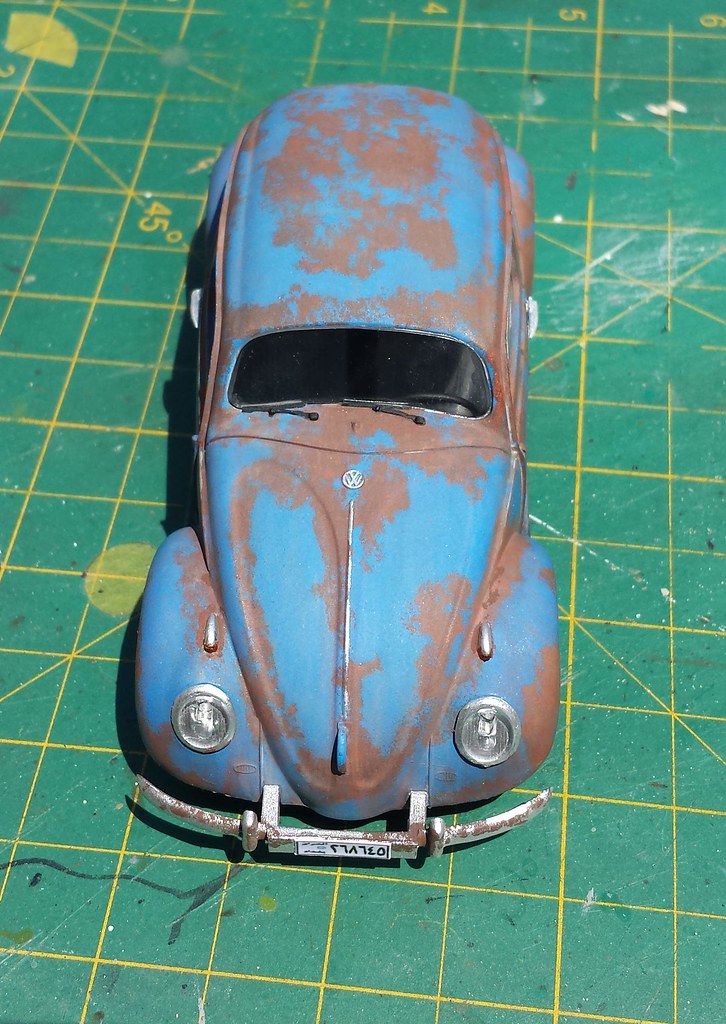
Pretty much done with the VW bug. Just gave it a slight coat of "dust" with Vallejo 70882 Middlestone:
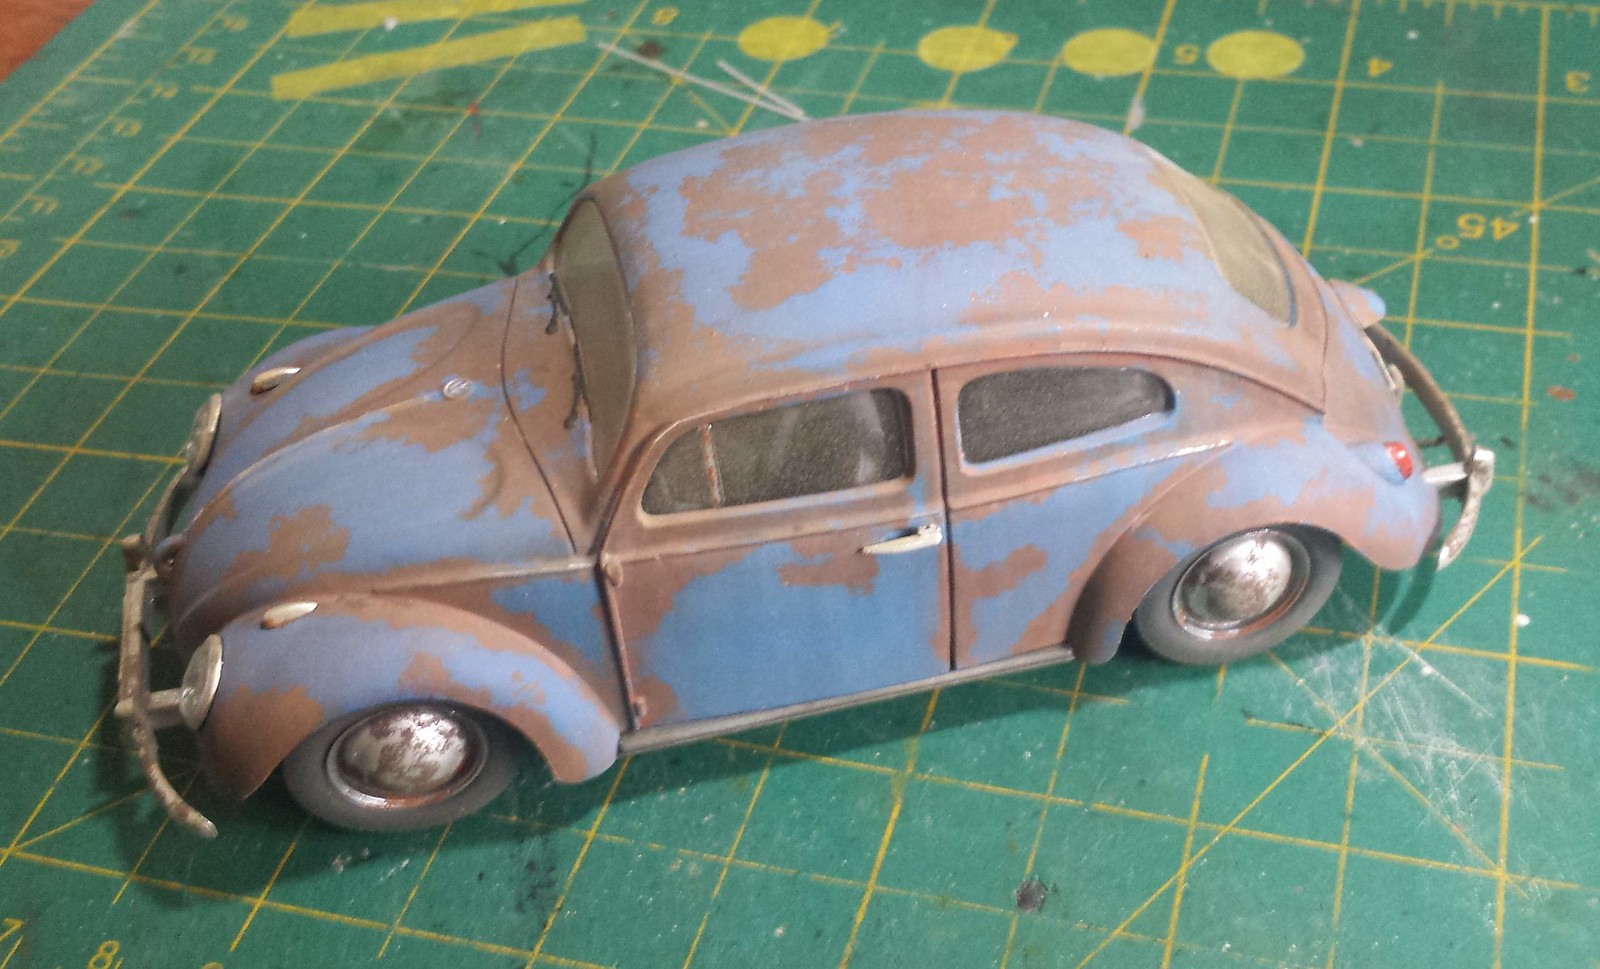
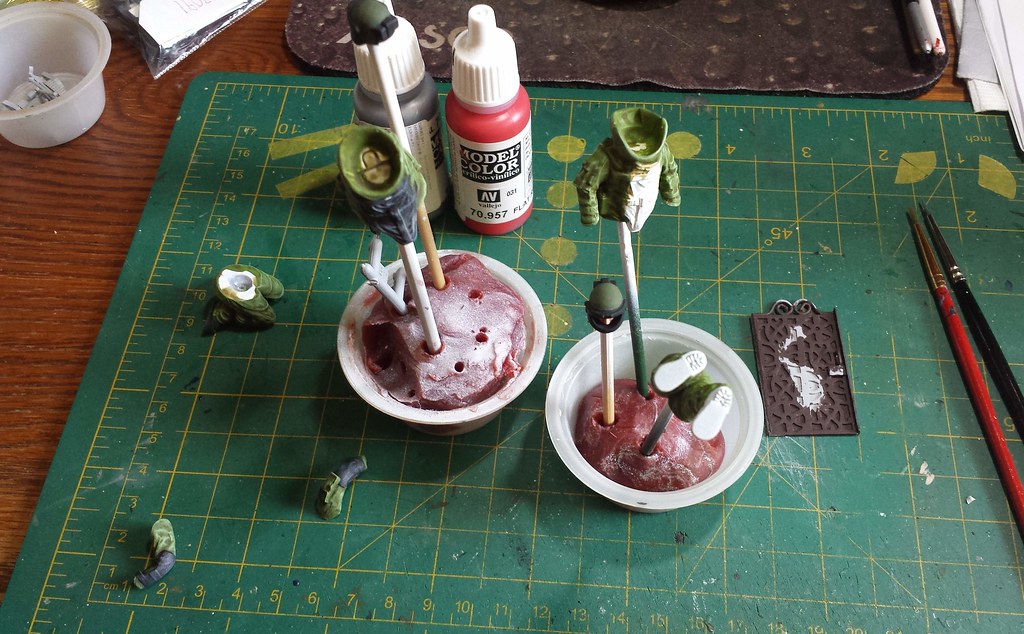
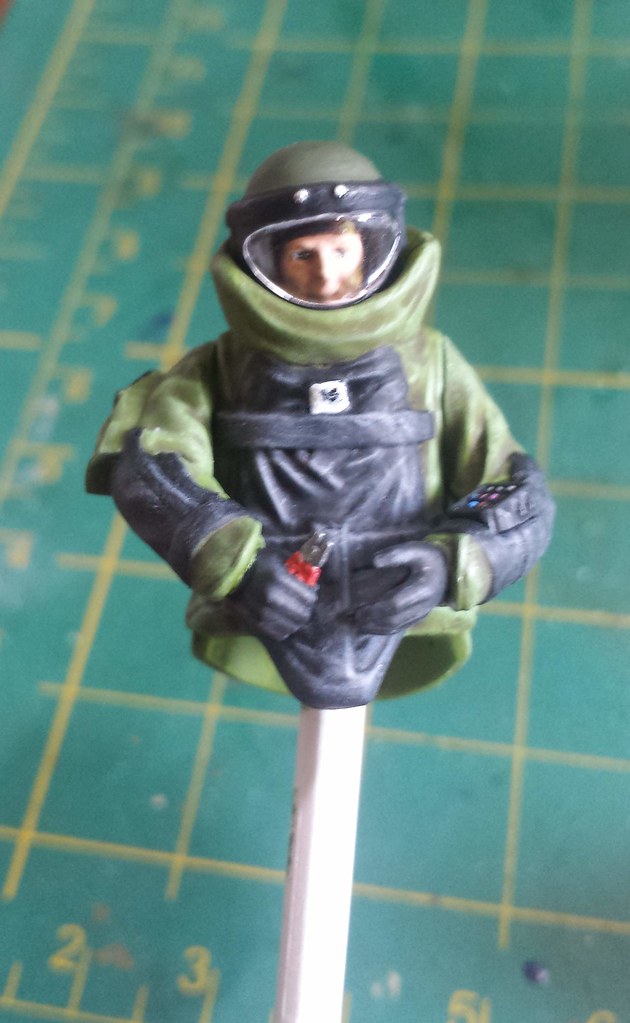
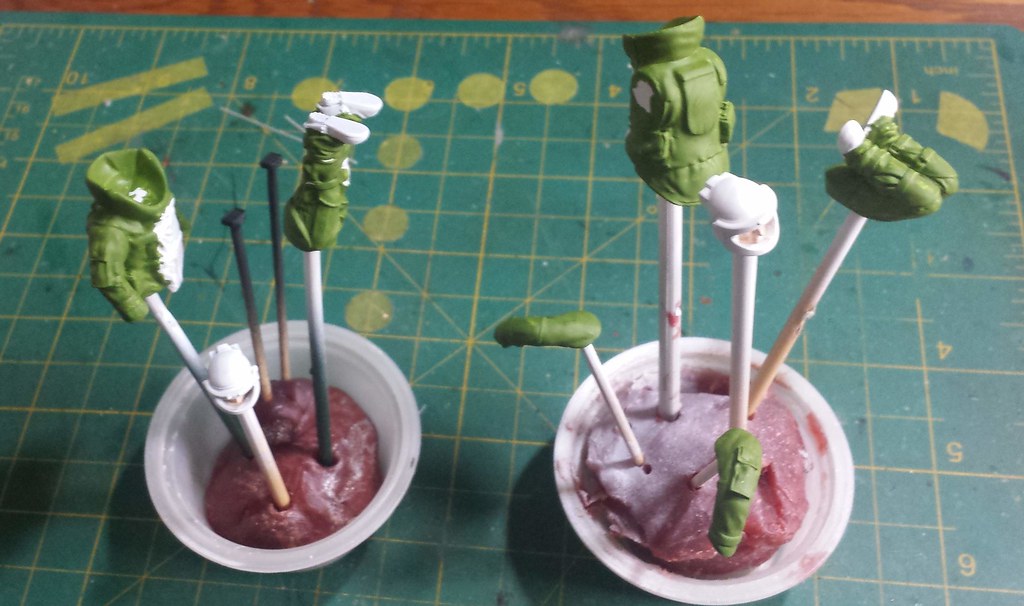
Starting with the figures:
Distrito Federal, Mexico
Joined: May 31, 2013
KitMaker: 1,457 posts
Armorama: 1,440 posts
Posted: Sunday, April 17, 2016 - 11:02 AM UTC


