_GOTOBOTTOM
Яusso-Soviэt Forum: Cold War Soviet Armor
For discussions related to cold war era Russo-Soviet armor.
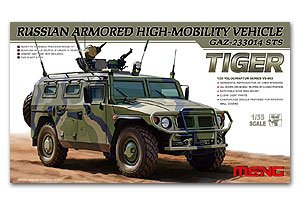
Meng Gaz Tiger
brodiebear
Visit this Community
England - East Anglia, United Kingdom
Joined: May 16, 2014
KitMaker: 91 posts
Armorama: 90 posts
Posted: Tuesday, May 10, 2016 - 02:29 PM UTC
Started on this kit last week;


The front suspension and steering, was a nightmare to get constructed - over engineered, you need to read two steps ahead and then its still dosn't make much sense with the instructions, but its attached now. The suspension arms don't have a very firm location so will be amazed if all four wheels touch the ground together. may have to sit on a slight bumpy hill !!
brodiebear
Visit this Community
England - East Anglia, United Kingdom
Joined: May 16, 2014
KitMaker: 91 posts
Armorama: 90 posts
Posted: Tuesday, May 10, 2016 - 02:29 PM UTC
Going great guns with this kit, only have the doors to put together, gun(s) and can then get some paint laid down – when goodness only knows, busy all weekend starting from Friday night (plus have a review build of HobbyBoss Leopard 2a4 to get started). All the major sub-assemblies will be painted separately and then brought together at the end. Was chuffed last night when I test fitted the wheels and every one touched the ground, wasn’t sure that would be the case, as some of the mounting points for the axles and suspension were a bit ‘woolly’ to say the least. Hopefully get some photos as to where I am up to, up on line over the next couple of days.
Karl187
#284
Visit this Community
Northern Ireland, United Kingdom
Joined: October 04, 2006
KitMaker: 3,094 posts
Armorama: 2,942 posts
Posted: Tuesday, May 10, 2016 - 03:41 PM UTC
I can't remember exactly how the suspension was when I built this but I do remember all four wheels came out level when I test fitted them. The area I found most flimsy was the doors and the spare wheel rack- I doubt they would cause such a problem if they are modeled closed up- but if you plan to have the doors open then be careful. I've taken mine to two shows and had various doors drop off in transit.
brodiebear
Visit this Community
England - East Anglia, United Kingdom
Joined: May 16, 2014
KitMaker: 91 posts
Armorama: 90 posts
Posted: Tuesday, May 10, 2016 - 05:58 PM UTC

Quoted Text

I can't remember exactly how the suspension was when I built this but I do remember all four wheels came out level when I test fitted them. The area I found most flimsy was the doors and the spare wheel rack- I doubt they would cause such a problem if they are modeled closed up- but if you plan to have the doors open then be careful. I've taken mine to two shows and had various doors drop off in transit.


Thanks for that, they do look like they dont have a lot to grab onto.
brodiebear
Visit this Community
England - East Anglia, United Kingdom
Joined: May 16, 2014
KitMaker: 91 posts
Armorama: 90 posts
Posted: Wednesday, May 11, 2016 - 01:26 PM UTC
Chassis - with steerable front wheels, all wheels on the ground


Base of body, only thing added is the gearbox tunnel and levers/sticks


Roof on


Rare shot - sunshine


I have to say the engineering of these parts is excellent - everything just dropping on top of each other, may be different once all the gubbings are in, but looks promising at the moment.
Hellrabbit
Visit this Community
United States
Joined: June 28, 2015
KitMaker: 139 posts
Armorama: 139 posts
Posted: Wednesday, May 11, 2016 - 03:52 PM UTC

Quoted Text

Started on this kit last week;


The front suspension and steering, was a nightmare to get constructed - over engineered, you need to read two steps ahead and then its still dosn't make much sense with the instructions, but its attached now. The suspension arms don't have a very firm location so will be amazed if all four wheels touch the ground together. may have to sit on a slight bumpy hill !!


Don't forget cut the small turning light in half length or they will be out of the frame.......which are not same as real thing looks like. Remember that...btw...that kind of headlight design sucks.....
brodiebear
Visit this Community
England - East Anglia, United Kingdom
Joined: May 16, 2014
KitMaker: 91 posts
Armorama: 90 posts
Posted: Monday, May 23, 2016 - 06:43 PM UTC

After a couple of relaxing hours, you get this far with the camo decals (well i did), still havent worked out why the russians decided to camo the inside of the vehicle though. The decals went on a treat, after a satin varnish coat was left to dry for 24 hrs, used Vallejo Decal medium and Decal Fix;


brodiebear
Visit this Community
England - East Anglia, United Kingdom
Joined: May 16, 2014
KitMaker: 91 posts
Armorama: 90 posts
Posted: Tuesday, May 24, 2016 - 03:13 PM UTC
Got the final part of the camo decals on last night;


Painted the switches/ fan vents, added the instrument decals to the dashboard, lined the dash with dark grey - need to add some gloss varnish to the whole dash, white glue into the dial apertures and add the grab handles.


Dry fitted the chairs (need Glossing) and ammo rack - needs to be detail painted;


then need to add some dry brushing, wash on the floor, some dirt pigments and silver scratches on the gunners step.


Спасибо за снижается путем (Thanks for dropping by)
Karl187
#284
Visit this Community
Northern Ireland, United Kingdom
Joined: October 04, 2006
KitMaker: 3,094 posts
Armorama: 2,942 posts
Posted: Tuesday, May 24, 2016 - 03:19 PM UTC
Great stuff Steve- the decals are probably the trickiest part of the build but Meng really did great as they all fit and are fairly hard wearing decals- I only managed to split one and it came back together nicely so it was barely noticeable.

On the real thing the camo isn't actually painted on. Its essentially panels of camo fabric that attach to the inner frame of the vehicle. I'm not sure if they provide any sort of ballistic protection- they seem quite thick so it is possible- or if they are just thick fabric to avoid things being smashed off the metal frame and side walls etc. The attachment points may accept some sort of custom ballistic protection and I guess they could also take panels of different camo styles.
brodiebear
Visit this Community
England - East Anglia, United Kingdom
Joined: May 16, 2014
KitMaker: 91 posts
Armorama: 90 posts
Posted: Tuesday, May 24, 2016 - 06:10 PM UTC

Quoted Text

Great stuff Steve- the decals are probably the trickiest part of the build but Meng really did great as they all fit and are fairly hard wearing decals- I only managed to split one and it came back together nicely so it was barely noticeable.

On the real thing the camo isn't actually painted on. Its essentially panels of camo fabric that attach to the inner frame of the vehicle. I'm not sure if they provide any sort of ballistic protection- they seem quite thick so it is possible- or if they are just thick fabric to avoid things being smashed off the metal frame and side walls etc. The attachment points may accept some sort of custom ballistic protection and I guess they could also take panels of different camo styles.


Thanks for the comment and info, still cant see why the interior has any camo at all, just bizarre
RKikIV
Visit this Community
Michigan, United States
Joined: June 07, 2016
KitMaker: 5 posts
Armorama: 1 posts
Posted: Saturday, June 11, 2016 - 03:35 AM UTC

Quoted Text

Great stuff Steve- the decals are probably the trickiest part of the build but Meng really did great as they all fit and are fairly hard wearing decals- I only managed to split one and it came back together nicely so it was barely noticeable.

On the real thing the camo isn't actually painted on. Its essentially panels of camo fabric that attach to the inner frame of the vehicle. I'm not sure if they provide any sort of ballistic protection- they seem quite thick so it is possible- or if they are just thick fabric to avoid things being smashed off the metal frame and side walls etc. The attachment points may accept some sort of custom ballistic protection and I guess they could also take panels of different camo styles.


It is indeed a Spall liner to lessen small arms fire and IED, Explosive fragments entering the crew compartment. I'm building the Exact Tigr rather than the Meng one. for this I have Put the Camo decals on Folded tissue soaked in glue. Gives a very realistic effect that the decals alone do not seem to give. Reason for it being Camo could be because.. Well Russia.. Just because. They have started using this in BTR and armored trucks also. Oddly always in that same "Les" woodland camo.

Good luck on your build and hope it is still going good..
Karl187
#284
Visit this Community
Northern Ireland, United Kingdom
Joined: October 04, 2006
KitMaker: 3,094 posts
Armorama: 2,942 posts
Posted: Saturday, June 11, 2016 - 03:14 PM UTC

Quoted Text


Quoted Text

Great stuff Steve- the decals are probably the trickiest part of the build but Meng really did great as they all fit and are fairly hard wearing decals- I only managed to split one and it came back together nicely so it was barely noticeable.

On the real thing the camo isn't actually painted on. Its essentially panels of camo fabric that attach to the inner frame of the vehicle. I'm not sure if they provide any sort of ballistic protection- they seem quite thick so it is possible- or if they are just thick fabric to avoid things being smashed off the metal frame and side walls etc. The attachment points may accept some sort of custom ballistic protection and I guess they could also take panels of different camo styles.


It is indeed a Spall liner to lessen small arms fire and IED, Explosive fragments entering the crew compartment. I'm building the Exact Tigr rather than the Meng one. for this I have Put the Camo decals on Folded tissue soaked in glue. Gives a very realistic effect that the decals alone do not seem to give. Reason for it being Camo could be because.. Well Russia.. Just because. They have started using this in BTR and armored trucks also. Oddly always in that same "Les" woodland camo.

Good luck on your build and hope it is still going good..


Just wanted to say thanks for the info on the camo liner Steve- interesting that they are starting to use it on other vehicles too.
brodiebear
Visit this Community
England - East Anglia, United Kingdom
Joined: May 16, 2014
KitMaker: 91 posts
Armorama: 90 posts
Posted: Sunday, June 12, 2016 - 12:25 AM UTC
still progressing, a bit slower as building a review model at the moment
brodiebear
Visit this Community
England - East Anglia, United Kingdom
Joined: May 16, 2014
KitMaker: 91 posts
Armorama: 90 posts
Posted: Tuesday, July 26, 2016 - 12:55 PM UTC
Back on the bench and progresing quite well;


Internals all fitted and weathered


Internal lights fitted


Ammo racks installed


Ammo racks - now normally if you have a raised lip on the side wall, you would normally fit the part to the lip, if you do that with this kit the shell wont fit onto the chassis, what you need to do is align the bottom of the rack with the bottom part of the raised area on the side wall, then the shell will fit onto the chassis, glad i tried this while the glue was still setting else it would have been a nightmare to rectify once the glue had hardened.
 _GOTOTOP