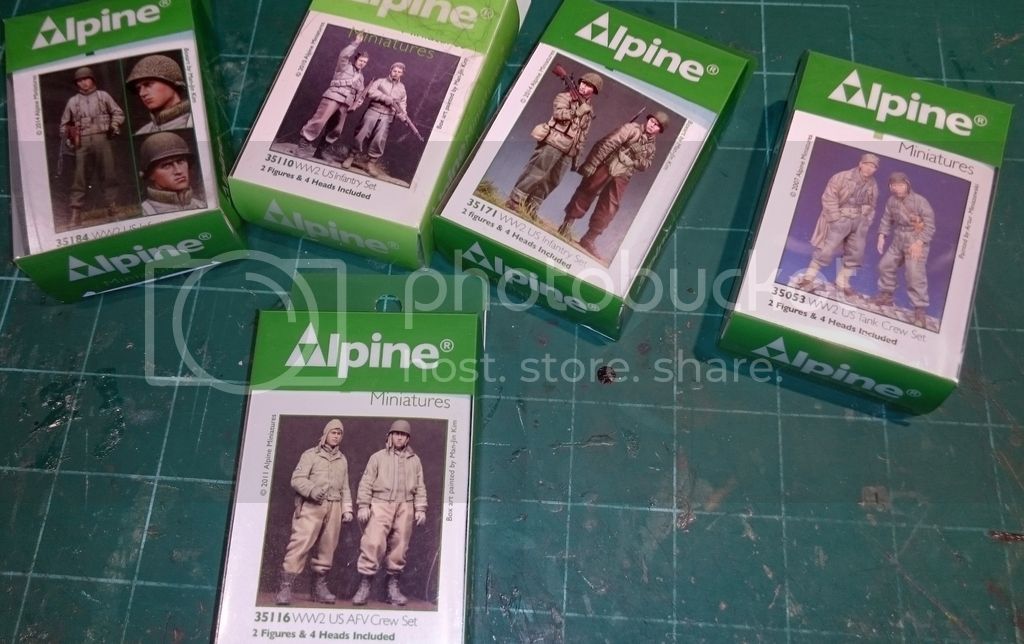
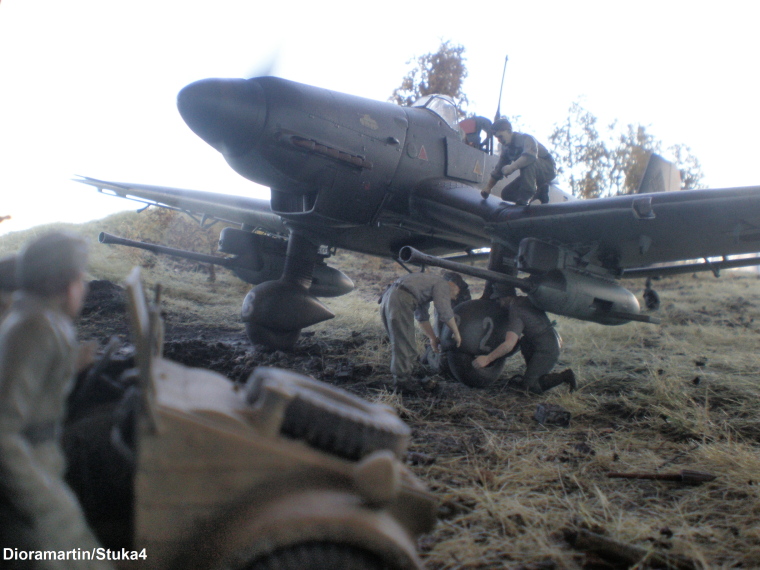
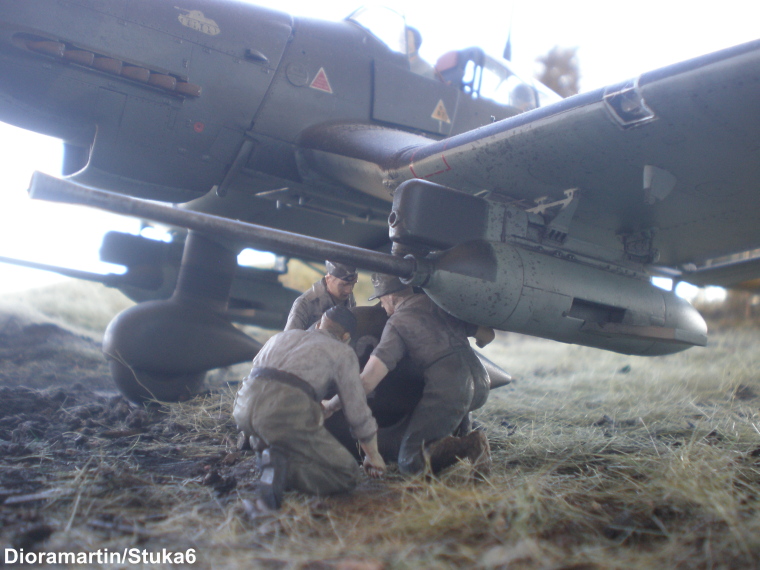
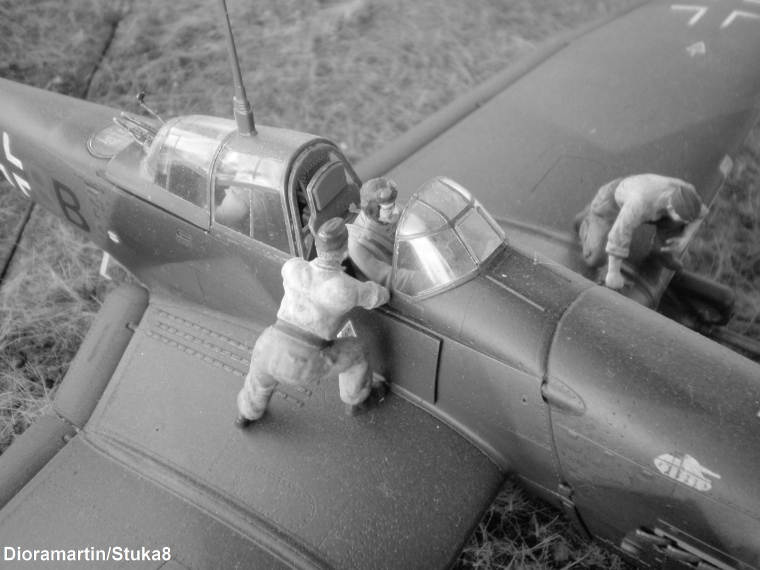
I recently picked up a new book that is put out by AK Interactive: The Eagle Has Landed. This "tour-de-force" book is an amazing collection of dioramas by Aitor Azkue; and nothing short of pure unadulterated model makers porn - (I've always wanted to use the phrase tour-de-force...lol)
Anyway...most of the dioramas are a combination of 1/35 and 1/32, something I have always wanted to try.
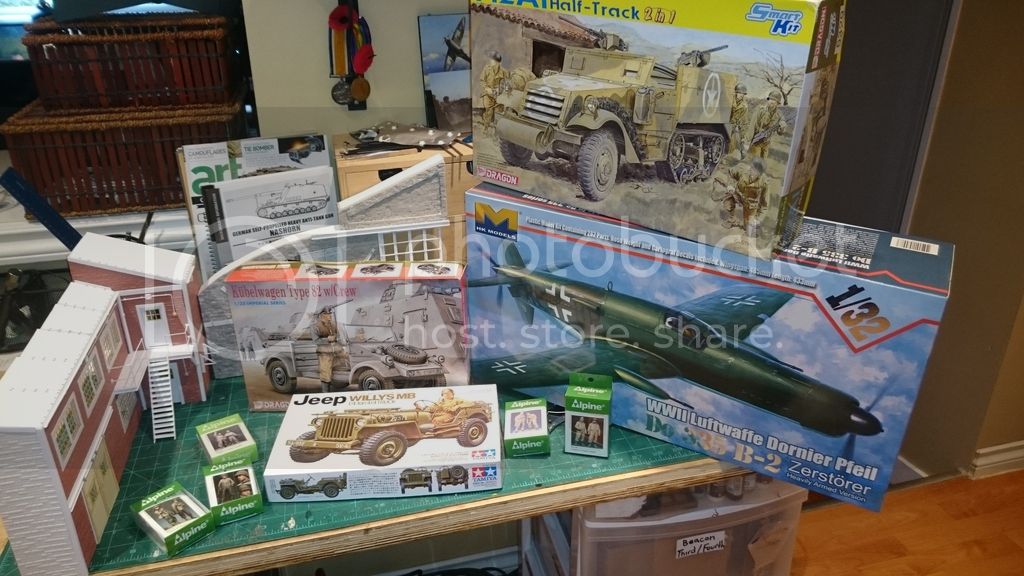
I am nearing completion of the buildings, and then I will start with the kits. It is a purely fictional setting of some American troops coming across one of the Do335's...
The Kubelwagen, if I choose to use it, will have a star painted on it to represent it as being acquired for use by the Americans. I am unsure about using the Half Track...and the figures may get changed up....
Dioramas
Do you love dioramas & vignettes? We sure do.
Hosted by Darren Baker, Mario Matijasic
The last Dornier Do335
gregcctrn
British Columbia, Canada
Joined: January 09, 2013
KitMaker: 329 posts
Armorama: 91 posts
Joined: January 09, 2013
KitMaker: 329 posts
Armorama: 91 posts
Posted: Wednesday, June 08, 2016 - 10:35 PM UTC
cheyenne
New Jersey, United States
Joined: January 05, 2005
KitMaker: 2,185 posts
Armorama: 1,813 posts
Joined: January 05, 2005
KitMaker: 2,185 posts
Armorama: 1,813 posts
Posted: Thursday, June 09, 2016 - 01:10 AM UTC
Very cool construction work Greg , great start .
Really like the tan double doors with top rollers on the left .
Kevlar06
Washington, United States
Joined: March 15, 2009
KitMaker: 3,670 posts
Armorama: 2,052 posts
Joined: March 15, 2009
KitMaker: 3,670 posts
Armorama: 2,052 posts
Posted: Thursday, June 09, 2016 - 10:00 AM UTC
Wow, that hanger is first rate. It looks very similar to one we had at Fliegerhorst Kaserne in Hanau. During the war the Germans were conserving high grade concrete for fortifications, so their cinder block buildings like hangers used a mixture of straw and concrete. These structures were fairly strong, but over the years the straw would deteriorate, and the blocks tended to crumble. We lost a UH60 crushed when one wall of a hanger similar to the one you've modeled here collapsed. The wall and hanger door section look just like one of those hangers. Great work!
VR Russ
VR Russ
Dioramartin
New South Wales, Australia
Joined: May 04, 2016
KitMaker: 1,476 posts
Armorama: 1,463 posts
Joined: May 04, 2016
KitMaker: 1,476 posts
Armorama: 1,463 posts
Posted: Thursday, June 09, 2016 - 11:57 AM UTC
Hi Greg, great concept & the buildings are looking good - will there be enough ground-space for the Doh(!) and one or possibly two vehicles? If the plane has been wheeled out of the hangar I'm thinking you'd need to build the other hangar door and open too - which would mean extra ground space anyway. If you're using 9 guys they couldn't have all rode in the Kubel so unless on foot you'd need the half-track too. Last thought - victors usually crawl all over booty (now that's an expression I've always wanted to use)so a couple of them could be up on the wing/looking into the cockpit maybe. And at the top of the steps if they're staying - they vanished in one shot. Good luck, I'll be looking out for this one. Cheers, Tim
ColinEdm
Associate Editor
Alberta, Canada
Joined: October 15, 2013
KitMaker: 1,355 posts
Armorama: 1,229 posts
Joined: October 15, 2013
KitMaker: 1,355 posts
Armorama: 1,229 posts
Posted: Thursday, June 09, 2016 - 06:22 PM UTC
Great start so far, amazing work on the buildings.
strongarden
Florida, United States
Joined: May 14, 2012
KitMaker: 730 posts
Armorama: 624 posts
Joined: May 14, 2012
KitMaker: 730 posts
Armorama: 624 posts
Posted: Thursday, June 09, 2016 - 06:50 PM UTC
Excellent beginning. Keep it comin' because I'll be watchin' for this one!
Seriously Greg, are you planning to have the Dornier at least partially inside the doors? Is there that noticeable a difference between the two scales? I've always had the thought of combining 32nd aircraft w/ 35th vehicles and figures. I really like what you've got so far.
Cheers Dave
Seriously Greg, are you planning to have the Dornier at least partially inside the doors? Is there that noticeable a difference between the two scales? I've always had the thought of combining 32nd aircraft w/ 35th vehicles and figures. I really like what you've got so far.
Cheers Dave
gregcctrn
British Columbia, Canada
Joined: January 09, 2013
KitMaker: 329 posts
Armorama: 91 posts
Joined: January 09, 2013
KitMaker: 329 posts
Armorama: 91 posts
Posted: Thursday, June 09, 2016 - 09:10 PM UTC
Thanks for the feedback guys!
I have always loved the Do335, and remember building the Monogram kit when I was 9 back in 1975/76. It was the trainer version, which sadly isn't available yet, but HK should be putting one out as they do depict it on the box art. I remember the Shep Paine insert that came with that kit; it depicted the plane in a badly damaged hangar. I tried to make one myself, but the lego blocks just didn't cut it!
I could have done this in 1/48 as Tamiya has the trainer version; however, the figures just aren't there in 1/48 to the same extent as they are in 1/35.
Then I stumbled across the book I mentioned "The Eagle Has Landed", and see how 1/32 and 1/35 can work. One of the guys at my local hobby shop, Sheldon, explained that the average person doesn't have a reference point in terms of size of most aircraft to people. So keeping everything 1/35 with the exception of the plane, the two scales are close enough that it looks fine. As well, some of the 1/35 figure brands out there are closer to 1/32. The only exception would be 1/35 Resicast figures, as they seem to be on the small side...
I like the idea of having half the plane inside the hangar, the problem is that would mean recreating the inside of the hangar somewhat, something that I worry would would be beyond my current skill set. I will be building some stairs on rollers that could be pushed around for accessing the cockpit, and I will have two figures up on the steps checking out the cockpit.
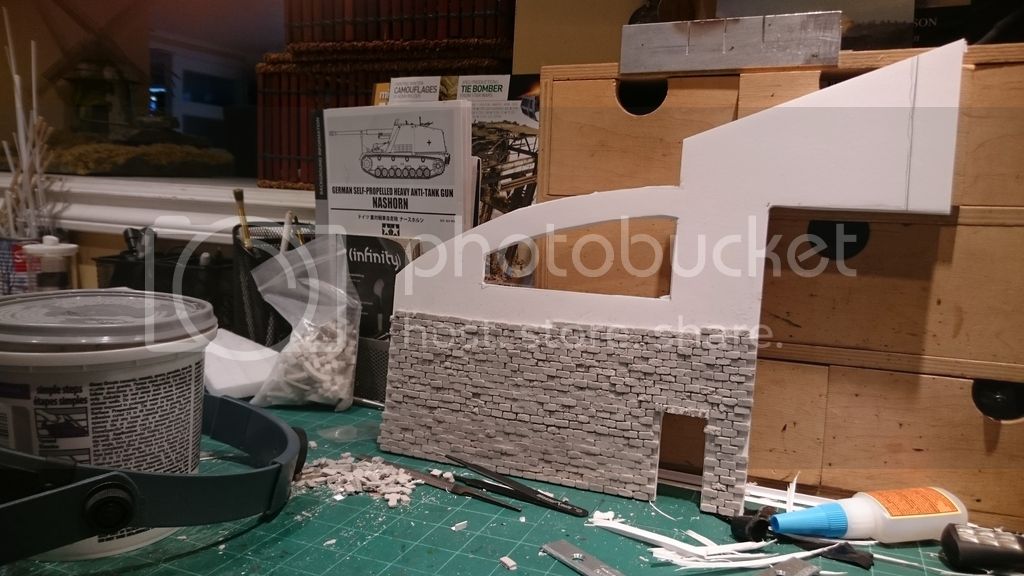
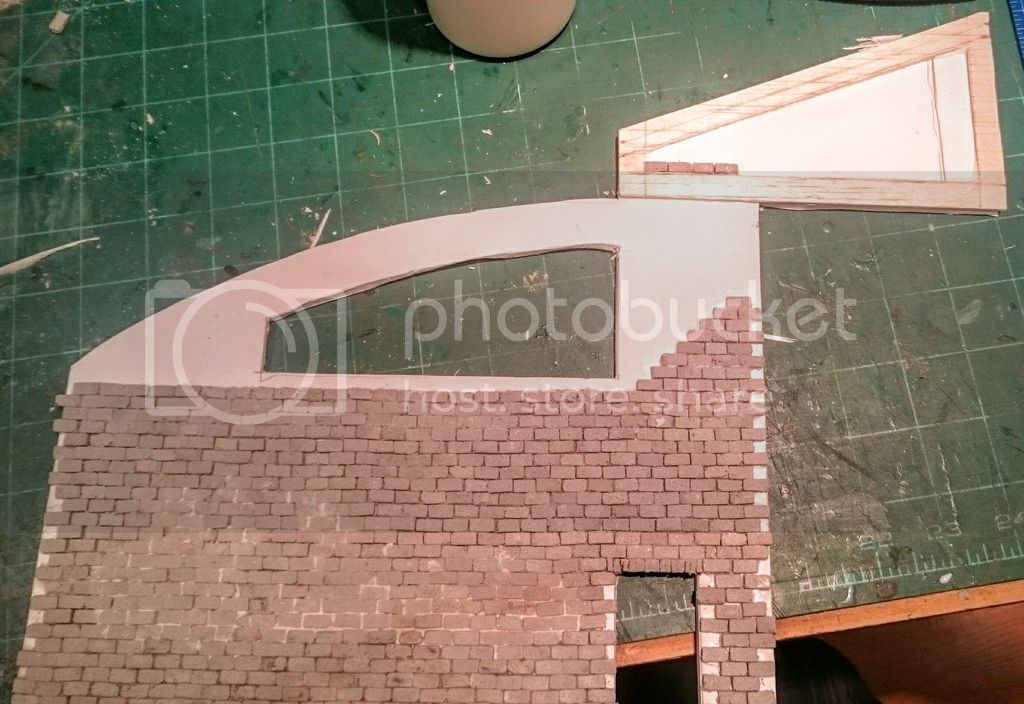
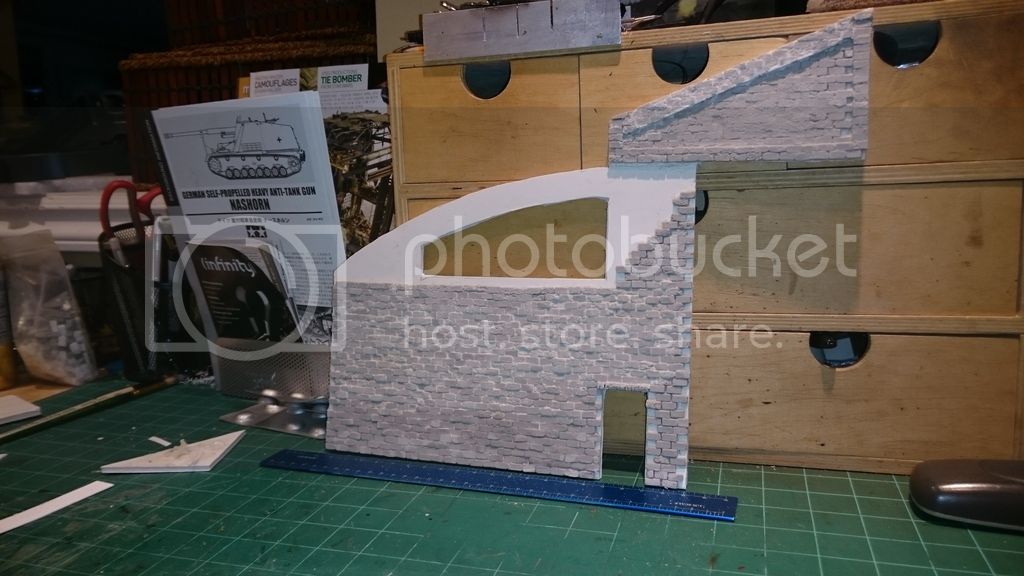
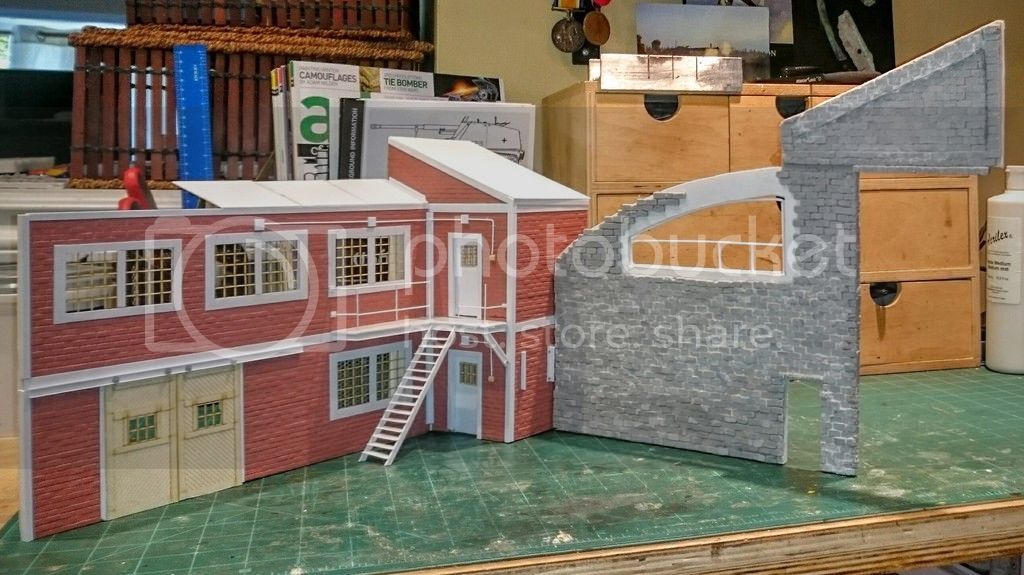
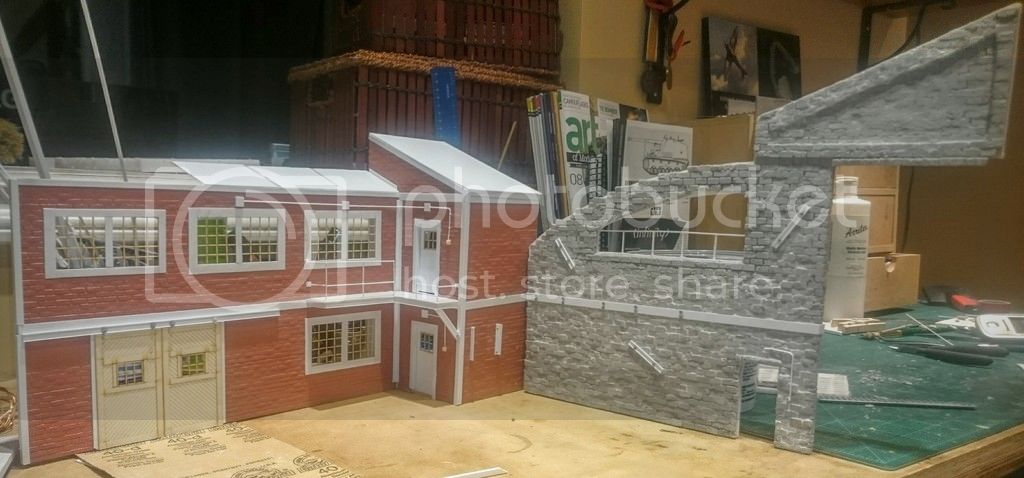
I have attached some more pics from the book that show 1/35 figures next to 1/32 planes....also a few pics of building up the structures. For the hangar I have used the J's Work brick mold, and premixed tile grout (Home Depot) for the bricks. In total I have cast about 1500 bricks. The other building is foam core with a brick pattern styrene. The tan coloured doors are a set of O gage round house doors, trimmed down.
I really appreciate constructive feedback, thoughts and suggestions are welcomed...I had thought about depicting the plane being worked on by Luftwaffe mechanics, but it seems more interesting to have soldiers wandering about looking it over...or as Tim put it "victors usually crawl all over booty"....
Start of the Hangar
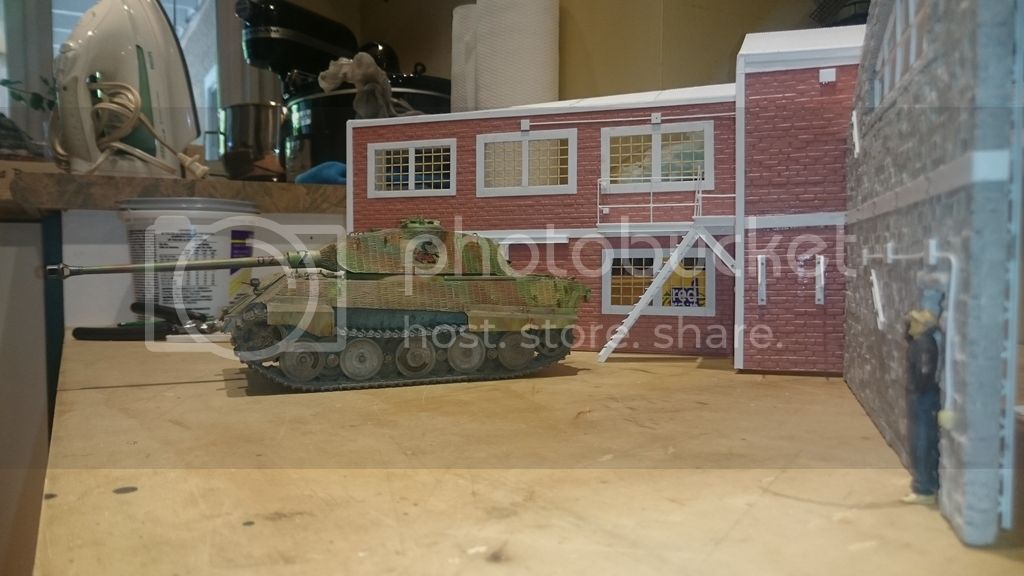
Just for size and perspective I placed a King Tiger
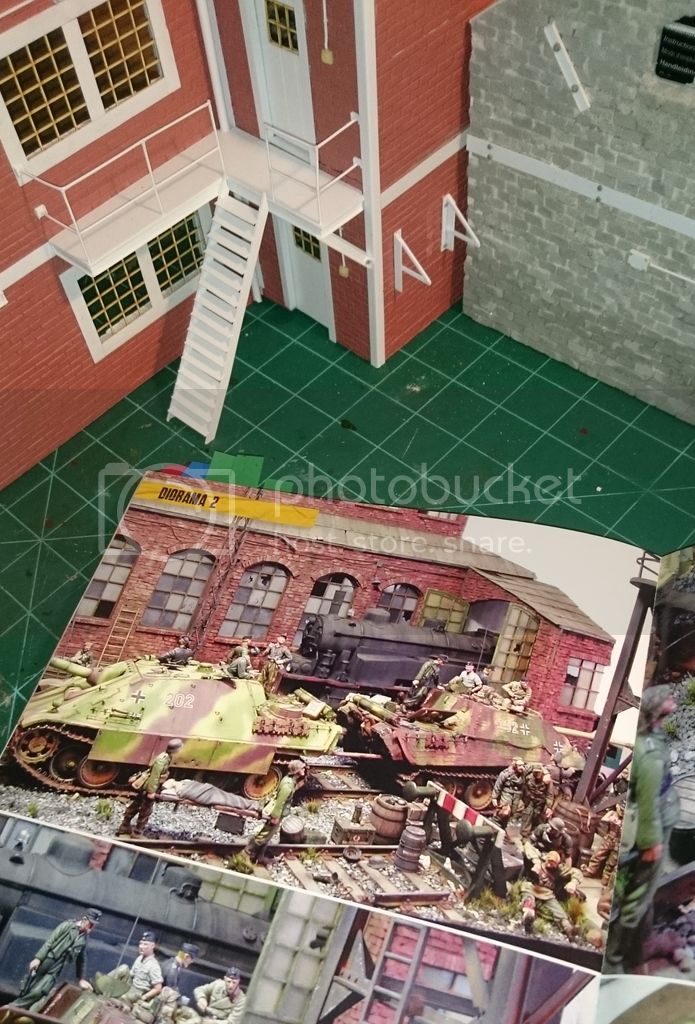
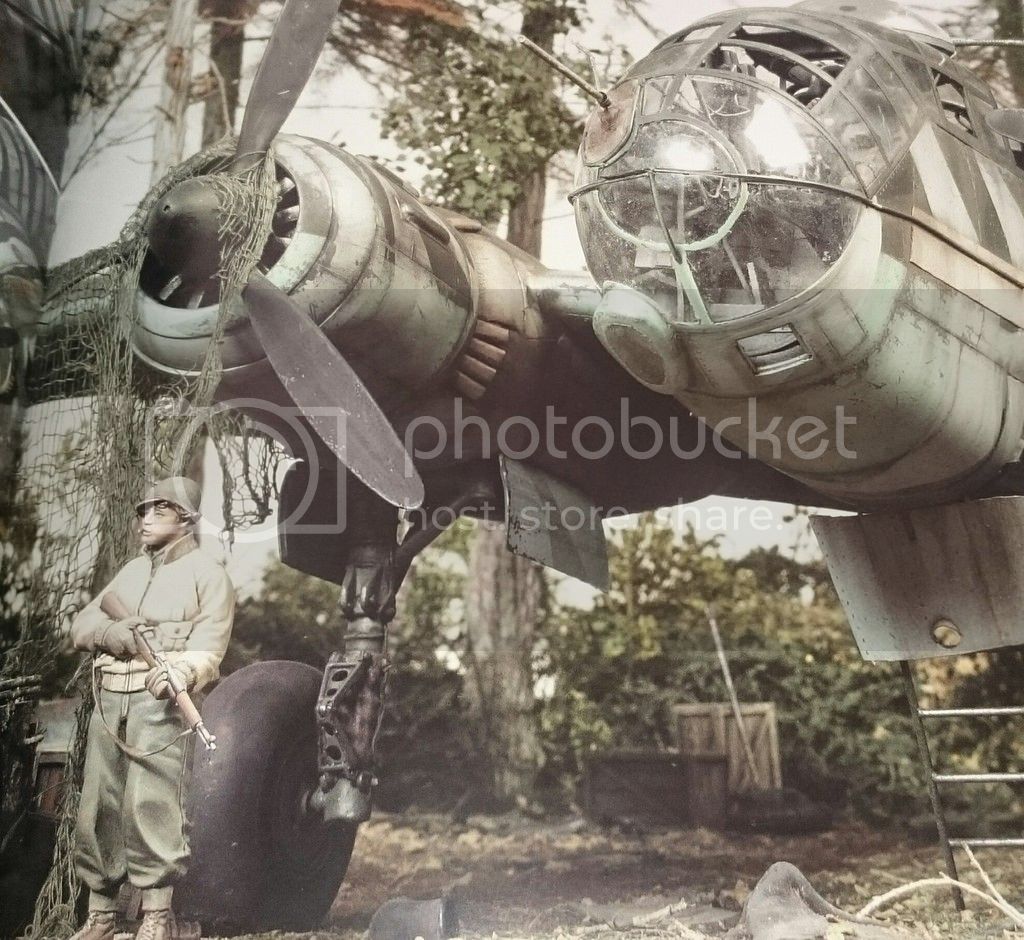
Here are some more pics from the book to show 1/35 figs with 1/32 aircraft
I have always loved the Do335, and remember building the Monogram kit when I was 9 back in 1975/76. It was the trainer version, which sadly isn't available yet, but HK should be putting one out as they do depict it on the box art. I remember the Shep Paine insert that came with that kit; it depicted the plane in a badly damaged hangar. I tried to make one myself, but the lego blocks just didn't cut it!
I could have done this in 1/48 as Tamiya has the trainer version; however, the figures just aren't there in 1/48 to the same extent as they are in 1/35.
Then I stumbled across the book I mentioned "The Eagle Has Landed", and see how 1/32 and 1/35 can work. One of the guys at my local hobby shop, Sheldon, explained that the average person doesn't have a reference point in terms of size of most aircraft to people. So keeping everything 1/35 with the exception of the plane, the two scales are close enough that it looks fine. As well, some of the 1/35 figure brands out there are closer to 1/32. The only exception would be 1/35 Resicast figures, as they seem to be on the small side...
I like the idea of having half the plane inside the hangar, the problem is that would mean recreating the inside of the hangar somewhat, something that I worry would would be beyond my current skill set. I will be building some stairs on rollers that could be pushed around for accessing the cockpit, and I will have two figures up on the steps checking out the cockpit.
I have attached some more pics from the book that show 1/35 figures next to 1/32 planes....also a few pics of building up the structures. For the hangar I have used the J's Work brick mold, and premixed tile grout (Home Depot) for the bricks. In total I have cast about 1500 bricks. The other building is foam core with a brick pattern styrene. The tan coloured doors are a set of O gage round house doors, trimmed down.
I really appreciate constructive feedback, thoughts and suggestions are welcomed...I had thought about depicting the plane being worked on by Luftwaffe mechanics, but it seems more interesting to have soldiers wandering about looking it over...or as Tim put it "victors usually crawl all over booty"....
Start of the Hangar
Just for size and perspective I placed a King Tiger
Here are some more pics from the book to show 1/35 figs with 1/32 aircraft
gregcctrn
British Columbia, Canada
Joined: January 09, 2013
KitMaker: 329 posts
Armorama: 91 posts
Joined: January 09, 2013
KitMaker: 329 posts
Armorama: 91 posts
Posted: Friday, June 10, 2016 - 06:05 AM UTC
Kevlar06
Washington, United States
Joined: March 15, 2009
KitMaker: 3,670 posts
Armorama: 2,052 posts
Joined: March 15, 2009
KitMaker: 3,670 posts
Armorama: 2,052 posts
Posted: Friday, June 10, 2016 - 06:24 AM UTC
Unless you are planning on increasing the size a lot, I think I'd nix trying to do a lot of the hanger interior-- your double doors look great by the way. At Fliegerhorst Kasern we had several large WWII hangers. Some of them were corrugated metal roofed, and showed concussion and fragmentation damage from WWII. One in particular had a large "Quonset" style roof with interior girders for support. A couple smaller ones had folding "accordion" style doors rather than sliding doors as you've depicted, but I really like your doors (they would have been metal sheathed doors). I suppose you could construct just the basics of an interior with a section of roof extending back a few inches, then park your DO 335 with just the tail inside the doors. Or perhaps you could place the buildings at a little more angle on the base. PS-- I see you're in B.C.-- do you ever attend the IPMS Seattle shows?
VR Russ
VR Russ
Dioramartin
New South Wales, Australia
Joined: May 04, 2016
KitMaker: 1,476 posts
Armorama: 1,463 posts
Joined: May 04, 2016
KitMaker: 1,476 posts
Armorama: 1,463 posts
Posted: Friday, June 10, 2016 - 09:18 AM UTC
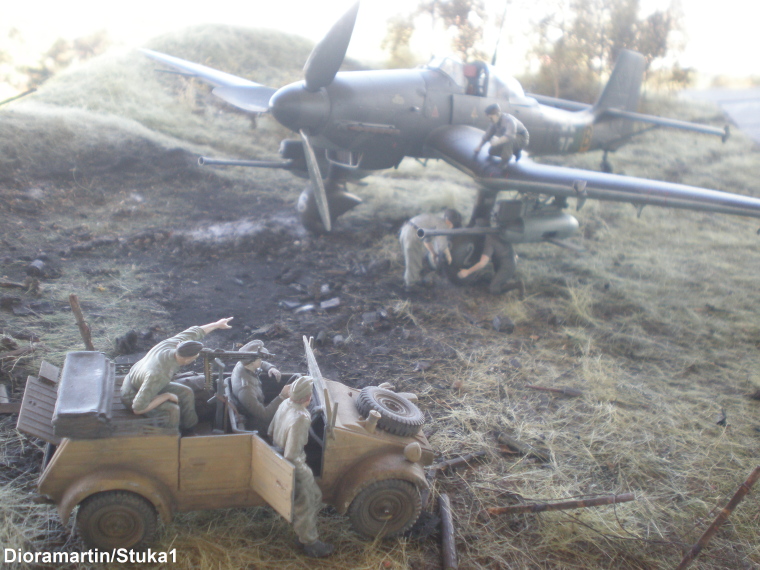
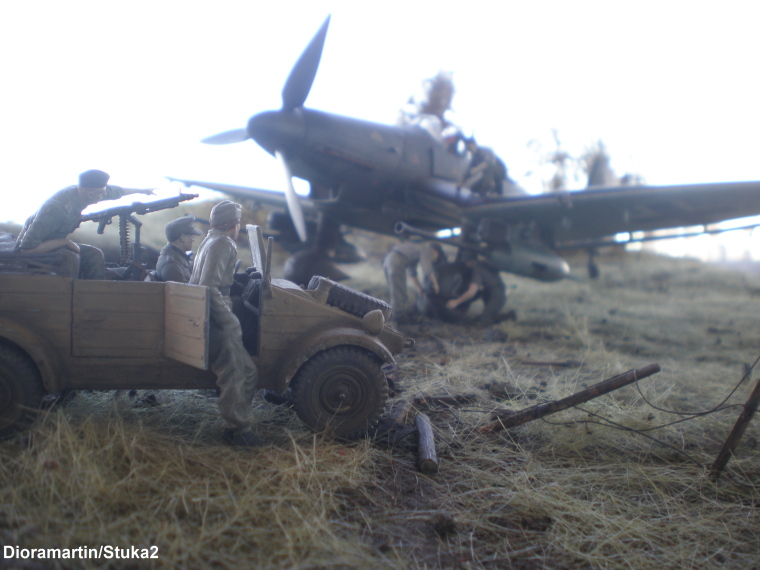
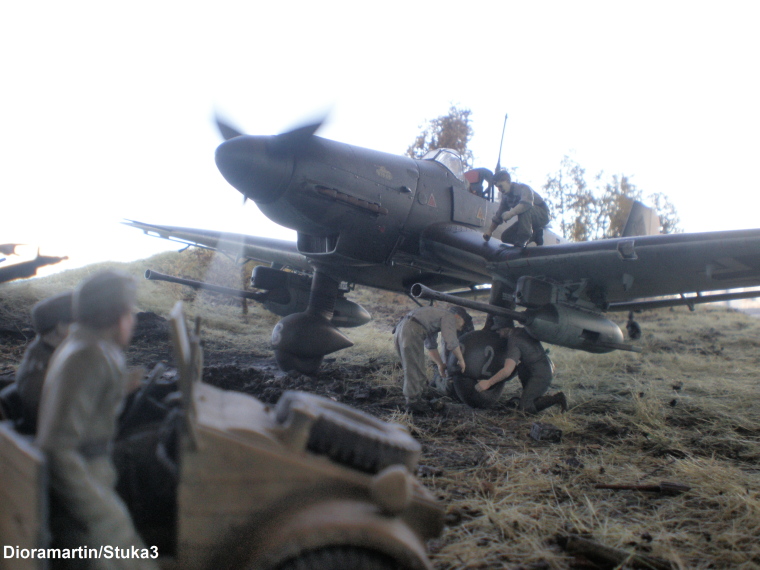
Just to illustrate what Sheldon’s talking about here are some test shots of a 1/32 Stuka Kanonvogel with 1/35 extras & Kubel. I think they prove the scale issue just isn’t.
The pilot’s certainly a big guy in comparison but I don’t think it’s that noticeable & certainly shouldn’t be for you, at least for images - I guess if you took it to a Show some pedants might mark you down but screw them. For a second or two I was thinking you could call your dio “Booty call” or even “Booty crawl” but if any of your GIs were bending over…nah let’s not go there.
Brilliant brickwork and those hangar doors are stellar. I agree with Russ (?) about not needing to go too far into the hangar – just say 1 or 2 inches into it & paint the back-panel pitch black – maybe make it a curved panel so you can’t even see any corners, & perhaps fill the back of the space with debris from a collapsed roof, just missing the plane’s tail? Or more radically if you were determined to not expand the dio’s overall dimensions, chop the tail off the plane and stick the end of the fuselage to a back-panel flush with the hangar doors, but I think that’s a high-risk/low return strategy.
I’ll be interested to see how you deal with the ground – asphalt or concrete slabs?
Posted: Friday, June 10, 2016 - 10:23 AM UTC
Greg,
Extraordinary work! I look forward to the next set of photos.
Very glad you are not worried about the non-issue of mixing 1/32 & 1/35 figures. When people balk, I simple post photos like these, with the question 'what scale were these guys?'
Extraordinary work! I look forward to the next set of photos.
Very glad you are not worried about the non-issue of mixing 1/32 & 1/35 figures. When people balk, I simple post photos like these, with the question 'what scale were these guys?'
srmalloy
United States
Joined: April 15, 2012
KitMaker: 336 posts
Armorama: 298 posts
Joined: April 15, 2012
KitMaker: 336 posts
Armorama: 298 posts
Posted: Sunday, June 12, 2016 - 09:55 PM UTC
Quoted Text
Very glad you are not worried about the non-issue of mixing 1/32 & 1/35 figures. When people balk, I simple post photos like these, with the question 'what scale were these guys?'
As long as you're consistent with the gear, it's unlikely to be particularly noticeable; as you illustrate, people come in different sizes, but weapons like the Kar98k only came in one size, and mixing 1/32 and 1/35 gear close to each other can look funny.
ropeynz
England - South West, United Kingdom
Joined: April 15, 2011
KitMaker: 134 posts
Armorama: 102 posts
Joined: April 15, 2011
KitMaker: 134 posts
Armorama: 102 posts
Posted: Sunday, June 12, 2016 - 11:00 PM UTC
Quoted Text
As long as you're consistent with the gear, it's unlikely to be particularly noticeable; as you illustrate, people come in different sizes, but weapons like the Kar98k only came in one size, and mixing 1/32 and 1/35 gear close to each other can look funny.
Did helmets come in one size? I suppose they might have adjustable liners...
Posted: Monday, June 13, 2016 - 03:12 AM UTC
I will be following this progress for sure, awesome concept and looking great so far.
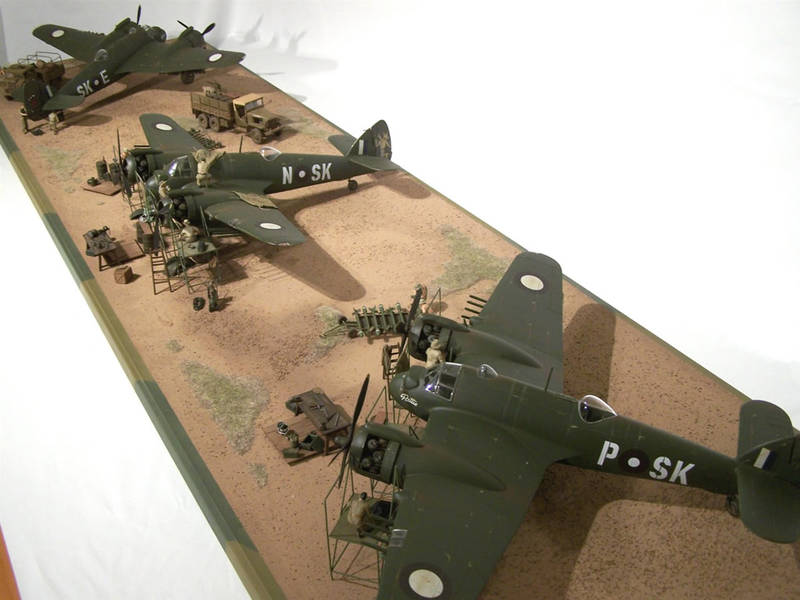
I have linked this a few times in the past, but I will do it again here as it has relevance. This diorama was put together by a friend of mine and has 3 x 1/32 Beaufighters together with 1/35 vehicles and crew and a bunch of scratchbuilt extras. No scale issues really.
Club page is HERE with more images. The figures are mostly German tank maintenance crew with scratched Aussie "slouch" hats.
For interest, you can see where the diorama resides now, under the clear case in the right of this image.
Cheers, D
gregcctrn
British Columbia, Canada
Joined: January 09, 2013
KitMaker: 329 posts
Armorama: 91 posts
Joined: January 09, 2013
KitMaker: 329 posts
Armorama: 91 posts
Posted: Monday, June 13, 2016 - 10:42 PM UTC
Thanks everyone for all the feedback, it really is very encouraging. Doing a dio with the Do335 is something I have always wanted to do, as I mentioned previously, I remember being 9 years of age building the Monogram kit. It was the trainer version, which is my preference; however, HK hasn't released one yet so I am pushing forward regardless.
I have run into one stumbling block...my other half said "Wow that's going to be pretty big once you're done, where are you planning to put it??".......
At this point, had you been in my head, you would have heard the sound of a record playing needle scratching across vinyl....
I have run into one stumbling block...my other half said "Wow that's going to be pretty big once you're done, where are you planning to put it??".......
At this point, had you been in my head, you would have heard the sound of a record playing needle scratching across vinyl....
Kevlar06
Washington, United States
Joined: March 15, 2009
KitMaker: 3,670 posts
Armorama: 2,052 posts
Joined: March 15, 2009
KitMaker: 3,670 posts
Armorama: 2,052 posts
Posted: Monday, June 13, 2016 - 11:49 PM UTC
Greg,
Before going to far with the base-- allow me to make a suggestion-- go to your local hardware store and but some wood mounting nuts-- I forget what they are called, but they have a threaded inside, a flat top with prongs, they're used to put threaded holes in sheets of plywood. You drill a hole, pound in the prongs (on the backside) with a hammer, and you have threaded mounts for long molly screws for hanging your diorama on the wall. This will save your space issue! If you are not planning on displaying it in the house, you could also "modularize" it like model railroaders do, and build it in sections, so you could store parts of it.
VR, Russ
Posted: Tuesday, June 14, 2016 - 02:48 AM UTC
Quoted Text
I have run into one stumbling block...my other half said "Wow that's going to be pretty big once you're done, where are you planning to put it??".......
Smile, point at the kitchen table, then run . . . .