M60 A3 Engine compartment in progress.
Parma, Italy
Joined: February 09, 2014
KitMaker: 241 posts
Armorama: 241 posts
Posted: Saturday, June 18, 2016 - 03:55 PM UTC
I almost finished to detail the engine compartment of this M60 and I added some details missing from the filter box.The Party who requested more time It was to close all openings in the Tamiya hull.All realized with the help of plasticard,wires of tin and copper and old telephone cables.
More photos on
http://acciaioverdemodellingblog.blogspot.it/2016/06/m60-a3-engine-compartment.htmlCheers


New Jersey, United States
Joined: July 25, 2006
KitMaker: 1,139 posts
Armorama: 946 posts
Posted: Saturday, June 18, 2016 - 05:41 PM UTC
Looking good. As a Dino tanker I have to say well done.
Tom
"ALLONS" 11TH ACR BLACKHORSE
"Death Before Dismount"
19K40/ Dino Rider 19F10
Parma, Italy
Joined: February 09, 2014
KitMaker: 241 posts
Armorama: 241 posts
Posted: Wednesday, August 10, 2016 - 04:41 PM UTC
I basically completed the work on the hull and missing only the tracks.I'll have to make some minor changes to the engine compartment after receiving some photos of this part of the tank from a friend.
In addition to small interventions to improve this old kit note that I had to eliminate the filler cap on the left why not present on the real tank.
More photos on
http://acciaioverdemodellingblog.blogspot.it/2016/08/m60-a3-hull-and-engine-compartment.htmlBest Regards


Washington, United States
Joined: March 15, 2009
KitMaker: 3,670 posts
Armorama: 2,052 posts
Posted: Thursday, August 11, 2016 - 06:28 AM UTC
Very Very nice work! Brings me back few years to my pack-pulling days (not the six pack either)! Paint the inside white, then scrape and sludge it up (especially the lower hull and torsion bars), and you'll have the look down perfectly. Who did the resin?

VR, Russ
Parma, Italy
Joined: February 09, 2014
KitMaker: 241 posts
Armorama: 241 posts
Posted: Thursday, August 11, 2016 - 04:32 PM UTC
Thanks Russ for your comment.The resin upgrade kit is of Verlinden Productions.
Cheers
ColinEdm
 Associate Editor
Alberta, Canada
Joined: October 15, 2013
KitMaker: 1,355 posts
Armorama: 1,229 posts
Posted: Thursday, August 11, 2016 - 07:01 PM UTC
Looking good! Very nice work on this.

The voices are back.....excellent....
New York, United States
Joined: May 02, 2013
KitMaker: 4,403 posts
Armorama: 4,078 posts
Posted: Thursday, August 11, 2016 - 08:07 PM UTC
Quoted Text
Thanks Russ for your comment.The resin upgrade kit is of Verlinden Productions.
Cheers
HELLO, GIGI63!!!
I AGREE with Russ and Colin!

VERY, NICE!!!

Texas, United States
Joined: June 12, 2007
KitMaker: 1,866 posts
Armorama: 1,696 posts
Posted: Saturday, August 20, 2016 - 12:57 AM UTC

#450
California, United States
Joined: July 19, 2015
KitMaker: 672 posts
Armorama: 668 posts
Posted: Saturday, August 20, 2016 - 01:32 AM UTC
HuGo 63, that is some beautiful work. Your wiring and tubing work is fantastic. Very convincingly done. You must have a ton of research materials to work from. I am following this. Keep the updates coming.
Regards,
Eric
"Pray for peace but prepare for violence"
- Me
"The only thing necessary for the triumph of evil is for good men to do nothing"
- Edmund Burke
Parma, Italy
Joined: February 09, 2014
KitMaker: 241 posts
Armorama: 241 posts
Posted: Thursday, October 20, 2016 - 11:16 PM UTC
I have finished the construction of the turret adding some missing details.The cable placed on the sides It was homebuilt with some copper wires twisted with the drill.There are only possible external loads that will add later.
More photos on
http://acciaioverdemodellingblog.blogspot.it/2016/10/m60-a3-turret-assembly-done.htmlCiao


California, United States
Joined: July 20, 2002
KitMaker: 666 posts
Armorama: 661 posts
Posted: Wednesday, November 09, 2016 - 08:24 AM UTC
Good work. Are you planning to replace the equipment box handles on the fenders with resin AM ones? I find that it really makes one of those differences that make folks notice.
New Jersey, United States
Joined: December 08, 2003
KitMaker: 2,864 posts
Armorama: 2,497 posts
Posted: Wednesday, November 09, 2016 - 09:44 AM UTC
Excellent job. Nice eye for all the details. You don't need to replace the handles on the sponson boxes, you did a good job cleaning them up. Maybe a brass lock on one to keep the tools from walking away?

OR one off center as they often rattled open during a road march.
"The only thing a man should take seriously is the fact that nothing should be taken seriously."
Samuel Butler, Victorian satirist
Steve Willoughby
barkingdigger
Associate Editor #013
England - East Anglia, United Kingdom
Joined: June 20, 2008
KitMaker: 3,981 posts
Armorama: 3,403 posts
Posted: Wednesday, November 09, 2016 - 05:00 PM UTC
Beautiful work! It's almost a shame to hide it under paint...
"Glue, or Glue Not - there is no Dry-Fit" - Yoda (original script from Return of the Jedi...)
Parma, Italy
Joined: February 09, 2014
KitMaker: 241 posts
Armorama: 241 posts
Posted: Tuesday, December 27, 2016 - 04:50 PM UTC
With the mounting of the Friulmodel tracks I have finished the construction of the M60.Now I'll have to prepare the base which I will place all the elements of this vehicle ( engine and engine bay cover ) I've done.
More photos on
http://acciaioverdemodellingblog.blogspot.it/2016/12/m60-a3-assembly-done.htmlCheers and Happy Holidays to all.


Kentucky, United States
Joined: September 26, 2007
KitMaker: 162 posts
Armorama: 116 posts
Posted: Tuesday, December 27, 2016 - 06:47 PM UTC
Gigi, well done; does bring back memories working with the M60A1 and M60A3.
One comment - the track on the M60 series did not have little if any 'sag' unless there was work on replacing a track block. I hope you can tighten the track.
I added a photo of a M60A1 to show the tension of the track.
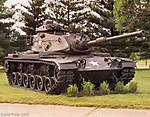
(Hope the photo works)
Looking forward to the painted finished model.

Parma, Italy
Joined: February 09, 2014
KitMaker: 241 posts
Armorama: 241 posts
Posted: Wednesday, December 28, 2016 - 03:11 PM UTC
Thanks Duane Unfortunately, if I remove a one spare of the tracks can not quite put them together.I think if you put the tank in an area of maintenance It could go well.
Cheers and Happy New Year
Kentucky, United States
Joined: September 26, 2007
KitMaker: 162 posts
Armorama: 116 posts
Posted: Wednesday, December 28, 2016 - 05:46 PM UTC
Gigi, yes, that would work (showing the tank undergoing maintenance). Are you planning on a diorama using the tank?
Happy New Year to you, Gigi, and your family.
England - South East, United Kingdom
Joined: March 11, 2010
KitMaker: 232 posts
Armorama: 198 posts
Posted: Wednesday, December 28, 2016 - 07:15 PM UTC
that's remarkably neat build
Parma, Italy
Joined: February 09, 2014
KitMaker: 241 posts
Armorama: 241 posts
Posted: Thursday, December 29, 2016 - 10:02 PM UTC
Yes Duane I planning a diorama in a maintanance area.
Parma, Italy
Joined: February 09, 2014
KitMaker: 241 posts
Armorama: 241 posts
Posted: Thursday, December 29, 2016 - 10:02 PM UTC
Thanks so much Chris and Happy New Year!!!!!!
North Carolina, United States
Joined: January 21, 2004
KitMaker: 803 posts
Armorama: 740 posts
Posted: Thursday, December 29, 2016 - 10:15 PM UTC
Were the grill doors solid or were they essentially slats?
Looking really good overall. I was on M-1's but pullin a pack is pullin a pack! Keep up the great work!
Kentucky, United States
Joined: December 11, 2014
KitMaker: 152 posts
Armorama: 139 posts
Posted: Friday, December 30, 2016 - 12:09 AM UTC
Very nice work! A couple of observations to add.
1. The square panel in front of fuel cells (don't recall which one) would be removed. It was removed from inside and was used to disconnect like 3 or 4 connections IIRC.
2. Not specific to your model but the M60 releases in general. The center periscope was the one that was typically (not always) lowered as driving was most often done open hatch. The obvious exception being during live fire or in a NBC threat environment. Google M60 tanks on exercise to see what I am referring to.
Washington, United States
Joined: March 15, 2009
KitMaker: 3,670 posts
Armorama: 2,052 posts
Posted: Friday, December 30, 2016 - 01:01 AM UTC
Quoted Text
Thanks Duane Unfortunately, if I remove a one spare of the tracks can not quite put them together.I think if you put the tank in an area of maintenance It could go well.
Cheers and Happy New Year
Gigi,
I think your M60 engine compartment work is fantastic-- but if I could make two suggestions: 1)the tracks on the M60 series are "live action tracks" as others have pointed out, and even in maintenance situations they likely wouldn't sag, unless they are totally worn out and the track pads would also reflect that. One end might sag if the track was completely separated, but the tracks are designed to flex upwards when removed. Therefore, I would see if you could glue the top run flat to remove the sag; 2) I think the gas return rods on the M-85 blank adapter are a little closer to the barrel-- it might be the angle of the photo, but the spacing looks a little wide to me. I'm not sure if any weapons would be fitted during engine maintenance, in the US Army, we likely would have removed them, unless the crew was right there. This will be a very unique model when finished. Are you going to depict the engine too?-- we used to put the engine on top of the rear deck when removed in the field-- there was also a "T" bar spreader used to remove the engine which you could easily scratch build and add too. Very nice work so far.
VR, Russ
Parma, Italy
Joined: February 09, 2014
KitMaker: 241 posts
Armorama: 241 posts
Posted: Friday, December 30, 2016 - 03:15 PM UTC
Thanks friends for our great comments and for your observations.Definitely some things I have forgotten also because not having much documentationI thank you for getting back to made note.In fact he's thinking first thing to eliminate the Browning however with regard to the tracks I do not know if I can change their length as if I had to take off one track part not be able to hook them.Is most likely if I can build the "T" spreader bar used for remove the engine.Thanks so much for your constructive comments and and if I can light some of these corrections.
Cheers and Happy New Year!!!!

Parma, Italy
Joined: February 09, 2014
KitMaker: 241 posts
Armorama: 241 posts
Posted: Saturday, February 18, 2017 - 05:27 PM UTC
I complete the concrete base of M60 diorama.After glued on the base a balsa wood sheet of 5 mm thickness I applied on it a layer of putty for shims available in the briko stores.Spend at least 24 hours when the putty is dry I sanded the entire surface with medium-grit sandpaper and then subsequently with a finer grain.After cleaning with a brush to remove the dust with a metal tip I engraved the surface reproducing the pavement separating lines and cracks that add realism and a more experienced in the whole.I then performed a light wash with raw umber oil and dry color I laid on the surface various shades of gray with the dry brush technique.Once you finished this step I realized oil stains with the specific product from the AK Interactive and also various dirtying earth tones with enamel colors.When I will place the vehicle and its various components on the base I will fulfill any other small aging interventions.
More photos on
http://acciaioverdemodellingblog.blogspot.it/2017/02/m-60-a3-concrete-base.htmlCheers


