_GOTOBOTTOM
Armor/AFV: Axis - WWII
Armor and ground forces of the Axis forces during World War II.
Hosted by Darren Baker
Italeri World of Tanks Tiger Build
Blackjack40
Visit this Community
Kansas, United States
Joined: February 17, 2016
KitMaker: 18 posts
Armorama: 18 posts
Posted: Tuesday, July 19, 2016 - 09:17 PM UTC
Team,

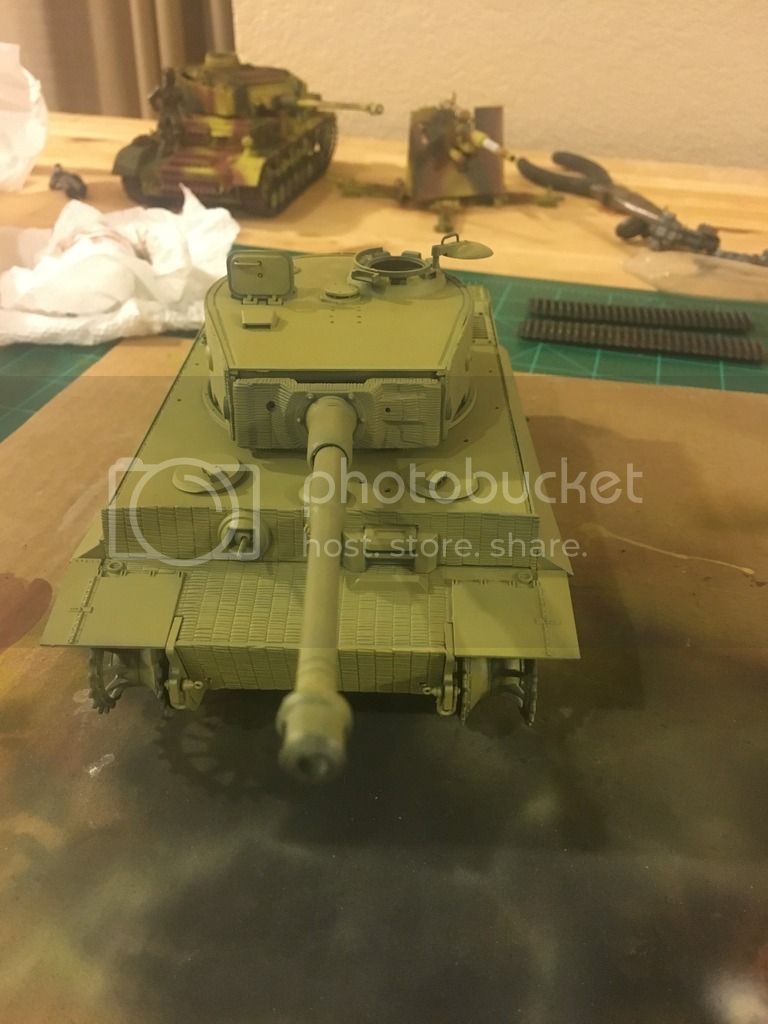
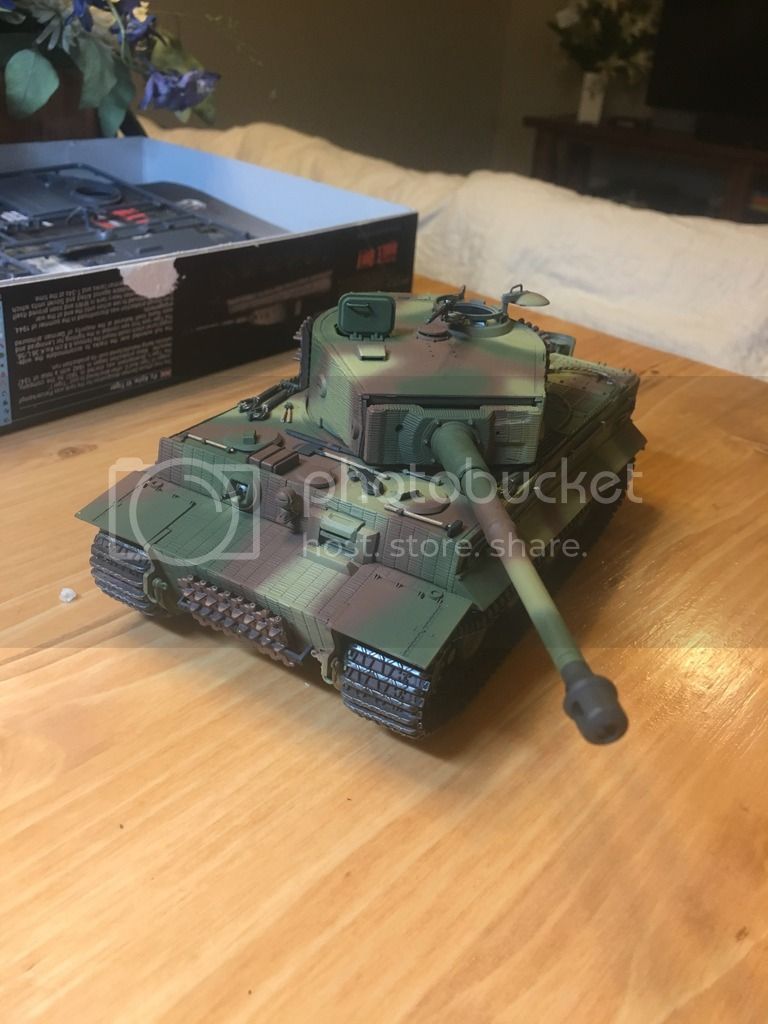
On a recent hobby lobby trip, I noticed the new Italeri World of Tanks line of models were on sale and decided to try out their Tiger kit. Below are the some pictures from the build beginning with my first coat of German yellow.

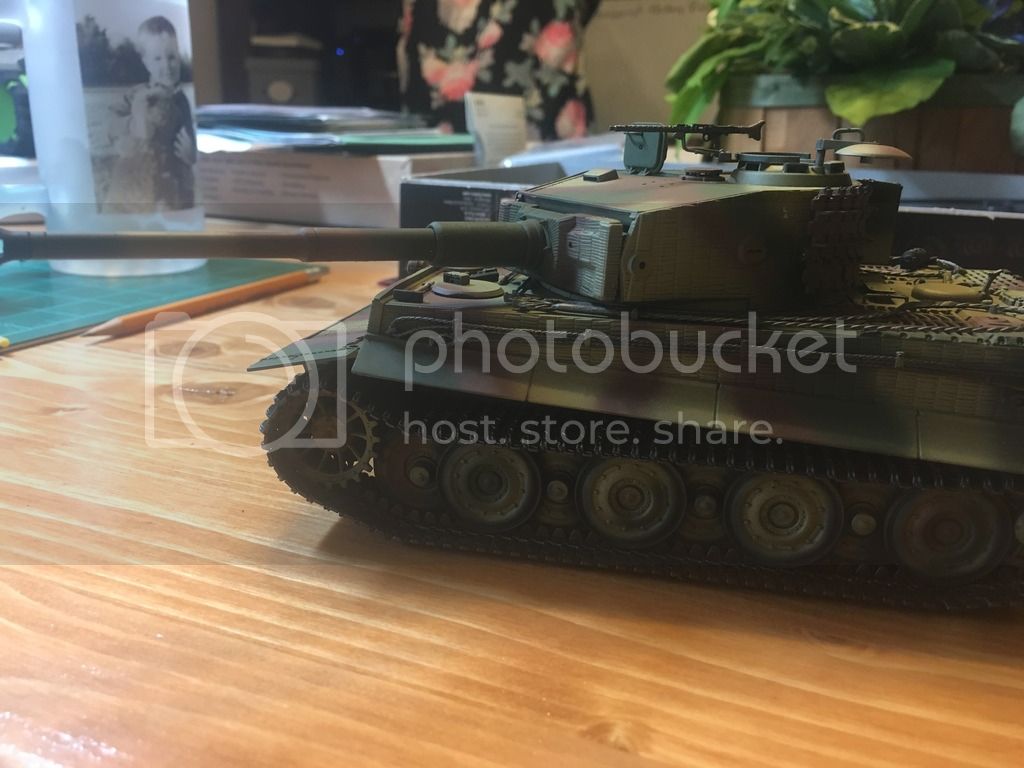
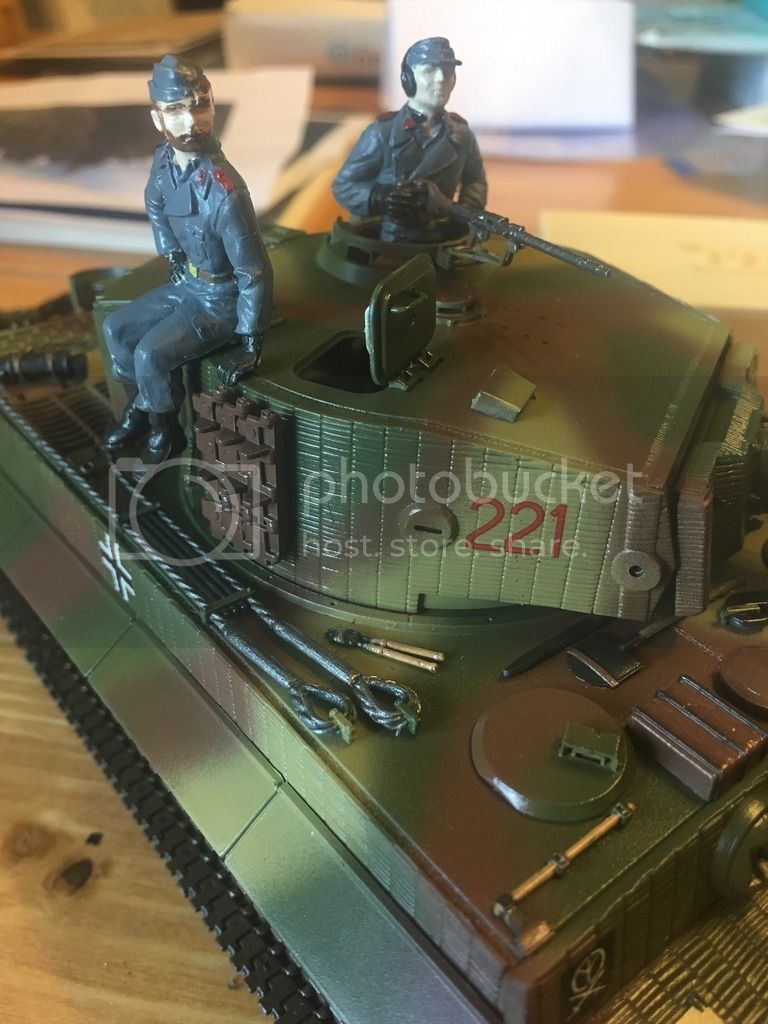
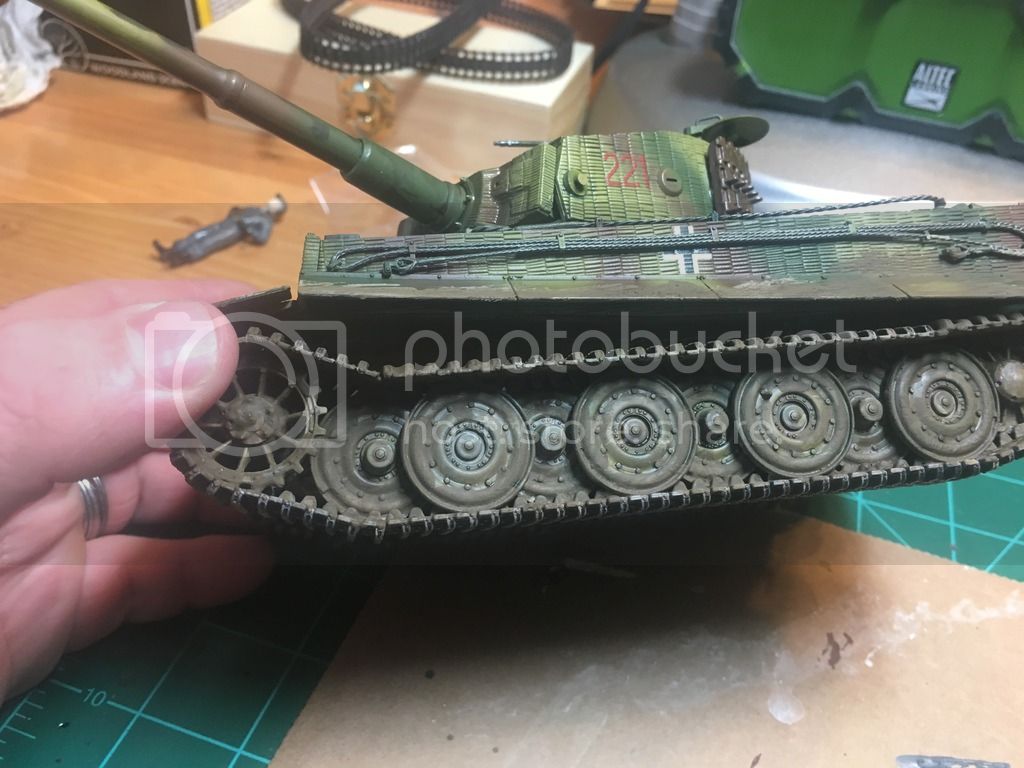
Some quick thoughts for anyone looking to build this kit in the future. The kit is very nicely made and the pieces fit together very well. It has the option to go with Zimmerit coated hull, which I thought looked better and decided to go with, but the pieces are different from the non-zimmerit pieces so a bit of reference is required if you decide go that route as its not covered in the instructions. Also this kit doesn't come with a crew or historic Decal options so if you want a model to be historically marked you'll need to augment with separate decals.

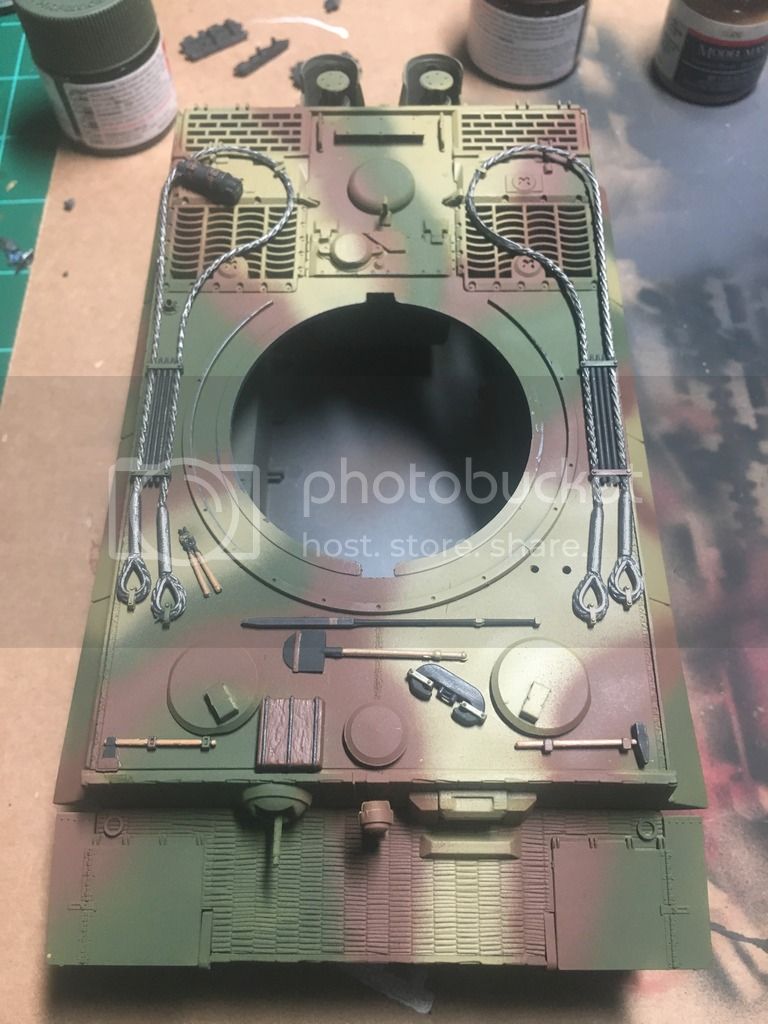
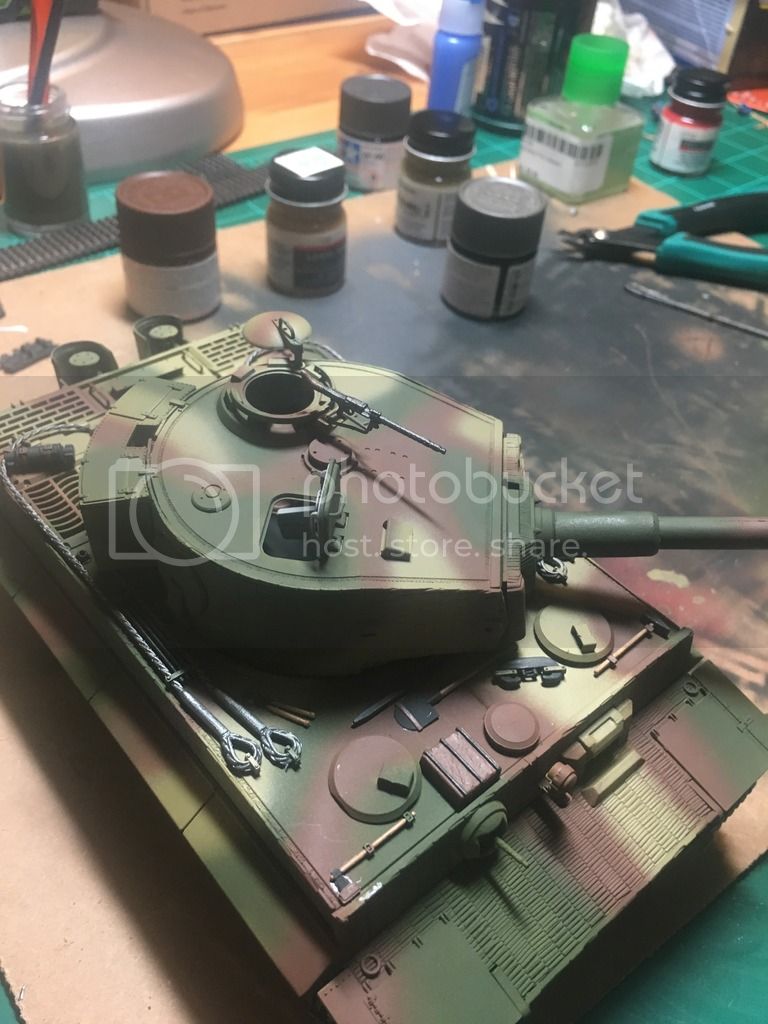
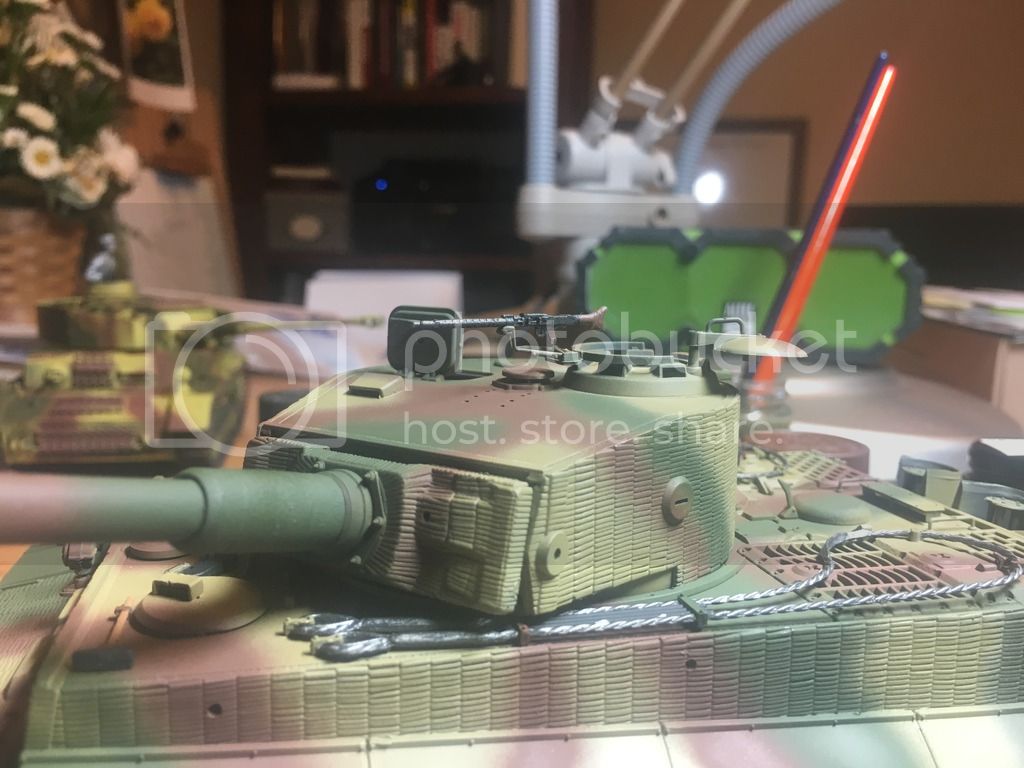
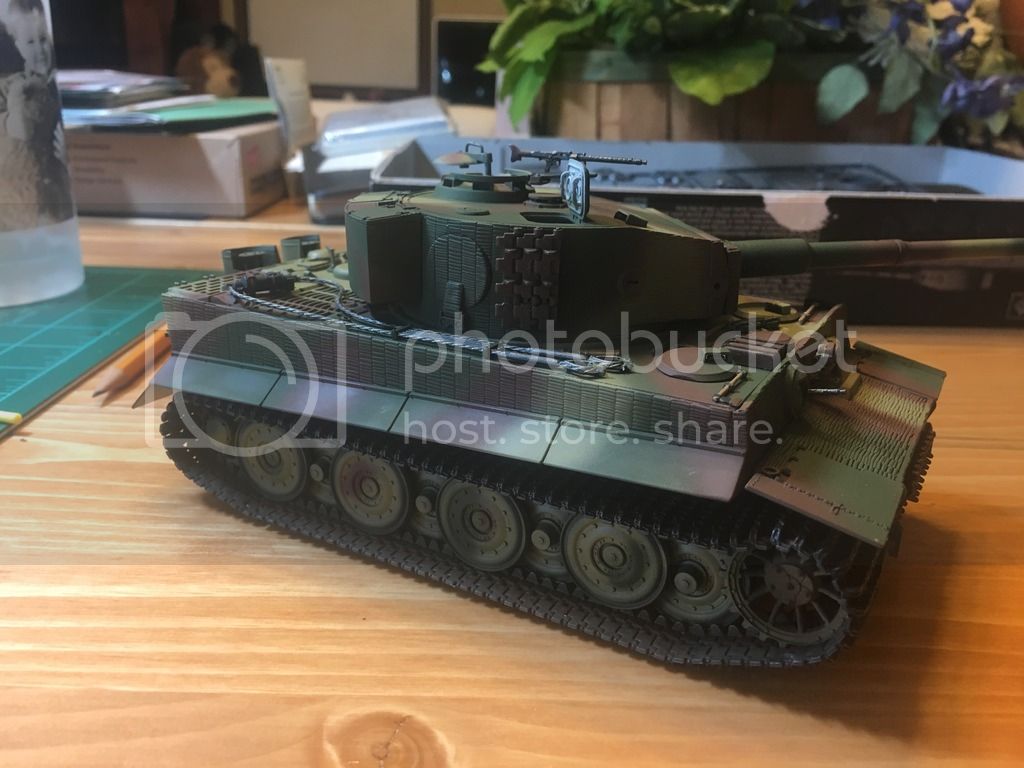
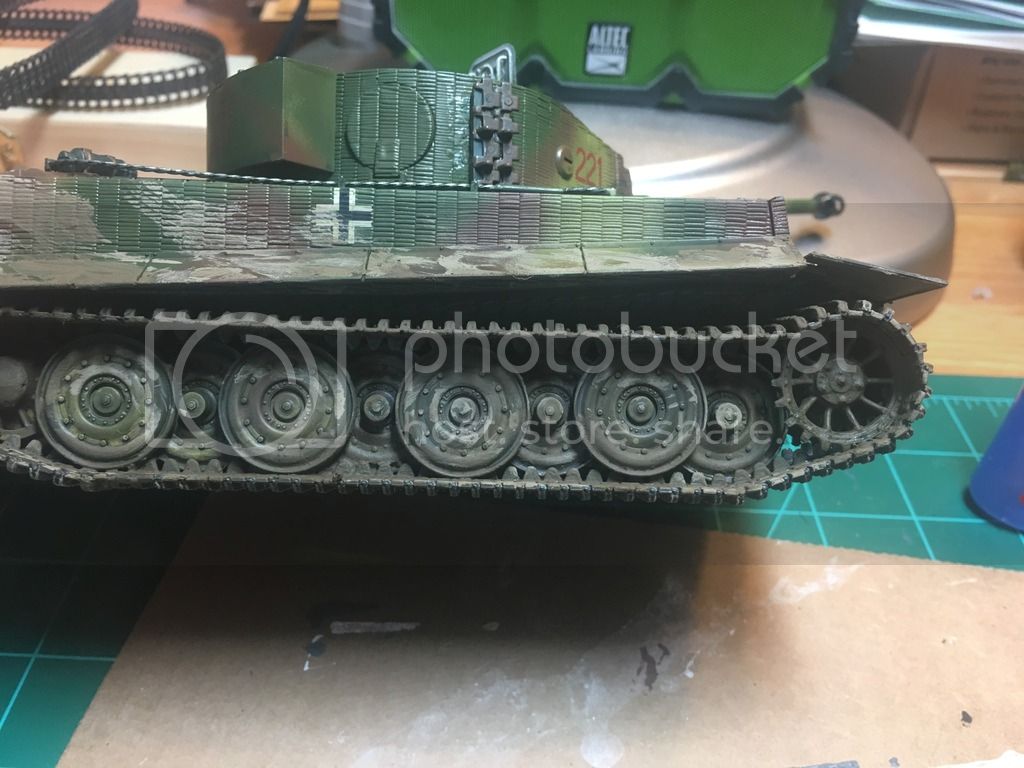
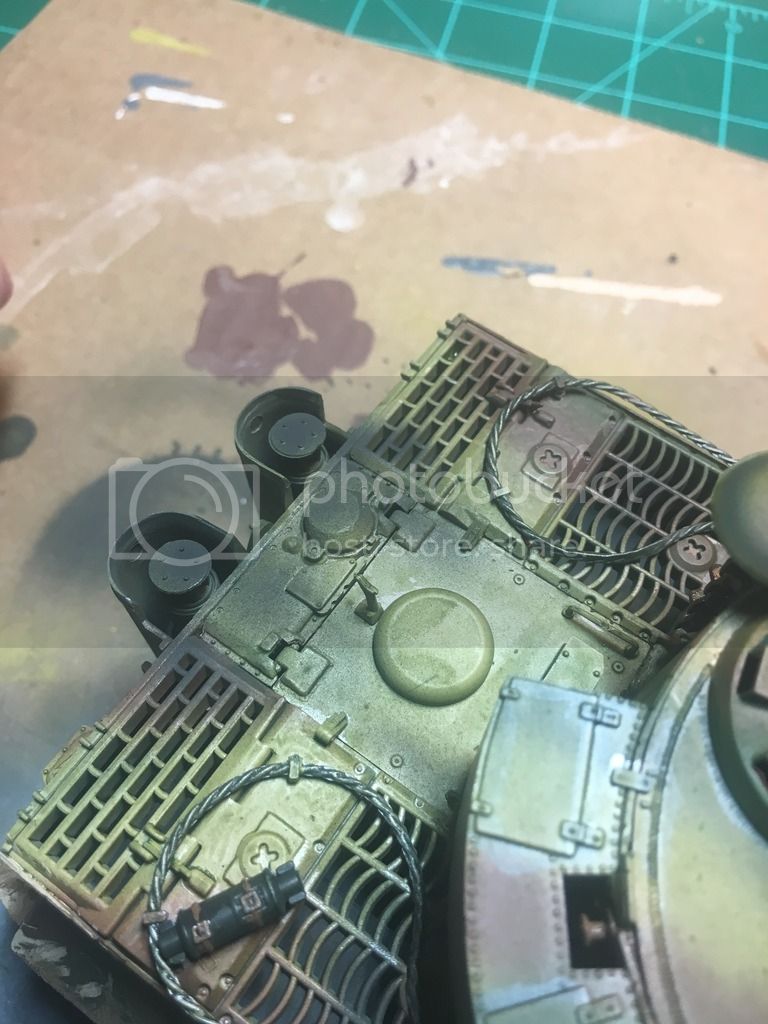
For painting, there is very little by way of instructions for painting, they provide in game photos as references but I found them pretty much useless. Instead of following their pictures I decided to go with a German three tone camo pattern using German Yellow as the base color. I painted the vehicle first and painted the equipment separate taking care to paint the attaching brackets to match the paint on the vehicle at that location, then attached with super glue. Finally I attached the tracks which I also painted separately (I did this last because I was dreading trying to fit the tracks but it actually turned out to be way easier then I anticipated).

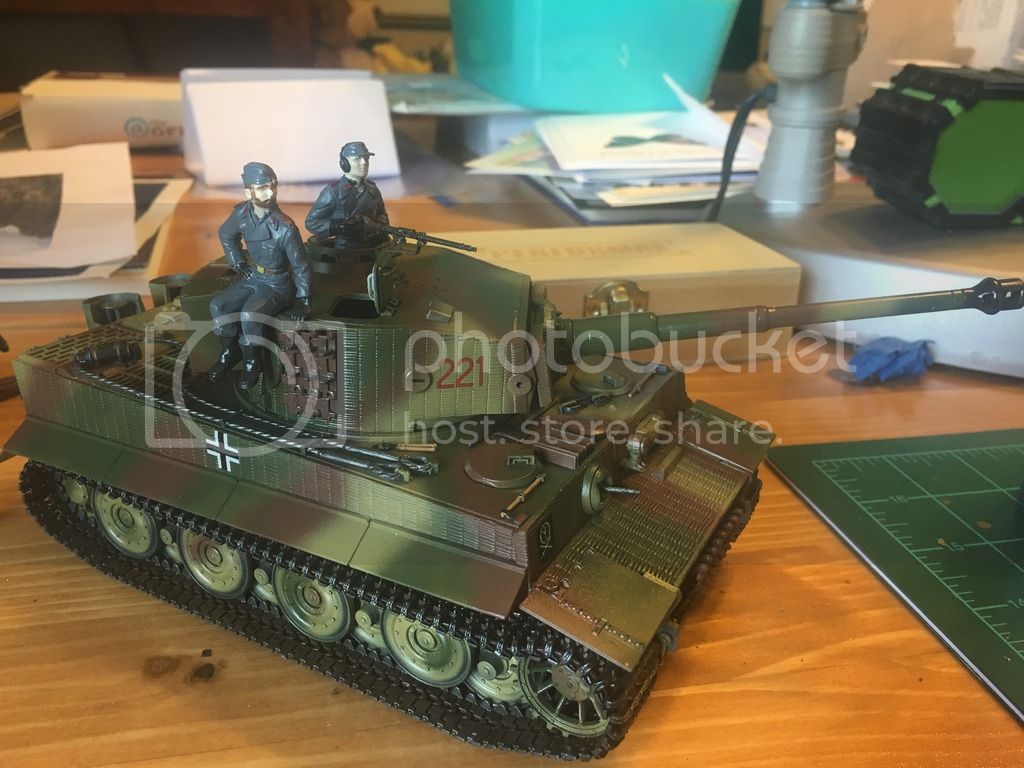
Once the painting was done I decided against using the game decals provided with the kit because I wanted a more realistic look. Instead of ordering a decal set or trying again to make them at home, I stole some unused decals from a Panzer IV kit I had built previously. On that note, I know the numbering is not historical to an actual Tiger Company, I choose the 35th Panzer Reg symbol because that’s the one I had and I thought I looked good. At some point I may change out the markings for actual historical ones but for now it seems to work. On the placement of the regimental symbol, I couldn’t find a picture of where this would have been on an actual Tiger, so I placed one on the front left and rear left upper hand corner of the vehicle. In most of the pictures I’ve seen, this spot was actually covered with additional track welded in place as extra armor.

Finally, the crew members were also stolen from the panzer IV kit, I’m not sure I’m happy with them just yet. More research is required for their uniforms. Finally, I painted the beard of the dude because he clearly needed a beard.

Hope you like the pictures, please let me know if you spot something off or have ideas for how I can make it better. Next step is weathering.

-Joe


Byrden
Visit this Community
Wien, Austria
Joined: July 12, 2005
KitMaker: 2,233 posts
Armorama: 2,221 posts
Posted: Tuesday, July 19, 2016 - 10:24 PM UTC

Quoted Text


please let me know if you spot something off


Okaaaaay....

Spare tracks are upside down.
Engine hatch is back to front.
Loader's periscope is back to front.
Lifting points on the turret front corners are missing.

Were the instructions to blame?

David
Blackjack40
Visit this Community
Kansas, United States
Joined: February 17, 2016
KitMaker: 18 posts
Armorama: 18 posts
Posted: Tuesday, July 19, 2016 - 11:05 PM UTC

[/quote]

Spare tracks are upside down.
Engine hatch is back to front.
Loader's periscope is back to front.
Lifting points on the turret front corners are missing.

Were the instructions to blame?
[/quote]

I noticed the engine hatch was back to front about half way through painting it... it has been fixed and re-painted.

The spare tracks were actually not covered in the instructions and the link racks only came with one half of the rack in a set of four so I looked up how many were typically on each side and placed them.

The loaders periscope... I just screwed that one up and didn't notice.

Lifting points... I have no idea what that is. Referencing the instructions there don't seem to be any mentioned.
johhar
Visit this Community
Alabama, United States
Joined: September 22, 2008
KitMaker: 476 posts
Armorama: 447 posts
Posted: Tuesday, July 19, 2016 - 11:22 PM UTC
The kit is what it is, so there will be simplifications like missing lifting points and no attempt to represent the co-axial MG. That said, those circles on the tracks, as well as any like them that are all numerous in this kit, should be removed.
Byrden
Visit this Community
Wien, Austria
Joined: July 12, 2005
KitMaker: 2,233 posts
Armorama: 2,221 posts
Posted: Wednesday, July 20, 2016 - 12:28 AM UTC
These are the lifting points. If the instructions don't mention them, I'll bet the parts are in the box somewhere;


Track links on the turret were normally 5 on the left, 2 on the right. But the thing I'm telling you is that they're upside down. The two teeth should be closer to the bottom. Is that how the kit provides them?

David
Blackjack40
Visit this Community
Kansas, United States
Joined: February 17, 2016
KitMaker: 18 posts
Armorama: 18 posts
Posted: Wednesday, July 20, 2016 - 12:42 AM UTC

Quoted Text


Track links on the turret were normally 5 on the left, 2 on the right. But the thing I'm telling you is that they're upside down. The two teeth should be closer to the bottom. Is that how the kit provides them?


The kit provided extra track link you could assemble for the turret and front portion, the only thing covered in the assembly instructions was the hanging track in the front.

It should be a pretty easy fix to flip the track, and I have some extra track pieces I can use to make it to 2 and 5, instead of 3 and 5.

As to the lifting points, I got what your talking about now, I'll look through the box and instructions again, that seems like a major oversight if they weren't included. Thou I probably just missed it.
brekinapez
Visit this Community
Georgia, United States
Joined: July 26, 2013
KitMaker: 2,272 posts
Armorama: 1,860 posts
Posted: Wednesday, July 20, 2016 - 02:20 AM UTC
Don't forget the dull coat when you're done.
Blackjack40
Visit this Community
Kansas, United States
Joined: February 17, 2016
KitMaker: 18 posts
Armorama: 18 posts
Posted: Wednesday, July 20, 2016 - 07:49 AM UTC
I looked in the Box and indeed I had missed lifting points. It's a very small pin that fits the hole on the corner of turret. I fixed the lifting points, the reversed periscope and the spare track and decided to drive on with weathering. I did not fix the circles on the tracks... I agree they detract from the look but, a step to far on this one.

This is the first time I've tried weathering, I used the Vallejo weather set for green vehicles. I think it turned out decent, thou probably a bit to much. For future attempts I think I'll try some different washes instead to give a worn but not filthy look. Also the kit used a green wash for the over all vehicle, I don't really like how it gave a greenish tent to the whole thing. If you know a better method for weathering I would love to learn and apply to my next model.

Thanks for the notes, I hope you guys liked it. A lot of first on this one for me, first tiger, first time using decal set, and first time weathering. I had a blast building it, learned a ton and plan to build another Tiger. Below are the pictures of the finial thing.


-Joe


Bravo1102
Visit this Community
New Jersey, United States
Joined: December 08, 2003
KitMaker: 2,864 posts
Armorama: 2,497 posts
Posted: Wednesday, July 20, 2016 - 09:07 AM UTC
We all start someplace. For a first effort well done. Good to see you're not afraid to try new stuff.

I always thought that sitting guy needed a beard too.
rover5700
Visit this Community
Alaska, United States
Joined: February 22, 2015
KitMaker: 47 posts
Armorama: 47 posts
Posted: Wednesday, July 20, 2016 - 11:45 AM UTC
I like your paint job.
srmalloy
Visit this Community
United States
Joined: April 15, 2012
KitMaker: 336 posts
Armorama: 298 posts
Posted: Friday, July 22, 2016 - 07:03 AM UTC
There is a picture over on the WoT reddit that is supposed to be of the 'WoT official model' of the Tiger, and it looks like a completely different kit from the one image linked in the post. No zimmerit, and as built it's a mess -- the original Feifel air cleaners, late commander's cupola, loader's periscope, steel wheels but original sprocket wheels, no shovel mounts on the glacis, and no Zimmerit. With only the one image, you can't tell what other anachronisms might be present, like the original bolted pistol port. Without the Feifel air cleaners and with the correct sprockets, it could be from February '44 or later, except for the lack of Zimmerit; Tiger production ceased before the use of Zimmerit was formally discontinued in September '44, but I don't know how consistent its application was prior to that.
Blackjack40
Visit this Community
Kansas, United States
Joined: February 17, 2016
KitMaker: 18 posts
Armorama: 18 posts
Posted: Friday, July 22, 2016 - 07:50 AM UTC
So I know mine had a few hiccups but I hope it's not a total mess like the one you're talking about on redit. The kit had different cupola options and both zimmerit and non-zimmerat options as well as the orginal air filters.

On that note thou, I would like to build another one, is there a kit you recommend? I find the battle Kursk particularly interesting, and would like to something accurate to that period.

-Joe
Bravo1102
Visit this Community
New Jersey, United States
Joined: December 08, 2003
KitMaker: 2,864 posts
Armorama: 2,497 posts
Posted: Friday, July 22, 2016 - 08:33 AM UTC
If you want a production specific model Italeri has the same plastic boxed as Afrika, mid and late production with the differences noted in the instructions. Something they decided to overlook in the game tie-in model probably because it's a different audience.
If you want an April 1944 production for Normandy you'd get the late and so on.
Now to answer the question.

Dragon makes various early Tigers as well as at least one with specific Kursk markings. Rye Field's early Tiger also has some Kursk era markings but they may be releasing a more Kursk oriented kit.
They are the best Tiger kits. None of the Italeri boxing are right for Kursk.
Zvezda kit is nice, Kursk specific but has some assembly and molding issues.
Tamiya's early Tiger is an easy to assemble basic kit but not as well detailed or as accurate as the Dragon or Rye Field though it is certainly more modeler friendly.
I personally like the Academy and Zvezda kits, but that's my problem that I would not want to inflict on you.
Charleygnarlyp290
Visit this Community
California, United States
Joined: May 07, 2013
KitMaker: 105 posts
Armorama: 85 posts
Posted: Thursday, July 28, 2016 - 04:11 AM UTC
Those figures look like the same figures that came with some of the old Monogram Armor Series kits.
Blackjack40
Visit this Community
Kansas, United States
Joined: February 17, 2016
KitMaker: 18 posts
Armorama: 18 posts
Posted: Thursday, July 28, 2016 - 07:45 PM UTC
Good eye, that's the kit I stole them from. In Some of the initial pictures you can see the tank in the background. I built it years ago, and it didn't turn out great(that was before I was actually trying to research and learn just learning through error), I've been using it as a practice tank to try out different painting and weathering. Before I did the tiger 1, I tried the three tone paint on it and used the completely wrong colors... I ended up repainting the panzer IV to try a winter wash on it using the hair spray and tooth brush technique.

-Joe
 _GOTOTOP