Been awhile since I updated here so thought I would share a couple of more posts before I get to far ahead.
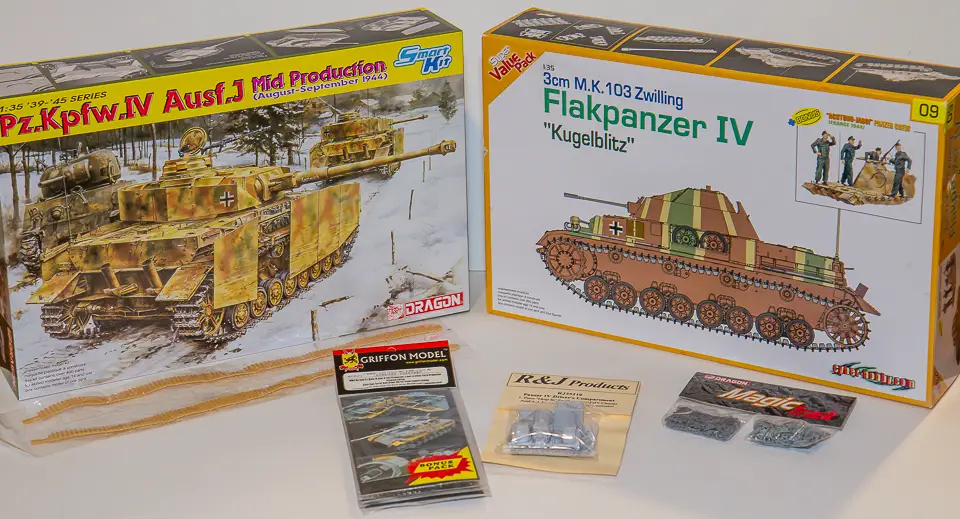
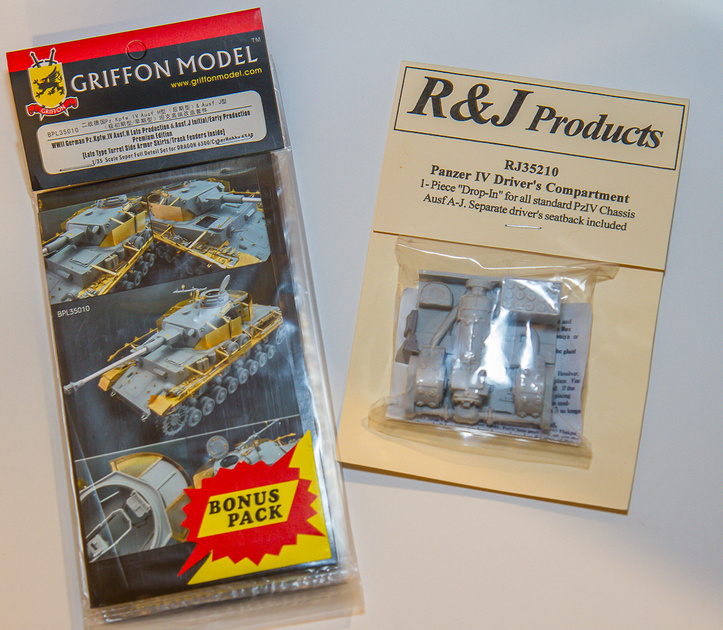
The Griffon PE set is great! Very detailed and really teaches you to plan way ahead. But I have to say it probably takes you almost five times as long to use PE as just straight building. But in the end it has detail that can't be matched.
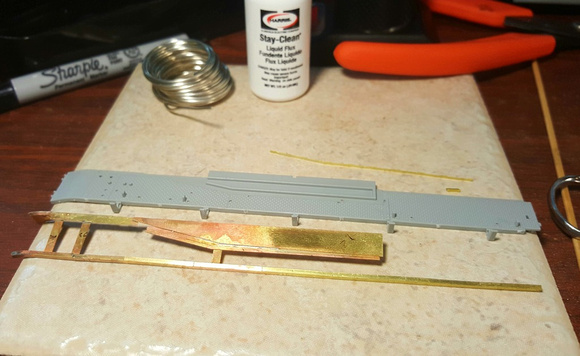
I have finished building each fender almost exclusively using a mini torch and High and Low Temp solder. I did use a soldering iron in a couple of tight places where it was nearly impossible to shield earlier joints. But I definitely prefer using the mini torch. I must say shielding is so critical when joining PE especially with the torch method. A friend in my AMPS club taught me the old wet tissue method which saved me from pulling my hair out. Other methods used including the metal clamps themselves (of which you will need plenty of variety) or any scrap of metal you can find as heat shields. Basically, once I mastered blocking/shielding, my PE build became much easier.
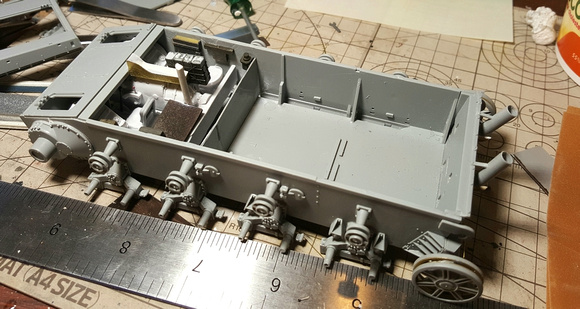
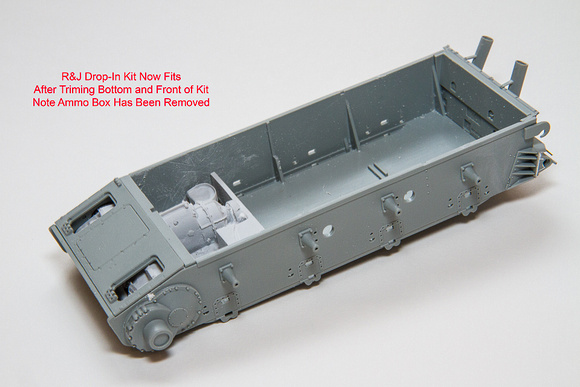
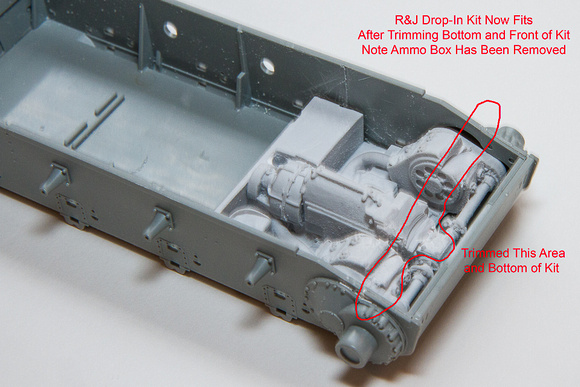
Before mounting the fenders I wanted to do most of the interior work in the hull. This included attaching the R&J Resin Drop in set and doing a bit of scratch building using pieces from the parts bin, old PE, and even a few old decals. I could not find any interior shots of the Kugelblitz, therefore I looked at several Panzer IV interiors as well as a good example of a Flakpanzer IV "Wirbelwind". This should give you a rough idea of what it was probably like in the lower hull of the Kugleblitz but also leaves some room for interpretation (and imagination

). Because this will only be viewed from the driver and radio operator open hatches, I didn't focus on making this super accurate. If that was more of a priority then I would have purchased a more complete interior kit from other vendors; especially since there are a lot of missing details with this R&J kit. Most notably missing include the radios, driver gauges/controls to the right of the driver, and misc. equipment mounted on the sides of the hull. Thus, I got a bit more creative with those items. Below is a series of pics of the interior before it was primed and finally painted and weathered.


img]
[img]
img]
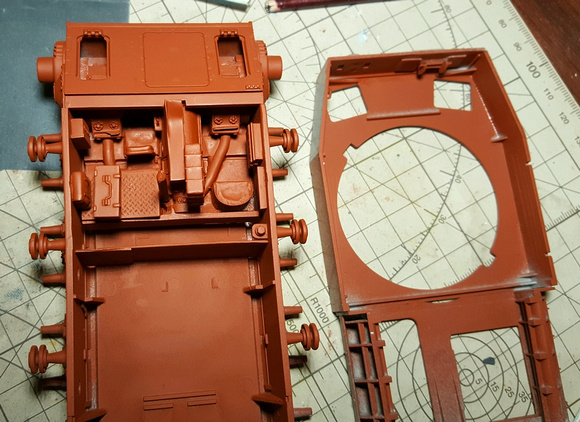
I decided to use the hairspray technique to show wear and tear from the off white painted interior down to the primer. Since not to much would be visible this was really just an excuse to practice the technique some more. I did this by priming the interior with a rust colored primer from an automotive store.
[img]
" BORDER="0">
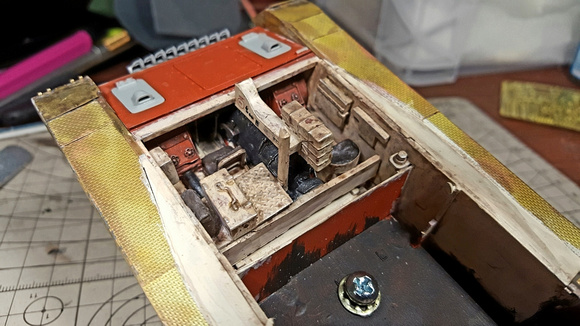
After the primer dried I simply hand painted the chipping fluid from AK and later mixed Vallejo acrylics to create the off-white color for the most of the hull/interior bits and a dark blue (almost black) for the transmission. After this dried I added water to areas I wanted to show wear and used a stiff paint brush and toothpick for some chipping. I followed this up with pin washes to represent dirt and grime and finally some dry brushing to bring out some raised detail and metallic wear. I used an acrlyic paint for the wash, which I likely will not use again. I feel oils or enamels are much more realistic. But this was a good place to try something new since little will be visible. Again, this was just a quick and dirty attempt to have something visible thru the hatches. I did not spend a lot of quality time on the painting that I plan to do on the exterior. For example, I hardly ever hand paint anything but this saved me a ton of time by avoiding getting the airbrush out. The below pics were taken before I sealed everything up with Tamiya Flat Clear.
" BORDER="0">
The Panzer IV J kit also came with more details for the upper hull then the kugelblitz kit; including interior parts for the MG and the driver vision block. These had to be mounted to the Kugelblitz interior front upper hull, requiring some scratch building, filling, etc.
I decided the main thing was to get the fenders fully built using solder and then mounted to the lower frame. I would then work later on adding details such as PE tool holders and other misc. PE. using CA glue. However, to mount the fenders to the lower hull I initially used CA Glue to temporary hold it and then applied a generous helping of two part epoxy glue (JB Weld) and let that set for 24 hours. I must say, JB Weld is pretty strong stuff (once it sets) and I feel confident that they are not going anywhere.
I probably could have also mounted the PE fenders to the upper hull first and then attach everything as one piece to the lower hull. However, I felt it was easier to line everything up by attaching them to the lower hull first, then lining the upper hull to them.
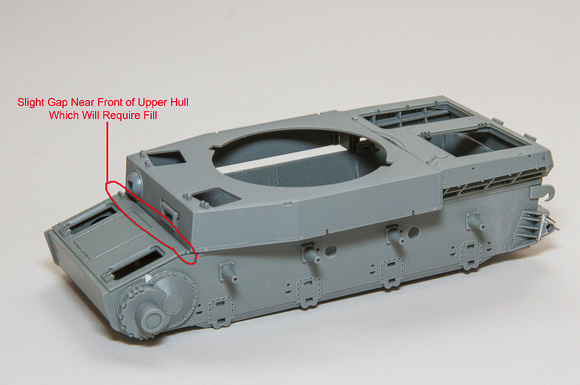
Next up is mounting the combined kit upper hulls to the Panzer IV J lower hull and various filling and sanding to make them seamless. This will be the true test of how successful this conversion process will be.


 " BORDER="0">
 " BORDER="0">
 " BORDER="0">
 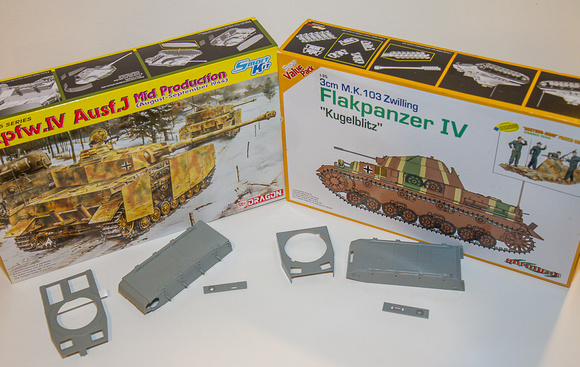 " BORDER="0">
 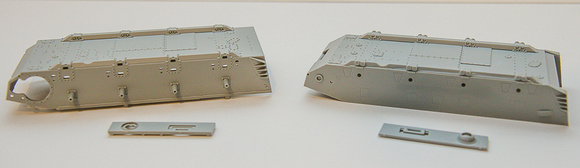 " BORDER="0">
 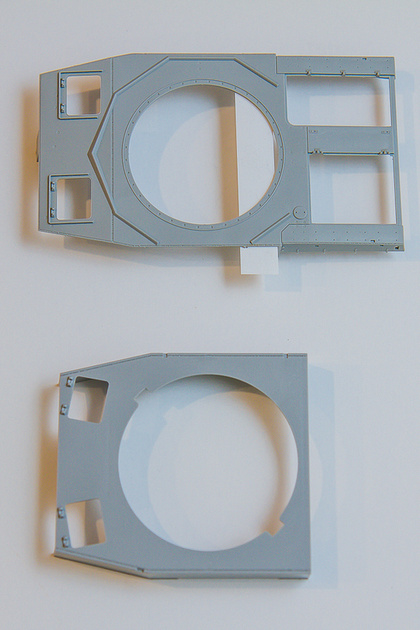 " BORDER="0">
 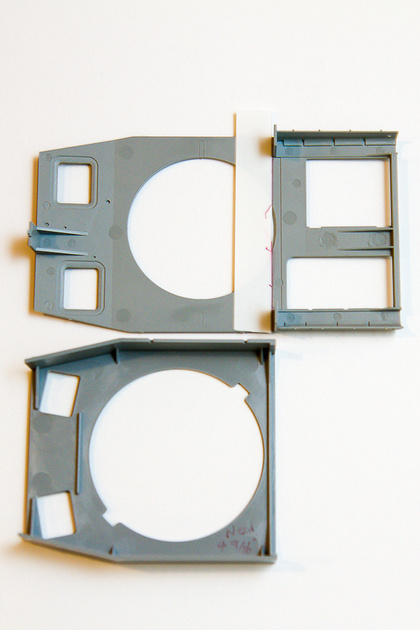 " BORDER="0">


 " BORDER="0">
 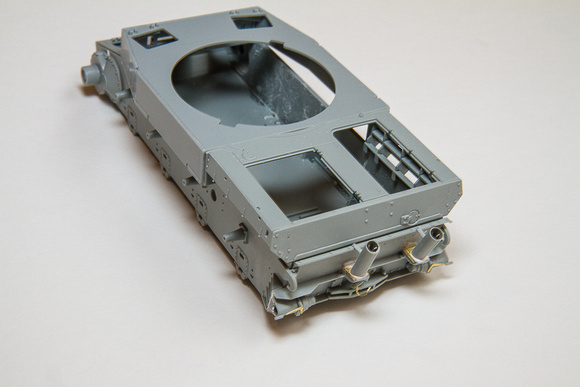 " BORDER="0">
 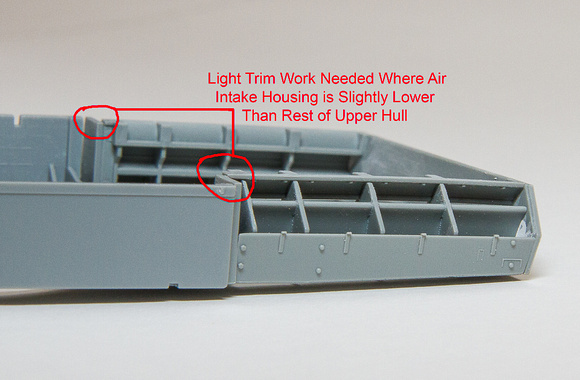 " BORDER="0">
 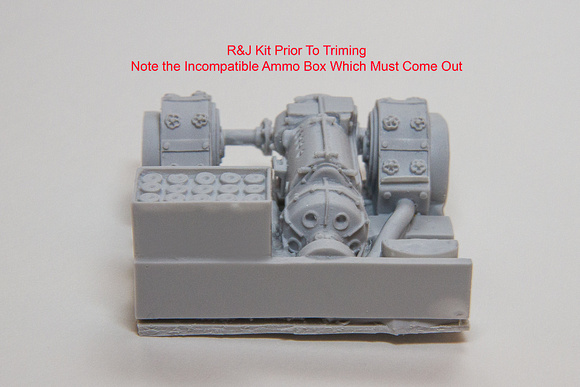 " BORDER="0">
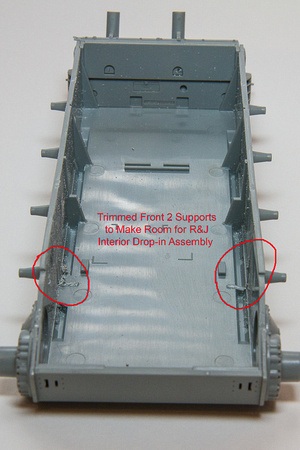 " BORDER="0">
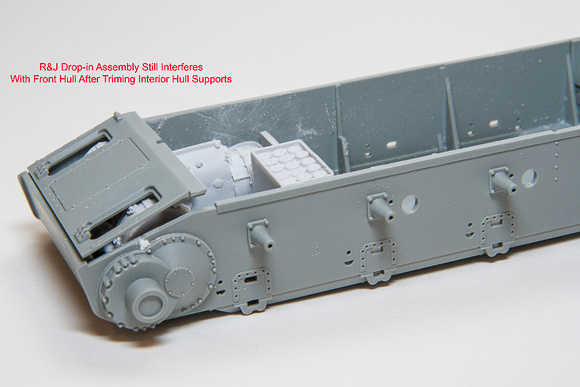
 " BORDER="0">


 " BORDER="0">
 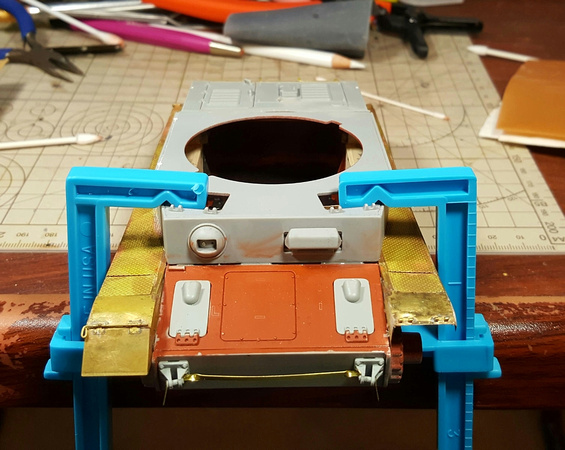 " BORDER="0">
 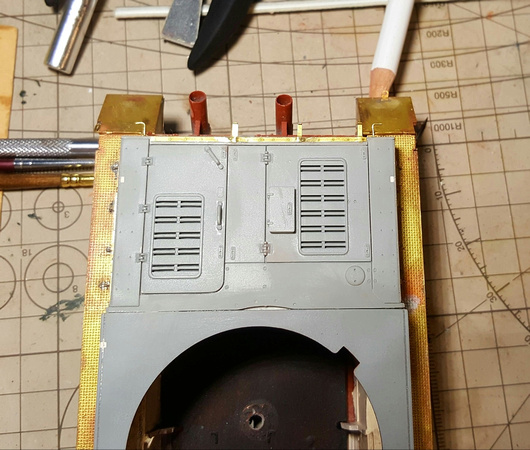 " BORDER="0">
 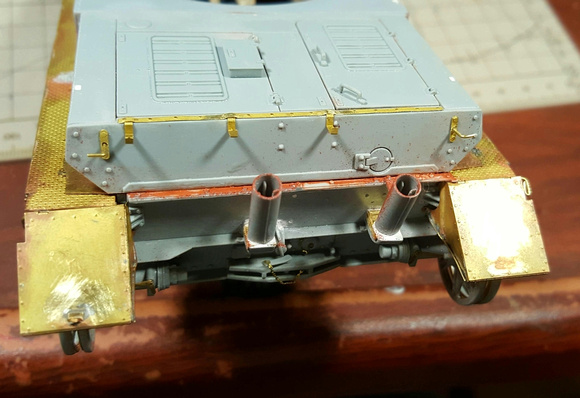 " BORDER="0">
 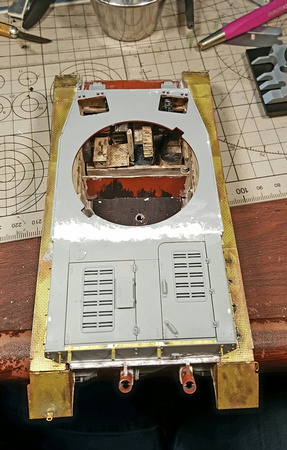 " BORDER="0">
 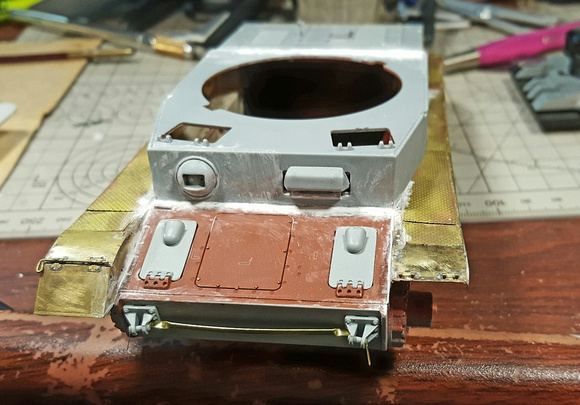 " BORDER="0">
 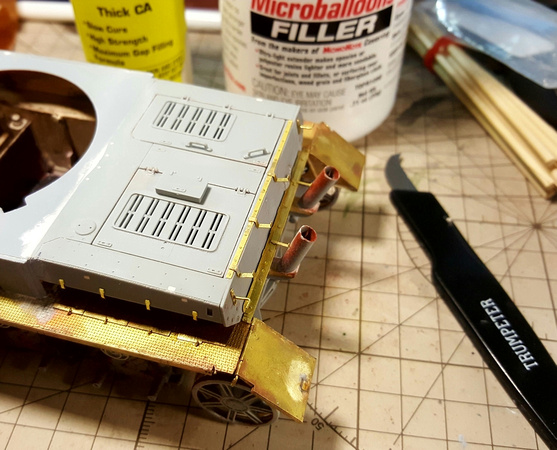 " BORDER="0">
 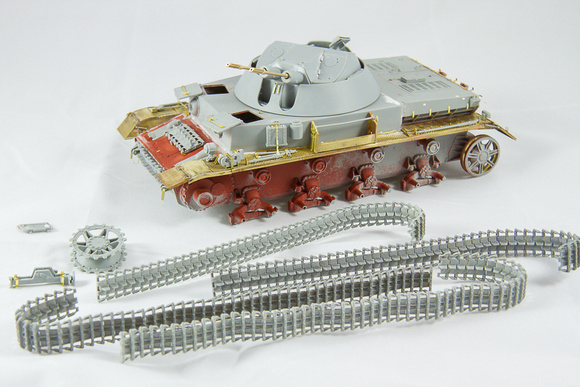 " BORDER="0">
 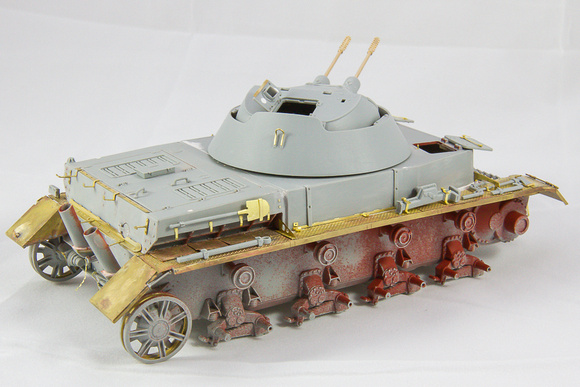 " BORDER="0">
 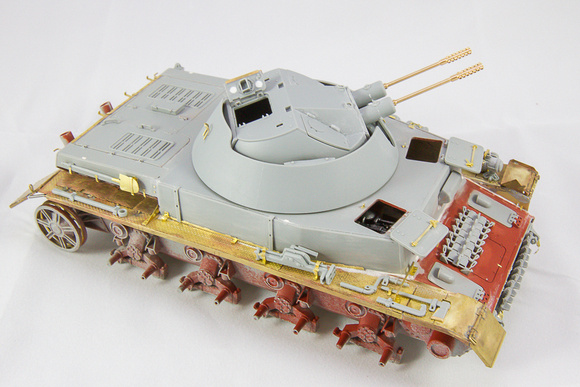 " BORDER="0">
 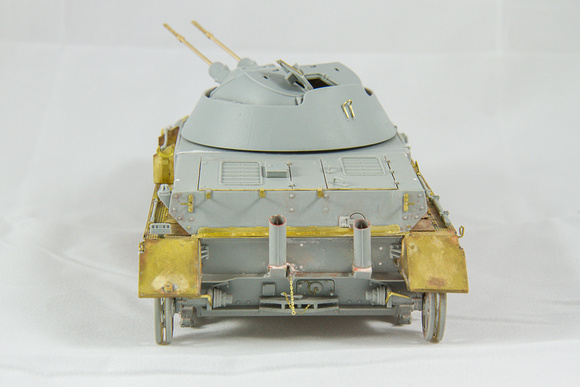 " BORDER="0">
 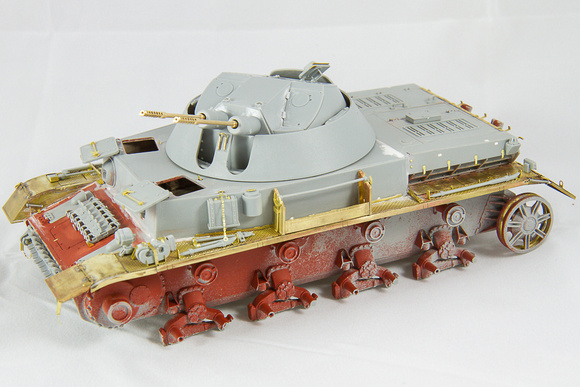 " BORDER="0">


