Day #5
I finished installing the remainder of the PE parts.
Rear Step Ladder:
Tow Cable Stowage Brackets:
BTW: NO tow cable supplied within the kit.
Filler Plates on the Right Front Corner of the Fighting Compartment:
While the Gator Grip Glue dried I went ahead and started on a job that might turn people away from buying this kit.
The Tracks:
The links are very small but if you're able to snip the injection gates off real close sanding the nibs is very easy and goes quickly.
10 of 107 links per side (as per the instructions)
After taking the above photo I put together both road wheel bottom runs in about two hours. That's removing the links from the sprues,cleaning up and gluing the links together.
I'll have to start some painting before continuing.
I take the weekends off so i'll see you Monday
Tony lee
Hosted by Darren Baker
Panda's Marder I
PvtMutt
Missouri, United States
Joined: July 01, 2006
KitMaker: 614 posts
Armorama: 601 posts
Joined: July 01, 2006
KitMaker: 614 posts
Armorama: 601 posts
Posted: Friday, September 09, 2016 - 06:49 AM UTC
PvtMutt
Missouri, United States
Joined: July 01, 2006
KitMaker: 614 posts
Armorama: 601 posts
Joined: July 01, 2006
KitMaker: 614 posts
Armorama: 601 posts
Posted: Monday, September 12, 2016 - 06:47 AM UTC
Day #6
I had to do some base color painting today so progress could continue and while the paint was drying I built the top run of the tracks using the provided jig.
After the paint cured for something like eight hours the road wheel assemblies were install.
I'll start building the track end sections next.
Pretty good day was had here in the Ozarks
Tony lee
Posted: Monday, September 12, 2016 - 07:12 AM UTC
Nice to know a jig is included. Would those track links be as big as a Pz I's?
PvtMutt
Missouri, United States
Joined: July 01, 2006
KitMaker: 614 posts
Armorama: 601 posts
Joined: July 01, 2006
KitMaker: 614 posts
Armorama: 601 posts
Posted: Monday, September 12, 2016 - 08:13 AM UTC
About the same size Tat.
You've got to be really careful NOT to glue the tracks to the jig,very easy to do btw.
If this wasn't a build review I would have used a set of Friul metal tracks i've got in the stash.
Thanks for following alone my friend
Tony lee
You've got to be really careful NOT to glue the tracks to the jig,very easy to do btw.
If this wasn't a build review I would have used a set of Friul metal tracks i've got in the stash.
Thanks for following alone my friend
Tony lee
PvtMutt
Missouri, United States
Joined: July 01, 2006
KitMaker: 614 posts
Armorama: 601 posts
Joined: July 01, 2006
KitMaker: 614 posts
Armorama: 601 posts
Posted: Tuesday, September 13, 2016 - 06:01 AM UTC
Day #7
Tracks for one side built:
The top section is just laying there so I can remove for painting.
"Houston We Have A Problem"
I closed up one end on the other side but came up short five links when building the other end section.
I never damaged any links and found the two links I dropped on the floor so what happened????????
The instructions call for 107 links per side so I counted the number of links on the sprue tree and it turns out to be 108.
The only thing I can figure is I built the tracks to tight making it require more links than provided or the instructions are wrong and more links are required to Get-R-Done.
Never Fear
Remember I said I had a set of Fruil tracks in the stash.
OH WELL my dad told me "Life is never easy"
Later Folks
Tony lee
panzerbob01
Louisiana, United States
Joined: March 06, 2010
KitMaker: 3,128 posts
Armorama: 2,959 posts
Joined: March 06, 2010
KitMaker: 3,128 posts
Armorama: 2,959 posts
Posted: Thursday, September 15, 2016 - 03:23 AM UTC
So, Tony... Are you telling us that this new Panda kit is short out-of-the-box several track - links - that the kit simply doesn't provide sufficient links to complete both runs?
That would be nothing short of a real bummer! Even a deal-breaker for buying this kit!
Darn! And here I was about to order one up!
Bob
PS: It all looks so very good as you have done it to this point, too!
That would be nothing short of a real bummer! Even a deal-breaker for buying this kit!
Darn! And here I was about to order one up!
Bob
PS: It all looks so very good as you have done it to this point, too!
PvtMutt
Missouri, United States
Joined: July 01, 2006
KitMaker: 614 posts
Armorama: 601 posts
Joined: July 01, 2006
KitMaker: 614 posts
Armorama: 601 posts
Posted: Thursday, September 15, 2016 - 03:53 AM UTC
Day #8
Are you ready for some comparison shots at this stage of the project?
Front:
You can see that the Panda has more detail added than the RPM model. The muffler/silencer cover:PE on the Panda and thick plastic on the RPM. Panda has tools. Armor shield on the Panda is thinner and has crisper detail.
Rear:
The fighting compartment walls are separate panels on the RPM while the Panda is a one piece shell. The grab handle holes on the RPM are huge so I filled those and will re-drill them. Note the lack of detail on the RPM lower hull.
Suspension:
RPM once again the detail is lacking and even missing the spring shackles.
Panda:
Side:
Panda
RPM
interior:
I still need to paint the panda shell storage rack before installing.
Panda radio needs painting yet and note the missing lower hull rivet detail on the RPM.
Did you notice the thinner armor plate on the Panda?
Top shot of the front:
If you have one of the RPM Marder I's or one of the many other brand names this kit has been sold under don't trash can it because you can always build it as a burned out wreck.
Looks like rain for a couple days so I may not get to paint.
See Ya when the shop opens back up.
Tony lee
Posted: Thursday, September 15, 2016 - 04:04 AM UTC
Re -- tracks, that's a bit worrying. That made me look for a pic of the parts:
I count 112 links, and as I understand there are two sprues of this (Tony can confirm) that should make 224 links. Hopefully it is enough to make complete runs for both sides if indeed the number called out is in error.
Posted: Thursday, September 15, 2016 - 04:14 AM UTC
Quoted Text
Day #8
Are you ready for some comparison shots at this stage of the project?
Front:
You can see that the Panda has more detail added than the RPM model. The muffler/silencer cover:PE on the Panda and thick plastic on the RPM. Panda has tools. Armor shield on the Panda is thinner and has crisper detail.
Rear:
The fighting compartment walls are separate panels on the RPM while the Panda is a one piece shell. The grab handle holes on the RPM are huge so I filled those and will re-drill them. Note the lack of detail on the RPM lower hull.
Suspension:
RPM once again the detail is lacking and even missing the spring shackles.
Panda:
Side:
Panda
RPM
interior:
I still need to paint the panda shell storage rack before installing.
Panda radio needs painting yet and note the missing lower hull rivet detail on the RPM.
Did you notice the thinner armor plate on the Panda?
Top shot of the front:
If you have one of the RPM Marder I's or one of the many other brand names this kit has been sold under don't trash can it because you can always build it as a burned out wreck.
Looks like rain for a couple days so I may not get to paint.
See Ya when the shop opens back up.
Tony lee
Nice to see these side-by-side pics Tony. Much appreciated. Guilty as charged -- I have one of those RPM kits If time permits, I may as well build it for the Dog Campaign!
PvtMutt
Missouri, United States
Joined: July 01, 2006
KitMaker: 614 posts
Armorama: 601 posts
Joined: July 01, 2006
KitMaker: 614 posts
Armorama: 601 posts
Posted: Thursday, September 15, 2016 - 04:31 AM UTC
The sample kit I received only had eight on the short side of the tree Tat.
Bob W.
If you can open the box and check the track tree to see if there are 12 or 8 links on the shorter side.
If you don't have enough just give me a poke,i've got extras
Thanks guys
Tony lee
Bob W.
If you can open the box and check the track tree to see if there are 12 or 8 links on the shorter side.
If you don't have enough just give me a poke,i've got extras
Thanks guys
Tony lee
PvtMutt
Missouri, United States
Joined: July 01, 2006
KitMaker: 614 posts
Armorama: 601 posts
Joined: July 01, 2006
KitMaker: 614 posts
Armorama: 601 posts
Posted: Saturday, September 17, 2016 - 08:21 PM UTC
ColinEdm
Associate Editor
Alberta, Canada
Joined: October 15, 2013
KitMaker: 1,355 posts
Armorama: 1,229 posts
Joined: October 15, 2013
KitMaker: 1,355 posts
Armorama: 1,229 posts
Posted: Sunday, September 18, 2016 - 01:53 AM UTC
Very nice Tony, I have been following as I have a soft spot for the ugly duckling Marders and other Panzerjaegers. Odd that you were shorted on the tracks, that would be frustrating. Def a better choice than the RPM kit.
PvtMutt
Missouri, United States
Joined: July 01, 2006
KitMaker: 614 posts
Armorama: 601 posts
Joined: July 01, 2006
KitMaker: 614 posts
Armorama: 601 posts
Posted: Sunday, September 18, 2016 - 03:55 AM UTC
Colin until one comes along at a later date the Panda Model is sure nuff on top of the list to obtain.
I'm thinking I just assembled the tracks to tight because even if I got 108 links for each side I should have had enough but 112 would have been nicer.
Yeah i'm partial to SPGs myself,that's all I have ever built.
Thanks for following along
Tony lee
I'm thinking I just assembled the tracks to tight because even if I got 108 links for each side I should have had enough but 112 would have been nicer.
Yeah i'm partial to SPGs myself,that's all I have ever built.
Thanks for following along
Tony lee
PvtMutt
Missouri, United States
Joined: July 01, 2006
KitMaker: 614 posts
Armorama: 601 posts
Joined: July 01, 2006
KitMaker: 614 posts
Armorama: 601 posts
Posted: Friday, September 23, 2016 - 04:00 AM UTC
PvtMutt
Missouri, United States
Joined: July 01, 2006
KitMaker: 614 posts
Armorama: 601 posts
Joined: July 01, 2006
KitMaker: 614 posts
Armorama: 601 posts
Posted: Friday, October 07, 2016 - 12:49 AM UTC
Day #11
Applied a very reduced coat of Dark Yellow to serve as a blend coat. This blend coat reduces the sharp contrast between colors.
After the base colors were completely cured I then applied MIG's Filter for a German Tri-Color paint scheme.
After the turps dry out of the filter then comes a clear sealer coat and decals.
Sure hope you folks on the east coast are weathering the storm safely.
See Ya Later
Tony lee
smorko
Serbia & Montenegro
Joined: March 11, 2013
KitMaker: 94 posts
Armorama: 89 posts
Joined: March 11, 2013
KitMaker: 94 posts
Armorama: 89 posts
Posted: Sunday, October 09, 2016 - 01:17 AM UTC
I built the model to almost the same point as you, and there is one thing bugging me. It is a Pak40, but the shells panda gives you are more like Kwk 40 shells. So much shorter. I dug around and found some Pak 40 rounds (like you did) and there's the problem. They cannot be put in (all) the racks because the gun is in the way. Also I did a RB barrel swap on mine and the RB barrel is significantly longer than the Panda one (5mm). Can anyone shed some light on this, because looking at the interior pictures of Marder I, Panda got the rack right.
PvtMutt
Missouri, United States
Joined: July 01, 2006
KitMaker: 614 posts
Armorama: 601 posts
Joined: July 01, 2006
KitMaker: 614 posts
Armorama: 601 posts
Posted: Thursday, October 13, 2016 - 12:28 AM UTC
Update #12
Decals:
After the filter dried a clear sealer was applied and then the decals were placed.
I couldn't find the name of the decal manufacture anywhere but other than being a little on the thick side they are well indexed and laid down on the model surface really well with the aid of a decal setting solution.
When dry i'll seal them up with another clear coat and we'll move on to whipping this Marder into shape.
Thanks for following along folks.
Tony lee
PvtMutt
Missouri, United States
Joined: July 01, 2006
KitMaker: 614 posts
Armorama: 601 posts
Joined: July 01, 2006
KitMaker: 614 posts
Armorama: 601 posts
Posted: Thursday, October 13, 2016 - 12:43 AM UTC
Milos all I can say about the supplied shells is it was what was found in the museum example or just lack of research.
The rounds looks like the rounds used by the Pak 37 to me.
Just looking at old pictures on the net the kit barrel looks about right. The AM barrel could have been designed to fit more than one manufactures kit and not specific to the Panda model.?????????
Those are the best answers I can give you without proper documentation,sorry.
Tony lee
Bonaparte84
Hessen, Germany
Joined: July 17, 2013
KitMaker: 338 posts
Armorama: 331 posts
Joined: July 17, 2013
KitMaker: 338 posts
Armorama: 331 posts
Posted: Thursday, October 13, 2016 - 01:56 AM UTC
Quoted Text
Update #12
Decals:
After the filter dried a clear sealer was applied and then the decals were placed.
I couldn't find the name of the decal manufacture anywhere but other than being a little on the thick side they are well indexed and laid down on the model surface really well with the aid of a decal setting solution.
When dry i'll seal them up with another clear coat and we'll move on to whipping this Marder into shape.
Thanks for following along folks.
Tony lee
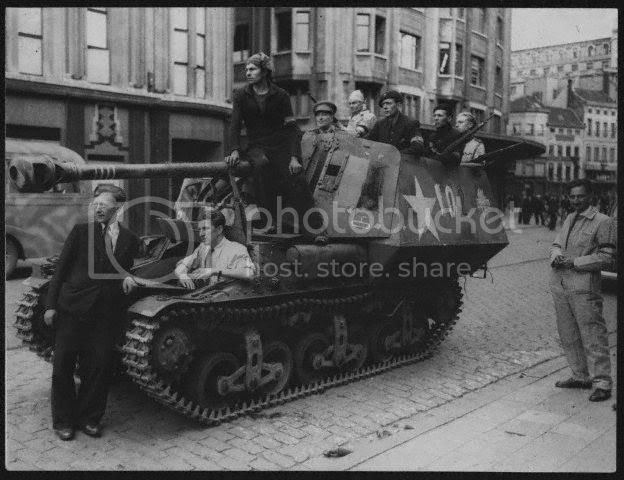
Sorry to say this as I really like your build, but colours of the flag are in the wron order. For Belgium, the correct order ist black, yellow, red. Just check again with the reference drawing you provided.
The order you have on now looks like a flag of modern day Germany...
PvtMutt
Missouri, United States
Joined: July 01, 2006
KitMaker: 614 posts
Armorama: 601 posts
Joined: July 01, 2006
KitMaker: 614 posts
Armorama: 601 posts
Posted: Thursday, October 13, 2016 - 02:28 AM UTC
Bonaparte84
Hessen, Germany
Joined: July 17, 2013
KitMaker: 338 posts
Armorama: 331 posts
Joined: July 17, 2013
KitMaker: 338 posts
Armorama: 331 posts
Posted: Thursday, October 13, 2016 - 04:54 AM UTC
The black is not the problem, it's the other two colours which are inverted. Yellow should be in the middle, not red.
Your version is a German flag on the side. See the German parliament with the German flag in front of it:
http://de.123rf.com/photo_28087462_deutsch-bundestag-reichstag-mit-der-deutschen-flagge-in-einer-brise.html
If it's any consolation for you: These two flags get mixed up all the time, even in TV news/ football games etc.
PvtMutt
Missouri, United States
Joined: July 01, 2006
KitMaker: 614 posts
Armorama: 601 posts
Joined: July 01, 2006
KitMaker: 614 posts
Armorama: 601 posts
Posted: Thursday, October 13, 2016 - 05:10 AM UTC
Well can you beat that I couldn't see the forest for the trees
"Here's Your Sign" Tony
Thanks for pointing that out and my apologies to the Belgians.
Tony lee
PS: I'll mask it off and repaint the yellow and red in the correct places.
"Here's Your Sign" Tony
Thanks for pointing that out and my apologies to the Belgians.
Tony lee
PS: I'll mask it off and repaint the yellow and red in the correct places.
PvtMutt
Missouri, United States
Joined: July 01, 2006
KitMaker: 614 posts
Armorama: 601 posts
Joined: July 01, 2006
KitMaker: 614 posts
Armorama: 601 posts
Posted: Friday, October 14, 2016 - 01:38 AM UTC
PvtMutt
Missouri, United States
Joined: July 01, 2006
KitMaker: 614 posts
Armorama: 601 posts
Joined: July 01, 2006
KitMaker: 614 posts
Armorama: 601 posts
Posted: Saturday, October 15, 2016 - 09:38 PM UTC
Armorsmith
Pennsylvania, United States
Joined: April 09, 2015
KitMaker: 1,063 posts
Armorama: 1,000 posts
Joined: April 09, 2015
KitMaker: 1,063 posts
Armorama: 1,000 posts
Posted: Saturday, October 15, 2016 - 10:03 PM UTC
Very nice so far. Looks like a major improvement over their MRAP which has major fit problems and rather vague instructions at times. Really like the paint and decals.