_GOTOBOTTOM
Armor/AFV: Axis - WWII
Armor and ground forces of the Axis forces during World War II.
Hosted by Darren Baker
Railway gun “DORA” – 1/35 by Soar Art Worksho
elmarriachi
Visit this Community
Baden-Württemberg, Germany
Joined: December 26, 2009
KitMaker: 813 posts
Armorama: 240 posts
Posted: Sunday, October 23, 2016 - 07:19 PM UTC
Hello all together.

A long time ago… at a place far, far away … I have started a big project concerning the German railway gun „Dora“. I have planned to continue this never ending project several times, but due to some other projects I never had the nerve to go back to the “Dora-project”. I have made lot of modifications and changes to the kit which made lot of work necessary. This discouraged me to continue so many times… so many times I had the “Dora” back on my desk, but never really started to continue finally. Now finally, after some years of pause I want to come back to this work….

What are we talking about… the “Dora”. It was Hitler Germany’s biggest (often called by mistake) railway gun, although it was no railway gun as it was not able to drive on rails. It was transported in several separate pieces and put together at its final destination. The kit in scale 1/35 from manufacturer Soar Art Workshop was called the biggest plastic kit ever…. And it is really, really huge. Big parts, lot of parts and lot of mistakes. There are many things at the kit that need some modifications or upgrades, some changes which I started long time ago.


A small survey of the changes done before are …

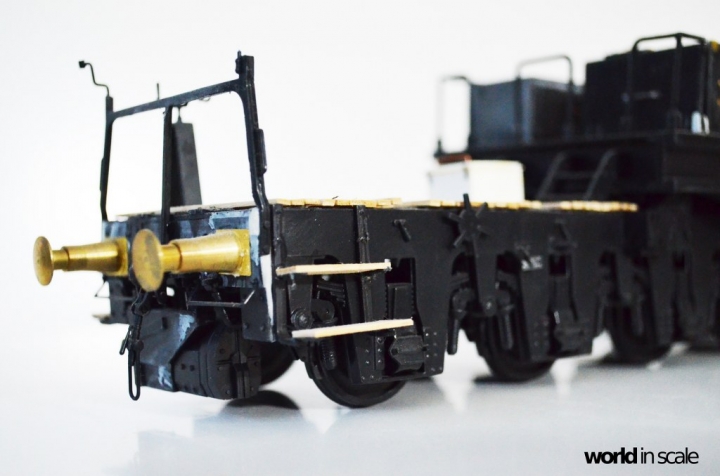
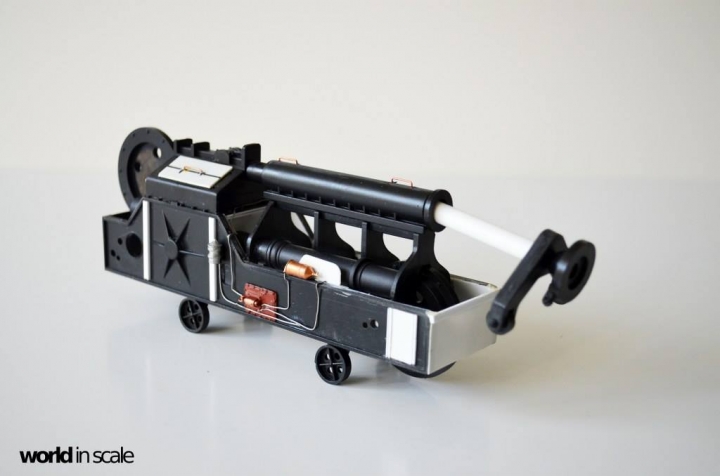
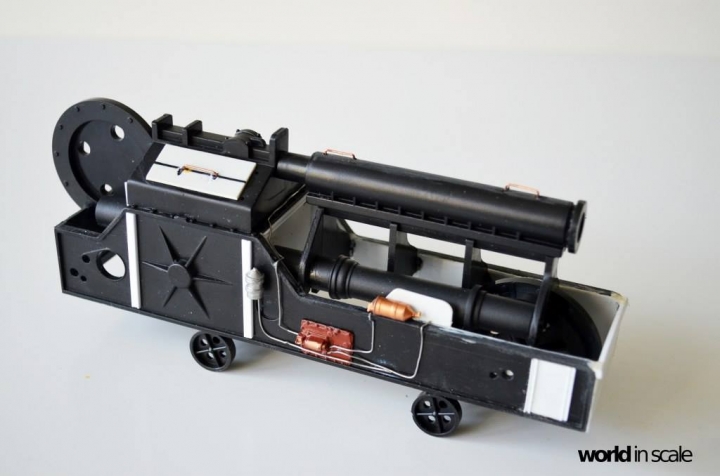
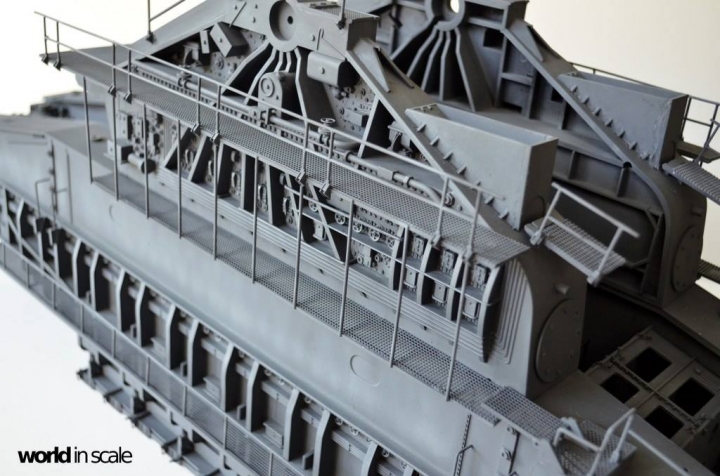
- Gun barrel. The gun barrel in the kit is too long and the proportions are wrong. I have cut the barrel in several pieces, shortened each part and put it together once again with an aluminium pipe inside for stability.
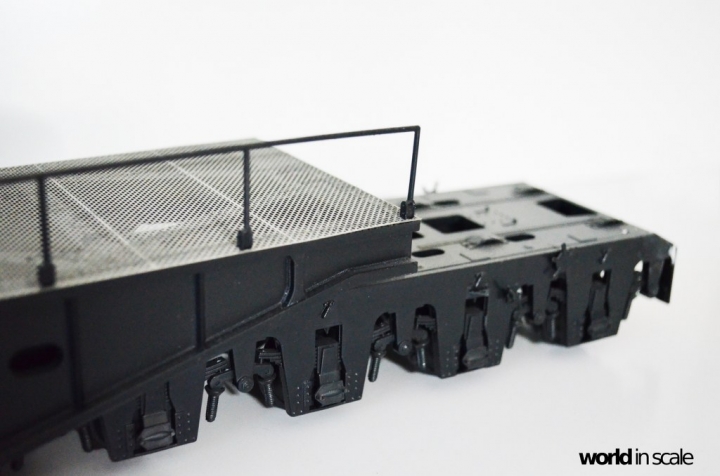
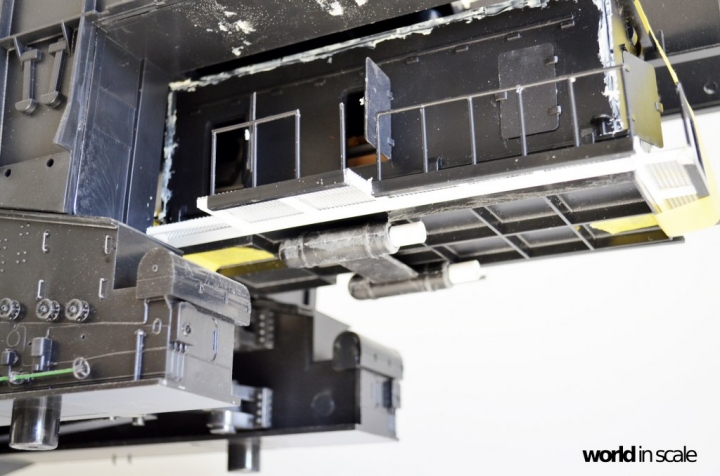
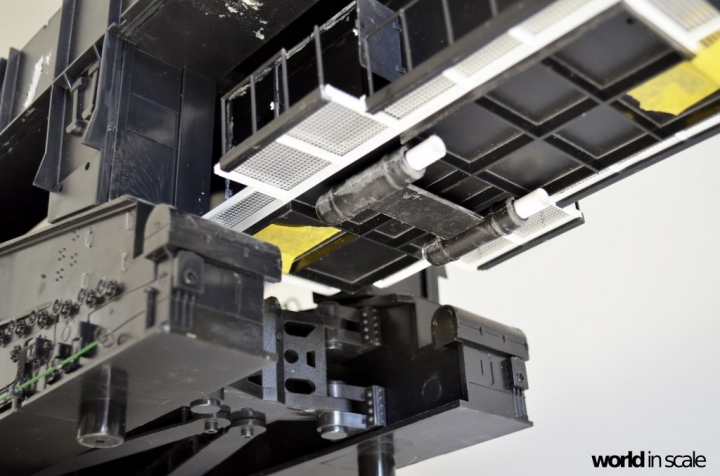
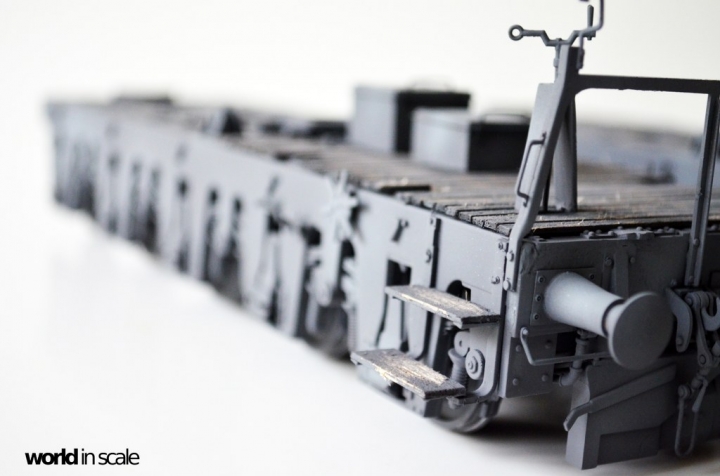
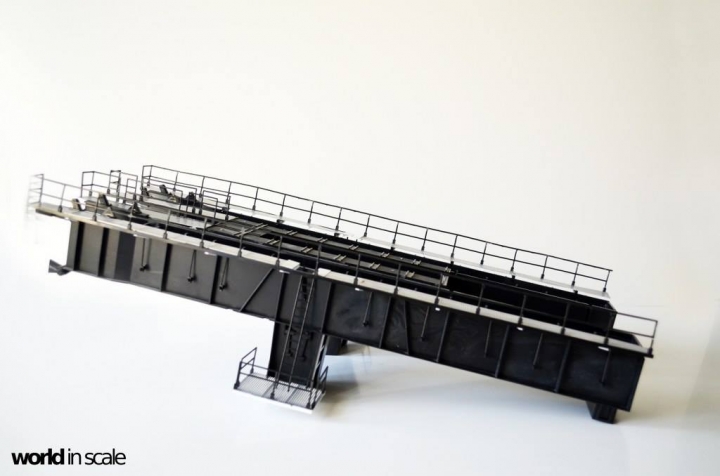
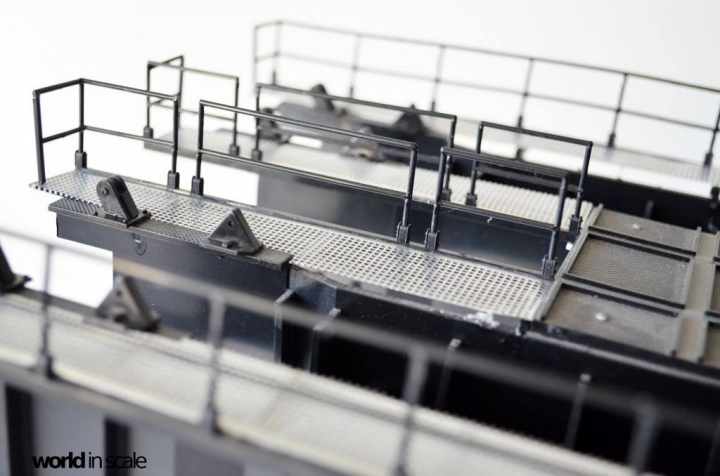
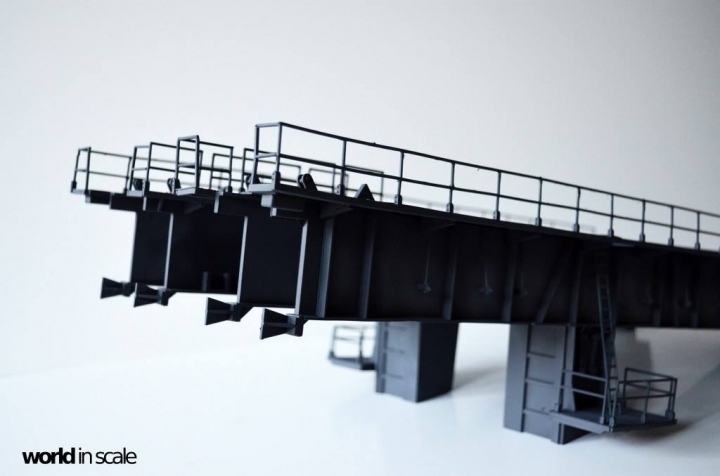
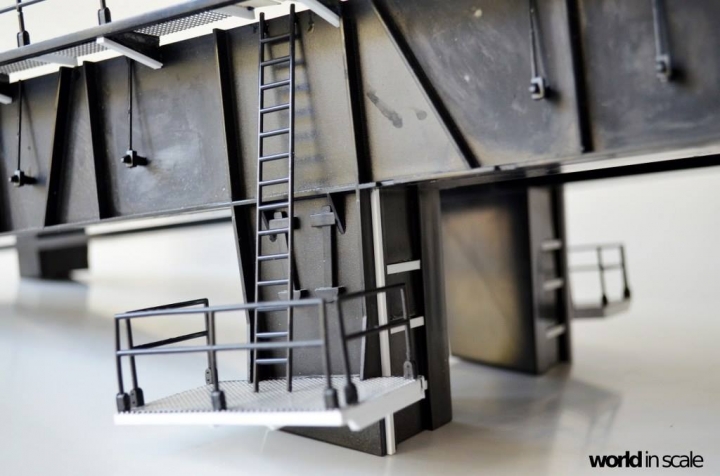
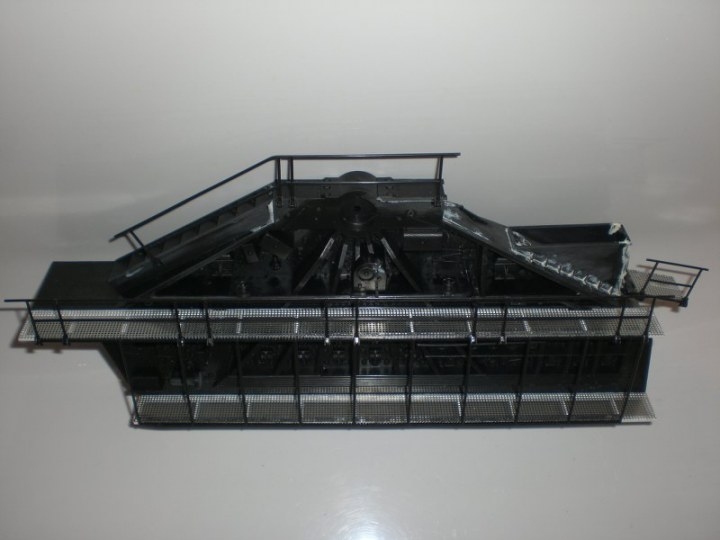
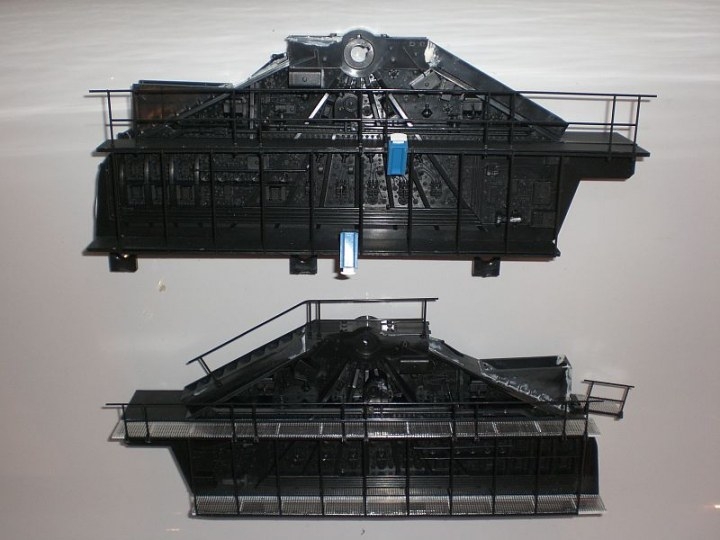
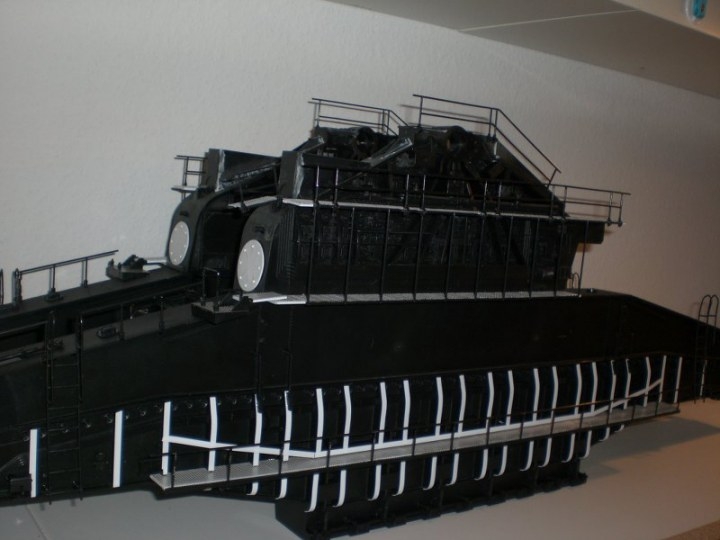
- Catwalks. The catwalks in the original cannon were made of wire frame. In the kit it is made of one-piece plastic walks. I have made new catwalks with mesh and new crossbars.
- Railings. All railings in the kit are about 10mm too high. I have modified each railing to its correct sizes.
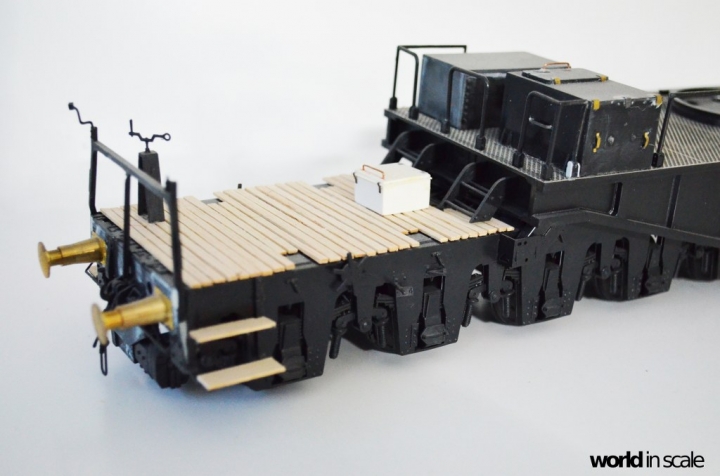
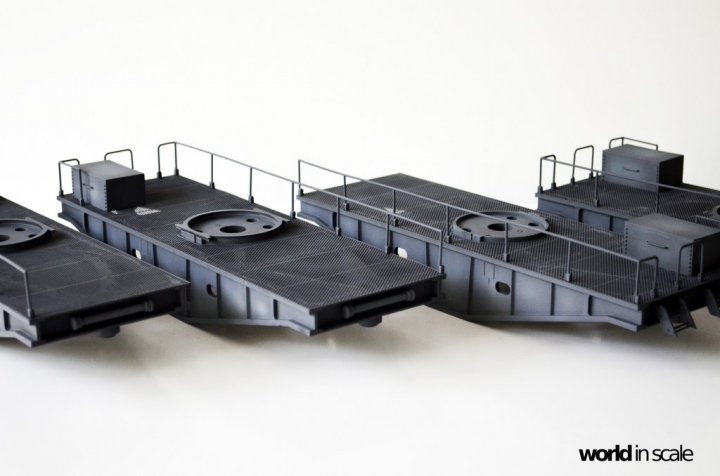
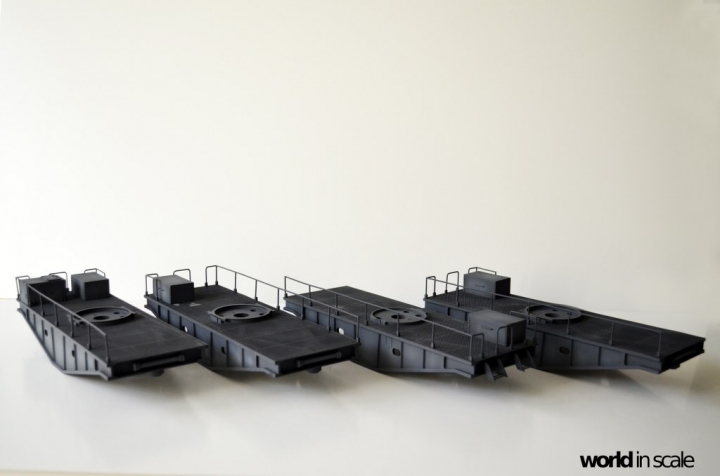
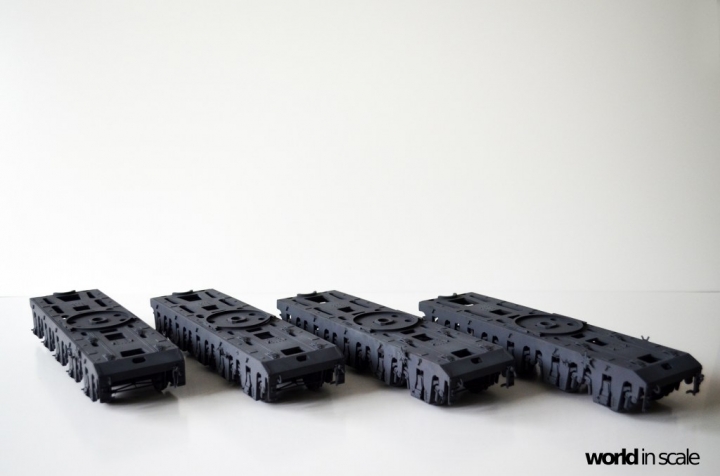
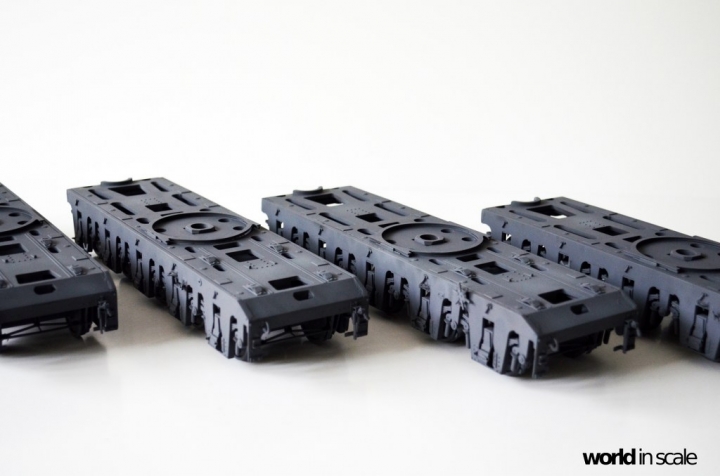
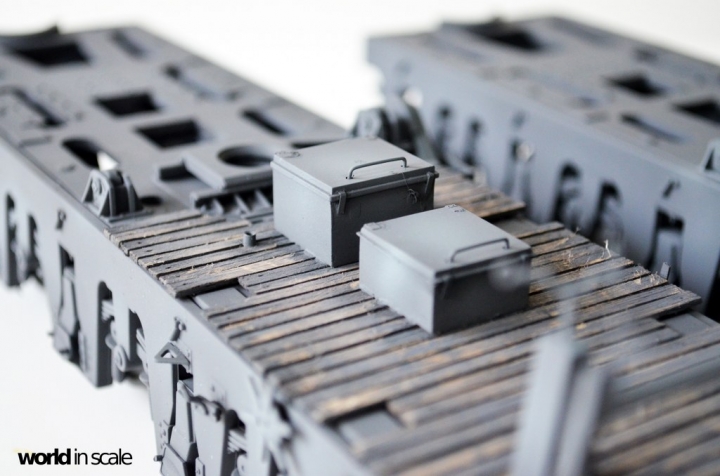
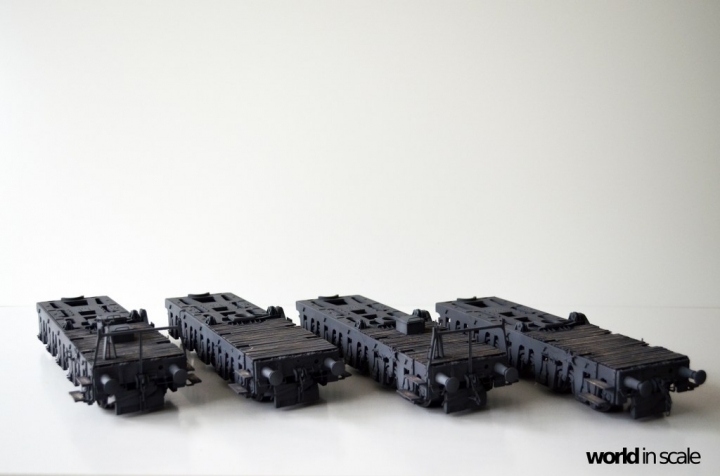
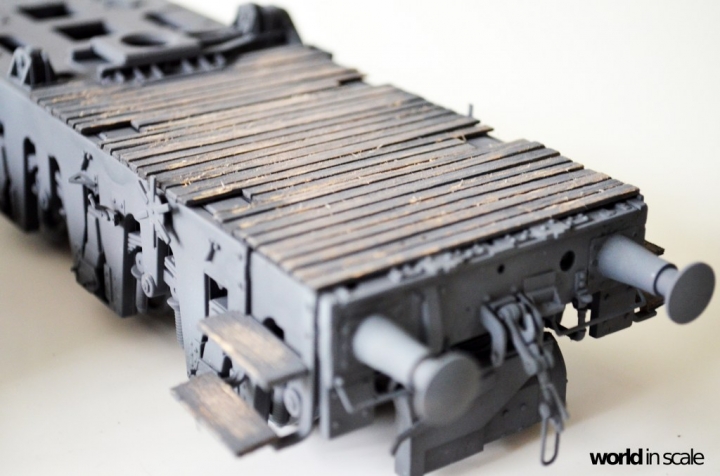
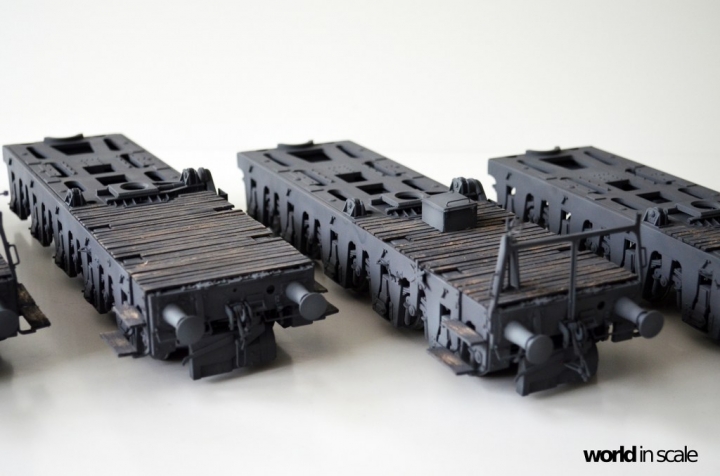
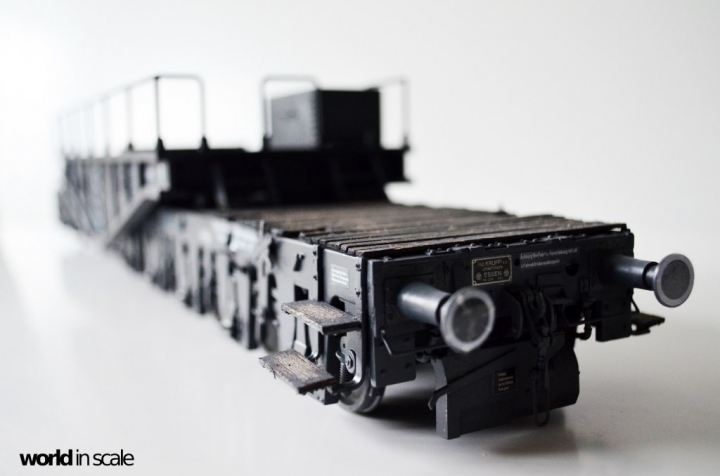
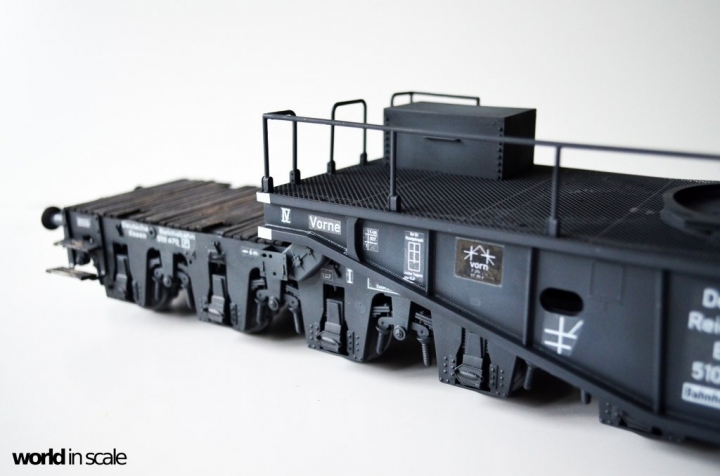
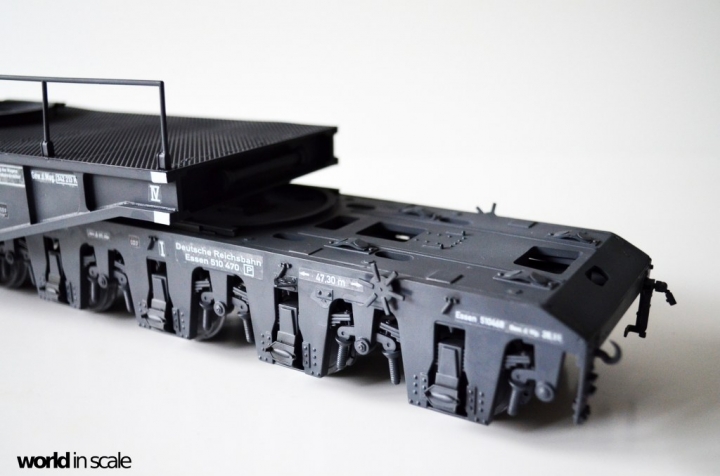
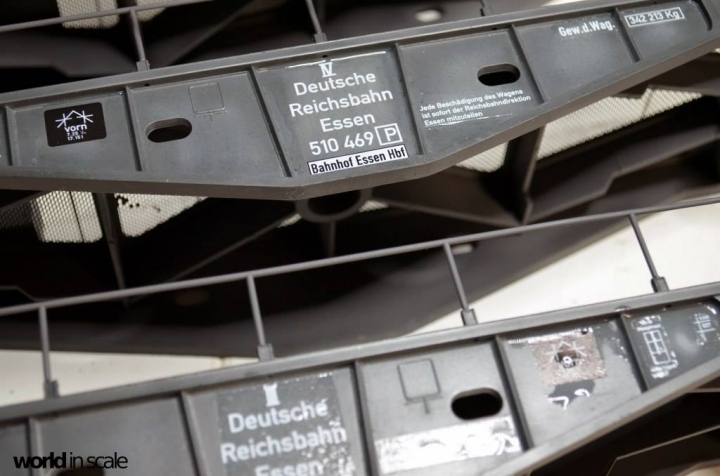
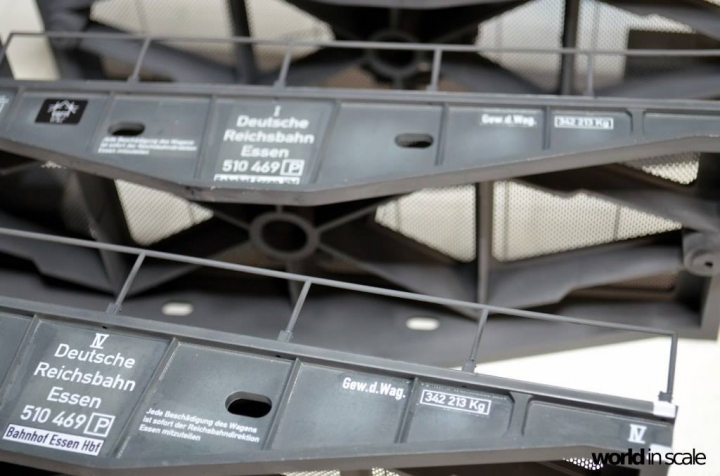
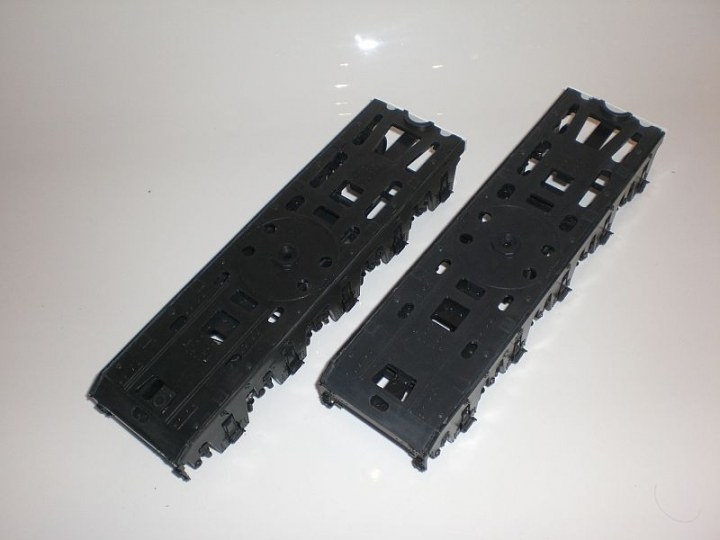
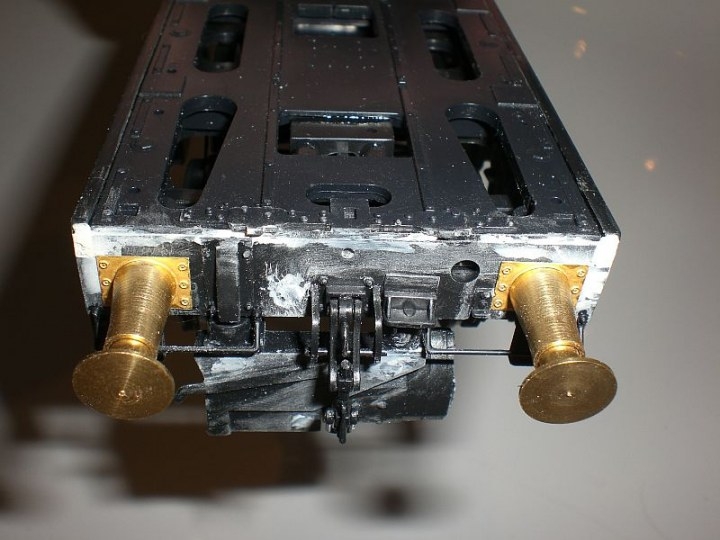
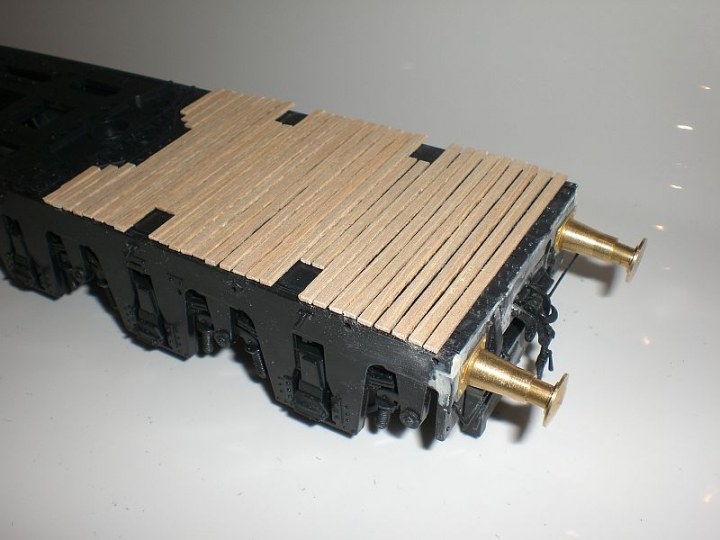
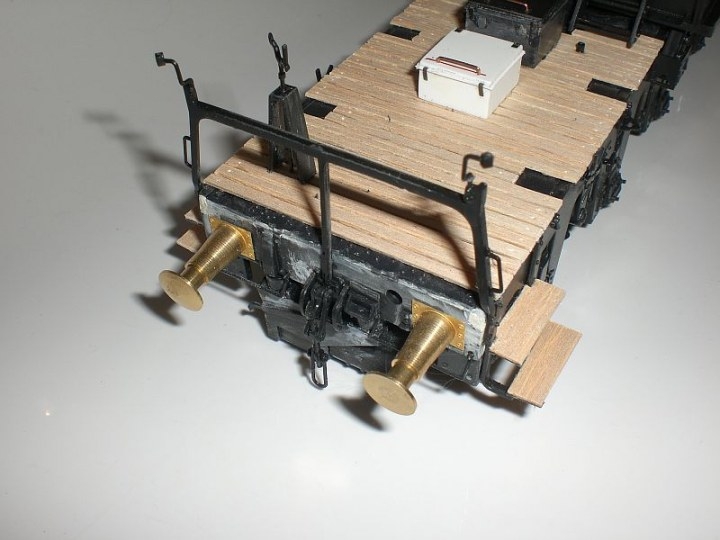
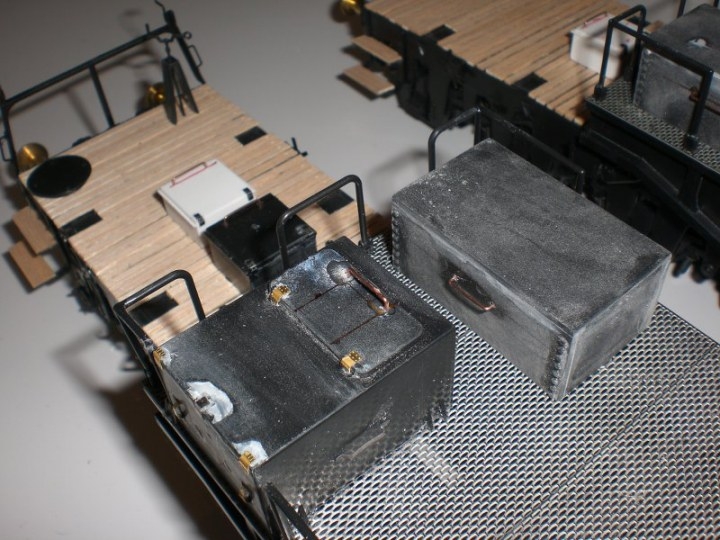
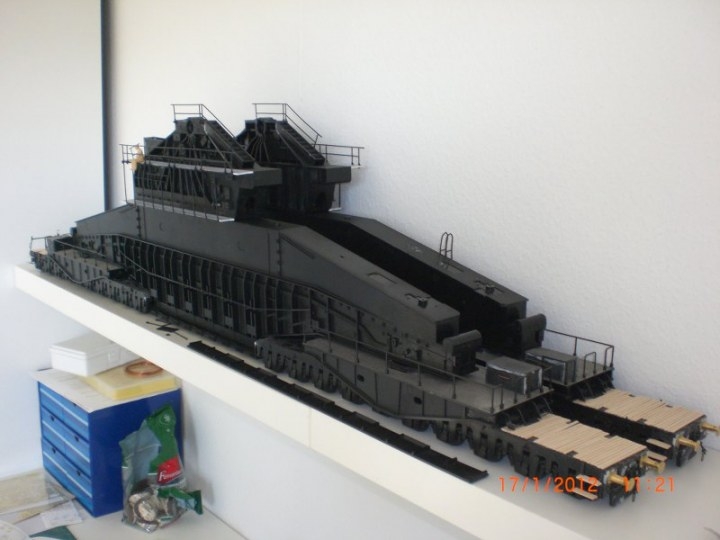
- Wagons. The gun was situated on 4 long wagons. Each of these wagons consisted of two separate wagons, put together under carriers. The kit provides 4 long wagons. I have cut each and made 8 separate wagons as it is at the original cannon. The running surface was made new of real balsa wood.

Further changes or modificatsions will follow during the further built of this model.

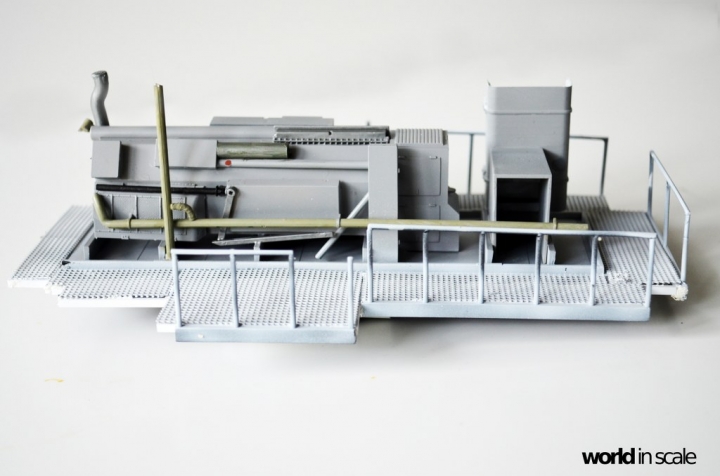
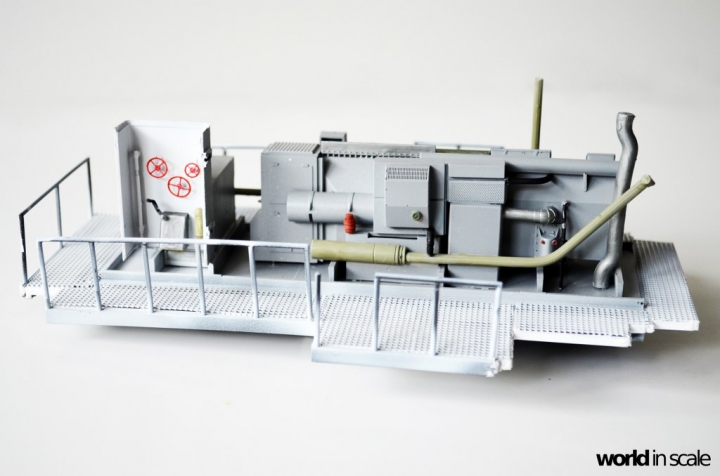
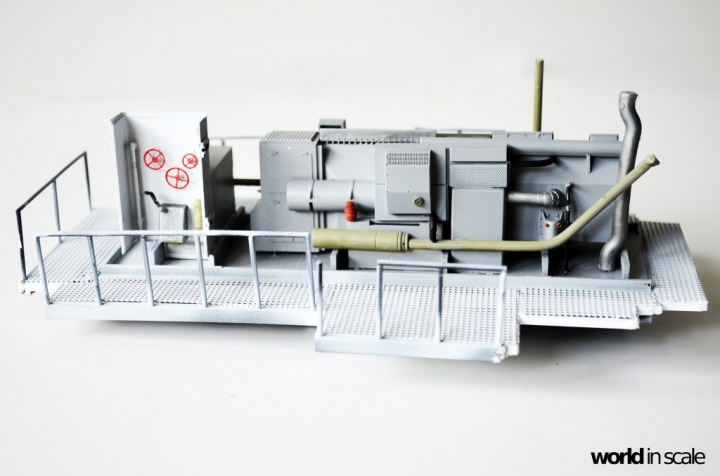
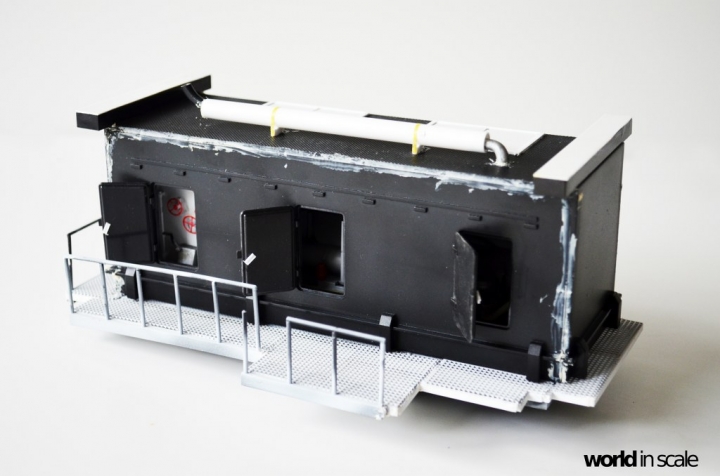
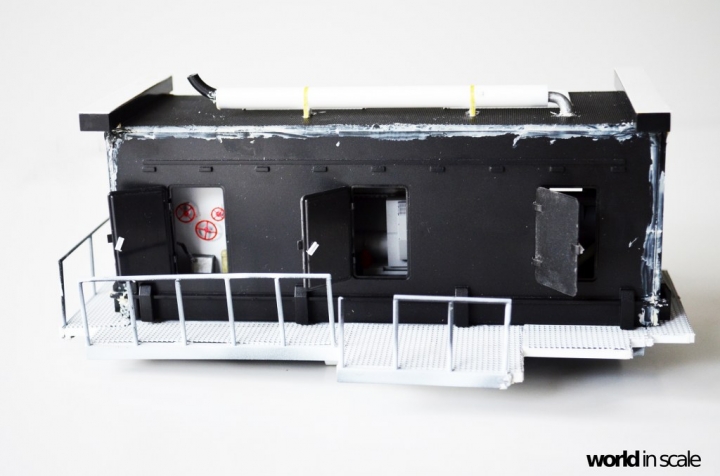
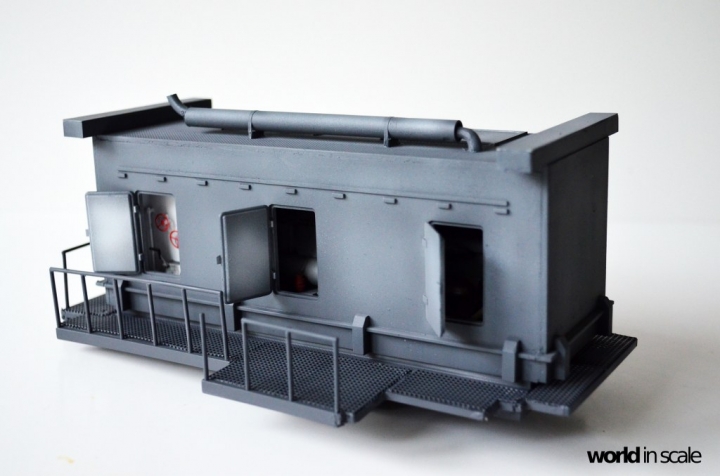
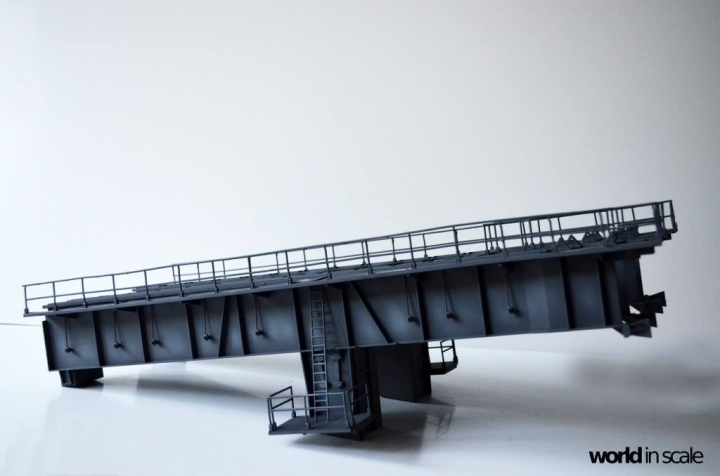
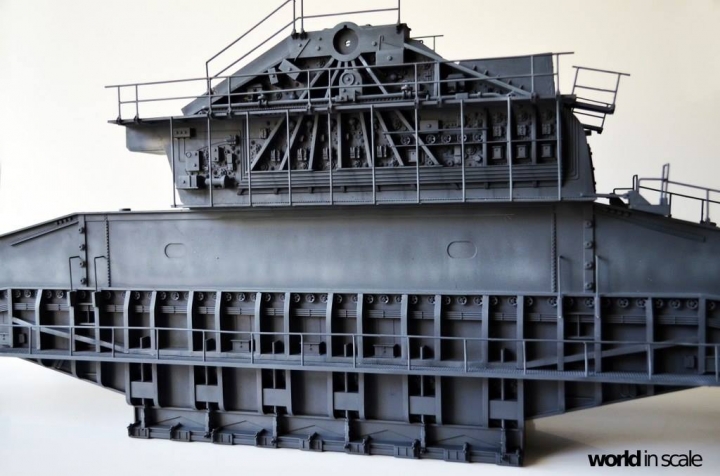
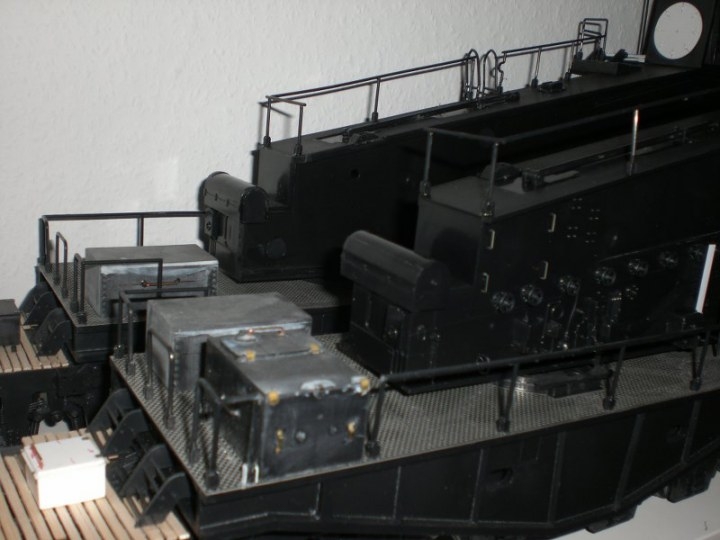
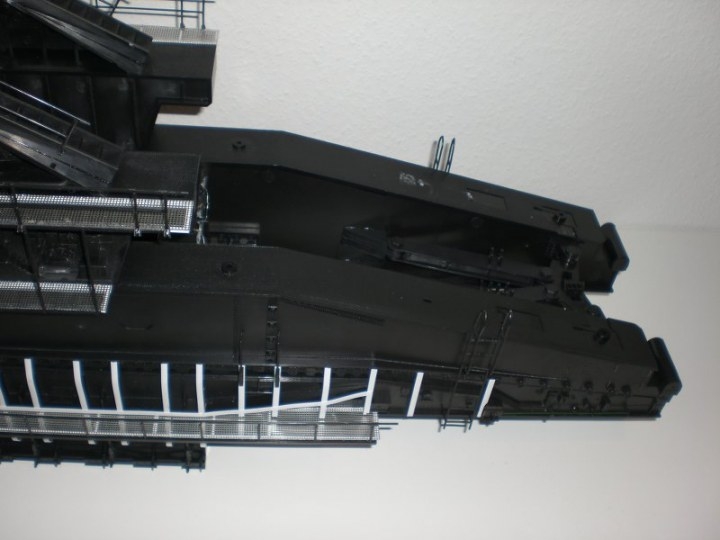
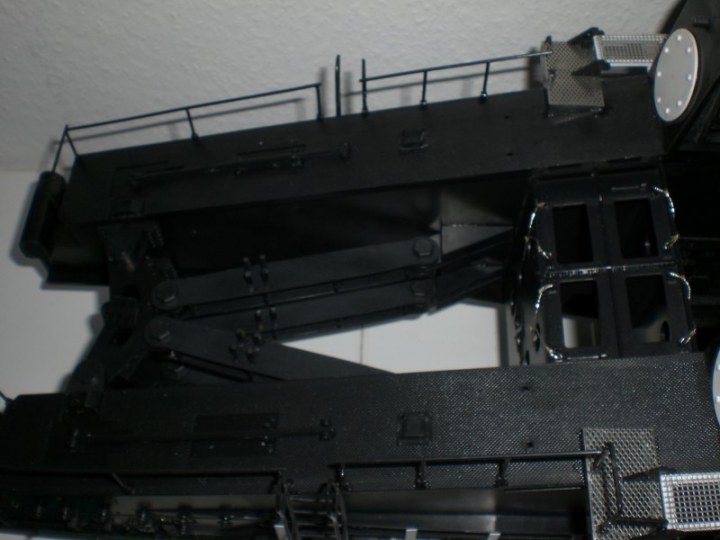
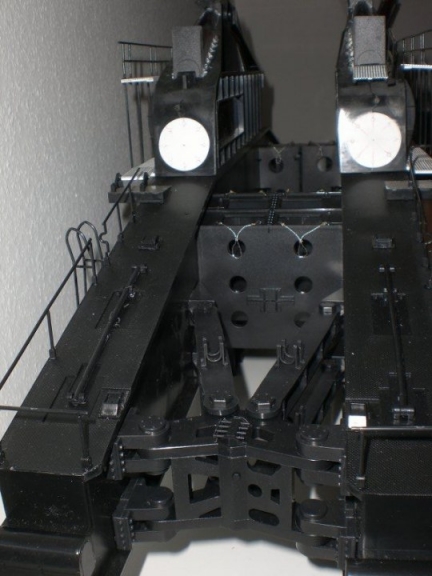
But for the moment, some pictures of the actual state of the kit in the following …


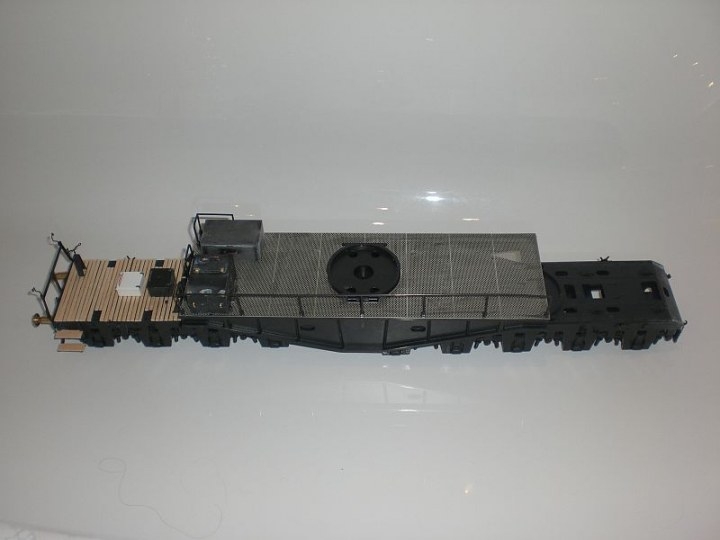
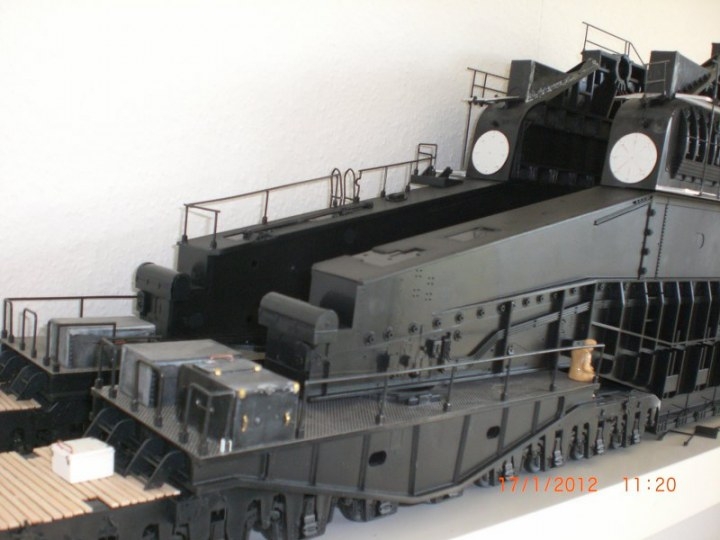
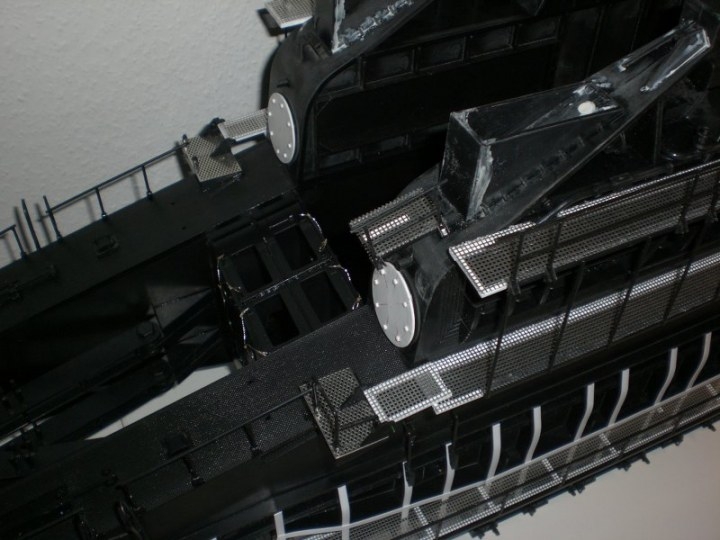
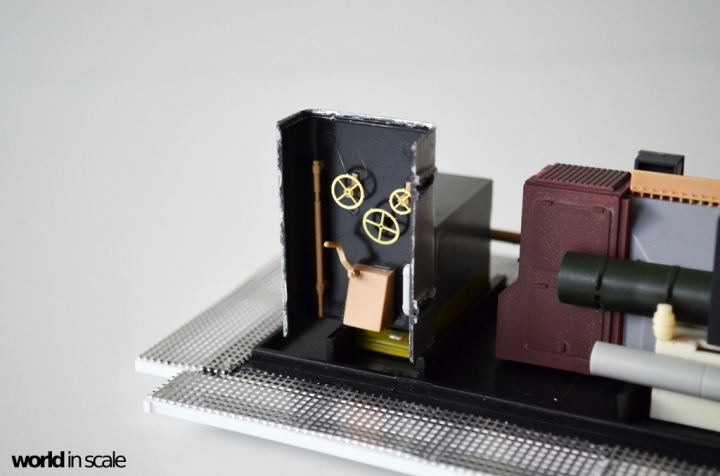
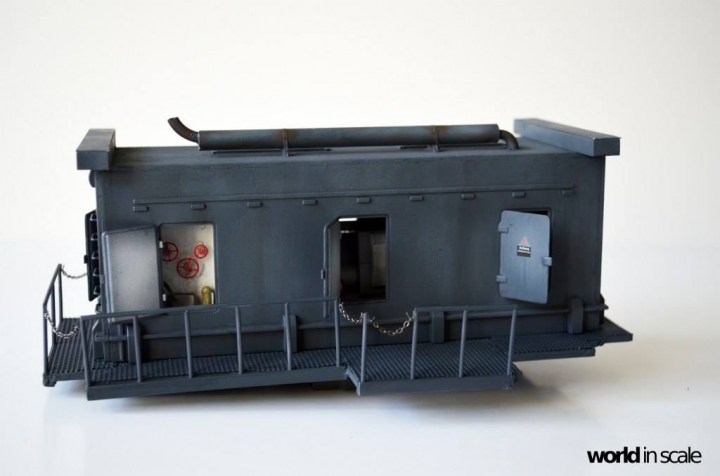
The next steps will be the platform at the top rear of the gun and the engine bay below it. Also I will start painting of the eight railway wagons in the next days.

I hope that this might become an interesting project for you, although I want to warn that I will not be able to work on it daily… so the updates will not come every day or week I think….

But after such long time I will continue now finally

Cheers,
Micha
165thspc
#521
Visit this Community
Kentucky, United States
Joined: April 13, 2011
KitMaker: 9,465 posts
Armorama: 8,695 posts
Posted: Sunday, October 23, 2016 - 08:27 PM UTC
You're a better man than all of us Gunga Din!

Cannot believe they modeled the four bridge trolleys each as a single piece. You are certainly on the right track making them separate 3-piece units. (Absolutely no pun intended there!)

Amazing work. Will follow this with much interest!
Bigred69
Visit this Community
Armed Forces Europe, United States
Joined: December 27, 2015
KitMaker: 290 posts
Armorama: 249 posts
Posted: Monday, October 24, 2016 - 01:20 AM UTC
Hi Micha, are you going to add extra space to your house, to put this on display?
TankCarl
Visit this Community
Rhode Island, United States
Joined: May 10, 2002
KitMaker: 3,581 posts
Armorama: 2,782 posts
Posted: Monday, October 24, 2016 - 04:35 AM UTC
So glad to read someone else building one.I suppose you sidcovered you need different glue to work on their plastic choice. I also bought the Hobby Boss 1/72nd one, and it had open grid walkways,and seperate trucks,instead of 4 long ones.
elmarriachi
Visit this Community
Baden-Württemberg, Germany
Joined: December 26, 2009
KitMaker: 813 posts
Armorama: 240 posts
Posted: Monday, October 24, 2016 - 12:03 PM UTC
Haha Still enough space .... but not shure how long

Yes there is some different glue necessary. When working on it last time I used the UHU glue in the dark red plastic bottle... this worked well... I have to check which one using this time
Dioramartin
Visit this Community
New South Wales, Australia
Joined: May 04, 2016
KitMaker: 1,476 posts
Armorama: 1,463 posts
Posted: Monday, October 24, 2016 - 02:11 PM UTC
Yikes, don’t often hear that something was too long, as the bishop said to the oh never mind

I’d really like to see this test-fired but of course you’d need an all-brass substitute tube to do it...as the actress said to the er

Aaaanyway it looks amazing, and I can understand how daunting it must be to complete, yet at the same time you’ve put so much work into it already, you just have to finish it. The Model-Maker’s Dilemma.

I’m sure you’ll do a great job….and then you can start on the 1,800-man crew. At an average of say one figure per day, I guess that’ll take um about 5 years?

Best of Luck, Courage mon brave

PS - can you take a picture with your hand in the frame, so we can appreciate how huge this really is?

Cheers, Tim
TankCarl
Visit this Community
Rhode Island, United States
Joined: May 10, 2002
KitMaker: 3,581 posts
Armorama: 2,782 posts
Posted: Tuesday, October 25, 2016 - 05:57 AM UTC
http://img.photobucket.com/albums/v439/TankCarl/DORA/MeandDora.jpg
elmarriachi
Visit this Community
Baden-Württemberg, Germany
Joined: December 26, 2009
KitMaker: 813 posts
Armorama: 240 posts
Posted: Wednesday, October 26, 2016 - 02:22 AM UTC
Hi,

here are the bogies once again - totally there are four nearly identically bogies now (each consisting of two 5-axled wagons). The differences are only the railings and the chests on top.


Next step will be a washing of the wooden parts.... then salt/water on the wood.... then airbrush in German Grey.... as fist step Then some highlights with light grey... drybrushing, washings

Cheers
Micha
elmarriachi
Visit this Community
Baden-Württemberg, Germany
Joined: December 26, 2009
KitMaker: 813 posts
Armorama: 240 posts
Posted: Wednesday, October 26, 2016 - 02:24 AM UTC
Hi,
I will make some pictures to show the size of this giant But I could tell that it is huge. Very huge

Once finished I will add some figures, but for shure not as much as there were in the past Only few ...

... one day ... once finished ... one day....

Cheers
Michael
TankCarl
Visit this Community
Rhode Island, United States
Joined: May 10, 2002
KitMaker: 3,581 posts
Armorama: 2,782 posts
Posted: Wednesday, October 26, 2016 - 07:56 AM UTC
TankManNick
Visit this Community
California, United States
Joined: February 01, 2010
KitMaker: 551 posts
Armorama: 543 posts
Posted: Wednesday, October 26, 2016 - 10:59 AM UTC
Congratulations getting this done! (Or almost done, whatever.)

It is quite an impressive sight and sure to gather many admirers. It is truly a beast even reduced 35 times!

Nice that your extra details all show on the outside. Some figures will really show the size.

elmarriachi
Visit this Community
Baden-Württemberg, Germany
Joined: December 26, 2009
KitMaker: 813 posts
Armorama: 240 posts
Posted: Thursday, October 27, 2016 - 06:24 PM UTC
Thanks a lot for your interest

I started painting the first 4 halfes of wagons... over the weekend the next 4.... then the 4 bridges ... then highlights.... then painting the details and wheels ..... then decals and weathering ...

I will make some new photos over the weekend

I have planned some figures on it yes.... and I will put it on a railway curve, to show that the wagons are totally 8 - not 4 as the kit brings

Cheers
Michael
elmarriachi
Visit this Community
Baden-Württemberg, Germany
Joined: December 26, 2009
KitMaker: 813 posts
Armorama: 240 posts
Posted: Wednesday, November 02, 2016 - 09:13 PM UTC
Update 1:

Some of the doors and hatches at the "Kraftzentrale" (engine room) will remain open or at least partly open. Due to that it was necessary to add something to the inside. I have searched wherever I could but have not found a detailed picture of the engine. As there won't be much visible of it I have decided to make it with some parts which I had left from any other kits... some trucks, tanks, airplanes, sprues, ... whatever I could find and glued together.
After that I have painted it in a light grey with the airbrush, then added some colors with the paint brush to it. I think it would be ok inside the engine room.... Also I have added one area ("indside a 1/24 truck tank") with some handwheels, lever and - later - some gauges.
The floor of the catwalk is made with plastic profile (evergreen) and aluminium mesh.


elmarriachi
Visit this Community
Baden-Württemberg, Germany
Joined: December 26, 2009
KitMaker: 813 posts
Armorama: 240 posts
Posted: Wednesday, November 02, 2016 - 09:13 PM UTC
Update 2:

The housing received some putty (not yet sanded) and the doors, partly open, with some (not finished) clasps inside.
On the roof I have added a new exhaust which is possibly visible on one picutre. Also I have added some closed hatches.
The exhaust on the downside of the floor received some new, open endpipes...


elmarriachi
Visit this Community
Baden-Württemberg, Germany
Joined: December 26, 2009
KitMaker: 813 posts
Armorama: 240 posts
Posted: Wednesday, November 02, 2016 - 09:13 PM UTC
Update 3

All the 8 wagons and the 4 bridges were painted in Tamiya's "German Grey" first, then I have added some highlights with a ligther grey.
After that a washing with AK Interactive's "Blue Washing for German Grey" followed, also the (hand painted) silver wheels.
A layer Future as base for the decals came next....


Next steps - decals, then matt clear coat, then further wathering ....

Cheers
Micha
jimz66
Visit this Community
Connecticut, United States
Joined: December 15, 2006
KitMaker: 1,165 posts
Armorama: 1,105 posts
Posted: Thursday, November 03, 2016 - 05:45 PM UTC
Looking good Micheal. Looking good.
elmarriachi
Visit this Community
Baden-Württemberg, Germany
Joined: December 26, 2009
KitMaker: 813 posts
Armorama: 240 posts
Posted: Thursday, November 03, 2016 - 11:50 PM UTC
UPDATE

After a layer of Future I have added all the thousands decals of the new peddinghaus-set. This is a lot of work. ... and each decal needs to be cut out ....
Now some days drying, then matt clear coat to save the decals ... then a little bit of weathering (but not much)


The "Kraftzentrale" was first painted inside in a light grey, then outside in German Grey, with light grey highlights. The doors were painted light grey, highlights in white.
Now also a filter from AK Interactive follows, then future, then decals and matt clear coat....


Cheers
Micha
elmarriachi
Visit this Community
Baden-Württemberg, Germany
Joined: December 26, 2009
KitMaker: 813 posts
Armorama: 240 posts
Posted: Monday, November 07, 2016 - 03:12 PM UTC
Hello,

big update... big dissatisfaction on my side.... I hate these decals .... the decals are still much too thick... nothing seems to work to solve this issue..... And - despite several layer of clear coat and using of several chemicals to fix the decals, it is still possible to remove each decal easily....  so what to do ...... 

Today I asked the best graphic-artist I know to issue the full decal sheet for me and print it on a new decal foil .... I have a company on hand, which made several decals for me some time ago in highest quality, They will print the decals for me new .... and then I will add all decals once again ... and then I will have this problem solved and the decals looking fantastic then  

That means for now.... I have to wait with the wagons... wait till I get the new decals. Then I will remove the decals of the first wagon for trying... then adding the new decals... when everything good, then I will remove all decals once again and add the new ones...  until I get the new decals on my desk I will continue with the other parts of the gun ...

Cheers
Michael
Modelrob
Visit this Community
Arizona, United States
Joined: October 20, 2015
KitMaker: 304 posts
Armorama: 293 posts
Posted: Monday, November 07, 2016 - 03:20 PM UTC
Sorry to hear about the decals, I can't wait to see the beast finished. Great work so far.

Robert
elmarriachi
Visit this Community
Baden-Württemberg, Germany
Joined: December 26, 2009
KitMaker: 813 posts
Armorama: 240 posts
Posted: Monday, November 07, 2016 - 05:57 PM UTC
Hi Robert,
it will be no problem finally... luckily there is an alternative for these rubbish decals ... so I could fix this problem
Will only be some more work... much more work .... but that's better then these bad decals
Cheers
Michael
elmarriachi
Visit this Community
Baden-Württemberg, Germany
Joined: December 26, 2009
KitMaker: 813 posts
Armorama: 240 posts
Posted: Monday, November 14, 2016 - 02:42 PM UTC
Hello,

some new update of the Dora gun. First the modified gun barrel, ready for a first layer of primer (and maybe more sanding and primering after that).


The loading mechanismus of the gun got a lot of modifications. The kit parts are realy simplified and need lot of modification.
I have added some details with plastic profile, plastic card, parts from other kits, wire, ....


The plattform at the rear of the gun was mounted next, then lot of modifications added. Some made of plastic profile, lot of mesh for all catwalks, modified hand rail and new made plattform left and right of the pillars.


elmarriachi
Visit this Community
Baden-Württemberg, Germany
Joined: December 26, 2009
KitMaker: 813 posts
Armorama: 240 posts
Posted: Monday, November 14, 2016 - 02:43 PM UTC
The loading mechanism was painted with Tamiya German Grey, then added some highlights with a light grey and a filter with AK Interactive's "Blue for German Grey" ...


The plattform after the painting, highlighting and filtering ...


elmarriachi
Visit this Community
Baden-Württemberg, Germany
Joined: December 26, 2009
KitMaker: 813 posts
Armorama: 240 posts
Posted: Monday, November 14, 2016 - 02:43 PM UTC
The painted main struts of the gun. The painting of these was a kind of logistical problem as it is really, really big... lot of paint and much to big for my paint booth ...
Also painted in German Grey, highlights with light grey, filtering ...


The engine room after the paint, some chains added at the hand rail ...


All the painting was made in a cloudy way, so that the black plastic was partially visibile under the grey paint. This gave some first kind of shadow to the big grey surfaces.
Some light grey was used for adding highlights in the big surfaces, specially at the areas which were in the light.
The bluefilter from AK Interactive is a great product to give some variety in the color and makes it look more interesting.

Next step will be some dry brushing of all the painted parts with a lighter grey, then a pin wash with high diluted black oil color.

A final layer of future will be the base for the decals, which were made completely new, printed on a very thin decal foil and will be added next

Cheers
Micha
elmarriachi
Visit this Community
Baden-Württemberg, Germany
Joined: December 26, 2009
KitMaker: 813 posts
Armorama: 240 posts
Posted: Tuesday, November 15, 2016 - 07:06 PM UTC
Hard work yesterday ... I have removed all decals which I had added before .... some tweezers, a little bit of scratching and taking the decals off in one part. Absolutely strange. The use of Micro set and sol was nearly wasted ....
After the removing I had to sand it a little bit to get a smooth surface again.... now I will paint these areas once again with a little bit of base color before adding the new decals, which were made for me

Cheers
Michael
elmarriachi
Visit this Community
Baden-Württemberg, Germany
Joined: December 26, 2009
KitMaker: 813 posts
Armorama: 240 posts
Posted: Monday, December 05, 2016 - 04:01 PM UTC
Hello @ all.

finally, the new decals are finished and printed... and the first ones applied on the parts. The decals are much thinner then the ones used before. Here are some first pictures with the decals, still wet

I think it was worth doing the additional works... let's see how it would look like, once all decals are applied and fixed.


Next step is one more layer of "Future" to homologate the decals with the rest of the surface, then a layer of matt clear coat as base for the weathering.

Cheeers,
Michael
 _GOTOTOP