Hi Xavier,
Lots of good advice above and more to come in the future as you search within the site. Welcome to Armorama!
I tend to agree with comments regarding gravity feed airbrushes. I'll just add … they are sooooo much easier to clean (emphasis on clean!). I have a Grex Tritium TG and AC1810 Compressor combo — pricy but reliable, so I feel like I got what I paid for.
As far as kit choice ... I started back by ordering a Dragon 1/35 German Half-Track which had nearly 500 parts! I was so excited over the level of detail that I threw caution (and money) to the wind! ... So what's this PE stuff?🤔 Haha! After much sprue-stripping (and PE avoidance!), I quickly came to the conclusion that my skill level was not worthy of such a challenge. Not totally defeated, I organized the parts into Tupperware containers and put them aside for a future date. I decided to slow my roll and ordered a couple of easier kits which really helped to get the ball rolling. One month later, I attacked that half-track with a vengeance — got it done! I just needed to learn the hard way, I guess. Nothing lost but a little time ... gained ... organizational skills!😄
BTW: My epic tale took place before I ever knew about Armorama. So, I'd have to say, you're in the right place to ask your questions.
Happy Modeling!🍺
—mike
Armor/AFV
For discussions on tanks, artillery, jeeps, etc.
For discussions on tanks, artillery, jeeps, etc.
Hosted by Darren Baker, Mario Matijasic
Where to start?

justsendit

Joined: February 24, 2014
KitMaker: 3,033 posts
Armorama: 2,492 posts

Posted: Sunday, January 01, 2017 - 02:15 AM UTC
French_guy

Joined: December 31, 2016
KitMaker: 17 posts
Armorama: 17 posts
Posted: Sunday, January 01, 2017 - 02:53 AM UTC
I agree that I don't want to start with something too challenging....So a Tamiya or Takom kit should be a good starter?
What about the "Cyber-Hobby.com" brand? my store is selling a King Tiger for $35....and the only brand I can read on the box is "Cyber-Hobby.com"
What about the "Cyber-Hobby.com" brand? my store is selling a King Tiger for $35....and the only brand I can read on the box is "Cyber-Hobby.com"
petbat

Joined: August 06, 2005
KitMaker: 3,353 posts
Armorama: 3,121 posts

Posted: Sunday, January 01, 2017 - 03:03 AM UTC
Hi 
If you want to keep it to a relatively inexpensive as a start up project, try Tamiya's 1/35th scale Renault UE. It is small, a quick build, fits together well..... and is French!
Being a smaller vehicle, brush painting will not be as noticeable as it will on the larger vehicles.
Joining a club as someone suggested is a great way to meet modellers, learn techniques, etc. Also clubs or club members sometimes have kit sales, etc, which is a great way to pick up items cheaply which means you can afford more kits to help your skills develop. The more you build, the better you will get with the experience.
Cheers
Peter

duttons

Joined: June 16, 2007
KitMaker: 193 posts
Armorama: 184 posts

Posted: Sunday, January 01, 2017 - 03:14 AM UTC
My vote would go to a Tamiya LeCelerc, which has the added feature of metal wheels to add weight in give a scale weight sort of effect, its a beautiful kit.
Posted: Sunday, January 01, 2017 - 03:21 AM UTC
Do some searches on youtube for the model you would like.
Here is a Cyber-Hobby review of a King Tiger.
https://www.youtube.com/watch?v=g1k2FOva3Z0
Here is a Cyber-Hobby review of a King Tiger.
https://www.youtube.com/watch?v=g1k2FOva3Z0

iakarch

Joined: May 19, 2007
KitMaker: 459 posts
Armorama: 421 posts

Posted: Sunday, January 01, 2017 - 03:50 AM UTC
Xavier,
The Dragon Tiger like the Tamiya an old kit by 2016 standards. Also if the kit requires application of zimmerit paste that could be complicated for a first kit.
One of the new Ming or Takom Tigers would be a good pick, new well engineered kits that includes everything in the box including a decent set of tracks.
French_guy

Joined: December 31, 2016
KitMaker: 17 posts
Armorama: 17 posts
Posted: Sunday, January 01, 2017 - 07:07 AM UTC
Quoted Text
Do some searches on youtube for the model you would like.
Here is a Cyber-Hobby review of a King Tiger.
https://www.youtube.com/watch?v=g1k2FOva3Z0
The one I saw at my hobby shop is that one exactly, for $35:
https://www.youtube.com/watch?v=OS15Bgj6EjQ
I will go back to look at their Tamiya kits....I know they have a lot
French_guy

Joined: December 31, 2016
KitMaker: 17 posts
Armorama: 17 posts
Posted: Sunday, January 01, 2017 - 07:31 PM UTC
Quoted Text
Hi
If you want to keep it to a relatively inexpensive as a start up project, try Tamiya's 1/35th scale Renault UE. It is small, a quick build, fits together well..... and is French!
Being a smaller vehicle, brush painting will not be as noticeable as it will on the larger vehicles.
Joining a club as someone suggested is a great way to meet modellers, learn techniques, etc. Also clubs or club members sometimes have kit sales, etc, which is a great way to pick up items cheaply which means you can afford more kits to help your skills develop. The more you build, the better you will get with the experience.
Cheers
Peter
I googled this kit, and it looks nice to "reconnect" with the hobby.....will have to check at my preferred hobby shop if they have it available

Posted: Monday, January 02, 2017 - 01:03 AM UTC
Have fun, grab a kit you like and just go for it.
The first kit I tried, well that did not end well, but I grabbed another as I just had fun.
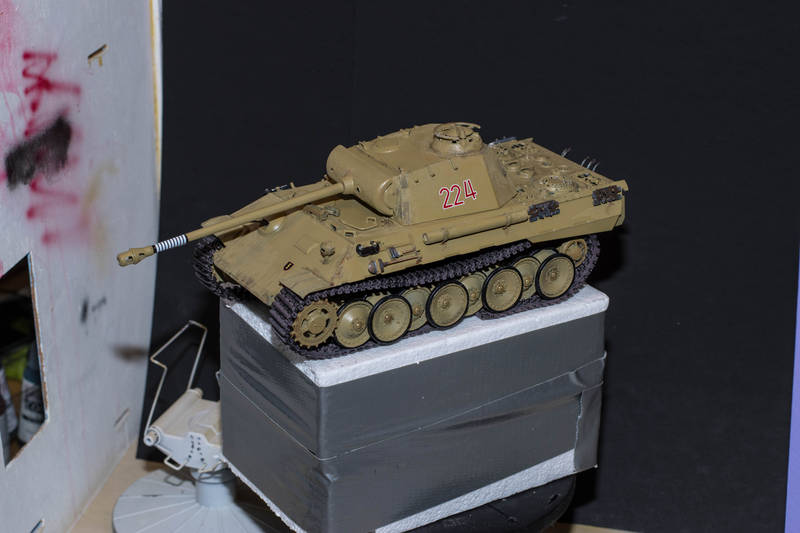
This is my second kit, went back to something I had done before and I think it does not look too bad, still needs some work but the end is in sight.

The first kit I tried, well that did not end well, but I grabbed another as I just had fun.
This is my second kit, went back to something I had done before and I think it does not look too bad, still needs some work but the end is in sight.

Posted: Tuesday, January 03, 2017 - 03:03 AM UTC
Xavier,
the key to getting back into the hobby and enjoying it is to realise that this is a skill, and any skill takes practice.
I can almost guarantee that your first model (and probably your next 10) are not going to look anything near as good as most you see online. To that end buy cheap and build often./ Build a subject you like, sure, but don't bother much with the newer kits. many have a high part count and may have metal or photo etched parts, which are very common in newer kits.
Build several older Tamiya or Italeri kits. They are not terribly accurate in some cases, but they go together well and are, most importantly, cheap. Focus on the basic skills: cleaning up parts, getting things to line up well, using just the right amount of glue and seam fillers, etc.
Get two or three basic kits under your belt, brush painted, before worrying about things like accuracy or photo etch or air brushes. You'll find a lot of things to exercise your skills on those first few kits without becoming overwhelmed trying to learn to do ALL the things the first few times out.
Once you are getting reasonable results on the building side, then start to look at simple airbrushing. Getting the one or two simple colours onto the model evenly and cleanly. You'll still need to hand paint small details and road wheels, so continue the brush skills.
After a few of those _then_ maybe look at a kit with separate track links or photo etch. maybe scratch build a small detail or two or correct a flaw in the kit by hand, but that should be several out-of-the-box kits down the road. If you concentrate on the basics and slowly crawling before you try to sprint, you'll minimise the frustration and maximise the enjoyment.
Keep your expenses down by sticking to the simple tools for the simple builds and finishes on the first few models.
And come back to ask for simple tips to jump those hurdles when you get to them. There are lots of us here that are happy to help out.
All the best.
Paul
GaryKato

Joined: December 06, 2004
KitMaker: 3,694 posts
Armorama: 2,693 posts

Posted: Tuesday, January 03, 2017 - 04:02 AM UTC
Quoted Text
Hi
If you want to keep it to a relatively inexpensive as a start up project, try Tamiya's 1/35th scale Renault UE. It is small, a quick build, fits together well..... and is French!
Being a smaller vehicle, brush painting will not be as noticeable as it will on the larger vehicles.
I second that! It is one of the few kits I've completed! It is also one of the later Tamiya kits so it fits well. You have to watch for the "moldy-oldies" that Tamiya still puts out (like their 25-pdr). Fortunately, their French stuff is quite new.
French_guy

Joined: December 31, 2016
KitMaker: 17 posts
Armorama: 17 posts
Posted: Tuesday, January 03, 2017 - 04:14 AM UTC
I've just purchased that kit actually...My store sells it for $32
Does it fall under the "cheap" kits that TankModeler was suggesting?
I've seen other kits in the $20 price range.....
I realize the store I go has a pretty large selection by the way
Does it fall under the "cheap" kits that TankModeler was suggesting?
I've seen other kits in the $20 price range.....
I realize the store I go has a pretty large selection by the way
GaryKato

Joined: December 06, 2004
KitMaker: 3,694 posts
Armorama: 2,693 posts

Posted: Tuesday, January 03, 2017 - 05:21 AM UTC
The "cheap" kits are usually the older Tamiya kits,like the 25-pdr. :-) They don't go as nicely together as the newer ones and you will certainly gain in modeling skills (and increase your vocabulary).
French_guy

Joined: December 31, 2016
KitMaker: 17 posts
Armorama: 17 posts
Posted: Tuesday, January 03, 2017 - 06:13 AM UTC
Talking about vocabulary......25 "pdr"???

bison126

Joined: June 10, 2004
KitMaker: 5,329 posts
Armorama: 5,204 posts

Posted: Tuesday, January 03, 2017 - 11:56 AM UTC
Quoted Text
Talking about vocabulary......25 "pdr"???
The way the Brits categorize the gun shell calibers. Most of the armies use the diameter of the shell in mm, the Brits use the weight in their imperial measures, if Im' correct.
Olivier
Posted: Tuesday, January 03, 2017 - 12:30 PM UTC
Spot on.
French_guy

Joined: December 31, 2016
KitMaker: 17 posts
Armorama: 17 posts
Posted: Tuesday, January 03, 2017 - 04:35 PM UTC
I've read that somewhere......."pounder", right?

TopSmith

Joined: August 09, 2002
KitMaker: 1,742 posts
Armorama: 1,658 posts

Posted: Tuesday, January 03, 2017 - 06:06 PM UTC
McDonald's has the quarter pounder and the Brits have the twenty five pounder! 


RobinNilsson

Joined: November 29, 2006
KitMaker: 6,693 posts
Armorama: 5,562 posts

Posted: Tuesday, January 03, 2017 - 06:35 PM UTC
From Wikipedia:
https://en.wikipedia.org/wiki/Caliber
article about weapon calibers, at the end there is a section about defining caliber as the weight of the shell.
"Pounds as a measure of cannon bore
Smoothbore cannon and carronade bores are designated by the weight in imperial pounds of spherical solid iron shot of diameter to fit the bore. Standard sizes are 6, 12, 18, 24, 32, and 42 pounds, with some 68-pound weapons, and other nonstandard weapons using the same scheme. See Carronade#Ordnance.
From about the middle of the 17th century until the middle of the 19th century, measurement of the bore of large gunpowder weapons was usually expressed as the weight of its iron shot in pounds. Iron shot was used as the standard reference because iron was the most common material used for artillery ammunition during that period, and solid spherical shot the most common form encountered. Artillery was classified thereby into standard categories, with 3 pounders (pdr.), 4 pdr., 6 pdr., 8 pdr., 9 pdr., 12 pdr., 18 pdr., 24 pdr., and 32 pdr. being the most common sizes encountered, although larger, smaller and intermediate sizes existed.
In practice, though, significant variation occurred in the actual mass of the projectile for a given nominal shot weight. The country of manufacture is a significant consideration when determining bore diameters. For example, the French livre, until 1812, had a mass of 489.5 g whilst the contemporary English (avoirdupois) pound massed approximately 454 g. Thus, a French 32 pdr. at the Battle of Trafalgar threw a shot with 1.138 kg more mass than an English 32 pdr.
Complicating matters further, muzzle-loaded weapons require a significant gap between the sides of the tube bore and the surface of the shot. This is necessary so the projectile may be inserted from the mouth to the base of the tube and seated securely adjacent the propellant charge with relative ease. The gap, called windage, increases the size of the bore with respect to the diameter of the shot somewhere between 10% and 20% depending upon the year the tube was cast and the foundry responsible."
// my comment
Nice table here in the Wikipedia article.
The dimensions for the muzzle loaded 18 pdr is completely different from the WW I or WW II 18 pounders, ain't it fun with all these strange measurement systems ...
end of comment, article continues//
"The relationship between bore diameter and projectile weight was severed following the widespread adoption of rifled weapons during the latter part of the 19th century. Guns continued to be classed by projectile weight into the mid-20th century, particularly in British service. However, this value no longer had any relation to bore diameter, since projectiles were no longer simple spheres—and in any case were more often hollow shells filled with explosives rather than solid iron shot."
/ Robin
French_guy

Joined: December 31, 2016
KitMaker: 17 posts
Armorama: 17 posts
Posted: Tuesday, January 03, 2017 - 06:53 PM UTC
Quoted Text
McDonald's has the quarter pounder and the Brits have the twenty five pounder!
This joke about Brits should have come from a French……


iakarch

Joined: May 19, 2007
KitMaker: 459 posts
Armorama: 421 posts

Posted: Tuesday, January 03, 2017 - 08:02 PM UTC
Quoted Text
The "cheap" kits are usually the older Tamiya kits,like the 25-pdr. :-) They don't go as nicely together as the newer ones and you will certainly gain in modeling skills (and increase your vocabulary).
I agree if your serious about getting back in to the hobby as you seem to be don't waste your time with an old kit that needs a lot of work and extra parts like track and photo etch. there are a lot of new high quality kits with every thing you need in the box.
more important than the kit is the basic tools glue you need. and most important of all is patience. I know that dragon King Tiger kit well and its ok, as a base kit, but it needs a lot added to it to make it good model.
French_guy

Joined: December 31, 2016
KitMaker: 17 posts
Armorama: 17 posts
Posted: Wednesday, January 04, 2017 - 12:03 AM UTC
Hoping it’s not a stupid question, but for that specific model (Tamiya French armor carrier Renault U.E)
Should I build the whole kit first, and then do the painting (starting with a primer on the whole model), or should I paint some parts before starting to build/glue it?
Thanks
Should I build the whole kit first, and then do the painting (starting with a primer on the whole model), or should I paint some parts before starting to build/glue it?
Thanks

iakarch

Joined: May 19, 2007
KitMaker: 459 posts
Armorama: 421 posts

Posted: Wednesday, January 04, 2017 - 02:49 AM UTC
Xavier,
Its my practice to leave the suspension and any tools separate from the hull making it easier to paint them. Plan your sub assemblies then do all your painting last (unless there is some interior painting then you do that first). Thats a very nice little kit you picked.
Its my practice to leave the suspension and any tools separate from the hull making it easier to paint them. Plan your sub assemblies then do all your painting last (unless there is some interior painting then you do that first). Thats a very nice little kit you picked.
 |


