_GOTOBOTTOM
Armor/AFV: What If?
For those who like to build hypothetical or alternate history versions of armor/AFVs.
Hosted by Darren Baker
Amusing Hobby 1/3 Jadgpanther II
darklen
Visit this Community
Alberta, Canada
Joined: September 16, 2003
KitMaker: 72 posts
Armorama: 70 posts
Posted: Tuesday, January 24, 2017 - 12:22 AM UTC


I received the new Amusing Hobby Jagdpanther II in 1/35 last week and spent the last few days building it. This is the first Panther II or variant in 1/35 in plastic since the Dragon 1994 release, which was plagued by accuracy problems. Remember, the Panther II was an actual mid-war project, not some late war fantasy as some believe. The sole (completed) lower hull is on display at the Ft. Knox museum with a Panther G turret installed. The project was canceled and many design elements used on the G. The turret for the Panther II was (as far as anyone knows) never designed or even a mock up built.

I'd like to thank the crew form Modellbau-König for processing my order and getting this kit to me so quickly. Two weeks from Germany to Western Canada! Thanks guys.

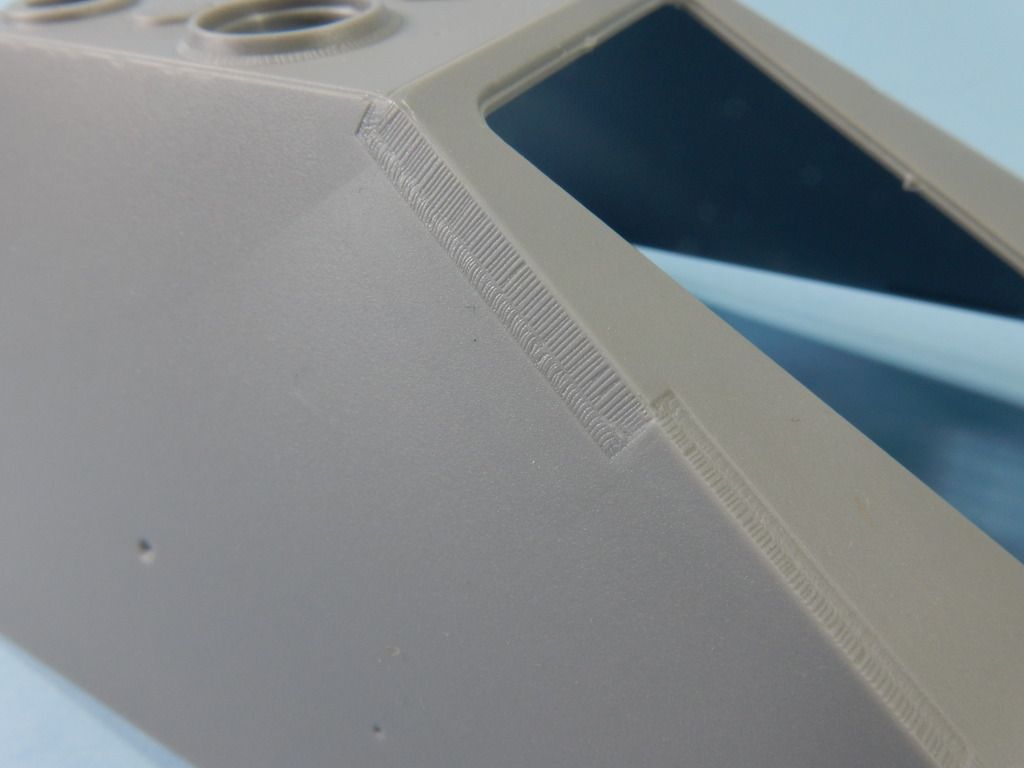
The kit details are an odd mix from exquisite to meh average. For example, the torch cuts and weld seams are very nicely done, while the steel wheels aren't really any better than the old Dragon kit. All the sprues in the kit are used with the upcoming Panther II with some additional sprues. The build is going quite well. As this is my first Amusing Hobby kit, I'm pleased with the engineering so far.

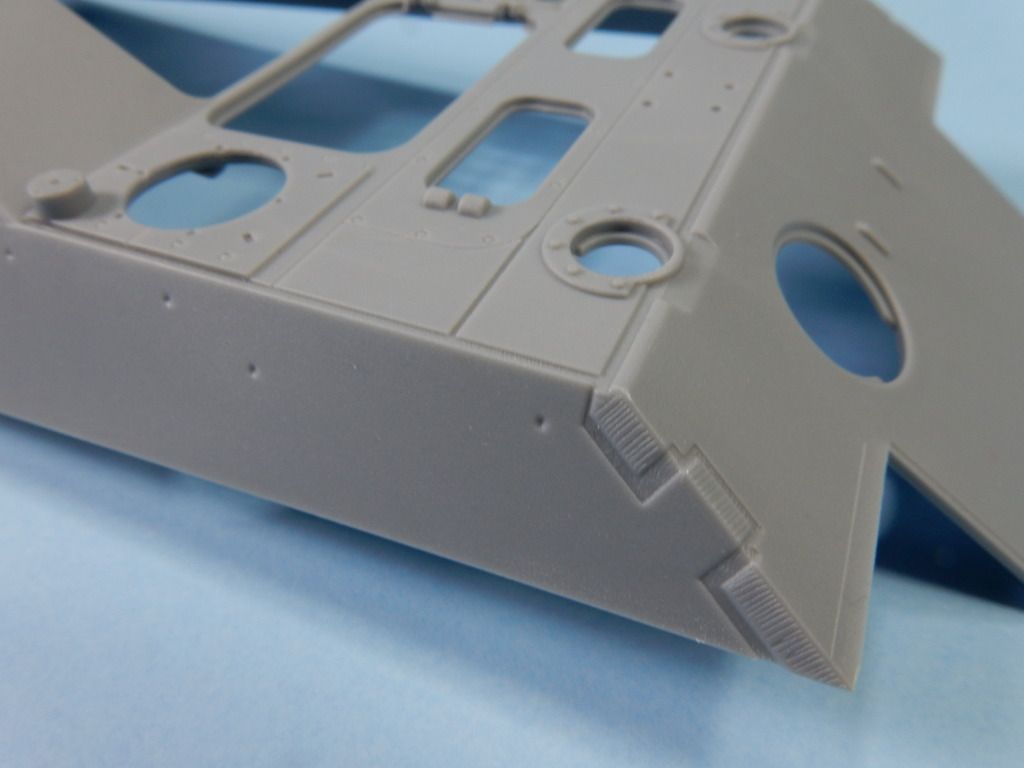
Here's some of the torch cuts & weld seams. Very nice.


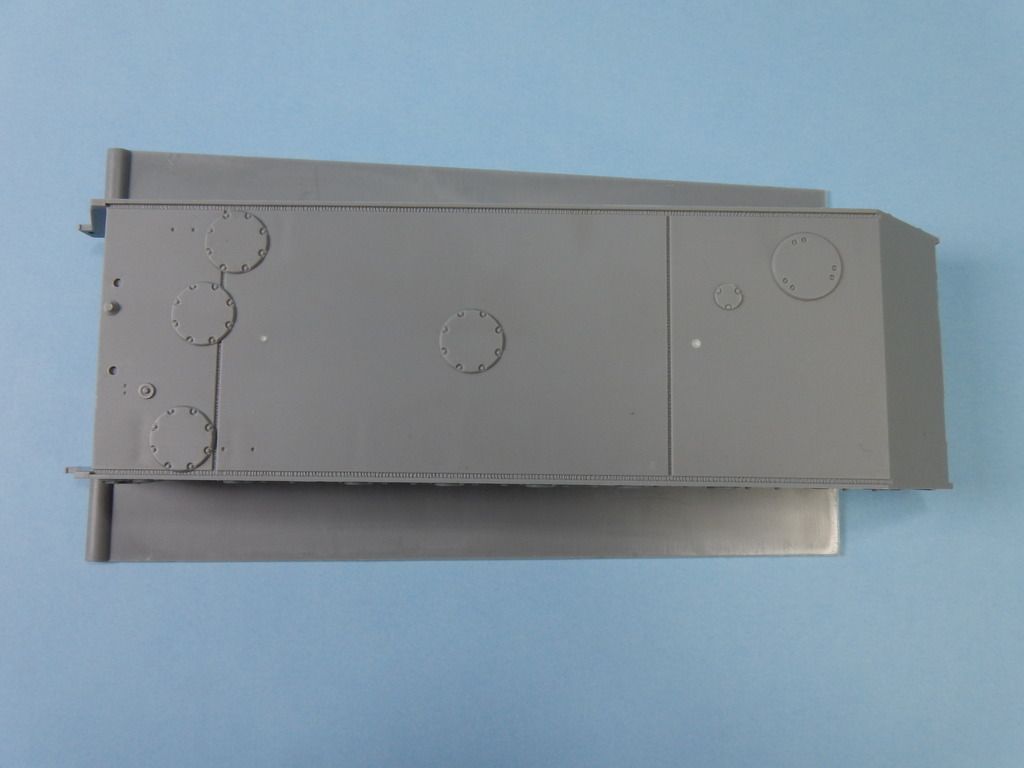
An interesting shot of the bottom. What I found interesting was the two locator marks at the rear. These would be for the special tow hitch the Panther II was designed to mount. It's not in this kit but is in the upcoming Panther II.


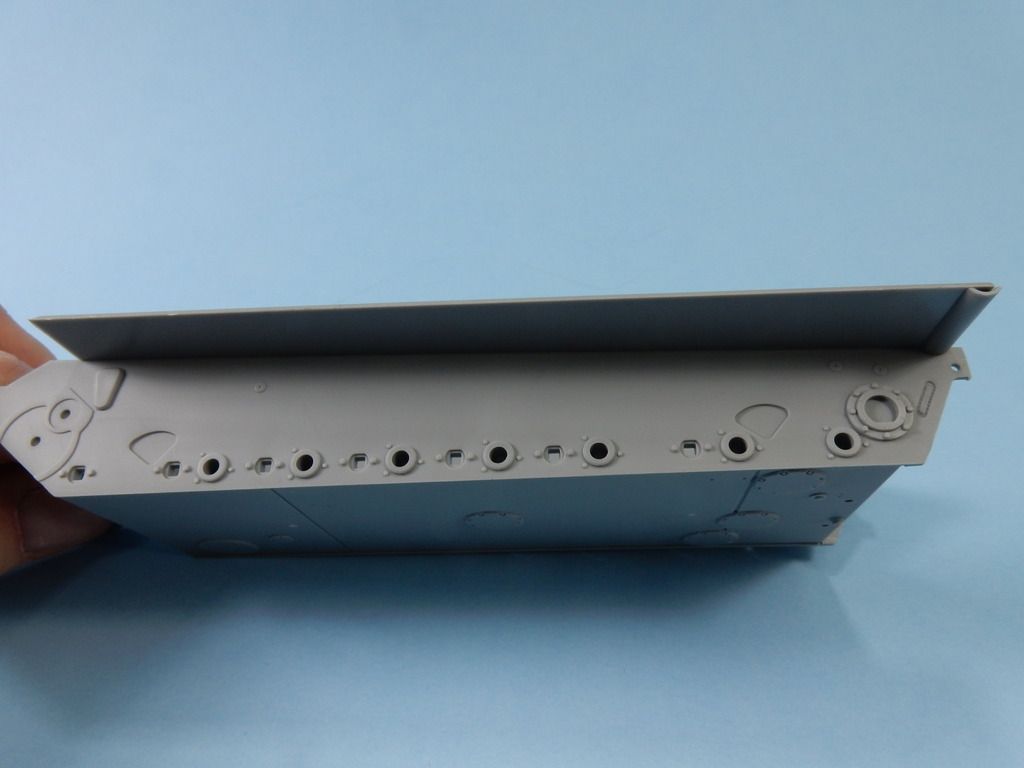
The suspension fits normally with separate torsion bars and swing arms that key into the lower hull. These are somewhat workable if installed as per the instructions. the swing arms don't really line up straight when installed but I'm hoping the weight of the finished vehicle will level them out. Some swing arms had some pretty bad sink marks, requiring putty. Fortunately, most won't be seen once the wheels are mounted. i did compare the suspension to the drawing in the Jentz & Doyle Panzer Tracts 5-4 on the Panther II & Panther F and they are pretty much bang on, unlike Dragons suspension.
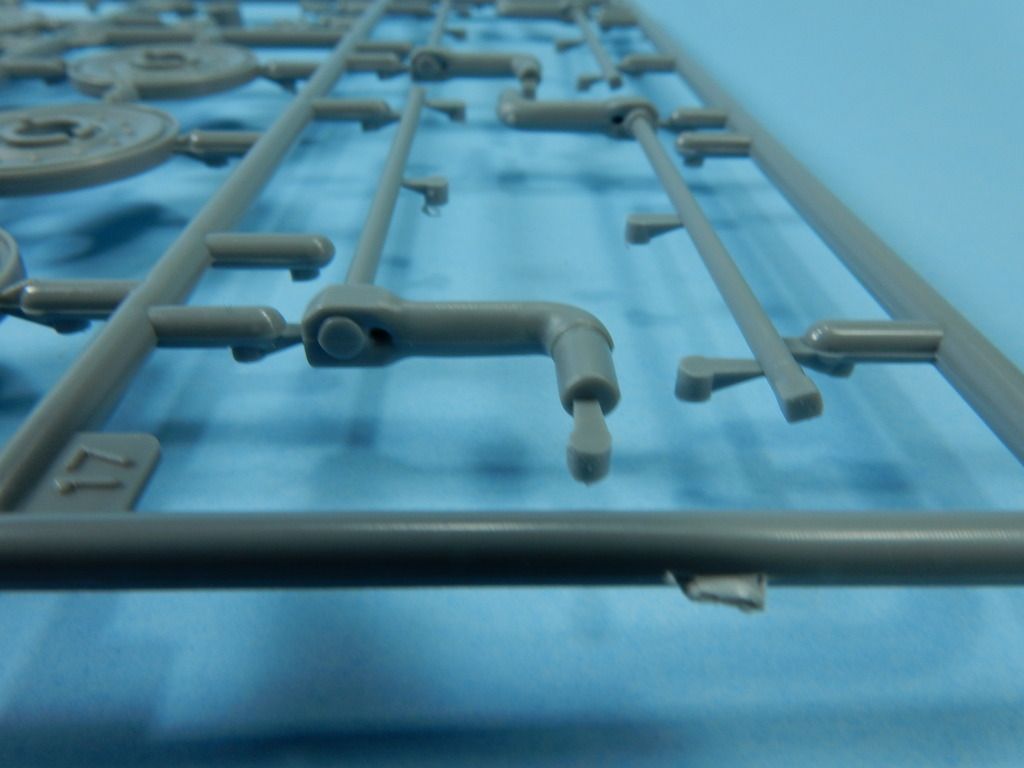
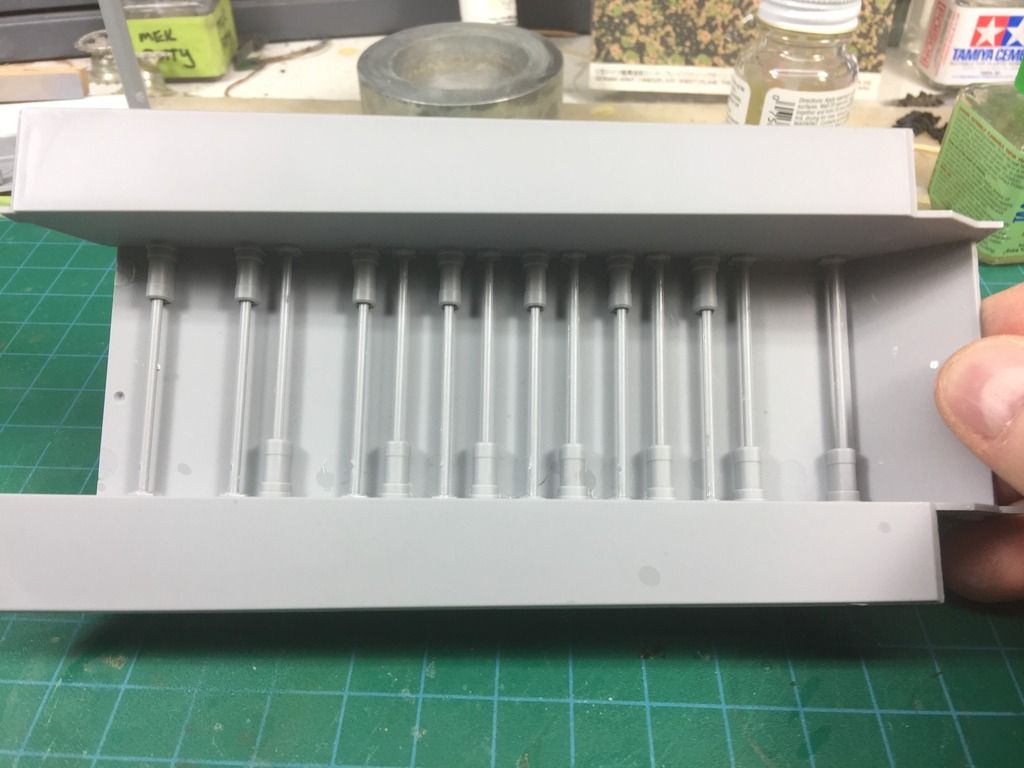
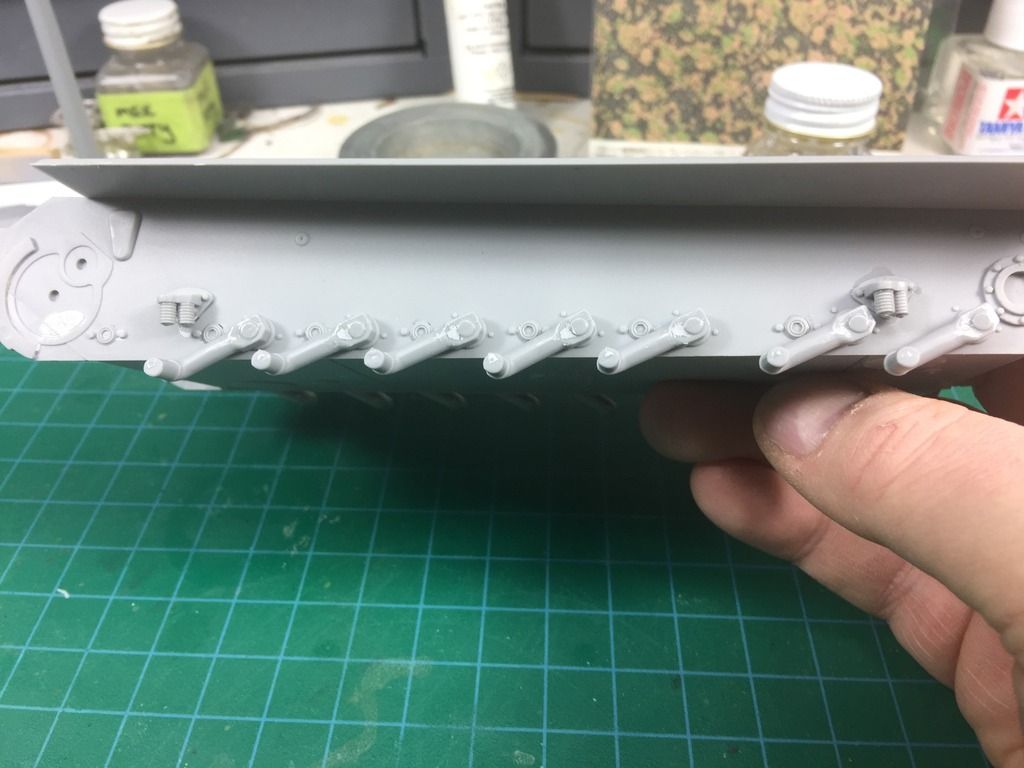
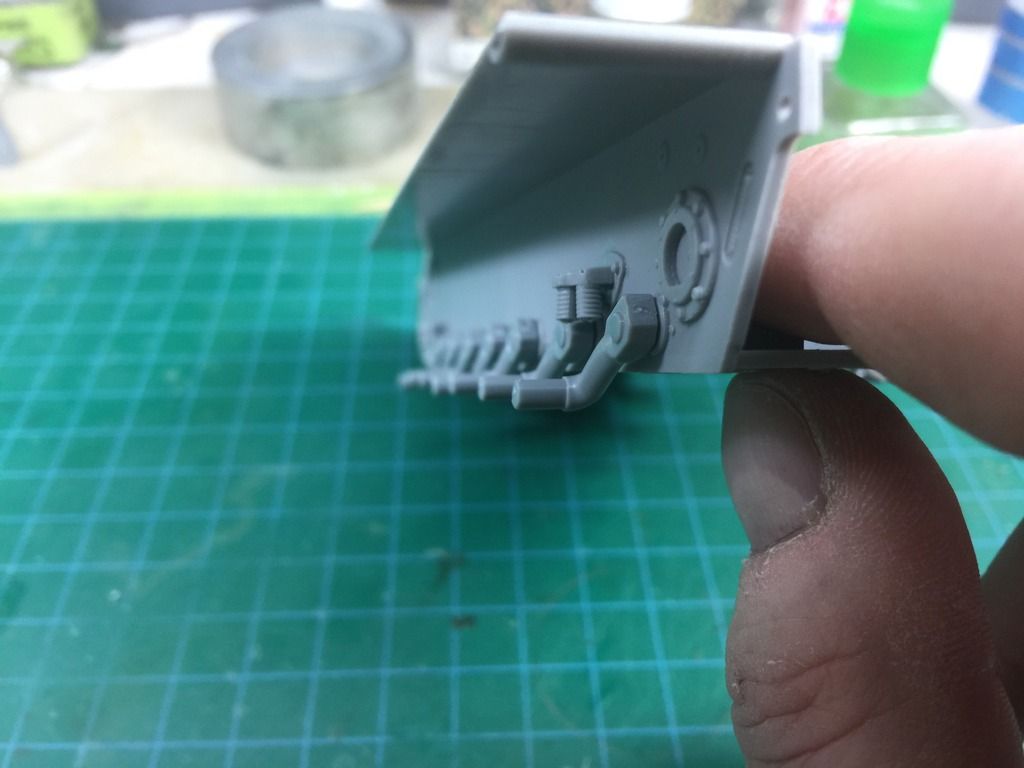


There some parts for the drive sprocket housing and tow points that get glued on. A little putty was needed to blend them in but not much.
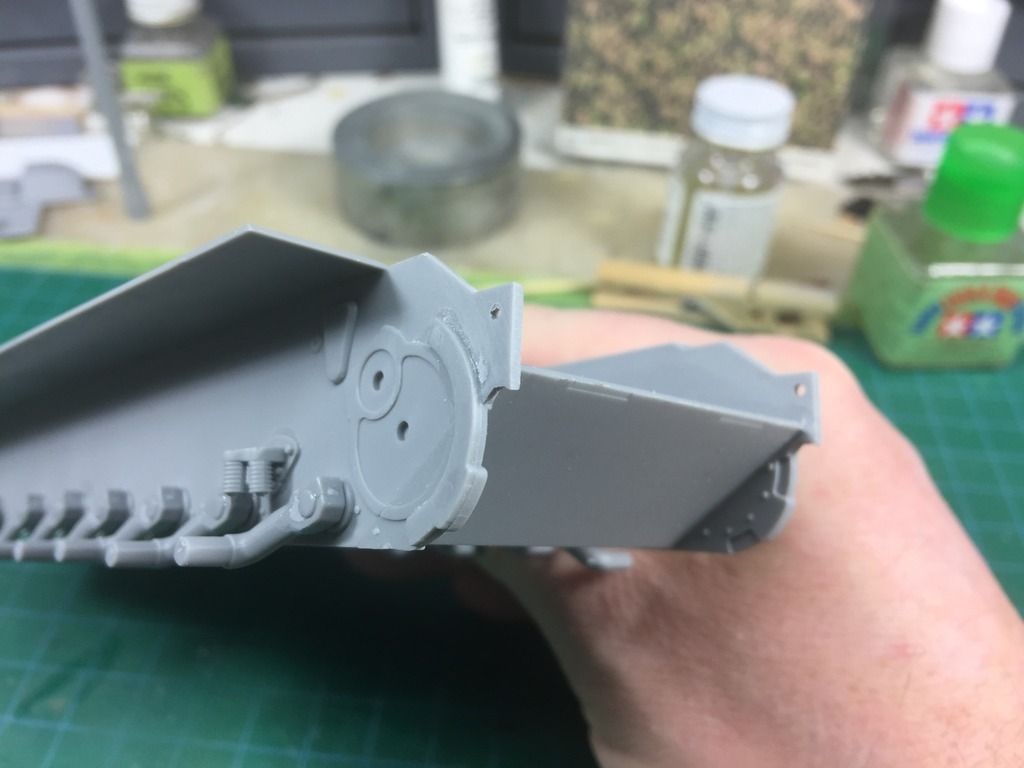


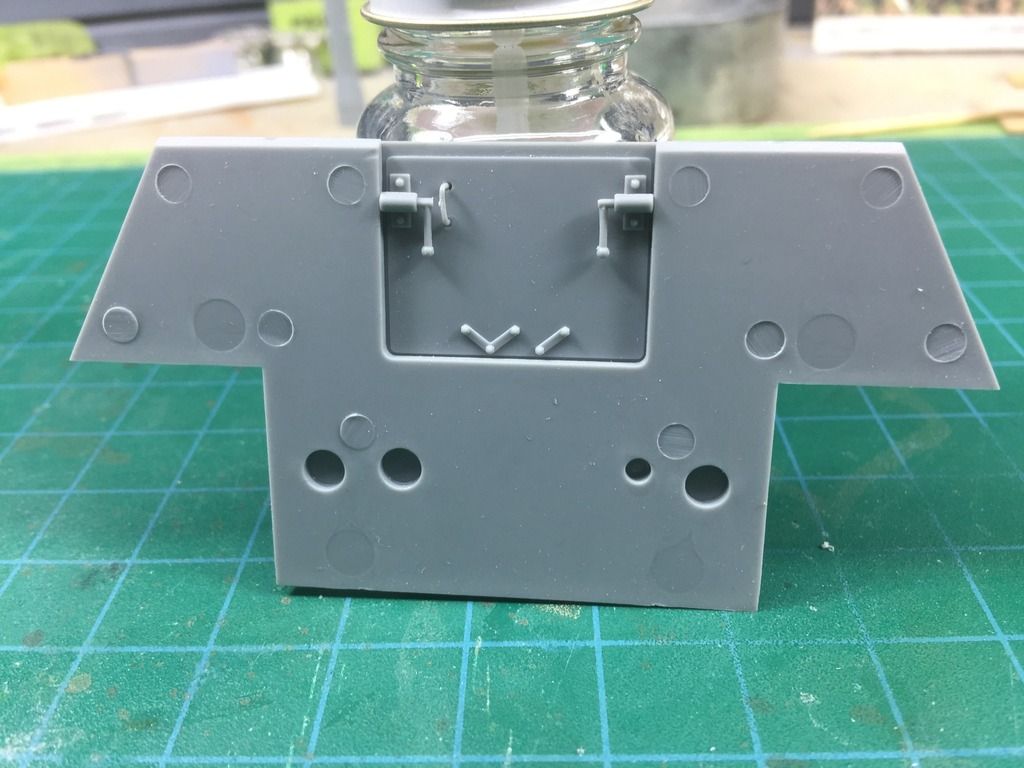
The lower hull rear plate was easy to assemble. It features a working lower door (there's an upper door on the upper hull, workable as well). The stowage boxes have PE clamps on them with locator points on the boxes themselves.
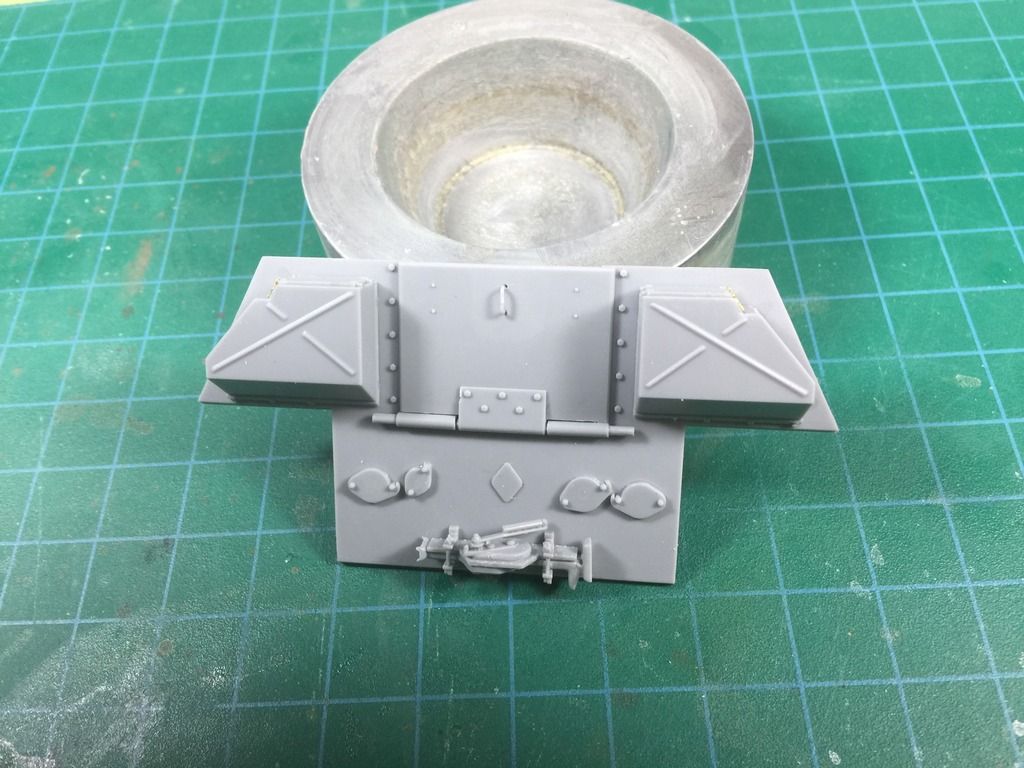
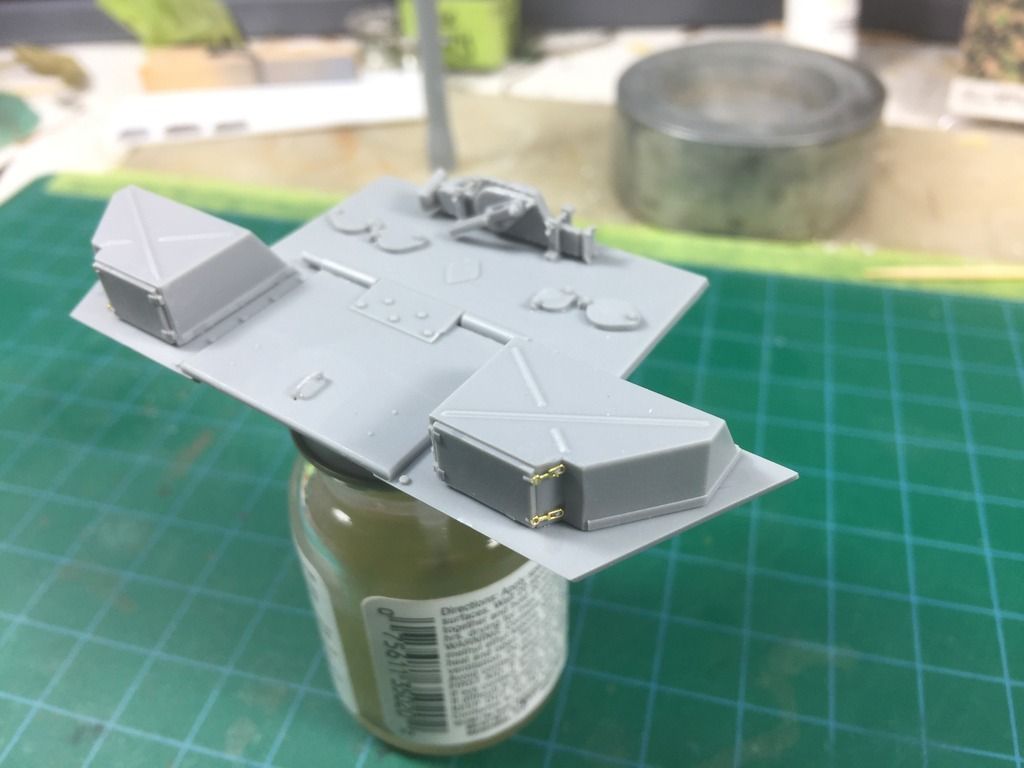


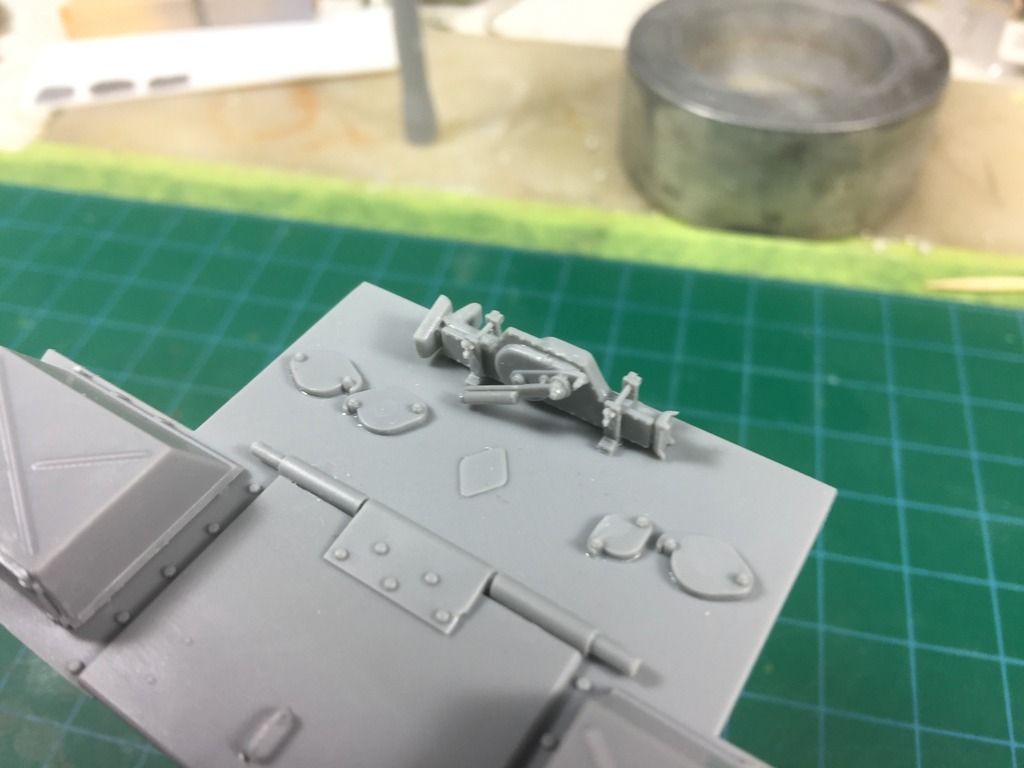
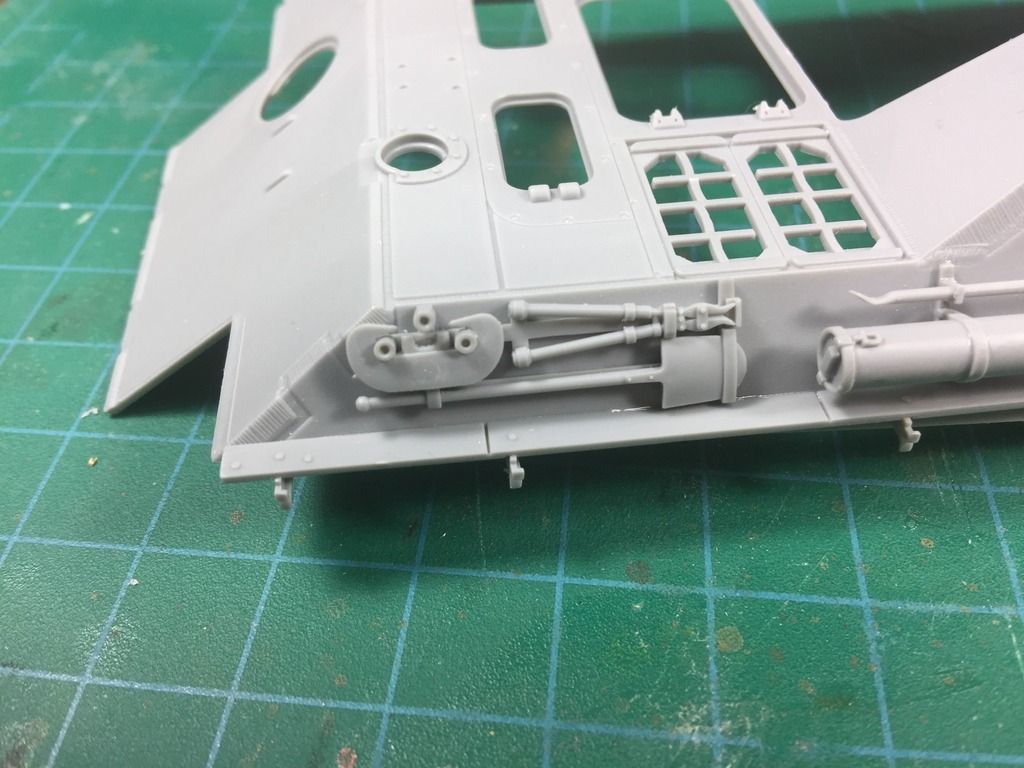
There's a multi piece jack that looks very nice when built. It mounts to the hull with molded retainers. Check out the wing nut detail. The access ports on either side of the jack are separate as well.


There is some interior detail to the door. I installed it but didn't clean it up much as I glued the door closed.


The tools and tool racks are separate parts and go together well. There are no clamps for the tools nor even molded on representation of them, just some banding. The fire extinguisher is quite nicely done and there are PE parts for the sledge hammer and ax.
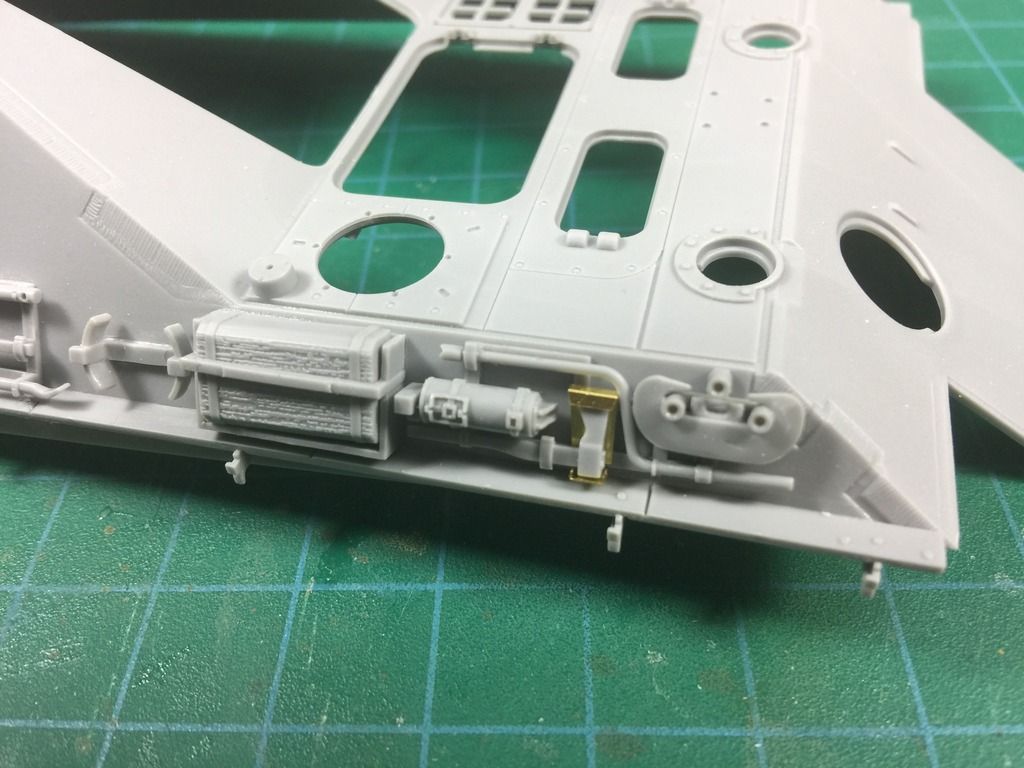
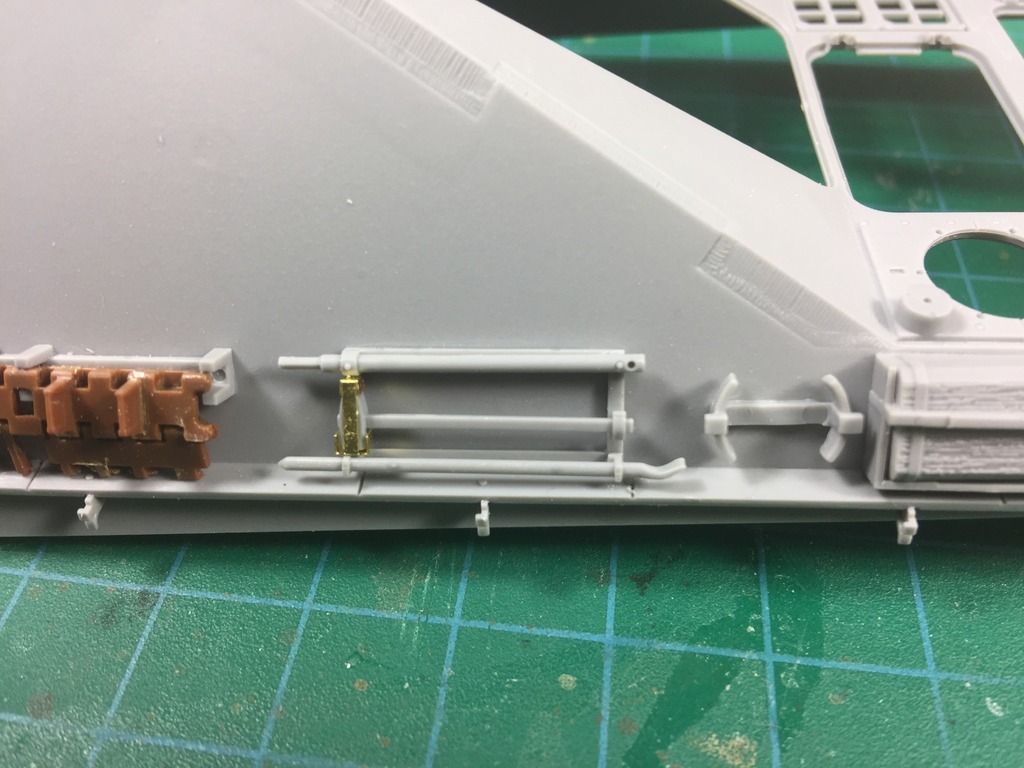


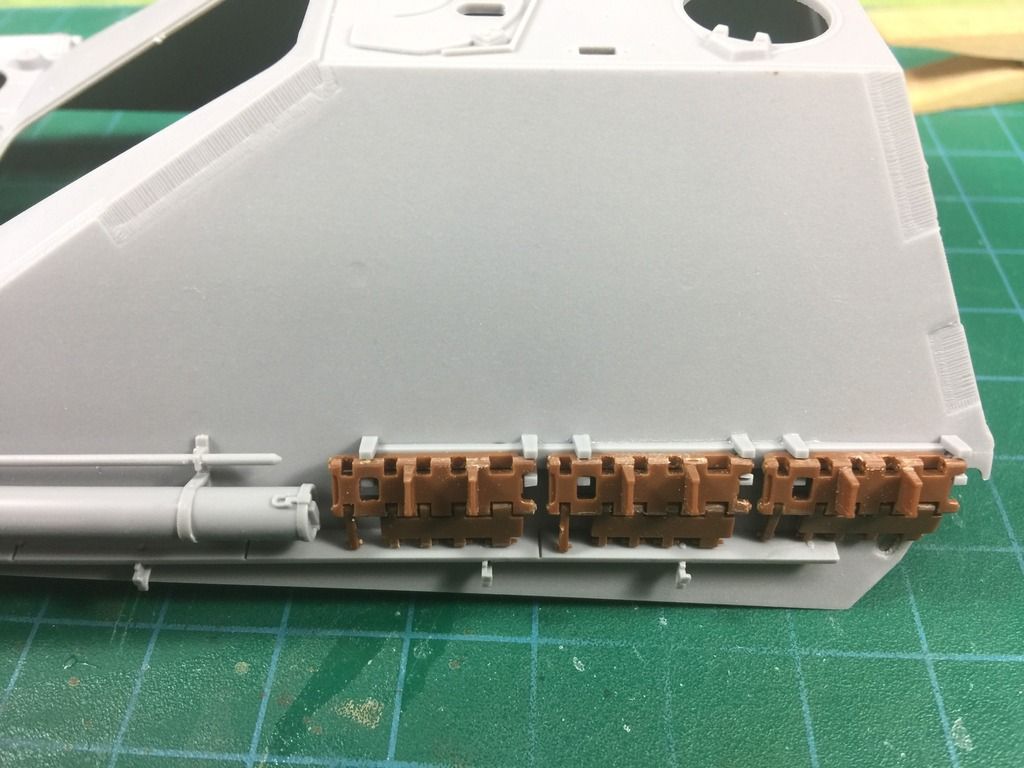
The track holders fit the tracks ok but are clunky and not long enough really. They should stick out another mm or 2 as the real holder had a pin & chain assembly to secure the tracks. The Dragon track holders are too short as well but are better molded for thickness than these.

The fender is one piece with 6 individual side skirt mounts.
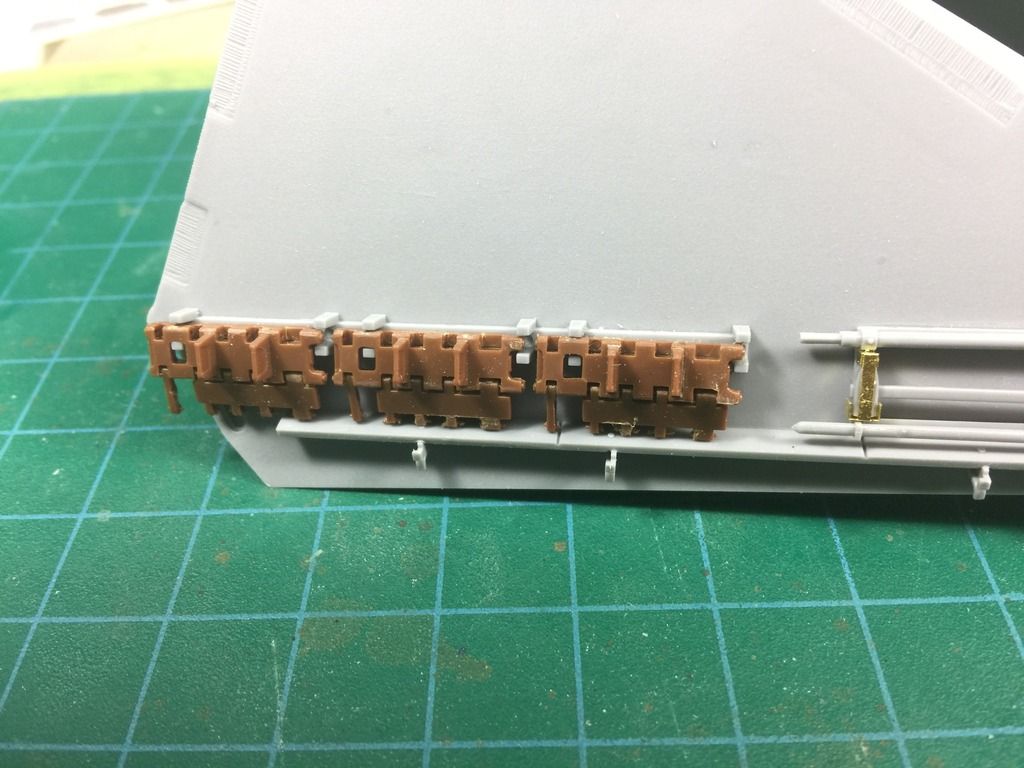


The drivers side took rack and cleaning tool tube. The instructions show the tube with the 90° angle iron rain shield on it but it's not on the part or anywhere in the kit.


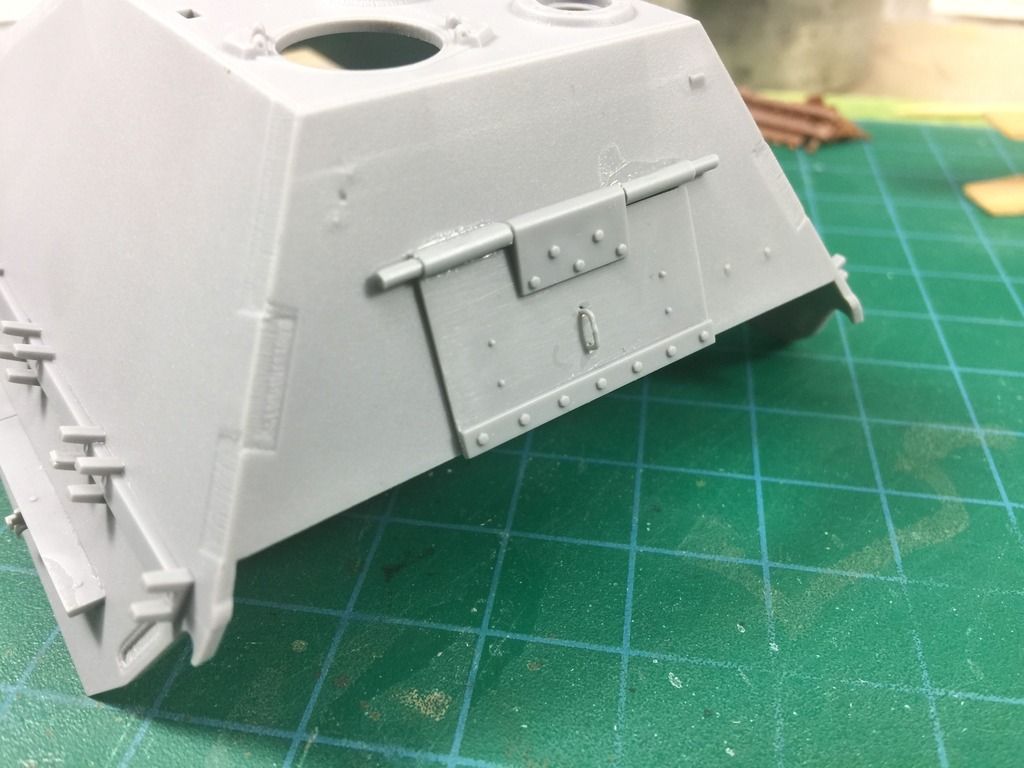
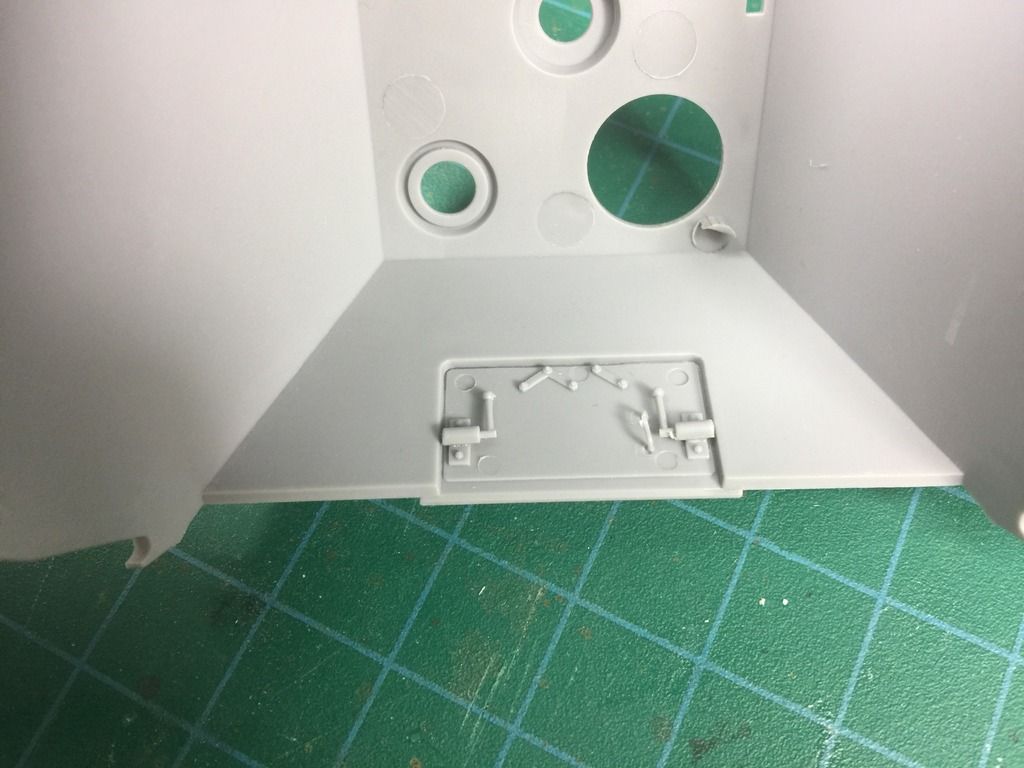
The rear door on the upper hull is similar to the lower, though the inside is marred by ejector pin marks. There is no interior detail other than the insides of the hatches, not even a rudimentary breech.


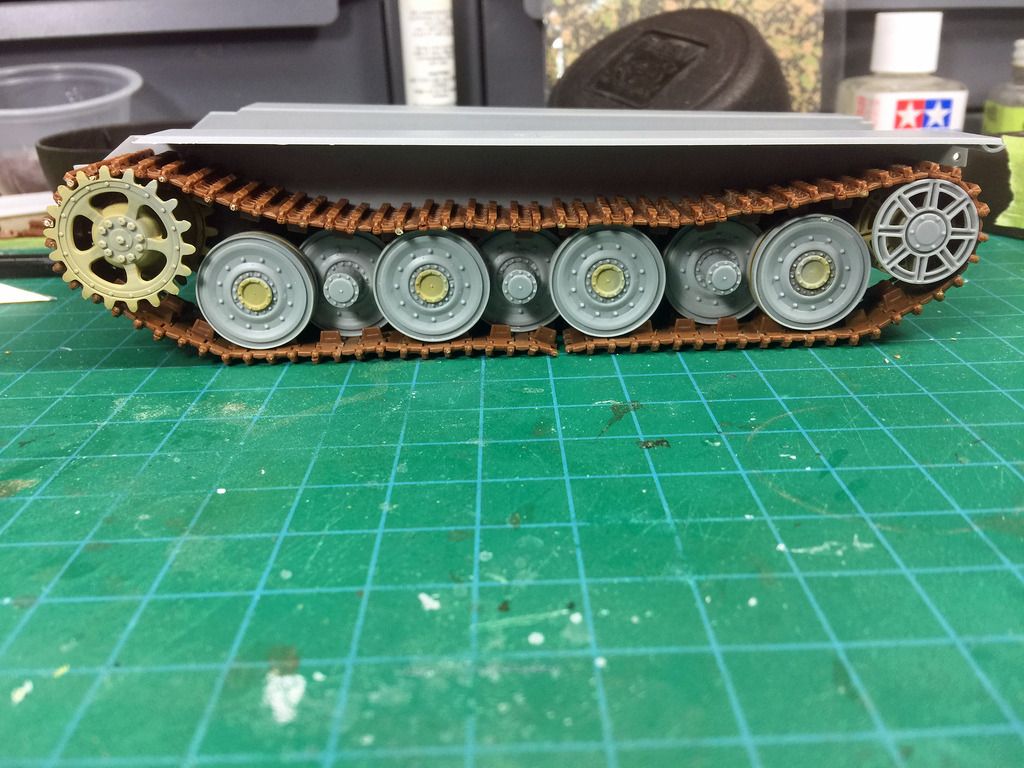
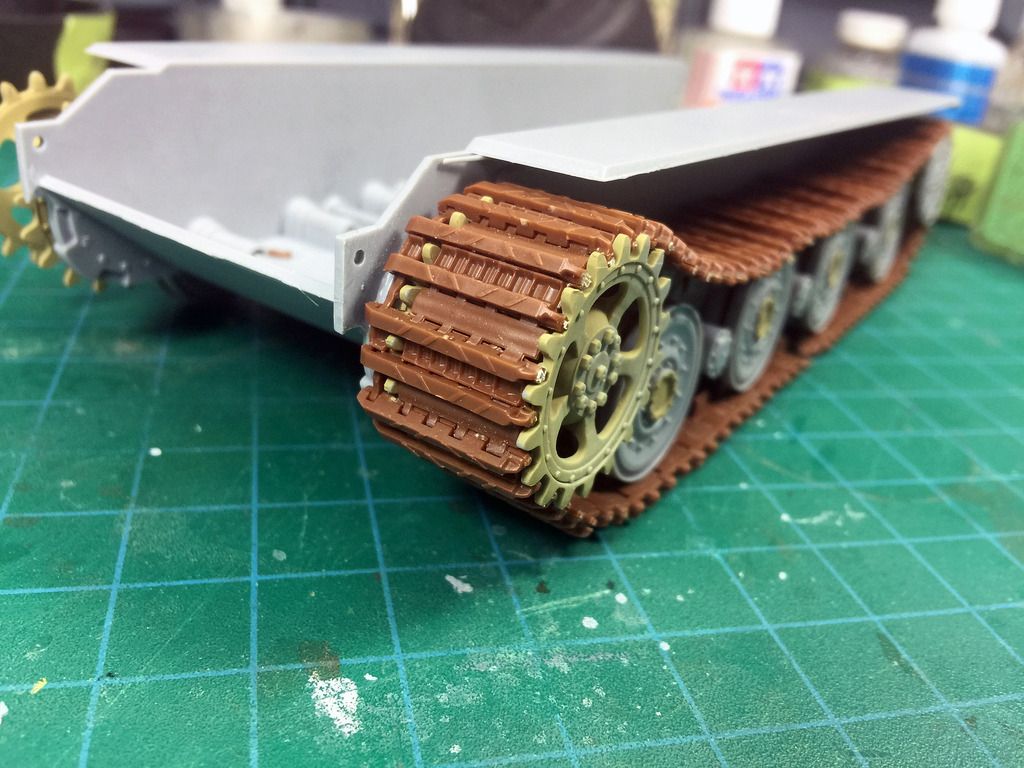
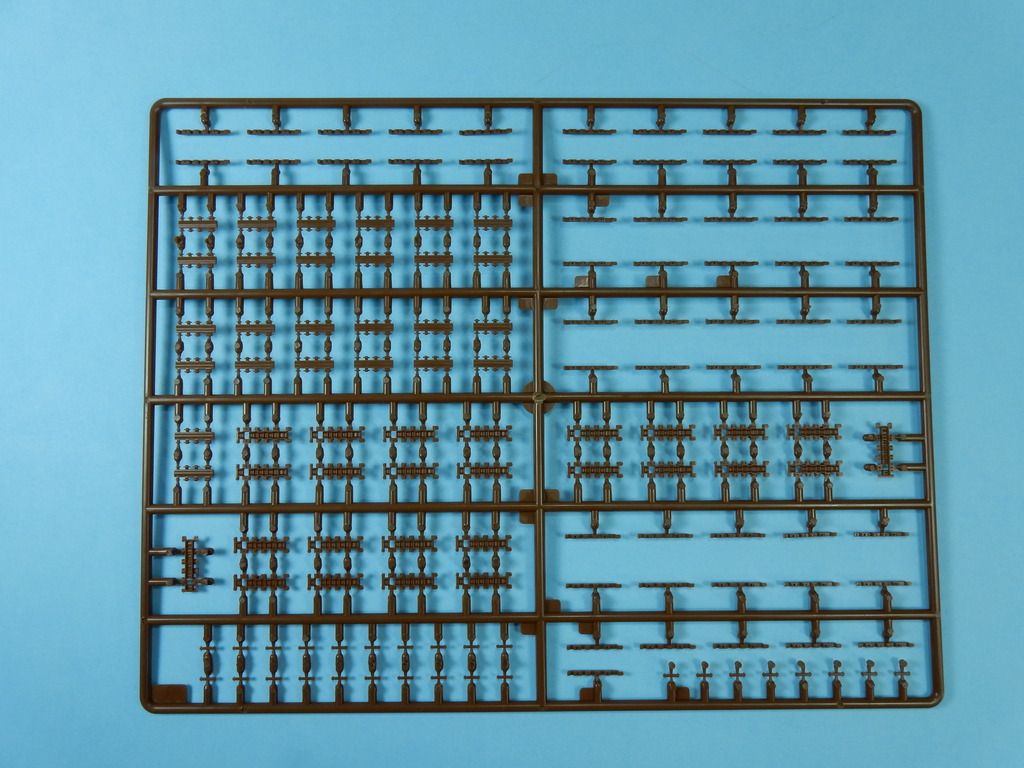
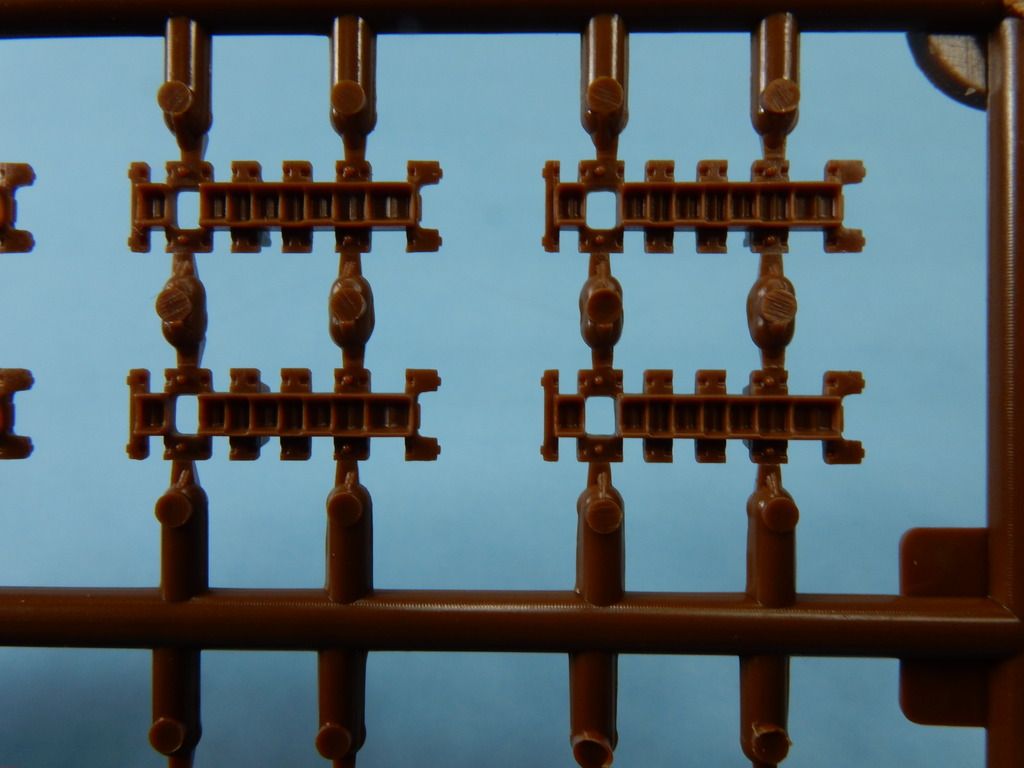
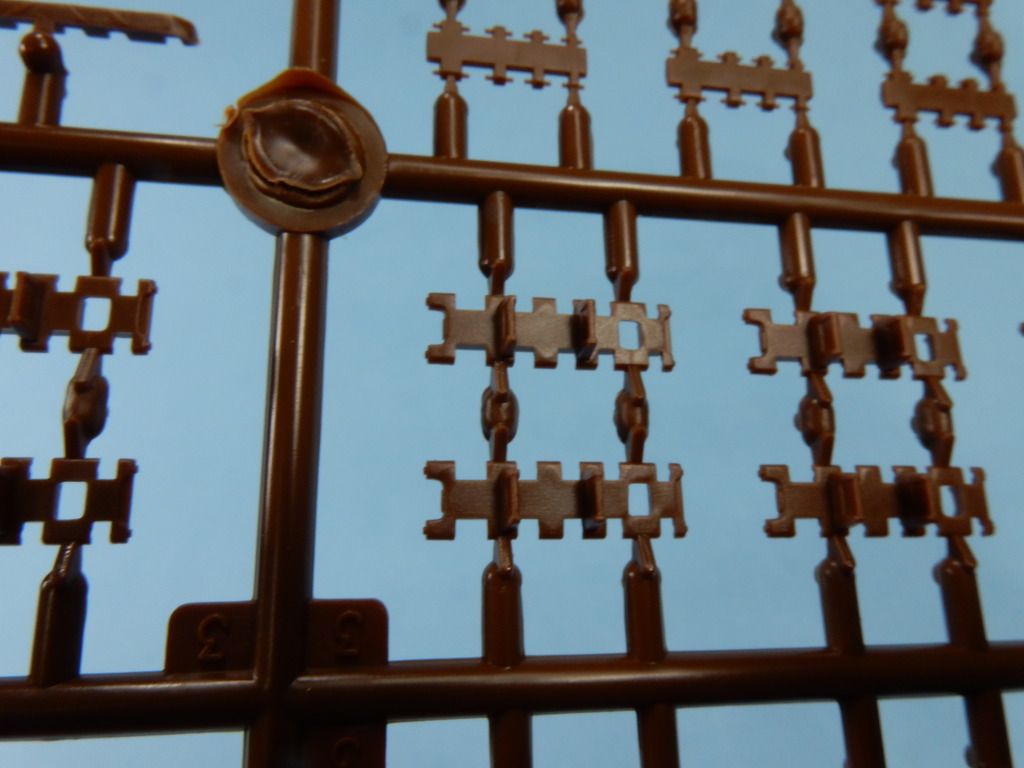
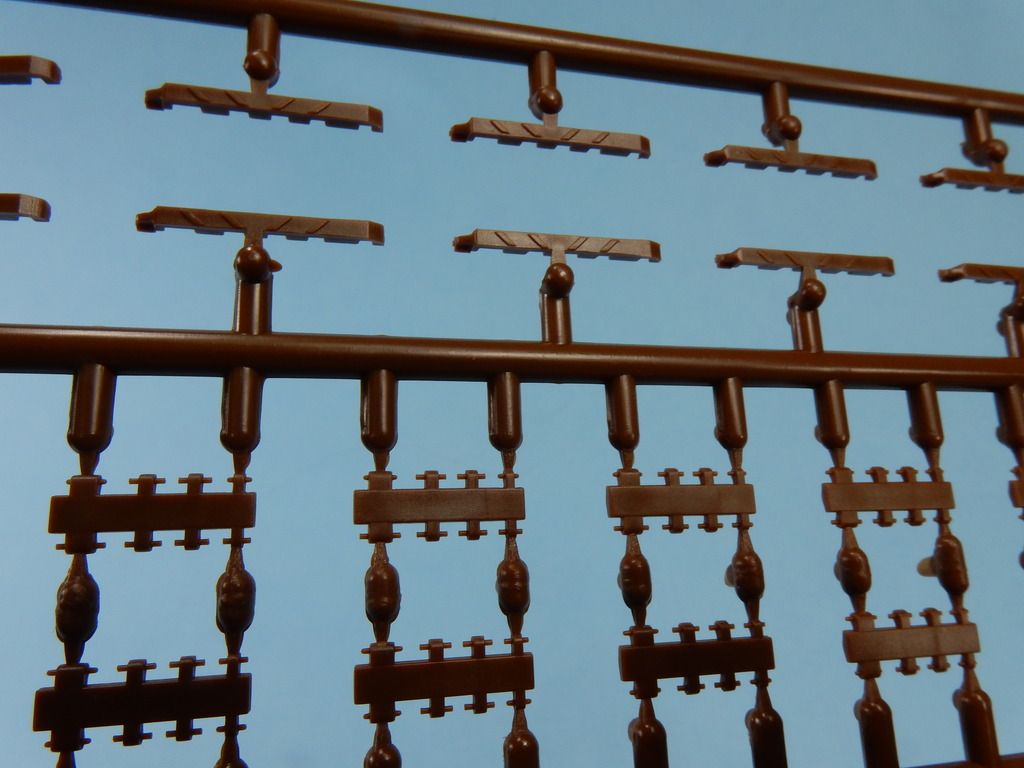
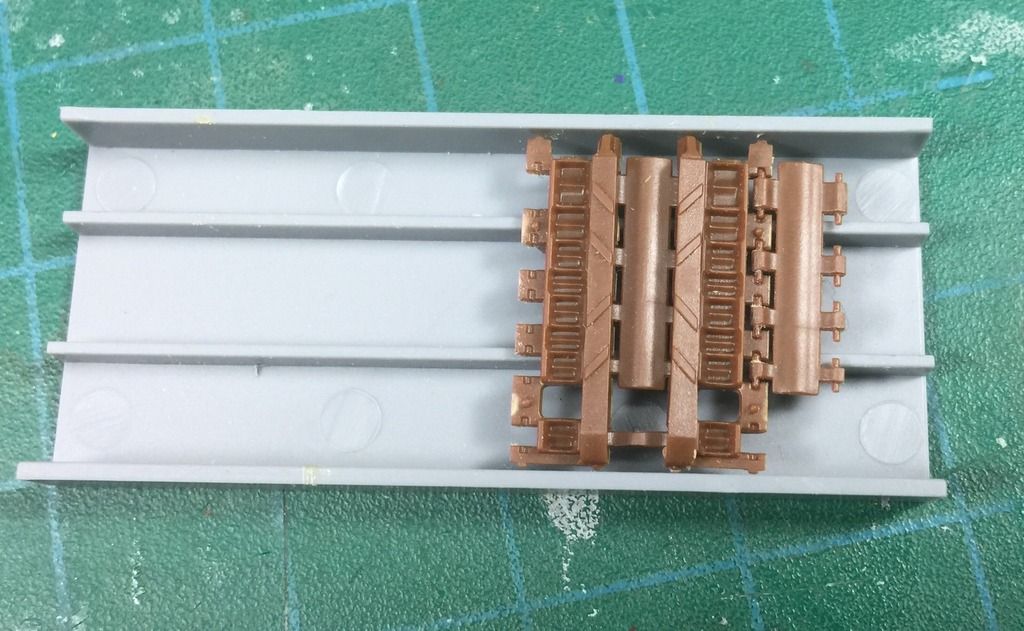
The tracks. Oh boy, the tracks. There are 4 sprues of track parts and 5 parts for every two links. The tracks can be made workable with care. Lots of care. And swearing. And lots of rum. The parts are, the main link (with the web detail inside of it), the connecting link (rounded on one side, flat on the other), the tiny end link and two different ice cleat parts. An assembly jig in is included but it's pretty small. To do a run, set up the main and connecting links. Be careful to orient the connecting links properly with the rounded side up (facing out). Once those are set up, add the tiny end links. Do I need to say sharp tweezers and a steady hand are needed for this? Once those are done, add a tiny drop of glue one the very end (top in the picture) and the large tab by the sprocket tooth hole and add the appropriate cleat part. There is an orientation to them so pay attention. The cleats should point like arrows to either side away from the main cleat. Note one side of the cleat has a narrowed part at the end, while the other does not. I should note, there is not a single ejector pin mark on any of the track link parts, not one. If you don't want to use these tracks, I test fitted both Fruil and Spade Ace and they both fit fine.


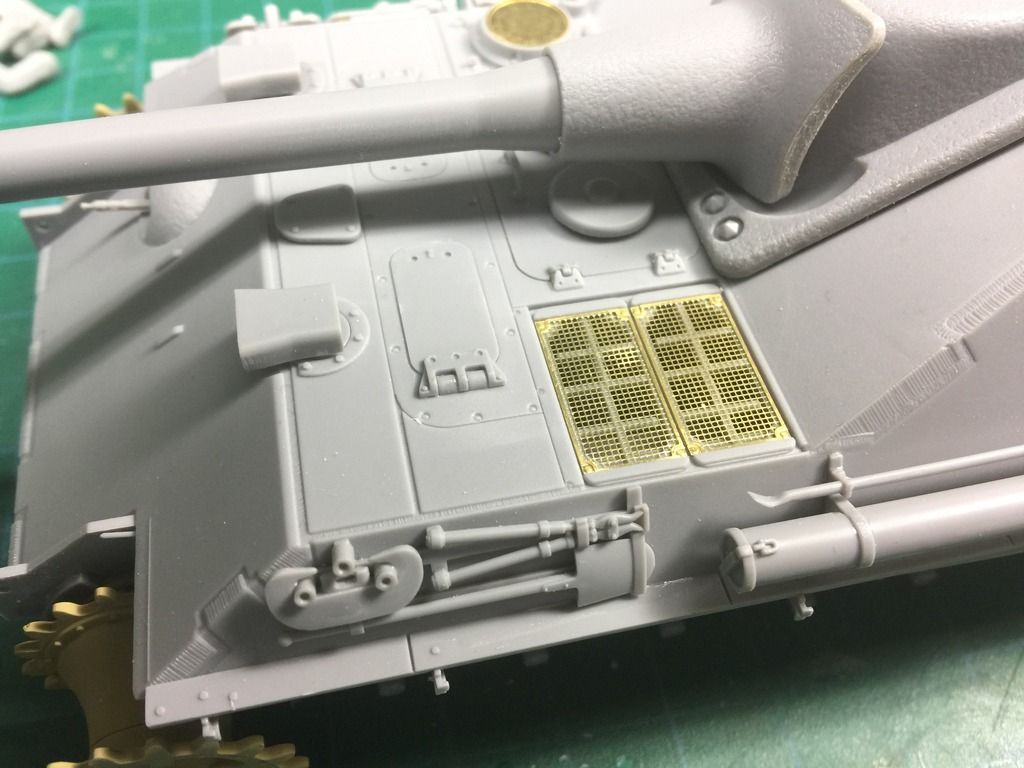
The only other PE are for the engine deck. Not as nice as most aftermarket brands but better than say Tamiya.


The details on the superstructure roof. The commander and gunners hatches can be posed open or closed. I'm leaving the commanders hatch open for a Dragon figure.
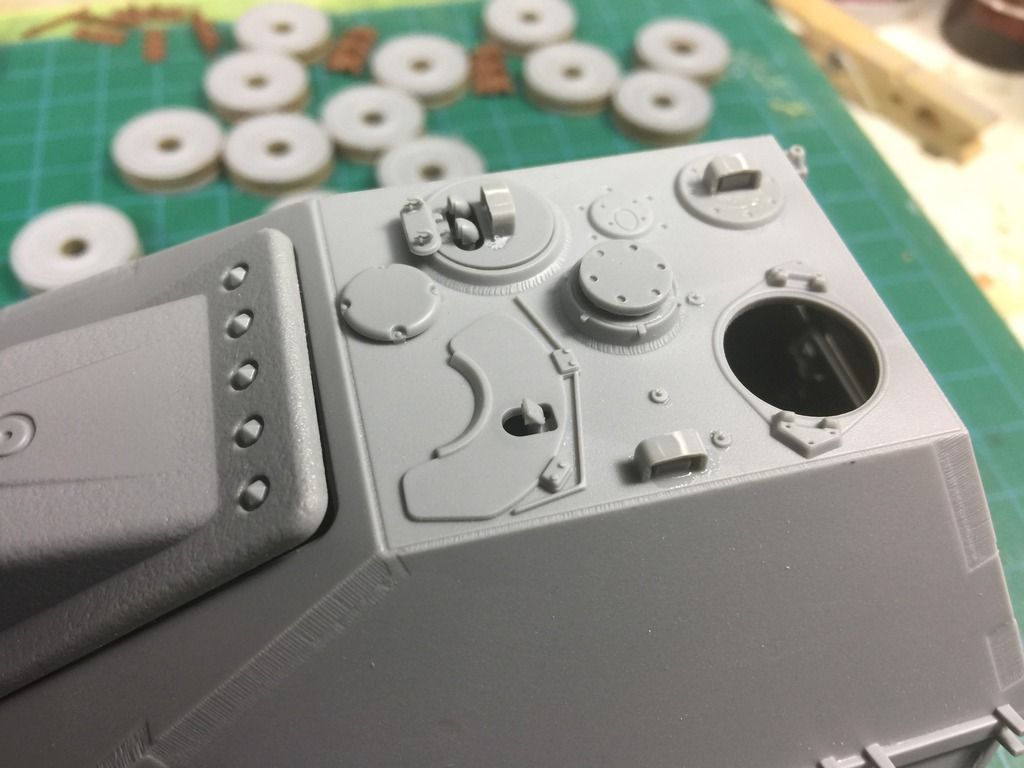


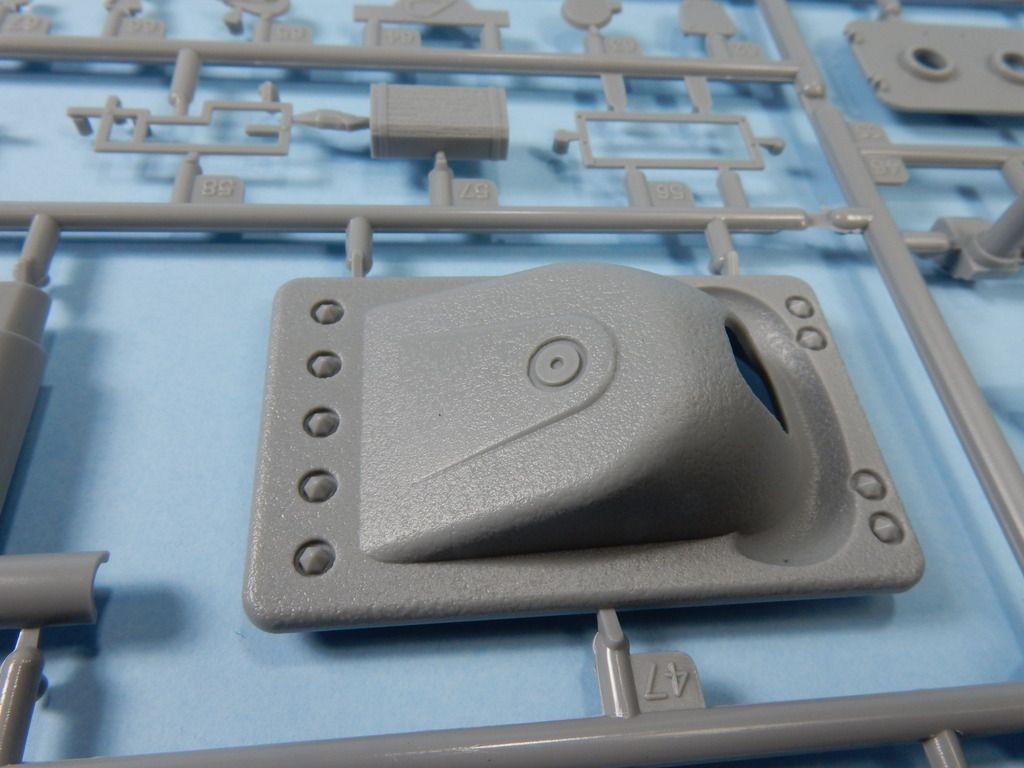
The round fan is quite a bit smaller than the normal Panther as are the driver an bow gunners hatches. Those hatches are actually so narrow, I couldn't get a figure in them from above. they'd have to be mounted from the inside. Like after the kit is done and painted? No thanks. The mantlet has a nice cast texture but is smooth on the sides due to molding limitations. I blended it in by using Testors liquid cement and stippled them with a short haired brush. the barrel is hollow all the way through but not rifled unfortunately.
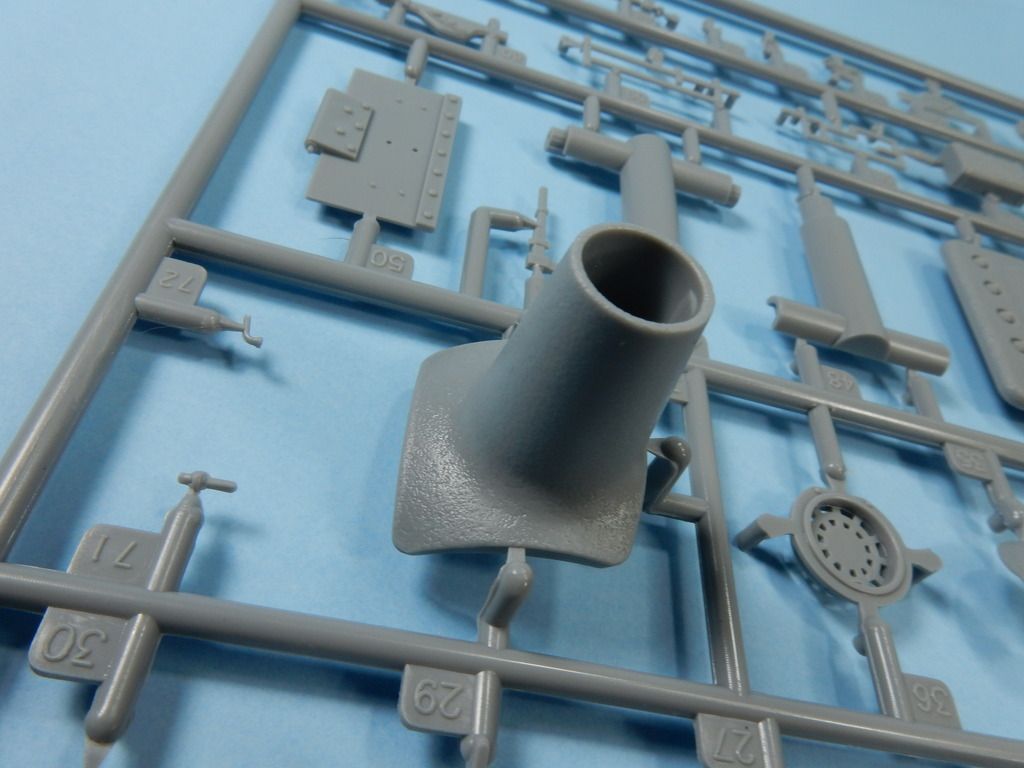
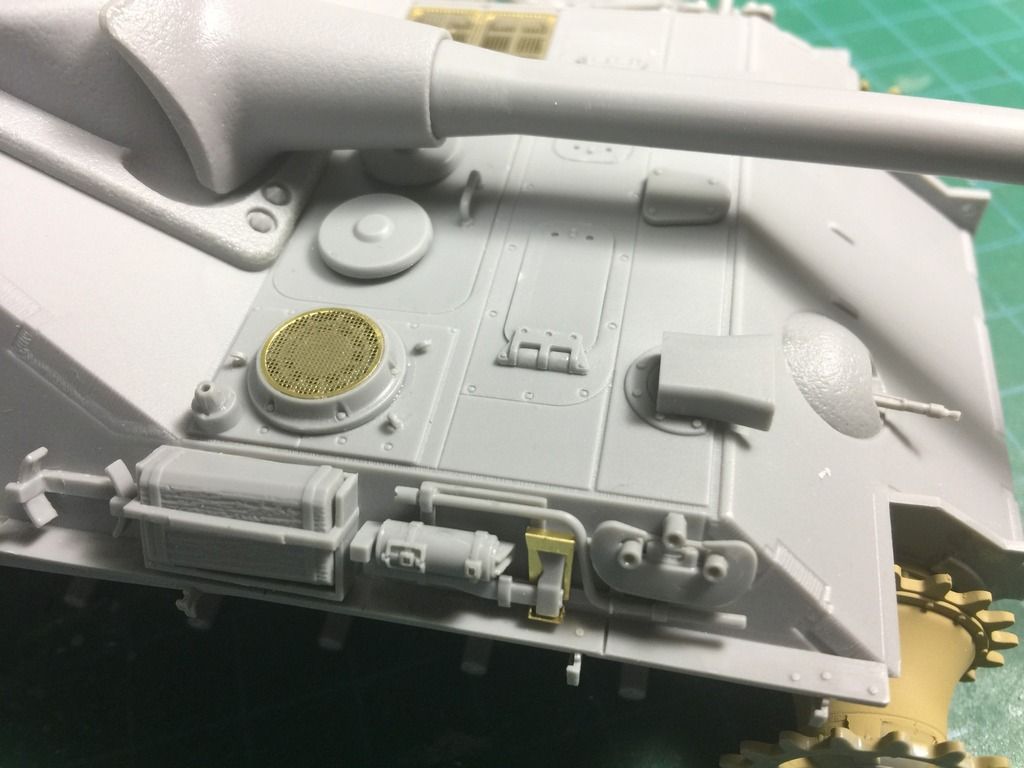
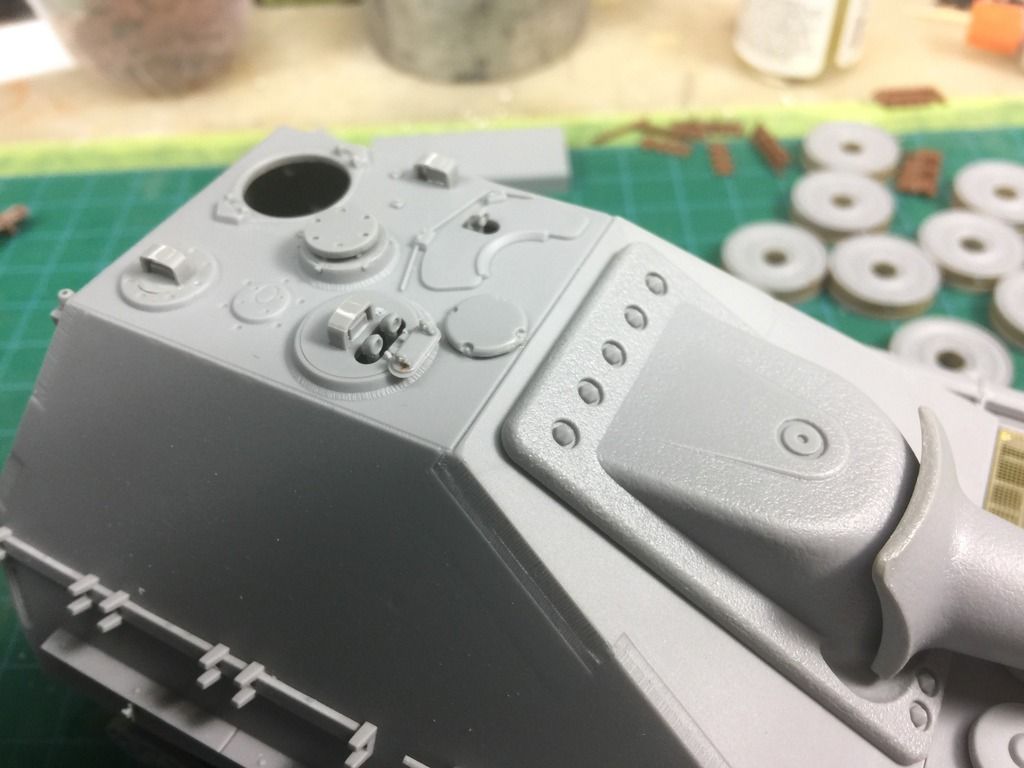


Here's a dry fit of the upper & lower hulls and the rear plate. Fit's ok considering there's no glue yet. All the hatch handles are a bit small for the locator holes, so I'll mix up a small batch if liquid putty (Testors liquid cement & Tamiya Basic putty) and paint it in.
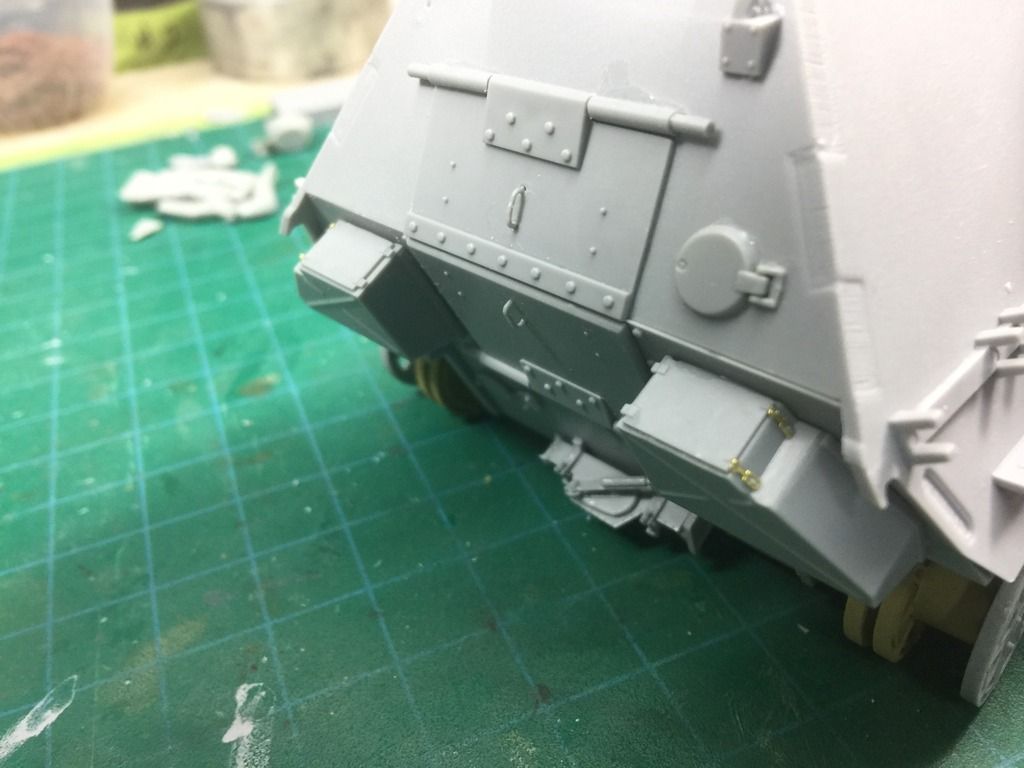


And that's as for as I got...in two days. Very good build so far. The wheels are a little tricky. I'll cover them in the next installment. I like to paint the insides for two part wheels before assembly and mounting. I hope to have this kitty done, painted & weathered by next weekend, time permitting.
sam_dwyer
Visit this Community
Victoria, Australia
Joined: November 03, 2008
KitMaker: 294 posts
Armorama: 291 posts
Posted: Tuesday, January 24, 2017 - 02:05 AM UTC
Great pics, thanks for sharing.

On some level I really like this vehicle, but on another level it does my head in. The WoT player in me thinks its cool, but then im drawn in to asking how are the rear hatches supposed to work - that upper hatch would be 100+kg in weight, easily. How are the crew meant to hold it open? And the engine radiator panels mounted where they are - where does the engine go? There doesnt look like enough room for the crew in the forward section of the hull, based on the hatch location and the proximity to the engine deck vents..

Anyway, cool vehicle and great pics.

Sam
darklen
Visit this Community
Alberta, Canada
Joined: September 16, 2003
KitMaker: 72 posts
Armorama: 70 posts
Posted: Tuesday, January 24, 2017 - 04:27 AM UTC
The engine would be (presumably) under the hatch that's under the mantlet. I checked with the engine from the Tamiya maintenance set and it fits sideways just fine. That said, If it's placed right under that, there's no space for the transmission as it goes back too far. Also oddly missing are any type of exhaust anywhere. As for the rear hatches, I'd presume there'd be sprung in the hinges somehow.
m4sherman
Visit this Community
Arizona, United States
Joined: January 18, 2006
KitMaker: 1,866 posts
Armorama: 1,808 posts
Posted: Tuesday, January 24, 2017 - 04:52 AM UTC
No exhaust? I thought something looked odd. Maybe it's into the crew compartment! The engine has to be under the crew compartment.

There are two threads for this build btw.
darklen
Visit this Community
Alberta, Canada
Joined: September 16, 2003
KitMaker: 72 posts
Armorama: 70 posts
Posted: Tuesday, January 24, 2017 - 06:06 AM UTC
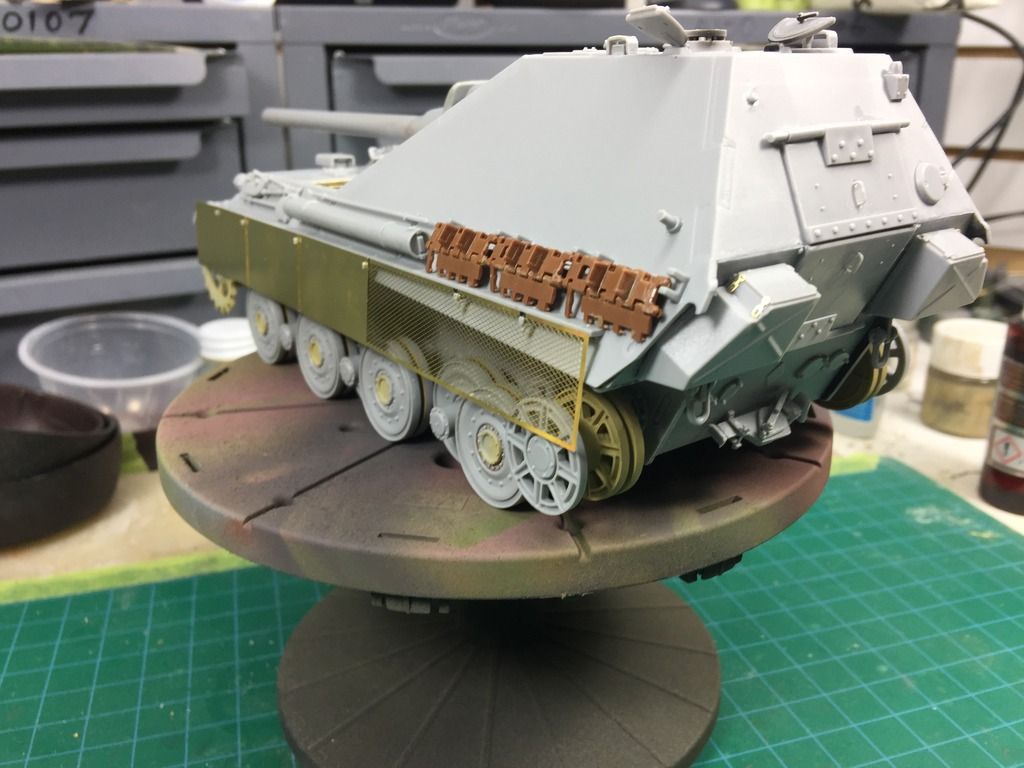
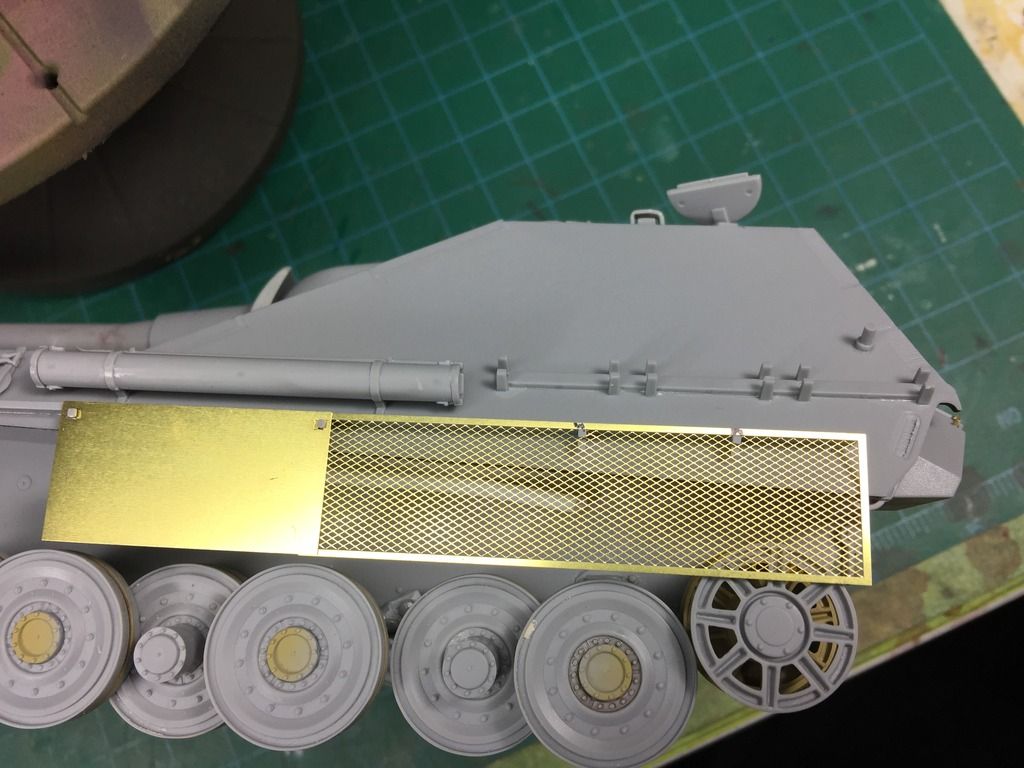
Well, for the exhaust, AH provide some mesh PE for the last two sections of the side skirts but they aren't mentioned in the instructions. I'm thinking the exhaust may have been intended to go out there somewhere but there's no parts for it. I can see the engine being further bask, under the gun mantlet. Probably enough room considering how far back the breech would be.

Don't know why there's two threads. Perhaps an admin can delete the other one as I can't.
tatbaqui
Staff MemberNews Writer
ARMORAMA
#040
Visit this Community
Metro Manila, Philippines
Joined: May 06, 2007
KitMaker: 2,713 posts
Armorama: 2,451 posts
Posted: Tuesday, January 24, 2017 - 08:51 AM UTC
Looking good Bob.

I take it that it builds quick and easy --I might eventually pull the trigger and get one myself. As for the exhaust I've seen a braille build that had it running on the sides like that of the Pz I. That may be an option.

Cheers,

Tat
MikeyBugs95
Visit this Community
New York, United States
Joined: May 27, 2013
KitMaker: 2,210 posts
Armorama: 1,712 posts
Posted: Tuesday, January 24, 2017 - 09:27 AM UTC
Maybe the Germans planned for this to be an all-electric tank? They could fit the batteries in the bottom of the vehicle and there'd be no exhaust.
Mongo13
Visit this Community
Michigan, United States
Joined: December 02, 2012
KitMaker: 130 posts
Armorama: 57 posts
Posted: Tuesday, January 24, 2017 - 02:09 PM UTC
Could be like the Nashorn. Coming out the side and running to the back. When mine shows up that's how I'll do the exhaust.
darklen
Visit this Community
Alberta, Canada
Joined: September 16, 2003
KitMaker: 72 posts
Armorama: 70 posts
Posted: Thursday, January 26, 2017 - 01:44 AM UTC
So, its taken two days to remove and clean up all the track link parts and assemble enough for one run of 88 links. While they look quite nice, they are quite tedious to assemble and realistically, way too complicated. You have to be quite careful when gluing as well. Too much will make them not workable and possibly glue them to the jig (happened to me a few times) and not enough will make them fall apart when you pull them from the jig.

Oh, and I managed to keep all the wheels operable. this will help with painting. And the suspension does work, so it can be posed with an articulated suspension.


Mongo13
Visit this Community
Michigan, United States
Joined: December 02, 2012
KitMaker: 130 posts
Armorama: 57 posts
Posted: Thursday, January 26, 2017 - 02:28 AM UTC
Starting on mine today.
Chuck4
Visit this Community
United States
Joined: November 13, 2013
KitMaker: 403 posts
Armorama: 401 posts
Posted: Thursday, January 26, 2017 - 02:33 AM UTC
When they moved the engine to the front and made the engine access hatches so much shorter, how did they think maintenance crews would install or remove the engine? By dismounting the gun, sliding it backwards through the firewall into the fighting compartment and then up out the mentlet?
MLD
Visit this Community
Vermont, United States
Joined: July 21, 2002
KitMaker: 3,569 posts
Armorama: 2,070 posts
Posted: Thursday, January 26, 2017 - 03:52 AM UTC
Any idea where the kit is available from in the states?
Not Squadron or Sprue Bro, my go to guys.
tatbaqui
Staff MemberNews Writer
ARMORAMA
#040
Visit this Community
Metro Manila, Philippines
Joined: May 06, 2007
KitMaker: 2,713 posts
Armorama: 2,451 posts
Posted: Thursday, January 26, 2017 - 04:04 AM UTC

Quoted Text

Any idea where the kit is available from in the states?
Not Squadron or Sprue Bro, my go to guys.


Mike,

You may want to check Pacific Coast:

http://www.pacmodelscatalog.com/mm5/merchant.mvc?Screen=CTGY&Store_Code=PCM&Category_Code=AHARM+135

Cheers,

Tat
MLD
Visit this Community
Vermont, United States
Joined: July 21, 2002
KitMaker: 3,569 posts
Armorama: 2,070 posts
Posted: Thursday, January 26, 2017 - 07:42 AM UTC
Tat,
Thanks, I always forget to check there. $70 is pretty steep though.
I guess I will put it on the 'keep an eye out for' list.
darklen
Visit this Community
Alberta, Canada
Joined: September 16, 2003
KitMaker: 72 posts
Armorama: 70 posts
Posted: Monday, January 30, 2017 - 08:18 AM UTC
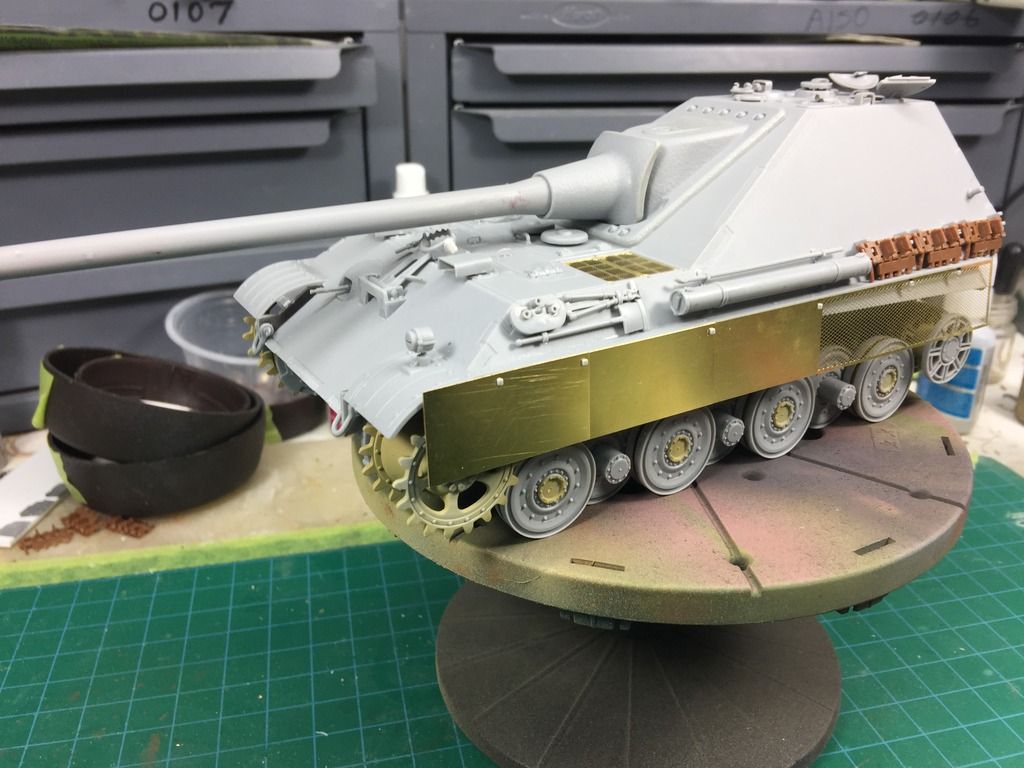
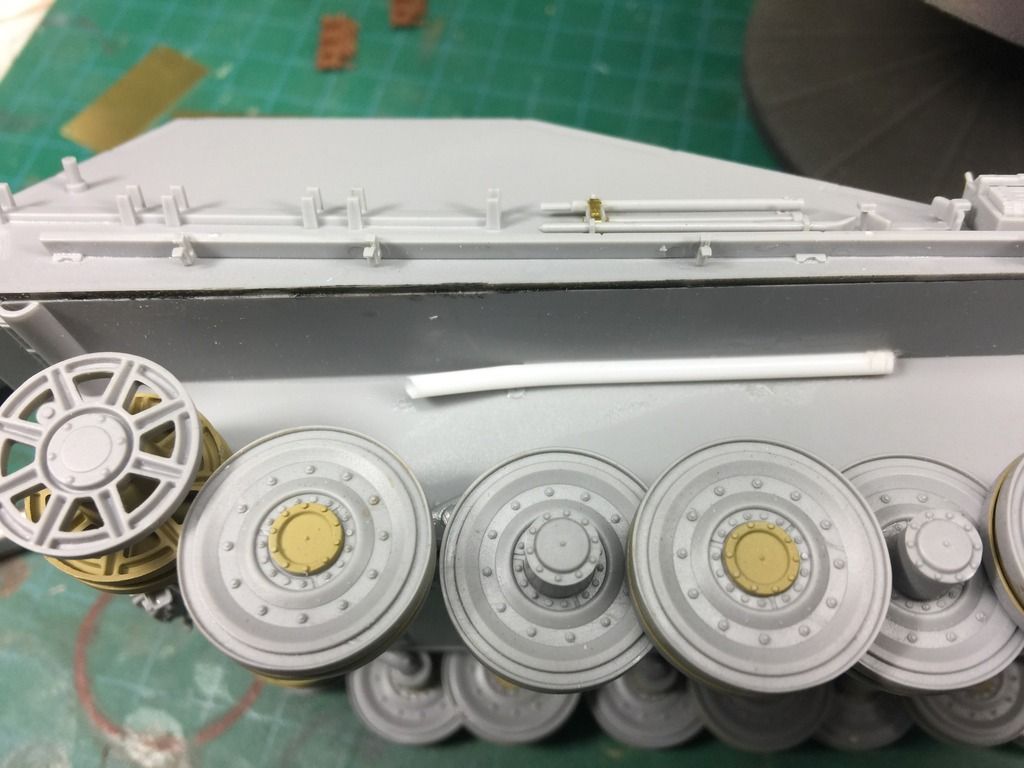
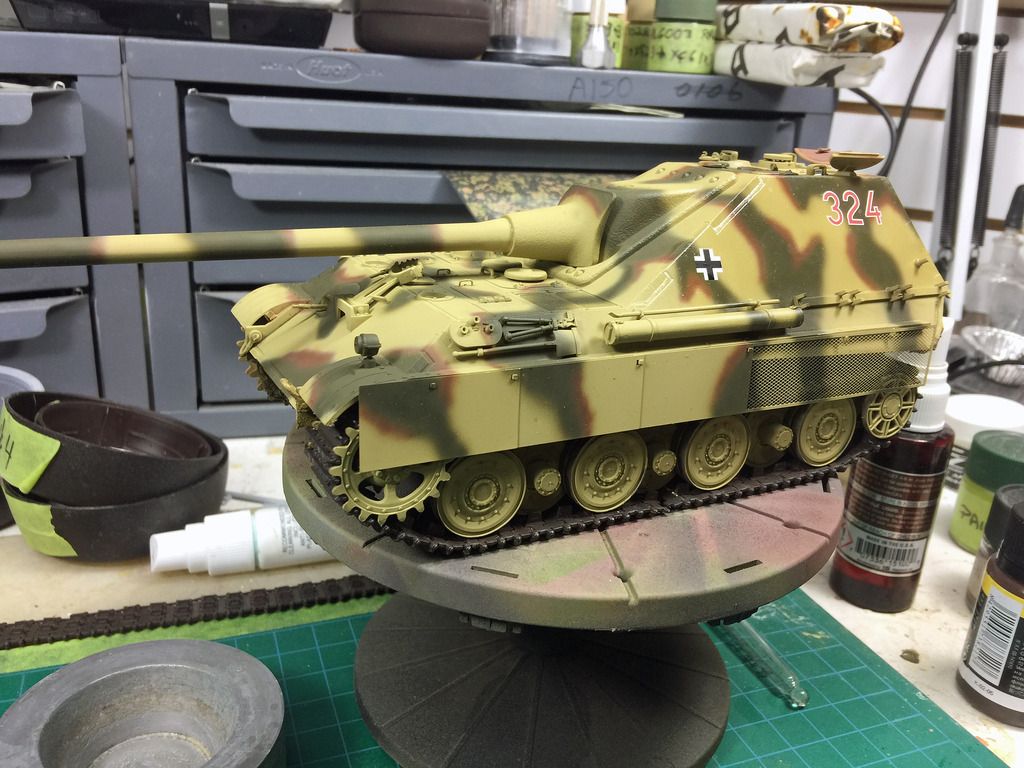
Build is done and painting started. Built out of the box other than the exhaust pipes which I added from some hollow plastic Q-tip handles. Hope to have a review & reveal video up sometime this week.


majjanelson
Visit this Community
South Carolina, United States
Joined: December 14, 2006
KitMaker: 1,355 posts
Armorama: 979 posts
Posted: Monday, January 30, 2017 - 08:48 AM UTC
Bob,

Your build is looking great, but I must say that your added exhaust pipes wouldn't work in my opinion.

Tracks sometimes tend to jump up during turns and starts/stops, especially loose tracks as German tanks used. The first time a track does that, it would catch on the trailing edge of the exhaust pipe and rip it off.

Also, since the tracks would be turning forward, mud and dirt likely would be thrown into the open end of the exhaust pipe, eventually clogging it up.

Instead, you could run the exhaust pipes straight out under the sponsons, and add a heavy, shallow curved plate across them, forming a "bulged" shape to provide protection from the tracks. This would be across the track and the plate would allow the track to slide past without catching. The slightly bulged shape directly above the rear idler is a smaller version of what I'm trying to explain so poorly.

Just my thoughts.
darklen
Visit this Community
Alberta, Canada
Joined: September 16, 2003
KitMaker: 72 posts
Armorama: 70 posts
Posted: Monday, January 30, 2017 - 11:12 AM UTC
Agreed. There isn't many options to put the things in an otherwise out of the box build though. The good thing is once the skirts are on, painted and even at the early stages of weathering, you can't really even see them anyway.
darklen
Visit this Community
Alberta, Canada
Joined: September 16, 2003
KitMaker: 72 posts
Armorama: 70 posts
Posted: Wednesday, February 01, 2017 - 11:15 PM UTC
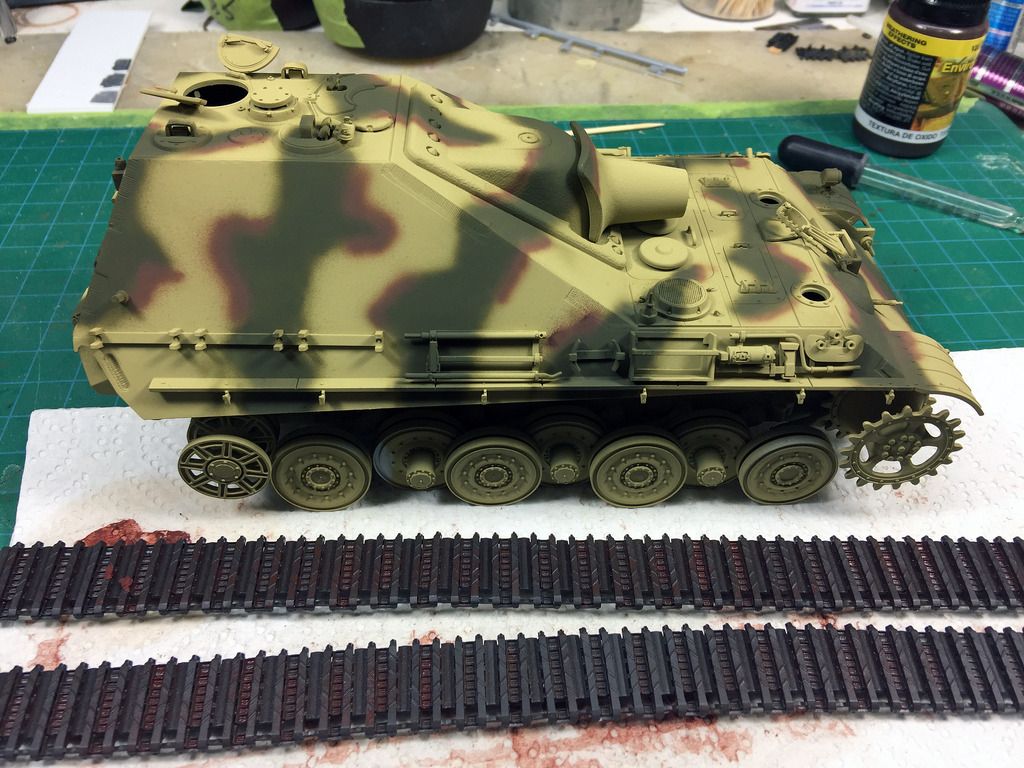
Decals on. They didn't respond to Micro Set and responded very little to Micro Sol. They went down well with Tamiya Mark Kit Strong. I've got it matt coated and am trying out some Vallejo weathering mud. Goopy stuff to say the least but easy to work with once you get the hang of it.

 _GOTOTOP