Hi everyone.
I think the bridge was installed on an M113A1. I found out that the upgrade to A1 was a diesel engine. Was there any external difference between the M113 and the M113A1 APC.
I'm thinking of using the Tamiya M113 kit that I have.
I'm going to scratch build the bridge and I have been gathering all pictures and information for a long time on the M113 MTAB that was used in Vietnam.
The hardest thing to find is clear detailed pictures of the lifting mechanism.
Thank you for any help,
Ralph
Hosted by Darren Baker
M113 MTAB used in Vietnam
Mech

Joined: July 20, 2002
KitMaker: 281 posts
Armorama: 226 posts

Posted: Friday, February 03, 2017 - 09:47 PM UTC
Mark

Joined: February 07, 2003
KitMaker: 554 posts
Armorama: 461 posts

Posted: Wednesday, March 15, 2017 - 12:30 AM UTC
Hi Ralph!
the lifting mechanism is indeed (one of) the hardest part of this vehicle.
Unfortunately I cant be of much help with that but I really hope you will continue and succeed with this build.
I for sure am very curious of your progress!
best regards
Mark
the lifting mechanism is indeed (one of) the hardest part of this vehicle.
Unfortunately I cant be of much help with that but I really hope you will continue and succeed with this build.
I for sure am very curious of your progress!
best regards
Mark

Mech

Joined: July 20, 2002
KitMaker: 281 posts
Armorama: 226 posts

Posted: Saturday, March 18, 2017 - 10:09 PM UTC
Hi Mark
Thank you very much for your interest in this vehicle. Are you thinking of building one as well.
I thought there would have been more people interested in the Vietnam war vehicles when I posted this.
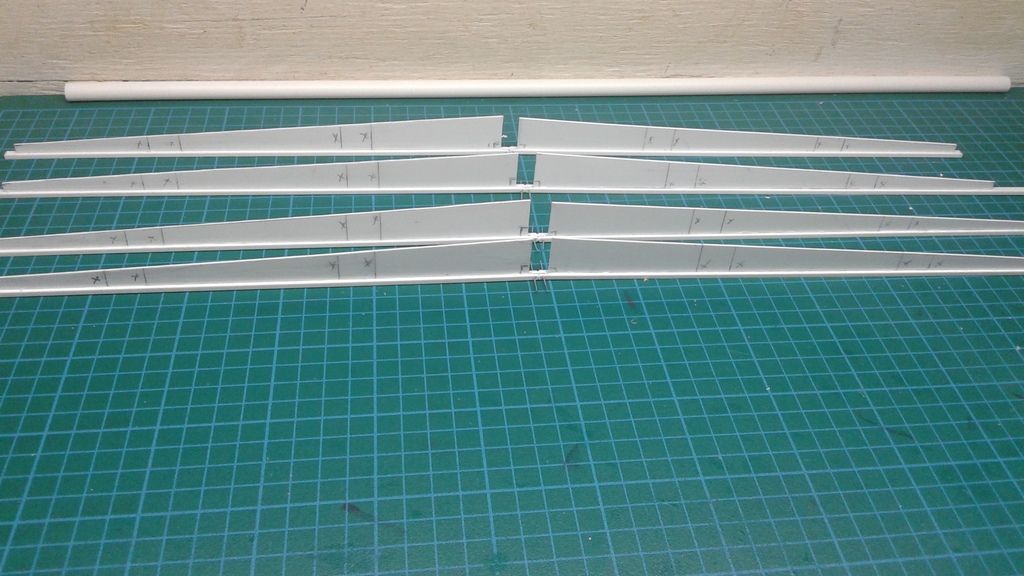
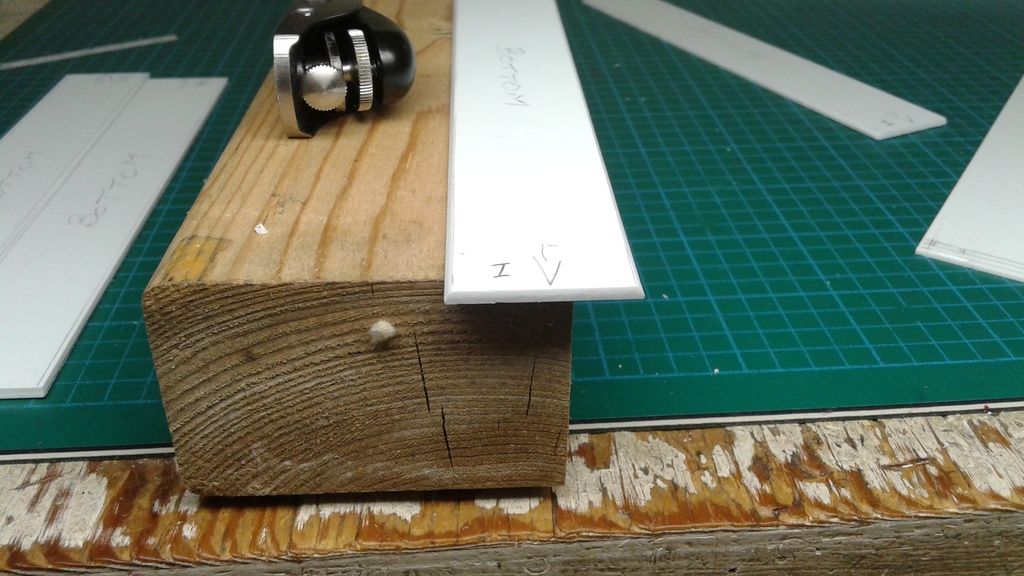
I figured that I would start with the bridge first and I'm well into the bridge building and working on the trusses and the cross braces that joins the two pieces of the bridge together. I have been taking picture of the build as I progress along.
This scratch build is quite a challenge as there is very few pictures of it and no clear detailed pictures.
I hope to post the pictures in the next week or two of my progress on my web page.
http://s1301.photobucket.com/user/scratch-builder/library/?sort=2&page=1
Cheers,
Ralph

Frenchy

Joined: December 02, 2002
KitMaker: 12,719 posts
Armorama: 12,507 posts

Posted: Saturday, March 18, 2017 - 10:38 PM UTC
Quoted Text
I think the bridge was installed on an M113A1. I found out that the upgrade to A1 was a diesel engine. Was there any external difference between the M113 and the M113A1 APC.
Just take a look at this related thread
Talking about online reference, you probably know about these 1968 and 1969 reports :
http://oai.dtic.mil/oai/oai?verb=getRecord&metadataPrefix=html&identifier=AD0671637
http://oai.dtic.mil/oai/oai?verb=getRecord&metadataPrefix=html&identifier=AD0863262
Too bad most of the included pics are unusable...

H.P.
Mech

Joined: July 20, 2002
KitMaker: 281 posts
Armorama: 226 posts

Posted: Saturday, March 18, 2017 - 11:00 PM UTC
Hi Frenchy
Thank you very much for the link it never came up on my search.
The other thing I noticed on one picture that I have was the exhaust pipe was extended so it was above the hydraulic cylinder of the lifting arm.
Cheers,
Ralph
Thank you very much for the link it never came up on my search.
The other thing I noticed on one picture that I have was the exhaust pipe was extended so it was above the hydraulic cylinder of the lifting arm.
Cheers,
Ralph
Mech

Joined: July 20, 2002
KitMaker: 281 posts
Armorama: 226 posts

Posted: Sunday, March 19, 2017 - 06:25 PM UTC
Hi Frenchy
Thank you for the two reports. I have the first link but did not have the second report and yes it's a shame about the pictures. I'm sure on the original reports all the pictures where clear.
Cheers,
Ralph
Thank you for the two reports. I have the first link but did not have the second report and yes it's a shame about the pictures. I'm sure on the original reports all the pictures where clear.
Cheers,
Ralph
Mark

Joined: February 07, 2003
KitMaker: 554 posts
Armorama: 461 posts

Posted: Sunday, March 26, 2017 - 01:51 PM UTC
Well, if it looks like your other scratchbuilds this MTAB will be nothing less than awesome!
Mark
Mark

Mech

Joined: July 20, 2002
KitMaker: 281 posts
Armorama: 226 posts

Posted: Monday, April 10, 2017 - 12:29 AM UTC
Hi Mark
I finally got some time to download the pictures of the scratch build bridge to my web page, I still have the complete lifting arms to build.
http://s1301.photobucket.com/user/scratch-builder/library/?sort=2&page=1
Cheers,
Ralph


I finally got some time to download the pictures of the scratch build bridge to my web page, I still have the complete lifting arms to build.
http://s1301.photobucket.com/user/scratch-builder/library/?sort=2&page=1
Cheers,
Ralph


Mech

Joined: July 20, 2002
KitMaker: 281 posts
Armorama: 226 posts

Posted: Sunday, April 30, 2017 - 06:07 PM UTC
Hi everyone
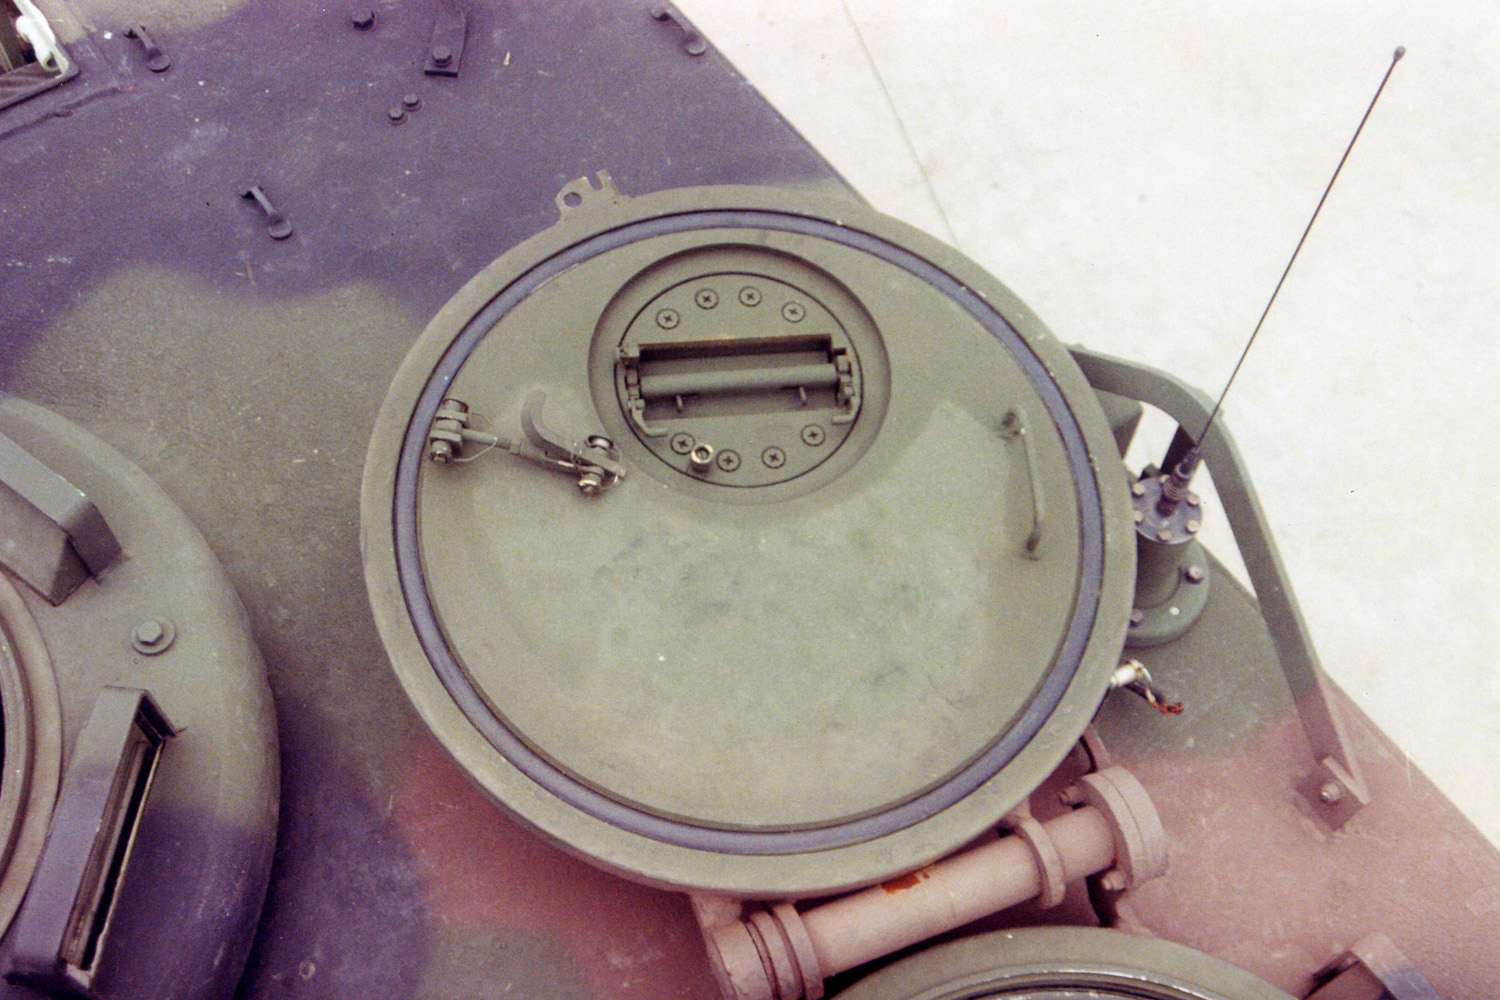
I'm curious what is installed in the opening of the hole in the drivers hatch. I'm building the Tamiya M113 to carry the bridge and nothing comes with the kit for that hole or opening.
Any help is greatly appreciated,
Ralph
I'm curious what is installed in the opening of the hole in the drivers hatch. I'm building the Tamiya M113 to carry the bridge and nothing comes with the kit for that hole or opening.
Any help is greatly appreciated,
Ralph

HeavyArty


Joined: May 16, 2002
KitMaker: 17,694 posts
Armorama: 13,742 posts

Posted: Sunday, April 30, 2017 - 06:15 PM UTC
The hole is for using an IR (night vision) periscope. There is a round plate in the opening with a small door for the periscope to slide up through.


Mech

Joined: July 20, 2002
KitMaker: 281 posts
Armorama: 226 posts

Posted: Sunday, April 30, 2017 - 06:46 PM UTC
Hi Gino
Thank you very much for the reply and picture.
Cheers,
Ralph
Thank you very much for the reply and picture.
Cheers,
Ralph
Mark

Joined: February 07, 2003
KitMaker: 554 posts
Armorama: 461 posts

Posted: Sunday, May 21, 2017 - 06:22 PM UTC
Hi Ralph, looks like a solid start!
Anymore progress shots? I'd love to see it evolve!
best regards
Mark
Anymore progress shots? I'd love to see it evolve!
best regards
Mark

Mech

Joined: July 20, 2002
KitMaker: 281 posts
Armorama: 226 posts

Posted: Sunday, May 28, 2017 - 11:09 PM UTC
Hi Mark
Thank you very much for the compliment.
I have built the lifting arms, hydraulic pistons and the mounting brackets for the M113.
I have being detail the old Tamiya M113 kit exterior for the bridge and then got involved with the interior and I think I'm over doing it. Right now I'm working on detailing the Hydraulic control leavers that the commander controlled the bridge lifting and lowering and release, you can see them if the ramp and commanders hatch is opened. I have been taking lots of pictures as I go along.
When I tried on Friday and Saturday Photoshop would not let me upload anything and it was working at a snail pace. It's never happened to me before.
Cheers,
Ralph
Mech

Joined: July 20, 2002
KitMaker: 281 posts
Armorama: 226 posts

Posted: Wednesday, June 28, 2017 - 10:20 PM UTC
Hi everyone
I'm at the stage of installing all the hydraulic hoses and piping on the bridge and vehicle but I need something for the hoses that is flexible so that the bridge can be lifted from its cradle to the full launch position.
I have 1mm tubing but it looks out of scale I think I need some tubing .5mm in diameter.
I'm hoping someone can point me in the right direction for what to use.
Thank you for any help,
Ralph
Joker

Joined: May 28, 2004
KitMaker: 813 posts
Armorama: 522 posts

Posted: Wednesday, June 28, 2017 - 11:12 PM UTC
Hi Ralph,
Have you given Hiroboy a look?..they deal in automotive scale modeling but should have a wide selection of tubing, another idea might be to look at the fly tying section of you local fishing tackle store, preferably a store that deals in a more complete fly tying material selection.
As an aside, you're scratch building skills are quite brilliant..I have often looked at the LVTE in amazement, stunning..how I would love to paint and weather that..
Best Regards,
Peter

KoSprueOne

Joined: March 05, 2004
KitMaker: 4,011 posts
Armorama: 1,498 posts

Posted: Thursday, June 29, 2017 - 07:20 AM UTC
Hi Ralph, This build is looking good. I checked out the photobucket build pictures. What a neat model build project.


Bravo36


Joined: January 11, 2002
KitMaker: 247 posts
Armorama: 229 posts

Posted: Thursday, June 29, 2017 - 08:54 AM UTC
Hi Ralph, for those hydronic lines, look at solder, used for electronics. Comes in many sizes and is flexible, but will hold its shape. Great for scale wire or tubing.
Mech

Joined: July 20, 2002
KitMaker: 281 posts
Armorama: 226 posts

Posted: Thursday, June 29, 2017 - 05:26 PM UTC
Thank you everyone for the recommendations.
Peter. I went to the Hiroboy site and the smallest tubing was 1.2mm that they carry. I will have to find a fish and tackle shop to see what they carry.
Thank you very much for the compliment. I love scratch building LVT's.
KoSprueOne. Thank you very much for the compliment.
Ralph. I will have to try the solder idea. Is there any chance that the flux in it can leech out in time.
Cheers,
Ralph

Frenchy

Joined: December 02, 2002
KitMaker: 12,719 posts
Armorama: 12,507 posts

Posted: Thursday, June 29, 2017 - 06:24 PM UTC
I wonder if this kind of elastic cord would fit the bill...
http://www.beadkraft.com/05mm-elastic-cord-black-100-meters
H.P.
http://www.beadkraft.com/05mm-elastic-cord-black-100-meters
H.P.
Joker

Joined: May 28, 2004
KitMaker: 813 posts
Armorama: 522 posts

Posted: Thursday, June 29, 2017 - 07:45 PM UTC
Ralph, I have something called "Micro Tubing", that I bought at a tackle store, it looks to be about .5 mm....and it is flexible plastic/rubber as well.
Good Luck,
P
Good Luck,
P
Mech

Joined: July 20, 2002
KitMaker: 281 posts
Armorama: 226 posts

Posted: Thursday, June 29, 2017 - 07:57 PM UTC
Peter. thank you that sound great.
Do you have a parts number for it so that I can try and call any shop in the Toronto, Canada area.
Ralph
Do you have a parts number for it so that I can try and call any shop in the Toronto, Canada area.
Ralph
Joker

Joined: May 28, 2004
KitMaker: 813 posts
Armorama: 522 posts

Posted: Thursday, June 29, 2017 - 11:13 PM UTC
It's an old package, and I'm not even sure the manufacturer is around, I'll see if I can find a substitute today and send you a PM with a link.
Joker

Joined: May 28, 2004
KitMaker: 813 posts
Armorama: 522 posts

Posted: Thursday, June 29, 2017 - 11:48 PM UTC
Good news, the manufacturer is still around, the product is called Micro Tubing and the company is called "Hareline Dubbin"...not sure where you are in Ontario, but it shouldn't be too hard to find.If you can't find it let me know.
Regards from The West Coast,
P
Regards from The West Coast,
P
Bravo36


Joined: January 11, 2002
KitMaker: 247 posts
Armorama: 229 posts

Posted: Saturday, July 01, 2017 - 11:11 PM UTC
The lead-free solder used for electronics does not have that flux core. It comes in spools of very thin wire. Order it on Amazon or from electronics supply stores. I use .022 and .015 diameters.
trickymissfit
Joined: October 03, 2007
KitMaker: 1,388 posts
Armorama: 1,357 posts
KitMaker: 1,388 posts
Armorama: 1,357 posts

Posted: Sunday, July 02, 2017 - 12:35 AM UTC
Quoted Text
Hi Mark
Thank you very much for your interest in this vehicle. Are you thinking of building one as well.
I thought there would have been more people interested in the Vietnam war vehicles when I posted this.
I figured that I would start with the bridge first and I'm well into the bridge building and working on the trusses and the cross braces that joins the two pieces of the bridge together. I have been taking picture of the build as I progress along.
This scratch build is quite a challenge as there is very few pictures of it and no clear detailed pictures.
I hope to post the pictures in the next week or two of my progress on my web page.
http://s1301.photobucket.com/user/scratch-builder/library/?sort=2&page=1
Cheers,
Ralph
I have seen a couple of photos in the past. All were down south. Maybe II Corp or three corps. None up north.
Gary
 |


