Kfz. 12 + 2.8cm sPzB41 Build Log

#521
Kentucky, United States
Joined: April 13, 2011
KitMaker: 9,465 posts
Armorama: 8,695 posts
Posted: Monday, April 03, 2017 - 11:40 PM UTC
Working now on what Jim Starkweather describes as the model with the longest name in the industry:
"Mettlerer Einheits PersonenKraftwagen (m.E.Pkw) Kfz.12 (Early Version) and 2.8cm, sPzB41 On Larger Steel-Wheeled Carriage with Trailer Sd.Ah.32/2"
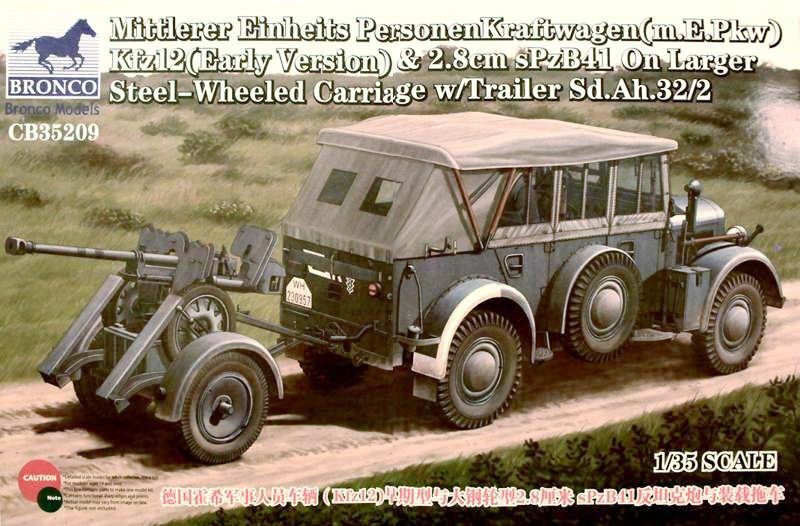
Bronco has combined two extremely high detail models to produce this kit offering. You could almost say three models when you consider the Sd.Ah.32/2 trailer porte, designed to transport the smallish AT gun at normal road speeds.

#521
Kentucky, United States
Joined: April 13, 2011
KitMaker: 9,465 posts
Armorama: 8,695 posts
Posted: Monday, April 03, 2017 - 11:54 PM UTC
The model box comes tightly packed with 10 tan plastic sprues plus hard tan plastic tires and one clear sprue to form the Field Car.
The gun and porte trailer requires an additional three more gray plastic sprues plus hard plastic tires.
Beyond that, the kit also comes with 5 more assorted miscellaneous detail sprues, two brass etched sheets, a decal sheet and a 31 page instruction manual.
In all the modeler receives a very full carton!

#521
Kentucky, United States
Joined: April 13, 2011
KitMaker: 9,465 posts
Armorama: 8,695 posts
Posted: Monday, April 03, 2017 - 11:56 PM UTC
After a few hours and approximately 25 parts later I had completed steps #1 & 2.
(There are 41 steps in the construction of the car alone.) This produced a very nice if very delicate base frame for the Horch Medium Field Car:

I'm the chassis guy and I have to say this model is designed with someone like me in mind. Even the main frame rails are assembled by joining a very detailed inside and outside moulding to form each box beam rail. Likewise most of the cross members are formed by joining both a top and bottom, 2 piece element.

#450
California, United States
Joined: July 19, 2015
KitMaker: 672 posts
Armorama: 668 posts
Posted: Tuesday, April 04, 2017 - 01:48 AM UTC
Michael, it looks nice. I wish Bronco had put this much effort into their HMMWV chassis. I'm not into WWII or German stuff but your builds are fun to follow. Keep the updates coming.
Regards,
Eric
"Pray for peace but prepare for violence"
- Me
"The only thing necessary for the triumph of evil is for good men to do nothing"
- Edmund Burke

#521
Kentucky, United States
Joined: April 13, 2011
KitMaker: 9,465 posts
Armorama: 8,695 posts
Posted: Tuesday, April 04, 2017 - 02:04 AM UTC
Thanks Eric

Unfortunately I am not familiar with the kit you mentioned.
________________________________________________________________________________________
On this kit I would suggest using a medium to fine file to clean up the part sprue gates, etc. A course file might grab the gate and break the tiny parts.
And by all means do what you can to keep the carpet monster at bay. I broke and then lost half of a small part and had to scratch build the missing piece before I could continue.
RobinNilsson
 TOS Moderator
Stockholm, Sweden
Joined: November 29, 2006
KitMaker: 6,693 posts
Armorama: 5,562 posts
Posted: Tuesday, April 04, 2017 - 02:17 AM UTC
Quoted Text
...
And by all means do what you can to keep the carpet monster at bay. I lost half of a small part and had to scratch build the missing piece before I could continue.
This reminds me of when I lost the drivers seat (front bench actually) for Tamiyas Sd.Kfz 7 (the halftrack ..). I searched everywhere for hours and finally resigned to the fact that I would have to make a new one, not difficult but unwanted/unnecessary work. I copied the two parts (seat and back rest) from another kit. After a few hours work over two evenings I had it finished and painted and then I had to airbrush something else.
The compressor started making trouble so I realised that it was time to clean the filter protecting the pipe where the compressor sucks in air.
Move bulky compressor to access the air filter.
Guess what is hiding behind the compressor?
Correct.
Now I have a spare front seat for a Tamiya Sd.Kfz. 7.
If I ever need one .....
/ Robin
In memory of Al Superczynski:
"Build what YOU want, the way YOU want to....
and the critics will flame you every time"

#521
Kentucky, United States
Joined: April 13, 2011
KitMaker: 9,465 posts
Armorama: 8,695 posts
Posted: Tuesday, April 04, 2017 - 02:26 AM UTC
Wanted to take a minute to share the beautiful wheel and tire moldings of the AT gun and the porte trailer. This somewhat unique method of transporting the gun* is what really caught my eye in this model.
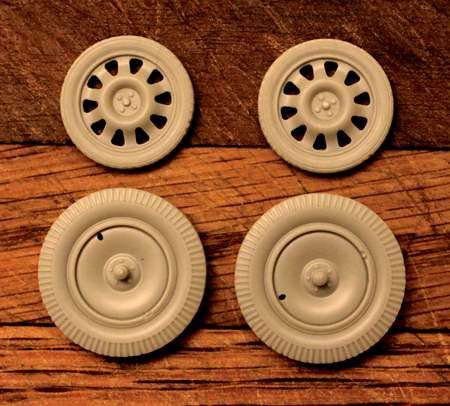
* Early in the Second World War the Germans used this style of porte to transport their old WWI artillery that was still carried on wooden wheels.

#521
Kentucky, United States
Joined: April 13, 2011
KitMaker: 9,465 posts
Armorama: 8,695 posts
Posted: Tuesday, April 04, 2017 - 05:58 AM UTC
And now steps #3 & 4:

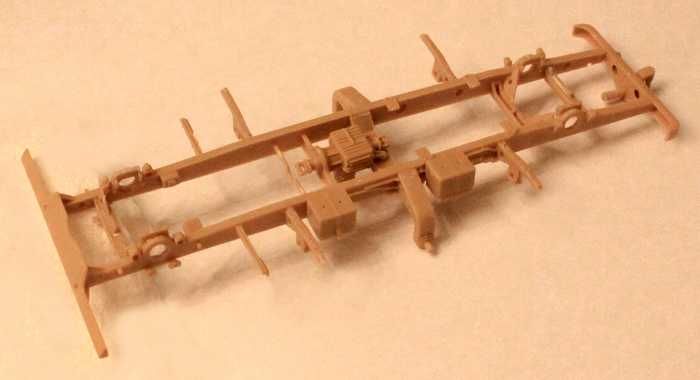
Fender brackets, transfer case and running board supports.
 Next up; front and rear differentials:
#521
Kentucky, United States
Joined: April 13, 2011
KitMaker: 9,465 posts
Armorama: 8,695 posts
Posted: Tuesday, April 04, 2017 - 06:12 AM UTC
A brief tour of the frame up to now:Transfer case (top and bottom views) battery boxes
and spare tire mounts:


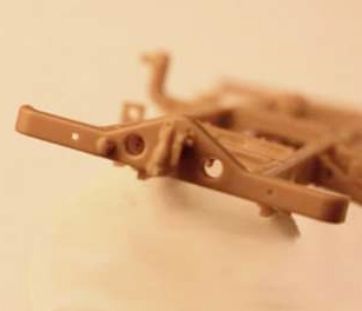
Front bumper and forward frame cross member (top & bottom views):


Rear axle support gussets (bottom view only): . . . . . . . . Rear Bumper:

England - East Anglia, United Kingdom
Joined: January 19, 2017
KitMaker: 50 posts
Armorama: 31 posts
Posted: Tuesday, April 04, 2017 - 08:43 AM UTC
Thanks for posting this up Michael, I'll pull up a chair and watch your build.
Funny thing is I've been thinking about buying this kit but not to use together, I have another tow vehicle in mind for the sPzB41 and just like the light trucks.

#521
Kentucky, United States
Joined: April 13, 2011
KitMaker: 9,465 posts
Armorama: 8,695 posts
Posted: Tuesday, April 04, 2017 - 02:44 PM UTC
My pleasure!
I very much like both these models but I too was thinking perhaps the gun would go better paired with a Ford or Blitz 3-4 ton truck or even a D7, Sd.Kfz.10 halftrack.
The Field Car might more properly be used as a Command Car, Signals or even for a Propaganda Officer.
F.Y.I. - Both the gun and the vehicle are available separately from Bronco.
CMOT
 Editor-in-Chief
England - South West, United Kingdom
Joined: May 14, 2006
KitMaker: 10,954 posts
Armorama: 8,571 posts
Posted: Tuesday, April 04, 2017 - 03:21 PM UTC
Michael: even though this is a blog for Armorama and a future review I am happy to see the gun towed by an alternate vehicle. Your progress thus far is pleasing to watch.

#521
Kentucky, United States
Joined: April 13, 2011
KitMaker: 9,465 posts
Armorama: 8,695 posts
Posted: Tuesday, April 04, 2017 - 09:36 PM UTC
Darren, I will be sure to show the gun posed with alternate vehicles as the build progresses.
Minnesota, United States
Joined: July 20, 2004
KitMaker: 1,513 posts
Armorama: 1,449 posts
Posted: Tuesday, April 04, 2017 - 11:00 PM UTC
There are a few photos of this vehicle with the gun mounted in the crew area.
Dan
Looking to meet other MN Armor modellers. I live in Buffalo.
Minnesota, United States
Joined: July 20, 2004
KitMaker: 1,513 posts
Armorama: 1,449 posts
Posted: Tuesday, April 04, 2017 - 11:03 PM UTC
Looking to meet other MN Armor modellers. I live in Buffalo.

#521
Kentucky, United States
Joined: April 13, 2011
KitMaker: 9,465 posts
Armorama: 8,695 posts
Posted: Tuesday, April 04, 2017 - 11:55 PM UTC
Dan, I have seen the 20mm flak gun mounted in/on both the Horch Kfz.12 and 15 Field Cars. Speaking for myself, I have not seen this little anti-tank gun mounted directly on such a vehicle but it seems very plausible. I have seen it mounted however on a 250 halftrack.

#521
Kentucky, United States
Joined: April 13, 2011
KitMaker: 9,465 posts
Armorama: 8,695 posts
Posted: Wednesday, April 05, 2017 - 12:09 AM UTC
Another tiny part lost to the Carpet Monster! - - Blankity, blank, blank, blank.
Fortunately is was basically a small flat washer so I made one with my punch set & drill.
Minnesota, United States
Joined: July 20, 2004
KitMaker: 1,513 posts
Armorama: 1,449 posts
Posted: Wednesday, April 05, 2017 - 12:12 AM UTC
Looking to meet other MN Armor modellers. I live in Buffalo.

#521
Kentucky, United States
Joined: April 13, 2011
KitMaker: 9,465 posts
Armorama: 8,695 posts
Posted: Wednesday, April 05, 2017 - 12:36 AM UTC
Of course I checked the site but I only saw the 20mm flak mounted on the Horch.

#521
Kentucky, United States
Joined: April 13, 2011
KitMaker: 9,465 posts
Armorama: 8,695 posts
Posted: Wednesday, April 05, 2017 - 12:48 AM UTC
Step #5 Complete: Front and rear differentials. (Twelve parts each.)


In case you loose track of which differential is which - the small mounting indent indicated by the red arrow is the only item that differentiates the front diff from the rear. The one WITH the indent being for the rear.
Minnesota, United States
Joined: July 20, 2004
KitMaker: 1,513 posts
Armorama: 1,449 posts
Posted: Wednesday, April 05, 2017 - 01:31 AM UTC
Looking to meet other MN Armor modellers. I live in Buffalo.

#521
Kentucky, United States
Joined: April 13, 2011
KitMaker: 9,465 posts
Armorama: 8,695 posts
Posted: Wednesday, April 05, 2017 - 01:37 AM UTC
The next steps require not only the building of the two differentials but also these two beautifully delicate gas tanks. I wanted to show these before they get covered up by the frame and floorboard.
Top view on the left, bottom view on the right.
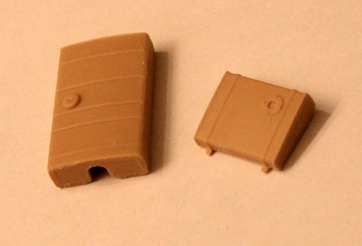


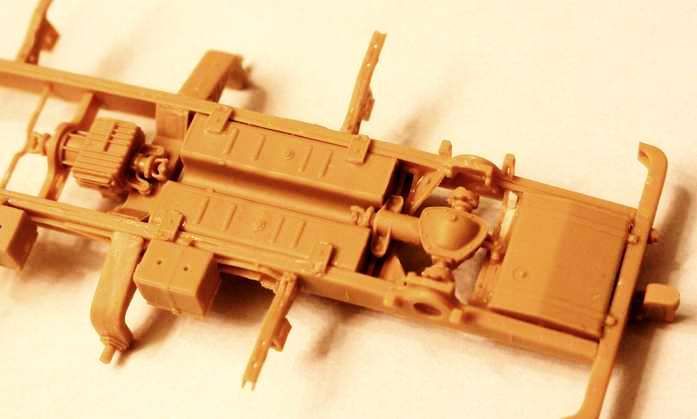
Just showing off the mounted gas tanks. There is still much yet to do before these current steps are complete.

#521
Kentucky, United States
Joined: April 13, 2011
KitMaker: 9,465 posts
Armorama: 8,695 posts
Posted: Wednesday, April 05, 2017 - 02:04 AM UTC
OK Dan, I did find two photos of the vehicle in question on page three of the site you listed so point proven:


#521
Kentucky, United States
Joined: April 13, 2011
KitMaker: 9,465 posts
Armorama: 8,695 posts
Posted: Wednesday, April 05, 2017 - 05:38 AM UTC
This photo was a lucky find thanks to Dan: - Simple welded steel vehicle mount for the squeeze bore AT rifle.

The car only has one spare tire. (Driver's side only.) Gun mount appears to be off center towards passenger side.

#521
Kentucky, United States
Joined: April 13, 2011
KitMaker: 9,465 posts
Armorama: 8,695 posts
Posted: Wednesday, April 05, 2017 - 09:12 AM UTC
Steps #6 & 7 Complete:
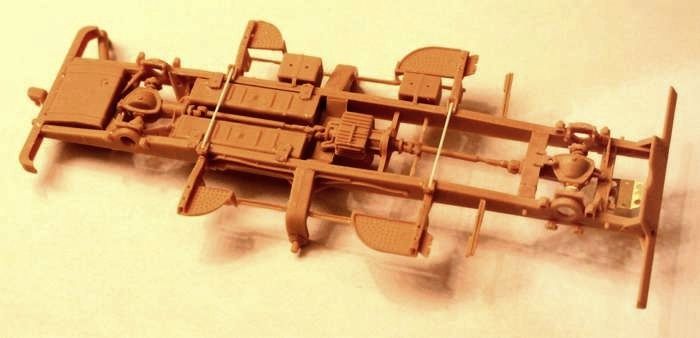
Driveshafts, gas tanks, gas filler, running boards, all frame gusset plates and the first piece of etch installed.
I almost always substitute AM plastic rod such as the Evergreen product, whenever a kit calls for molded straight "rod" as you can see in the bottom photo.
The frame is really starting to look complex. I suspect not counting the internal moving parts such as engine, transmission, transfer case, etc. this chassis has as many parts as the original Horch vehicle!


