Building the base.
What I used.
Foam core board for the elevation
Plaster of Paris for the terrain
Dried river bank clay for the boulders
Dried moss for foliage
A wire tree
Duluxe materials solid water
Noch static grass
Strong pva glue
Millet seeds
Paints
Daler rowney Cryla artists acrylic;
Vandyke brown
Lamp black
Games workshop;
Agrellan mud? I think.. it made a cracked texture
Tamiya;
Flat earth
Red Brown
Black
Dark yellow
Lifecolour;
Olivgrun
Oil paints Winsor and Newton Winton;
Titanium white
Burnt umber
Ultramarine blue
Chrome yellow hue
Sap green
Yellow ochre
Quick guide.
I drew out a few sketches during some quiet periods at work (I work in a local art supply shop so have access to a load of different supplies)
When happy with the dynamic of the sketches I sourced a suitable eased box frame. I wanted the extra height to make the build more imposing.
I cut the foamboard to shape as I stacked it up. I left each layer or two to dry whilst being weighted down by a book or other heavy objects.
For the earth I mixed up a plaster and paint mix with some static grass and millet seeds for texture.
I then liberally applied it with a pallet knife to the foamboard. When it was drying I applied boulders and detritus (see next paragraph) and textured certain areas with a stiff hog bristle brush. For verticals or slopes I tried to emulate how the soil would erode so I used vertical brushstrokes and stippling. I the pressed In the tiger to give it a location on the base.
Boulders.. this was a complete accidental discovery/ spur of the moment Choice . Last year I was making my own oil paint using local clay. After I strained them through a cloth to take out any silt I set the clay aside in tubs in the shed. When they dried they made little slabs of clay. To make the boulders and ground detritus I simply crumbled this clay over my diorama I a completely random manner apart from the larger rocks that were placed.
Plaster mix and tiger

This is the sprinkled clay. I made sure to crumble it down to tiny dust like particles and smaller and larger rocks.. the riverbed was the highest concentration .

I sprayed the base when dry with pva glue and a varnish to seal the delicate stones.
Then I airbrushed a number of tamiya earth and dust colours over the whole thing and began to paint the stoned and rocks in a number of different greys browns blacks and khakis.


I added the games workshop texture paint ( for dry earth cracking ) and washed the ground with oils ultramarine and burnt umber mix and a yellow ochre and titanium white mix.
Next up was the static grass. I have one of those puffer bottles that blows the static grass to attention. This was applied randomly and sprayed a dark earth and then a dark green and drybrushed various acrylic middle and light greens and later dry brushed with lighter oils.

.
Next up was the first layer of water. I tinted it with a little green
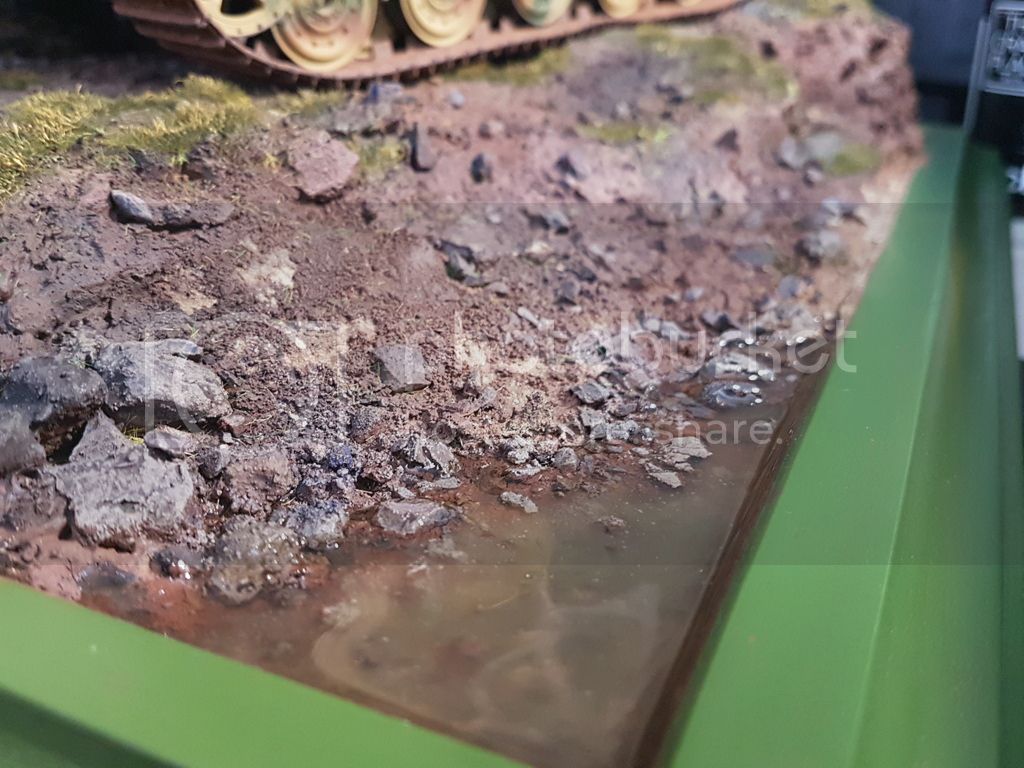
A little pastel dust and a wire tree was added inbetween resin layers. I texturused the water with a toothbrush but found it didn't hold its shape as well as I would have liked
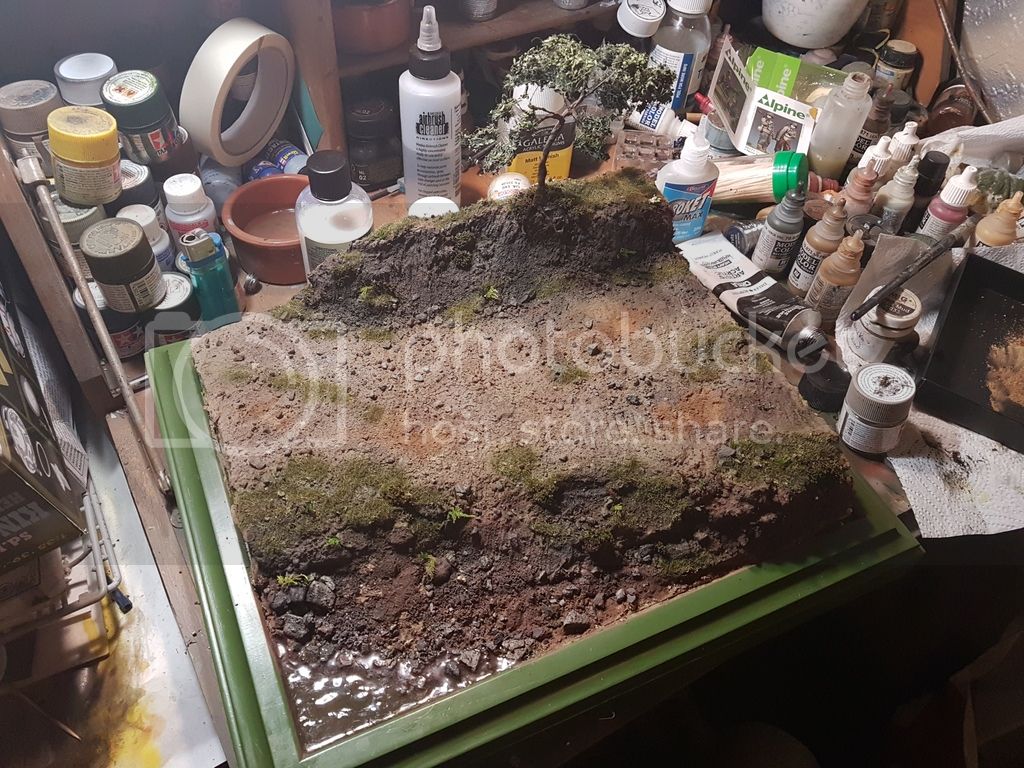
The moss I found on a late night walk in the countryside. Some looked like ferns and some looked like little bushes and some like coarse grasses. I microwaved them to preserve them. Then glued some to the base. I later painted them with oils. Using various greens yellows and blues to get a good variety of shades


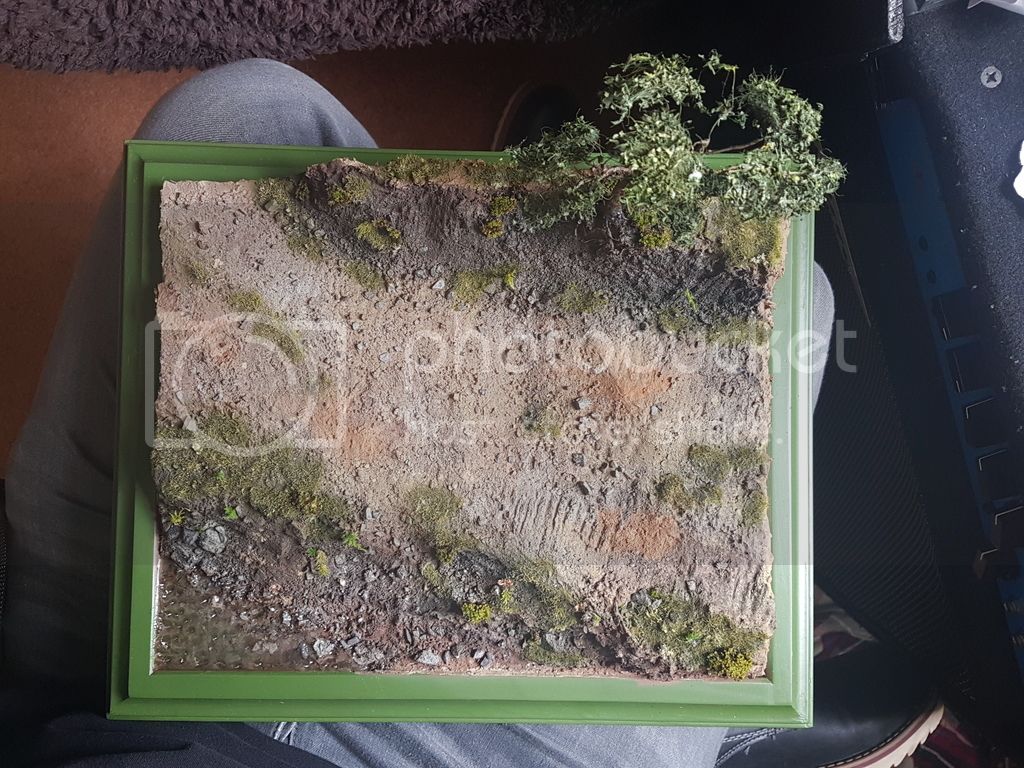

This last photo was taken when I hadn't painted the edging black.

Here are a few more shots in various lighting and angles


In retrospect I would have seated the tank on the base better. I hope this mini guide helps someone
Also just for fun a close up of the figure. You wouldn't believe that the black was done with tamiya paint. The other colours were Vallejo , lifecoloir and humbrol metalcote. The belt buckle was masked and sprayed Alclad steel mixed with duraluminium


