_GOTOBOTTOM
Figures
Military figures of all shapes and sizes.
Miniart Zis3 Dio on the desk
erichvon
Visit this Community
England - East Midlands, United Kingdom
Joined: January 17, 2006
KitMaker: 1,694 posts
Armorama: 1,584 posts
Posted: Saturday, July 29, 2017 - 02:03 PM UTC
After doing the DML King Tiger build/blog/review and having positive feedback (thank you gents) I've decided to do it again. A build/blog/review thing. Now the King Tiger is done I've got a clear desk so yesterday had a look through the stash after a new project. Allsorts of vehicles/artillery/buildings but nothing grabbed me until I found this. I bought this last year off ebay dirt cheap without really knowing why I bought it. Is it just me or does anyone else buy things because they're a bargain without actually having any idea what they're going to do with it once it's built? Half my stash is like that lol. I actually bought another Zis 3 and crew last week cheap as I'd forgotten about this one lol. Oh well I'm sure I'll find something to do with it. This retails at roundabouts £35 which once you open the box isn't bad at all for what you get. I've had a look through the reviews on here and noones done one for this so I thought we'd take an indepth look at it. After all it's effectively three reviews in one as the ammo set and figures can be bought seperately :-)


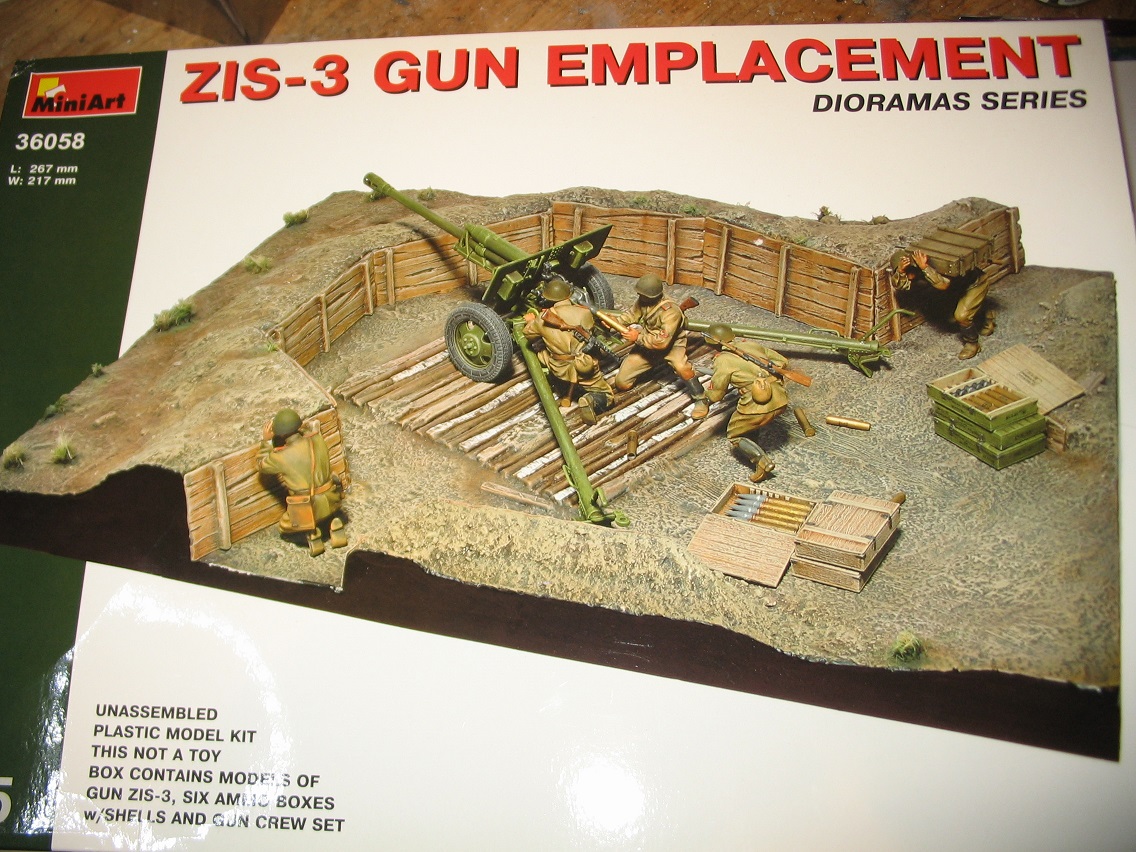
Inside you've got the base for the diorama which is part of a trench system. The Russians were masters of in depth anti-tank positions as was found to Germany's cost at Kursk in 1943. They lured German armour into a network of pre-prepared camouflaged anti-tank guns which turned the area into a killing zone with interlocking fields of fire. I imagine that is what the kit represents. There is seperate wooden panels to reinforce the sides of the position and a carpet of logs has been laid for the Zis 3 to sit on thus giving it a flat and solid surface even in heavy rain where heavy things tend to sink.


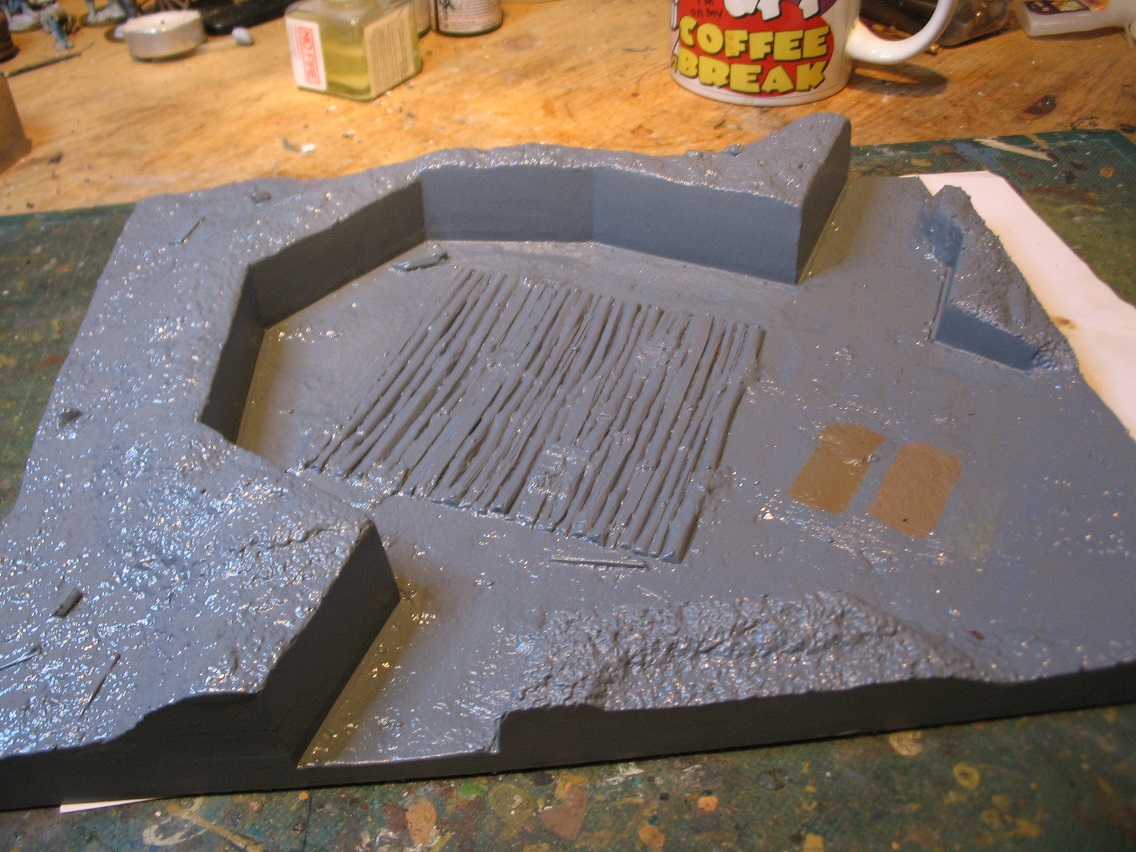
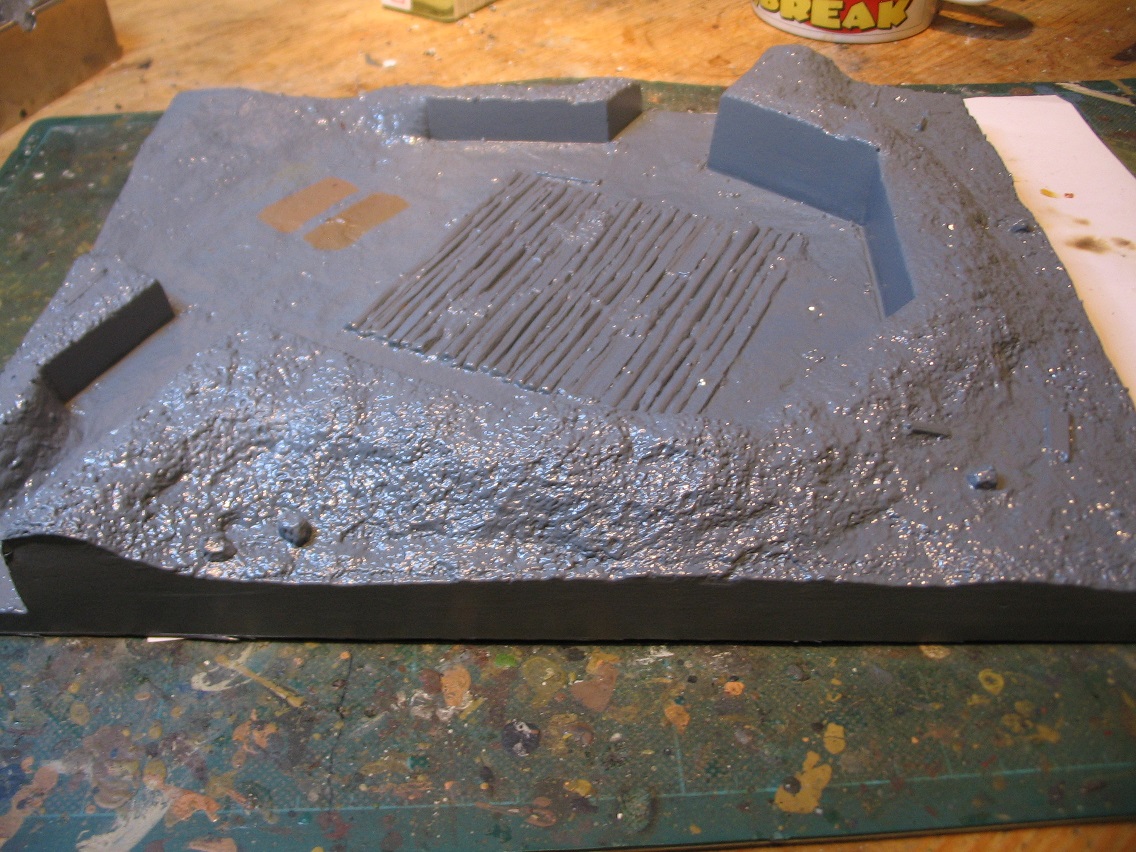
As you can see there is a definite spoil where they've dug it out which lends a nice effect as a recently dug pit. There are tyre marks but unfortunately you can't see them due to my dodgy photographic skills.


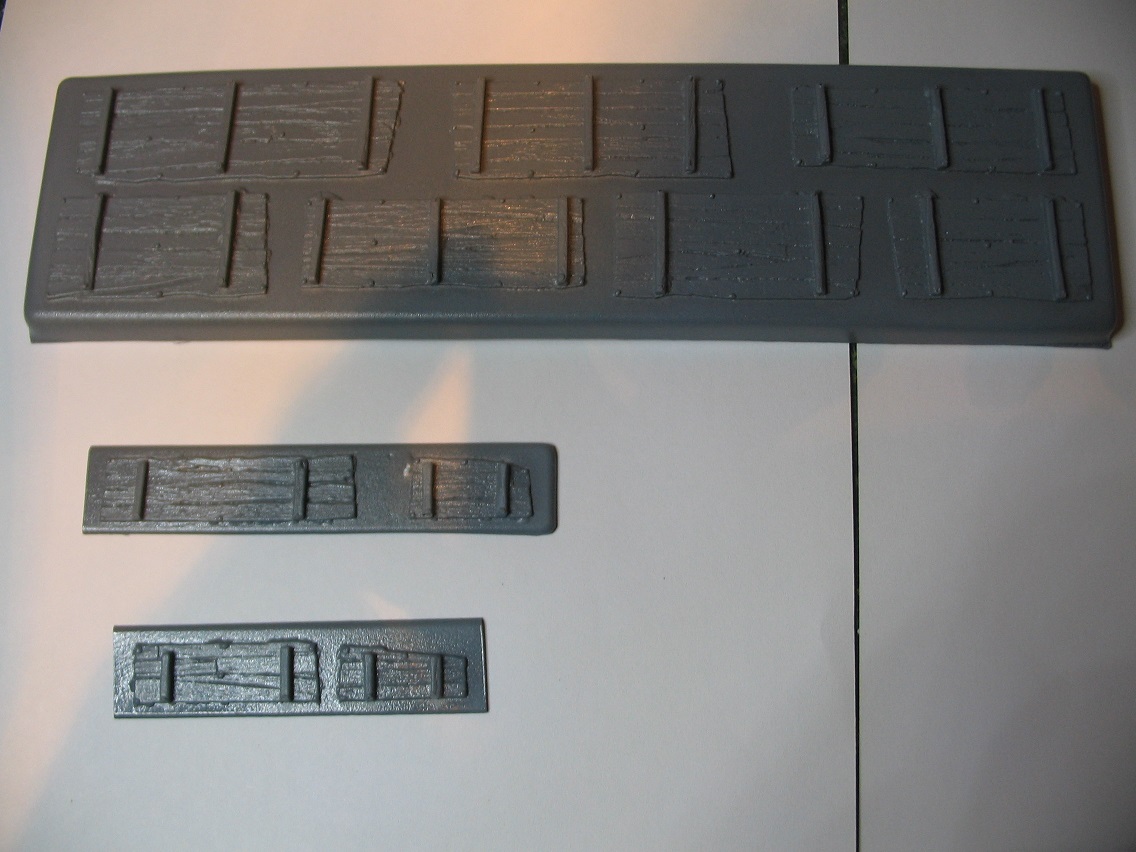
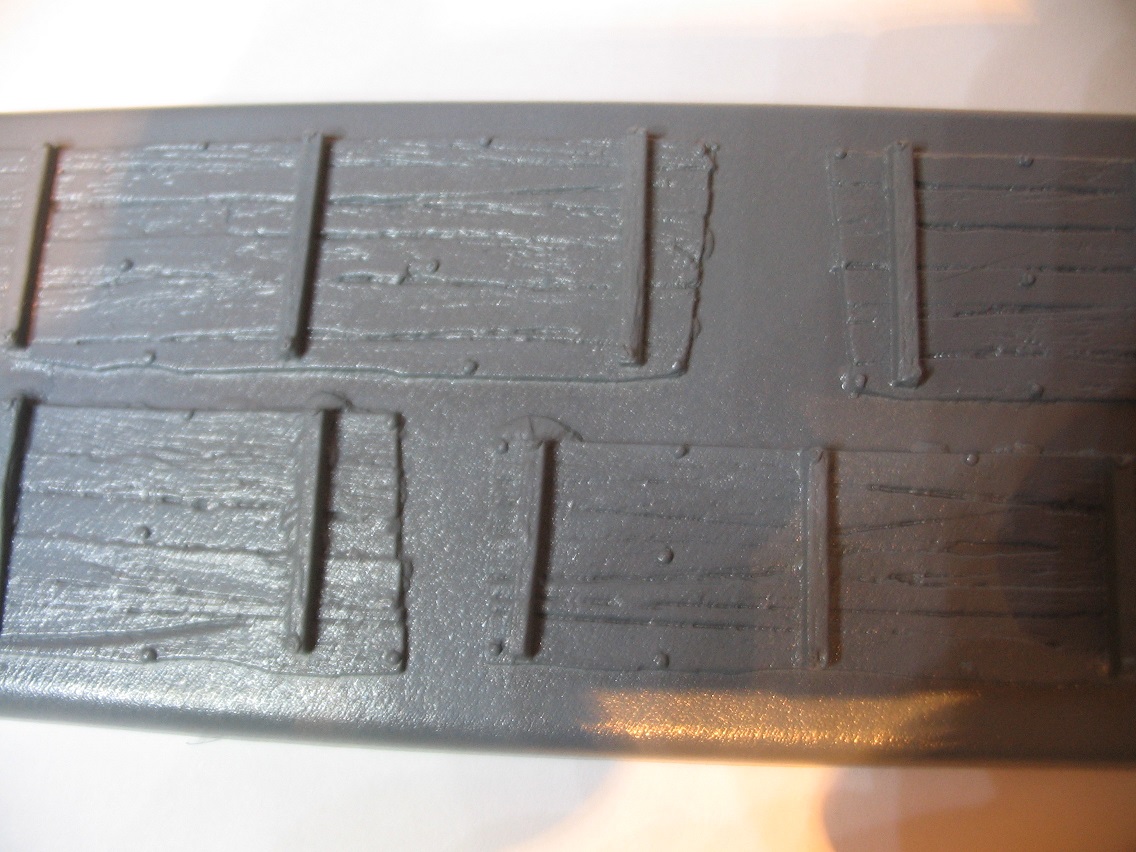
As you can see the wood panelling is rather rough in appearance (no neatly sawn planks) with crevices in between them which I think looks very effective. Should look good with some careful painting. Scrap wood just jammed behind a buttress post. One thing you can see here is Miniart pimples. These parts are vac form which I don't really see the point of here because they'll be flat when trimmed out. I don't know what it is but with their vac form buildings they're covered in these little pimples so these will need trimming off. Easily done anyway, just a minor annoyance.


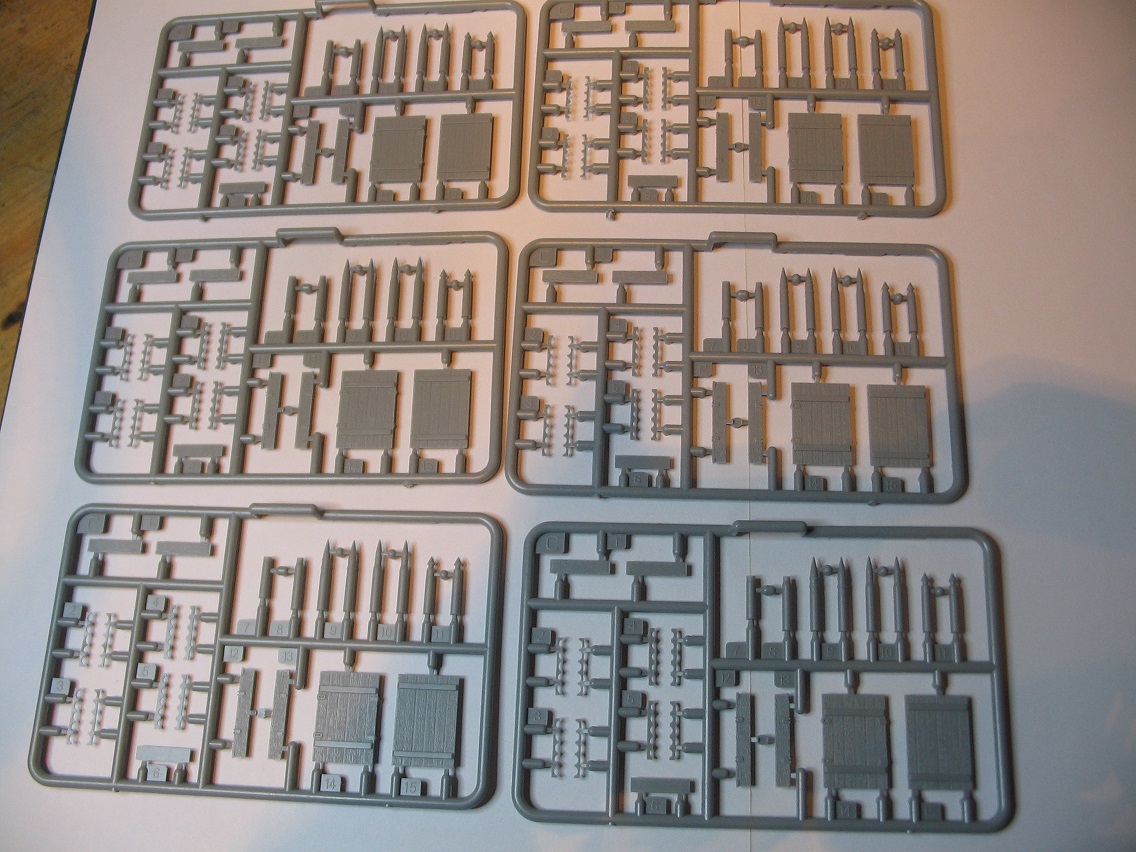
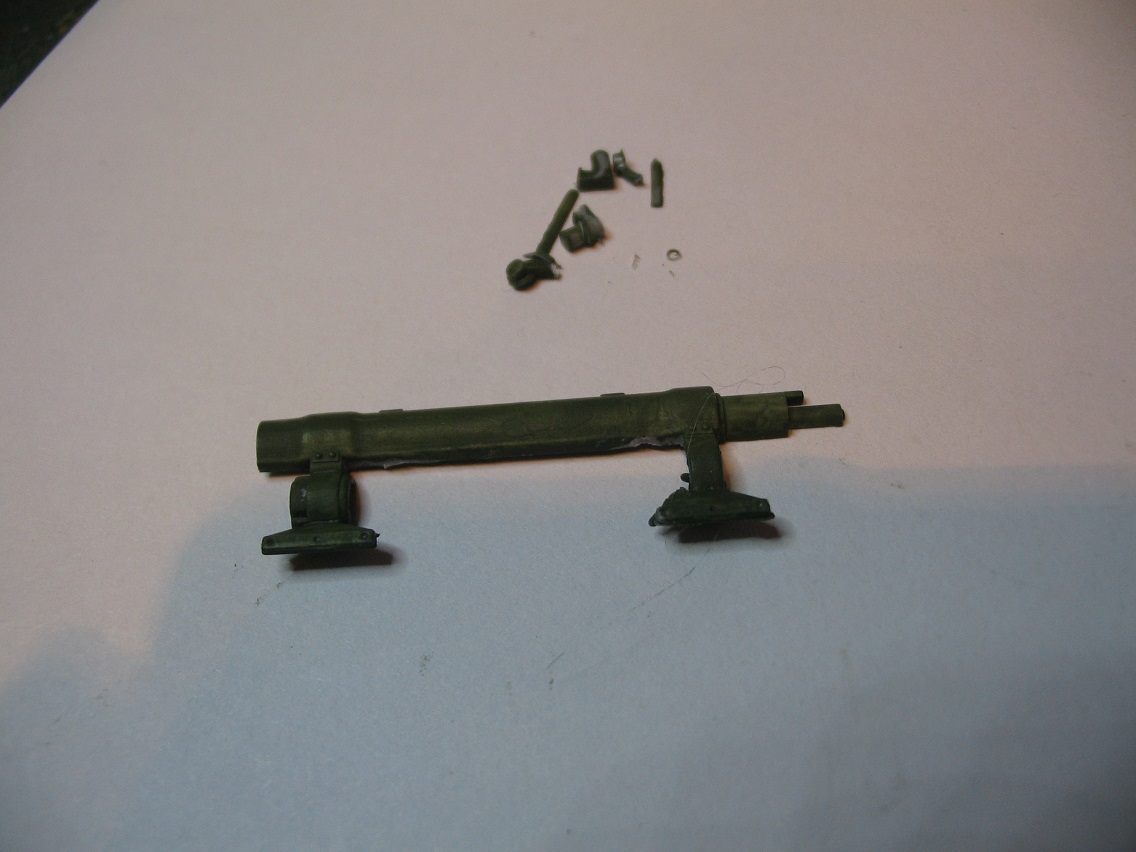
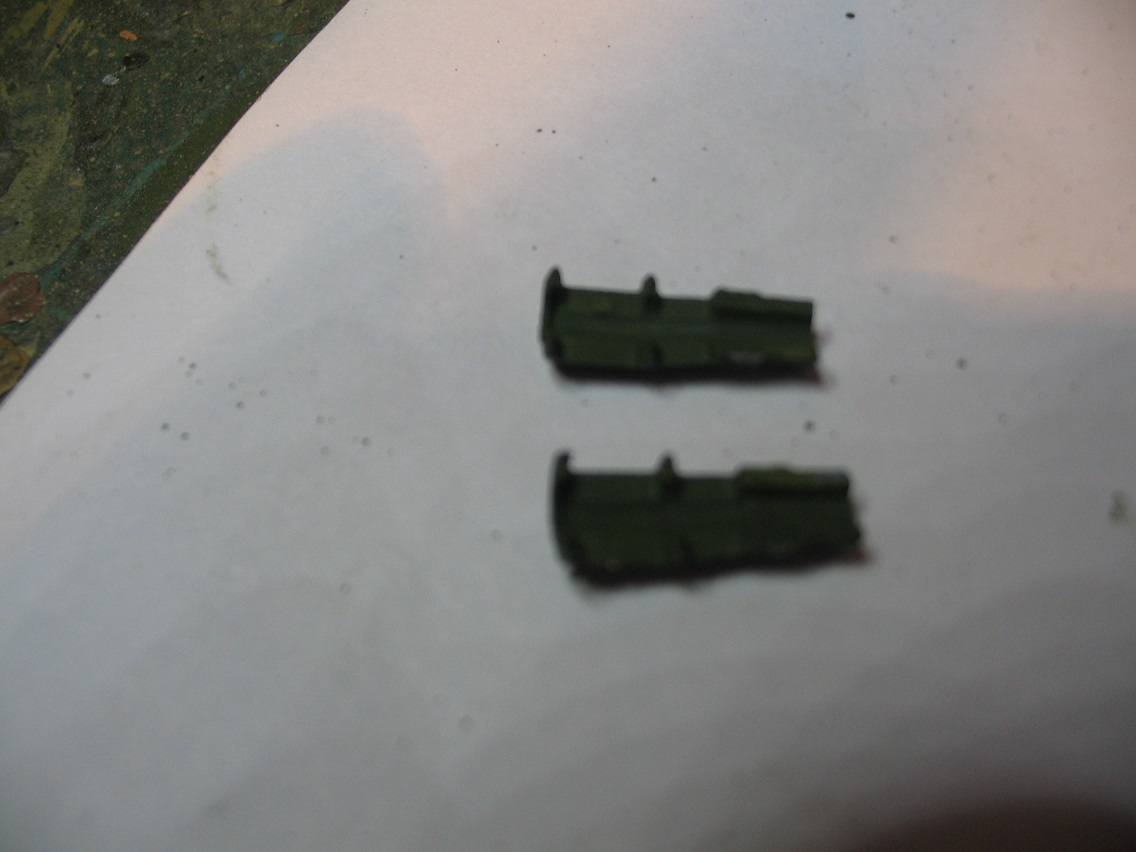
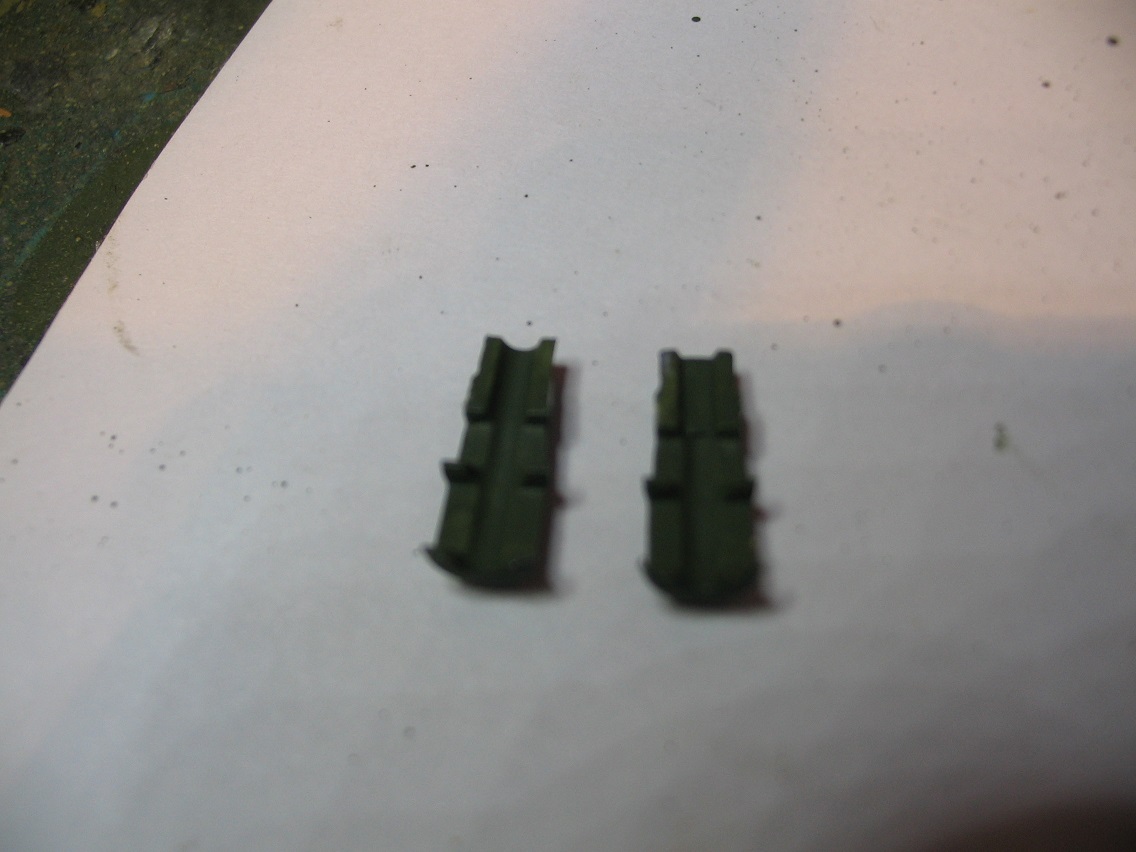
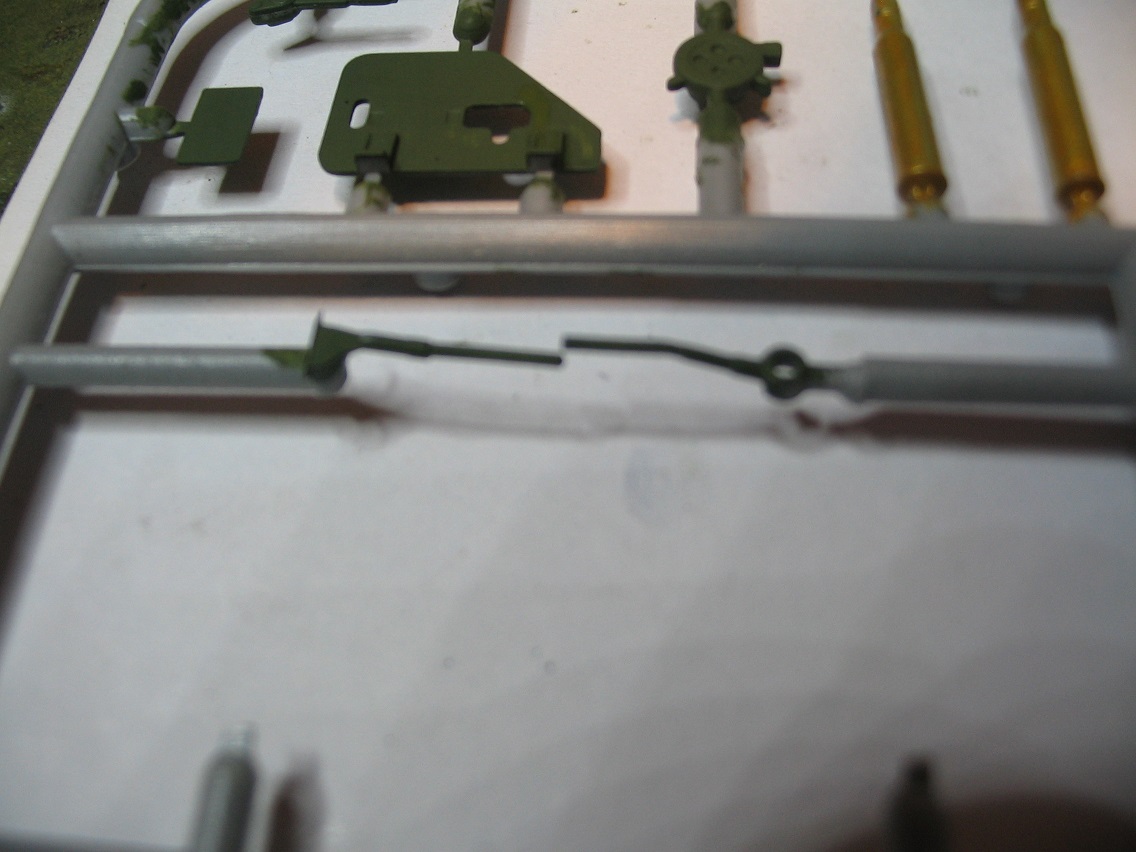
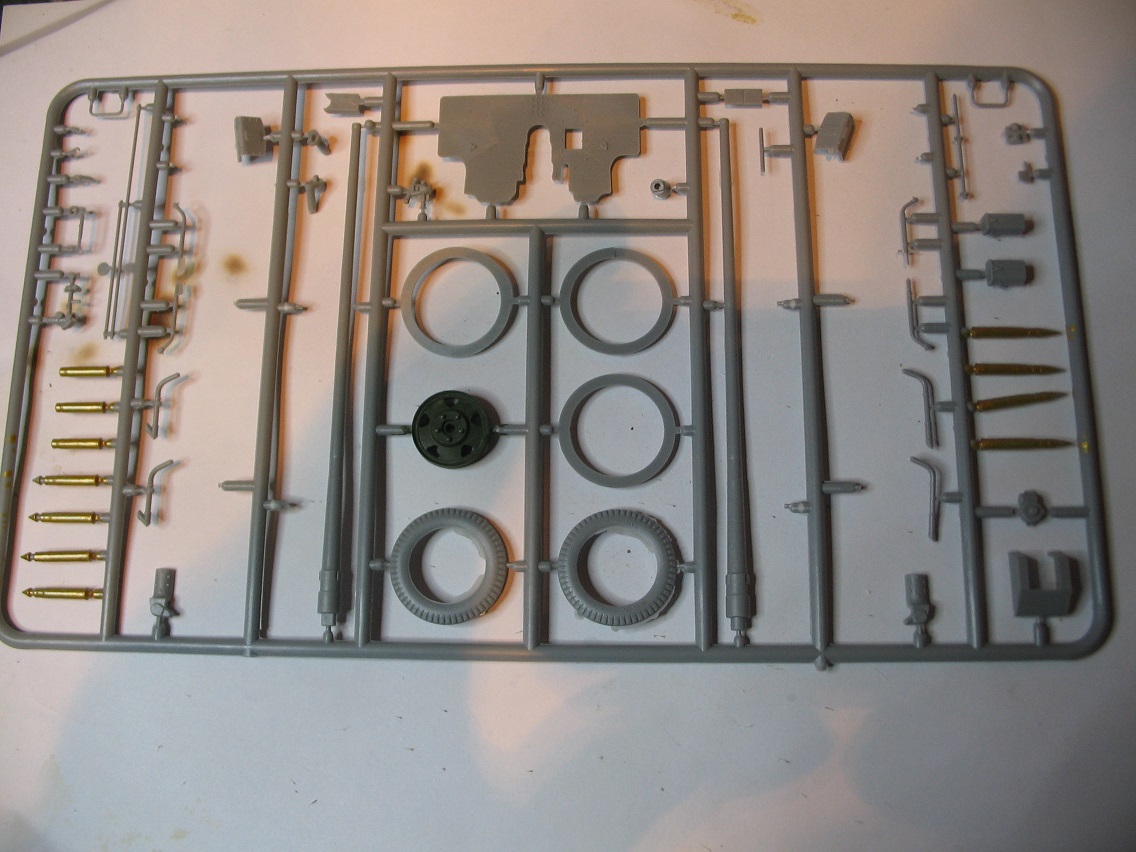
You get 6 sprues of ammunition and ammo boxes which I would imagine is the seperate ammo set that Miniart do. There's a nice selection of HE, AP and spent cases to litter the pit with. The Zis 3 was originally designed as a divisional artillery piece for line of sight suppressive fire. After some usage they found it to be a very capable anti-tank gun and produced anti-tank shells for it. It's the anti-tank capabilities that the gun is best known for.
The boxes have nice wood detailing and contain the vertical shell spacers so boxes can be left open ready for firing.


The figures are what we've comne to expect from Miniart in that the moulding is crisp, folds fall naturally and they're dynamic. They are posed loading the gun while a comrade brings up more ammunition and an officer is off to one side watching the fall of the shot. While these are specifically a crew to this gun I would imagine they'd be fine for any other Soviet or even captured German gun. They could even be kitbashed into normal Soviet infantry. Sorry, I always look at figures and think what else they can do lol. They look to be very good figures and I look forward to building them.

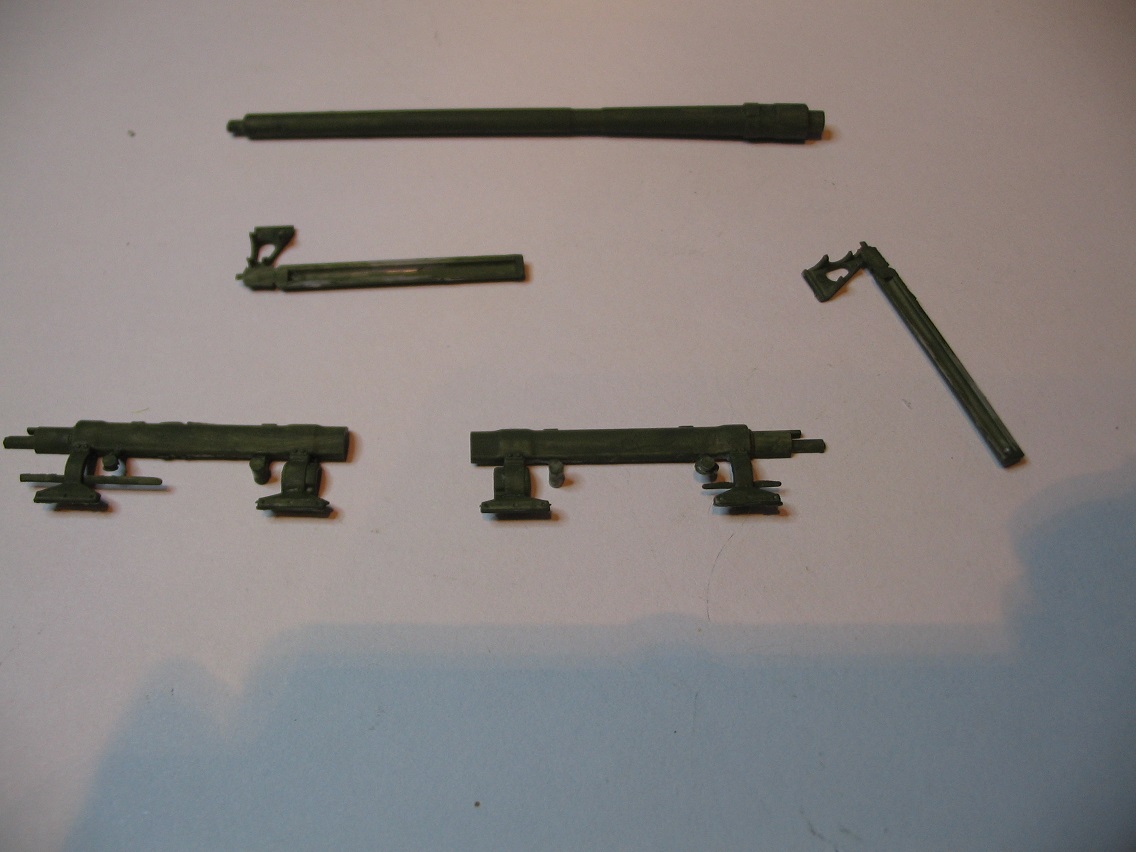
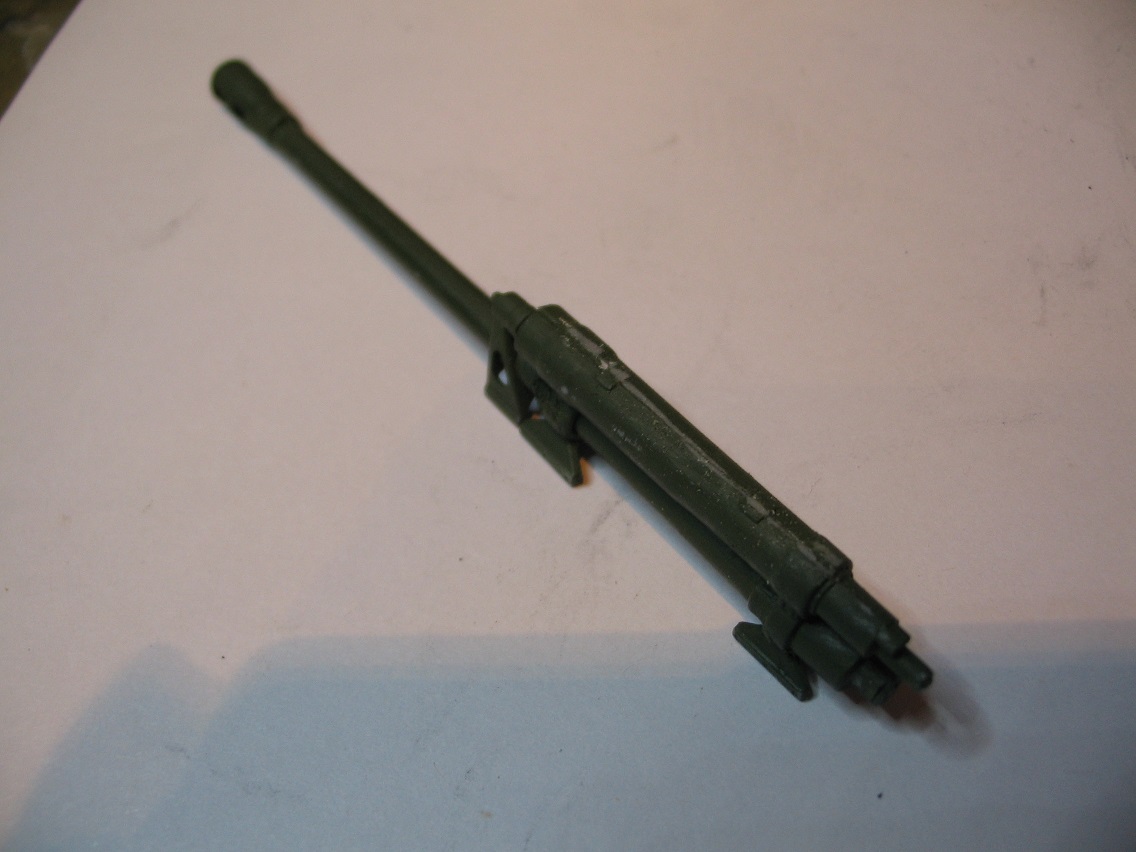
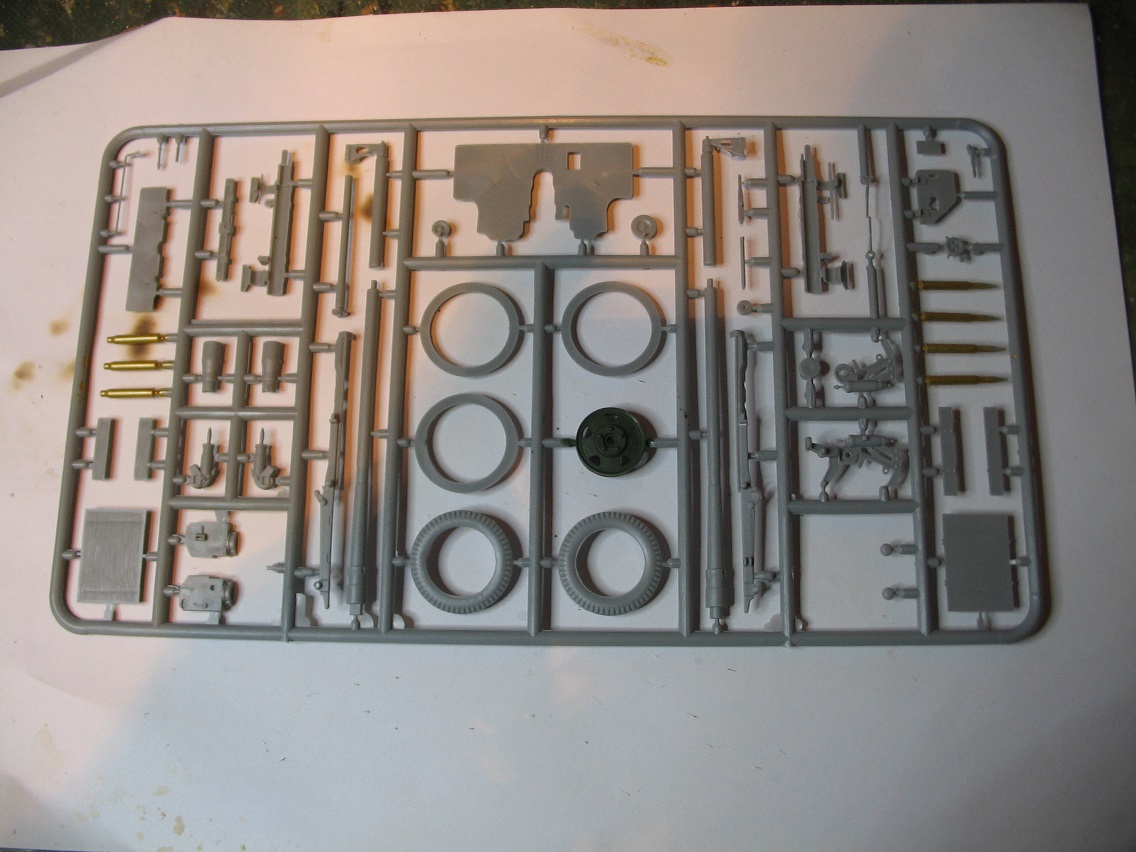
Then finally onto the gun. Not a weapon I'm particularly familiar with so I spent a couple of hours saving photos from walkarounds and photos of it in use so that I've got something to refer to for fit of parts if I have problems. I also find that looking at hundreds of photos gives some inspiration as well. These days whenever I build anything I always put together a file of photos on the PC, not only as reference to help me with the build but to give me dio ideas for later.


Sorry that one sprue is half empty. It was only after I'd put the wheels together that I realised I'd not taken photos of the sprues. Doh!

One thing that I have noticed and I don't like at all is that the parts are not numbered on the sprues.


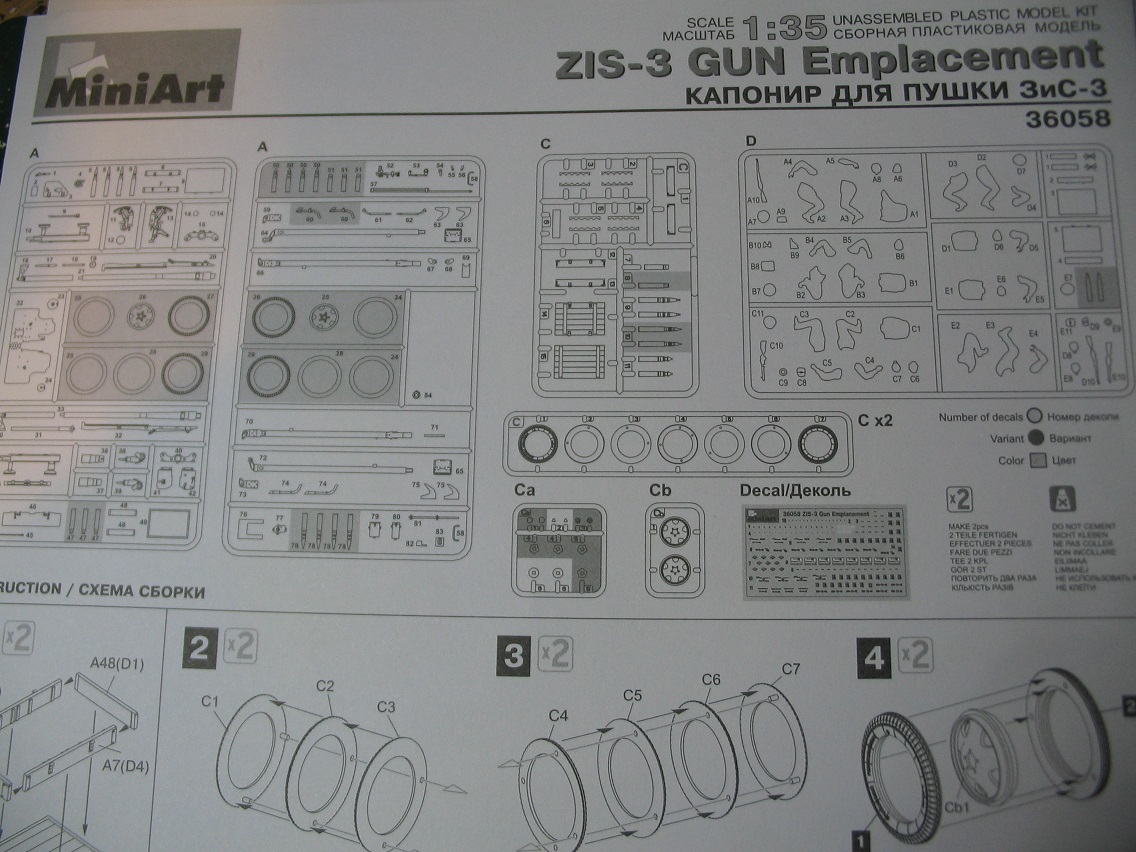
Okay there's a diagram in the instructions of all sprues with the appropriate part numbers on so how difficult would it have been to put the numbers on the sprues? While not a problem as such it is a bit annoying having to keep referring to the instructions to search out the part that I need. Rather than look at the build part then take the bits of the sprues,it's build part, instructions to find out which sprue the part is on then, search through then double check it is the right part. Just time consuming.

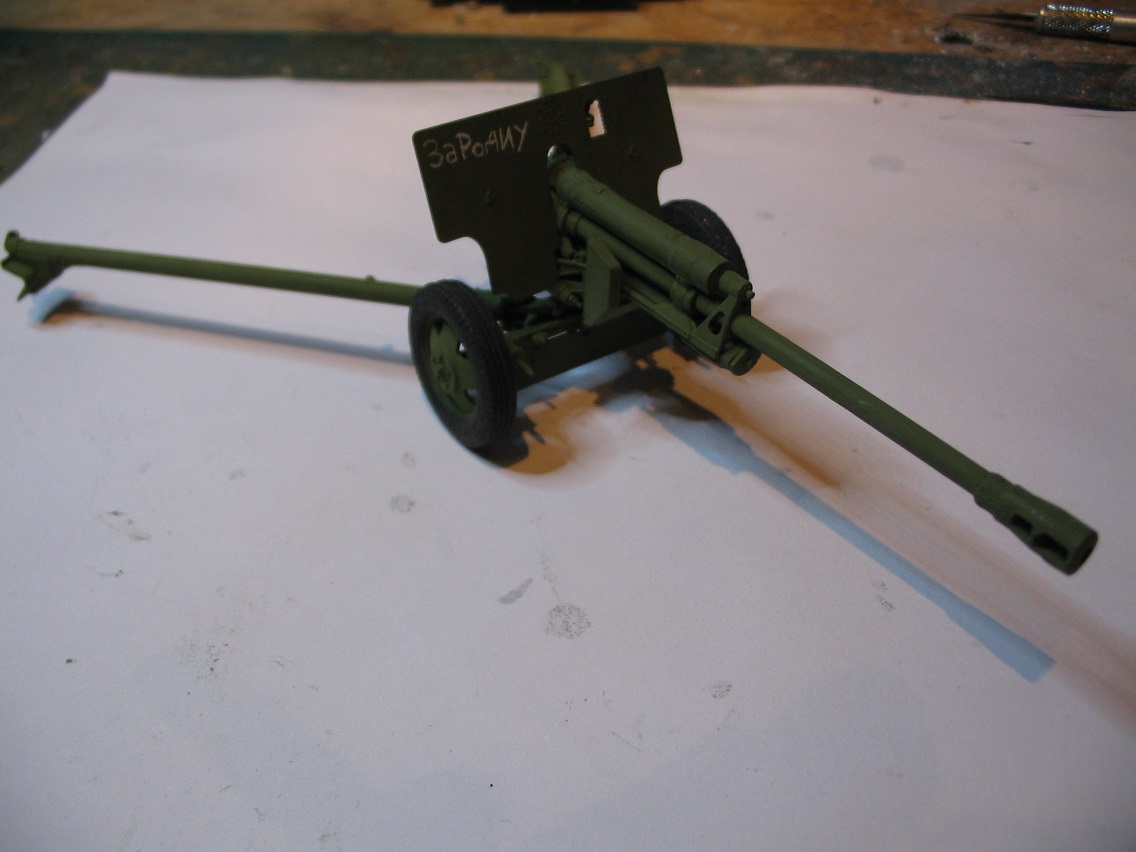
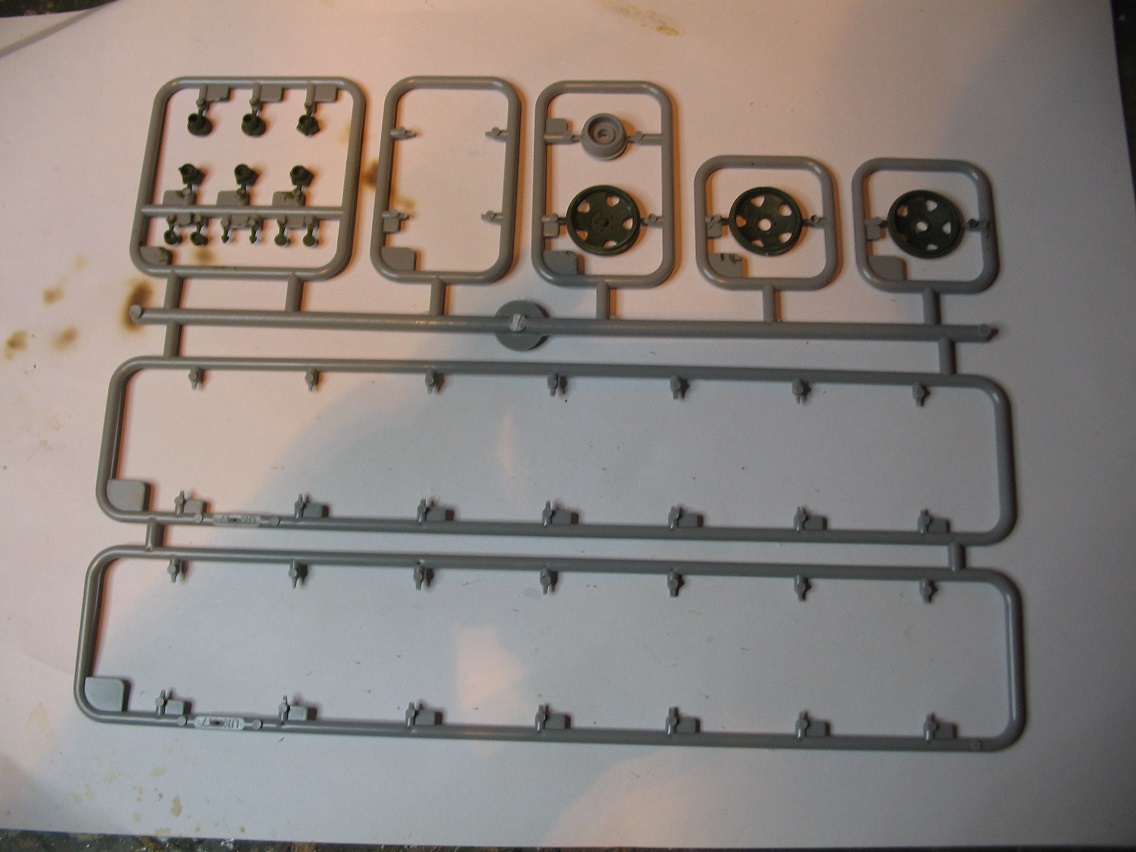
As you can see the tryes are made up of slices which does look good once it's all together as it gives quite a delcate pattern. One thing to bear in mind, and I didn't think of it till I'd done one tyre, is that each slice has a slightly different camber on the edge. If you take more than one part off at a time there's the possibility they may get jumbled up or be placed the wrong way round. What I did there was paint a stripe on each one so I knew which side faced the outer tyre. Simple but it worked.

/>

I built two tyres up before I went to bed last night and gave them a quick paint as I wanted to see what the tread looked like after using seven slices to make a tyre..


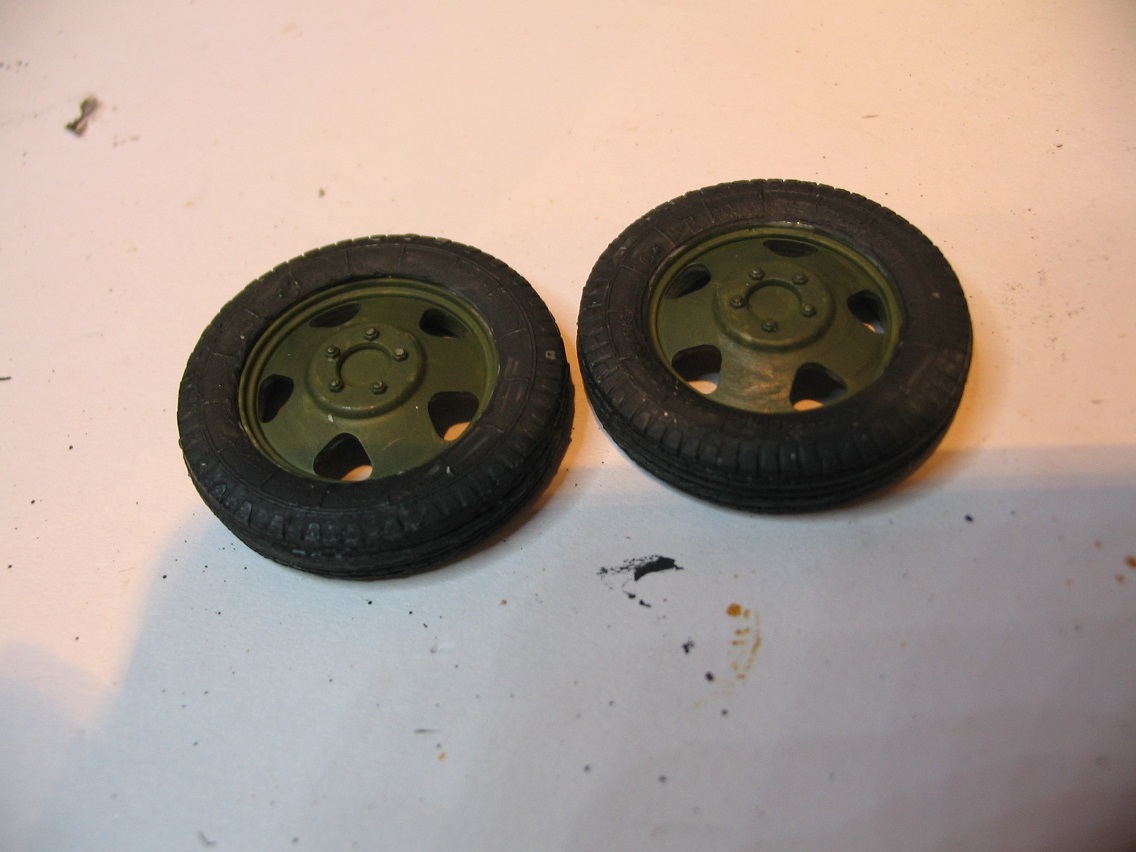
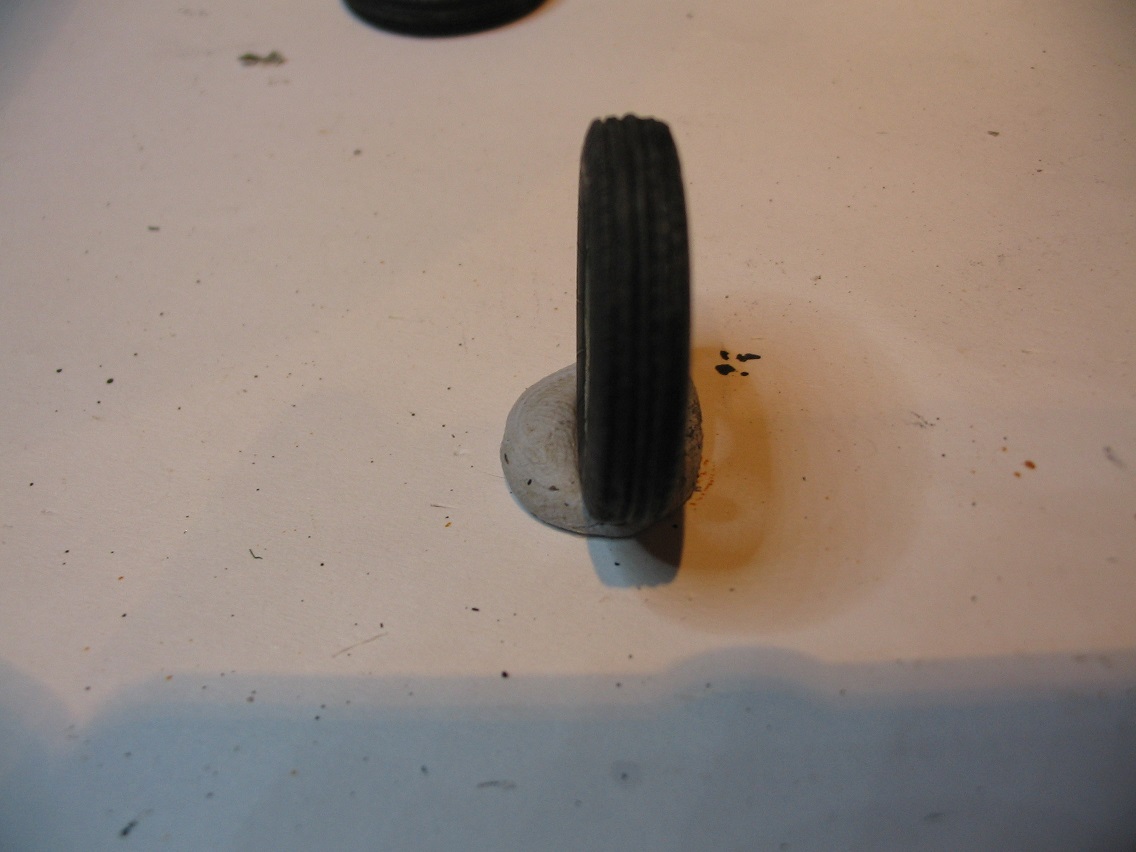
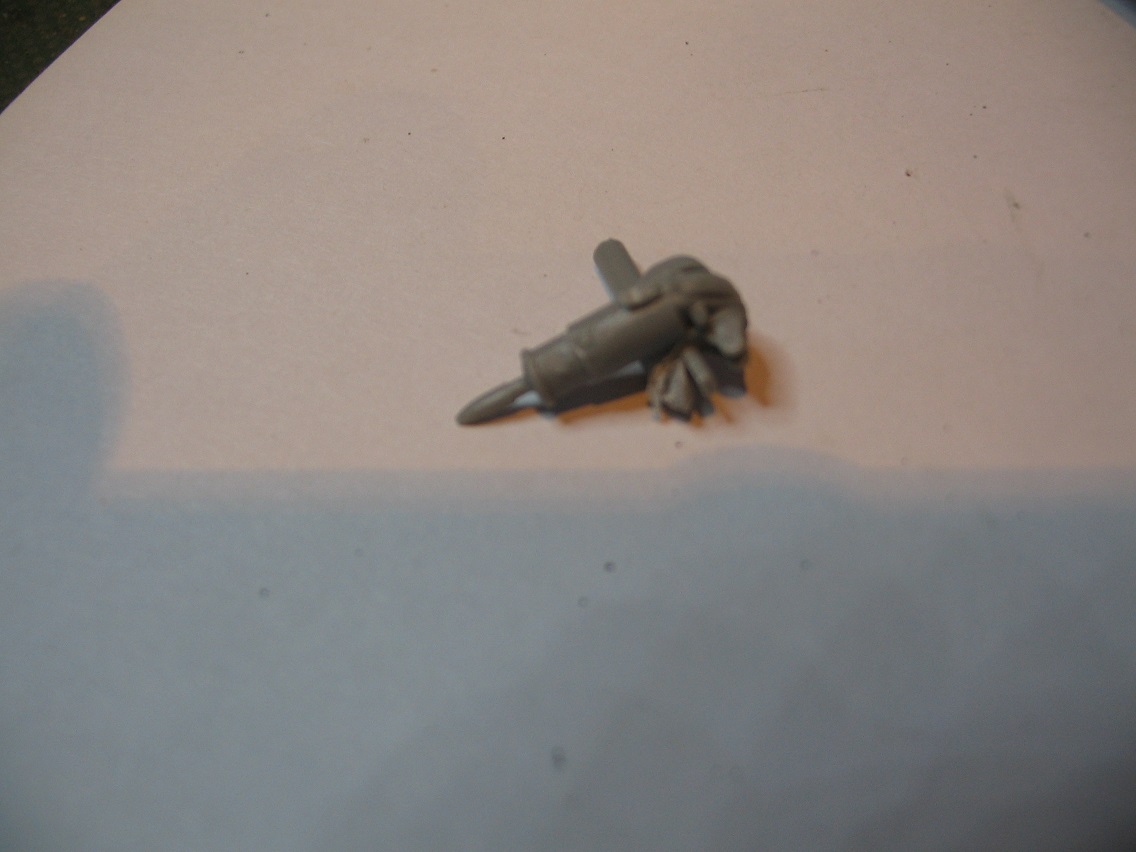
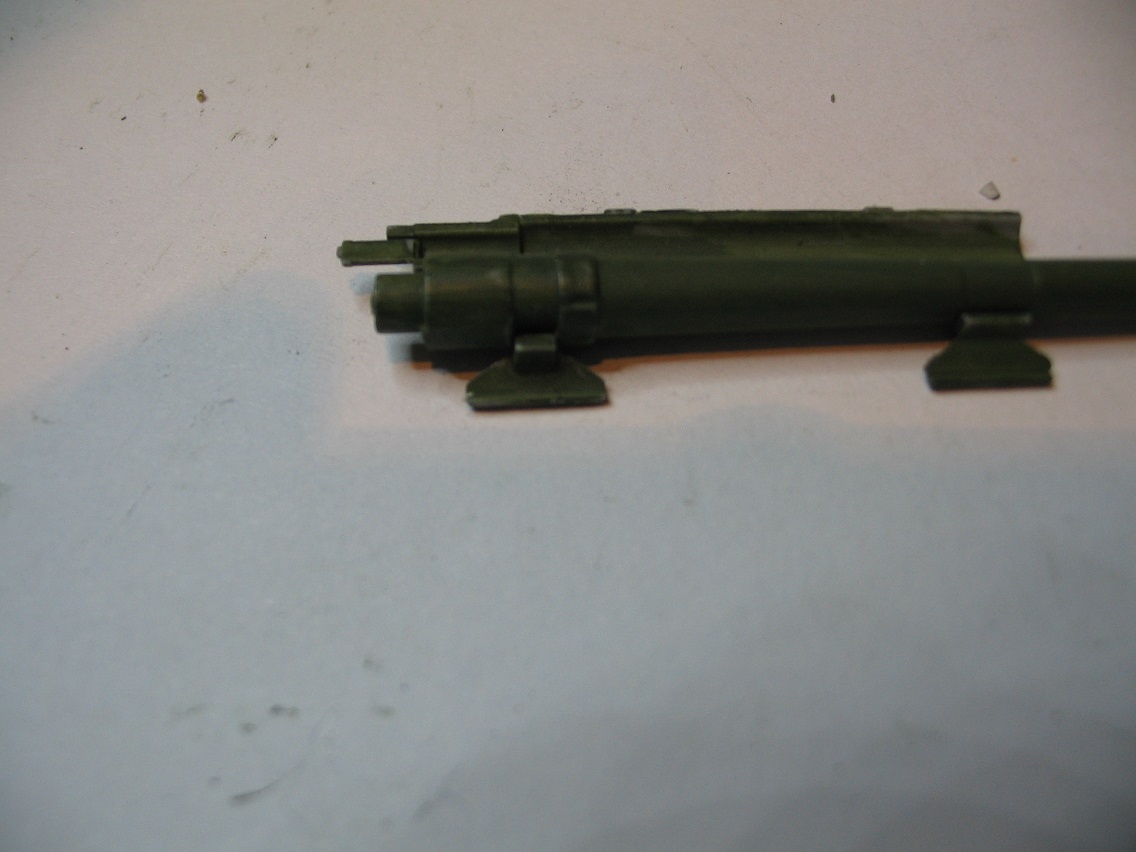
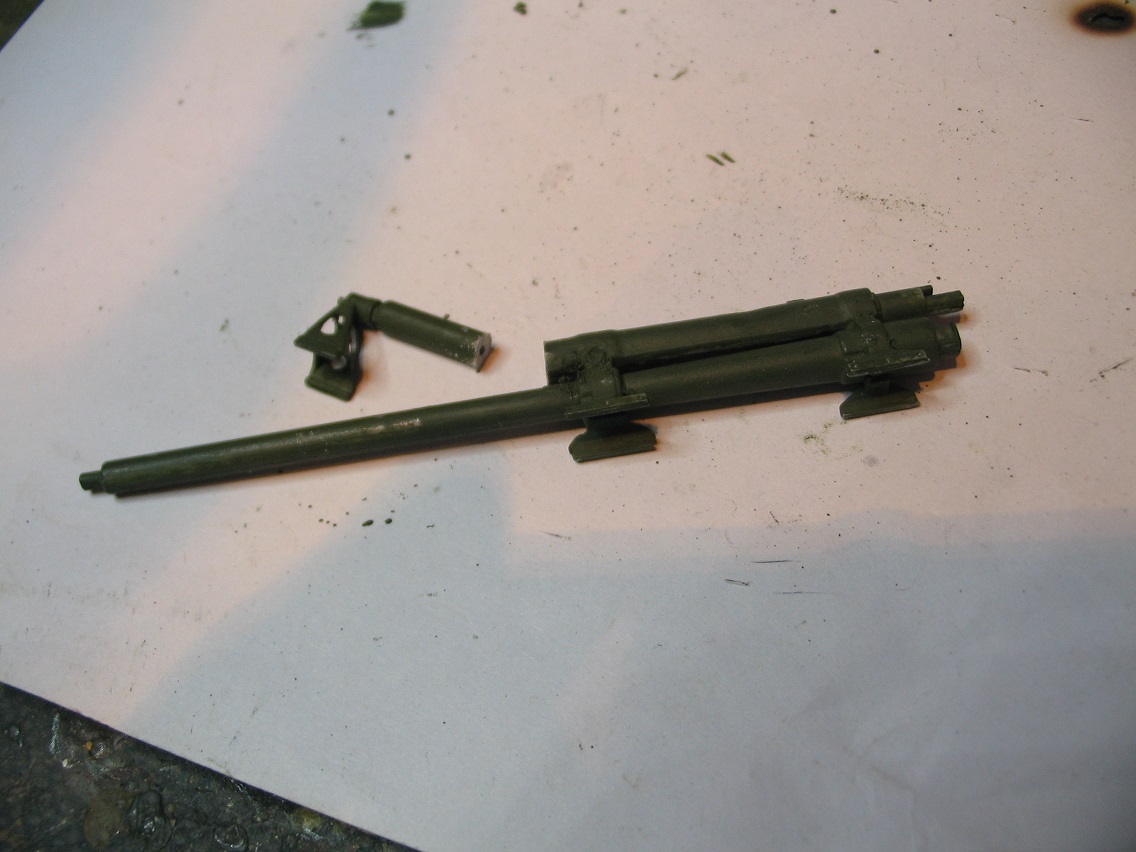
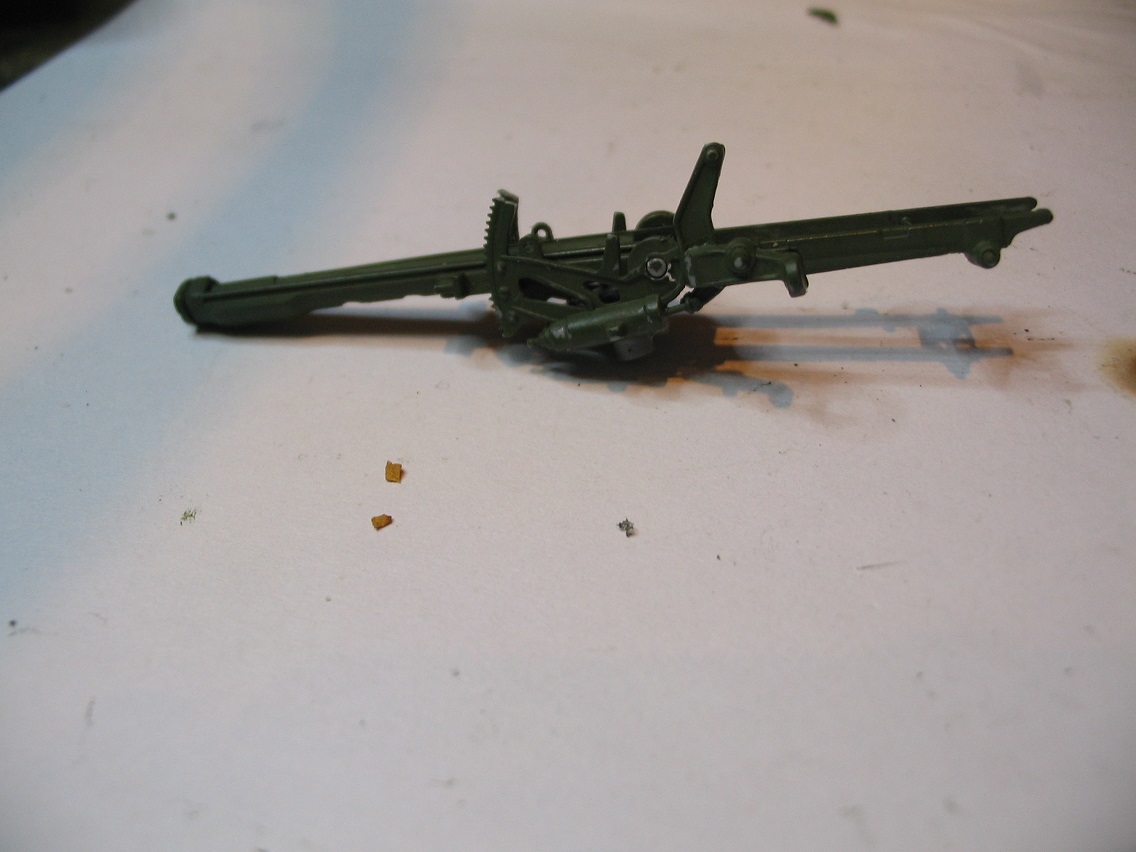
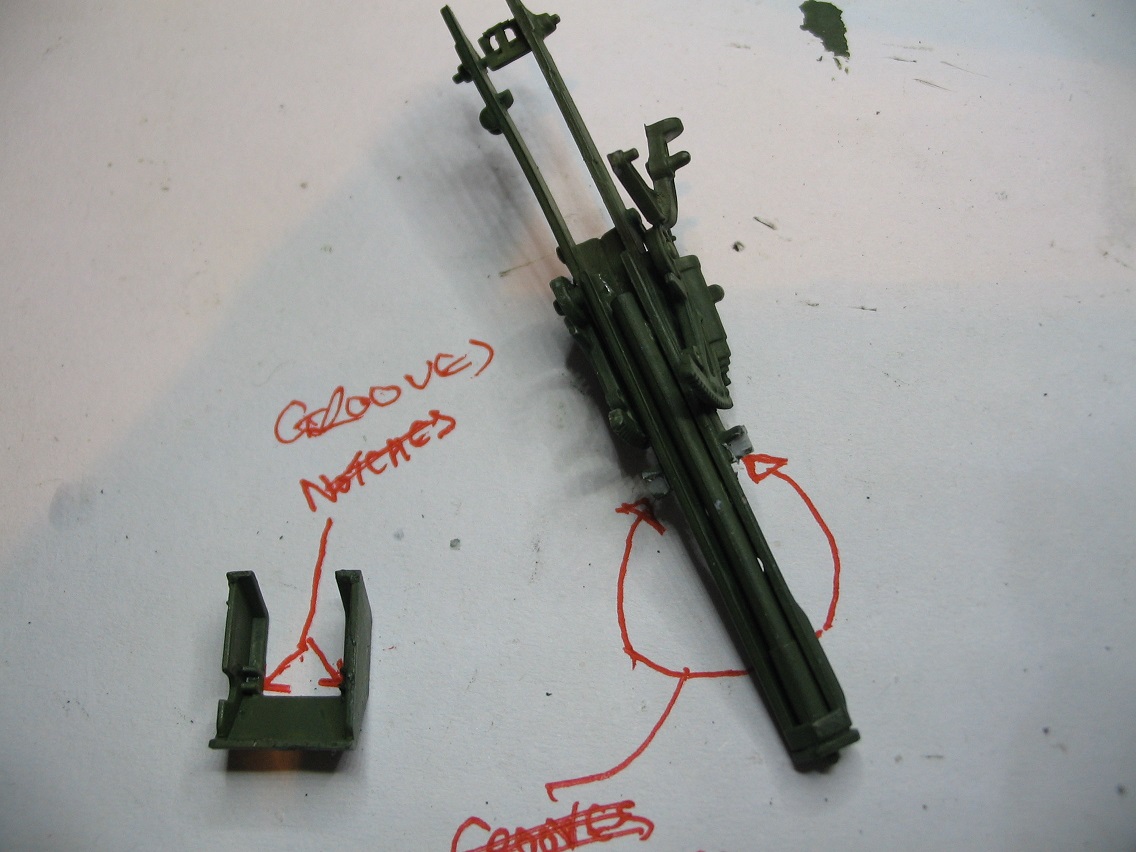
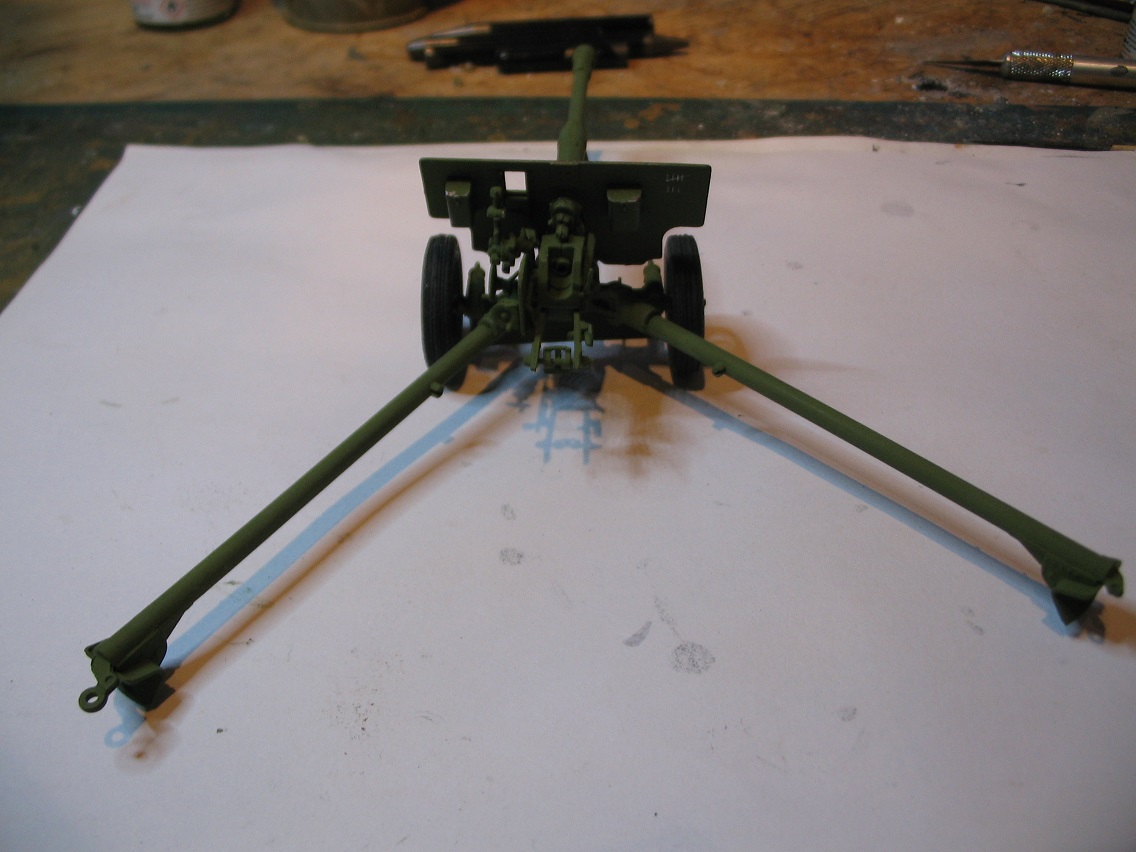
Not a great photo of it end on but you can see that the tyre pattern is quite effective when done. When I went to take the trail parts off the sprues I did notice quite a bit of flash. Easy enough to take off with a sharp No11 but I wonder if it's all going to be like this?


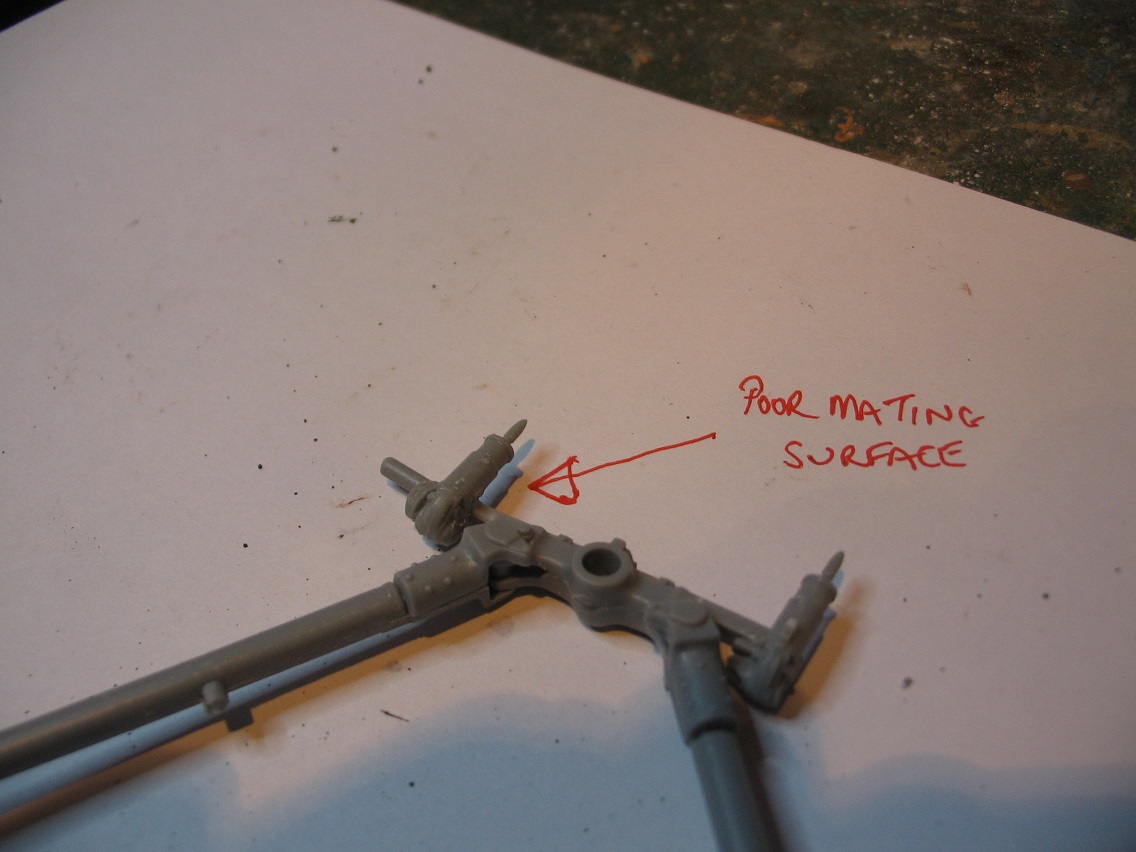
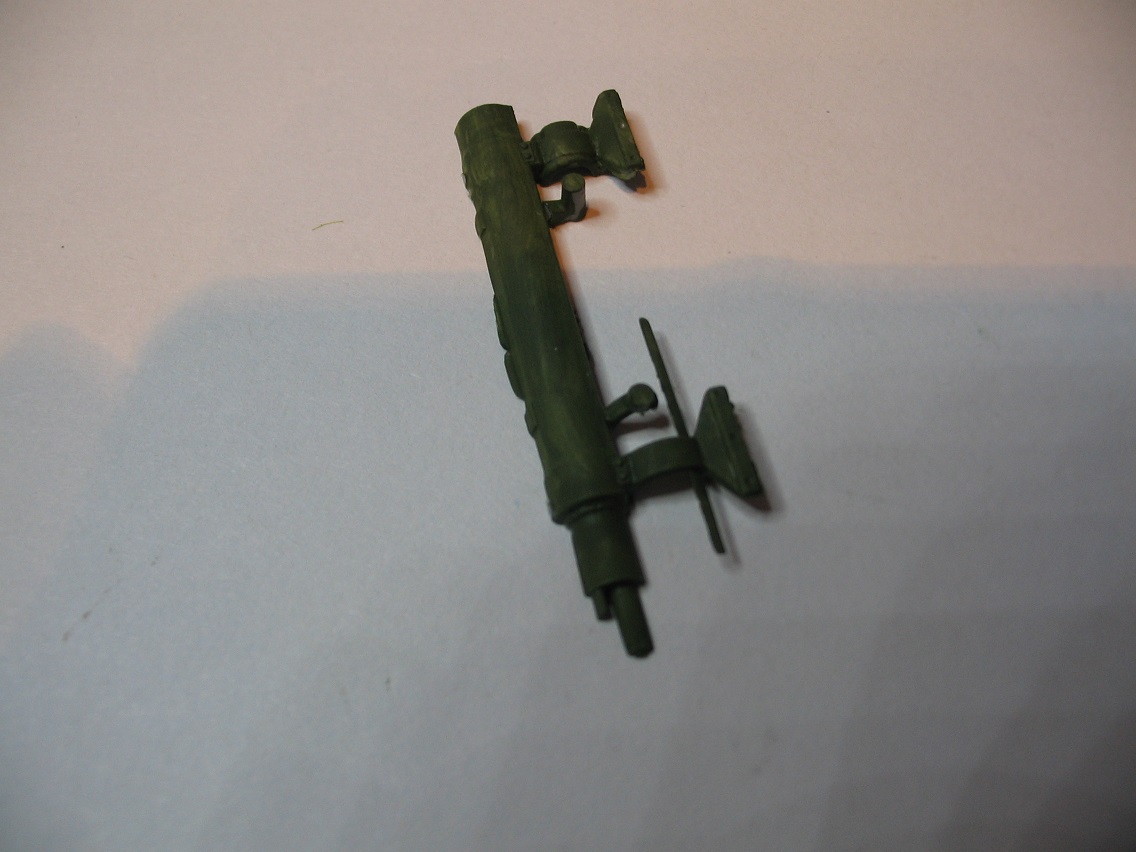
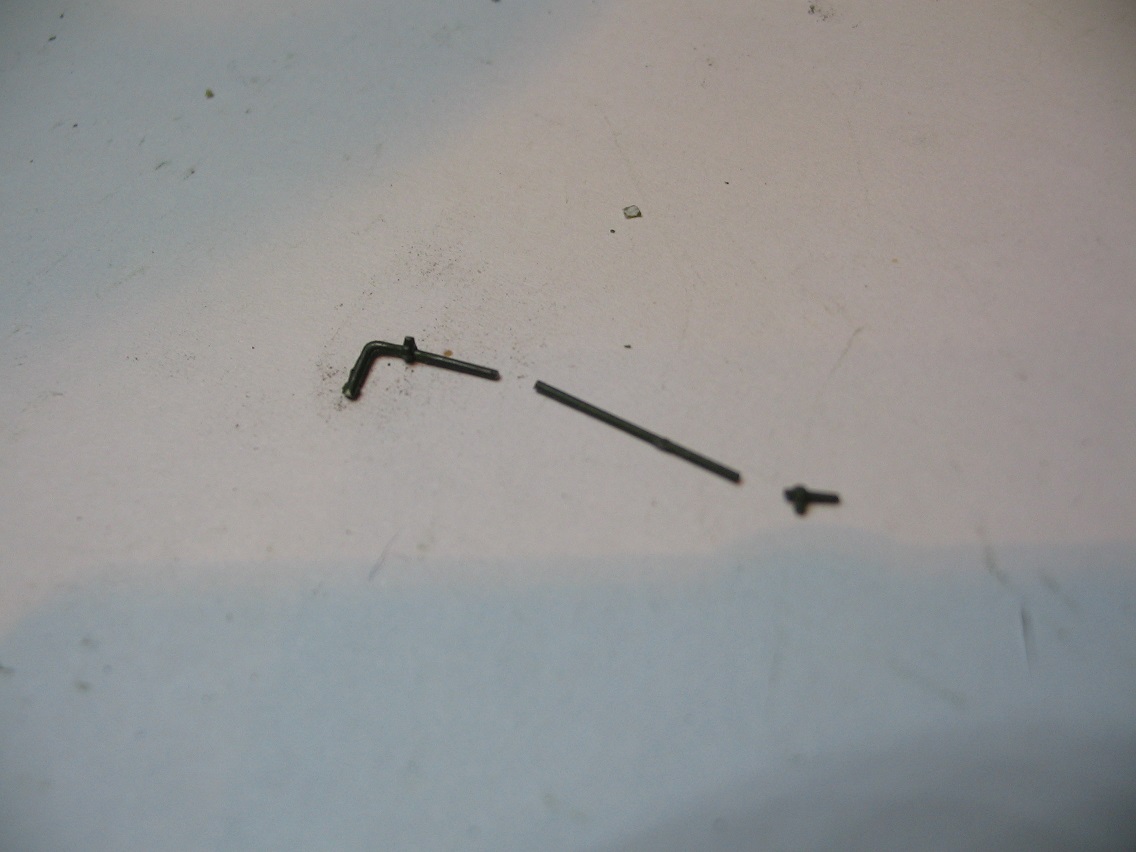
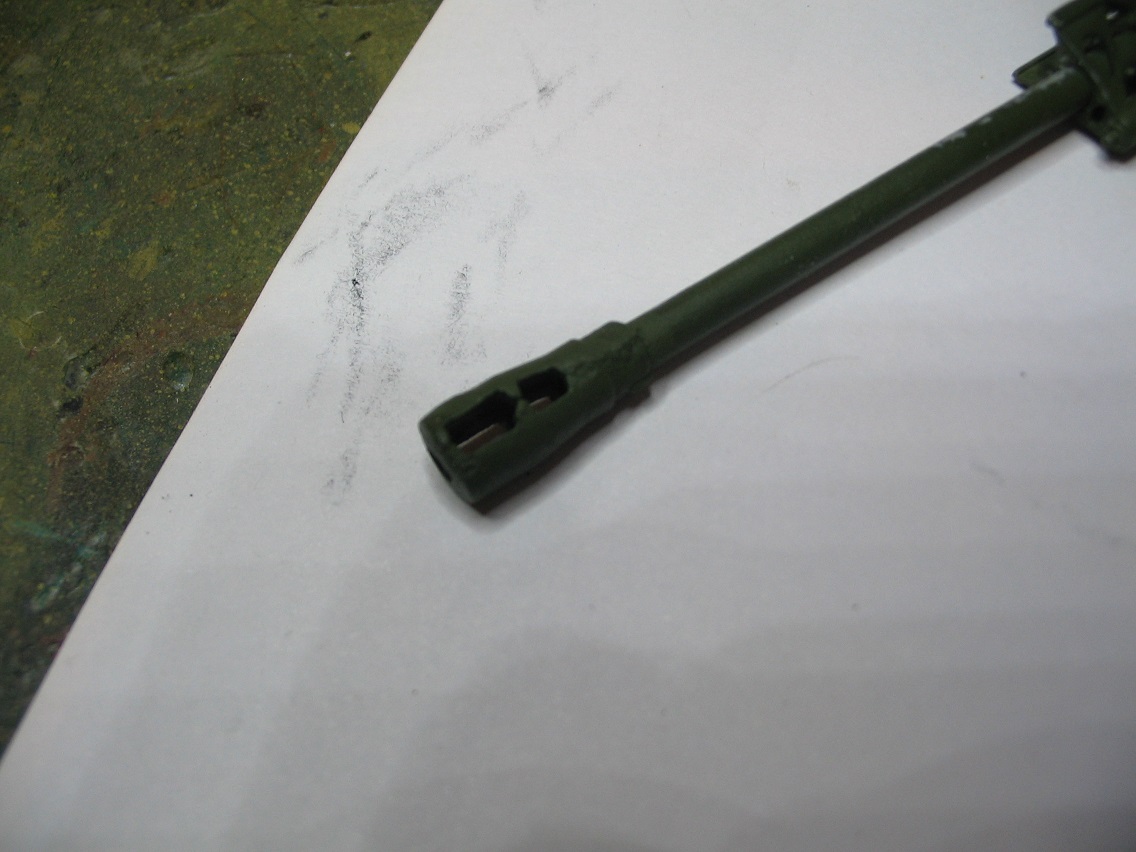
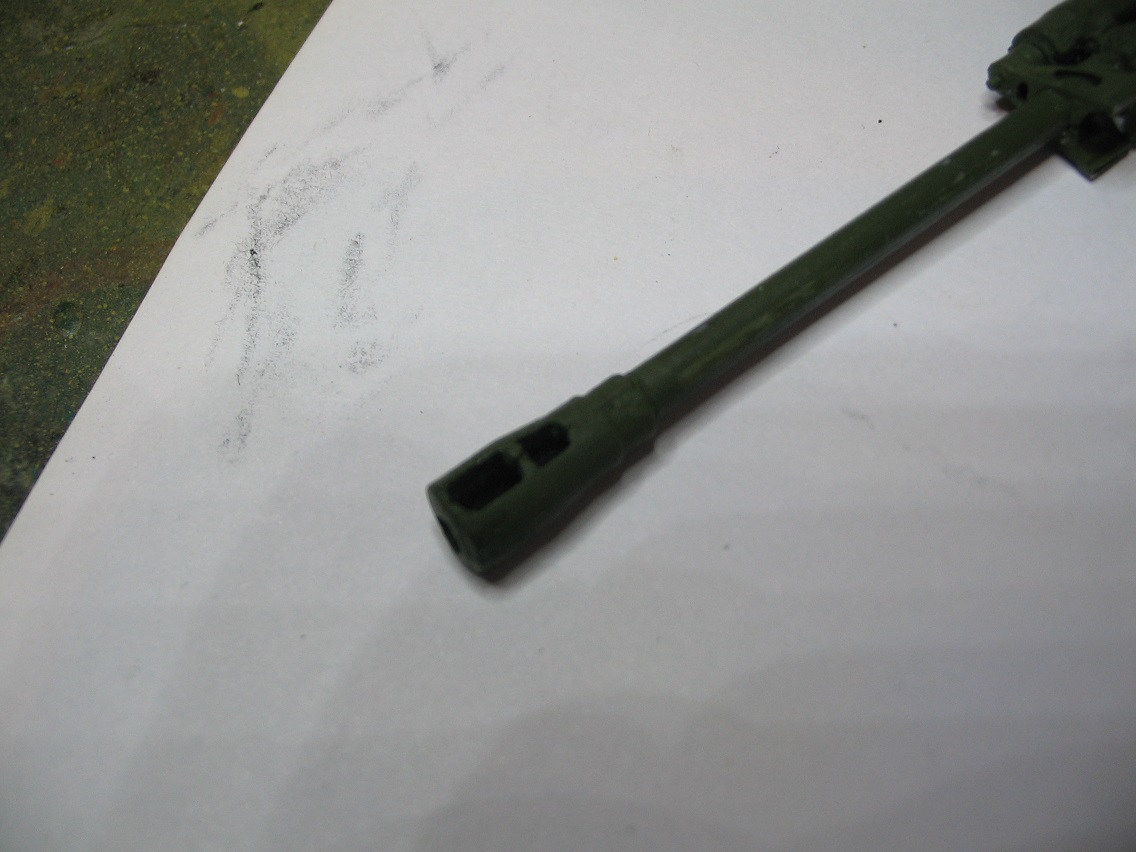
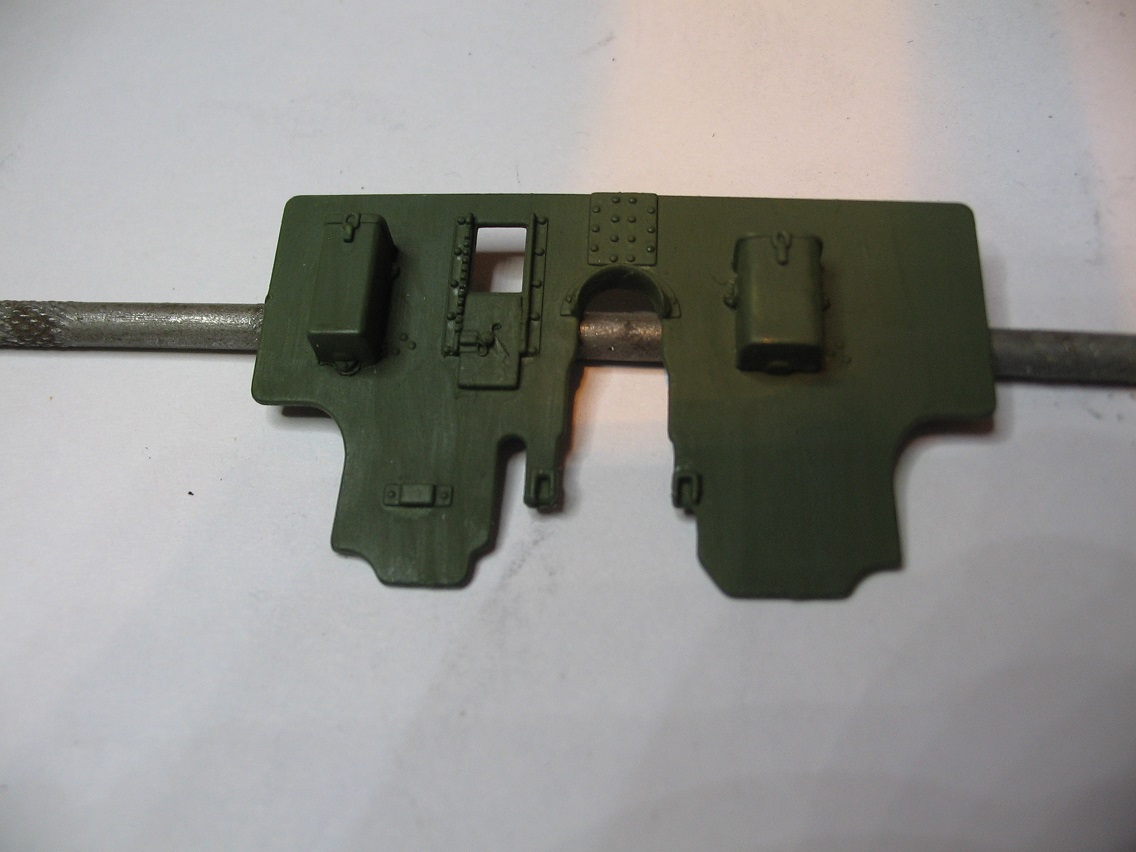
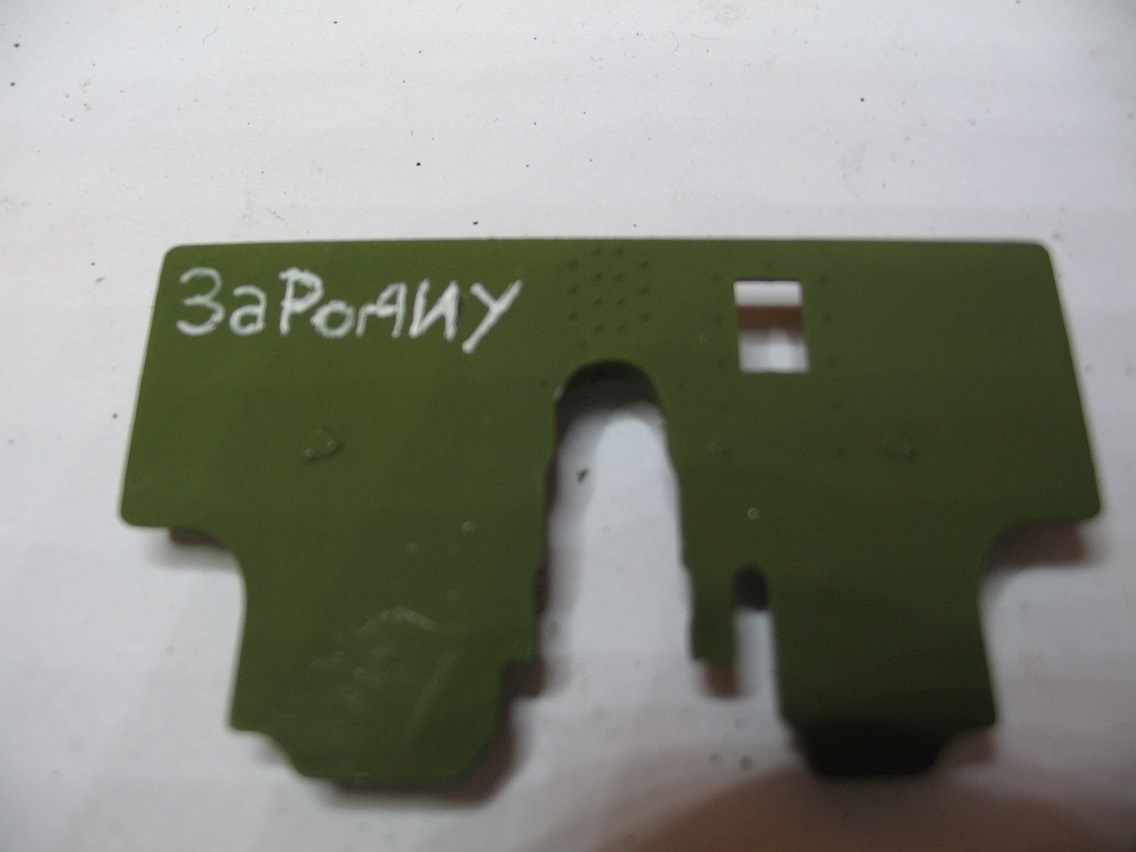
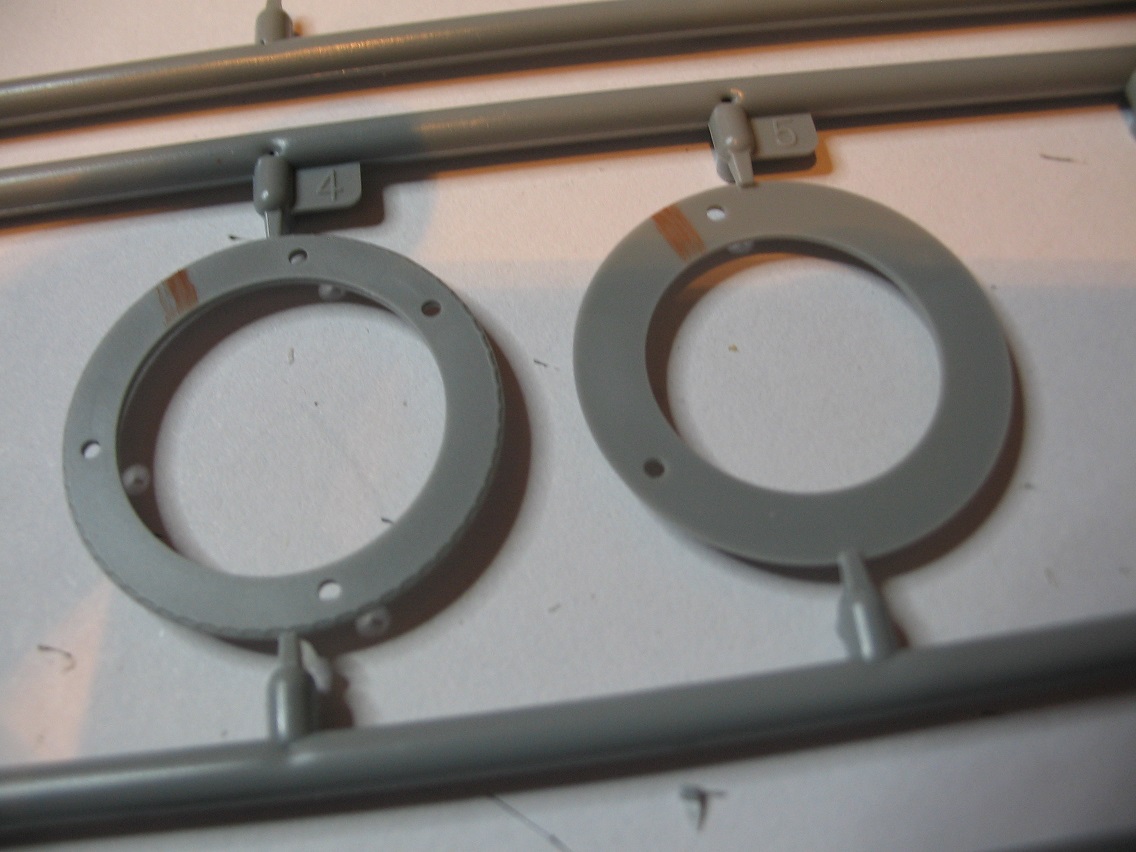
One thing I noticed when comparing parts with the instructions were these two parts.


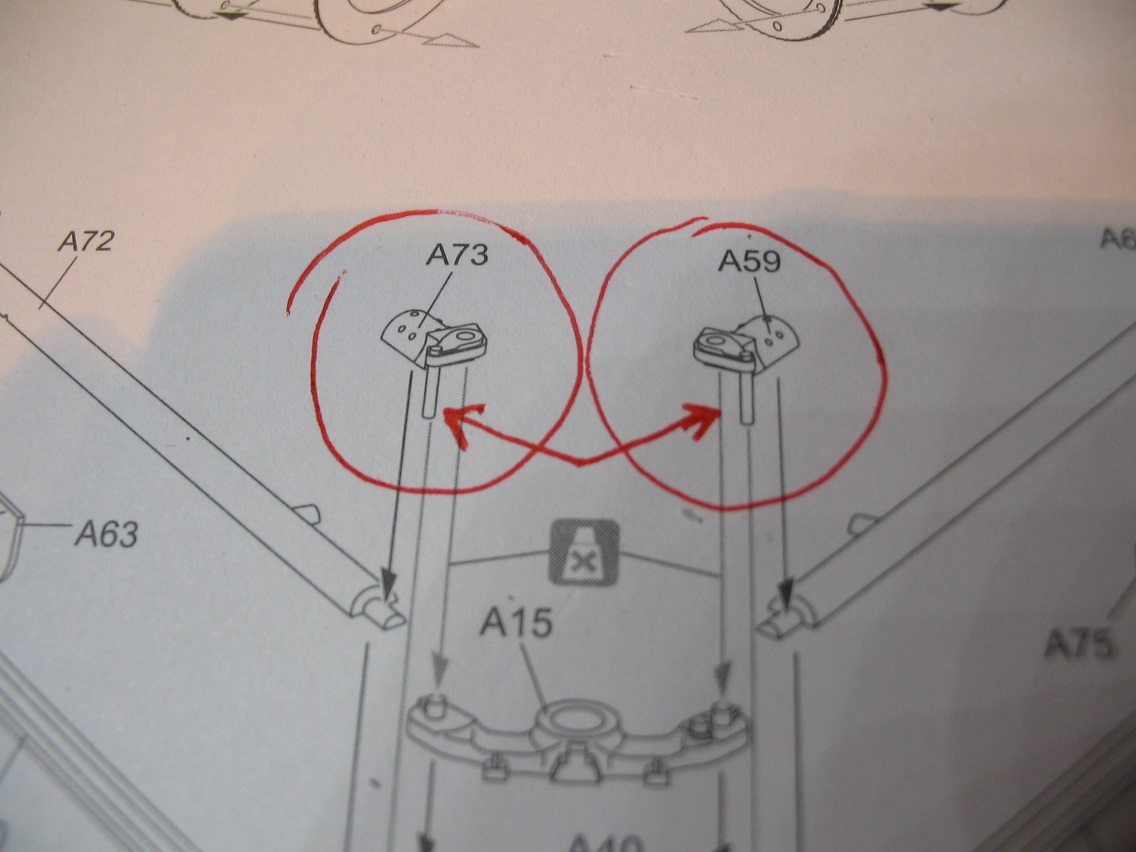
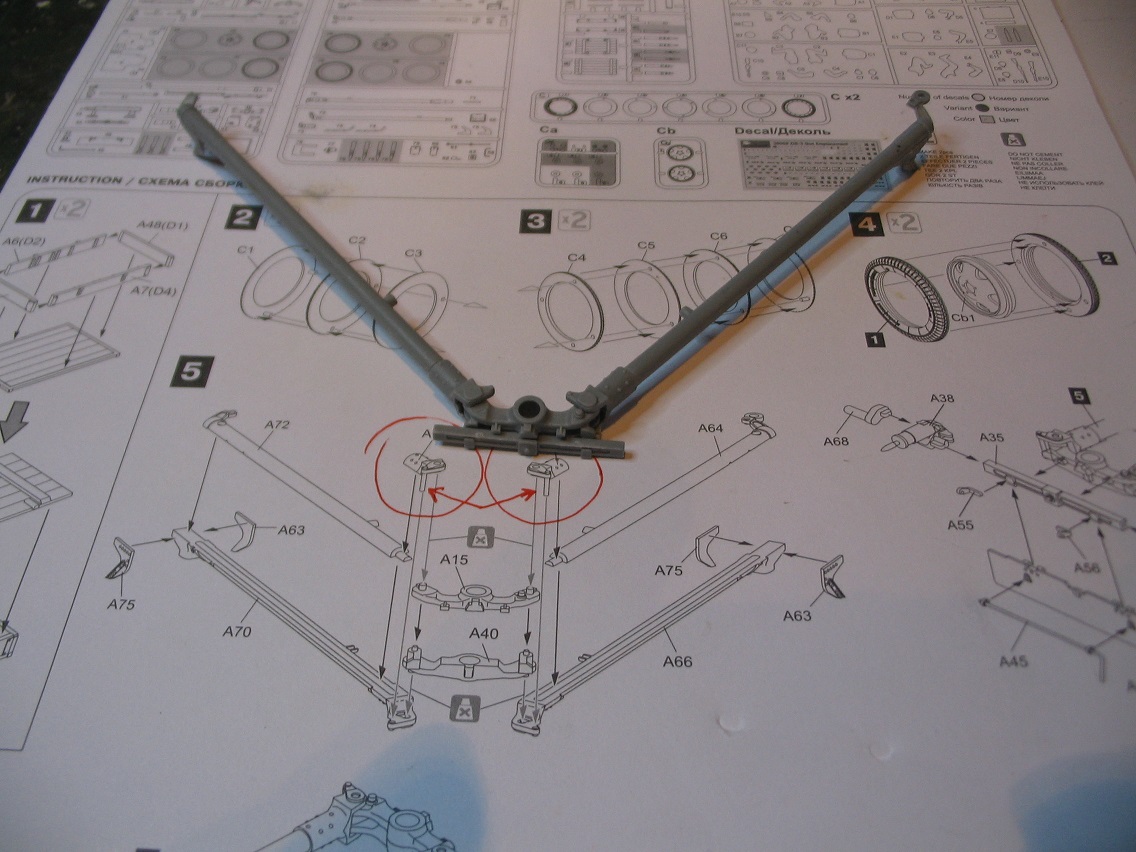
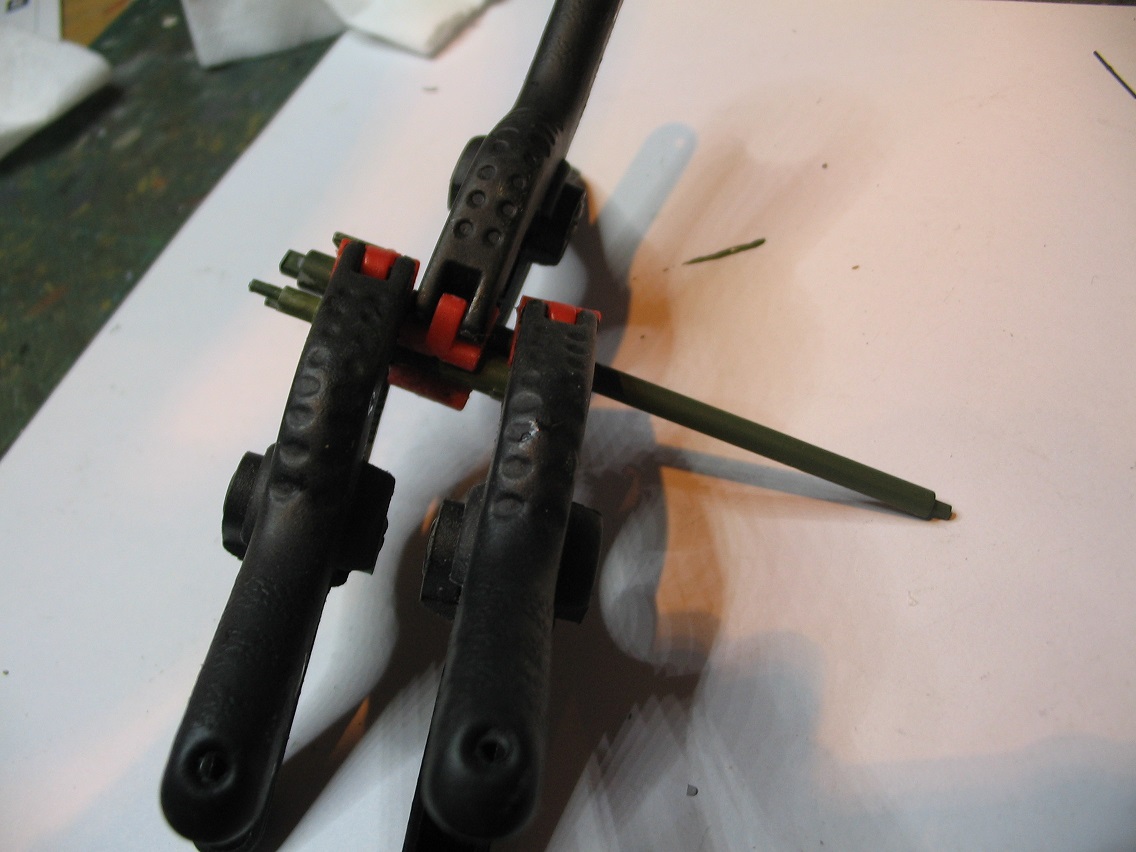
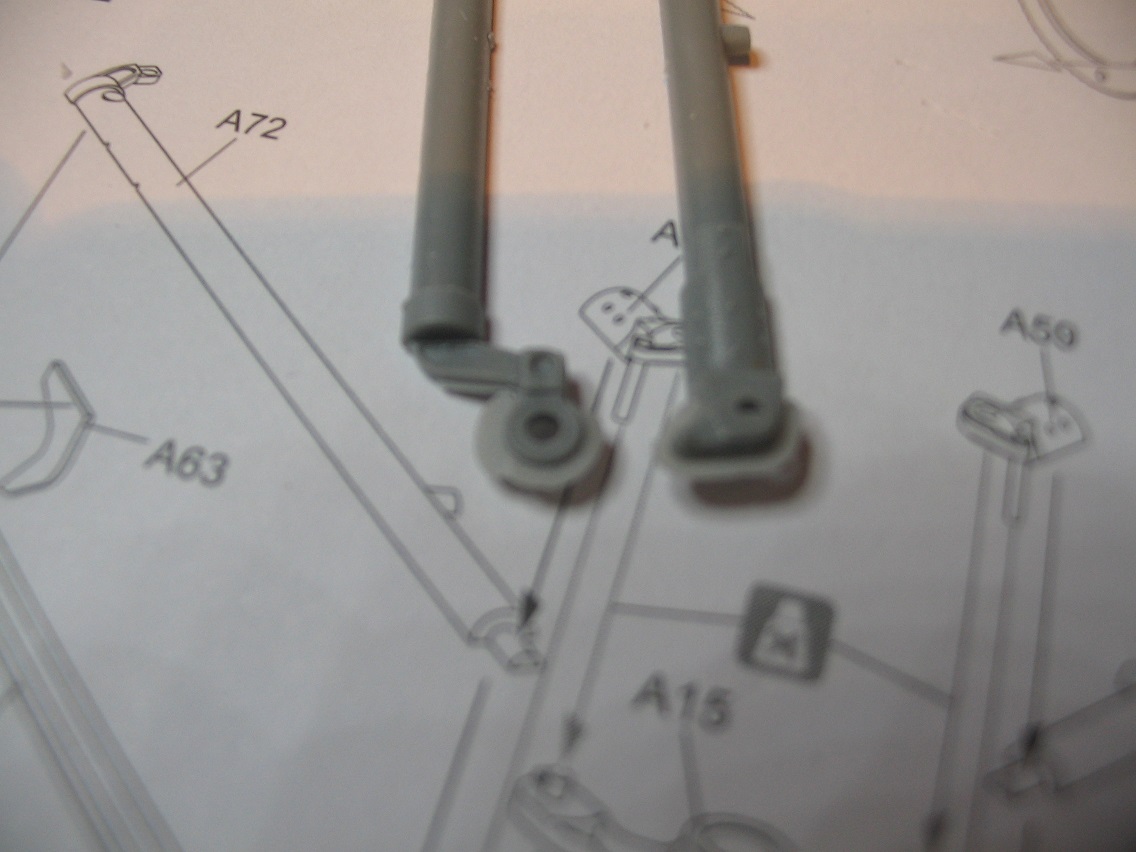
As you can see there are two locating pins on the trail ends to mount it to the carriage. Not on mine there's not. They've both snapped off at some point. I'd heard people mention that Miniarts plastic is brittle and that backs that up I suppose. We'll see as the kit progresses. They've obviously bumped against other parts on it's journey from the factory and wherever else it's been before it got to me and consequently broken off. I can work around it but they shouldn't have broken off that easily

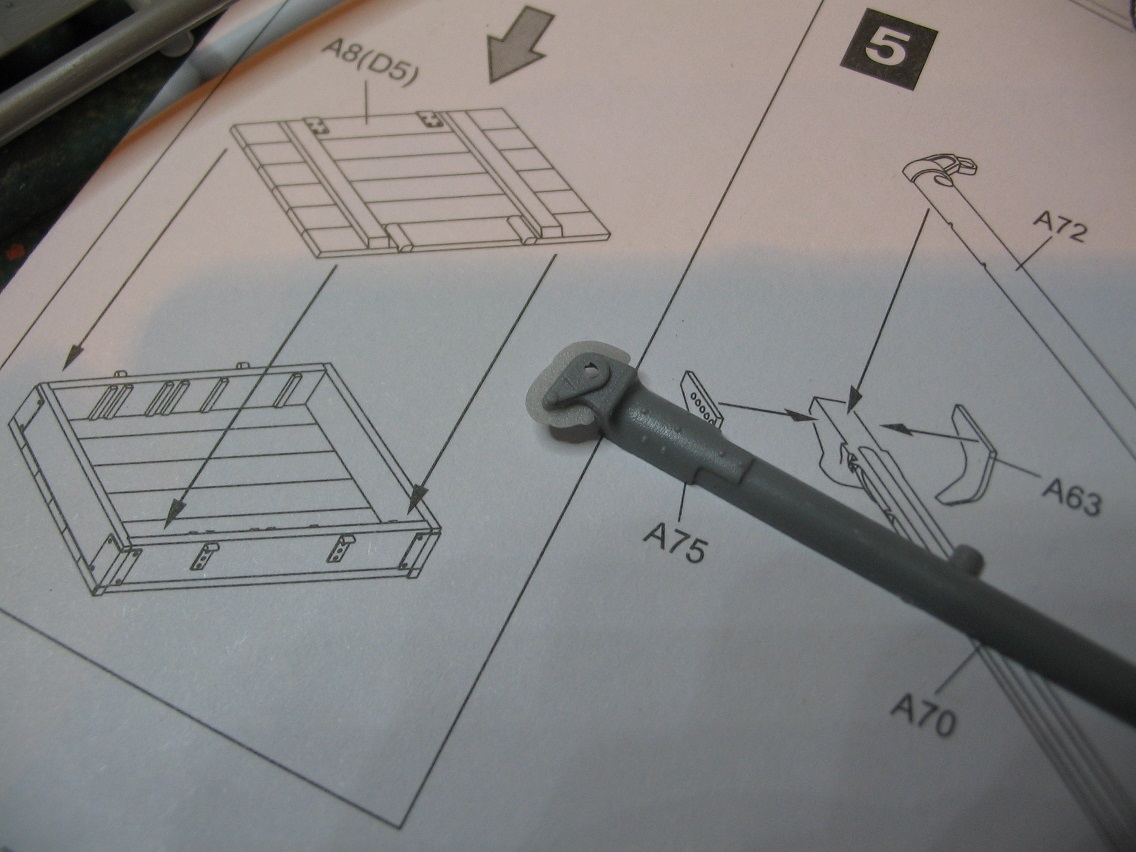
As you can see the instructions are very clear and detailed so no ambiguity unlike some manufacturers where you may as well not bother with the instructions as they just confuse matters.
Another thing I noticed on the instructions was the paints guide.


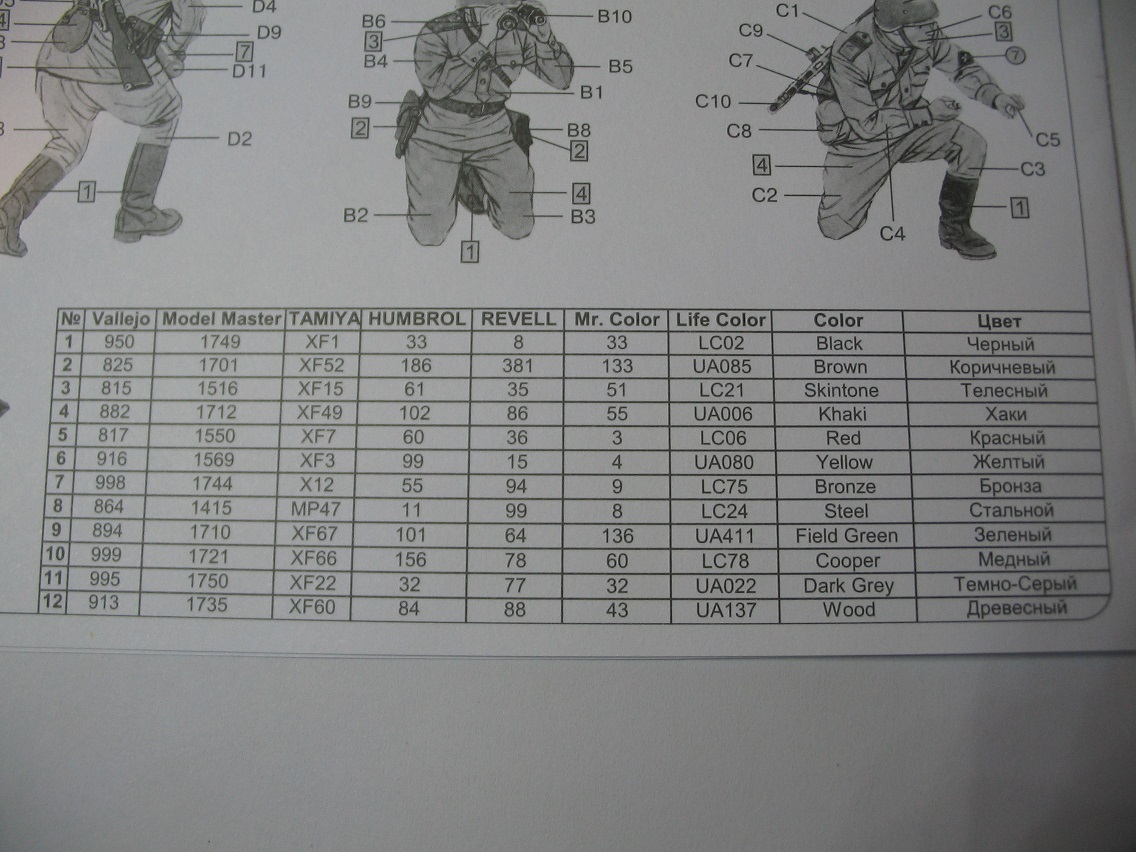
They've listed the colours by all the main players in the paint world which is a massive aid so if you can't get one type at your LHS you can always get another or alternatively if you're not overly keen on say Tamiyas XF67 shade for green you've got a choice of another six manufacturers whose shades will inevitably vary.

Now that I've introduced you to the kit properly I can get on with the fun and interesting bit. The build! MOre later...
Invincible
Visit this Community
United Kingdom
Joined: May 03, 2017
KitMaker: 148 posts
Armorama: 122 posts
Posted: Saturday, July 29, 2017 - 10:11 PM UTC
I really like your style of in depth reviews, and I'll be looking forward to seeing this build completed. Sorry to hear about the snapped locating pins.
erichvon
Visit this Community
England - East Midlands, United Kingdom
Joined: January 17, 2006
KitMaker: 1,694 posts
Armorama: 1,584 posts
Posted: Saturday, July 29, 2017 - 10:45 PM UTC
Thanks mate, I really appreciate that. I'm rather new to this reviewing business so I'm finding my feet but having said that I'm enjoying doing it as it's making me think more about the kits that I'm building. As I build quite a bit of stuff it makes sense to do a review of it via a build blog while I'm building it anyway and as there's so much stuff out there I figured a few in depth reviews wouldn't hurt. Glad you like the style
erichvon
Visit this Community
England - East Midlands, United Kingdom
Joined: January 17, 2006
KitMaker: 1,694 posts
Armorama: 1,584 posts
Posted: Wednesday, August 02, 2017 - 07:29 PM UTC
Had a break for a couple of days as I had a gum infection that escalated into a tooth being yanked at the dentists so wasn't in the mood for anything but I'm back with a bit of an update now. As this is a relatively small kit and the instructions follow a logical sequence I've stuck to that. The trail of the gun went together easily enough even though the two vertical pins I mentioned last time were missing. There's a small gap at the sides where the top and bottom meet but easily filled in with a bit of filler. Nothing unusual there.


The two pieces that I've arrowed are the two missing pins but the top part located easily enough. I've got to admit I was quite surprised that they'd both come off in the bag but it went together with no trouble without them.

My first problem, which I hope will be my last was attaching the axle mounts. On the inside of these there is a thin inverted L shaped piece of plastic which inserts into the back of the square poortion of the front of the gun carriage. I put a bit of liquid poly on and attached it. It would not hold at all as the mating area is so small. We're talking about literally a 1mm join for a part that needs to be quite strong. In the end I took it off and decided to CA it. By this time the liquid poly had eaten a big chunk of it.


What I decided to do as a matter of neccessity was to cut off the mating mould on the back of the axle mount and use Humbrol Filler on the back of the square front bar to make a decent mating surface.


You won't see it as the plate of the axle mount is about 3mm long and flat against the squared bar but at least you get a decent surface to work against. Not a major problem but something that makes you think "How do I get round the fact I've just melted part of my kit with glue?".One of the drawbacks with cement on small parts but it was fixed with no drama. For some reason they've made it with the axle ends as seperate parts to glue onto the troublesome part. It would have made sense to me just to have that as part of the bit I'd just glued on.

I skipped doing the next stage on the gun trail as they are the handles for moving it in position and the cleaning rods. I inevitably knock things like that off so will go back to that when it's all together.
Time to start on the gun cradle and barrel. The barrel sadly is a two part affair. Surprisingly though there are no male/female connecting points which means that you have make sure that you get them perfectly lined up when gluing them. Using liquid poly allows you some freeplay so squaring up is not a problem I was just surprised that there was no hole and pin as we've got used to over the years.
As always with two part barrels you get that ugly seam that needs scraping or sanding delicately so that the barrel's smooth all the way round.


There's a flat notch on one side of the rear of the barrel, it's purpose will become clear later. I painted it with a thin coat just to see how much work was needed to clean up the join. At this point I thought metal barrel lol. In all seriousness it's not too bad and we did without spending an extra £5-7 on metal barrels years ago and on a limited budget a lot of us can't afford that for every kit so I'll do it the old school way.
Onto the gun cradle. This is made up of five parts so quite a straightforward job really. I was quite surprised at the amount of flash on two parts here. What was quite comical was that there are four pin shaped pieces that are flash which is the same thickness as the pins that had snapped off the carriage parts. Typical! The bits I needed had snapped off yet the crap I need to clean off is okay lol.


This is the part with flash attached. As you can see it needs a bit of a clean up.


Post clean up with the trimmed flash above it.


Quite a bit for one part. While flash is to be expected and is nothing more than an annoyance, there does seem to be quite a bit of it so far.
Once I'd cleaned both parts up I went to dry fit them together. Once again no bloody guide holes! I can't understand this as from the most complicated to the most simple kit they've always had that little nub of plastic on one part and a little hole on the other so that male and female parts can be glued together in everlasting kit love. You know what I mean anyway lol. It's just common sense as it stops parts slipping about, out of alignment once glued together. Fortunately they went together easily and lined up well.The next part of the cradle which holds the forward part of the barrel was the same. No pin/hole.


Once these were together,they were off to one side to dry. The instructions make it look like you have to put this section all together at the same time including with the barrel. Dont! You'll end up with glue all over you and in a real mess. Fortunately I thought about this beforehand and did it my way. Do it in two stages

While not a problem, I just find it strange that Miniart don't do the pins. It's not like you see them as they're inside the parts! This went together easy enough. I didn't glue the bottom part where the barrel passes through as I thought a bit of expansion room may be a good idea. I never trust any kit 100% where it comes to clearances.

Onto the barrel and barrel mount. Now this is where the squared out piece comes into play. It's not apparent in the instructions but the recess fits over a notch in the rear bottom of the cradle. If you correctly dry fit before gluing you'll find that it's the only way the two cradle parts will go together without a huge gap at the top.


Once I was happy with the fit on went the glue. As this is quite a long join at the top and bottom which tapers away it was a job for the trusty black clamps. Same again I've not glued the bottom of the brackets at this point.


Once this was dry and I'd checked the front part of the barrel mount I could put them both together. The long tube on the forward part goes into the tube on the top of the back end. Unfortunately there are no marks or stops to tell you how far in it's supposed to go so it's a question of looking at photos of a real Zis 3 and judging for yourself. Hopefully I've got it right. Alternatively a better approach which of course I thought of after I'd glued it all together would be to push the front part in dry and leave it until mounting it on the lower part of the barrel carriage. Why do I always have these ideas about 2 hours after I've done something and the glues dry? If, it's not far enough in I can shorten it as the front is left dry.


So that's it together. Some of you may wonder why it's got paint on it at this stage. I always paint as I go along so that I can see any areas in sub assemblies that need fillering and also some areas are difficult to get to when it's all assembled. As I'm airbrushing it at the end it does the job of an undercoat and I know I'll get 100% coverage.

What do I think of it so far? It's okay. There's been a few niggles but nothing major. The instructions are clear and uncomplicated but I'm not keen on the fact that the parts aren't numbered on the sprues. This isn't helped by the fact that both sprues are called A. Admittedly one goes from part 1-49 and the other 50-83 but as it doesn't actually say A on the sprue couldn't they called them 1 and 2? Looking at the sprues themselves there are spares like a complete gun shield and shells and wheel parts it tells you not to use. There is also another barrel which I believe is for the Zis-2 looking at their other kits. Not a huge amount of difference between the guns so generic sprues would work in these circumstances as I would imagine that the gun carriage is the same for both weapons systems. If you think about it the Germans used the same carriage, the sd.Ah 52, for the Flak 38, Flak 37 and numerous other things so I can't blame Miniart for doing the same. It's not caused any problems so fine by me.

The lack of locating pins. This could potentially cause problems for some. Especially for the "I'm going to build this in an afternoon" school of modelling. You can't throw this together like you can with some kits as you need to take your time getting parts lined up properly as the kit's not going to help you. Clamps are a good idea as once you've got it in position you don't want it moving once the glues on and as you can see from the photo of the carriage together there's still a gap to be fillered and that's with having the clamps on

The bits snapping off? Now that's not good. A better example...


This was to be attached to the armour plate at the bottom of the gun, some sort of bar to take the wheels off I think. The bottom part (the shortest bit) was already snapped on the sprue. I managed to get the rest off, very carefully with a new blade, without breaking it. I went to pick it up to glue onto the plate and it snapped again. As it is because it's so thin it can't be fixed. As they're in a fixed position diowise they're not changing wheels luckily for them. Joking aside it's a bit bad when parts are so fragile that picking them up breaks them. I'd heard that their plastic was a bit on the brittle side and me being me always keep an open mind but it does seem that way. Fortunately it's not a vital part and there are photos in abundance of tanks, softskin vehicles, artillery pieces missing ancillary tools. Either lost in combat or another crew has pinched them because theirs is broken or some other nefarious crew has pinched theirs which they can't do without so they then pinch someone elses. The circle of army kleptomania rolls on.

So far I'm enjoying the build despite a few glitches. I've got another two of these to build plus an SU76 so it's a useful learning curve for me. It also makes a bit of change from building German stuff as that's all I seem to have built for the last couple of years. Not by design, just opportunity. I've seen German stuff at the right price, bought it and that's it. Hopefully do some more work over the next couple of days.
erichvon
Visit this Community
England - East Midlands, United Kingdom
Joined: January 17, 2006
KitMaker: 1,694 posts
Armorama: 1,584 posts
Posted: Tuesday, August 08, 2017 - 01:25 AM UTC
After a couple more days work the Zis 3 is about done. Logically I'll start where I left off.

It turned out I had made a mistake when putting the barrel in the cradle. My own fault for not looking further ahead in the instructions and also for not checking against the real thing. It was an easy fix as all I had to do was shorten the top, what I imagine is the recoil cylinder and glue it back on.


There was the usual clean up on top with it being a two part assembly but nothing major. A scrape with a No. 11 blade and a quick flick of an emery board and the seam was gone.
Putting together the actual carriage for the gun itself wasn't difficult but it would have been helpful if there'd been locating pins as once the glue was on it was a question of making sure that the ends were level and that the back of it was flat. The rest of this section went together with no problems.


The plate wich protects the gunner from the recoil is a nice thickness and looks to be about right. There are two very small guides to help position this but the only way you're going to get this to stay vertical is CA. Any other glue will take too long to cure and unless you're willing to sit there for an hour to make sure it doesn't move it's CA. It literally perches on the bar by less than a millimetre so you can understand the mating problem.
I went back to the barrel at this point to attach the muzzle. I've got to say I wasn't over impressed with this. Once again, no locating pins but more to the point the divider on the muzzle was a bit on the anorexic side.


Not the clearest of photos which I apologise for but you can see just how thin it is. On the real thing it's a solid block. My only real problem during the build happened here. Because the join wasn't that great I decided to use a clamp to hold it together. Bad move. Because the middle part is so flimsy the clamp crushed the muzzle and a big chunk snapped out! Lets just say the air was blue. I managed to repair it relatively easily and with a bit of filler it was okay again but don't apply too much pressure to this if you build it or you'll have the same disaster.


From those two pics you can see it a lot more clearly. From a couple of feet away it looks okay but it wouldn't pass close up scrutiny. Personally, when I next build one of these (I've got another two) it's going to be a metal barrel and hopefully metal muzzle as the kit one is inadequate really. It all depends on the individual I suppose but I wasn't happy with it. Once that was sorted out it was a case of sliding the barrel onto the top of the carriage which went straight on no problem. A bit of liquid poly under each of the feet and that part was finished.

The next stage is adding the elevation depression wheels, sights etc. I was apprehnesive about this section due to how thin I knew the components would be. When I went to the sprues to start taking off the relevant parts this awaited me...


That was before I'd even picked up my knife! Fortunately I was able to repair it and the other parts came off easily enough but I cut them off very slowly with a brand new blade without applying any pressure to them. Essentially carved them off the sprue. Withe the pins being snapped off the carriage near the beginning and now this I'd agree that the plastic is brittle so any thin parts are to be approached with caution when removing from the sprue and handling them.

The instructions for this section are very clear which is always appreciated. Part a53 however was a breakage waiting to happen as the hole at the top end was too small. I contemplated drilling it out but odds were it would snap so I took out a section of it as below.


That way it went straight on with no problems and you can't see it once the sights are on anyway. Just saved breaking another part I thought. The sights are an odd one. I did a search to check the sight for painting and the three Zis 3 sights I looked at were all different to the one in the kit. They matched in every detail but it would appear that the sight in the kit is either wrong or another type. As it's something I don't know enough about to be sure I left it as it is.
I'd decided that as the mini dio is a gun emplacement I'd set it at Kursk due to the proliferation of Soviet AT ambush sites. A brilliant strategic decision of the Russians as they funnelled German armour into killing zones where tank after tank was brewed up. On the back of the gunshield I added a rudimentary tally for the day and on the front "Za Rodinu" which means "For The Motherland". I've got to say painting Russian words is very confusing as they just seem to be a jumble of letters but it didn't come out too bad.


As you can see the bolt head detail on the shield is nicely done and there is even the sliding horizontal bolt on the gunners slit. The slit can be either open or closed. I decided to leave this off right until the end as there are two bars which attach to it and didn't want to knock anything off.
I went back to the carriage and saw that there were some rather large gaps on the two brackets that hold the trails on.


Easy enough job. A little bit of filler on each side and the gaps were gone.
When it came to fitting the shield I couldn't help but think it sat higher than real life examples but that may just be me. The connection between the shield and the carriage is not the best I've seen and once again it was a job for CA as the weight of the shield kept moving it. Once that was stuck I added the two supporting rods to the front of the shield and they lined up perfectly so my guesstimation was right for a change. One thing I forgot to mention earlier was there is a cover under the barrel which makes up part of the carriage. Once again we have a rather dubious mating point. Now to all intents and purposes a horizontal "blade" going into a groove. Simple. No, it wasn't. It was too thick so this had to be gently pared away with a sharp blade as you can't get either a file or emery board in to do it at this stage.


Easily sorted out but annoying. As I was almost done it was time for some wheels. It was at this point I had to laugh.


For the first and only time throughout the whole build I found some numbered parts. The wheel bosses. You can't mistake them for anything else yet they're the only parts numbered! Obviously someone will be beaten severely for making things easier for modellers by being helpful and adding part numbers.

After some deliberation I went for XF67 NATO Green to paint it. I wasn't 100% sure of the colour but when I diluted it for the airbrush it lightened it to a yellowish "puke" green colour for want of a better way of describing it which looked right to me as a Russian green. After a couple of thin coats I finished putting it together.


There are a few bits like handles on the trails for moving the gun to go on but it's pretty much there before weathering.

My thoughts on the kit. I liked it if I'm honest. It was a reasonably straightforward build, moulding was sharp and it does build up into a respectable looking Zis 3. There are some areas where Miniart let themselves down. Some of the mating surfaces are quite poor and more thought could have gone into how to attach some parts to each other. I wasn't impressed with the lack of locating pins either. It's no real biggie to us as we've all built dozens of kits over the years so know what we're doing, locating pins or not. It is a pain in the respect that you can't guarantee a part won't move out of alignment once you've applied advesive (of whatever type you favour) and moved onto another section. Fortunately I didn't have any problems with that but it's a real possibility unless care is taken when lining parts up and putting them to one side to dry. The plastic as I've mentioned is quite brittle on thin items like pins and rods and are easily broken on the sprue before you even approach them. Whether this is something that's changed since the kit was released I don't know. It's possible that they may have changed the plastic that they use as it all has slightly different formulations (I used to work for a plastics company many years ago)so it may not be an issue now.
The instructions were clear and logically laid out but the lack of part numbers was a bit annoying after a bit as I kept having to look at the sprue diagram, find the part then go back to the diagram to double check it was the right part. Not quite the same as just wanting part 87 and going to the sprue for it. A minor thing but it had to be said.

Overall? If you like Eastern Front/Soviet stuff it's well worth picking up. A simple enough kit, no fit issues as such apart from a lack of locating pins and detail nicely done . The gunshield, whilst plastic, is thin enough to look like the real thing and can't be much thicker than PE. It builds up into a nice representation of the Zis 3 without being too expensive or too complicated. Next stage is the figures which I'm looking forward to as having built Miniart figures before
they're nicely animated and these don't look any different.
Invincible
Visit this Community
United Kingdom
Joined: May 03, 2017
KitMaker: 148 posts
Armorama: 122 posts
Posted: Tuesday, August 08, 2017 - 03:21 PM UTC
Excellent build! You are right about miniart changing plastic: originally they used a slightly iffy plastic from Russia, but after complaints they changed to a more expensive, higher quality plastic from Belgium.
Looking forward to seeing the base completed!
Biggles2
Visit this Community
Quebec, Canada
Joined: January 01, 2004
KitMaker: 7,600 posts
Armorama: 6,110 posts
Posted: Tuesday, August 08, 2017 - 07:40 PM UTC
About those vacu-form pimples - the real PITA is that most of the time when you sand or trim them off, they leave a small hole through the plastic. I built one of their kits and a wall had dozens of these pimples; sanded them all level, then had to fill and re-texture each resulting hole.
 _GOTOTOP