_GOTOBOTTOM
Armor/AFV: Vietnam
All things Vietnam
Hosted by Darren Baker
Dragon`s M48A3 mod.B Build log
Luftan
Visit this Community
Aichi-ken, Japan / 日本
Joined: June 04, 2016
KitMaker: 87 posts
Armorama: 76 posts
Posted: Thursday, August 17, 2017 - 09:45 PM UTC
Hello. I am relatively inactive at Armorama, but Ive decided to post a build log for the Dragon`s M48A3 mod.B that I am currently working on.


The build started at the end of March. So far, it has been my most ambitious, expensive and long build in my modelling life
I am hoping to complete it by September for the Kansai AFV convention.

As a base upgrade to the kit, I purchased Voyagers Basic PE set and Resin canvas cover set. First time using Voyager set.


The resin canvas set comes with additional metal barrel for the 50cal machine-gun. Great cost performance!


First thing first, tackling the driver sprocket. Dragon forgot (or was too lazy to add) the 3 round holes on the driver sprocket. I drilled 2 pilot holes, and gradually connected them together with a sharp blade.


And the rest of wheels...

bkkinman
Visit this Community
Texas, United States
Joined: December 29, 2007
KitMaker: 57 posts
Armorama: 53 posts
Posted: Thursday, August 17, 2017 - 10:27 PM UTC
Welcome back. I will follow this- kit is on my list.
JSSVIII
Visit this Community
Massachusetts, United States
Joined: March 28, 2007
KitMaker: 1,169 posts
Armorama: 1,067 posts
Posted: Friday, August 18, 2017 - 04:11 AM UTC
I have this kit in my stash Luftan, looking forward to the rest of your build!
Luftan
Visit this Community
Aichi-ken, Japan / 日本
Joined: June 04, 2016
KitMaker: 87 posts
Armorama: 76 posts
Posted: Friday, August 18, 2017 - 08:01 AM UTC
Thank you both !

after finishing up the wheels, construction moves to the chassis of the tank. The top engine cover had weak cast texture and was missing some weld detail.
I cut a thin strip of plastic paper and glue it on the cover to replicated the weld line. This process was covered by another build log which I can't seem to find now. Credit goes to him.


Heavily deluded Mr.Surfacer was painted to create the cast texture. It first received a rough texturing using a toothbrush, and smoothed out with a sandpaper.

Overall, the fit of the kit is very good.... except one part.


The aft engine deck is constructed from multiple complicated pieces, and the fit is rather terrible. You can carefully sand down the areas which obstructs other parts, or forcefully cement them together. I took the latter approach, which worked surprisingly well

I also started working on the turret.


The resin canvas cover must be worked with before attaching small and fiddly parts. I have no idea why Dragon decided to omit such iconic feature. Canvas covers were fitted to almost every M48A3s deployed in Vietnam.

Attaching the resin part was much easier than I imagined. Still, some minor drilling, sanding and filling is needed to achieve a nice seamless fit to the turret.

Mounting the xenon searchlight was my next task.


In my opinion, the cover for the searchlight is a bit unrealistic. But its miles better than what Dragon provides. Dragon provides... no searchlight at all


A little question at the end. Is there a way to adjust the side of the photos within the forum? Id like them to be slightly smaller, but resizing on 3rd party software is a tedious task.
Something like height="42" width="42" function for HTML.
Luftan
Visit this Community
Aichi-ken, Japan / 日本
Joined: June 04, 2016
KitMaker: 87 posts
Armorama: 76 posts
Posted: Friday, August 18, 2017 - 12:43 PM UTC
Work continues on the turret.
There is really not much going on the M48`s turret. The only complicated construction OOB would be the rear stowage rack and the commander`s cupola.

Voyager provides full PE stowage rack.


Extra things like copper wire cable, antenna mount and jerry can holder has been added as well. There was no detail on the other side of the gunner hatch, so I made them my self using epoxy putty and spare PE parts.

Here is a picture of the commander`s cupola.


The mod.B variant has an extra layer for the commander`s cupola.
In most cases, the 50cal machine-gun was removed from inside the cupola, and mounted externally on top of it.


This was because of the tight space inside the commander`s cupola, and extreme heat/humidity.

Voyager also includes metal parts for the barrel and the iconic T-shaped muzzle break. The part Dragon provides is not bad at all, but still can't compete with this beauty.


GTDeath13
Visit this Community
Attica, Greece / Ελλάδα
Joined: June 12, 2015
KitMaker: 921 posts
Armorama: 919 posts
Posted: Friday, August 18, 2017 - 03:20 PM UTC
Great work so far. I will be watching with great interest.

Why did you chose the voyager manlet over the Def one? Any particular reason?

Except adding the plastic strip to the engine deck. did you form it to resemble a weld seam by any means (scribing, texturing) etc?

Did you solder the turret basket?
Luftan
Visit this Community
Aichi-ken, Japan / 日本
Joined: June 04, 2016
KitMaker: 87 posts
Armorama: 76 posts
Posted: Friday, August 18, 2017 - 04:25 PM UTC
Thank you Nikos.

Generally speaking, Voyager is easier (and cheaper) to get here in Japan. I also liked the fact that it came with the necessary parts to mount the 50cal outside.

The weld line received the weld pattern using a sharp blade. I did this much later in the build, so what you see in the picture is a simple plastic stripe.

Everything was built using CA glue. I wish I could get hands on soldering equipment...
Luftan
Visit this Community
Aichi-ken, Japan / 日本
Joined: June 04, 2016
KitMaker: 87 posts
Armorama: 76 posts
Posted: Friday, August 18, 2017 - 06:04 PM UTC
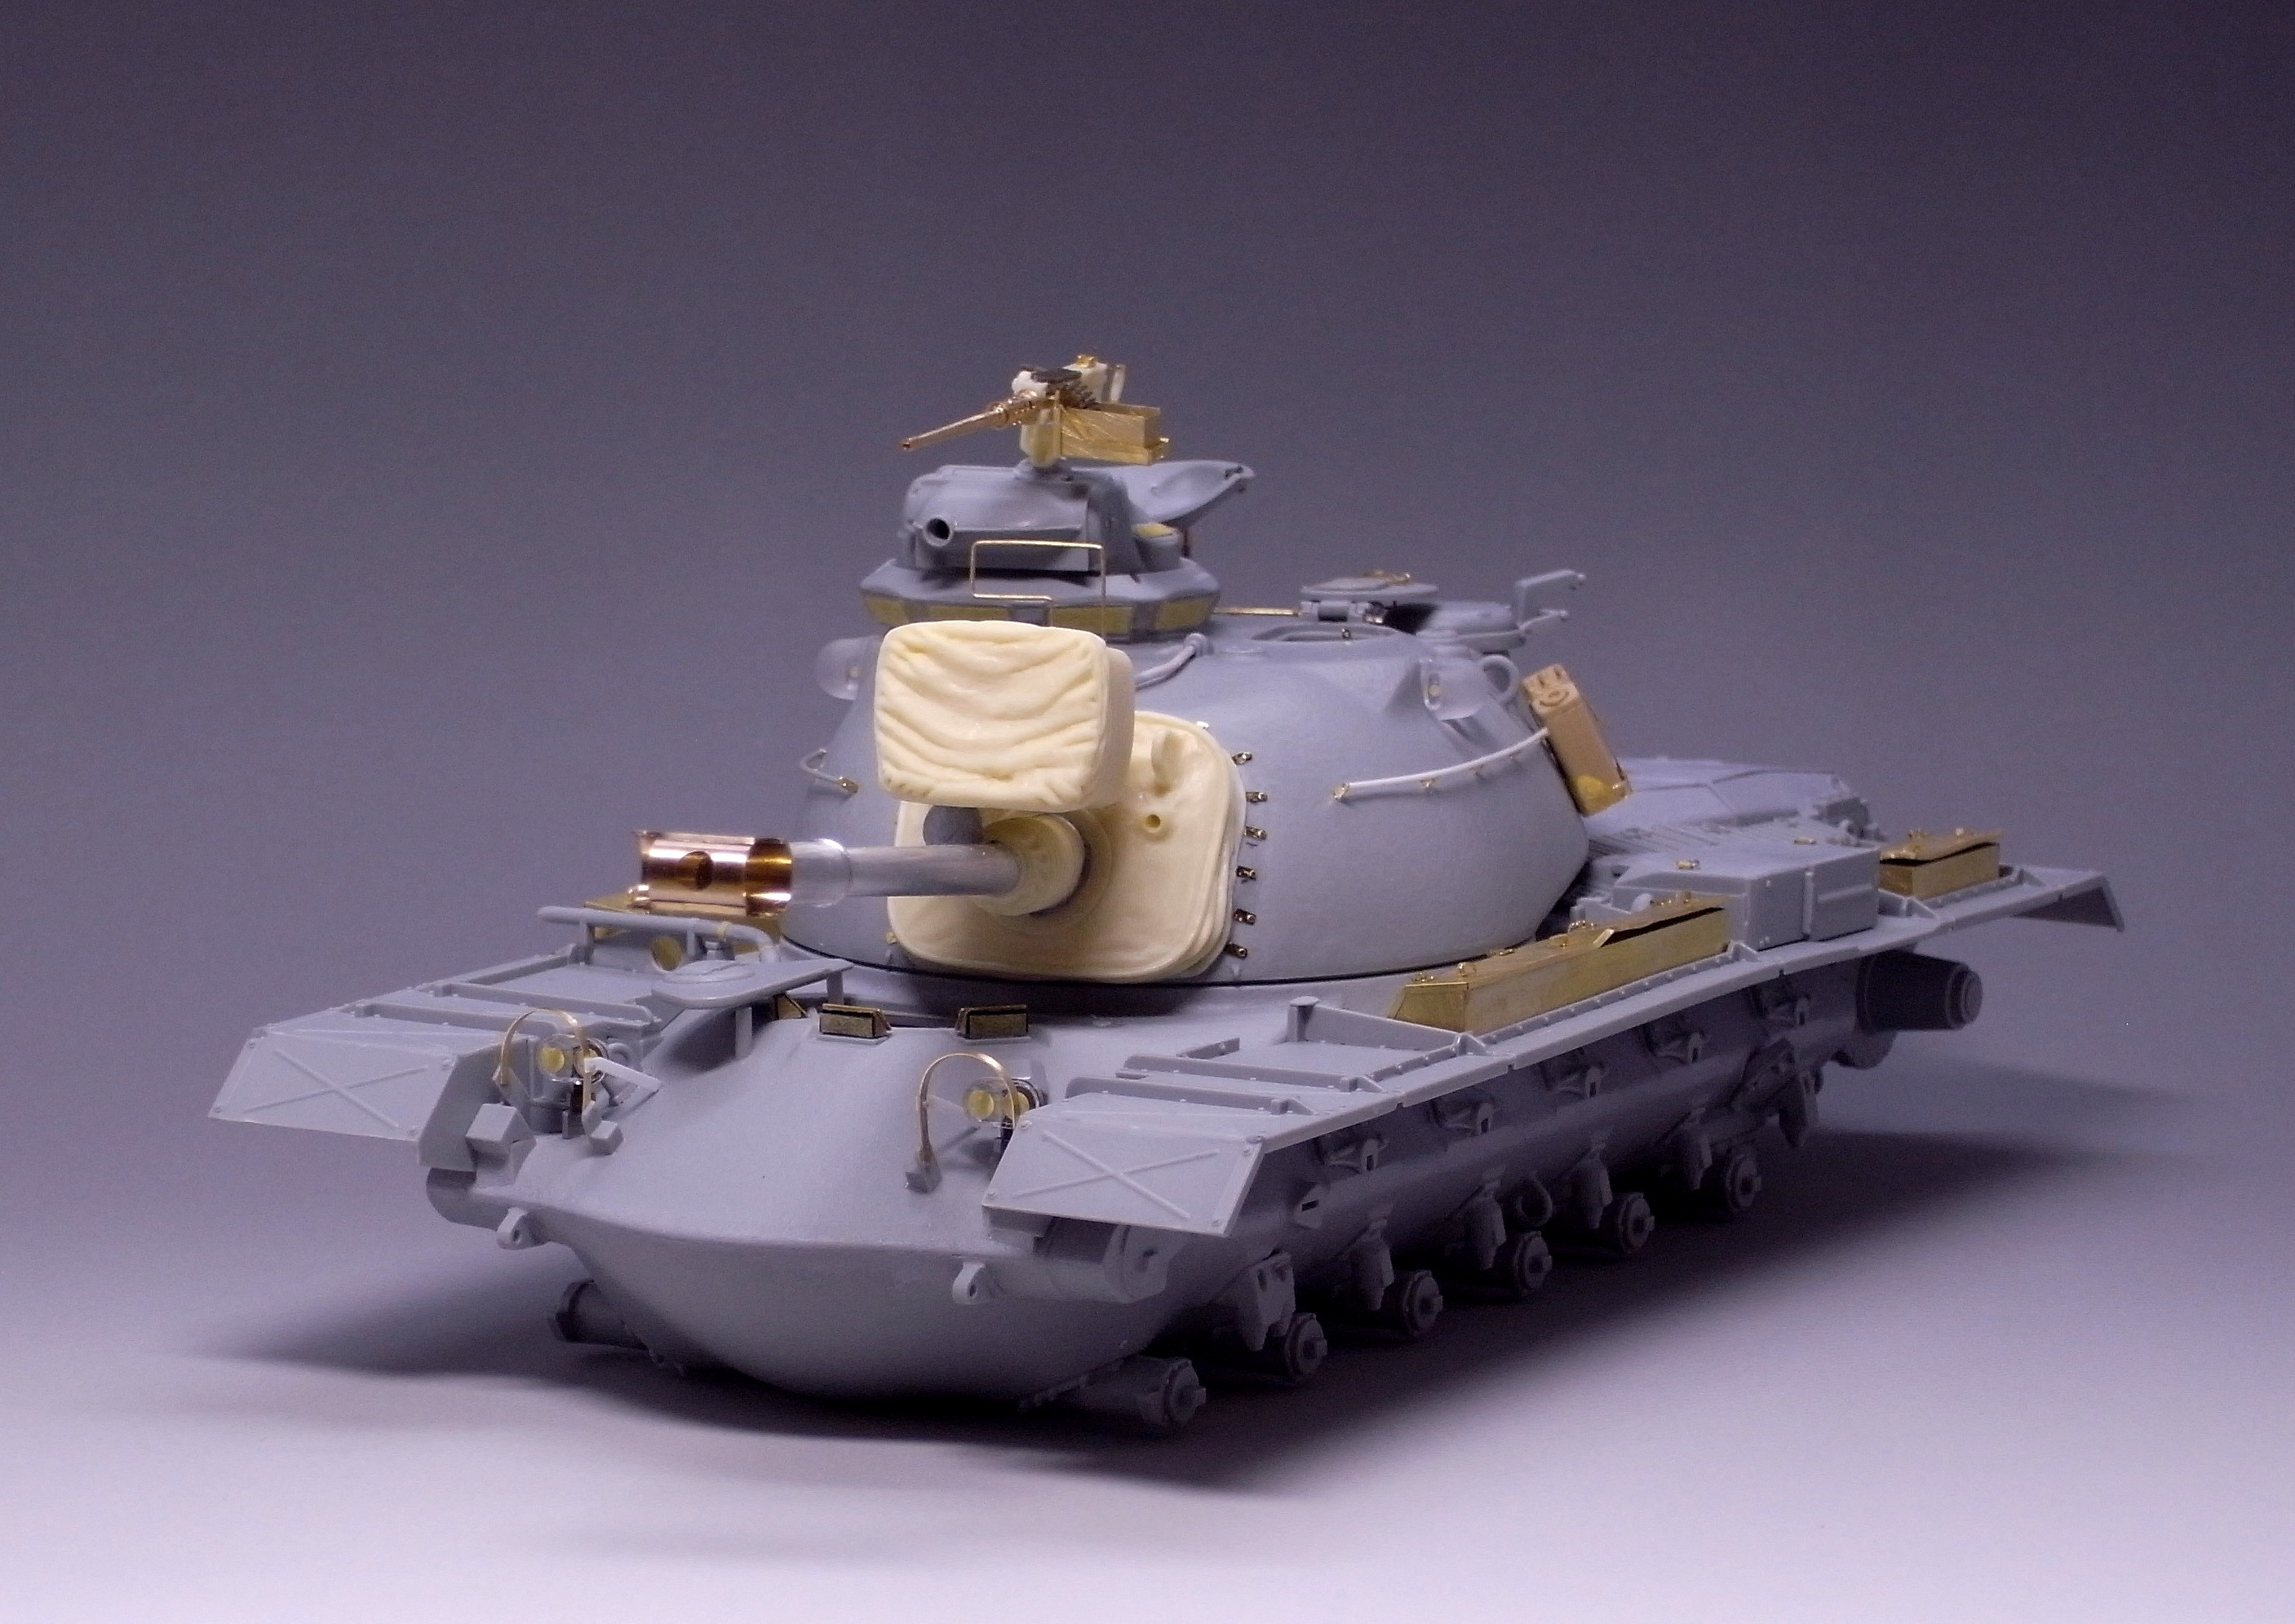
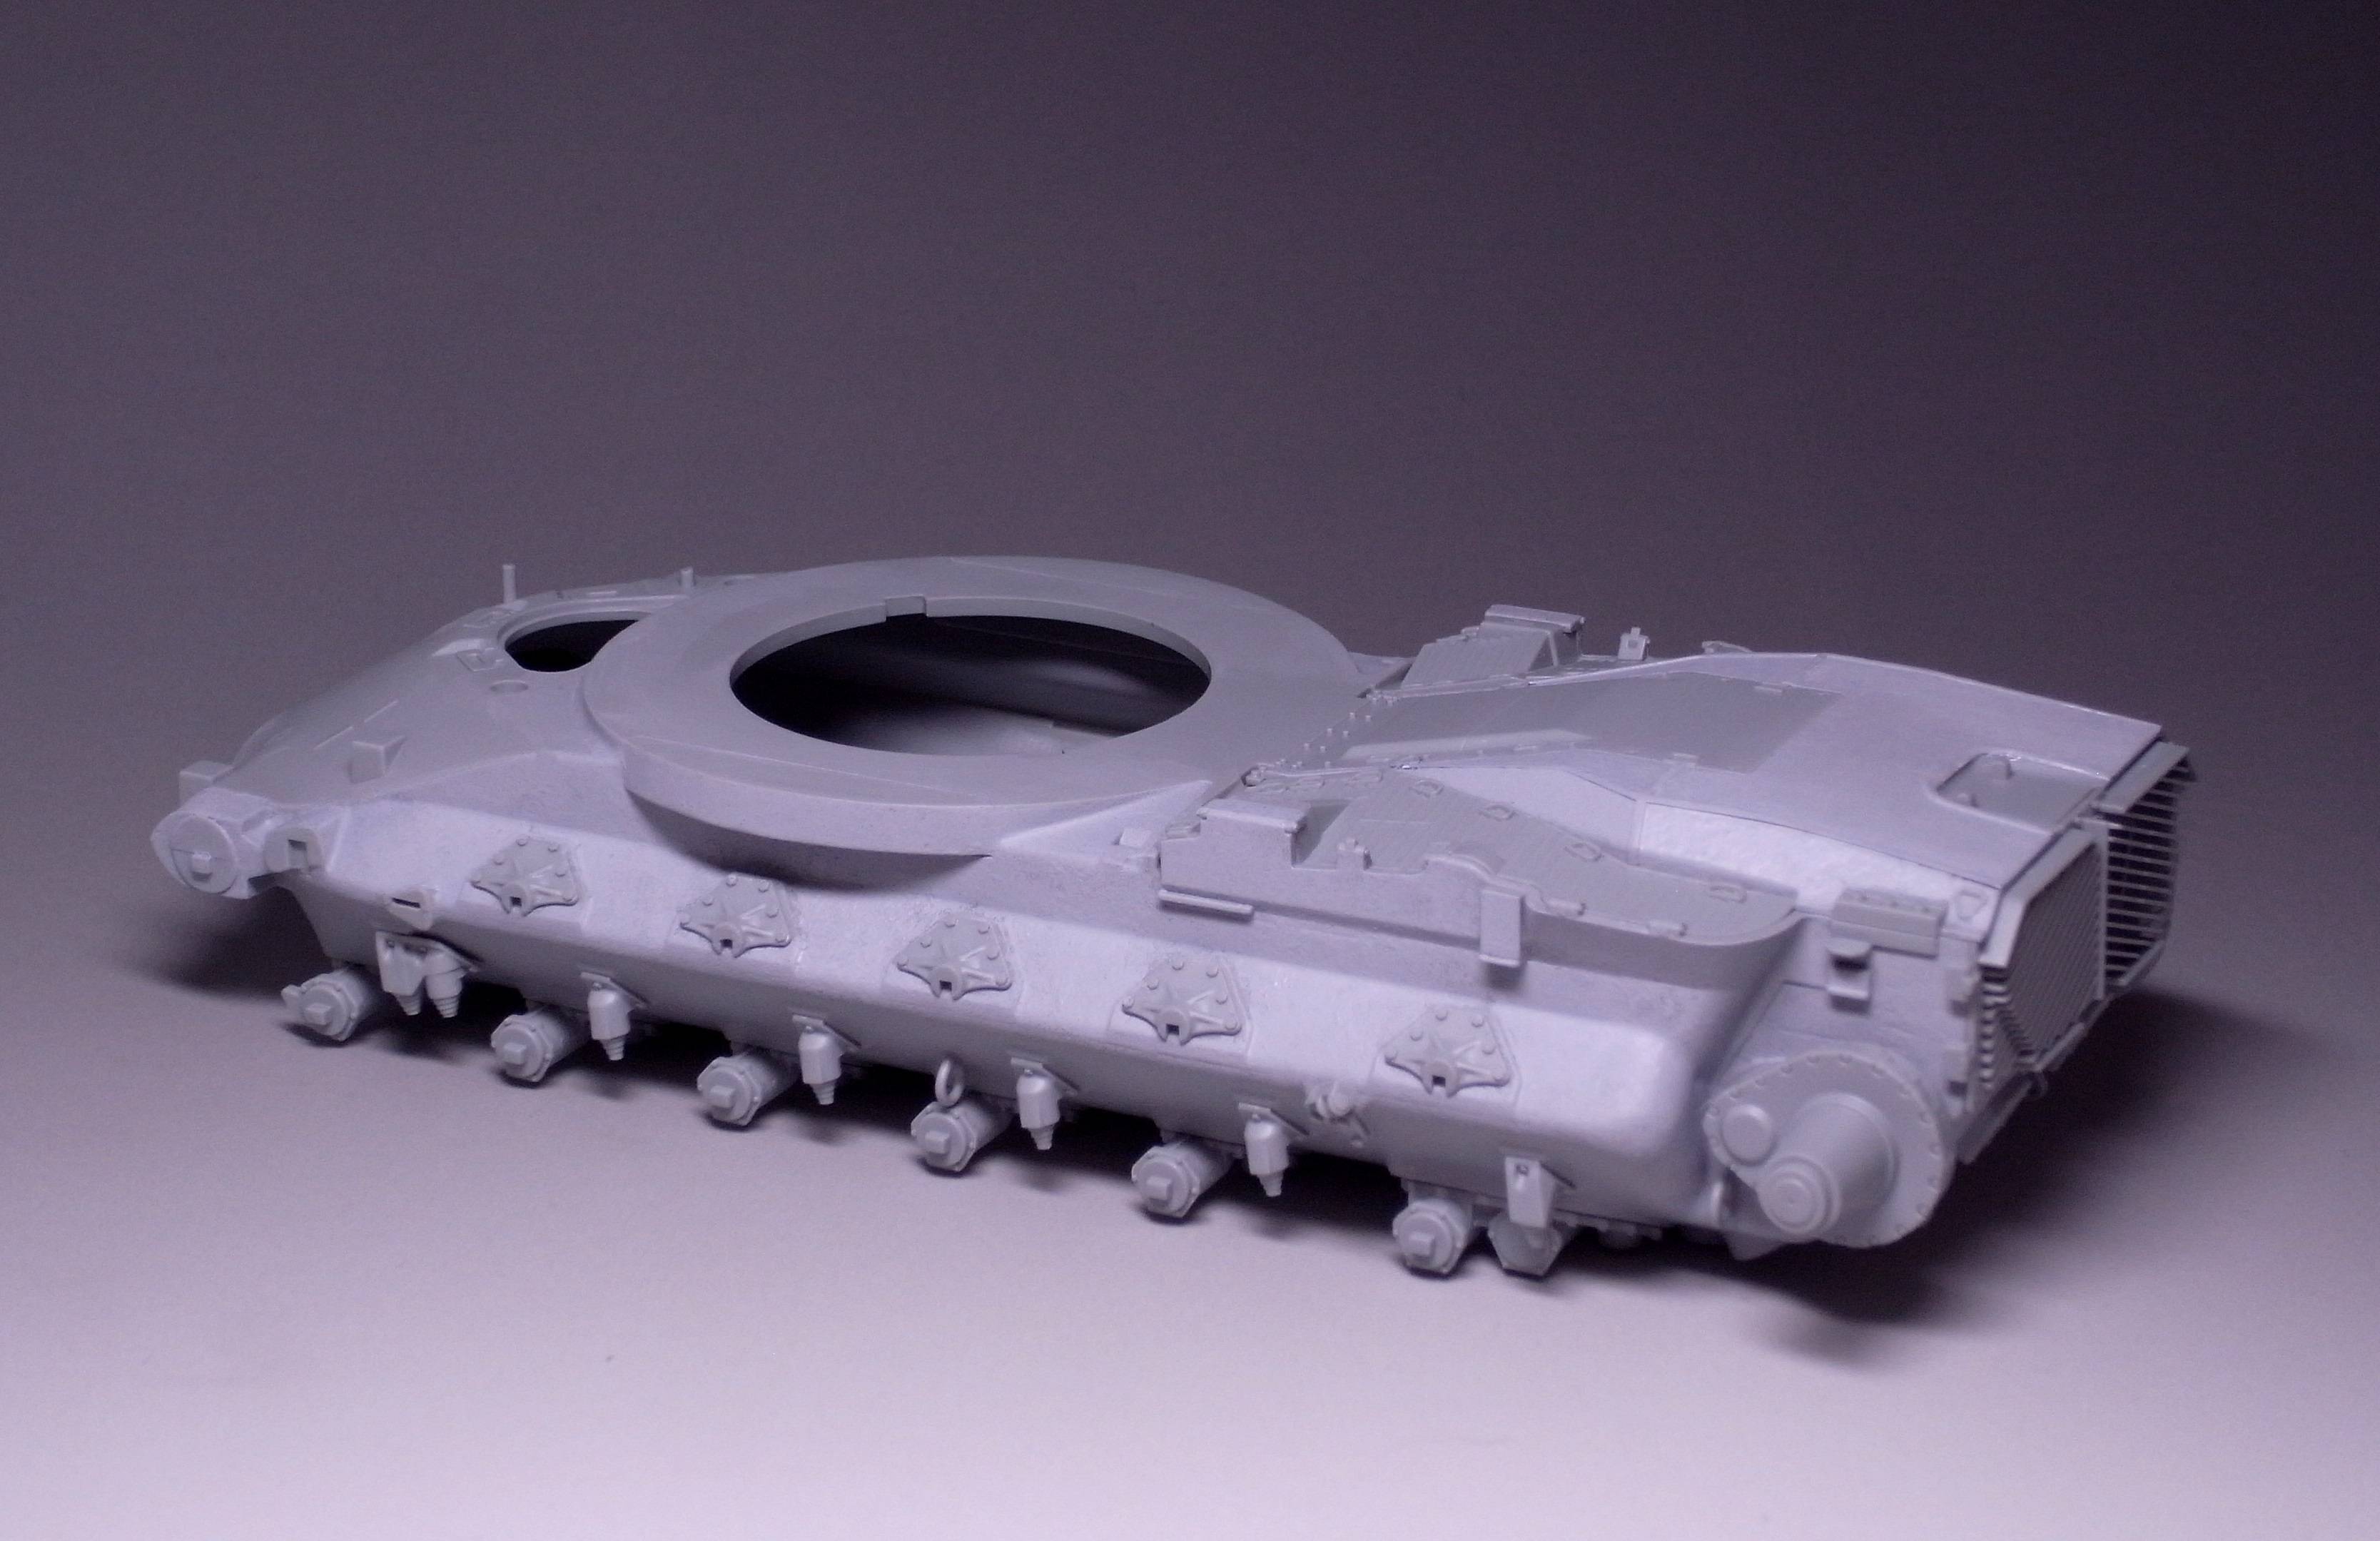
With the turret construction completed, I moved on to the chassis.
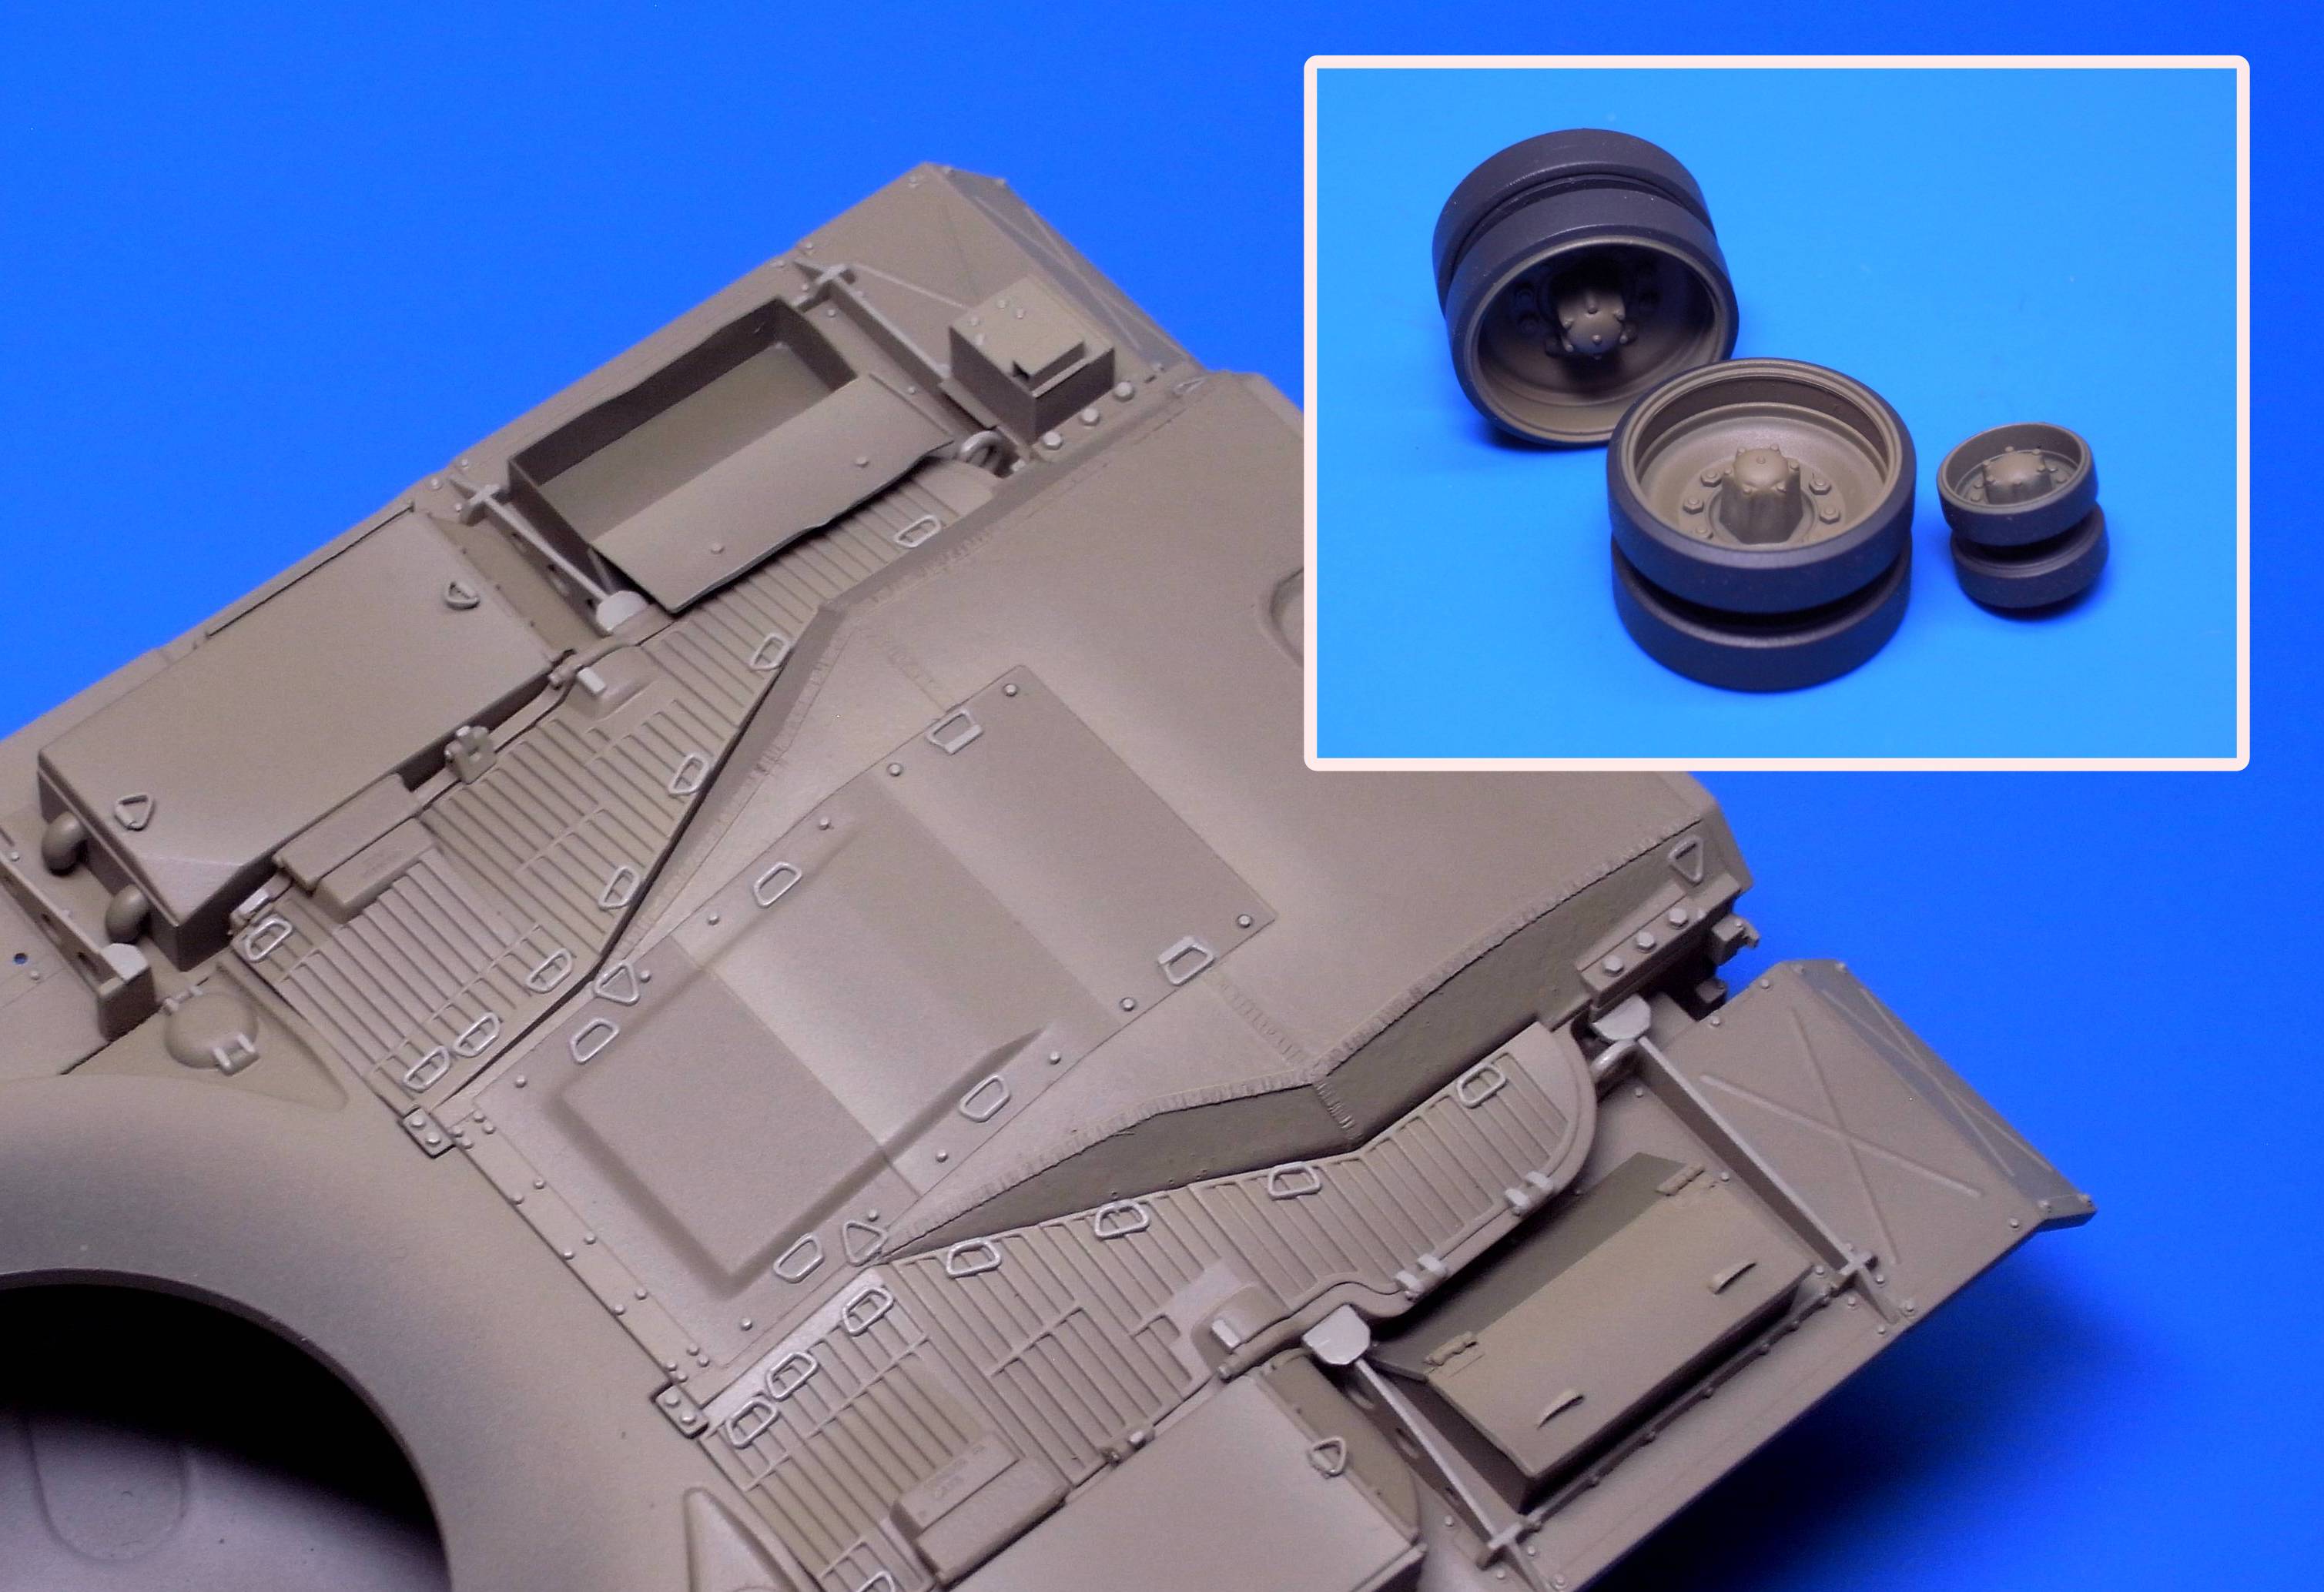
Again, M48 is a quite simple tank, so there is really not much going on except for the stowage boxes and front light.

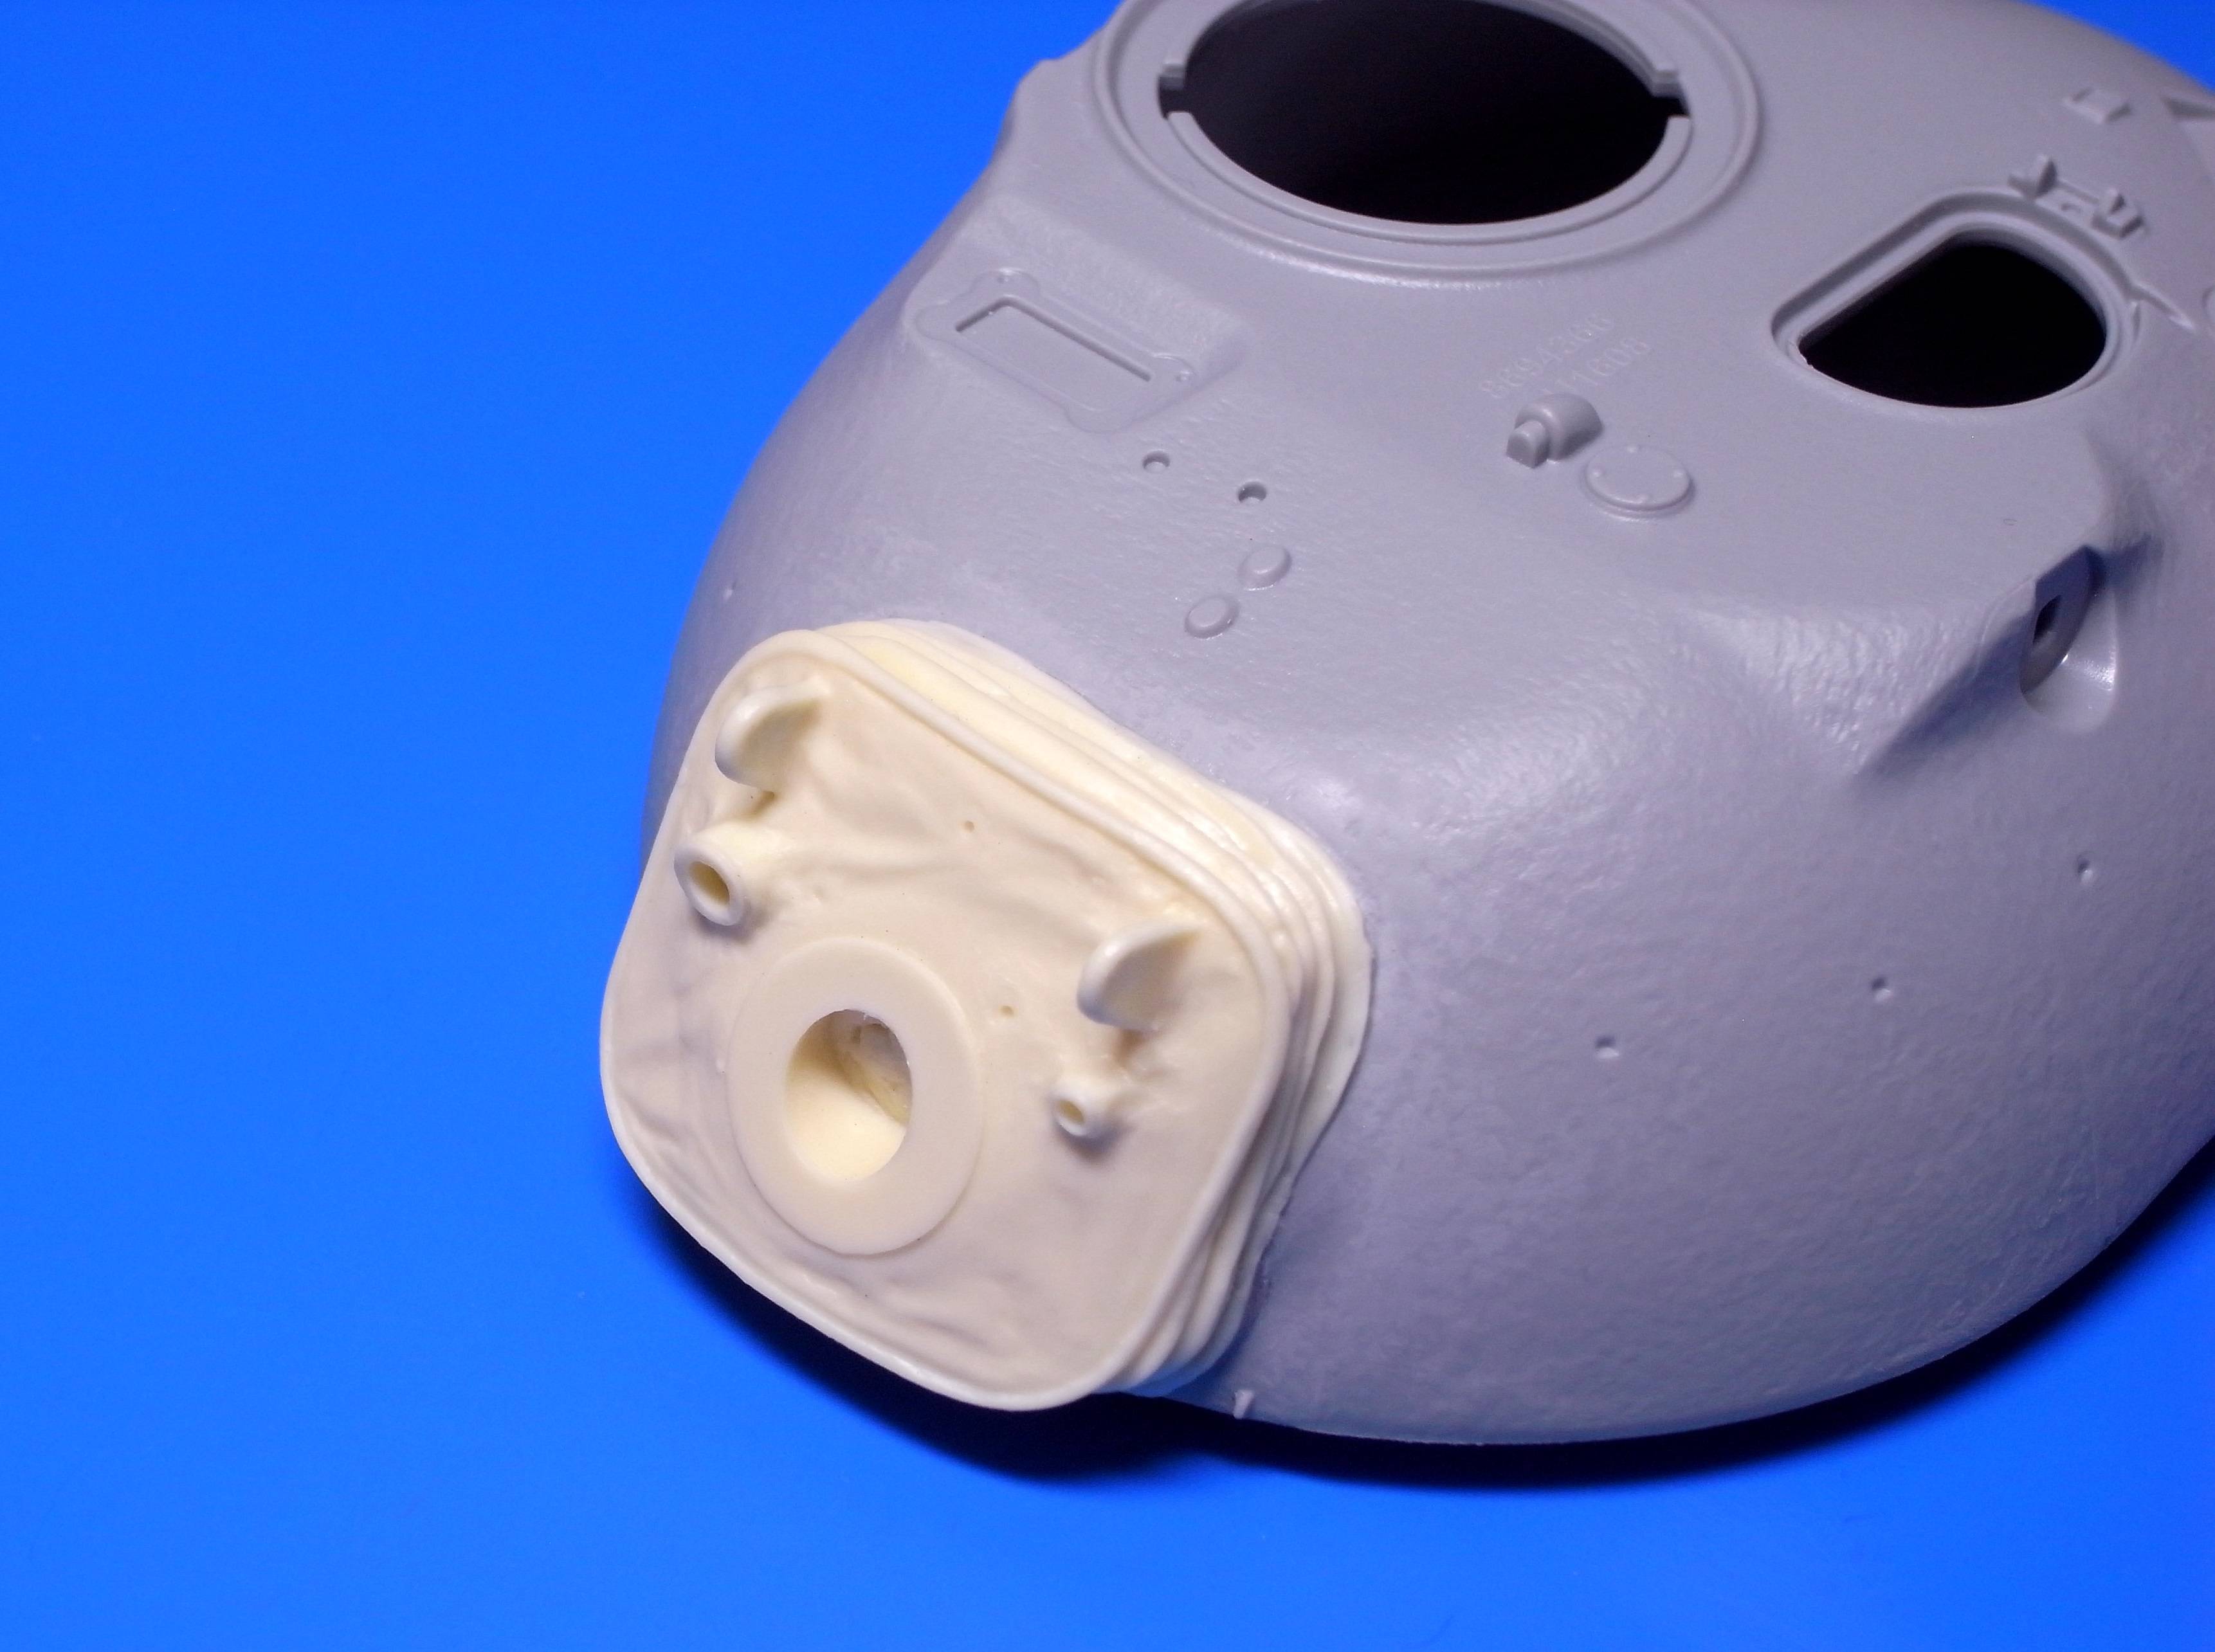
There is a strange looking box-shaped object on the side of the engine deck. It looks like an air filter for the engine, but Im not quite sure.
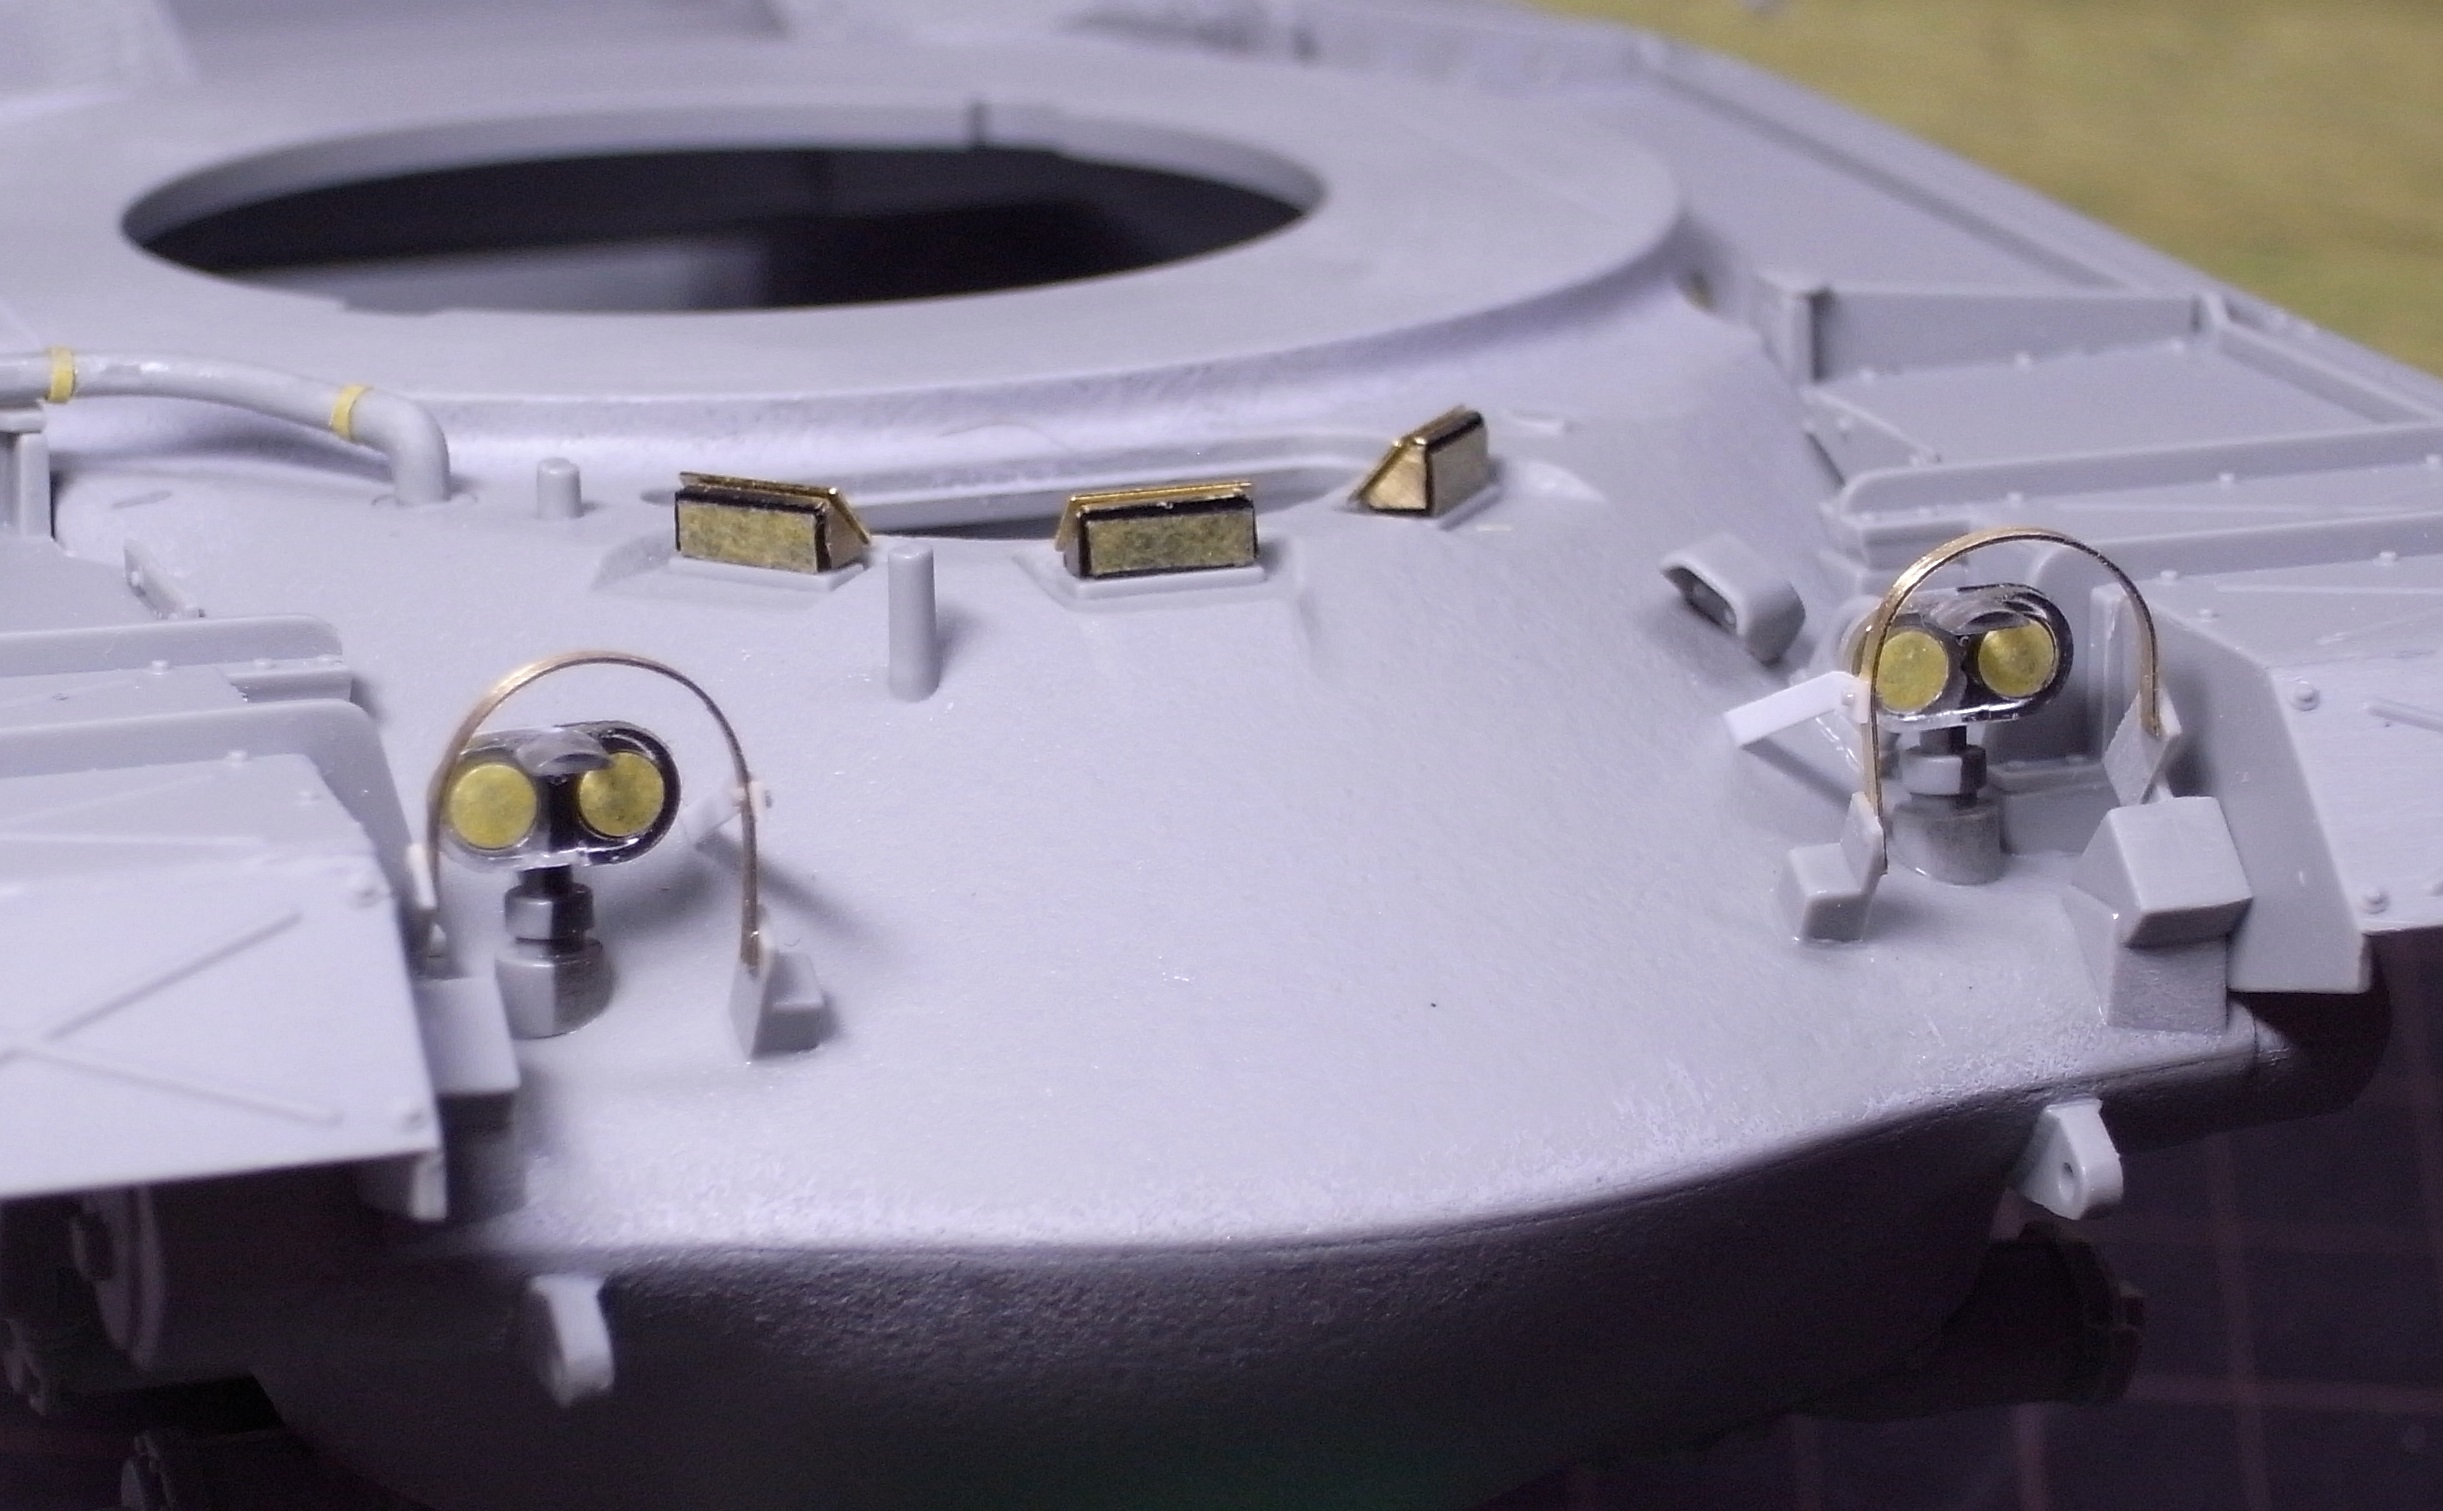
I decided to replace the handles using a strip of masking tape and 0.2mm steel wire.


Voyager also provides this handle on their PE sheet, but it looks too flat. Handles are moveable since the masking tape & steel wire is not glued together.

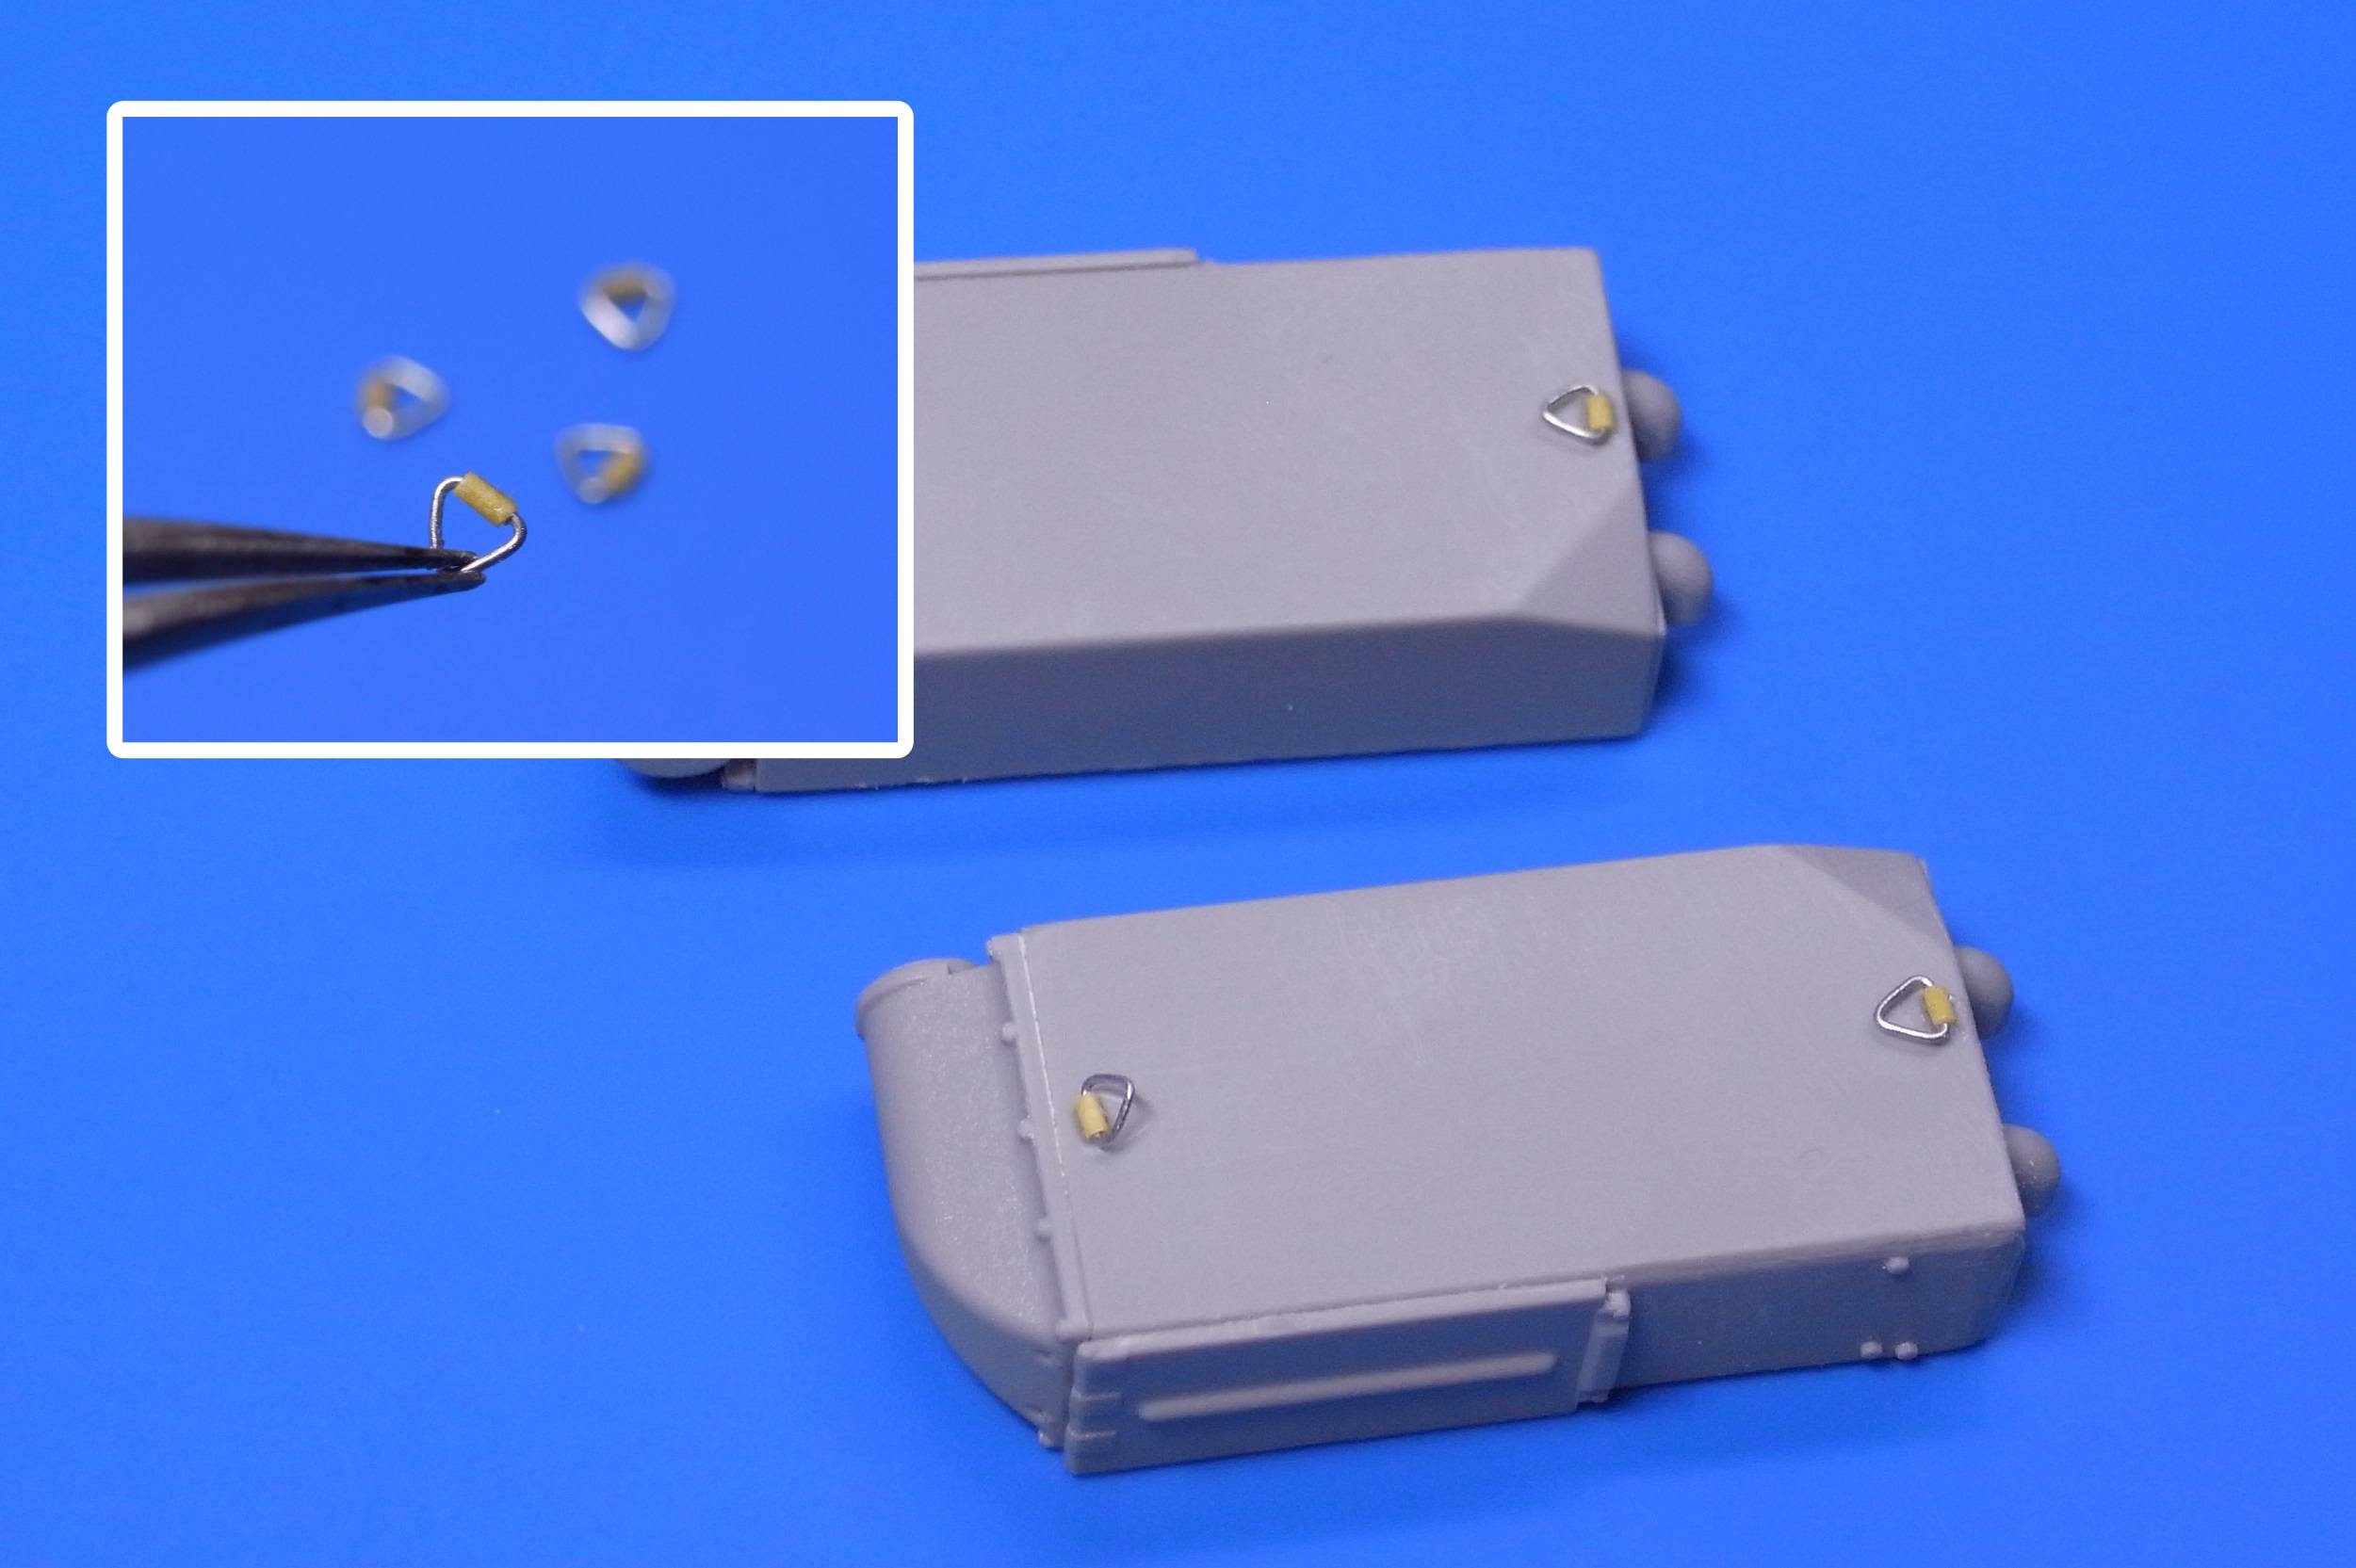
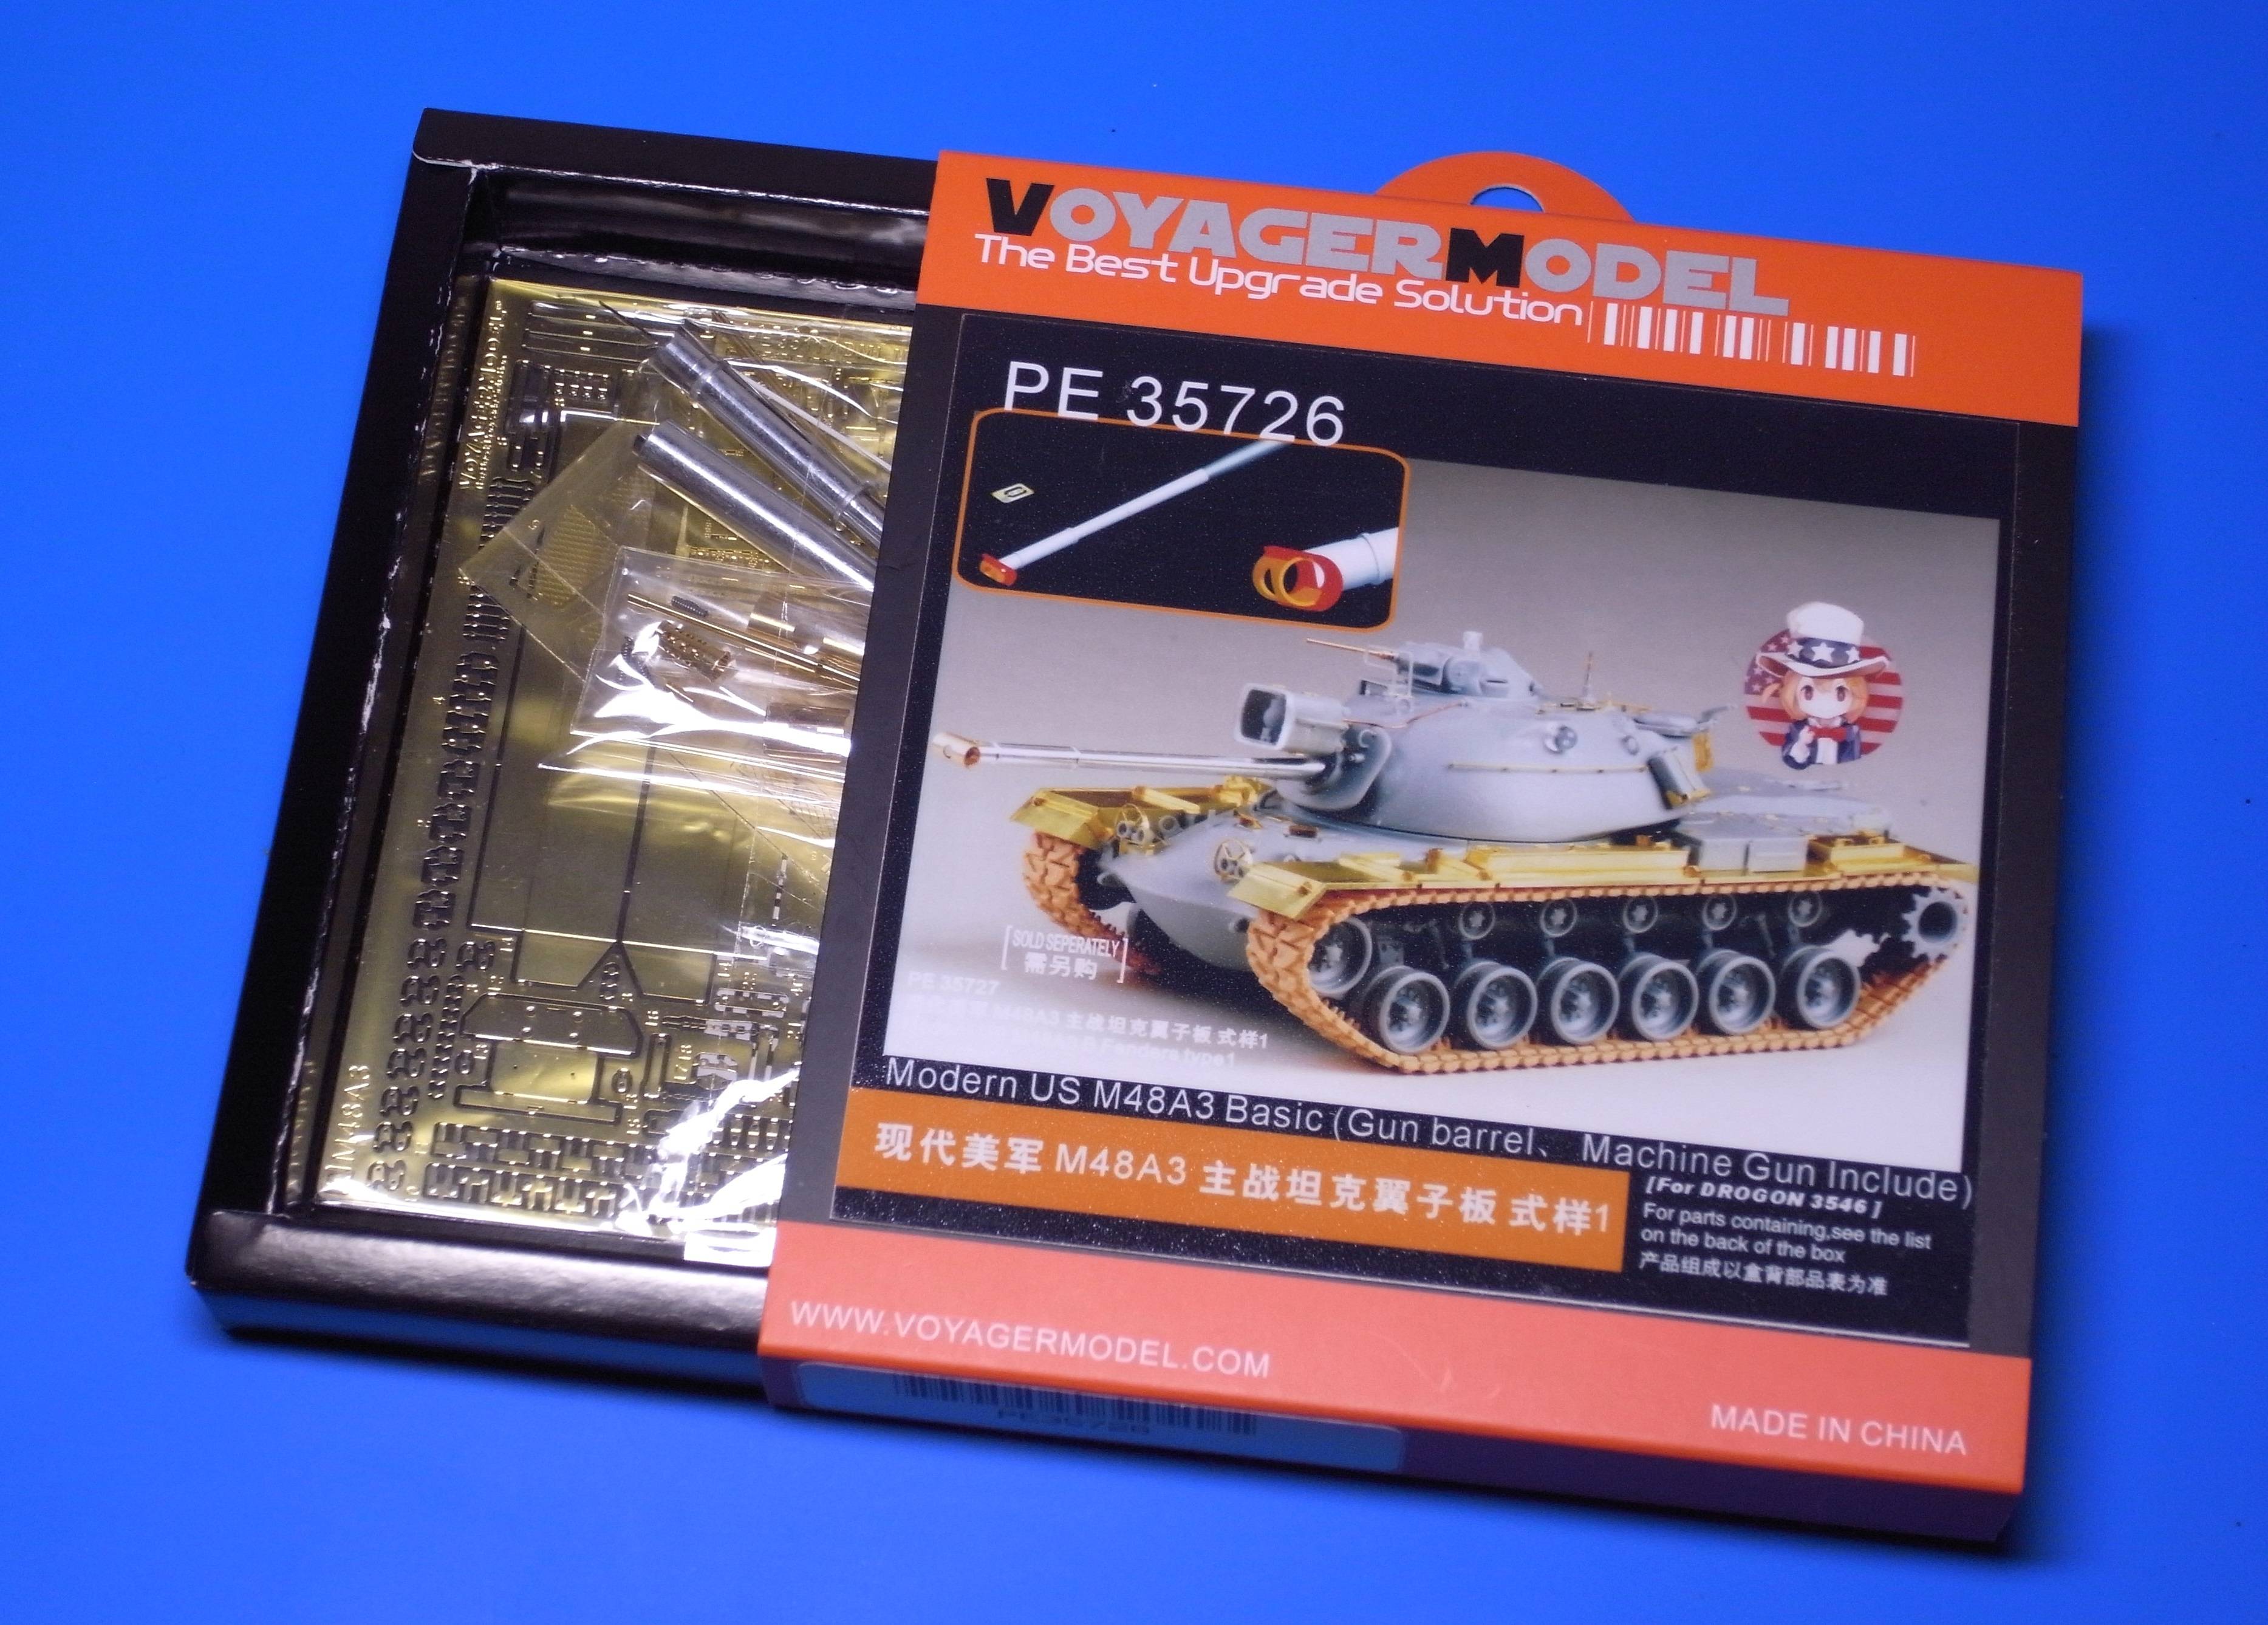
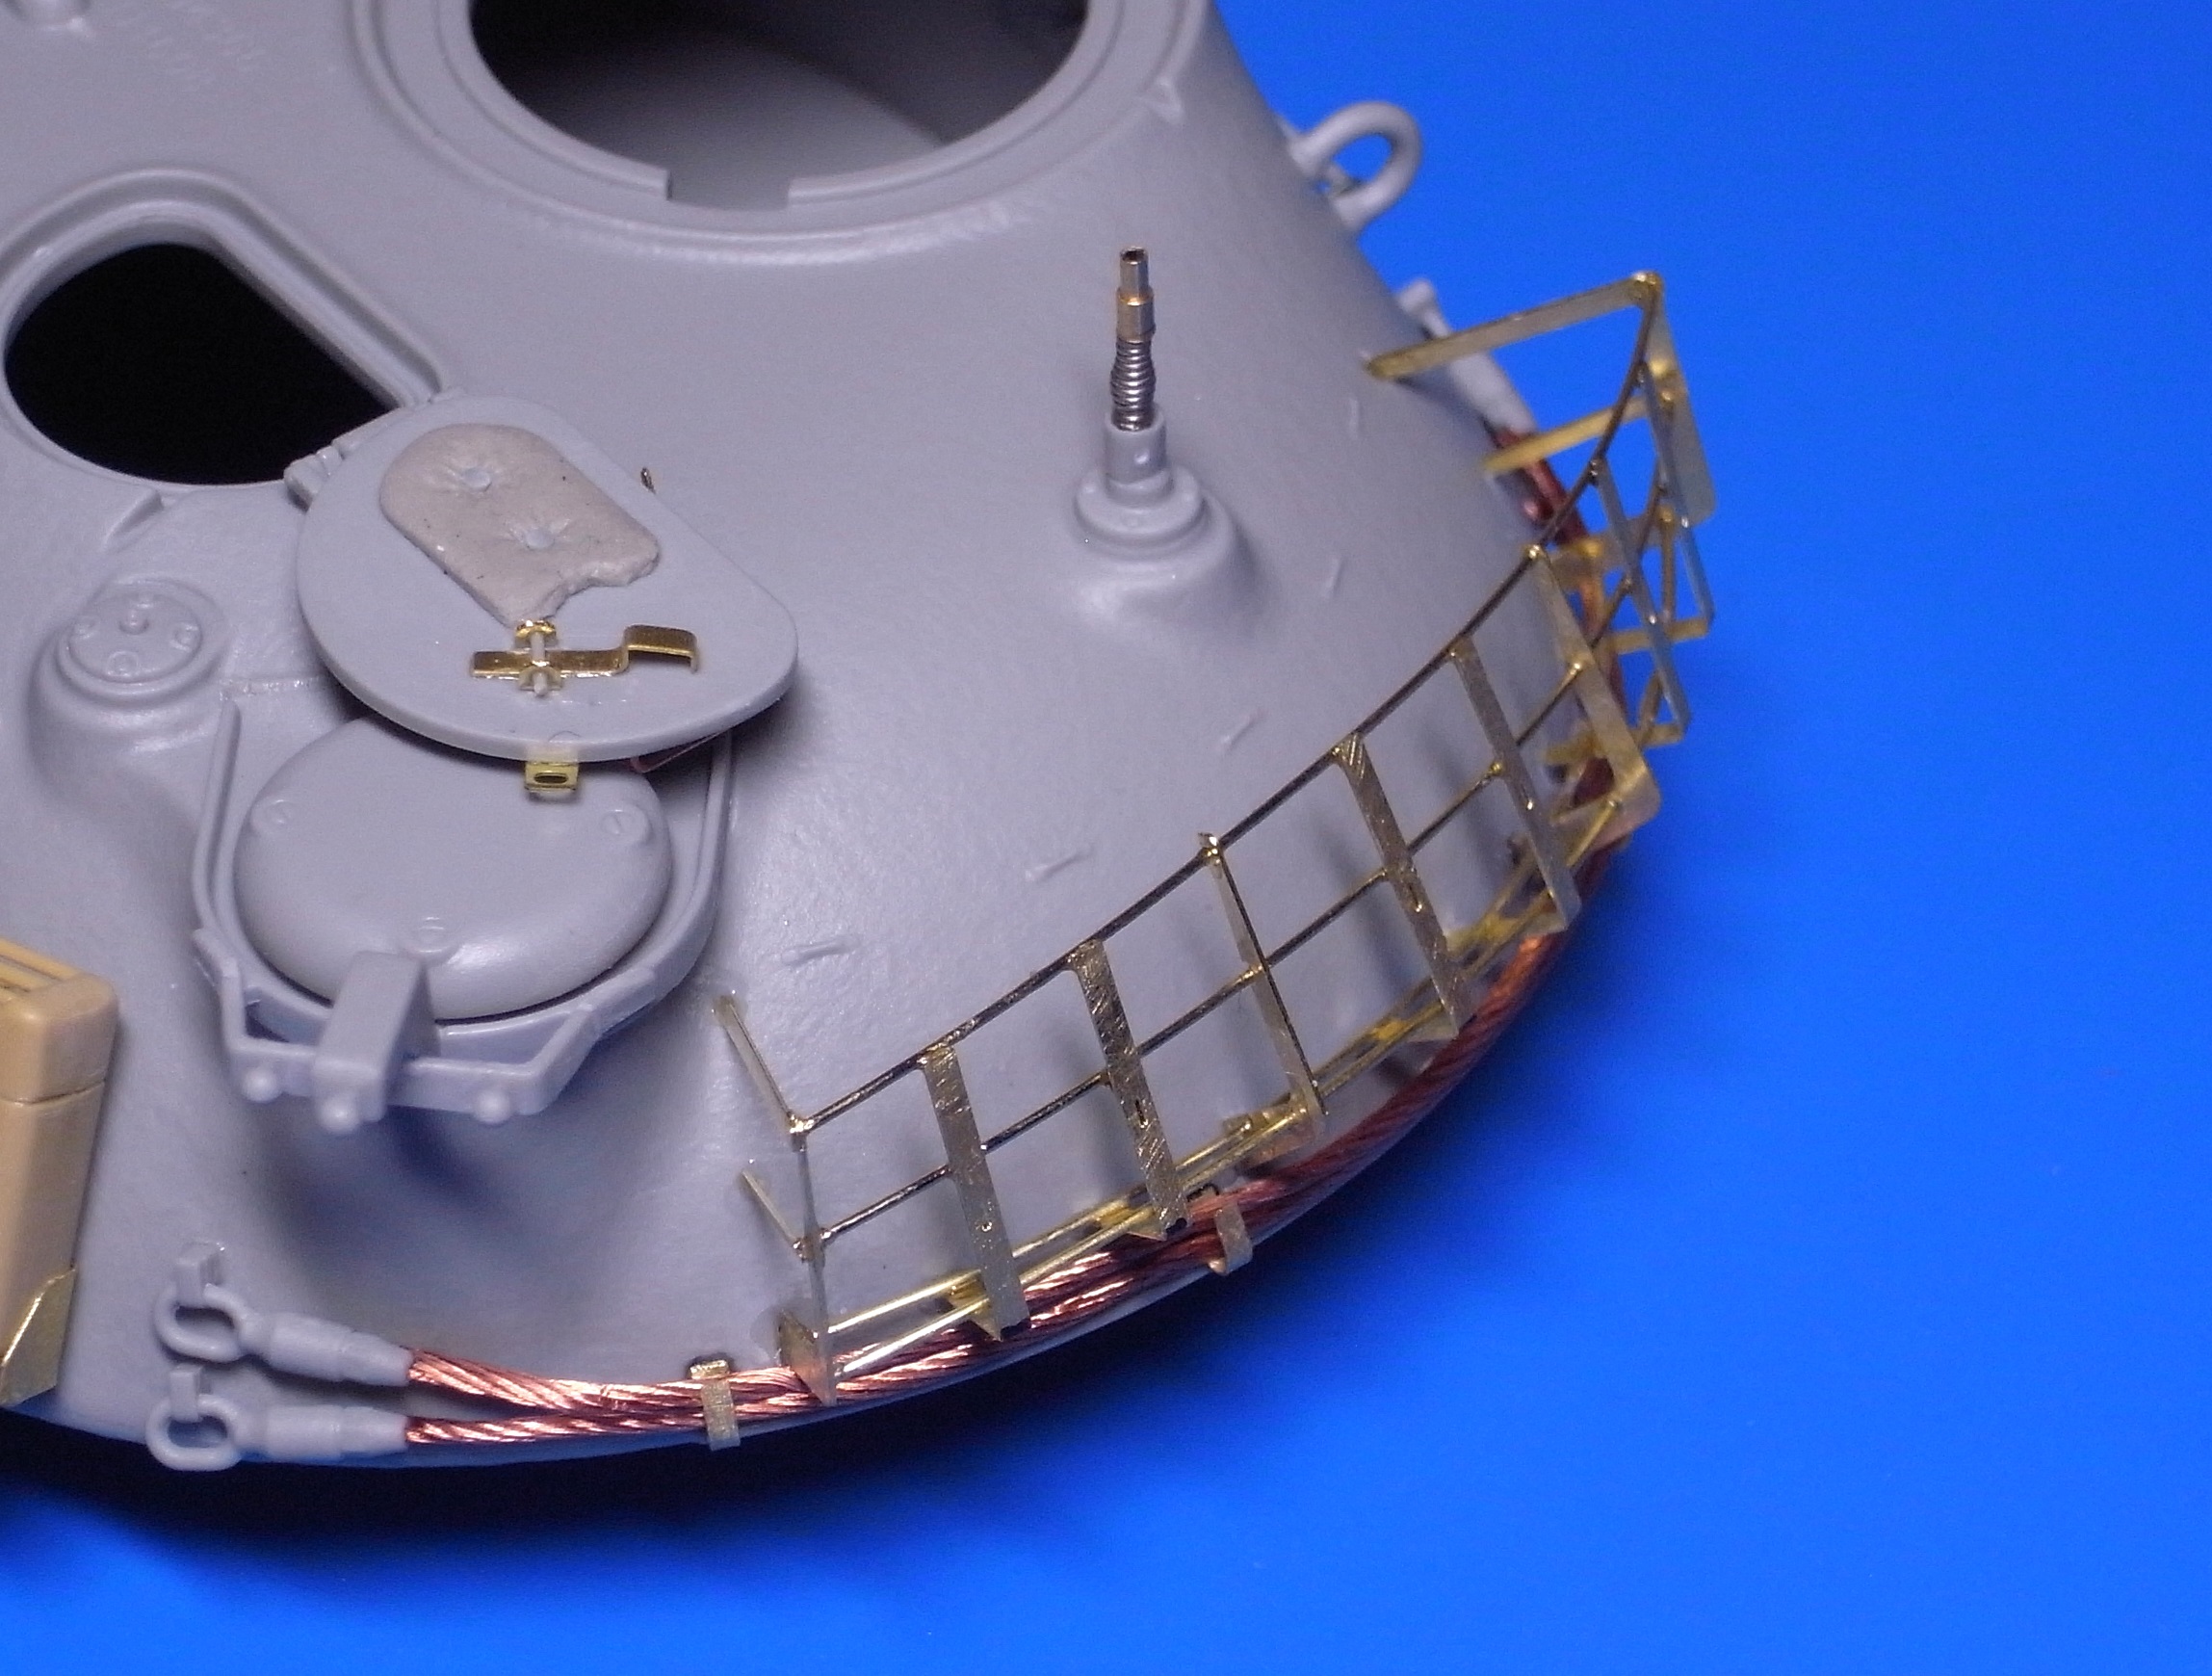
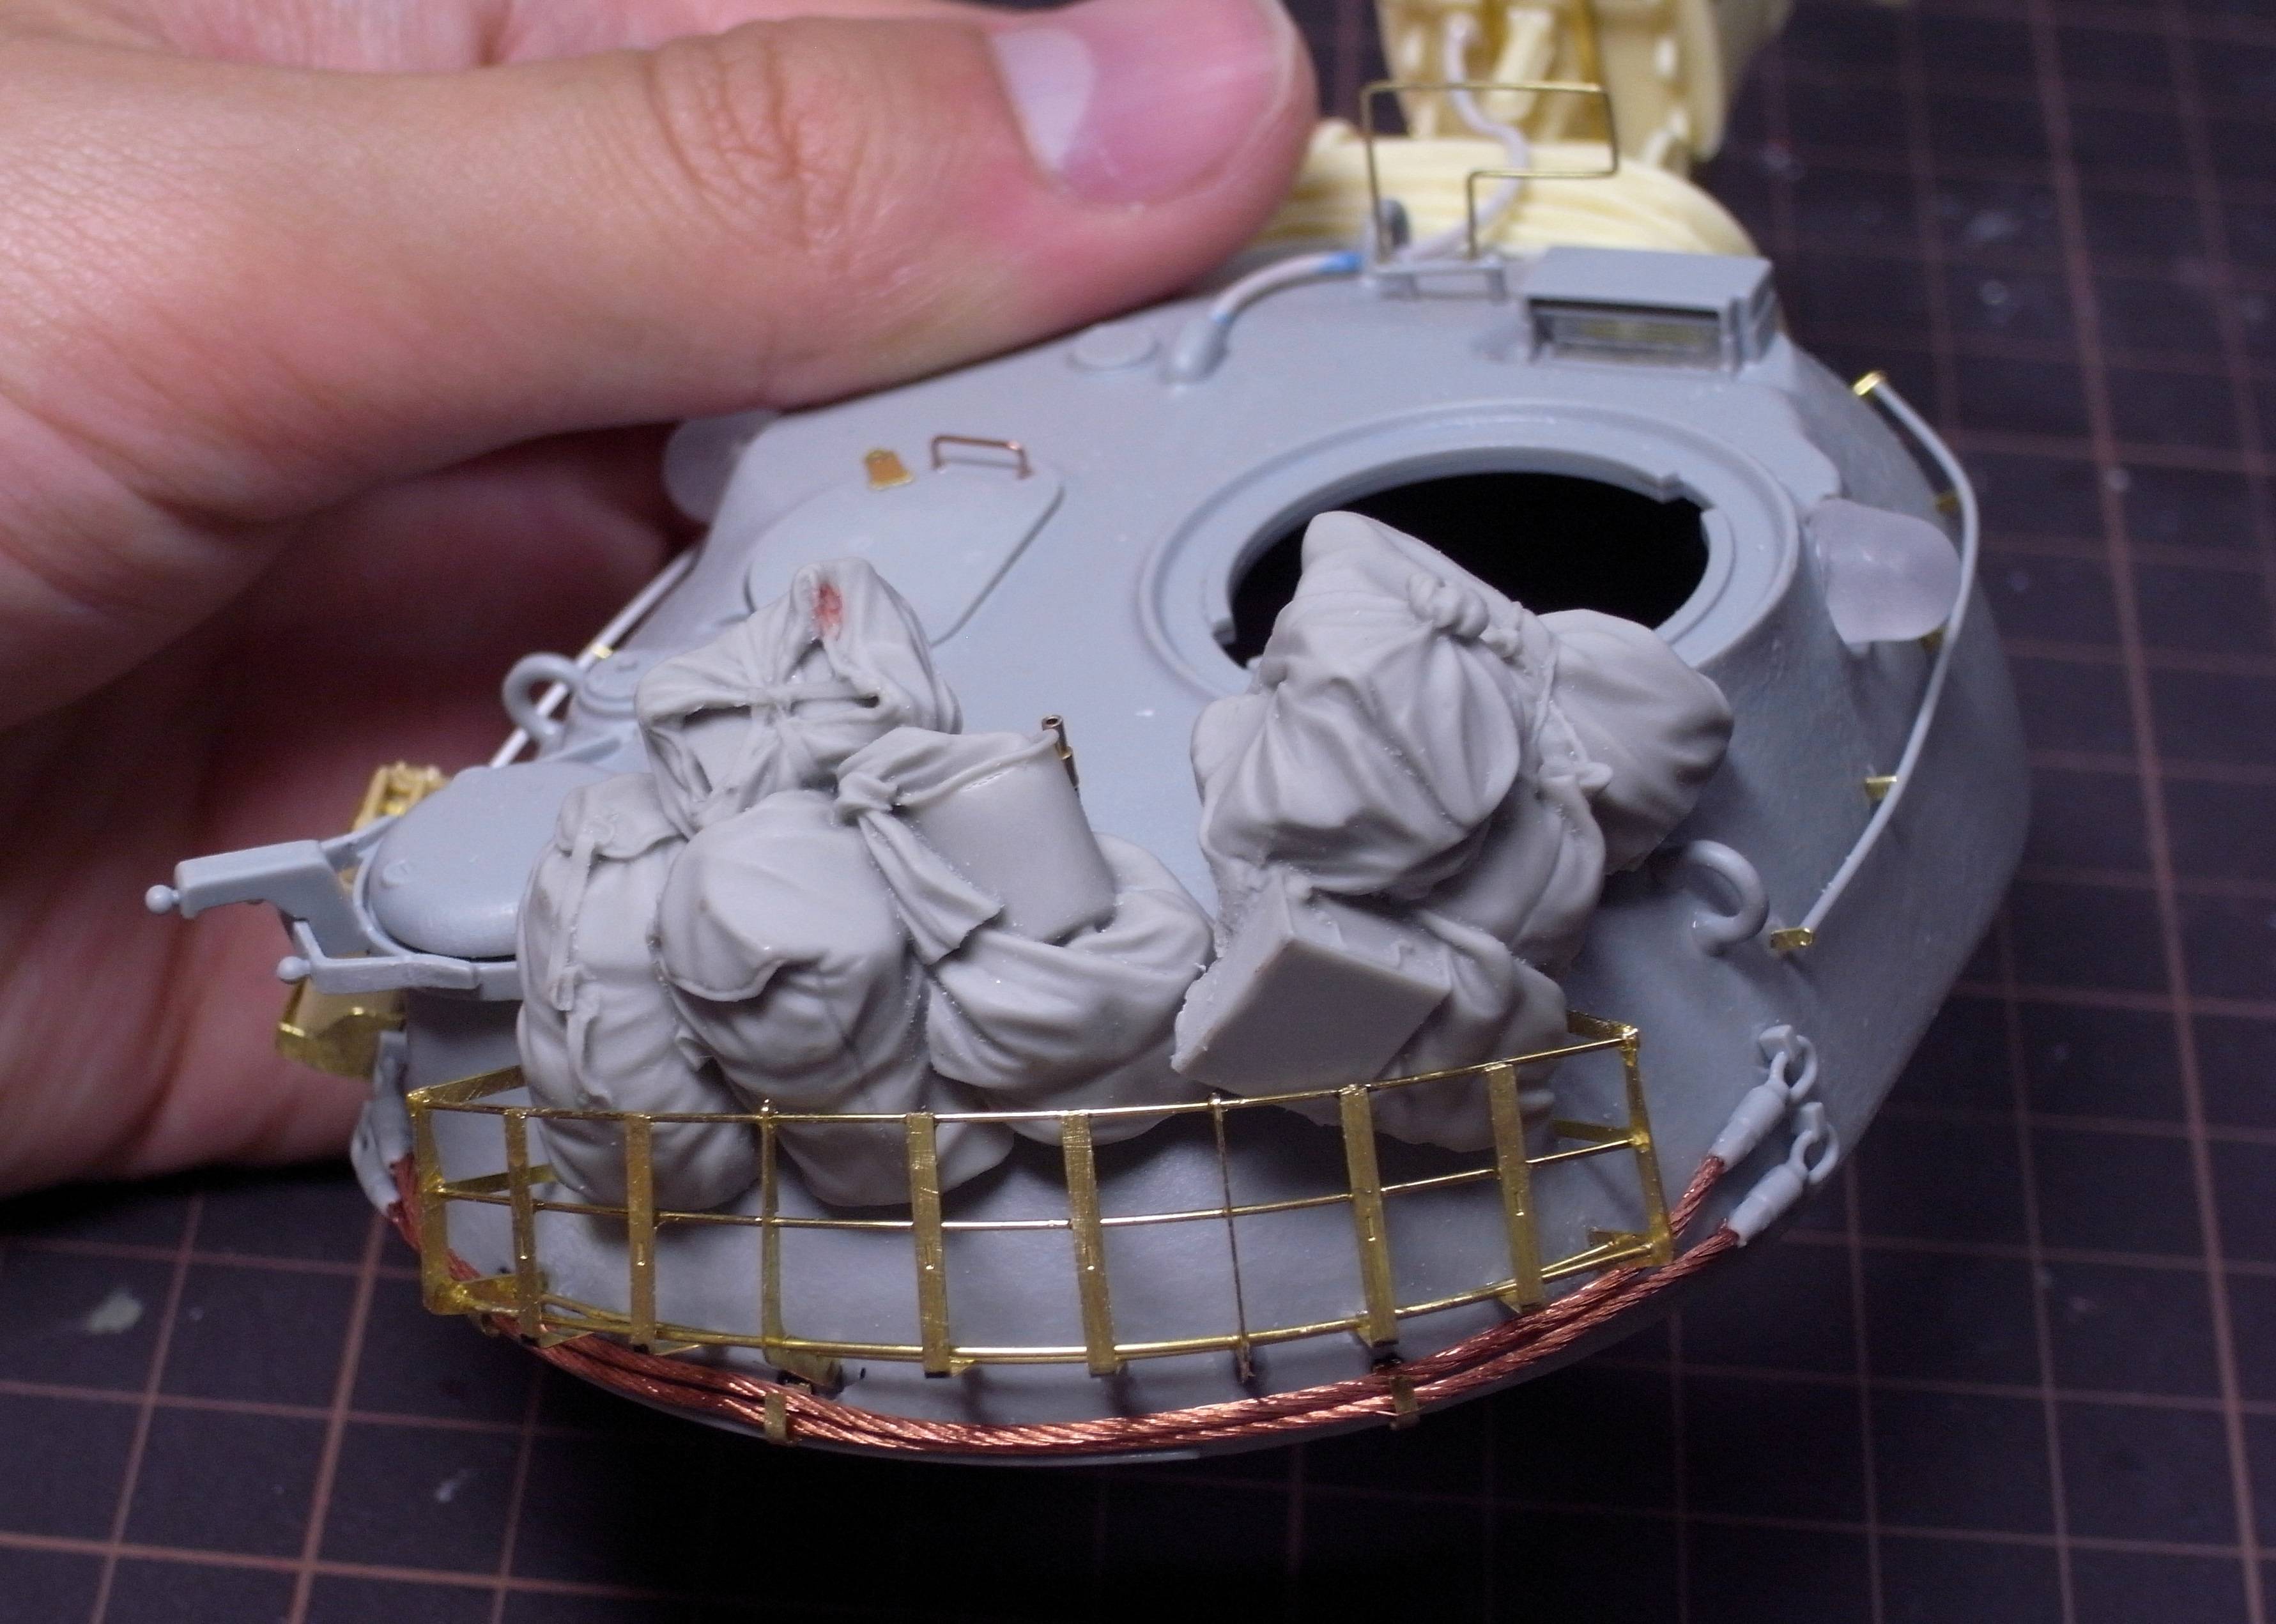
Next up, the stowage boxes. Dragon parts are nice looking, but can't be built open. Voyager to the rescue.


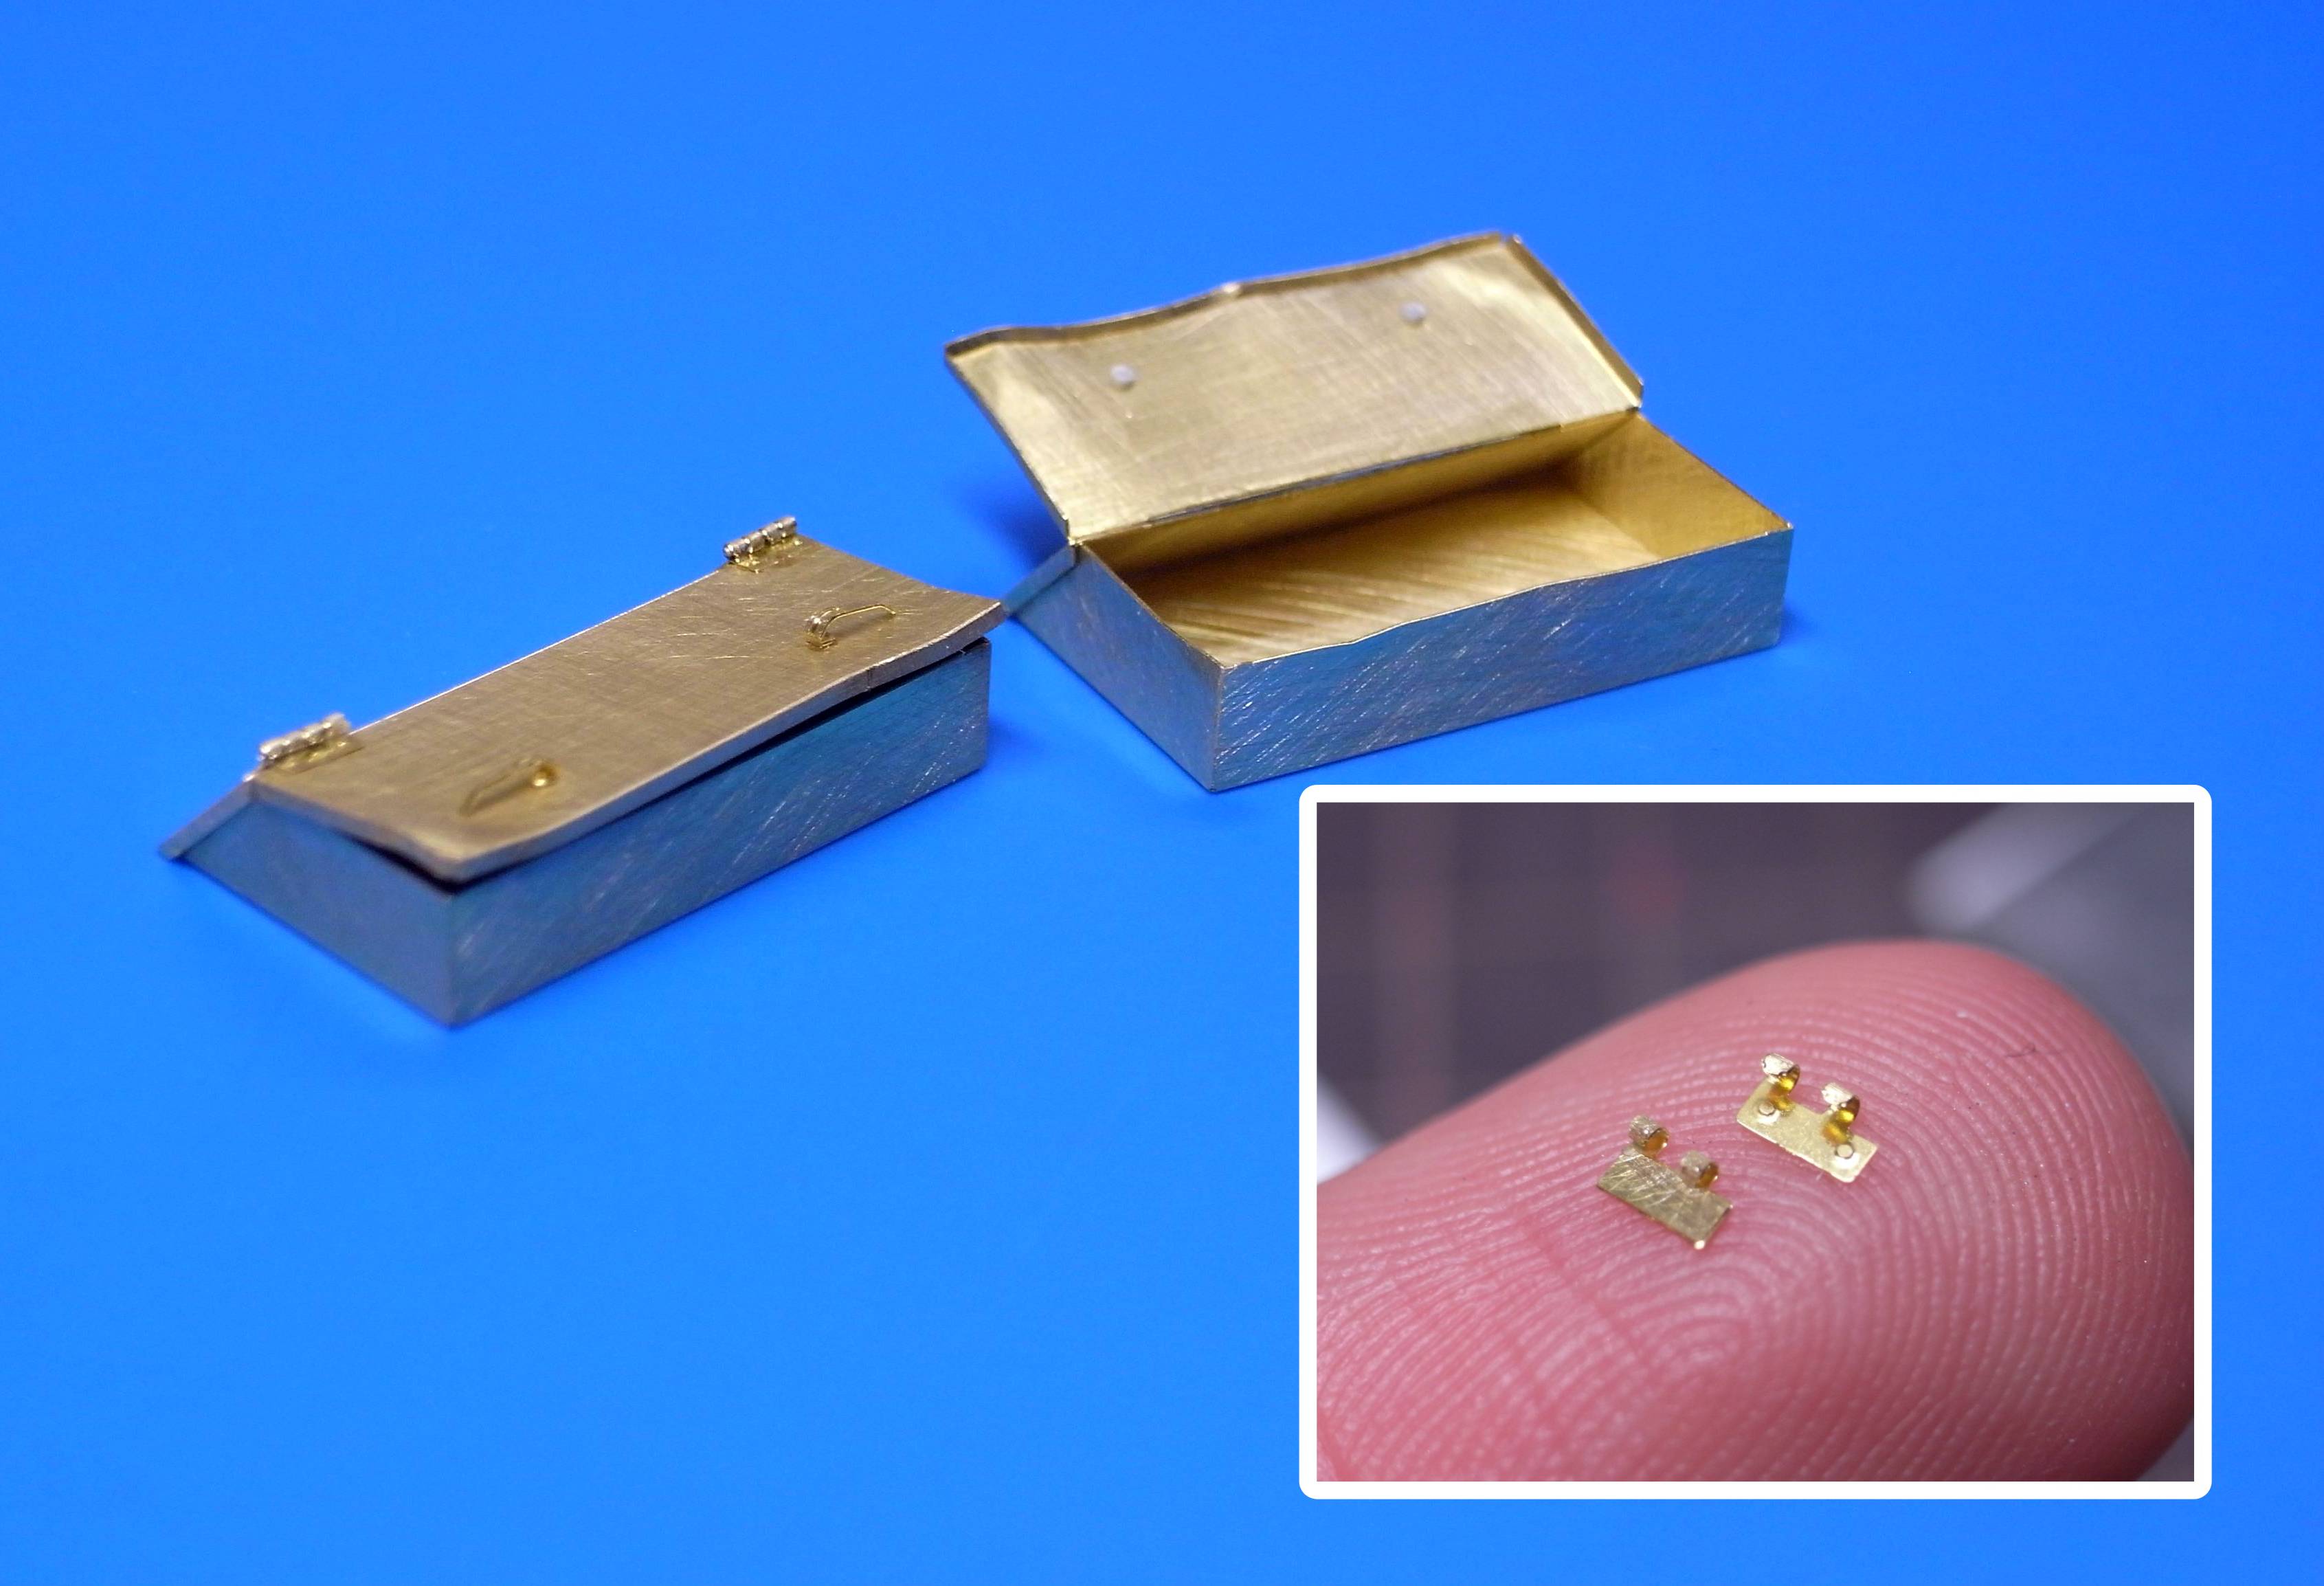
These moveable hinges were very tiresome to build. Voyager (and other companies) sell special tool for building hinges, but I didn't want to pay extra $15 for only 10 hinges.
They were carefully made into shape with the guide of drill bits. I used the same 0.2mm wire for merging the two hinges.

At the end, I decided to glue the hinges for more rigidity. I only wanted 1 stowage box to be opened, and it didn't have to be "moveable". In addition, Ive bent and applied some minor damage to the boxes. I didn't add any bullet holes since that felt too cliche

Moving on to the front portion.


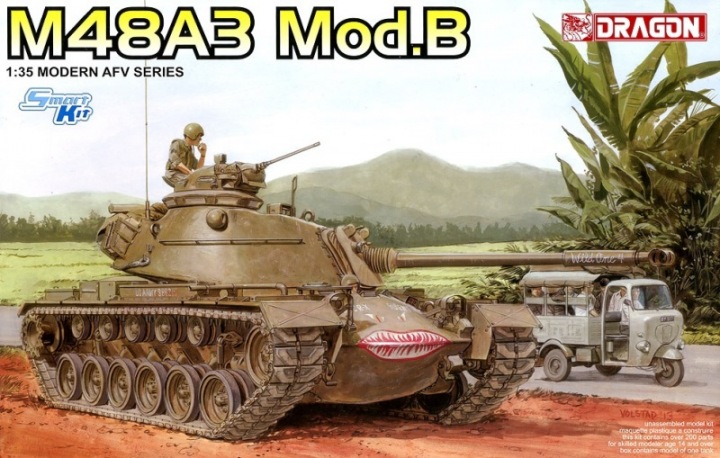
At this staged, Ive realised that I actually bought the wrong version of the voyager PE set. The one I needed was for the mod.B variant. There is not much difference between the two versions, except for the light guards. I had to use plastic stripes and PE sprue to replicate the correct light guard.

Dragon provides clear parts for the front lights. Each side has 1 light and 1 IR light. One was painted with silver from behind, and other with gloss black. I used Wave`s pre-cut circle masks to mask the lights.

After long tedious PE work, I decided to do something different.
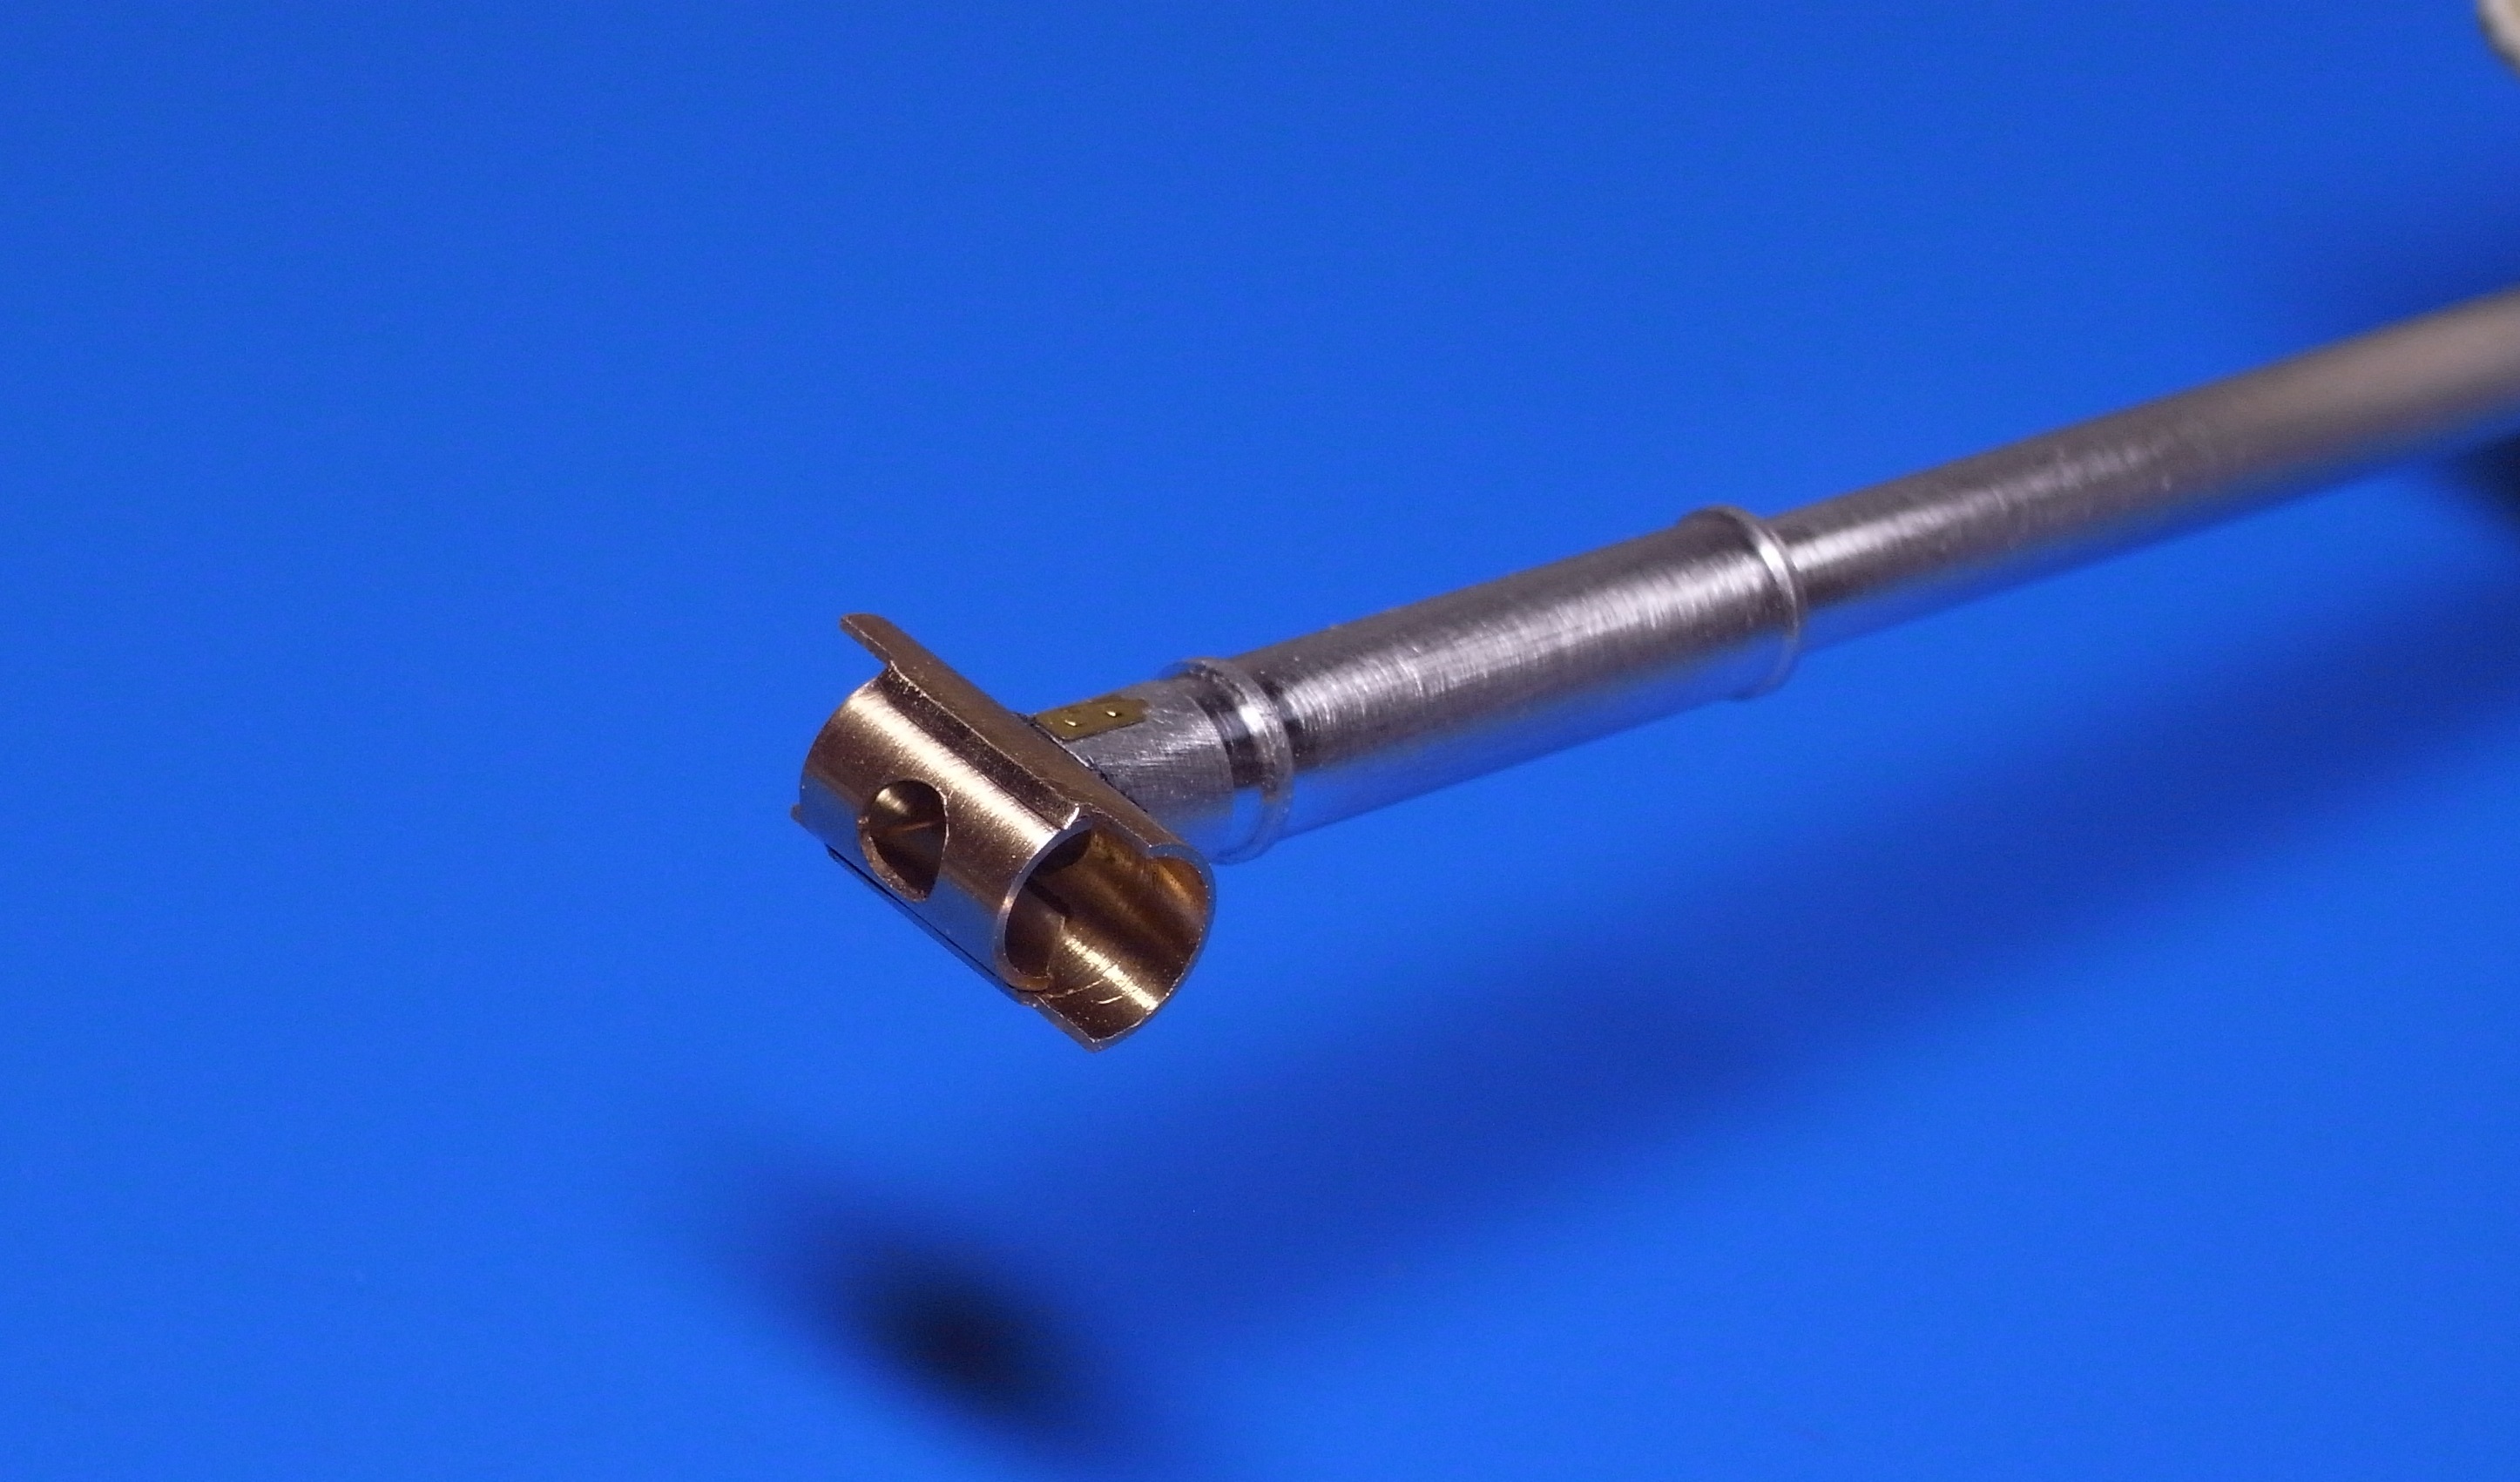
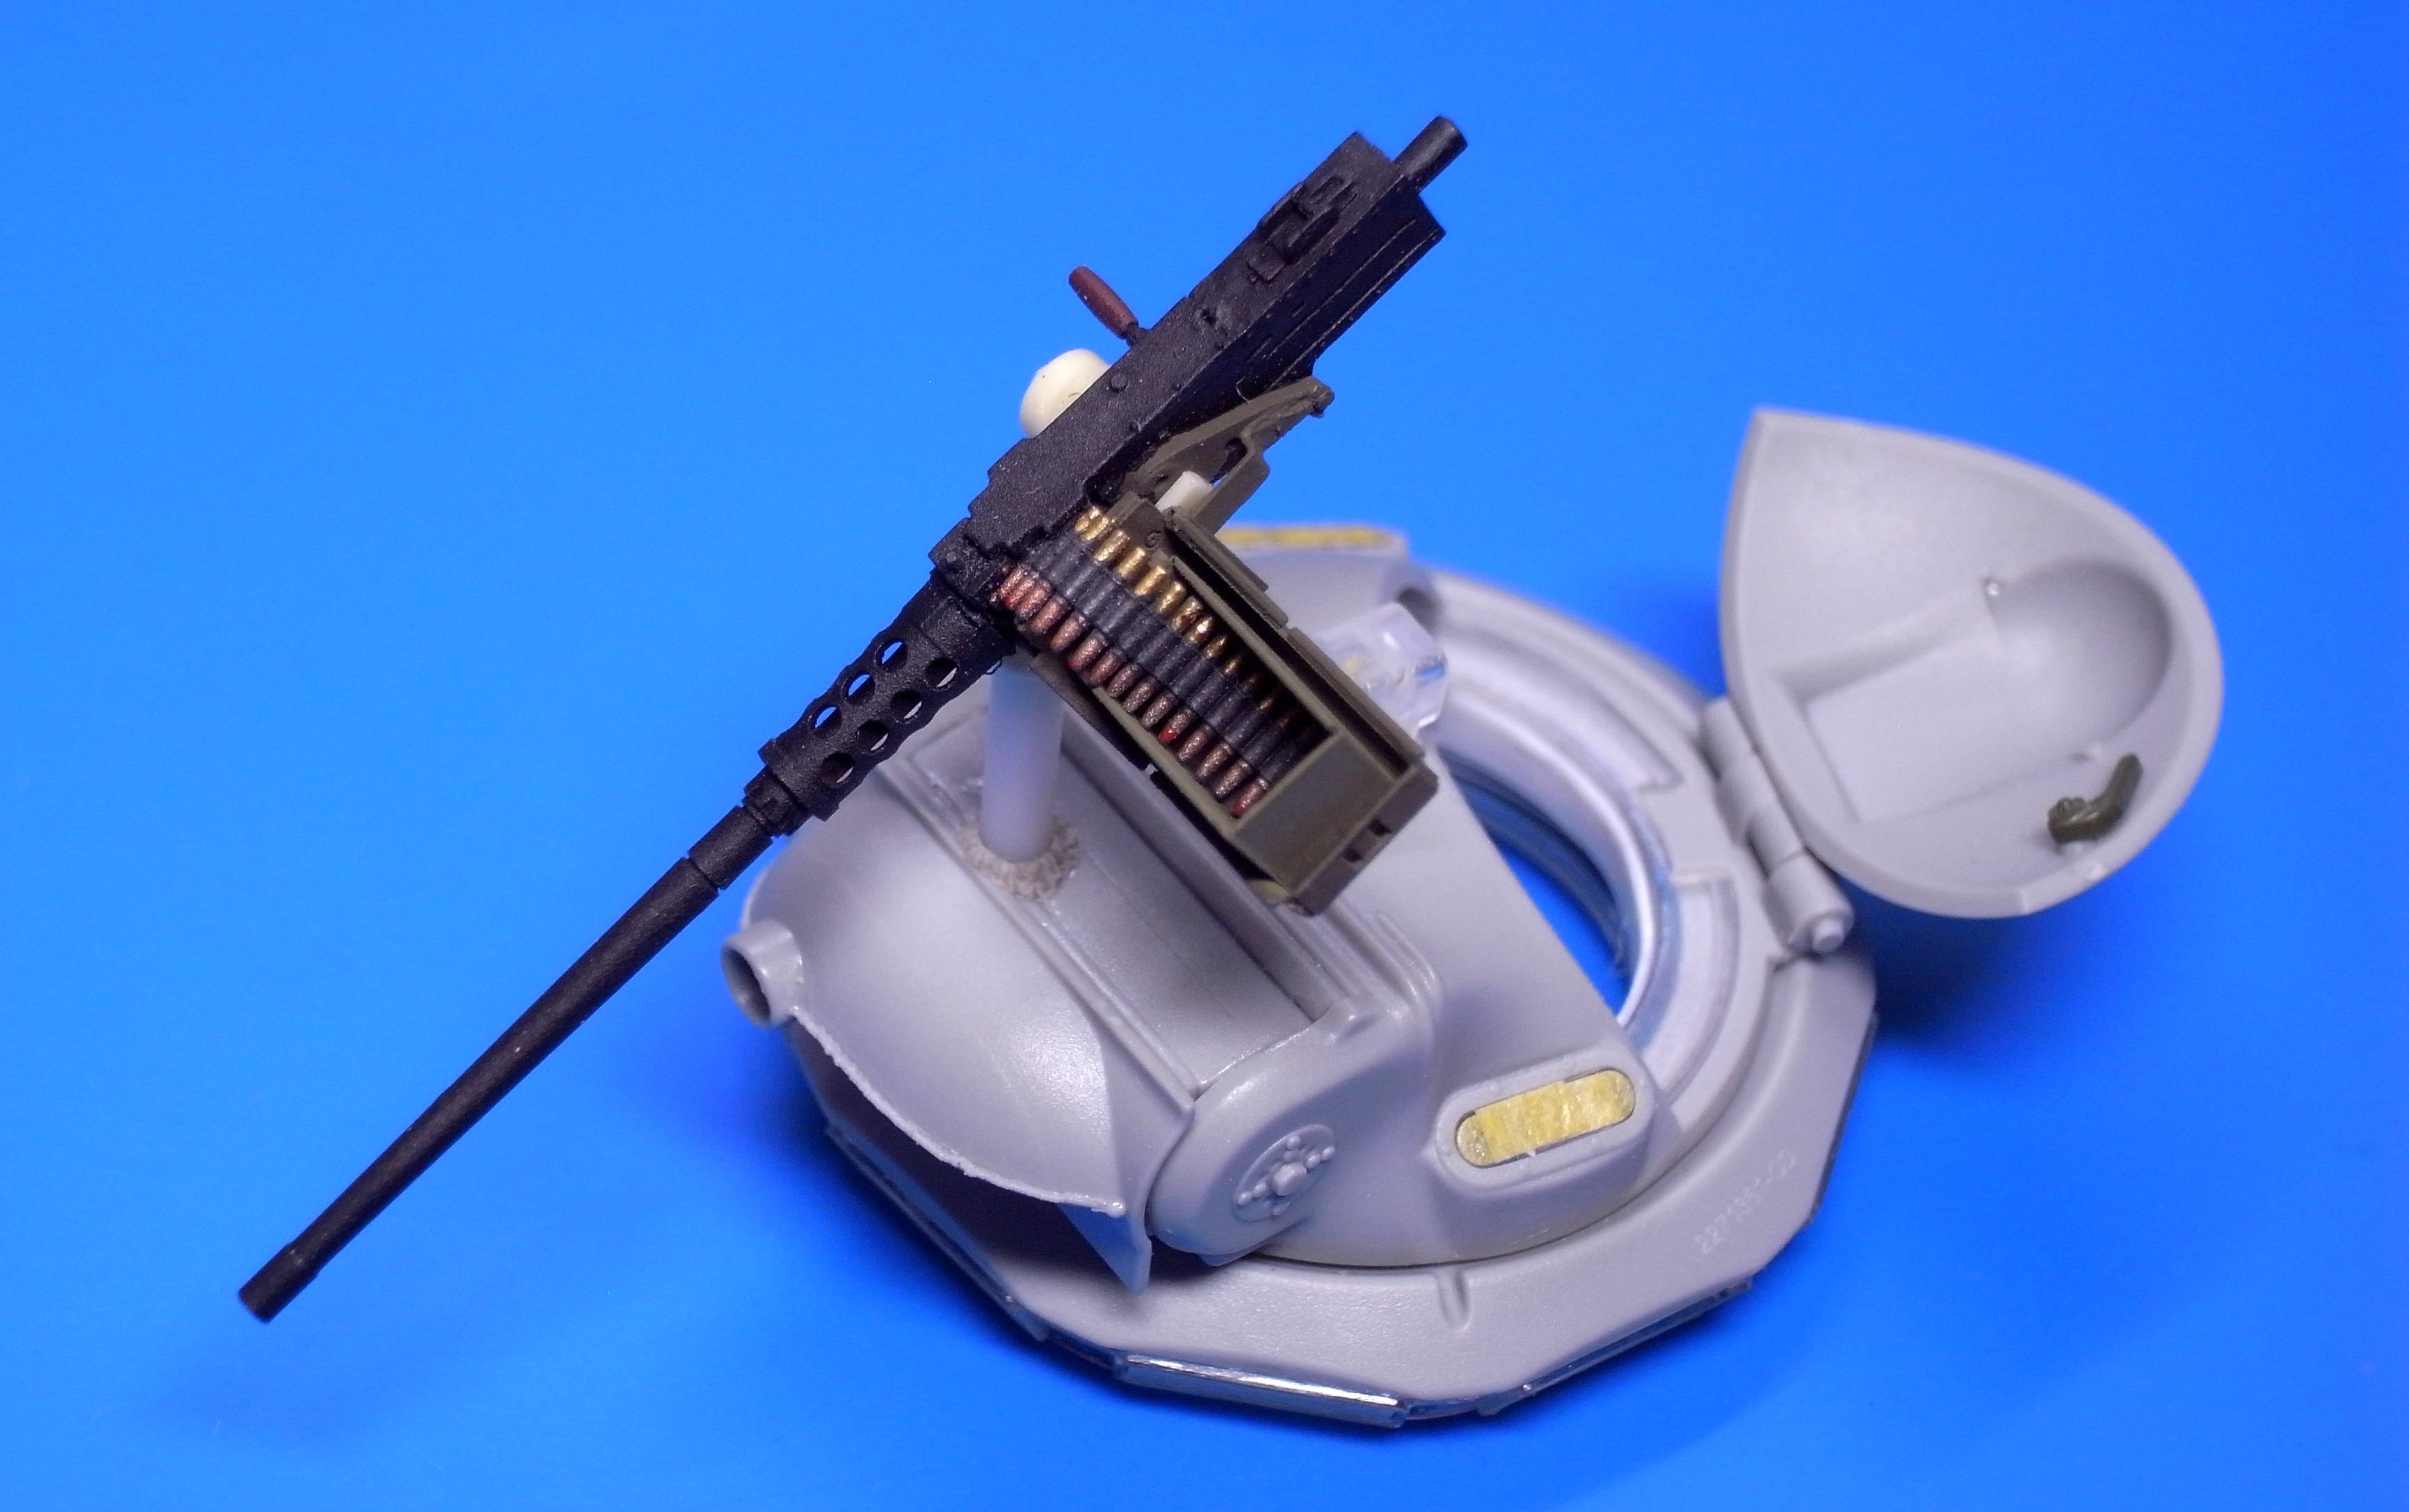
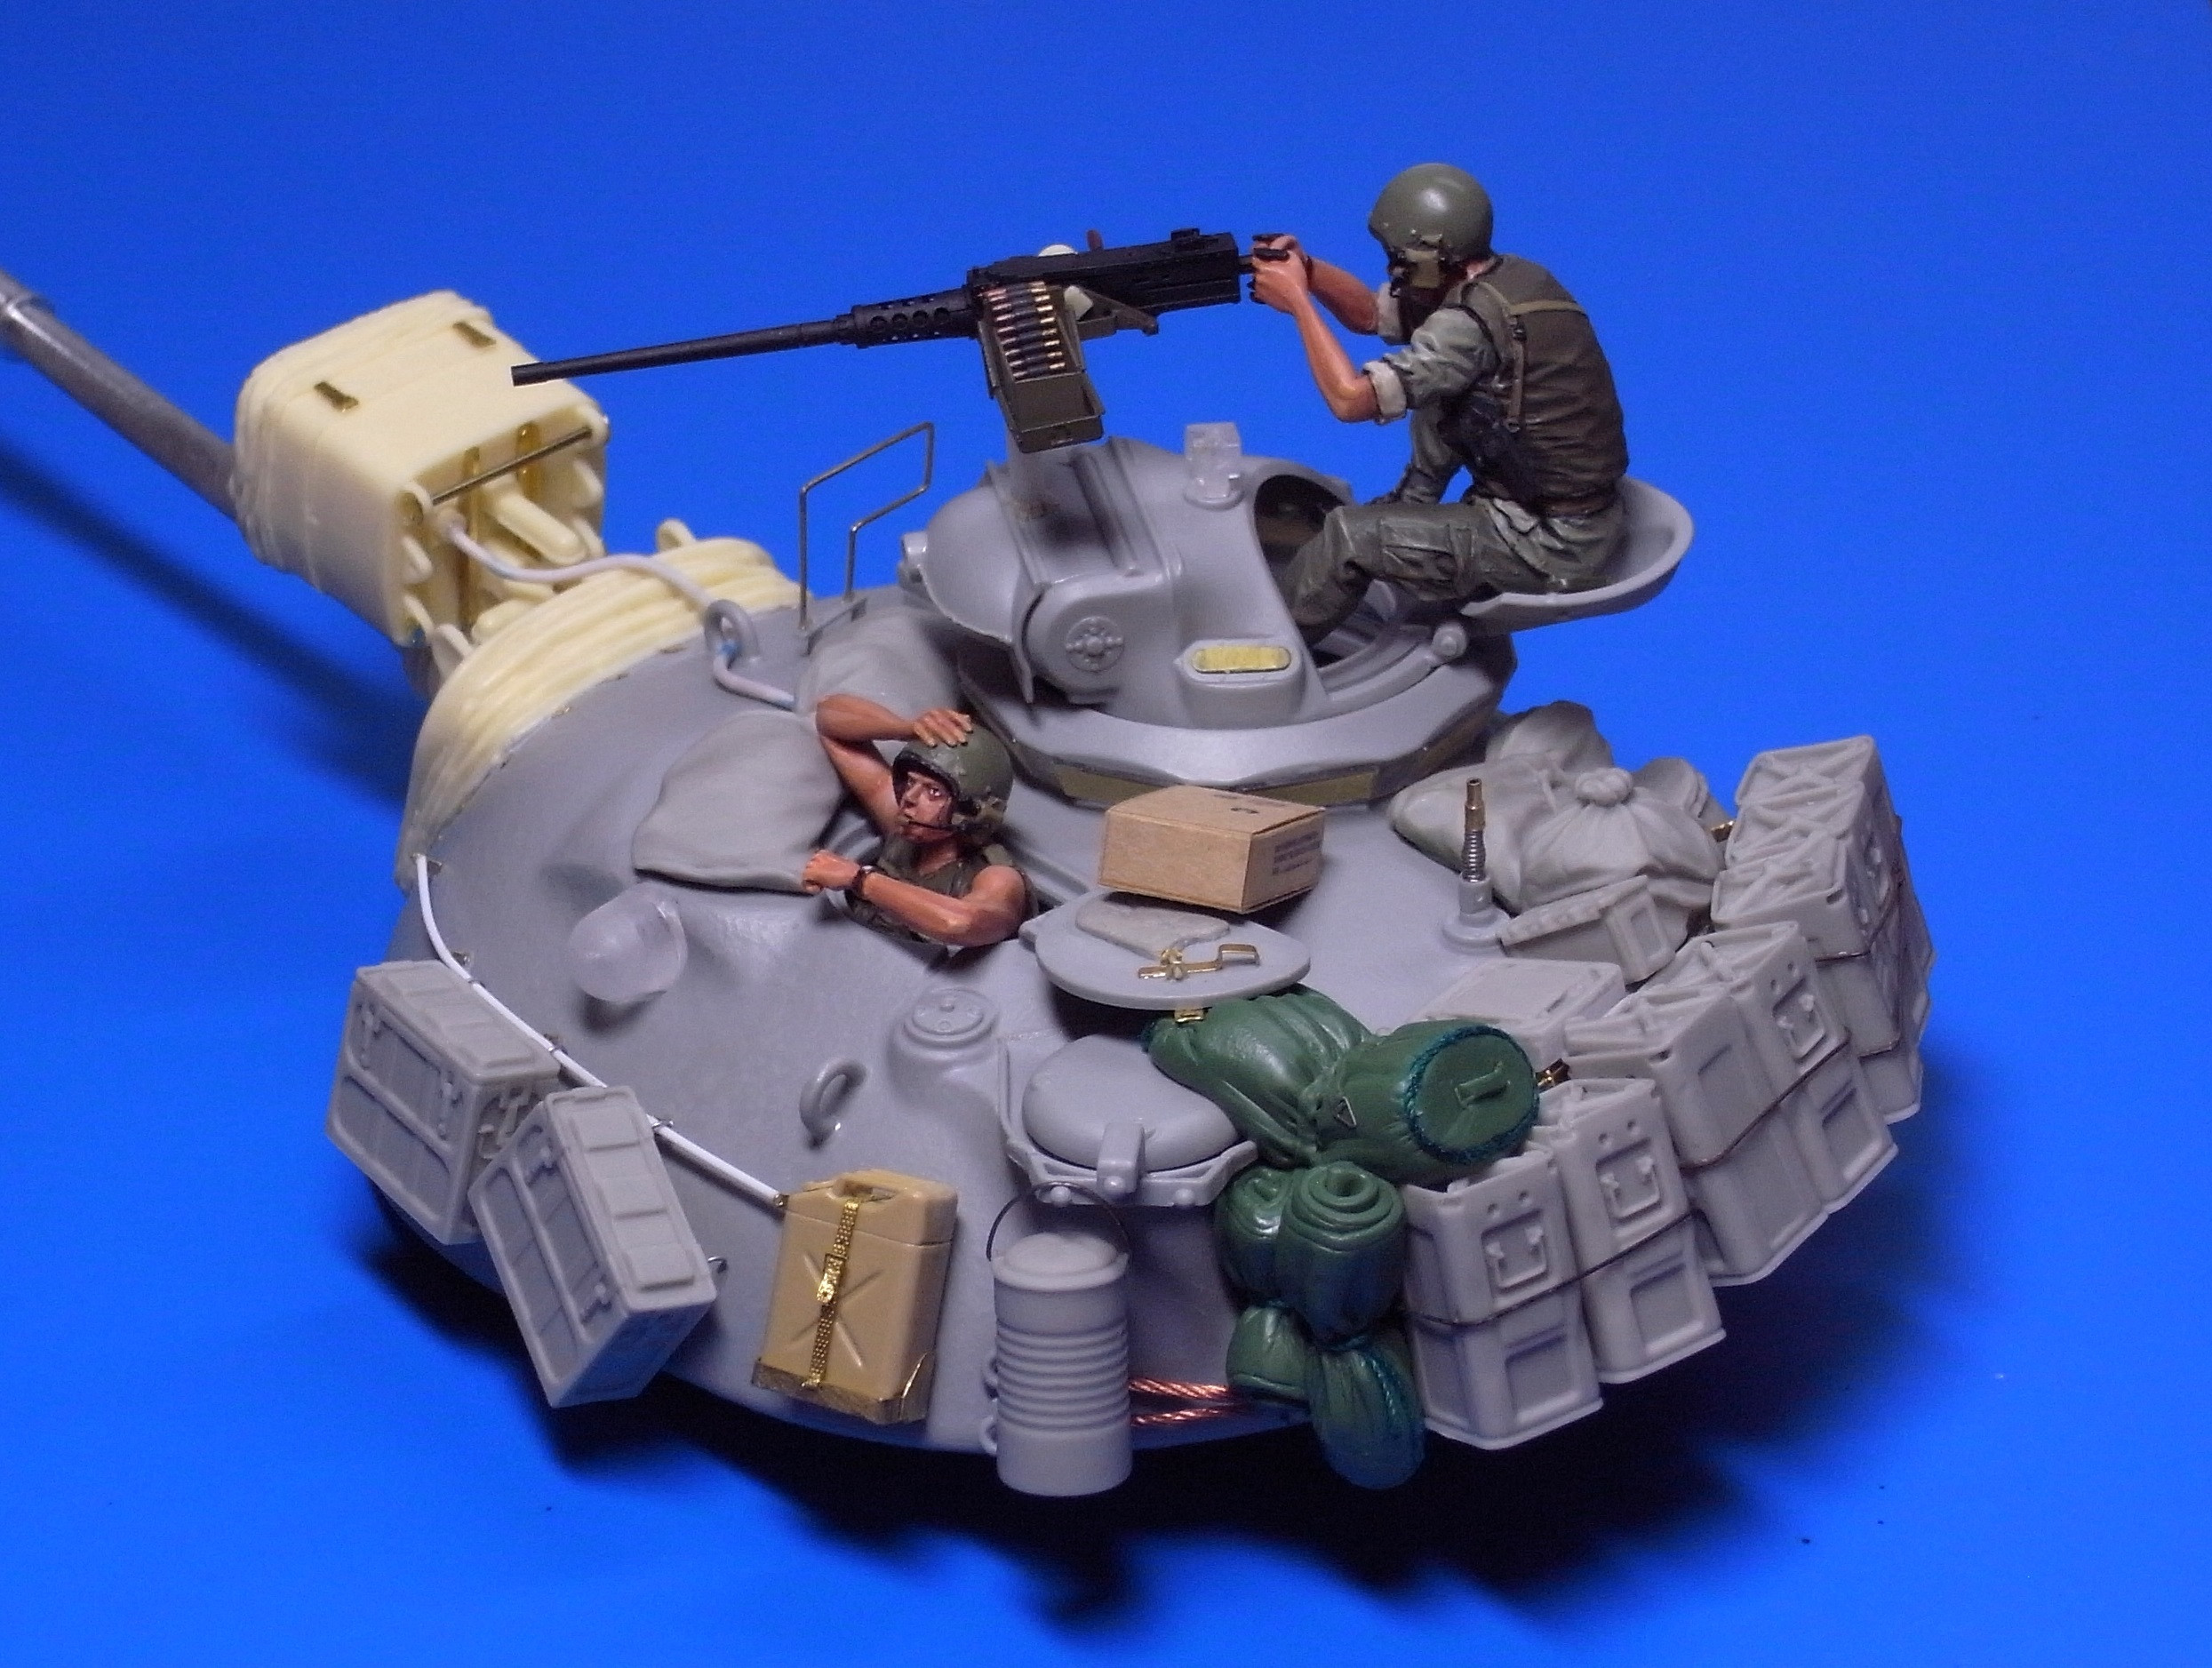
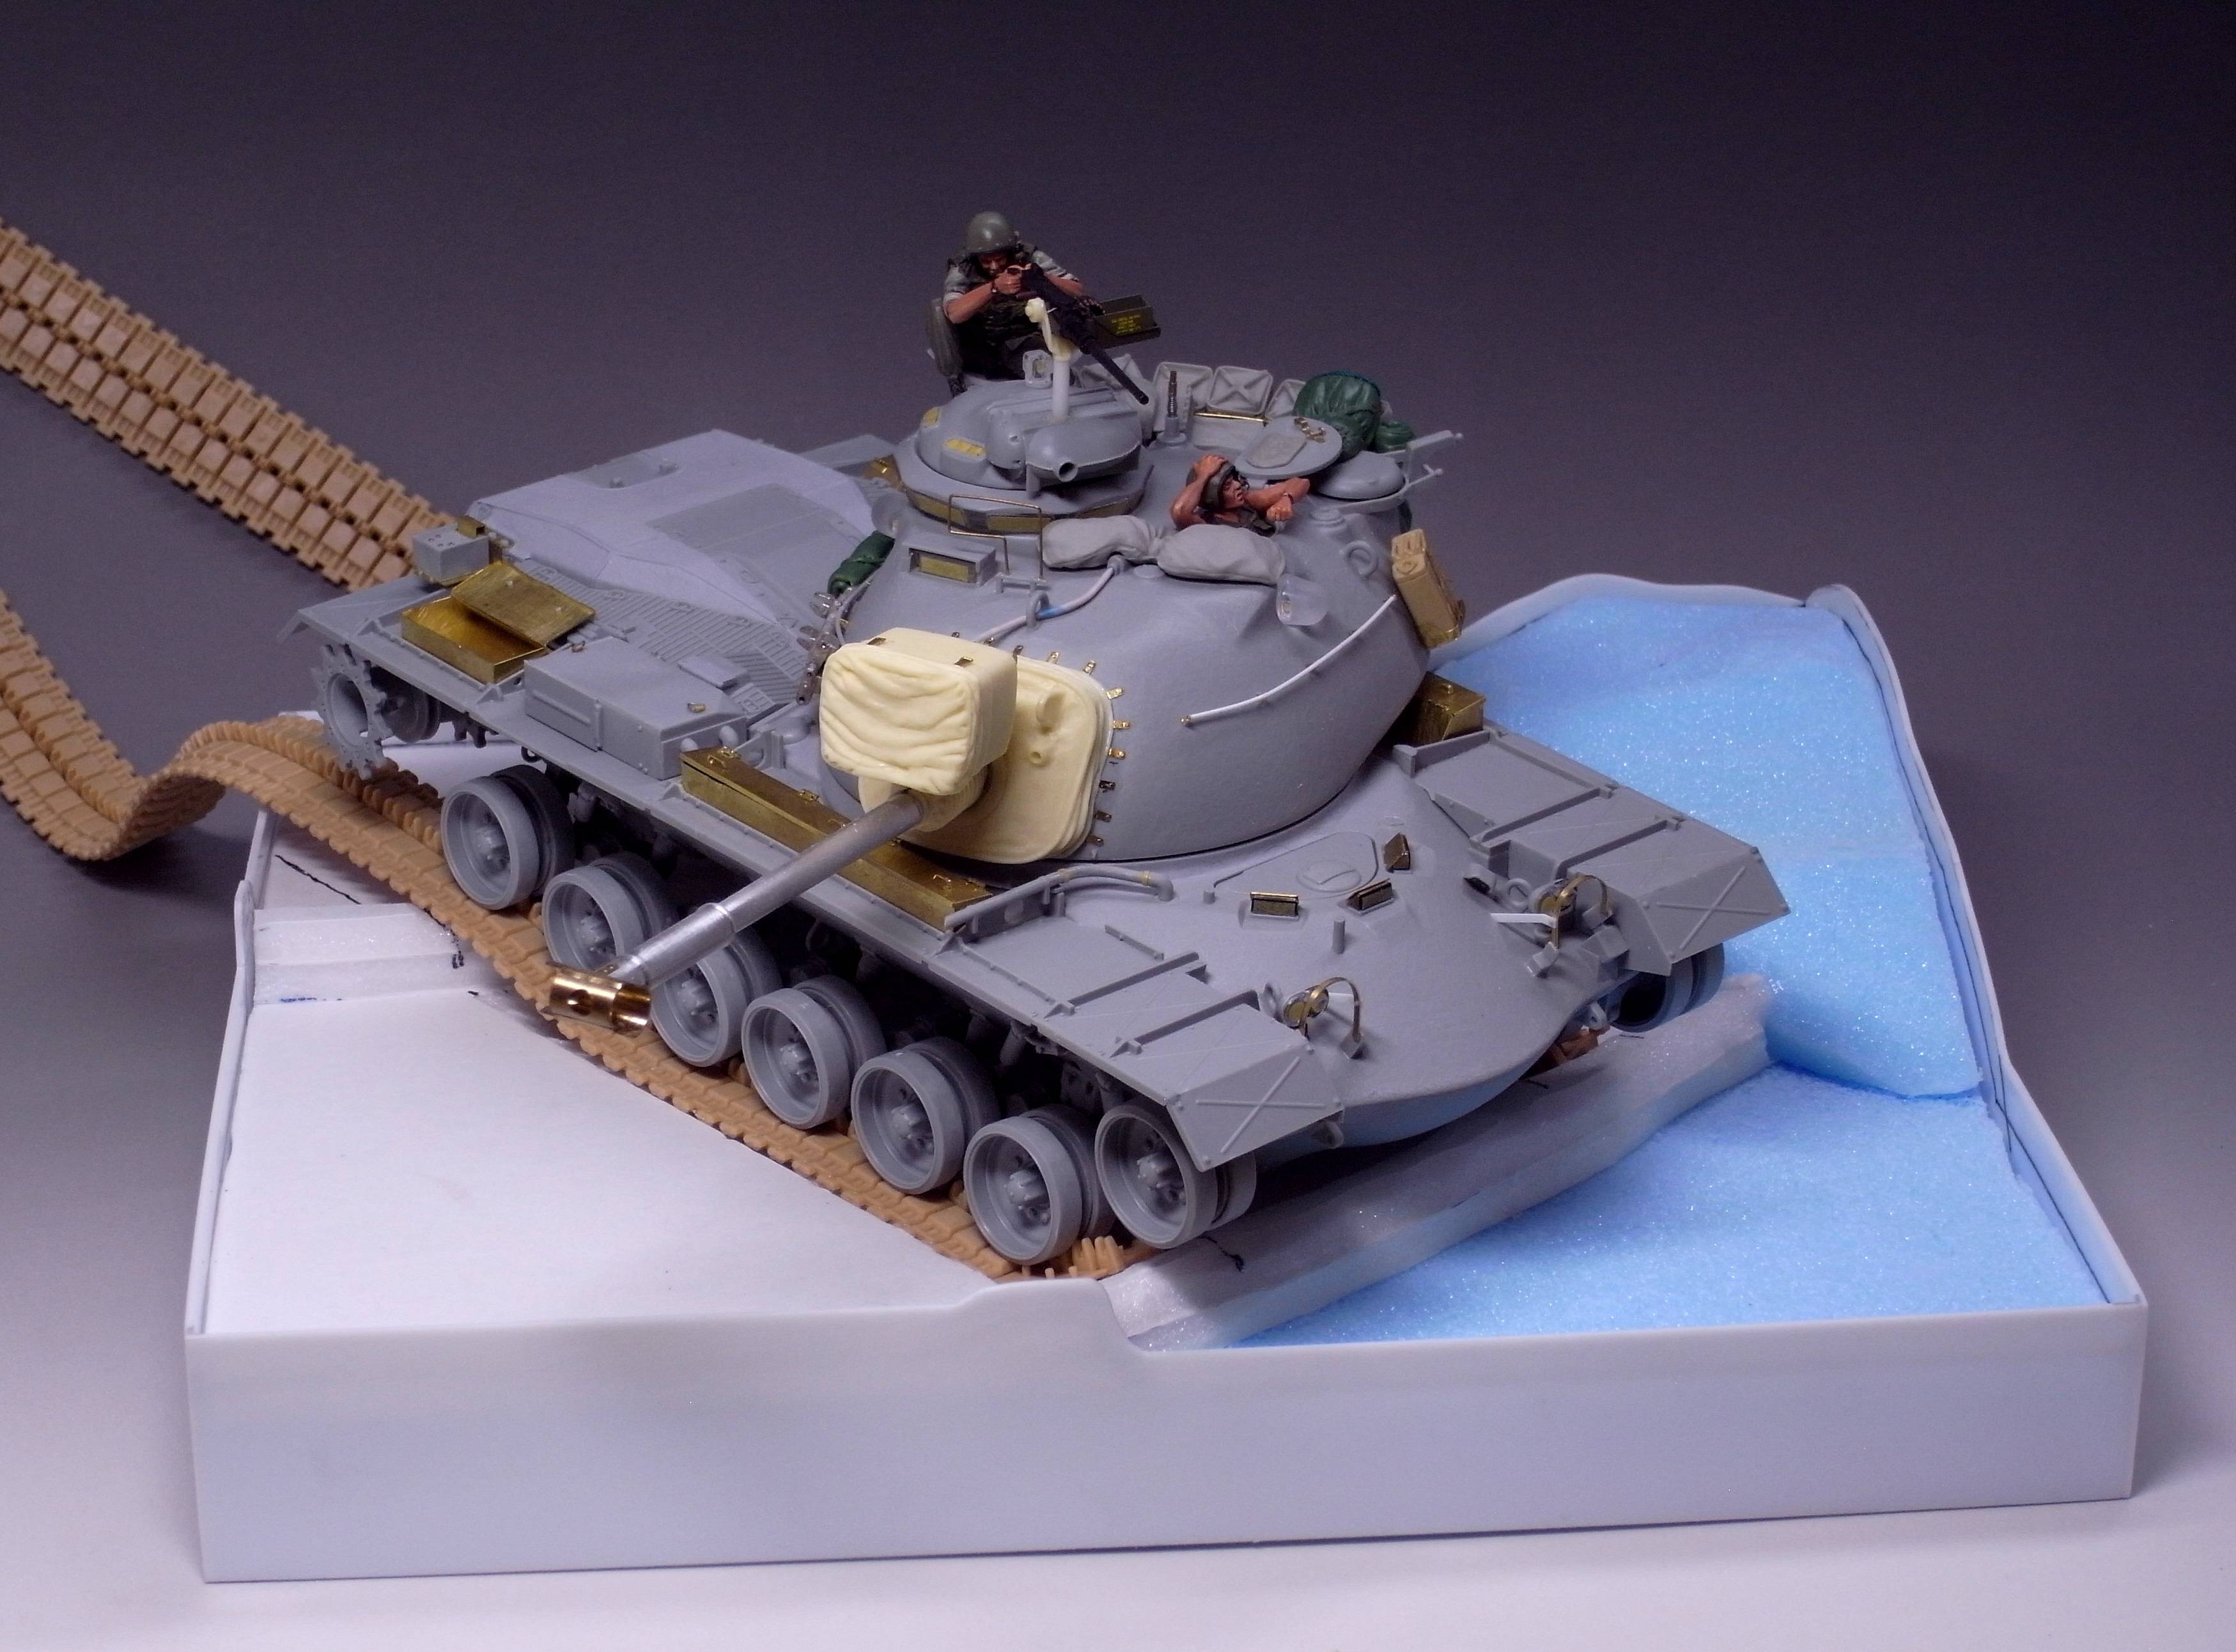
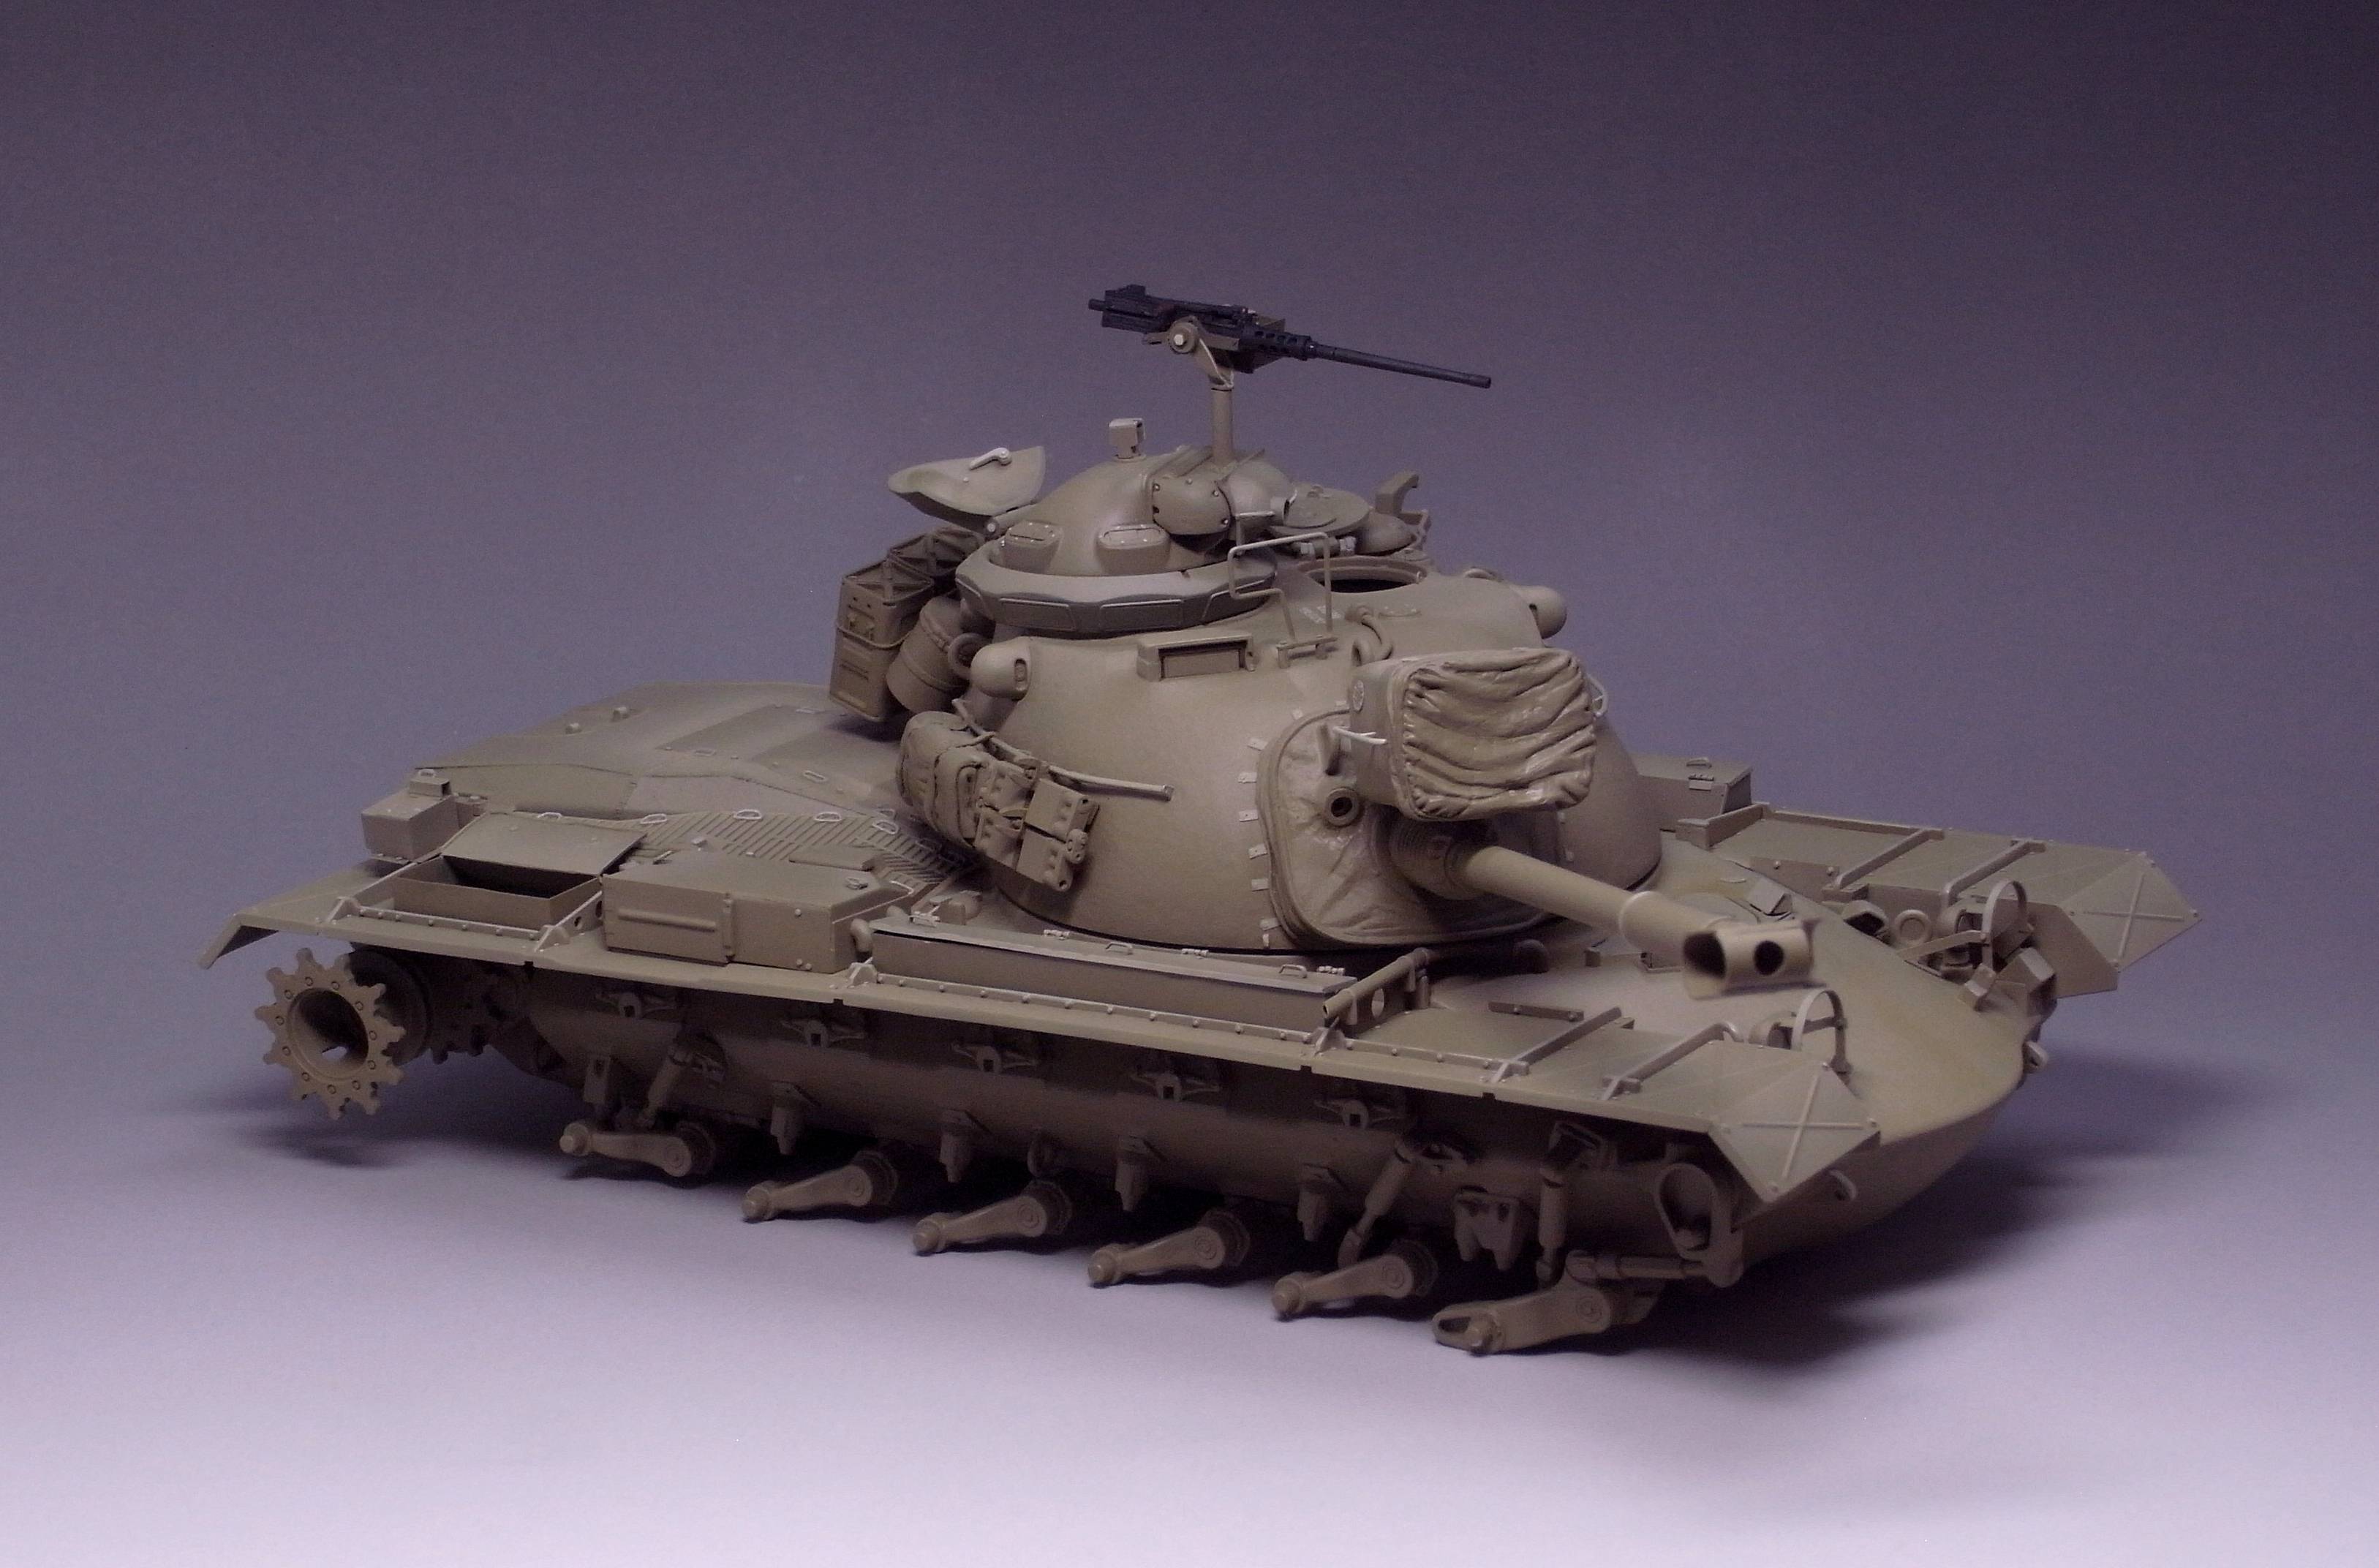
Building the externally mounted 50cal.


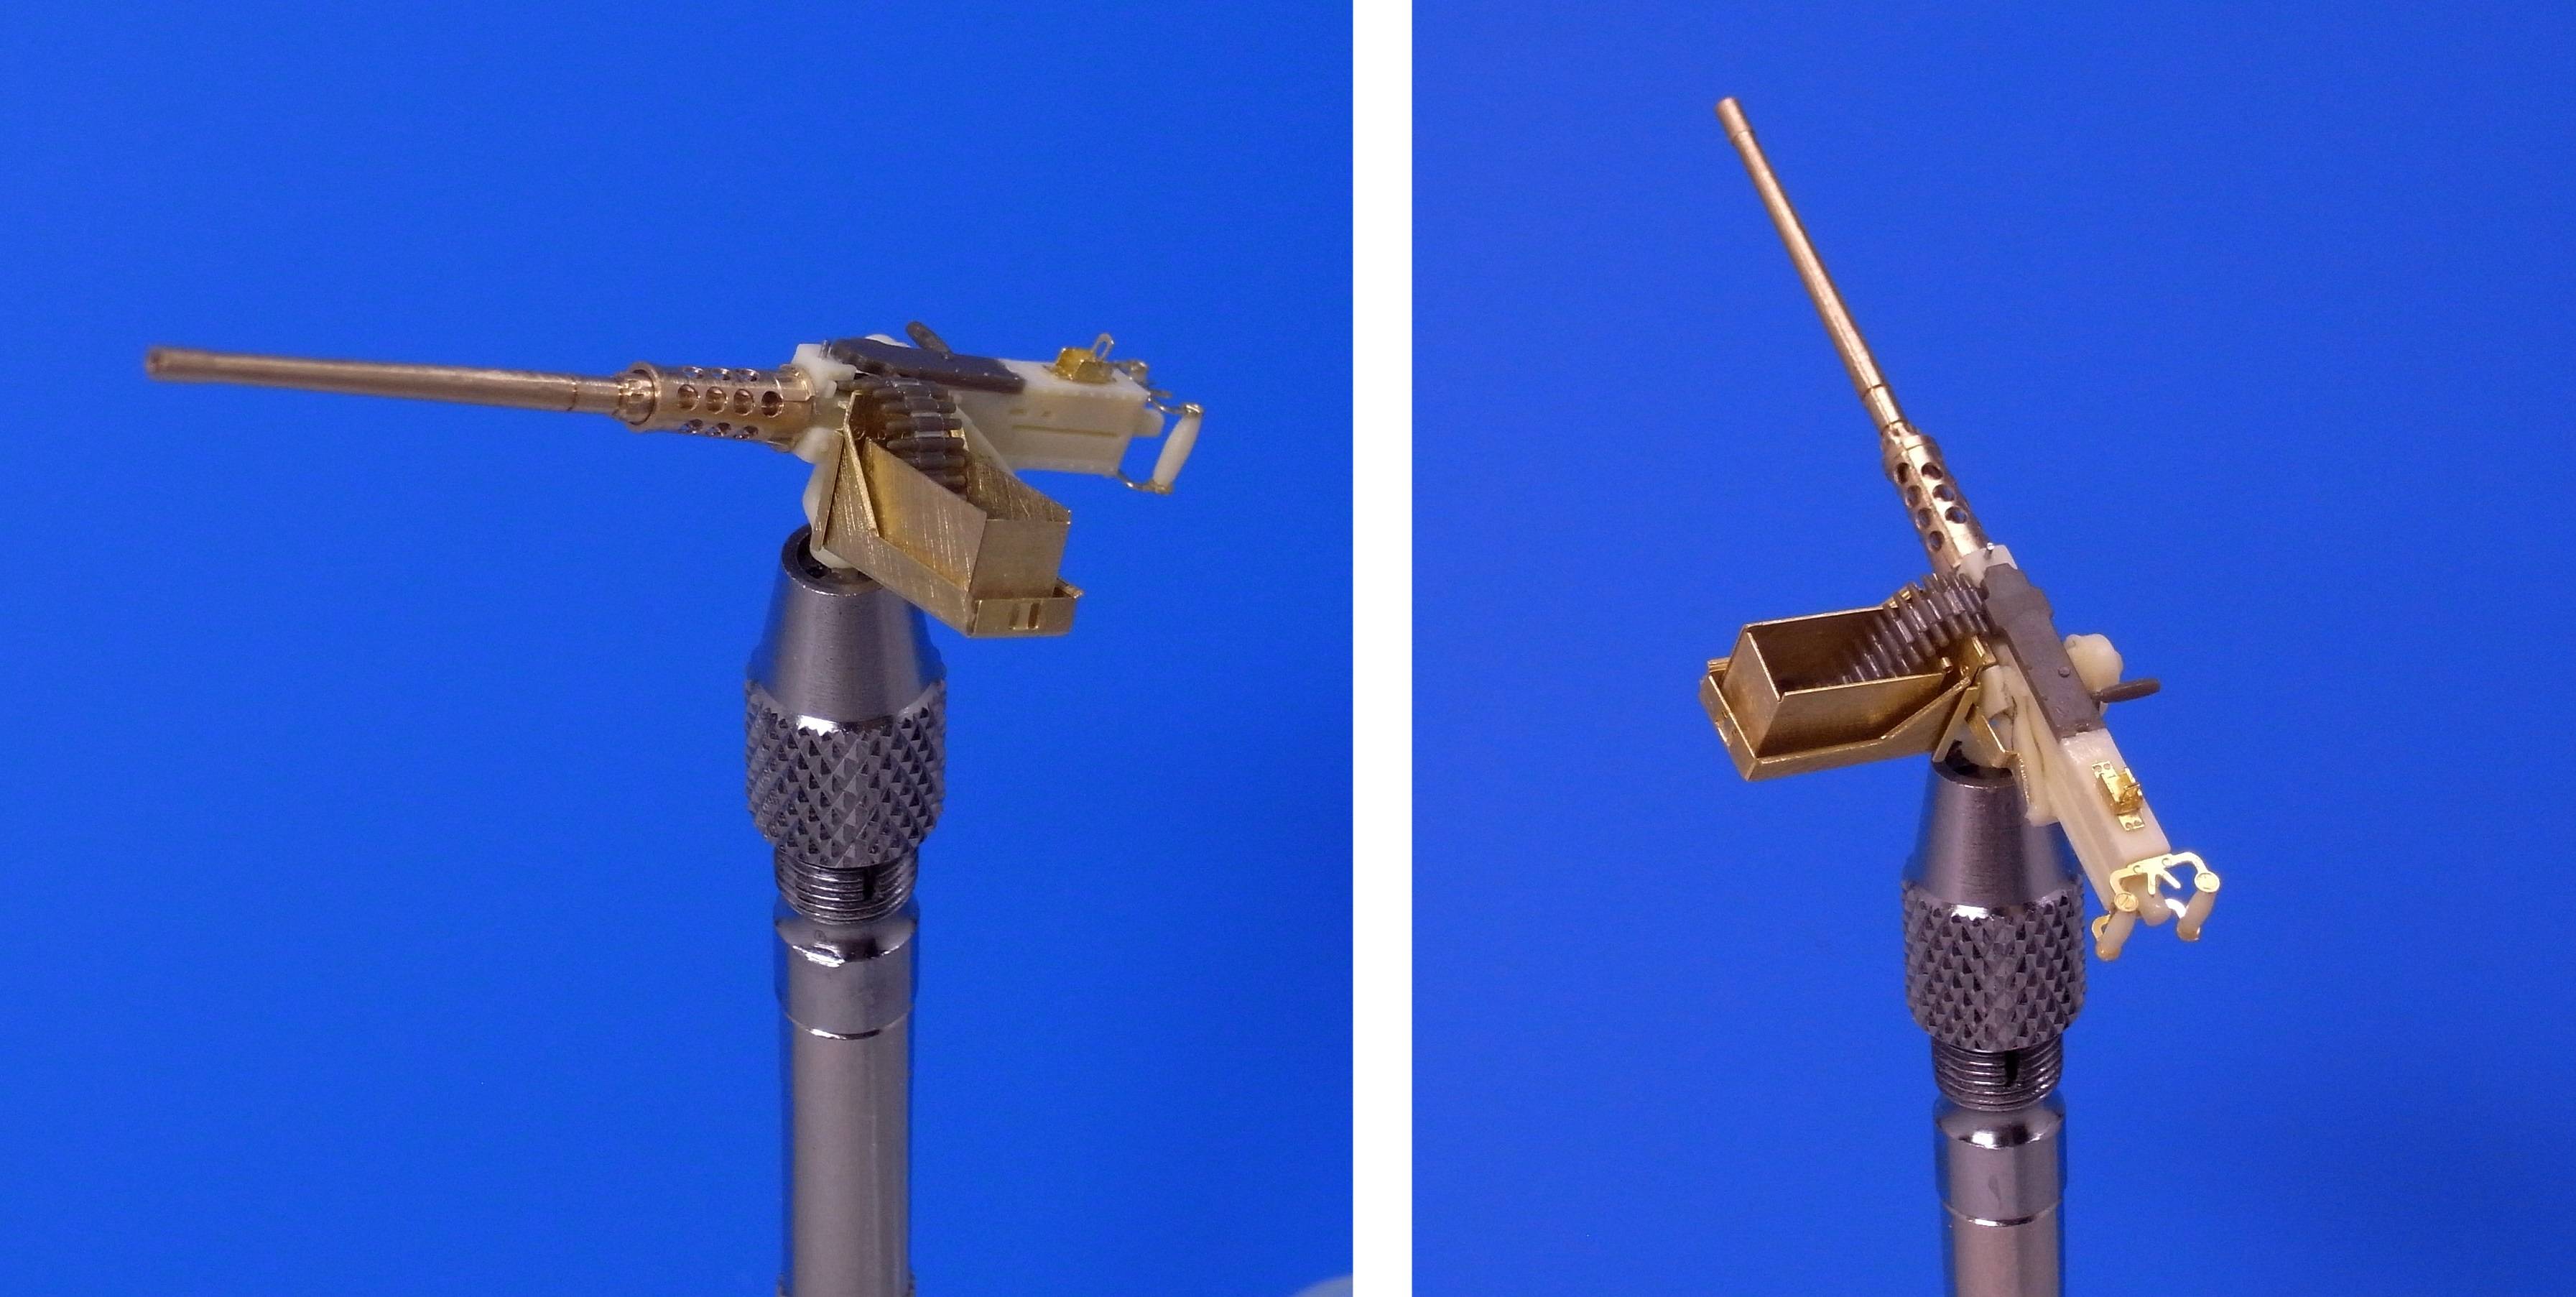
This is a chimera of Voyager barrel and PE, resin parts, Asuka`s 50cal set, etc. I don't think I can build more pimped out 50cal than this one.

With that done, 90% of the tank construction is finished.
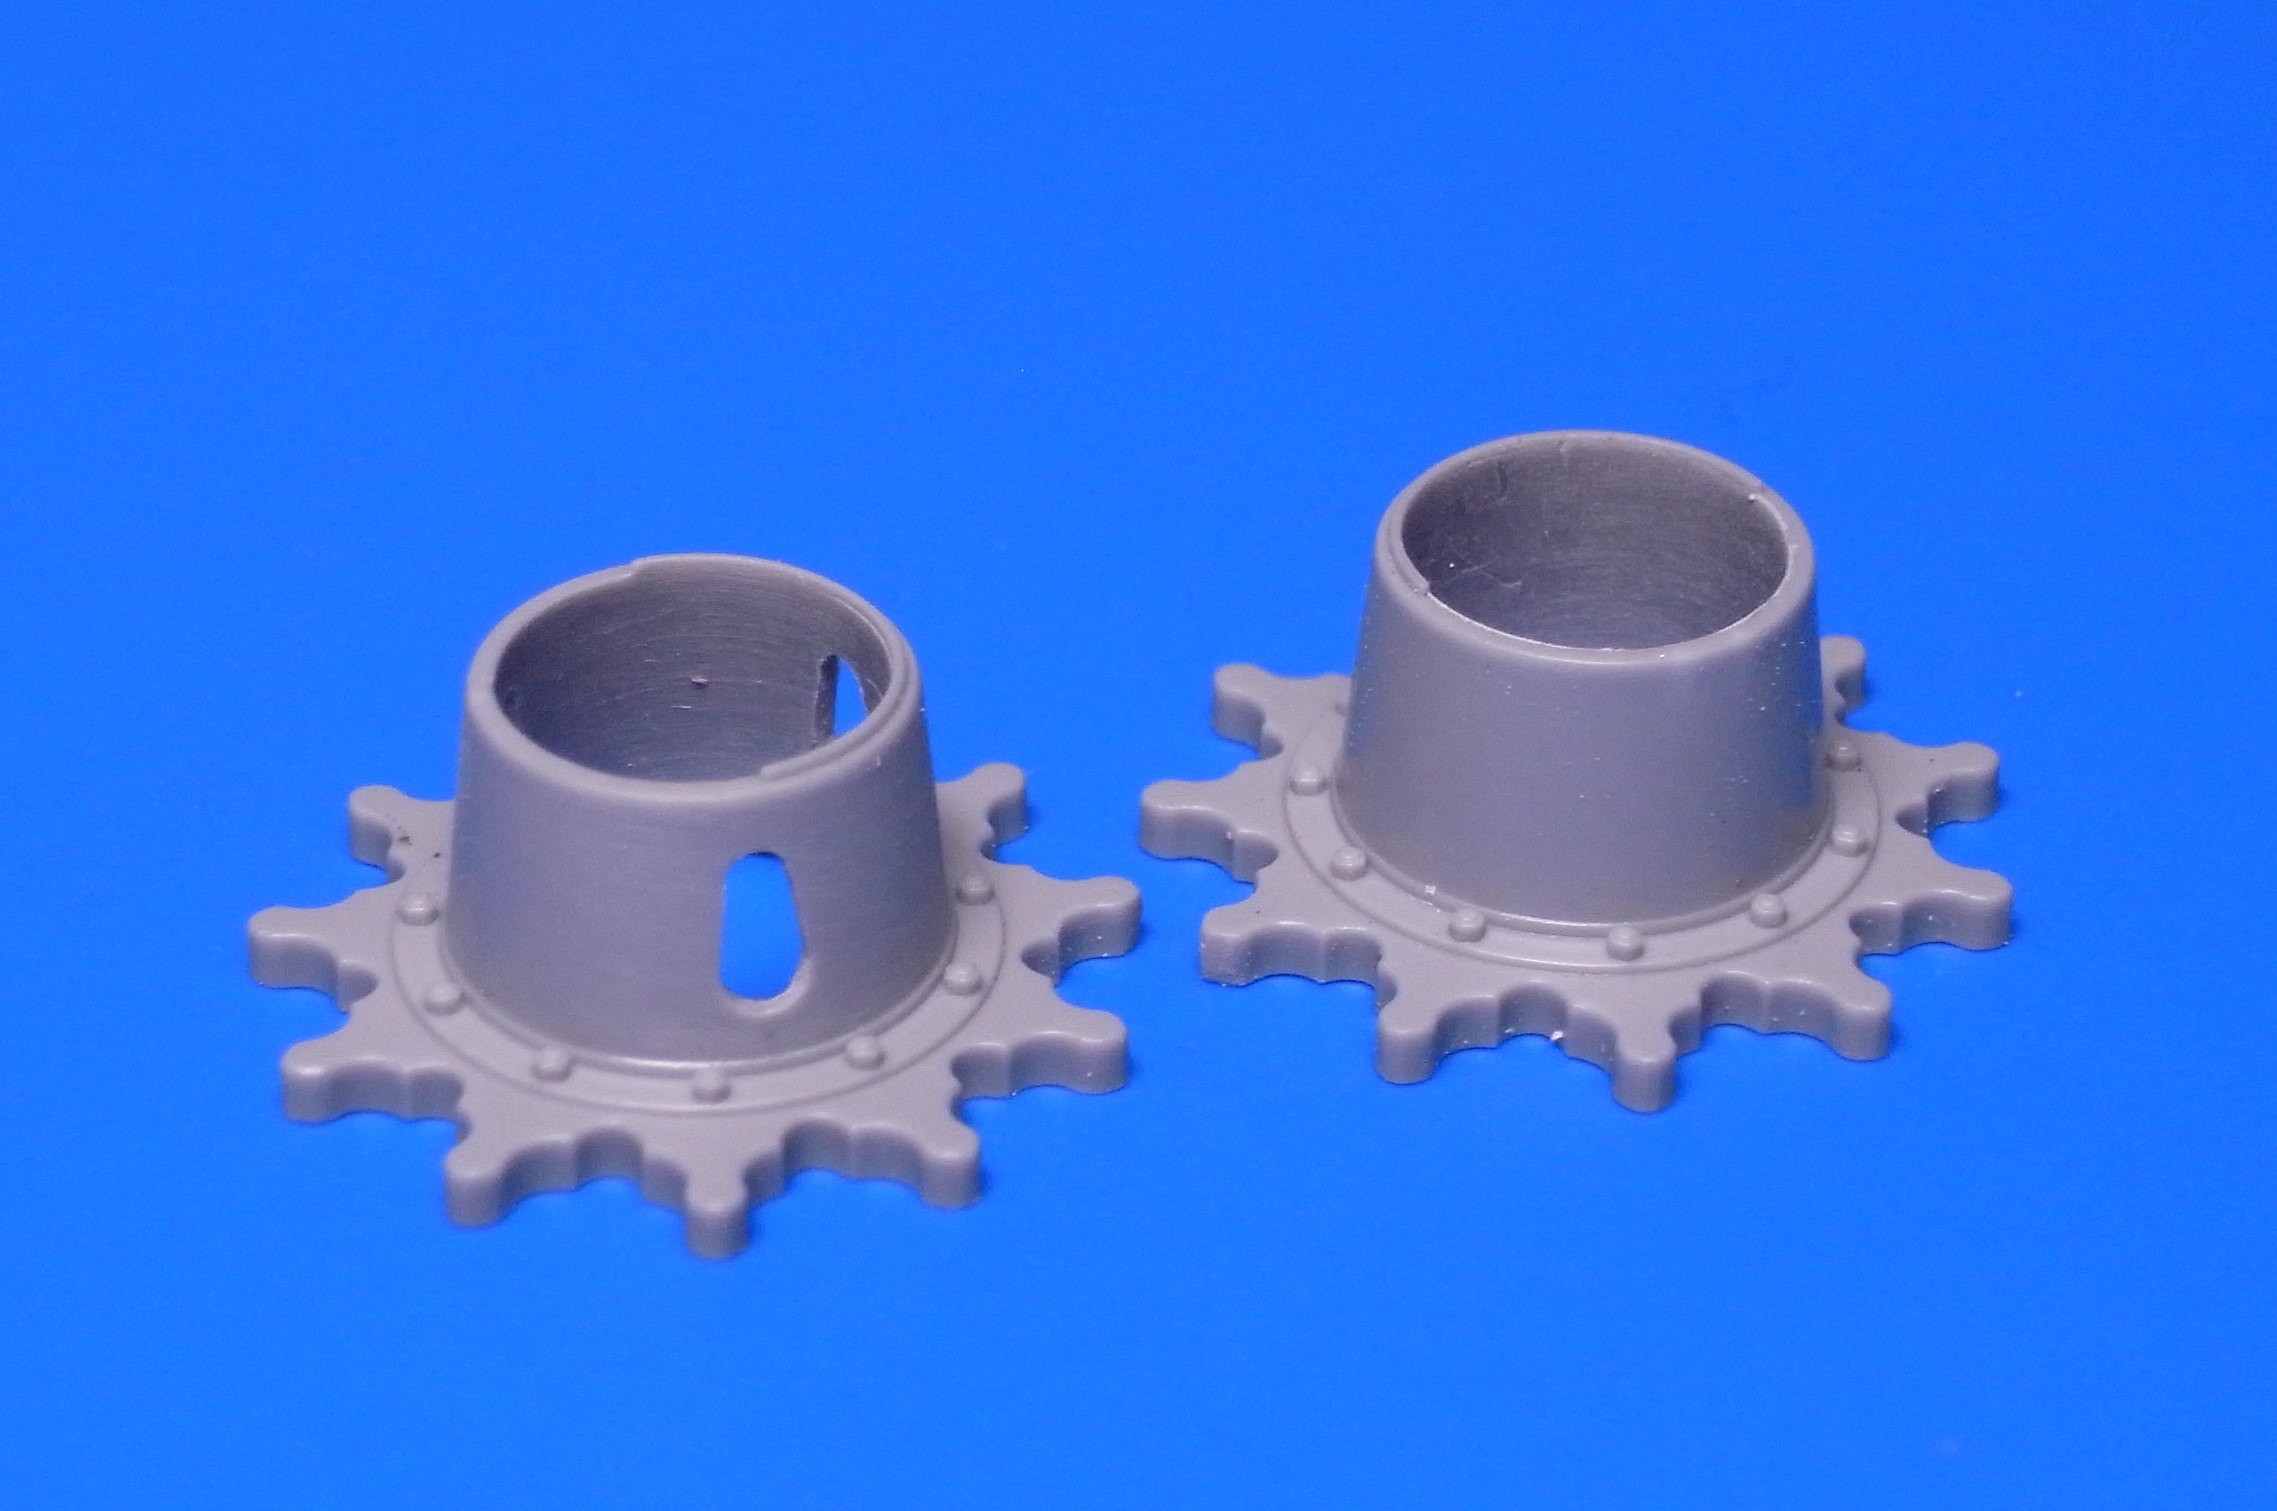
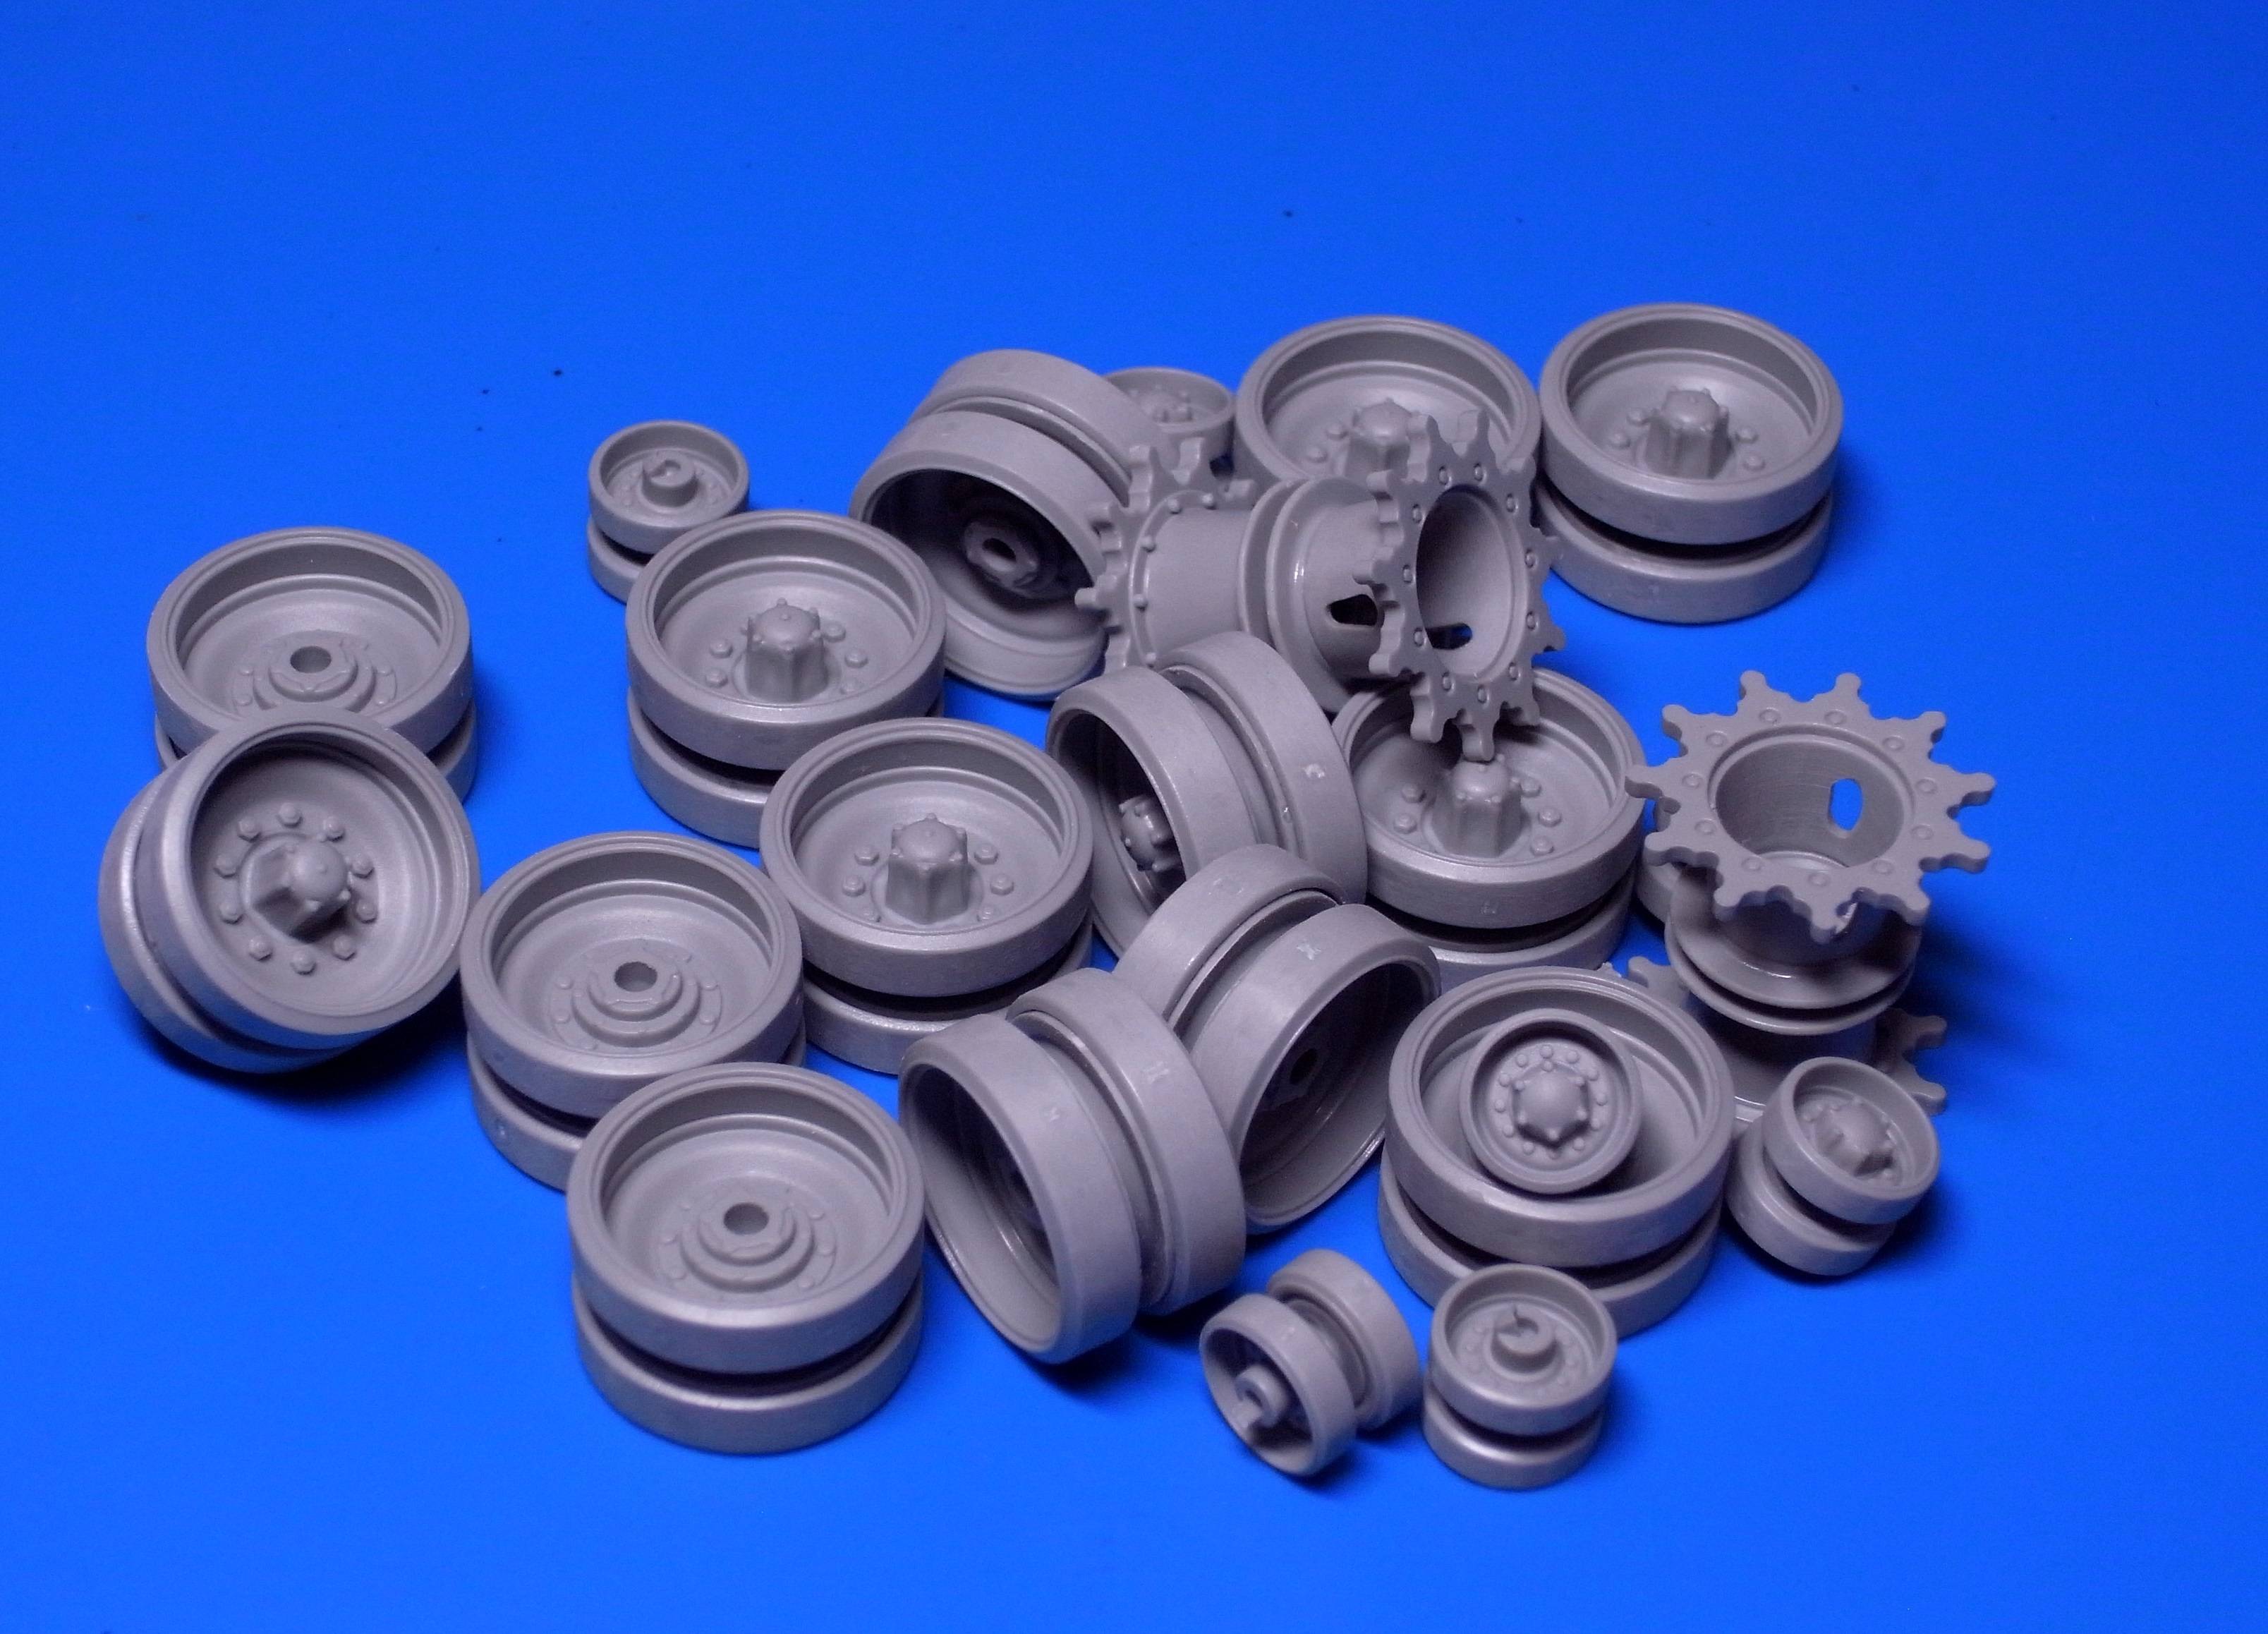
I haven't started with the lower suspension, since I am planning to mount this tank on a diorama.

m4sherman
Visit this Community
Arizona, United States
Joined: January 18, 2006
KitMaker: 1,866 posts
Armorama: 1,808 posts
Posted: Friday, August 18, 2017 - 10:01 PM UTC
Very good work. Those boxes are the air filters for the engine.
27-1025
Visit this Community
North Carolina, United States
Joined: September 16, 2004
KitMaker: 1,281 posts
Armorama: 1,222 posts
Posted: Saturday, August 19, 2017 - 02:04 AM UTC
Nice work. The Voyager set really adds a lot to the kit in addition to your own details.
Luftan
Visit this Community
Aichi-ken, Japan / 日本
Joined: June 04, 2016
KitMaker: 87 posts
Armorama: 76 posts
Posted: Saturday, August 19, 2017 - 07:05 AM UTC
Thank you two. I am glad you are liking the progress so far.

I had some time to spare while I waited for the Legend`s stowage set to arrive. I decided to paint up the 50cal machine-gun as well as the 2 figures from Bravo.


Simple airbrushing and hand painting. The tip of the bullets was painted with Tamiya copper mixed with grey, and some received a red tip to replicate the tracer bullets.

Bravo creates beautiful and life-like figures of the Vietnam era US soldiers. They sell few different figures for the M48 specifically. I decided to go with the "Close Combat" set with 2 figures.

It has been a year and a half since I got back into modelling, and I am slowly getting confident about building/painting armour. However, figures are a different story. They require different kind of artistic skill to achieve a realistic look. For the first time, I am using Vallejo paint.


Compared to Tamiya enamel which I normally use, Vallejo had excellent coverage and lack of brush marks. The only difficulty I had was blending the shadow/base/highlight on the figures. Unlike Tamiya enamel, they do not blend well (or at all) when dried.

You can see the list of colors I used to paint the figures. 3 bottles in the front is what I used for the face/skin.


After a week wait, stowage set from Legend has finally arrived at my home. I have quite enjoyed Legend`s set from my last build on Tamiya`s Panzer.II, so I had high expectations.
However, fiddling around with the resin stowage revealed a crucial problem. The big stowage chunk simply didn't fit inside the rear basket.


The voyager PE set has drastically changed the shape of the stowage basket compared to the original plastic parts. I tried trimming off the underside of the resin stowages, but it still did not achieve a clean fit. I needed to somehow blend in the open gaps using putty and other materials.


Green stuff is a 2 part Duro putty. I never self-made stowage before, but YouTube videos helped me tremendously. They also recommended Duro putty for its easy use. Its not perfect, but I was able to use part of the resin stowage, and made it look ok.

JSSVIII
Visit this Community
Massachusetts, United States
Joined: March 28, 2007
KitMaker: 1,169 posts
Armorama: 1,067 posts
Posted: Saturday, August 19, 2017 - 04:48 PM UTC
You really solved the stowage fit problems Luftan, looks great!
sgtreef
Visit this Community
Oklahoma, United States
Joined: March 01, 2002
KitMaker: 6,043 posts
Armorama: 4,347 posts
Posted: Saturday, August 19, 2017 - 05:42 PM UTC
Nice work so far.
As I have two of these to build Dragon, and Tamiya, will keep an eye on it.
But no PE for me.
How do the tracks fit?
Cheers
Kenaicop
#384
Visit this Community
Nevada, United States
Joined: August 23, 2005
KitMaker: 1,426 posts
Armorama: 1,316 posts
Posted: Saturday, August 19, 2017 - 08:11 PM UTC
Really loving this build, can't wait to see it under paint. Great job.
Armorsmith
Visit this Community
Pennsylvania, United States
Joined: April 09, 2015
KitMaker: 1,063 posts
Armorama: 1,000 posts
Posted: Saturday, August 19, 2017 - 08:18 PM UTC
Great stuff. I have this in the stash so your build is very informative. Thanks
Luftan
Visit this Community
Aichi-ken, Japan / 日本
Joined: June 04, 2016
KitMaker: 87 posts
Armorama: 76 posts
Posted: Saturday, August 19, 2017 - 10:35 PM UTC
Thank you guys for the encouragement

@Jeff
The DS track Dragon supply is good enough for display use. The M48 doesn't have much sag on their tracks, so no need for after market indie links. However, since Im building this up for a diorama, I purchased Friul metal track.


At this point, I had to start working on the diorama base so I could get my hands on the tank`s suspension system. I have never built a proper diorama in the past, except for this tiny 1/72 vignette.


Since there is a specific sub section for diorama builds, I won't be posting much about the base construction. (Im I allowed to include diorama build on this post?)

To keep it simple, I built the base from 3mm plastic sheet and some styrofoam. I wanted to avoid wood work since they would require me to purchase extra set of tools.


The kit suspension is not designed to be moved. The 3 axis in the middle are easy to modify, but other axis has extra arm supporting them. I was able to somewhat fit the suspension to the ground..

With the suspension system finished, I can finally start putting paint on the M48. Airbrushing is always fun but challenging to me. I like trying out different techniques, but Im getting more and more into colour modulation.
Colour modulation is a technique frequently used in in-game texturing for 3D models. This is quite popular here in Japan. But you need to be careful, as over doing it will make your tank look too "artsy".


M48 is a round tank rather than it being square. So colour modulation isn't really visible except for the top engine deck.
For the olive drab, I mixed Mr.Color 304 & 128(1:1). If I want a darker tone, I would add the ratio for 304. If I need highlight, 128 ratio would be bigger. Quite simple.


This is how my M48 looks as of now. I recently started my first full time job, so its difficult to find time and energy to fiddle around with the model. But I`ll continue my work and post the progress here
Dragon164
#226
Visit this Community
British Columbia, Canada
Joined: February 20, 2012
KitMaker: 1,909 posts
Armorama: 1,066 posts
Posted: Sunday, August 20, 2017 - 12:28 AM UTC
Looks Good! Luftan

For resizing your pictures get a program called PhotoRazor it's free and can batch resize all your pics.

Cheers Rob.
JSSVIII
Visit this Community
Massachusetts, United States
Joined: March 28, 2007
KitMaker: 1,169 posts
Armorama: 1,067 posts
Posted: Sunday, August 20, 2017 - 12:38 AM UTC

Quoted Text


This is how my M48 looks as of now. I recently started my first full time job, so its difficult to find time and energy to fiddle around with the model. But I`ll continue my work and post the progress here


Good luck with your new job Luftan, I hope it won't take up too much of your free time, you're doing nice work!
pzandt
Visit this Community
United States
Joined: January 02, 2013
KitMaker: 68 posts
Armorama: 57 posts
Posted: Sunday, August 20, 2017 - 12:45 AM UTC
Looks good! I look forward to following your progress.
Blade48mrd
Visit this Community
Washington, United States
Joined: September 03, 2004
KitMaker: 1,185 posts
Armorama: 810 posts
Posted: Tuesday, August 22, 2017 - 01:25 AM UTC
Luftan -

An outstanding and inspiring job. Your attention to detail and precise techniques make this a pleasure to follow. You've really got a special 'knack' for all this with your modeling skills, complimented by scratch building, figure painting, and I'm quite sure, a talent for dioramas as well. I've been working on a IDF Magach and really enjoy the Voyager sets. Also have plans for a M48A3 for the upcoming "Vietnam 50th Anniversary" Campaign so your build has been extremely helpful. Good luck with the new job and anxious for more on the build. Thanks for sharing,

Mike
Gore_X
Visit this Community
Hessen, Germany
Joined: September 15, 2015
KitMaker: 64 posts
Armorama: 62 posts
Posted: Tuesday, August 22, 2017 - 01:32 AM UTC
I agree with the others: It´s an outstanding job.The details are impressive and i especially like what you did with the figures.
I´m looking forward to the next steps.
Kevlar06
Visit this Community
Washington, United States
Joined: March 15, 2009
KitMaker: 3,670 posts
Armorama: 2,052 posts
Posted: Tuesday, August 22, 2017 - 02:46 AM UTC
Luftan,
You're doing great work, and it looks excellent, especially your figures. However, I have one comment-- the weld seams on the rear deck-- I believe the rear deck on the M-48A3 is cast, not welded, just like the M-60 deck. It's actually a one piece affair that's removed to pull the engine-- therefore no weld seams. I realize I'm late to the "party" -- and they are not readily noticeable, so it probably won't make any difference.
VR, Russ
barkingdigger
Staff MemberAssociate Editor
ARMORAMA
#013
Visit this Community
England - East Anglia, United Kingdom
Joined: June 20, 2008
KitMaker: 3,981 posts
Armorama: 3,403 posts
Posted: Tuesday, August 22, 2017 - 03:37 AM UTC
IIRC the deck is cast in four sections, which are welded together to make a single piece that is indeed lifted off for access to the engine. The front half (with the top access panels) is a single cast part (the access panels are rolled sheet), while the rear half is made of two side pieces and a "roof" section. There is a weld across between the front and rear halves, and welds on each side of the "roof" about 3 or 4 inches in from the edges. These are fairly subtle welds, best mimicked in plastic with 0.020" rod set in shallow grooves. Pity there's no 0.020" half-round out there...
Kevlar06
Visit this Community
Washington, United States
Joined: March 15, 2009
KitMaker: 3,670 posts
Armorama: 2,052 posts
Posted: Tuesday, August 22, 2017 - 05:32 AM UTC

Quoted Text

IIRC the deck is cast in four sections, which are welded together to make a single piece that is indeed lifted off for access to the engine. The front half (with the top access panels) is a single cast part (the access panels are rolled sheet), while the rear half is made of two side pieces and a "roof" section. There is a weld across between the front and rear halves, and welds on each side of the "roof" about 3 or 4 inches in from the edges. These are fairly subtle welds, best mimicked in plastic with 0.020" rod set in shallow grooves. Pity there's no 0.020" half-round out there...


Yes-- I agree they are just a "bead" weld, not a wide weld. Not sure if you want to change it at this point. I also note there are some very subtle tie downs represented at the rear of the turret bustle just above the rack. They can be represented by thin styrene rod, but I think you're going to cover them with additional gear anyway so it doesn't really matter. Sorry to "nit pick" at this late point. You are doing great work though-- especially the figures. As far as the seachlight cover goes, I agree it should be flatter, but I suppose the canvass would sag if the hard insert was removed or worn out.
VR, Russ
sgtreef
Visit this Community
Oklahoma, United States
Joined: March 01, 2002
KitMaker: 6,043 posts
Armorama: 4,347 posts
Posted: Tuesday, August 22, 2017 - 05:16 PM UTC
Getting better indeed, nice work, have you tried Spade Ace tracks a little cheaper, and not handed, so hole goes all the way thru.
Nice paint job, like that lighter then that nasty OD green dark semi gloss color. LOL.
You could try and make a new cover with epoxy putty, as you still have the original to fall back on, if so desired.
Was it a bear to apply all those little brass deals around the Mantle cover? Looks like it to me.Thanks for the heads up on the tracks Luftan


Cheers

 _GOTOTOP