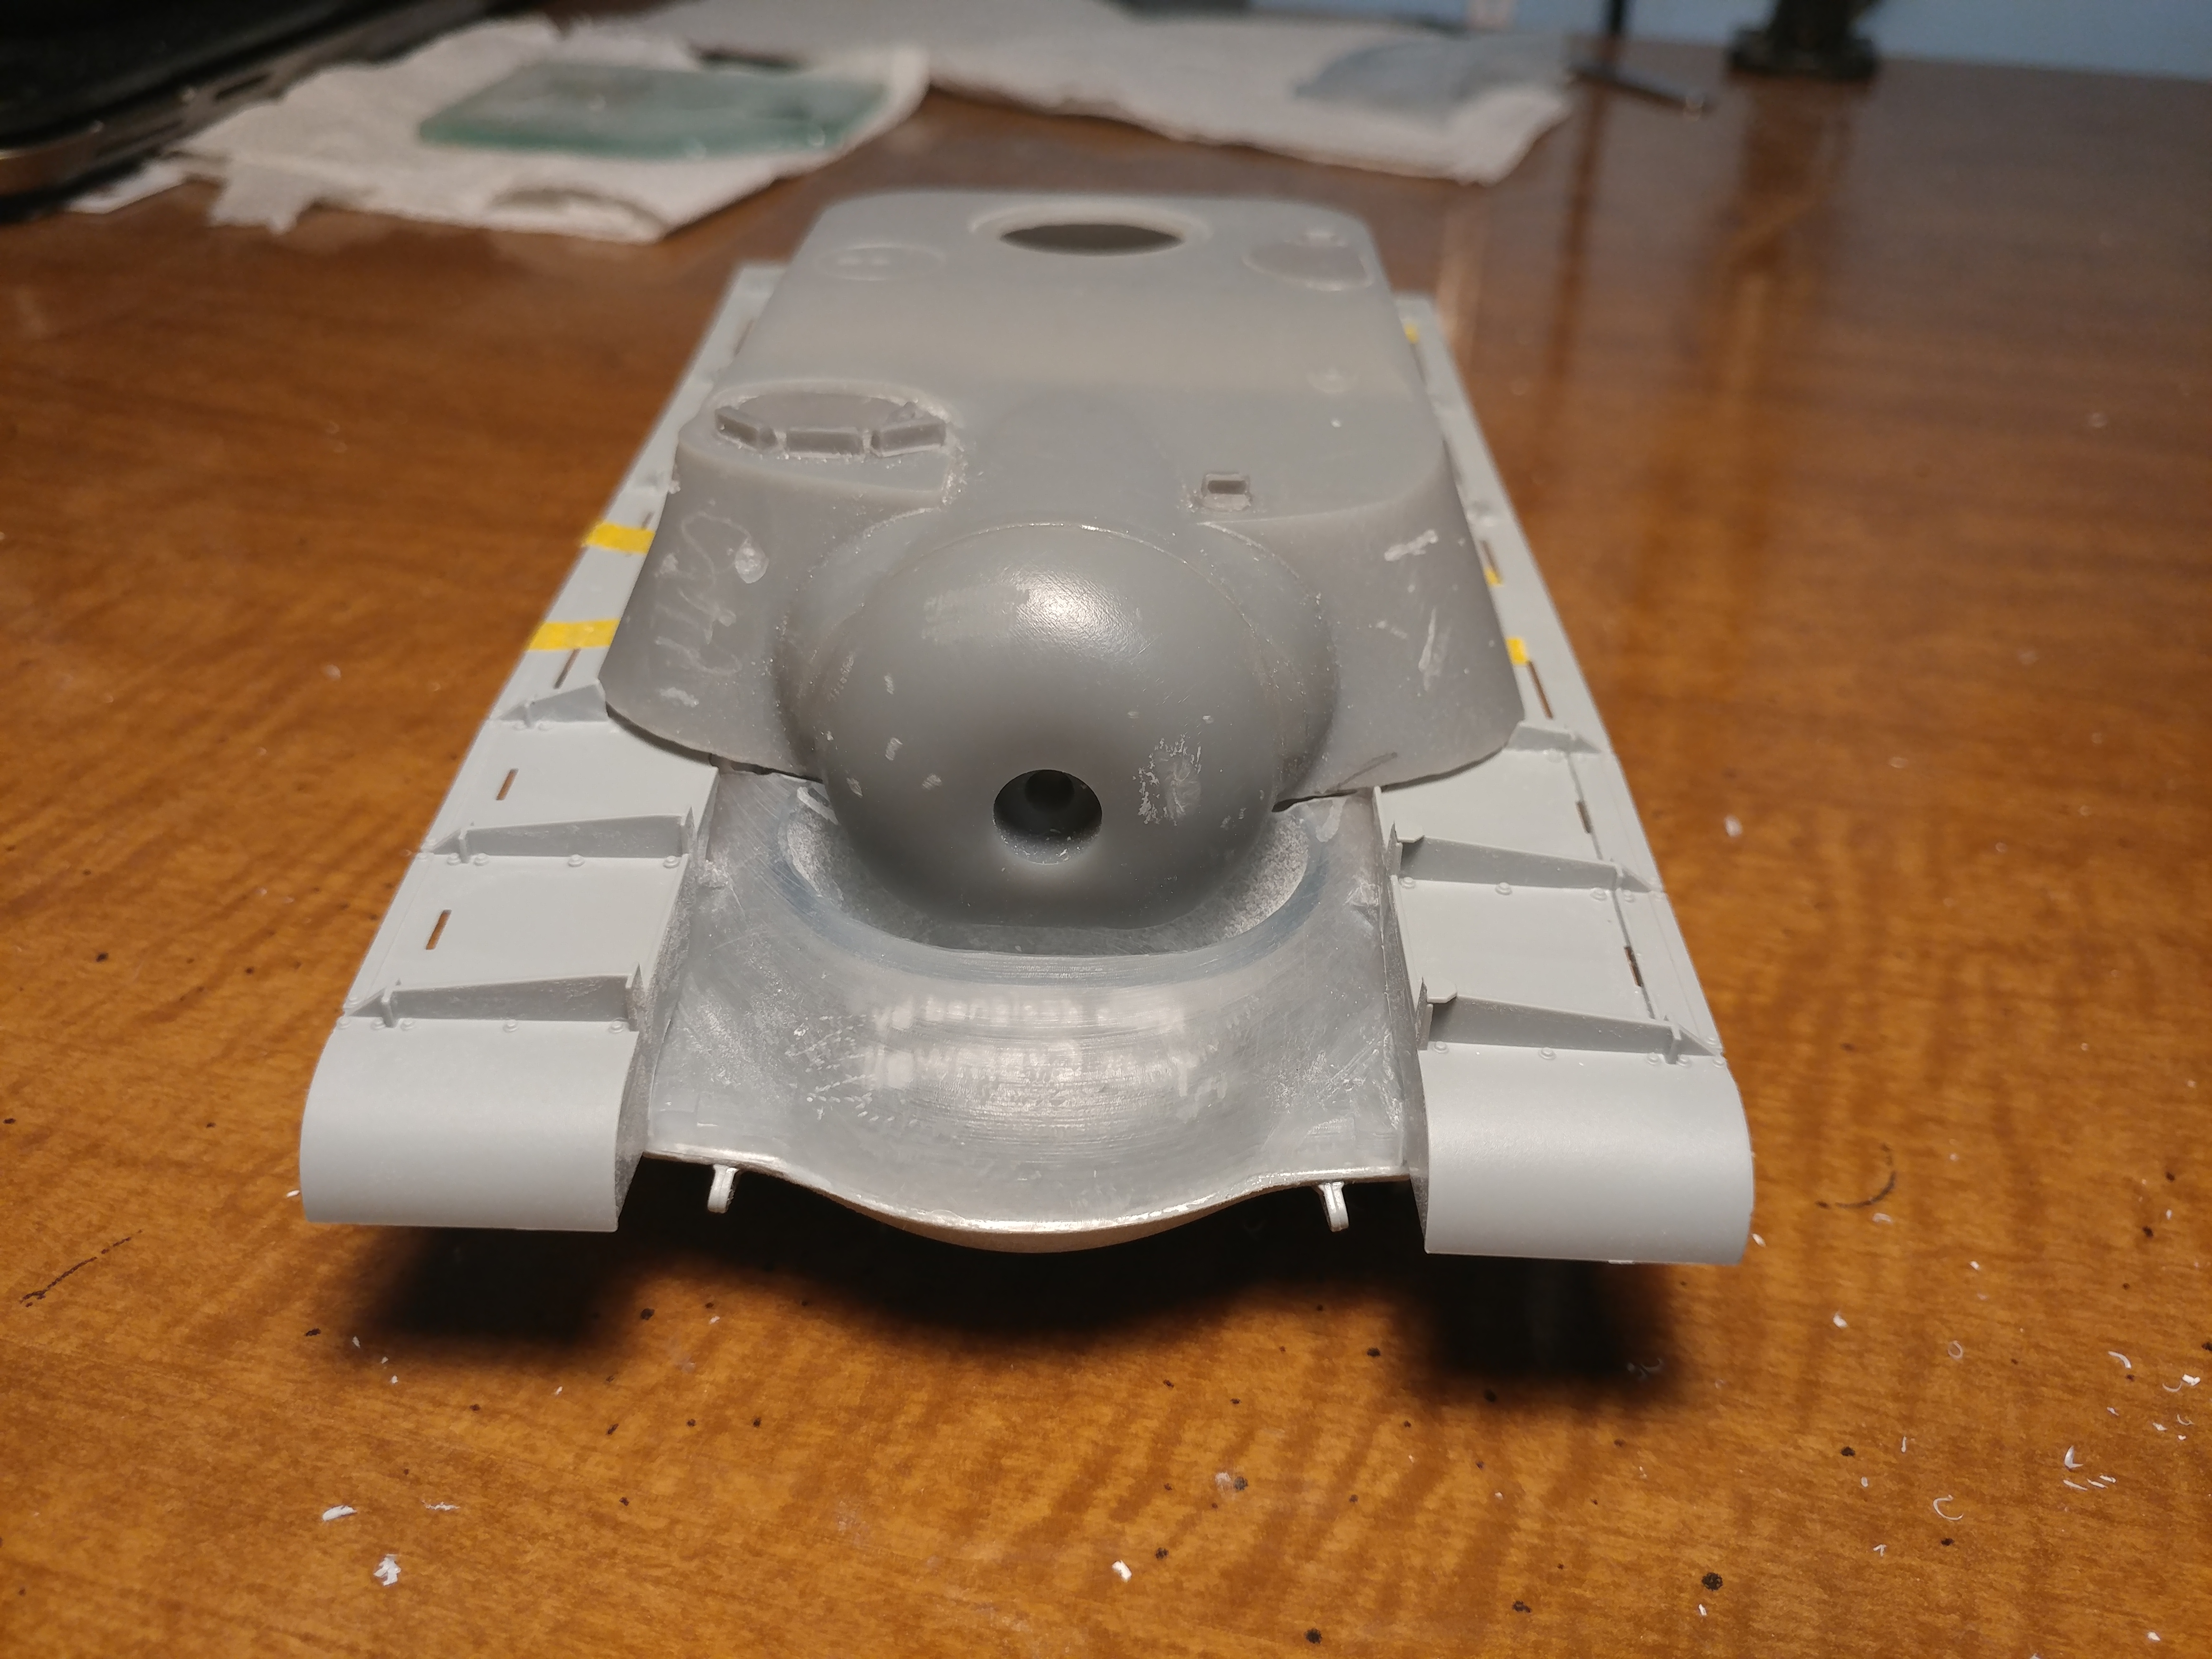
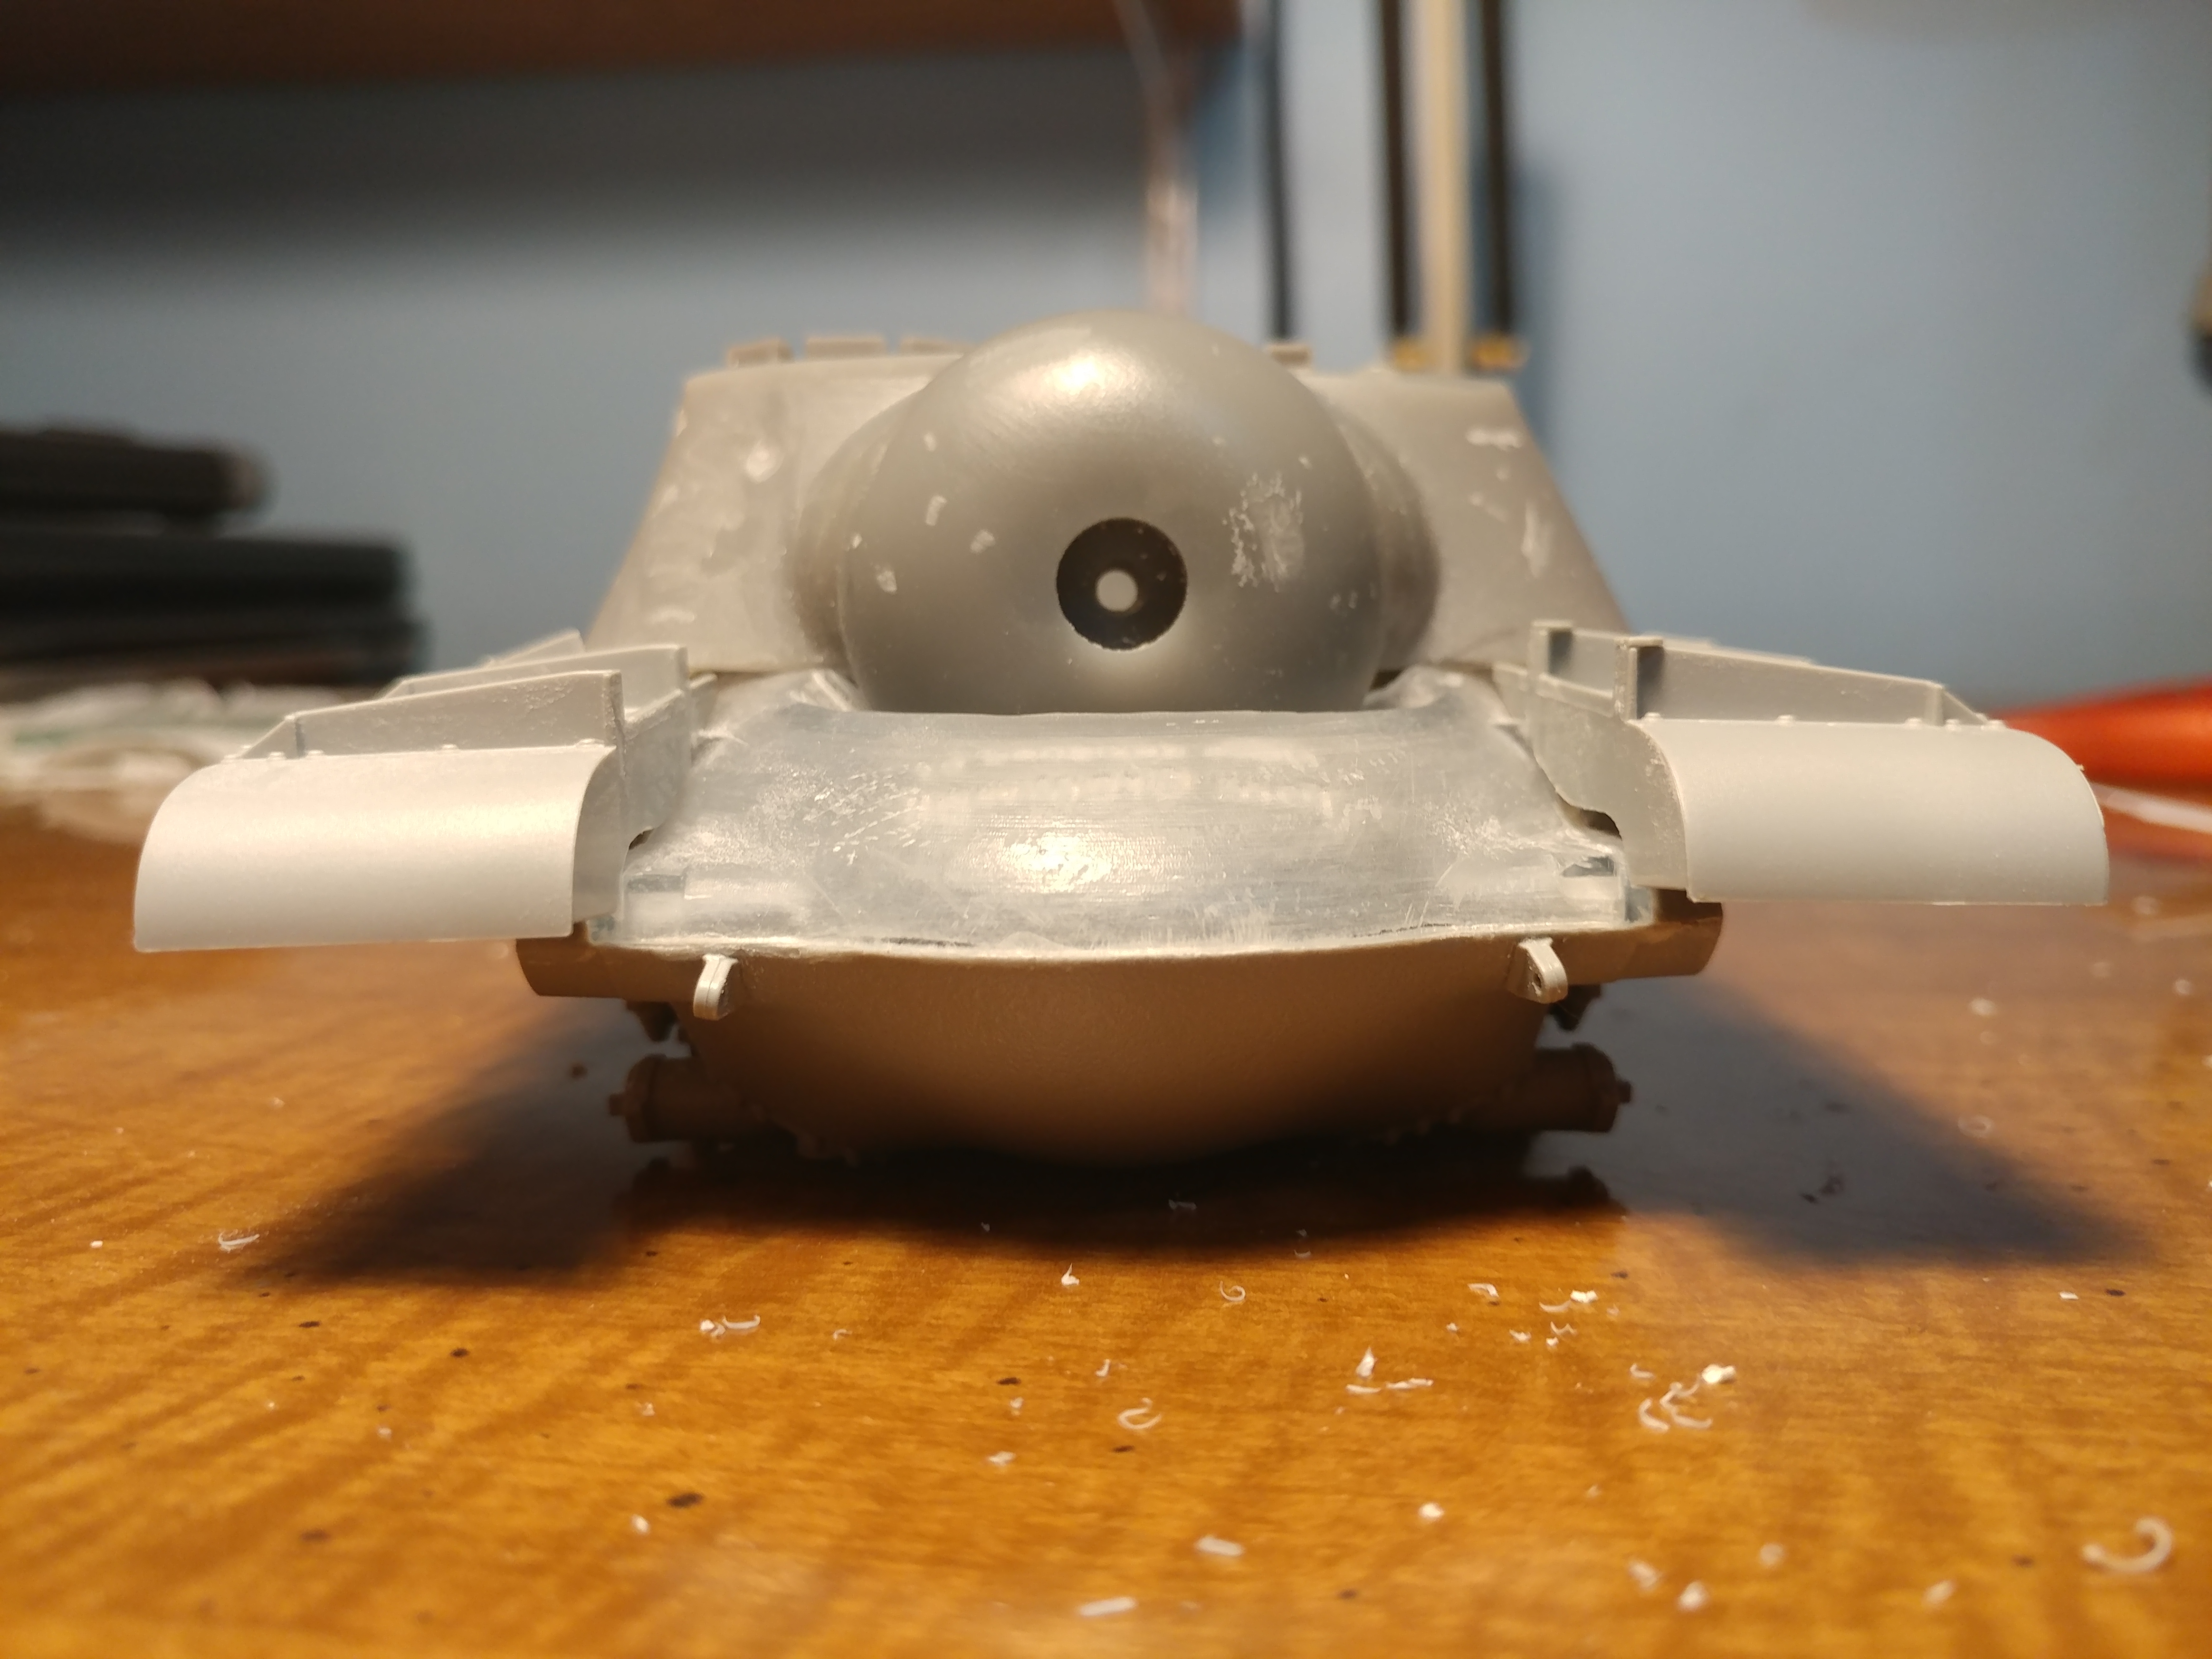
3D Printed 1/35 T110E3 (T110E4) Conversion
New York, United States
Joined: May 27, 2013
KitMaker: 2,210 posts
Armorama: 1,712 posts
Posted: Monday, August 21, 2017 - 12:50 AM UTC
So almost a year after finishing the 3D model, I finally have enough of the parts together to start the conversion. What I'm using is Dragons great 1/35 M48A1 kit and printed parts to create a T110E4 heavy casemate tank. In the WoT world it's known as the T110E3 tank destroyer but it's wrong... What else is new?
Obligatory shout-out: The nose section of this model was designed by Tom Cromwell I simply edited a few areas to make it fit the conversion. It was just too complex for me to model completely.
Here's the start including the parts being used. There are actually more parts than you see but they are all small parts like hatches and periscopes.

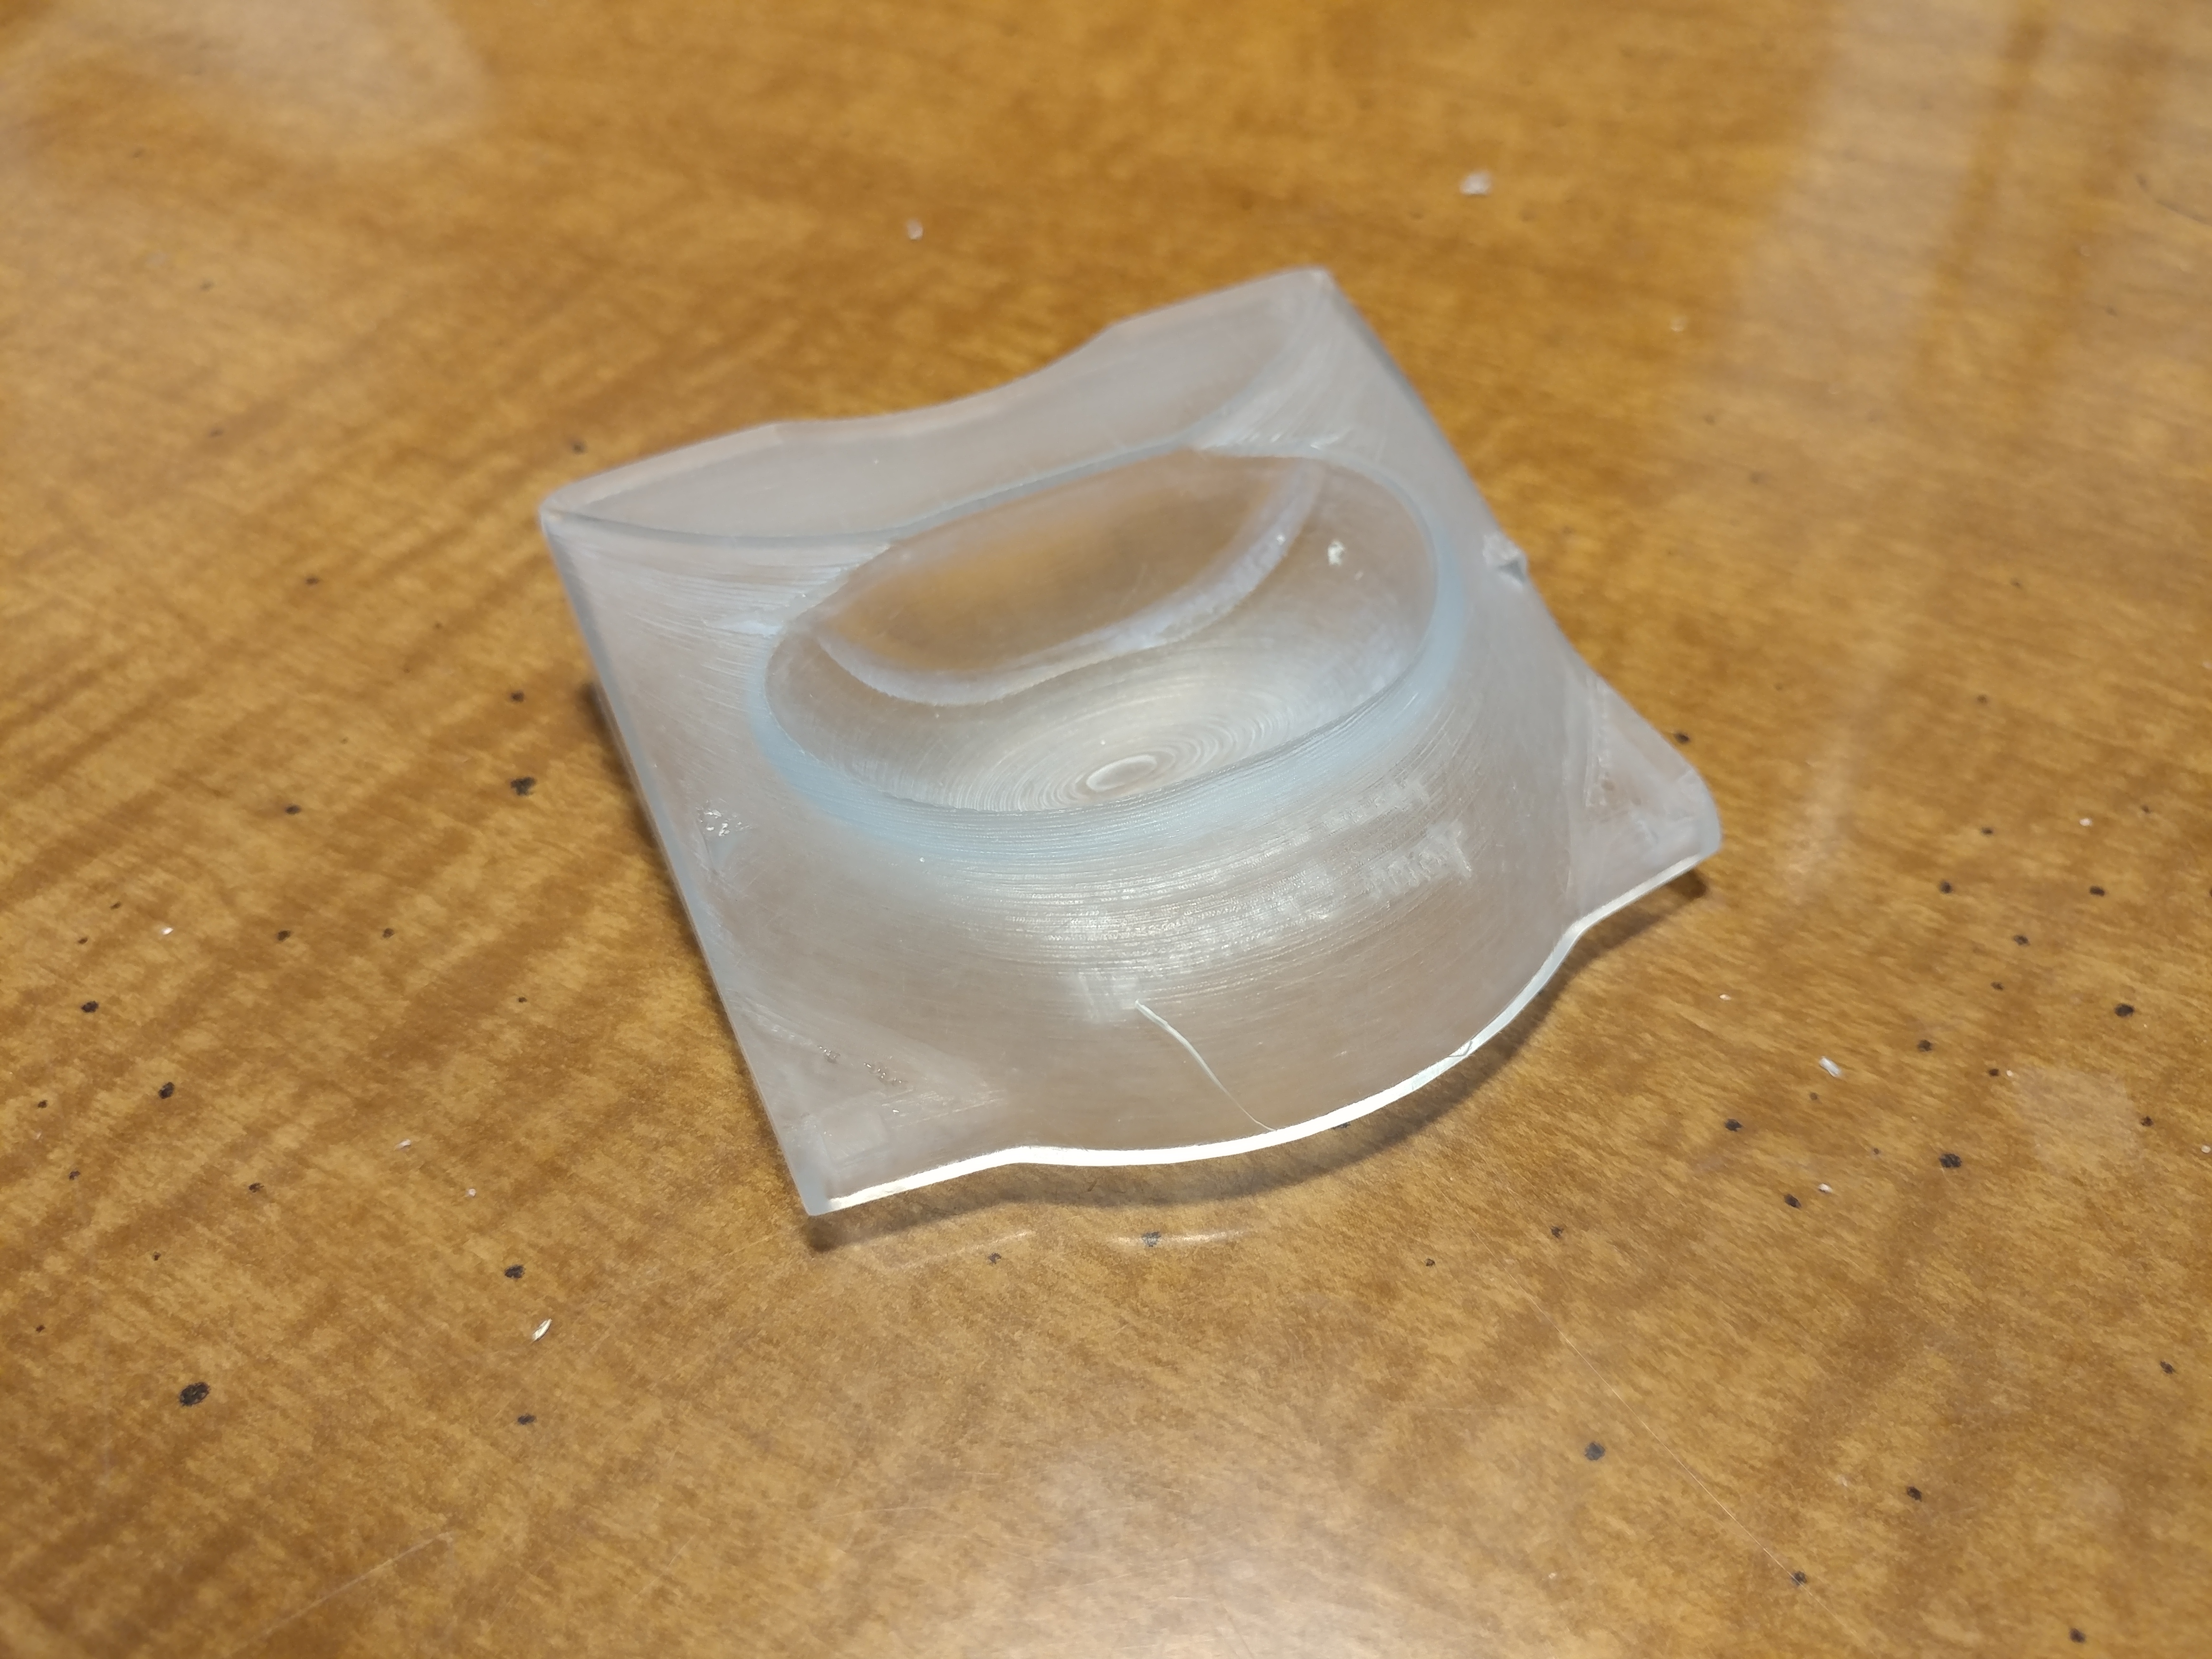

And this is the final result of all the cutting. Warning, if you're squeamish about seeing cut up and mangled plastic, these pictures may disturb you. You have been warned.
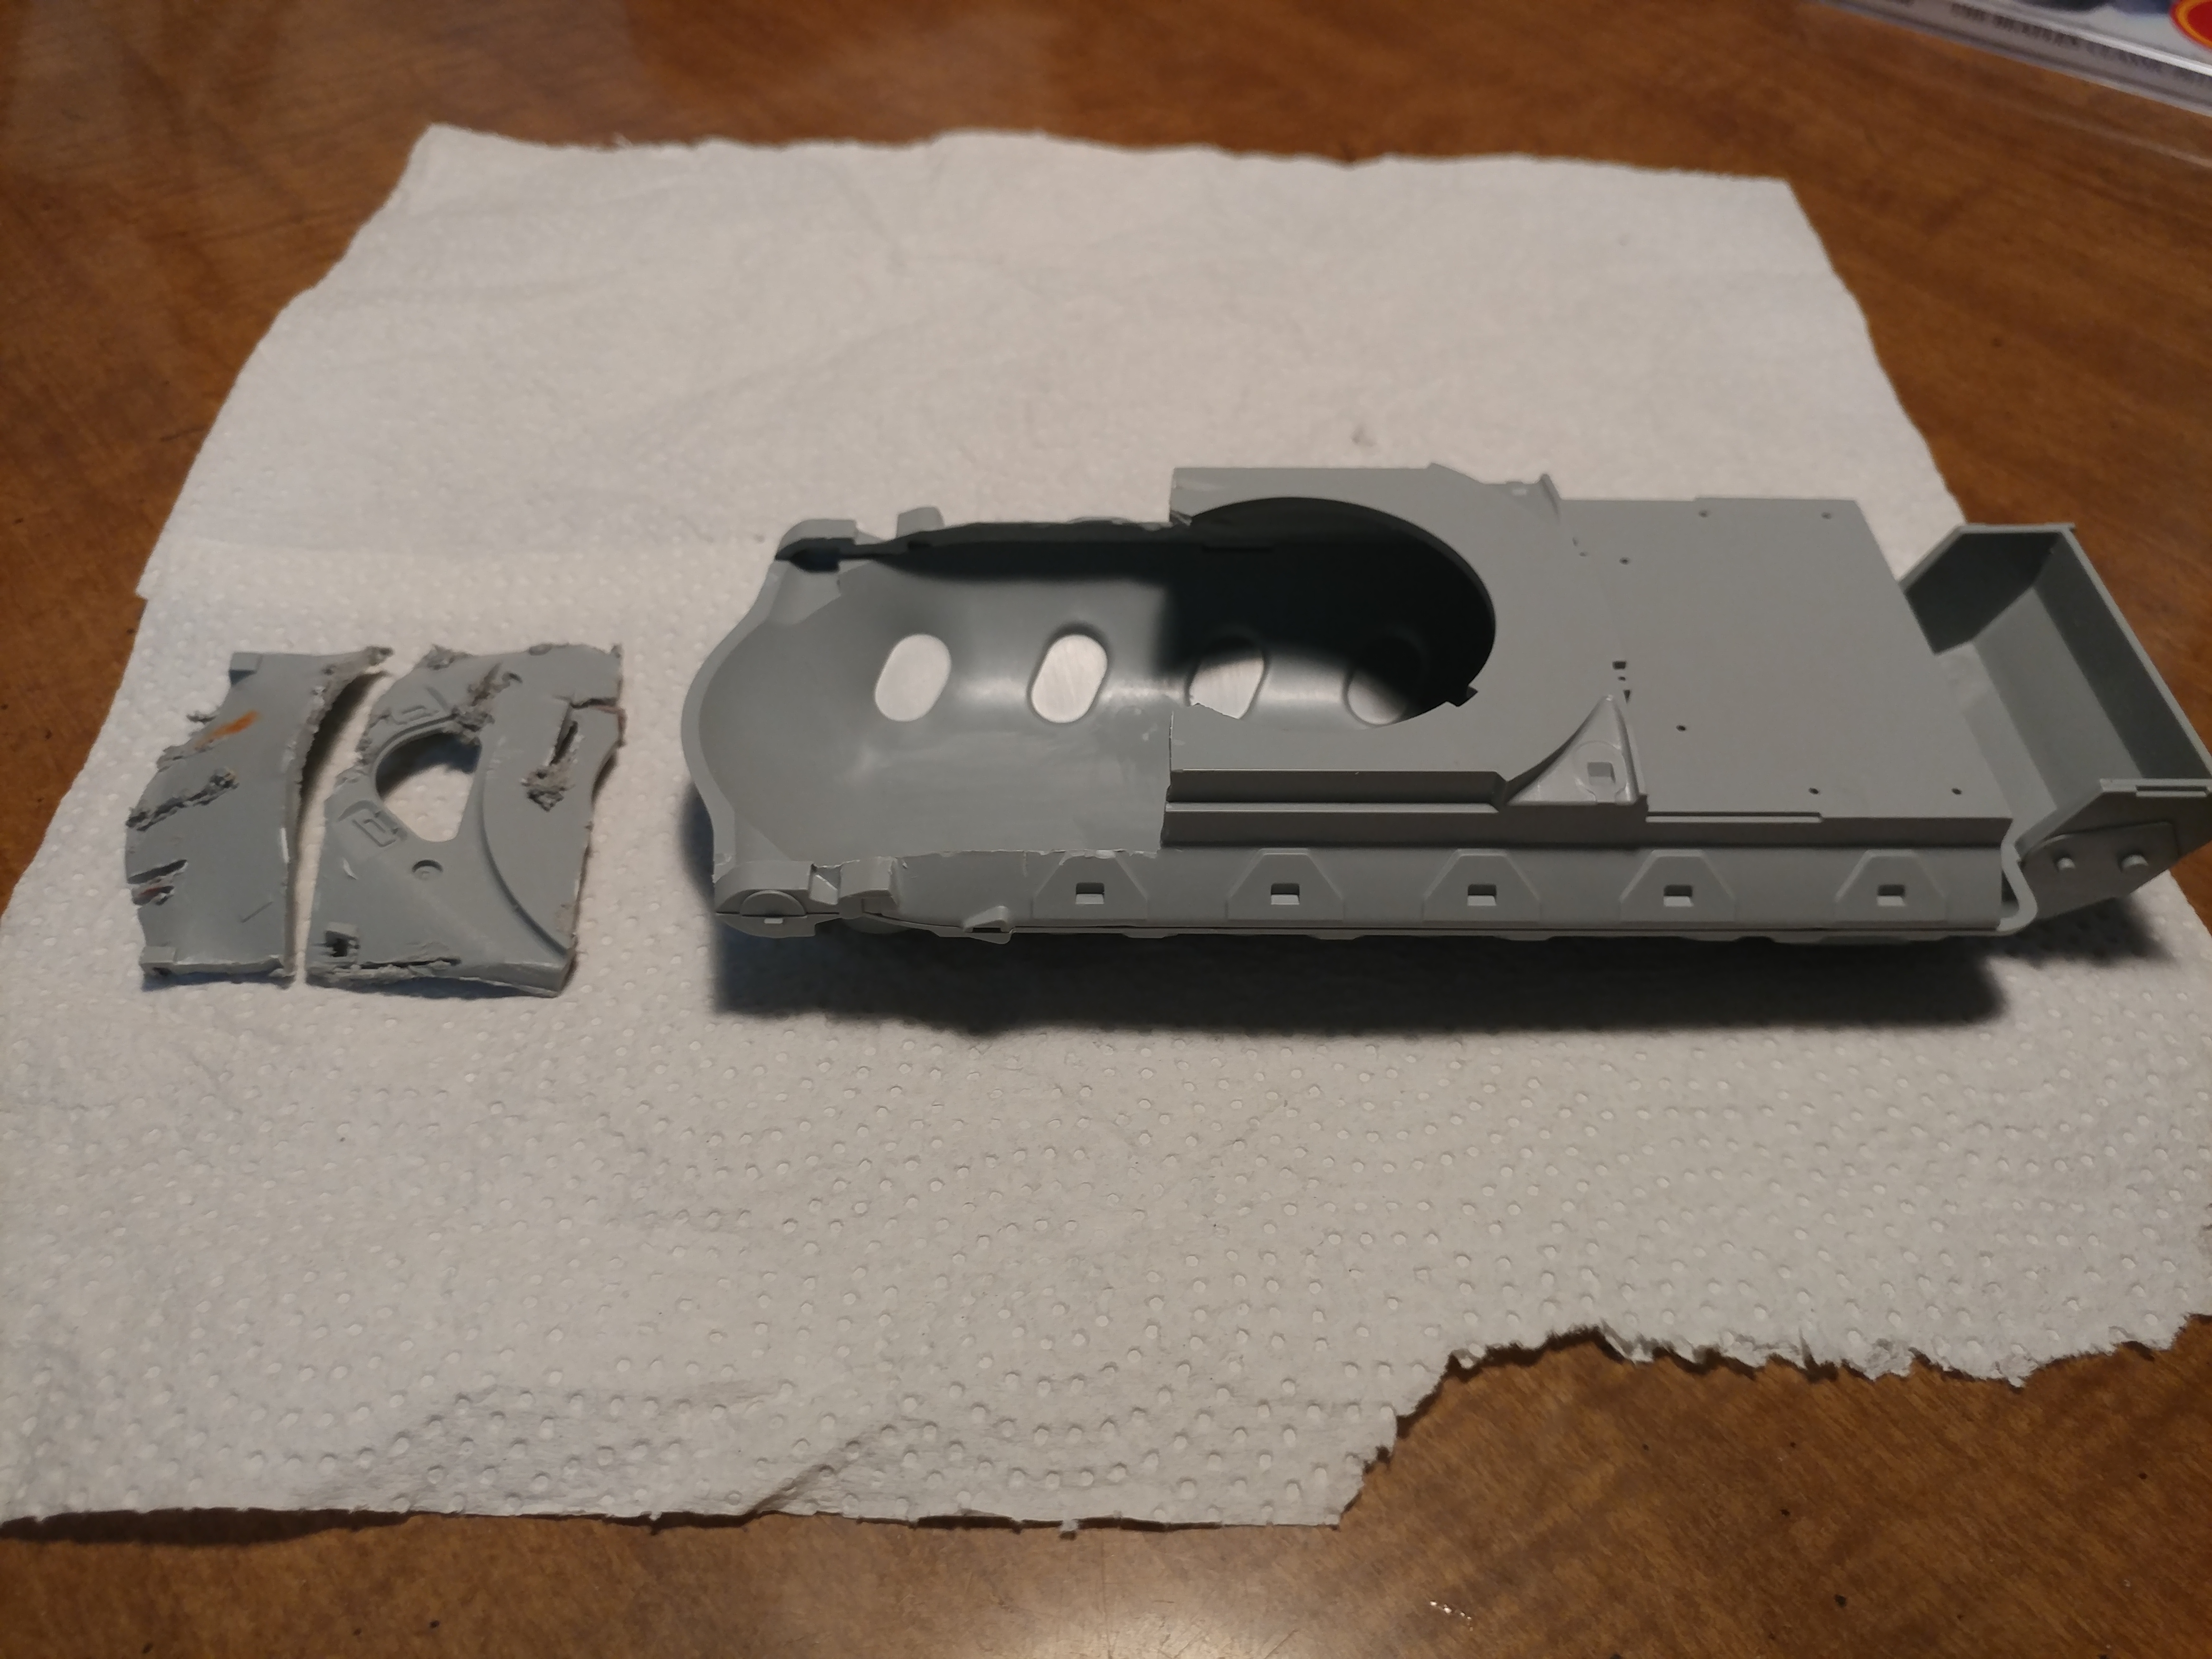


And the final results:
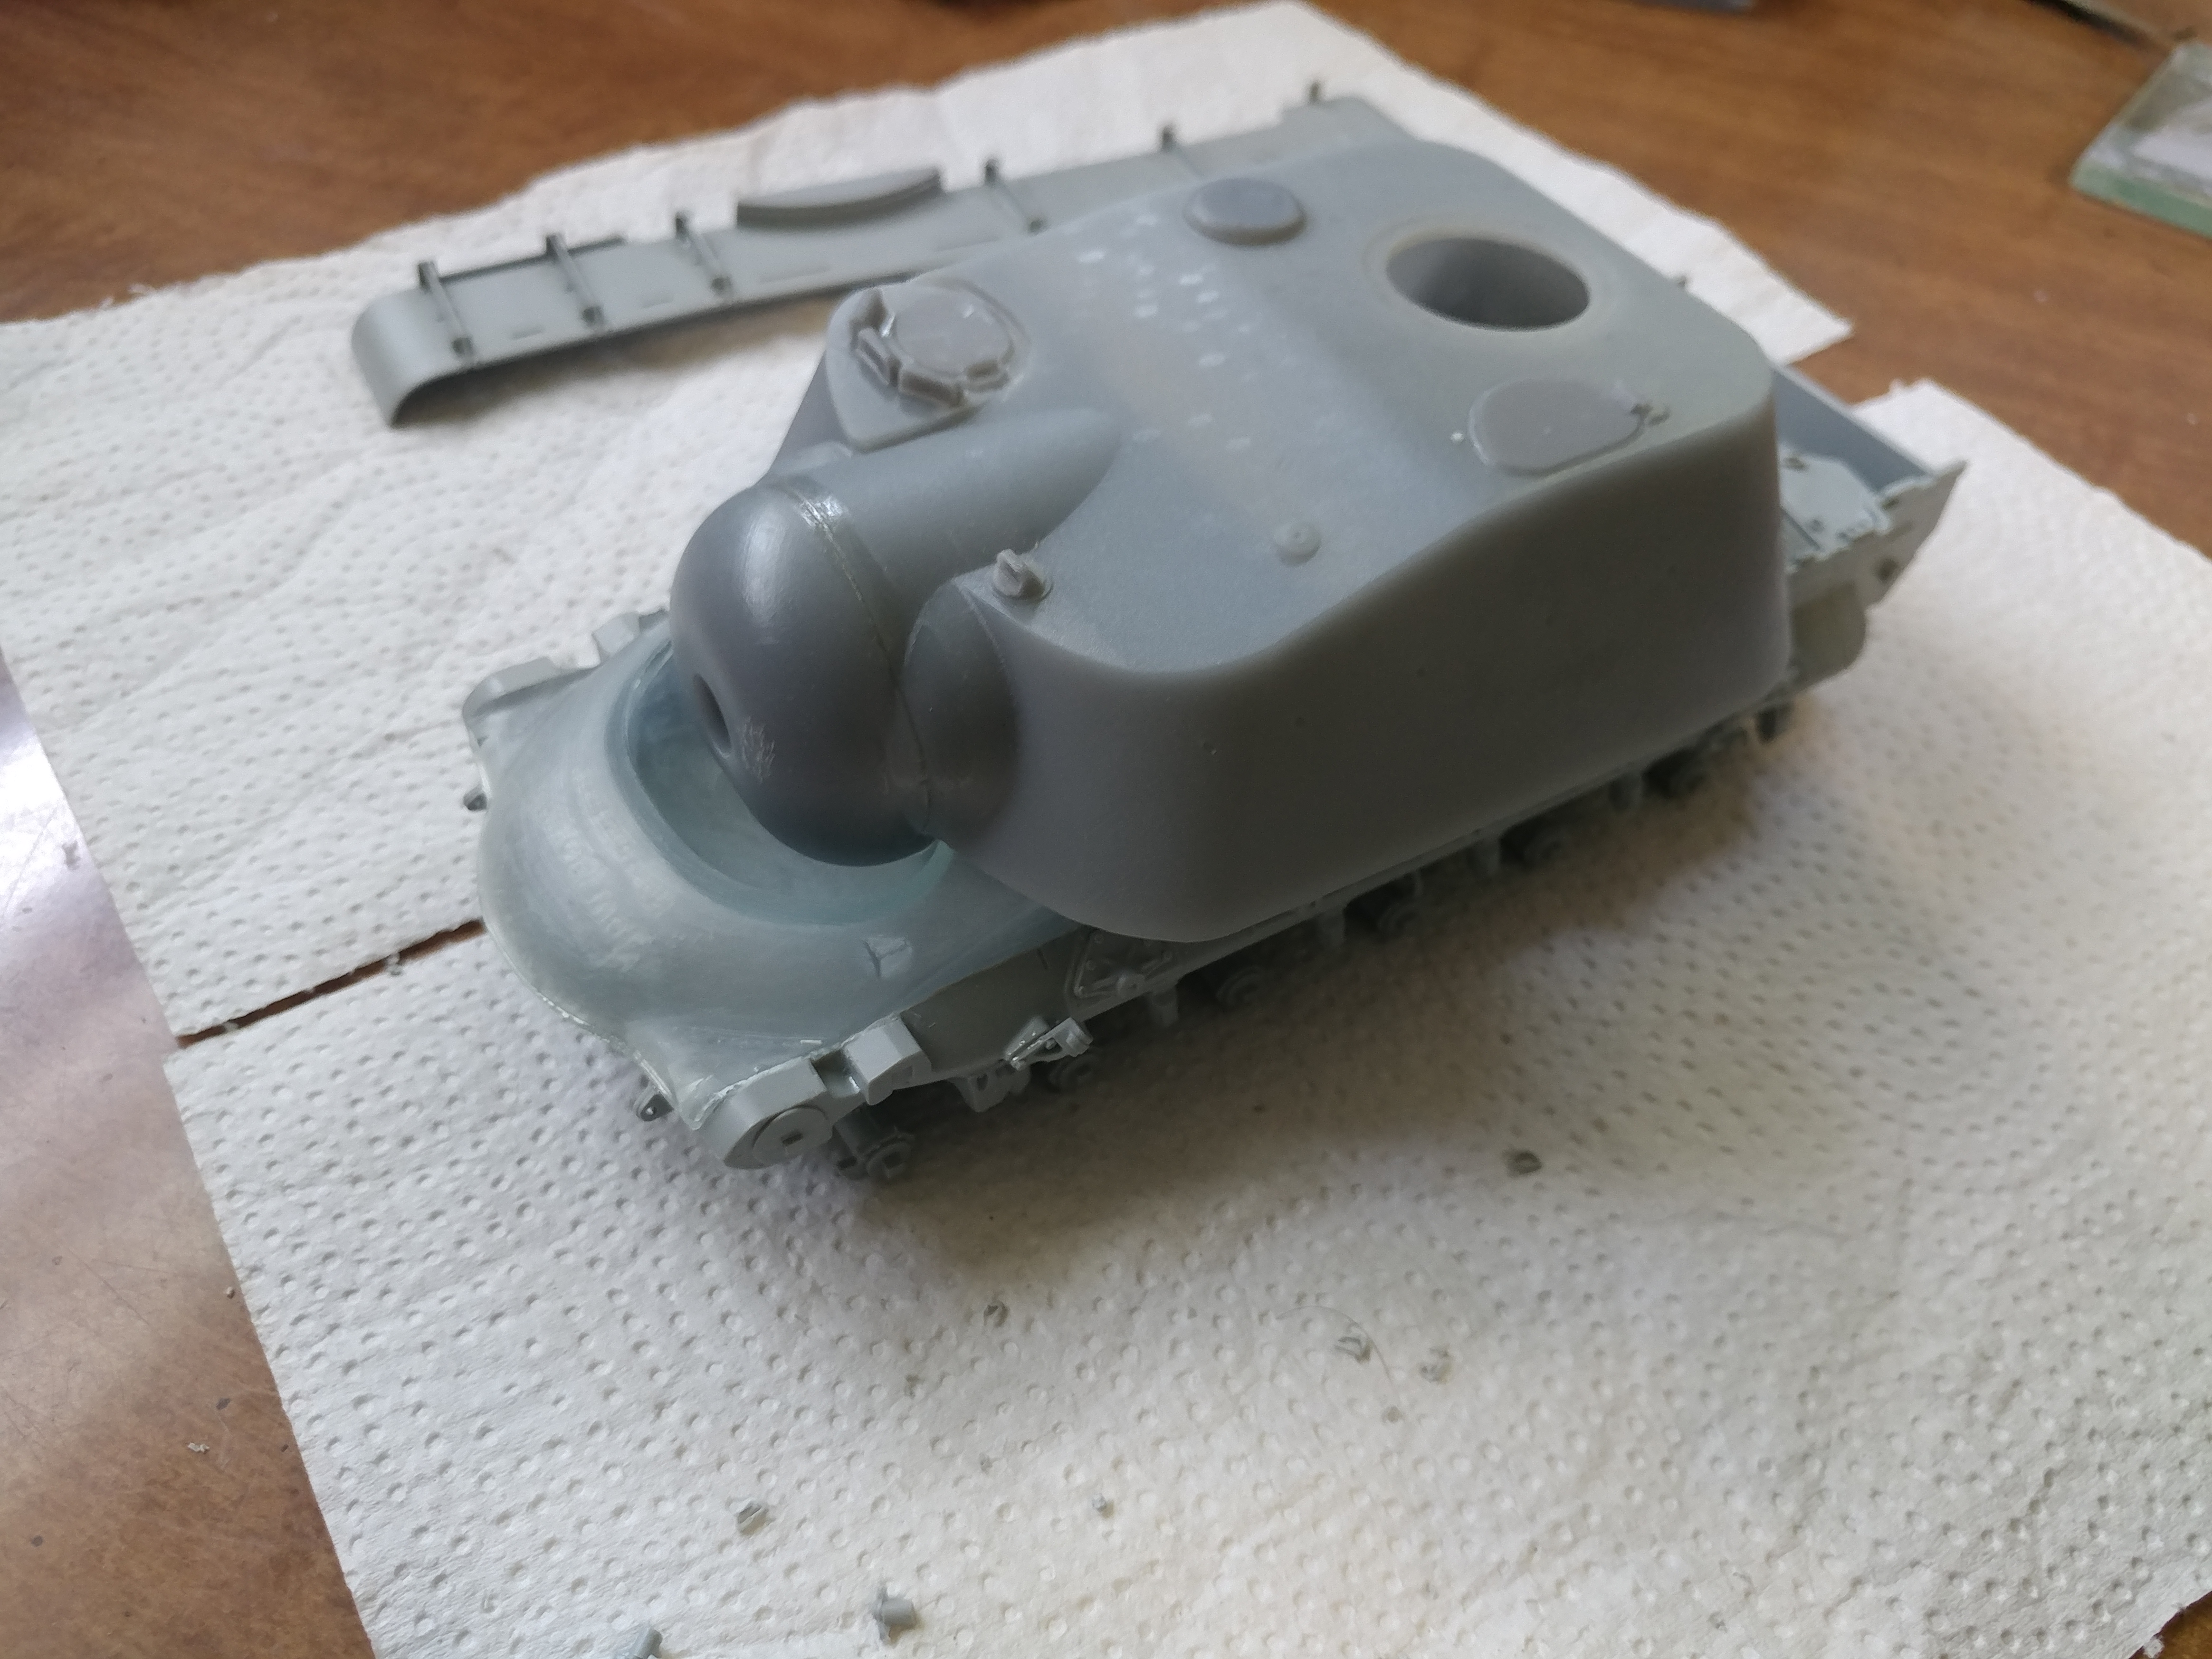
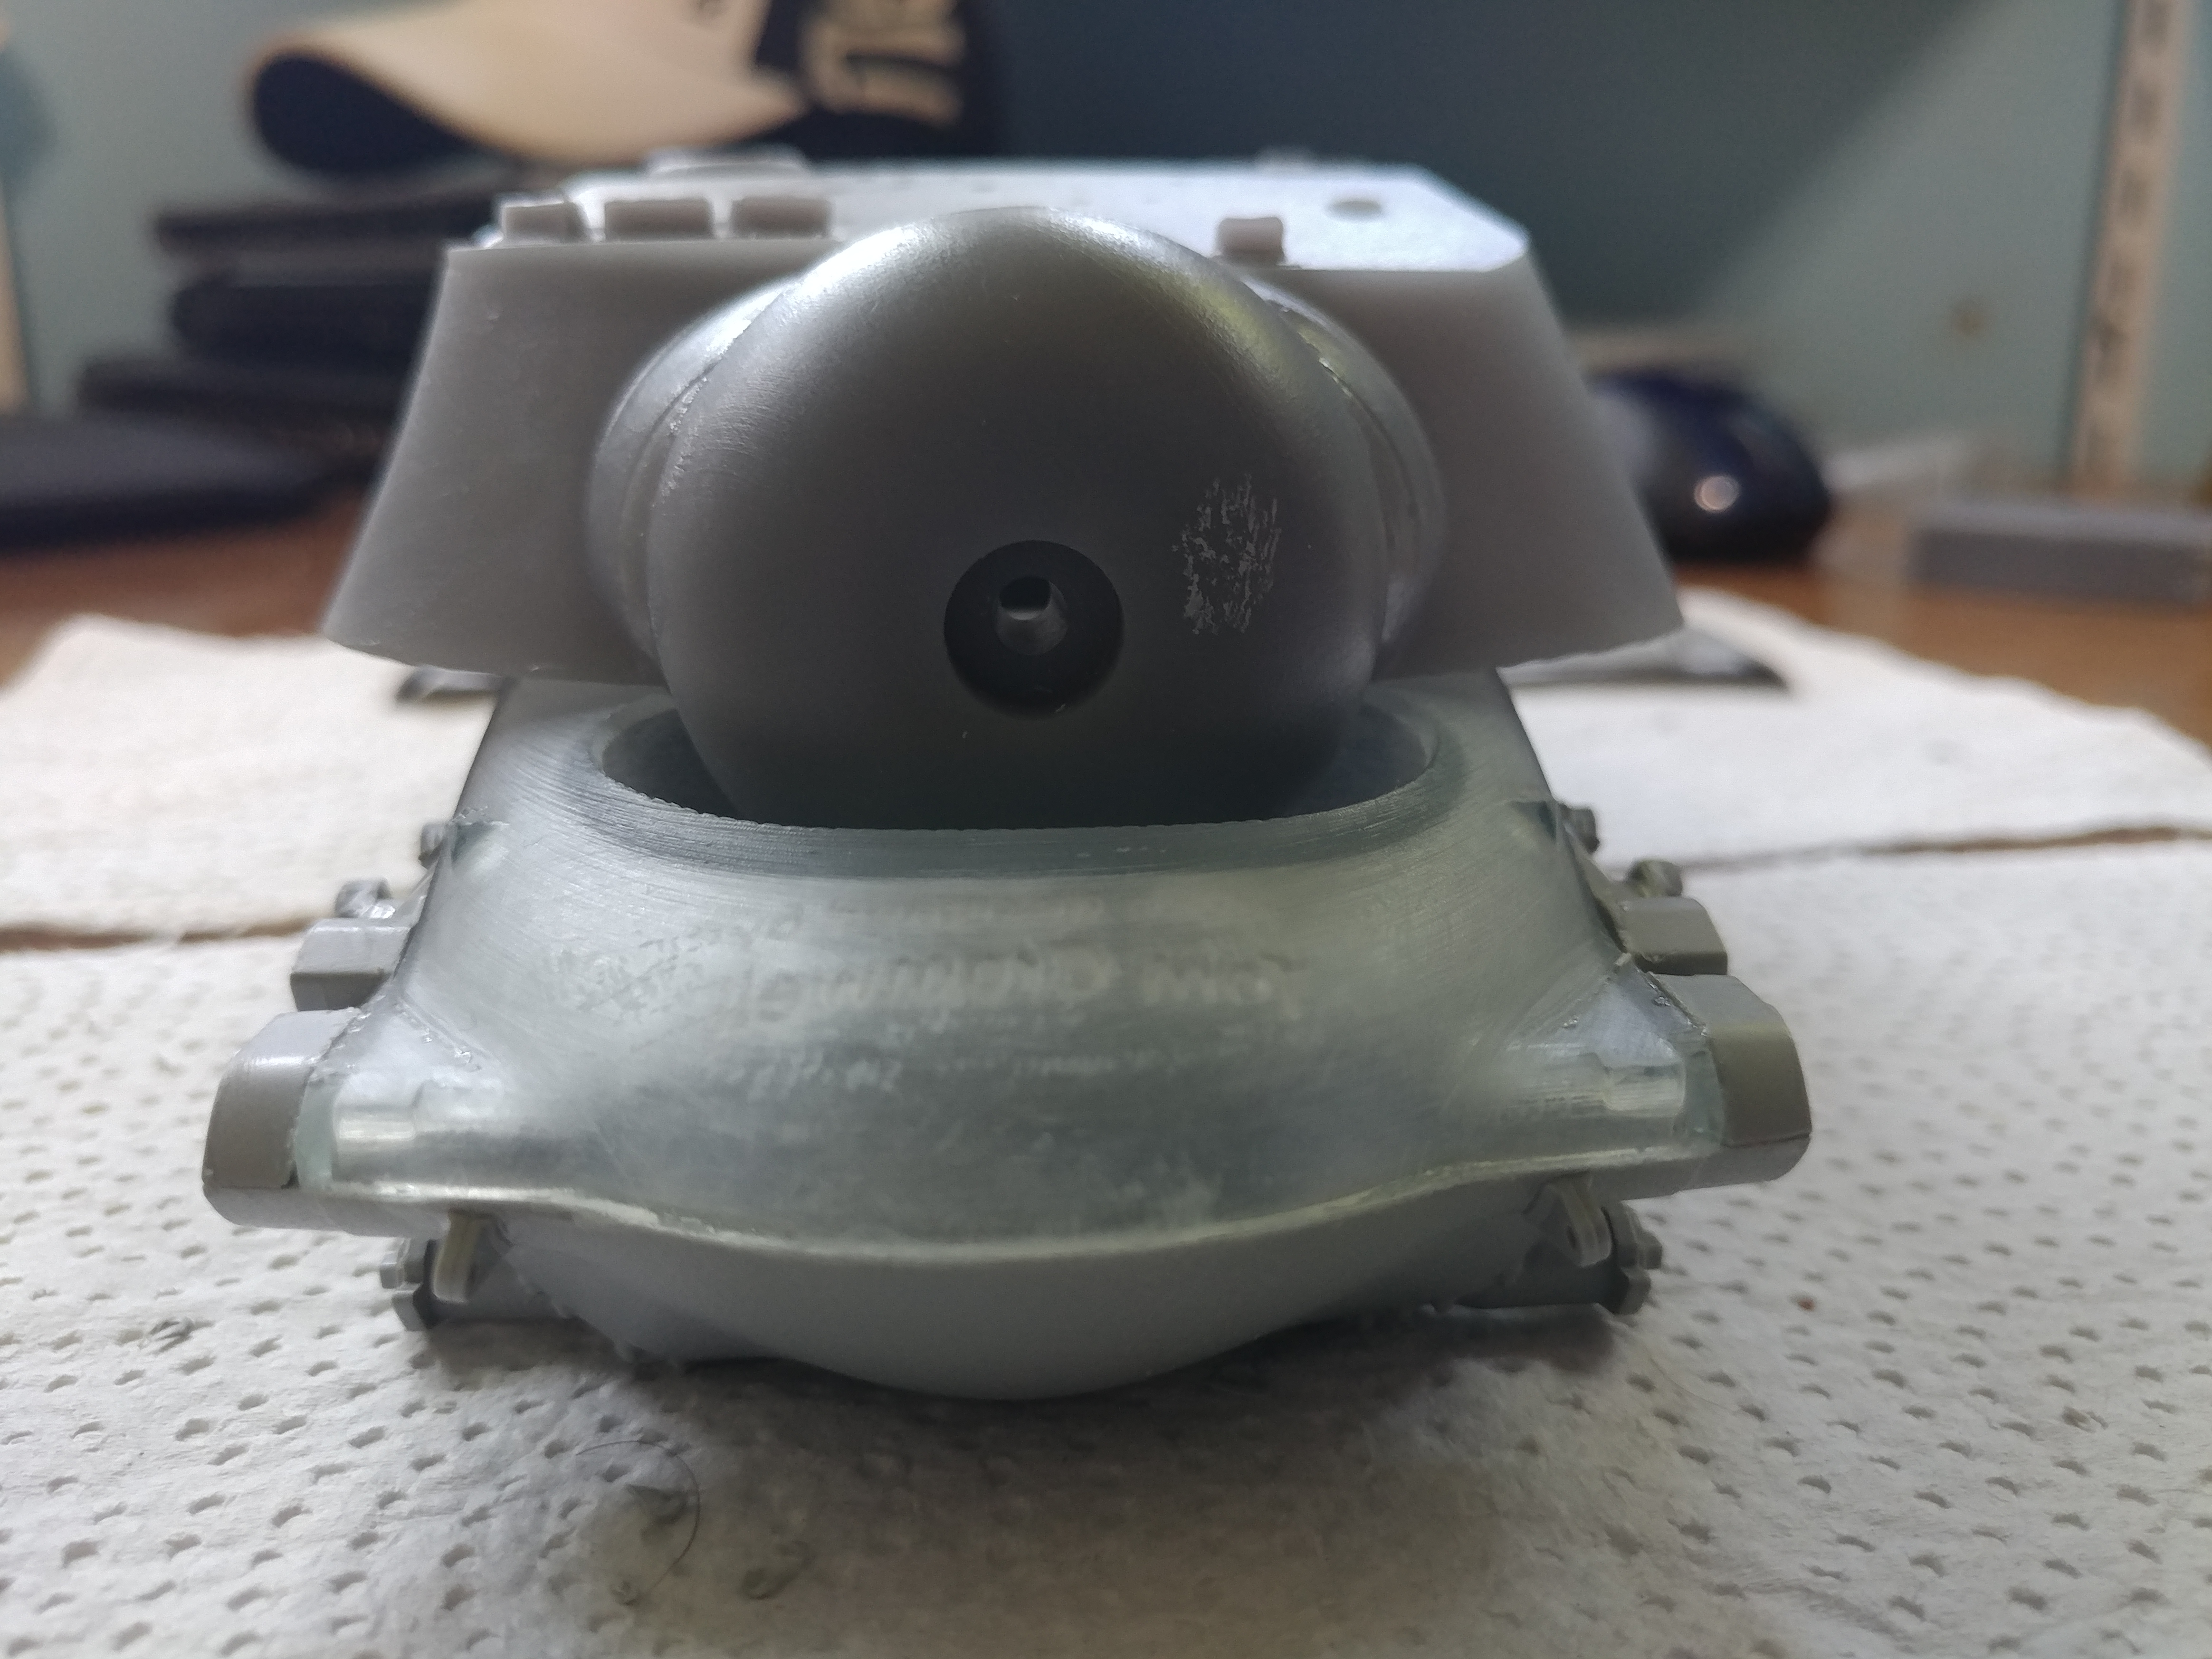
I still have a lot of work to do in the blending and filling department. That cutting left some good sized chunks missing no matter how cleanly I tried to cut the nose out. The rear of the casemate has large triangular opening above the engine grills that needs filling and the remaining front part of the kit nose needs to be blended into the printed nose.
I do some 3D design work. Message me for more info on what I'm doing or have done. Inquire about a product catalog.
barkingdigger
 Associate Editor
#013
England - East Anglia, United Kingdom
Joined: June 20, 2008
KitMaker: 3,981 posts
Armorama: 3,403 posts
Posted: Monday, August 21, 2017 - 01:39 AM UTC
Hi Mike, lookin' good! What a beast...

"Glue, or Glue Not - there is no Dry-Fit" - Yoda (original script from Return of the Jedi...)
North Carolina, United States
Joined: January 21, 2004
KitMaker: 803 posts
Armorama: 740 posts
Posted: Monday, August 21, 2017 - 02:28 AM UTC
Silly question:
What would be the benefit of having the mantlet go so far down?
New York, United States
Joined: May 27, 2013
KitMaker: 2,210 posts
Armorama: 1,712 posts
Posted: Monday, August 21, 2017 - 03:25 AM UTC
The front isn't the actual mantlet. I haven't ordered the mantlet yet but I think I'll do just that now.
I do some 3D design work. Message me for more info on what I'm doing or have done. Inquire about a product catalog.
New York, United States
Joined: May 27, 2013
KitMaker: 2,210 posts
Armorama: 1,712 posts
Posted: Monday, August 21, 2017 - 12:34 PM UTC
The commanders cupola is finished. I made it so the hatch can open/close but if it doesn't really work out I might glue it shut anyway. I also might need to order a new engine deck because the one I have (the printed one, not the kit deck) is pretty well warped. It's surprising because I made the walls very thick to prevent this and cracking.
I do some 3D design work. Message me for more info on what I'm doing or have done. Inquire about a product catalog.
barkingdigger
 Associate Editor
#013
England - East Anglia, United Kingdom
Joined: June 20, 2008
KitMaker: 3,981 posts
Armorama: 3,403 posts
Posted: Monday, August 21, 2017 - 09:32 PM UTC
Hi Mike,
Before you chuck more money at SW, try to unwarp the deck with hot water. Find a bowl big enough to dunk the deck, fill it with boiled water (from a kettle - you can make a tea/coffe with the leftovers!), let it cool a moment so it is nearly boiling, and dunk the deck (holding it with tweezers!) for about half a minute - then press it with something flat to straighten it and hold it there until it cools. Basically, the same as you would with traditional cast resin!
I think they say the deformation temp is something like 80 degrees C, so just short of boiling at 100 degrees C.
"Glue, or Glue Not - there is no Dry-Fit" - Yoda (original script from Return of the Jedi...)
New York, United States
Joined: May 27, 2013
KitMaker: 2,210 posts
Armorama: 1,712 posts
Posted: Monday, August 21, 2017 - 09:54 PM UTC
It was actually printed off of Shapeways. At the time, it was too expensive for me to get it through Shapeways but now it's only about $9. I edited it to include strengthening ribs and the hinges are 1.3 times larger so they hopefully won't chip off.
I do some 3D design work. Message me for more info on what I'm doing or have done. Inquire about a product catalog.
Attica, Greece / Ελλάδα
Joined: June 12, 2015
KitMaker: 921 posts
Armorama: 919 posts
Posted: Monday, August 21, 2017 - 09:58 PM UTC
Oh boy!!! I would love to get me one of these conversion sets complete.
What a beast of a tank!!!
More photos please....
New York, United States
Joined: May 27, 2013
KitMaker: 2,210 posts
Armorama: 1,712 posts
Posted: Monday, August 21, 2017 - 10:04 PM UTC
Well I'm currently working on the fenders and will get them test fitted soon. I'll be able to find out where I need to putty and whatnot.
I do some 3D design work. Message me for more info on what I'm doing or have done. Inquire about a product catalog.
New York, United States
Joined: May 27, 2013
KitMaker: 2,210 posts
Armorama: 1,712 posts
Posted: Tuesday, August 22, 2017 - 01:08 PM UTC
Turns out I also have to cut apart the kit engine deck because the superstructure interferes and won't sit flush with the fenders. Pretty simple procedure - just trace, cut and finesse.
But it's more complicated than I thought. The superstructure still doesn't sit flush with the fenders and I have yet to find a cure.
Where it stands:

The Dragon cupola is a drop fit. Just need to take the locating tabs off.
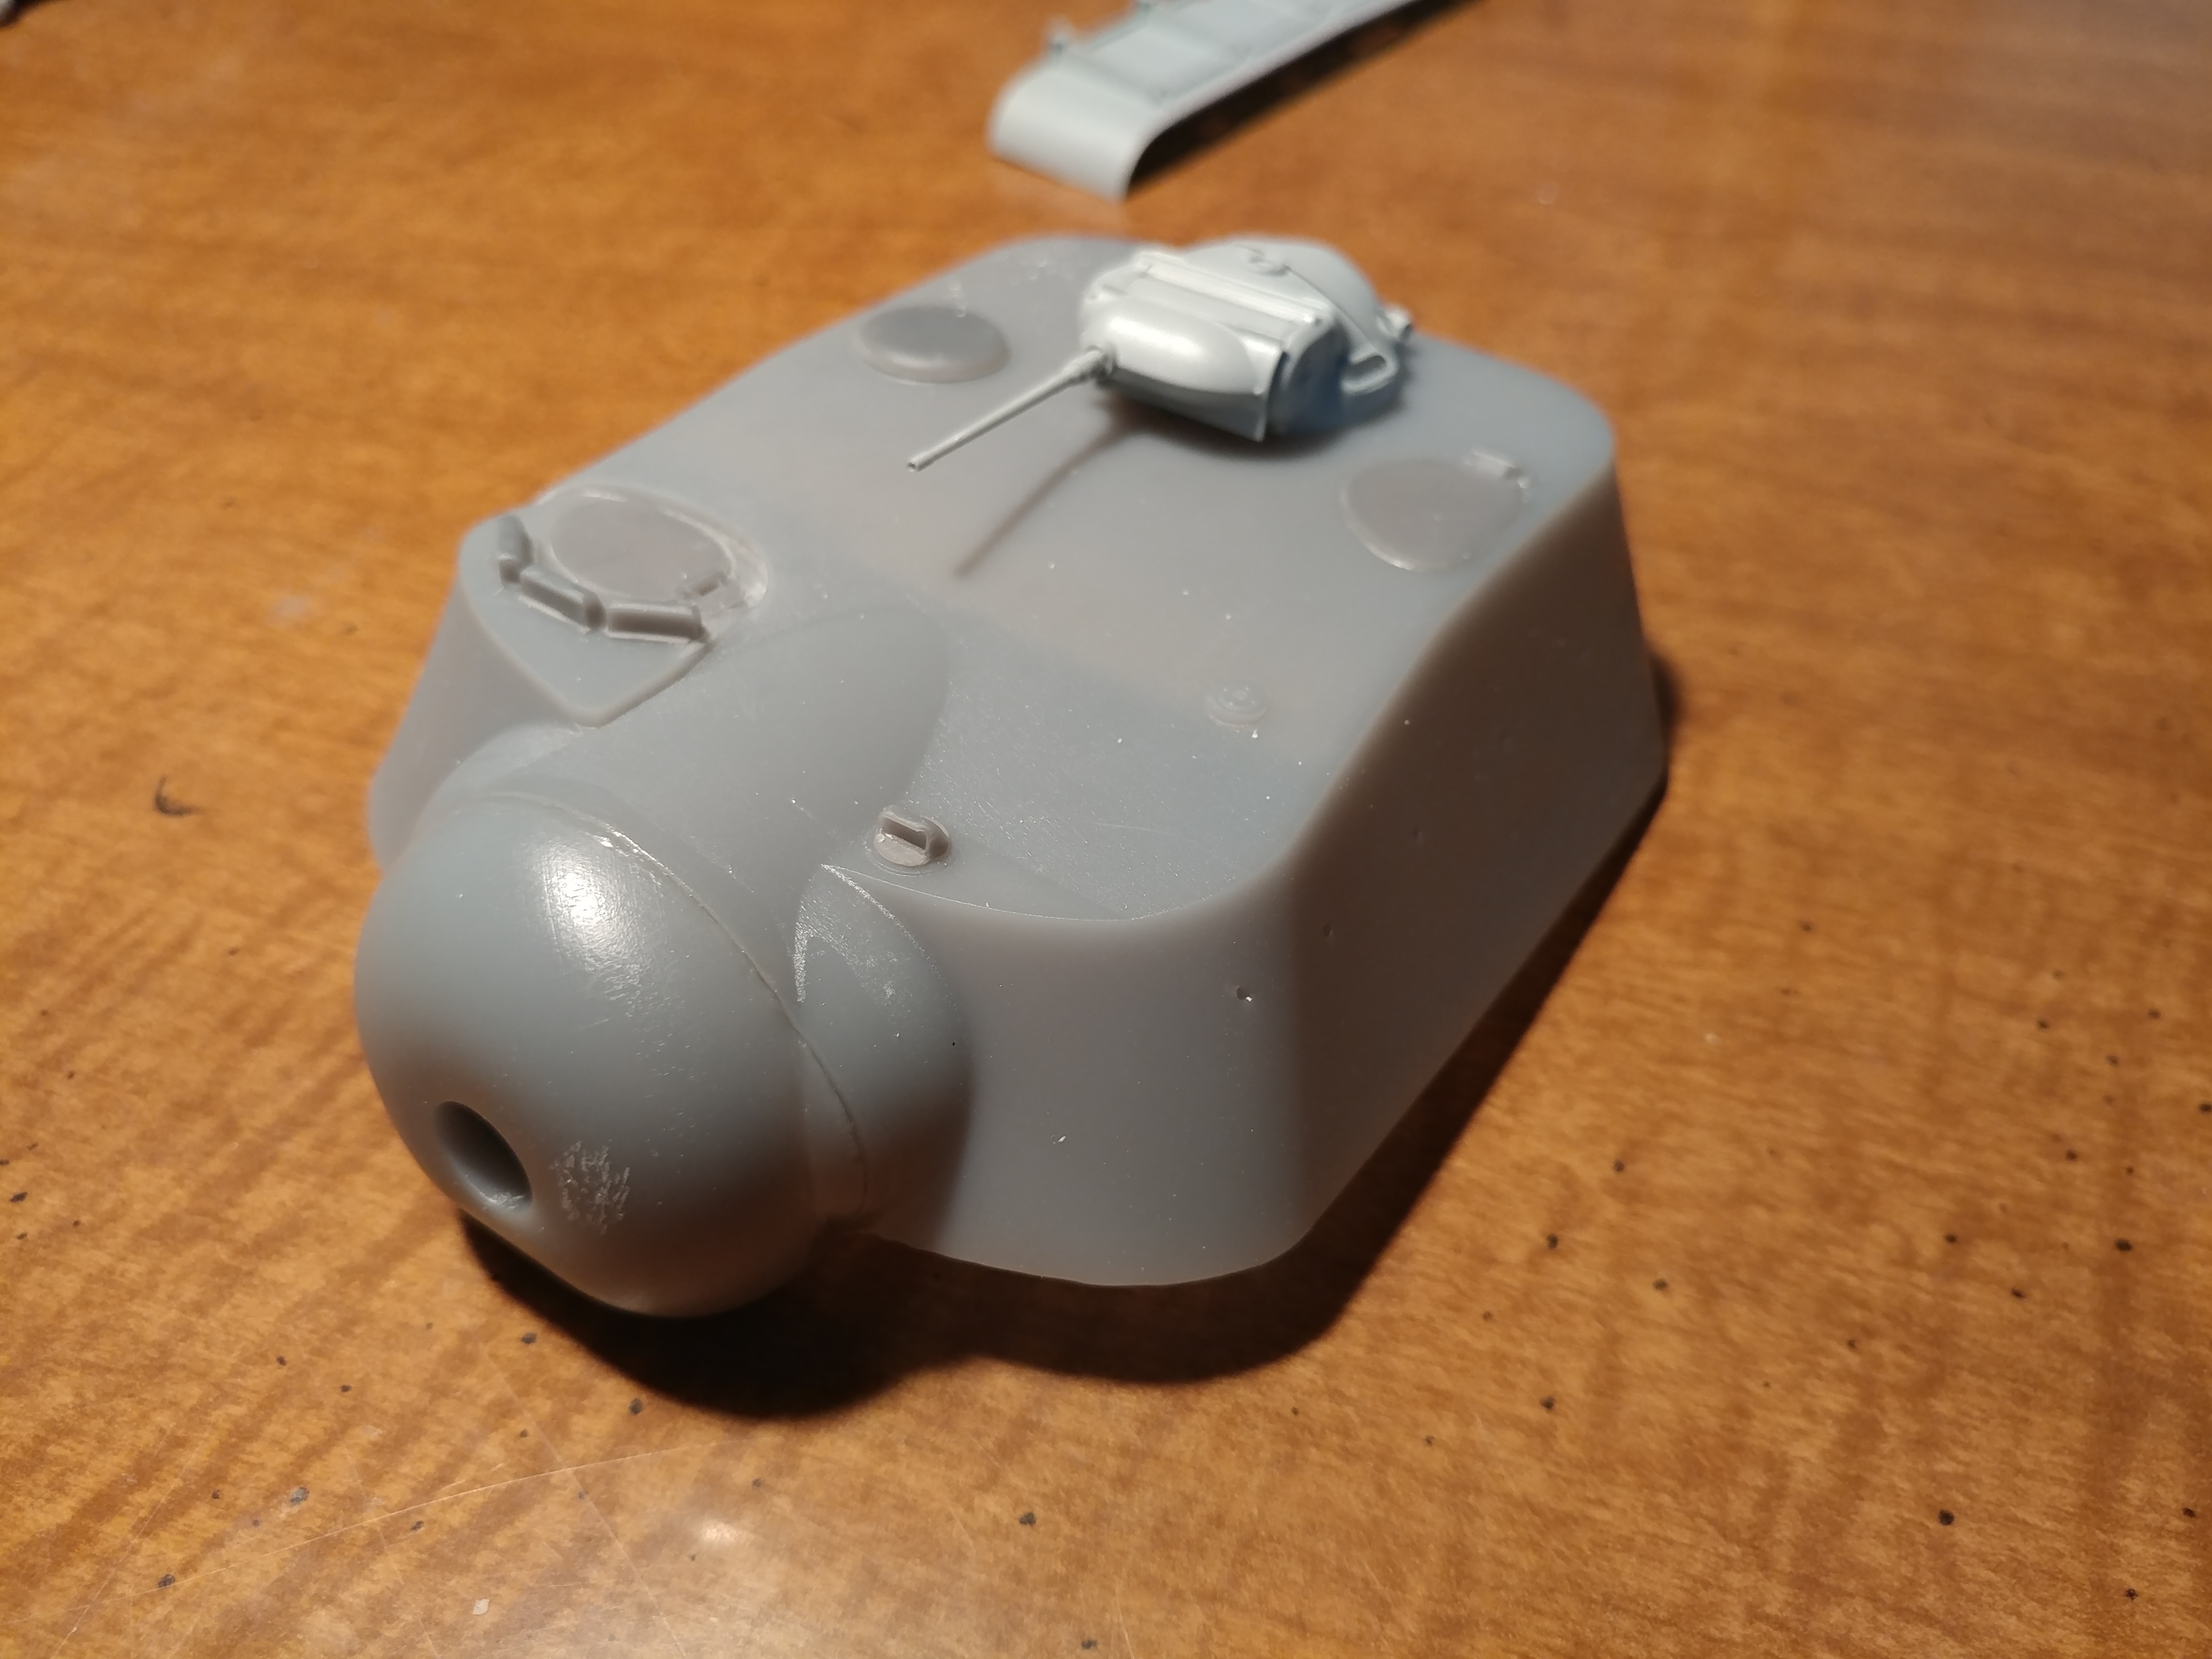

Changes necessary to engine deck.

And just the fenders. Note tht third and fourth fenders have been shortened to accommodate the superstructure.
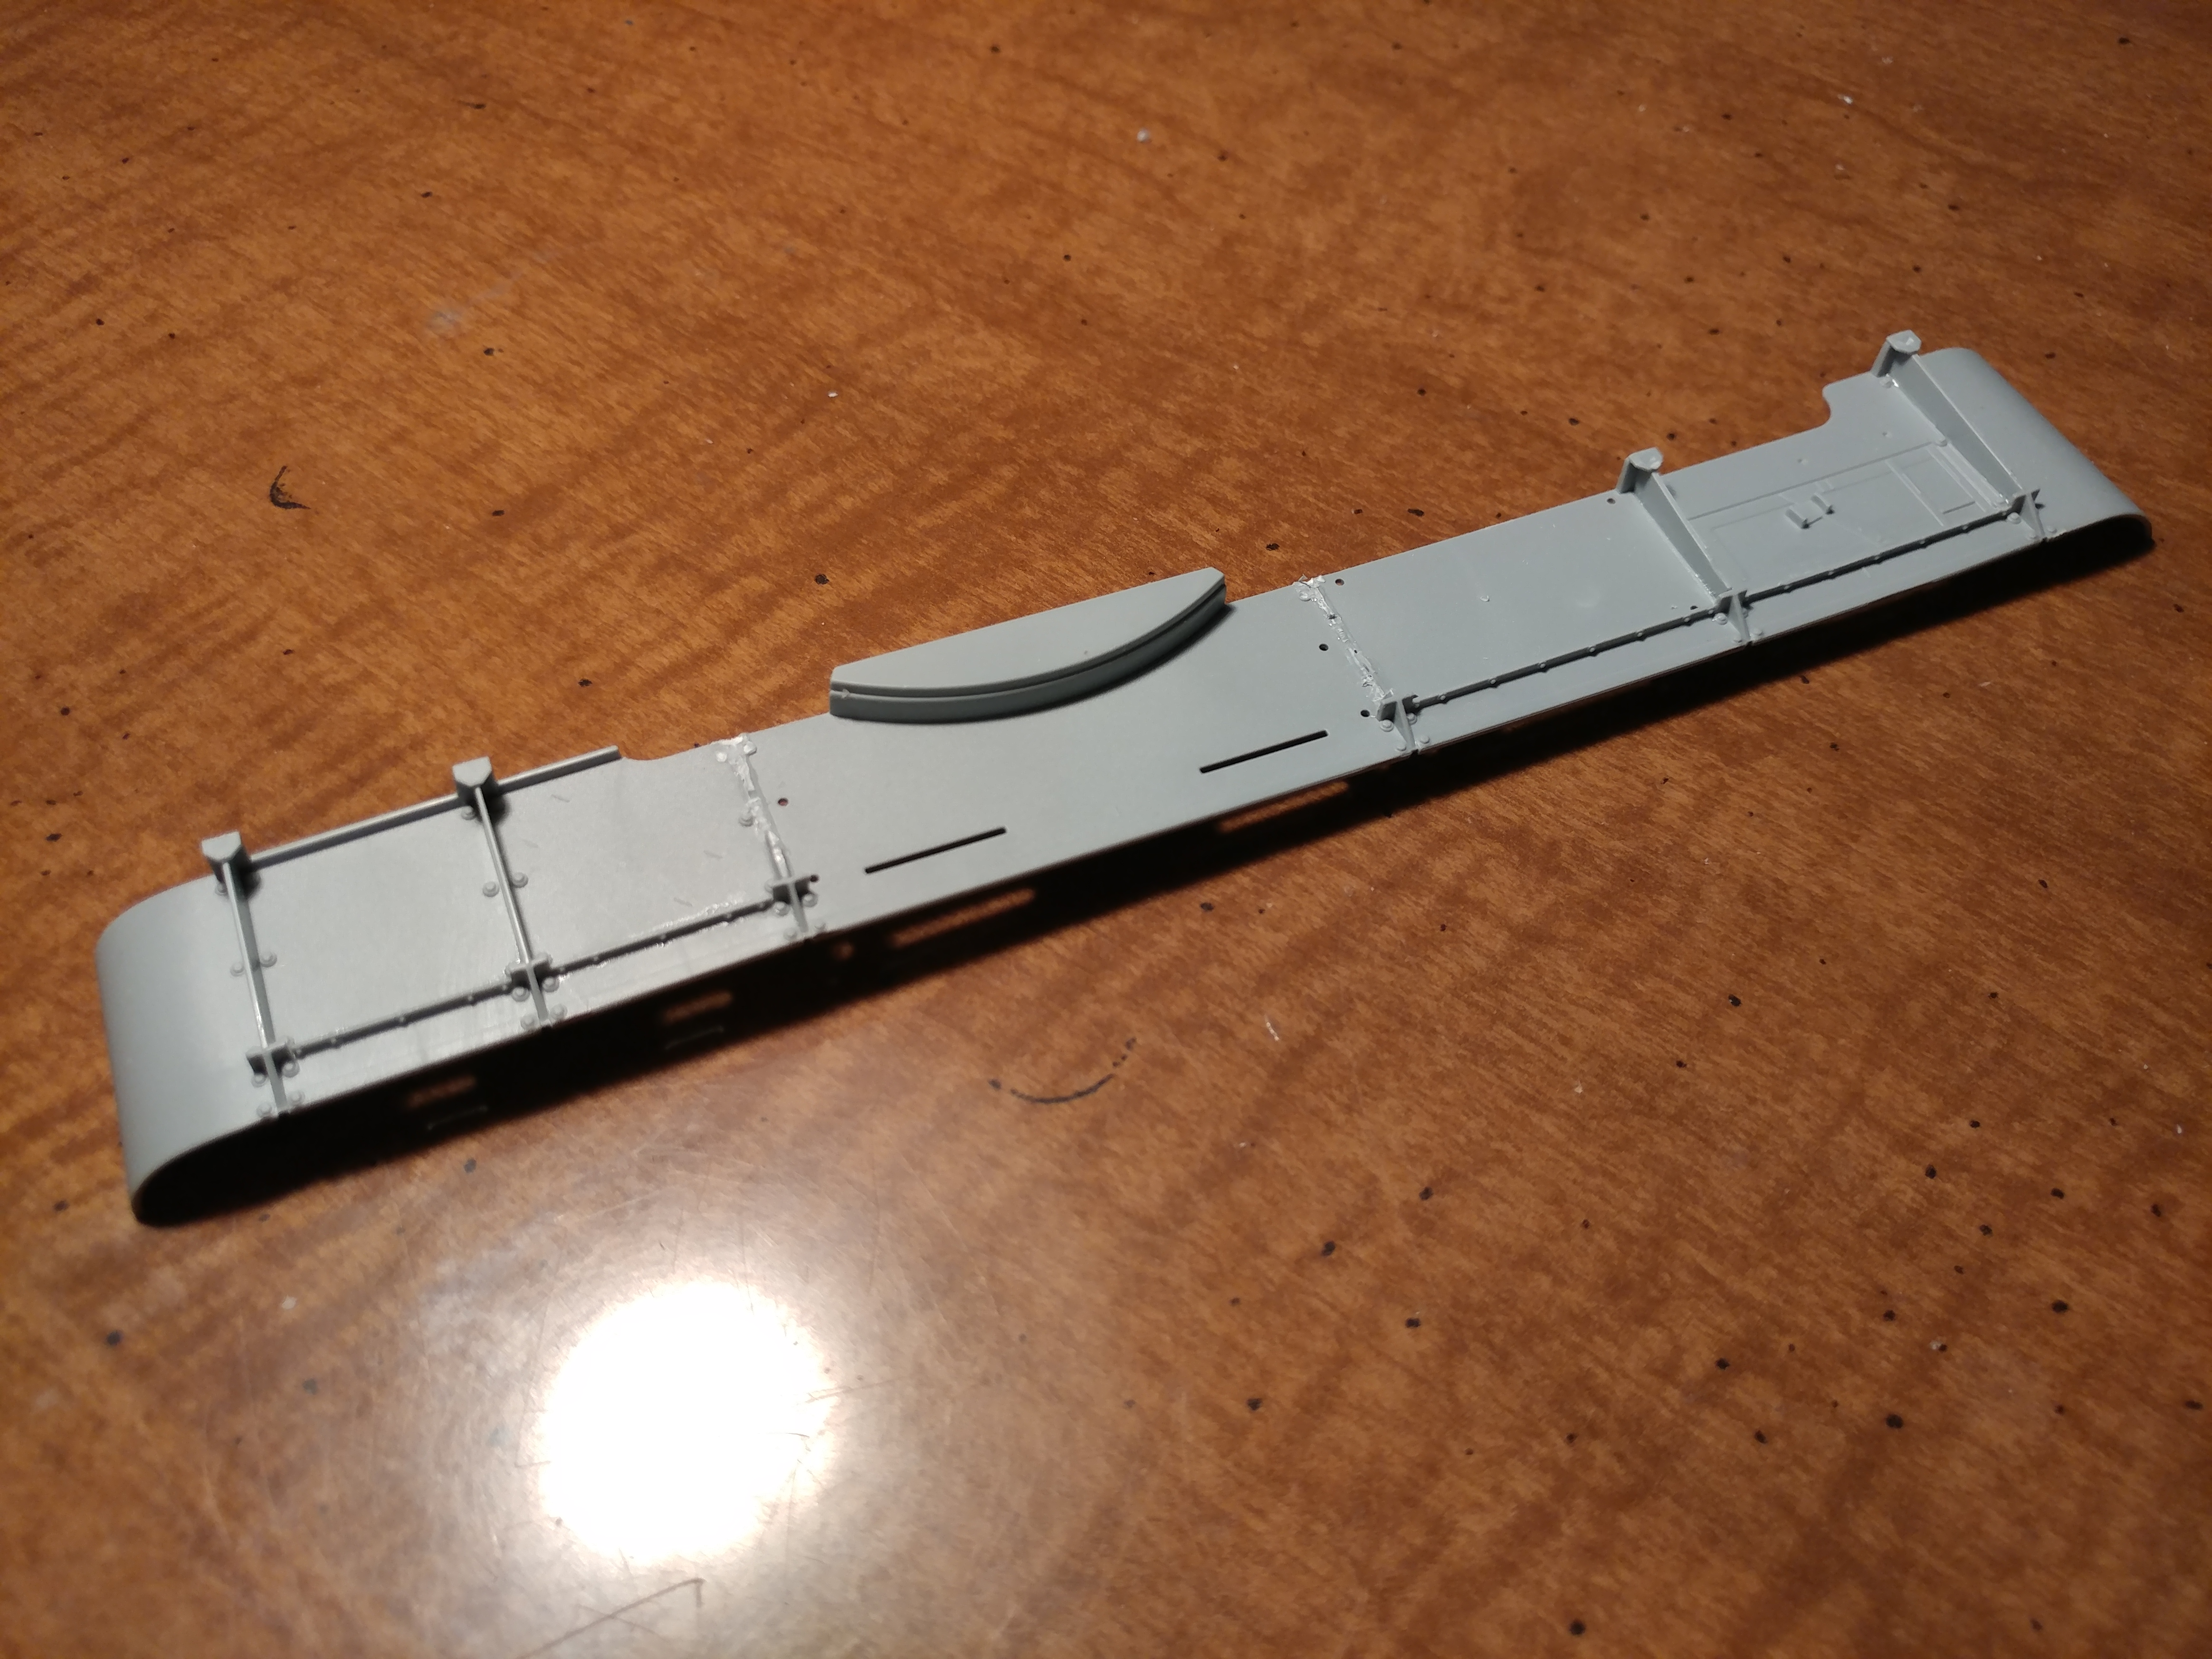
That's all for now. I'm gonna sit on this and clear my head for a couple days. Come back to it refreshed on Thursday.
I think my next project would be the WOT version T110E4. It's turreted so it's (again) a simple drop fit into the Dragon Hull with some changes to the engine deck to accommodate a new engine cover... That should be easier... Right?
I do some 3D design work. Message me for more info on what I'm doing or have done. Inquire about a product catalog.
New York, United States
Joined: May 27, 2013
KitMaker: 2,210 posts
Armorama: 1,712 posts
Posted: Wednesday, August 23, 2017 - 09:22 PM UTC
Ok, so I've figured out the hang up that's preventing the superstructure from sitting flush on the fenders. Turns out it's the nose piece. Who would've thought, right? Well now I've started to carve channels for the structure but I also need to shave down the bottom of the bulb in the superstructure. Time to once again whip out the Dremel tool.
I do some 3D design work. Message me for more info on what I'm doing or have done. Inquire about a product catalog.
European Union
Joined: January 28, 2015
KitMaker: 2,099 posts
Armorama: 1,920 posts
Posted: Thursday, August 24, 2017 - 02:42 AM UTC
Wasn't the T110 series supposed to be actually based on the M103?
Never gonna' give EU up, never gonna' let EU down.
New York, United States
Joined: May 27, 2013
KitMaker: 2,210 posts
Armorama: 1,712 posts
Posted: Thursday, August 24, 2017 - 06:55 AM UTC
I'm not sure. The T110 drawings all show 6 wheels while the M103 uses 7. I think the T110 series were going to be completely new vehicles.
I do some 3D design work. Message me for more info on what I'm doing or have done. Inquire about a product catalog.
New York, United States
Joined: May 27, 2013
KitMaker: 2,210 posts
Armorama: 1,712 posts
Posted: Friday, August 25, 2017 - 09:25 PM UTC
I do some 3D design work. Message me for more info on what I'm doing or have done. Inquire about a product catalog.
South Australia, Australia
Joined: June 17, 2007
KitMaker: 235 posts
Armorama: 232 posts
Posted: Saturday, August 26, 2017 - 04:17 AM UTC
That is awesome! I have wanted to build the 110E3 and the Foch 155 tank destroyers but just don't have the scratch skills to justify the costs. With 3D printers, soon enough we will not have to wait for the model companies to bring out 'wants'.
Will be watching this one closely, keep up the great work!
New York, United States
Joined: May 27, 2013
KitMaker: 2,210 posts
Armorama: 1,712 posts
Posted: Saturday, September 02, 2017 - 09:48 AM UTC
I do some 3D design work. Message me for more info on what I'm doing or have done. Inquire about a product catalog.
Attica, Greece / Ελλάδα
Joined: June 12, 2015
KitMaker: 921 posts
Armorama: 919 posts
Posted: Saturday, September 02, 2017 - 02:32 PM UTC
Looking awesome!!! Are there any more 3D parts missing to complete the build?
New York, United States
Joined: May 27, 2013
KitMaker: 2,210 posts
Armorama: 1,712 posts
Posted: Saturday, September 02, 2017 - 07:20 PM UTC
I just need two handrails. They aren't really important though and I may leave them out.
I do some 3D design work. Message me for more info on what I'm doing or have done. Inquire about a product catalog.
North Carolina, United States
Joined: January 21, 2004
KitMaker: 803 posts
Armorama: 740 posts
Posted: Saturday, September 02, 2017 - 07:55 PM UTC
Ideas about what to 3-D Print?
How about something like this based on an M-1 Abrams Chassis?
South Australia, Australia
Joined: June 17, 2007
KitMaker: 235 posts
Armorama: 232 posts
Posted: Sunday, September 03, 2017 - 02:51 PM UTC
Very nice work on that barrel, is that rifling?
New York, United States
Joined: May 27, 2013
KitMaker: 2,210 posts
Armorama: 1,712 posts
Posted: Sunday, September 03, 2017 - 07:54 PM UTC
Quoted Text
Ideas about what to 3-D Print?
How about something like this based on an M-1 Abrams Chassis?
I could do this for an Abrams chassis but it would require a complete redesign of pretty much everything.
Quoted Text
Very nice work on that barrel, is that rifling?
Yep. It's rifled about an 1/6 of the way in.
I do some 3D design work. Message me for more info on what I'm doing or have done. Inquire about a product catalog.
barkingdigger
 Associate Editor
#013
England - East Anglia, United Kingdom
Joined: June 20, 2008
KitMaker: 3,981 posts
Armorama: 3,403 posts
Posted: Monday, September 04, 2017 - 01:36 AM UTC
They certainly didn't plan to go around many corners with that gun!

"Glue, or Glue Not - there is no Dry-Fit" - Yoda (original script from Return of the Jedi...)
South Australia, Australia
Joined: June 17, 2007
KitMaker: 235 posts
Armorama: 232 posts
Posted: Tuesday, September 05, 2017 - 06:07 AM UTC
Quoted Text
They certainly didn't plan to go around many corners with that gun! 

Provided we only ever need to drive in a straight line we will be fine!
That gun is very impressive quality, what sort of 3D printer are you using? Did you do the CAD work yourself?
New York, United States
Joined: May 27, 2013
KitMaker: 2,210 posts
Armorama: 1,712 posts
Posted: Tuesday, September 05, 2017 - 07:15 AM UTC
I did design all the printed parts except the replacement nose which was designed by our very own Tom Cromwell aka Barkingdigger. I didn't print these myself. The dark grey were printed by various small print shops on DLP printers, the clear nose was also by a small printer and the gun/mantlet was printed by Shapeways.
I do some 3D design work. Message me for more info on what I'm doing or have done. Inquire about a product catalog.
South Australia, Australia
Joined: June 17, 2007
KitMaker: 235 posts
Armorama: 232 posts
Posted: Friday, September 08, 2017 - 10:15 AM UTC
Very well done mate.
I have been thinking about getting a low end 3D printer to play around with myself, but they are still a little pricey to justify it.
Looking at the quality you have there with the barrel it looks like they have certainly stepped up in quality since I last looked. Looking forward to seeing more work on this one.


