_GOTOBOTTOM
AFV Painting & Weathering
Answers to questions about the right paint scheme or tips for the right effect.
Hands free armor airbrushing
JSSVIII
Visit this Community
Massachusetts, United States
Joined: March 28, 2007
KitMaker: 1,169 posts
Armorama: 1,067 posts
Posted: Saturday, September 30, 2017 - 06:40 AM UTC
I was showing a friend my airbrushing setup, and he said I should share with others the rig that I use to hold my armor models, so I have both hands free for the airbrush.

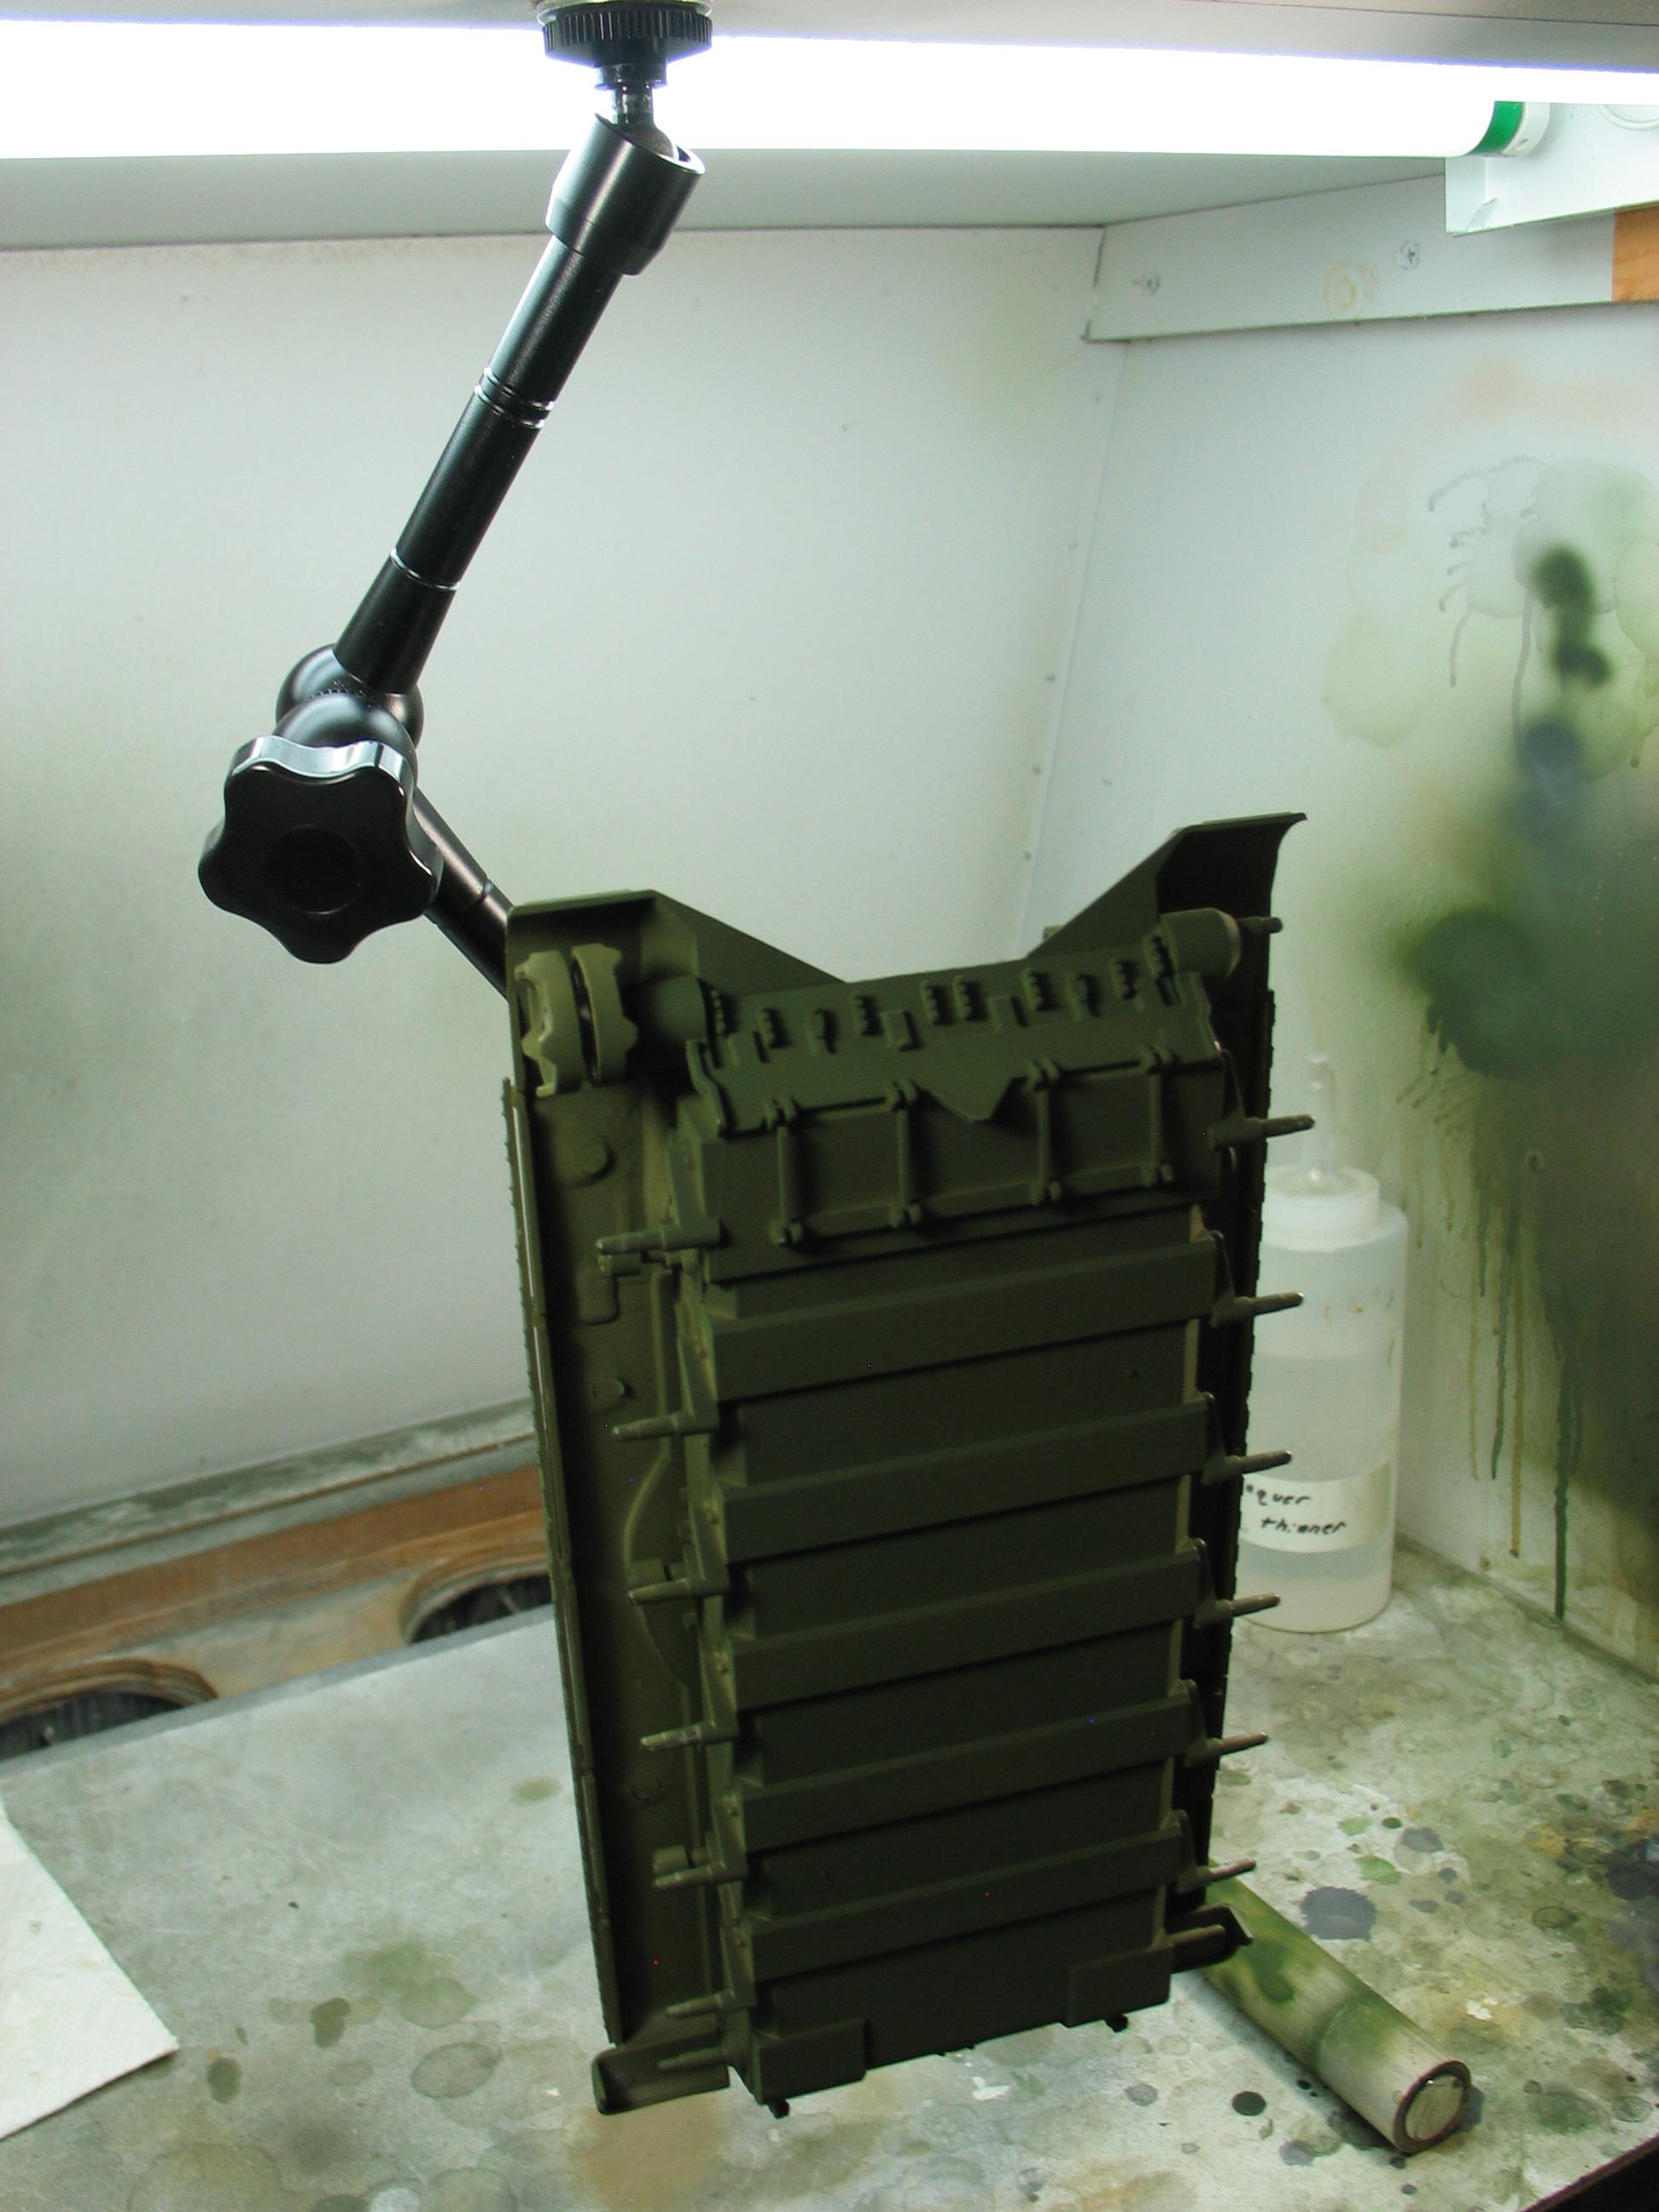
So here's what I use...


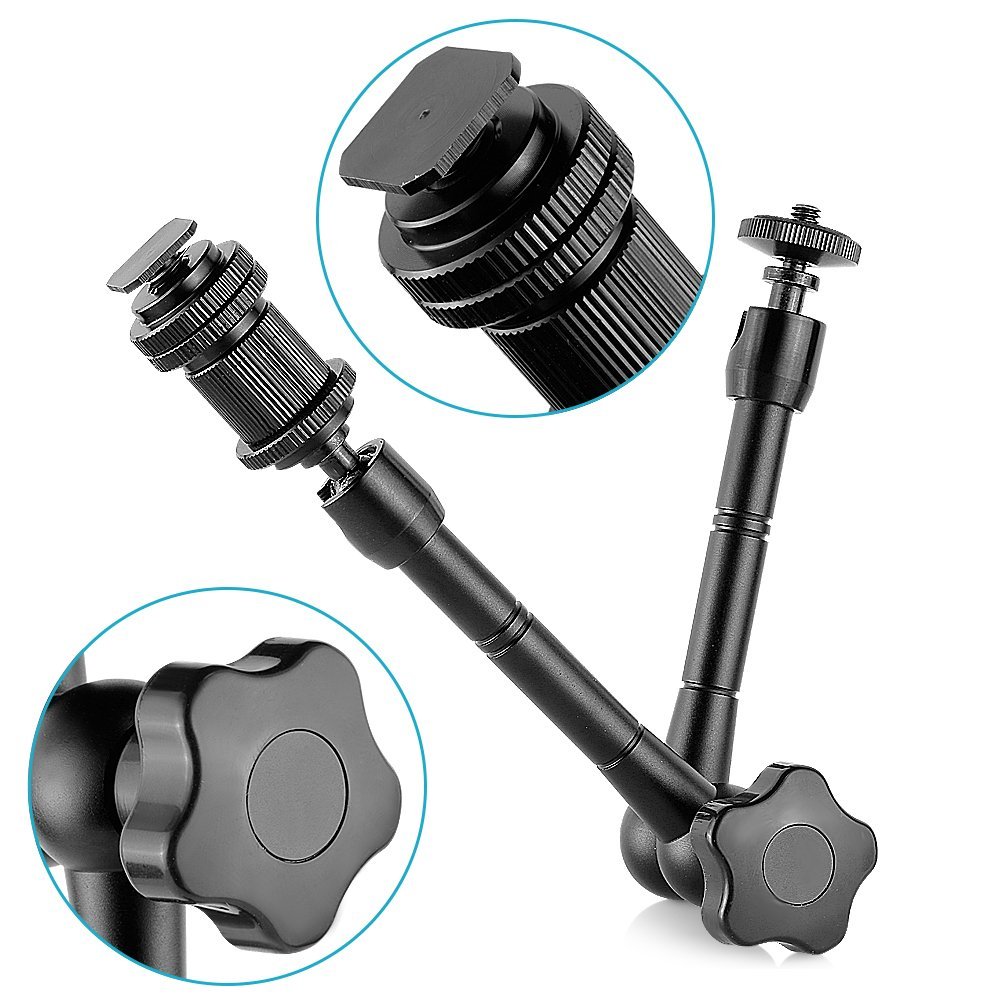
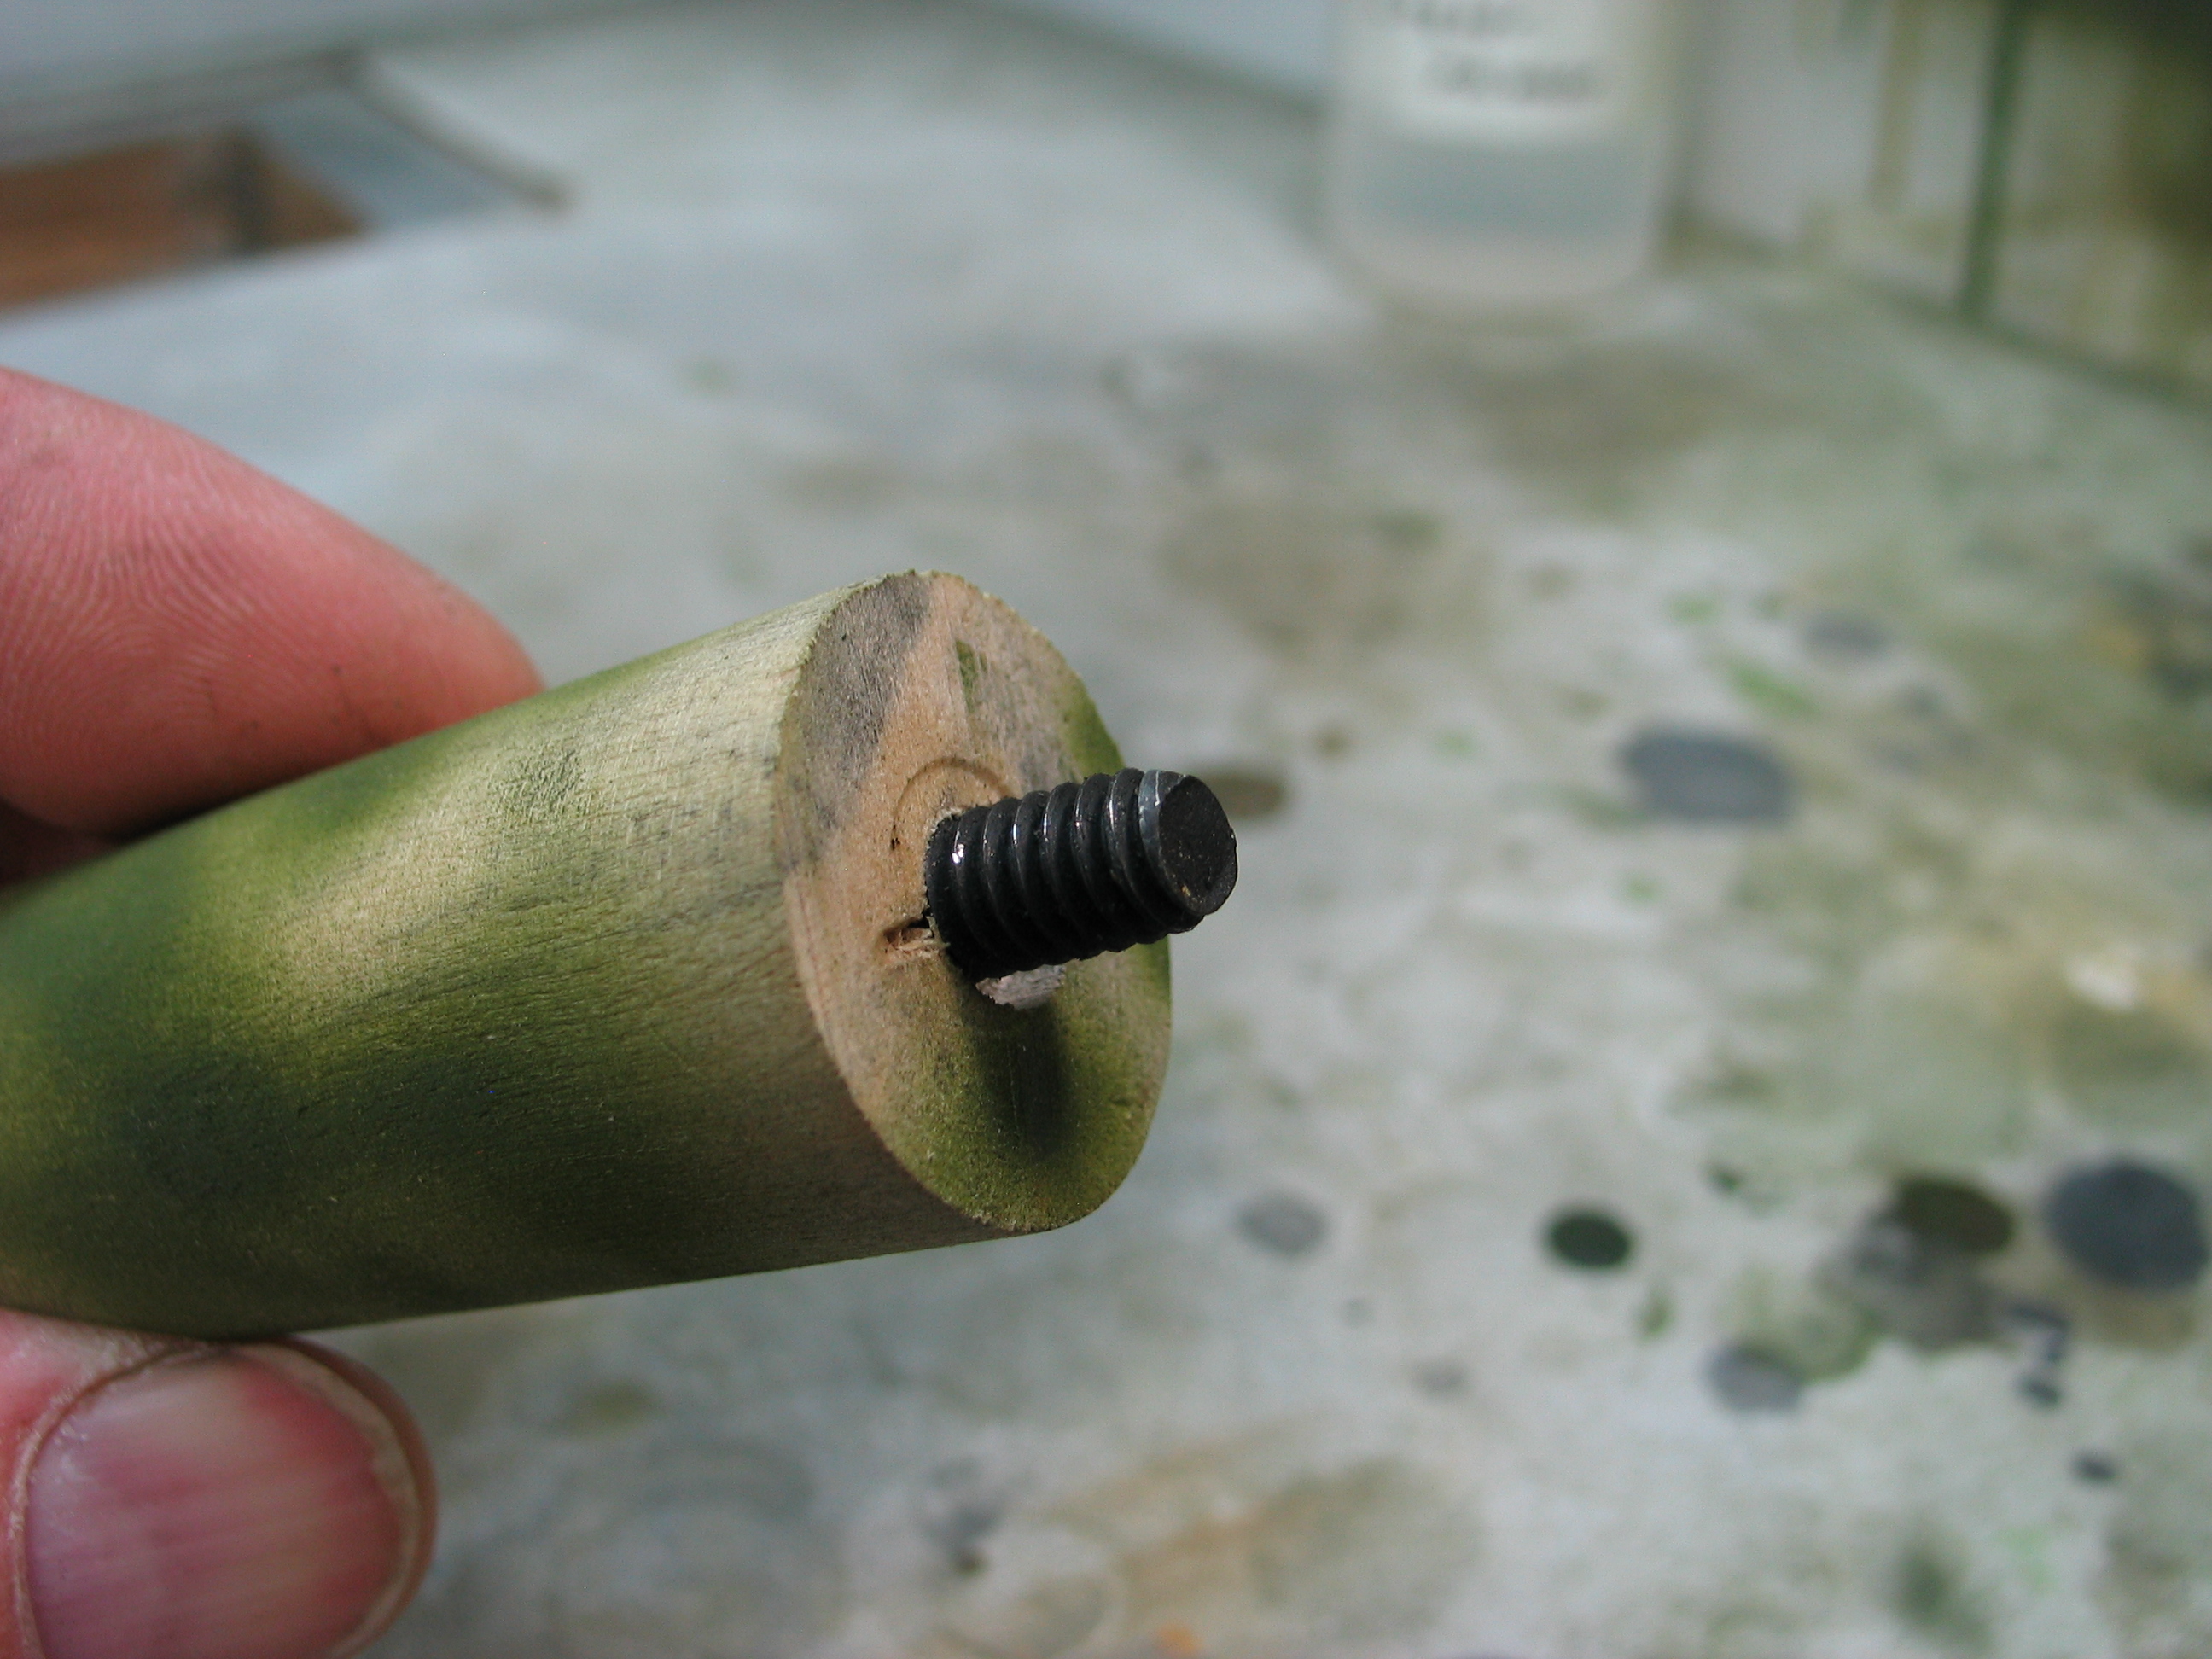
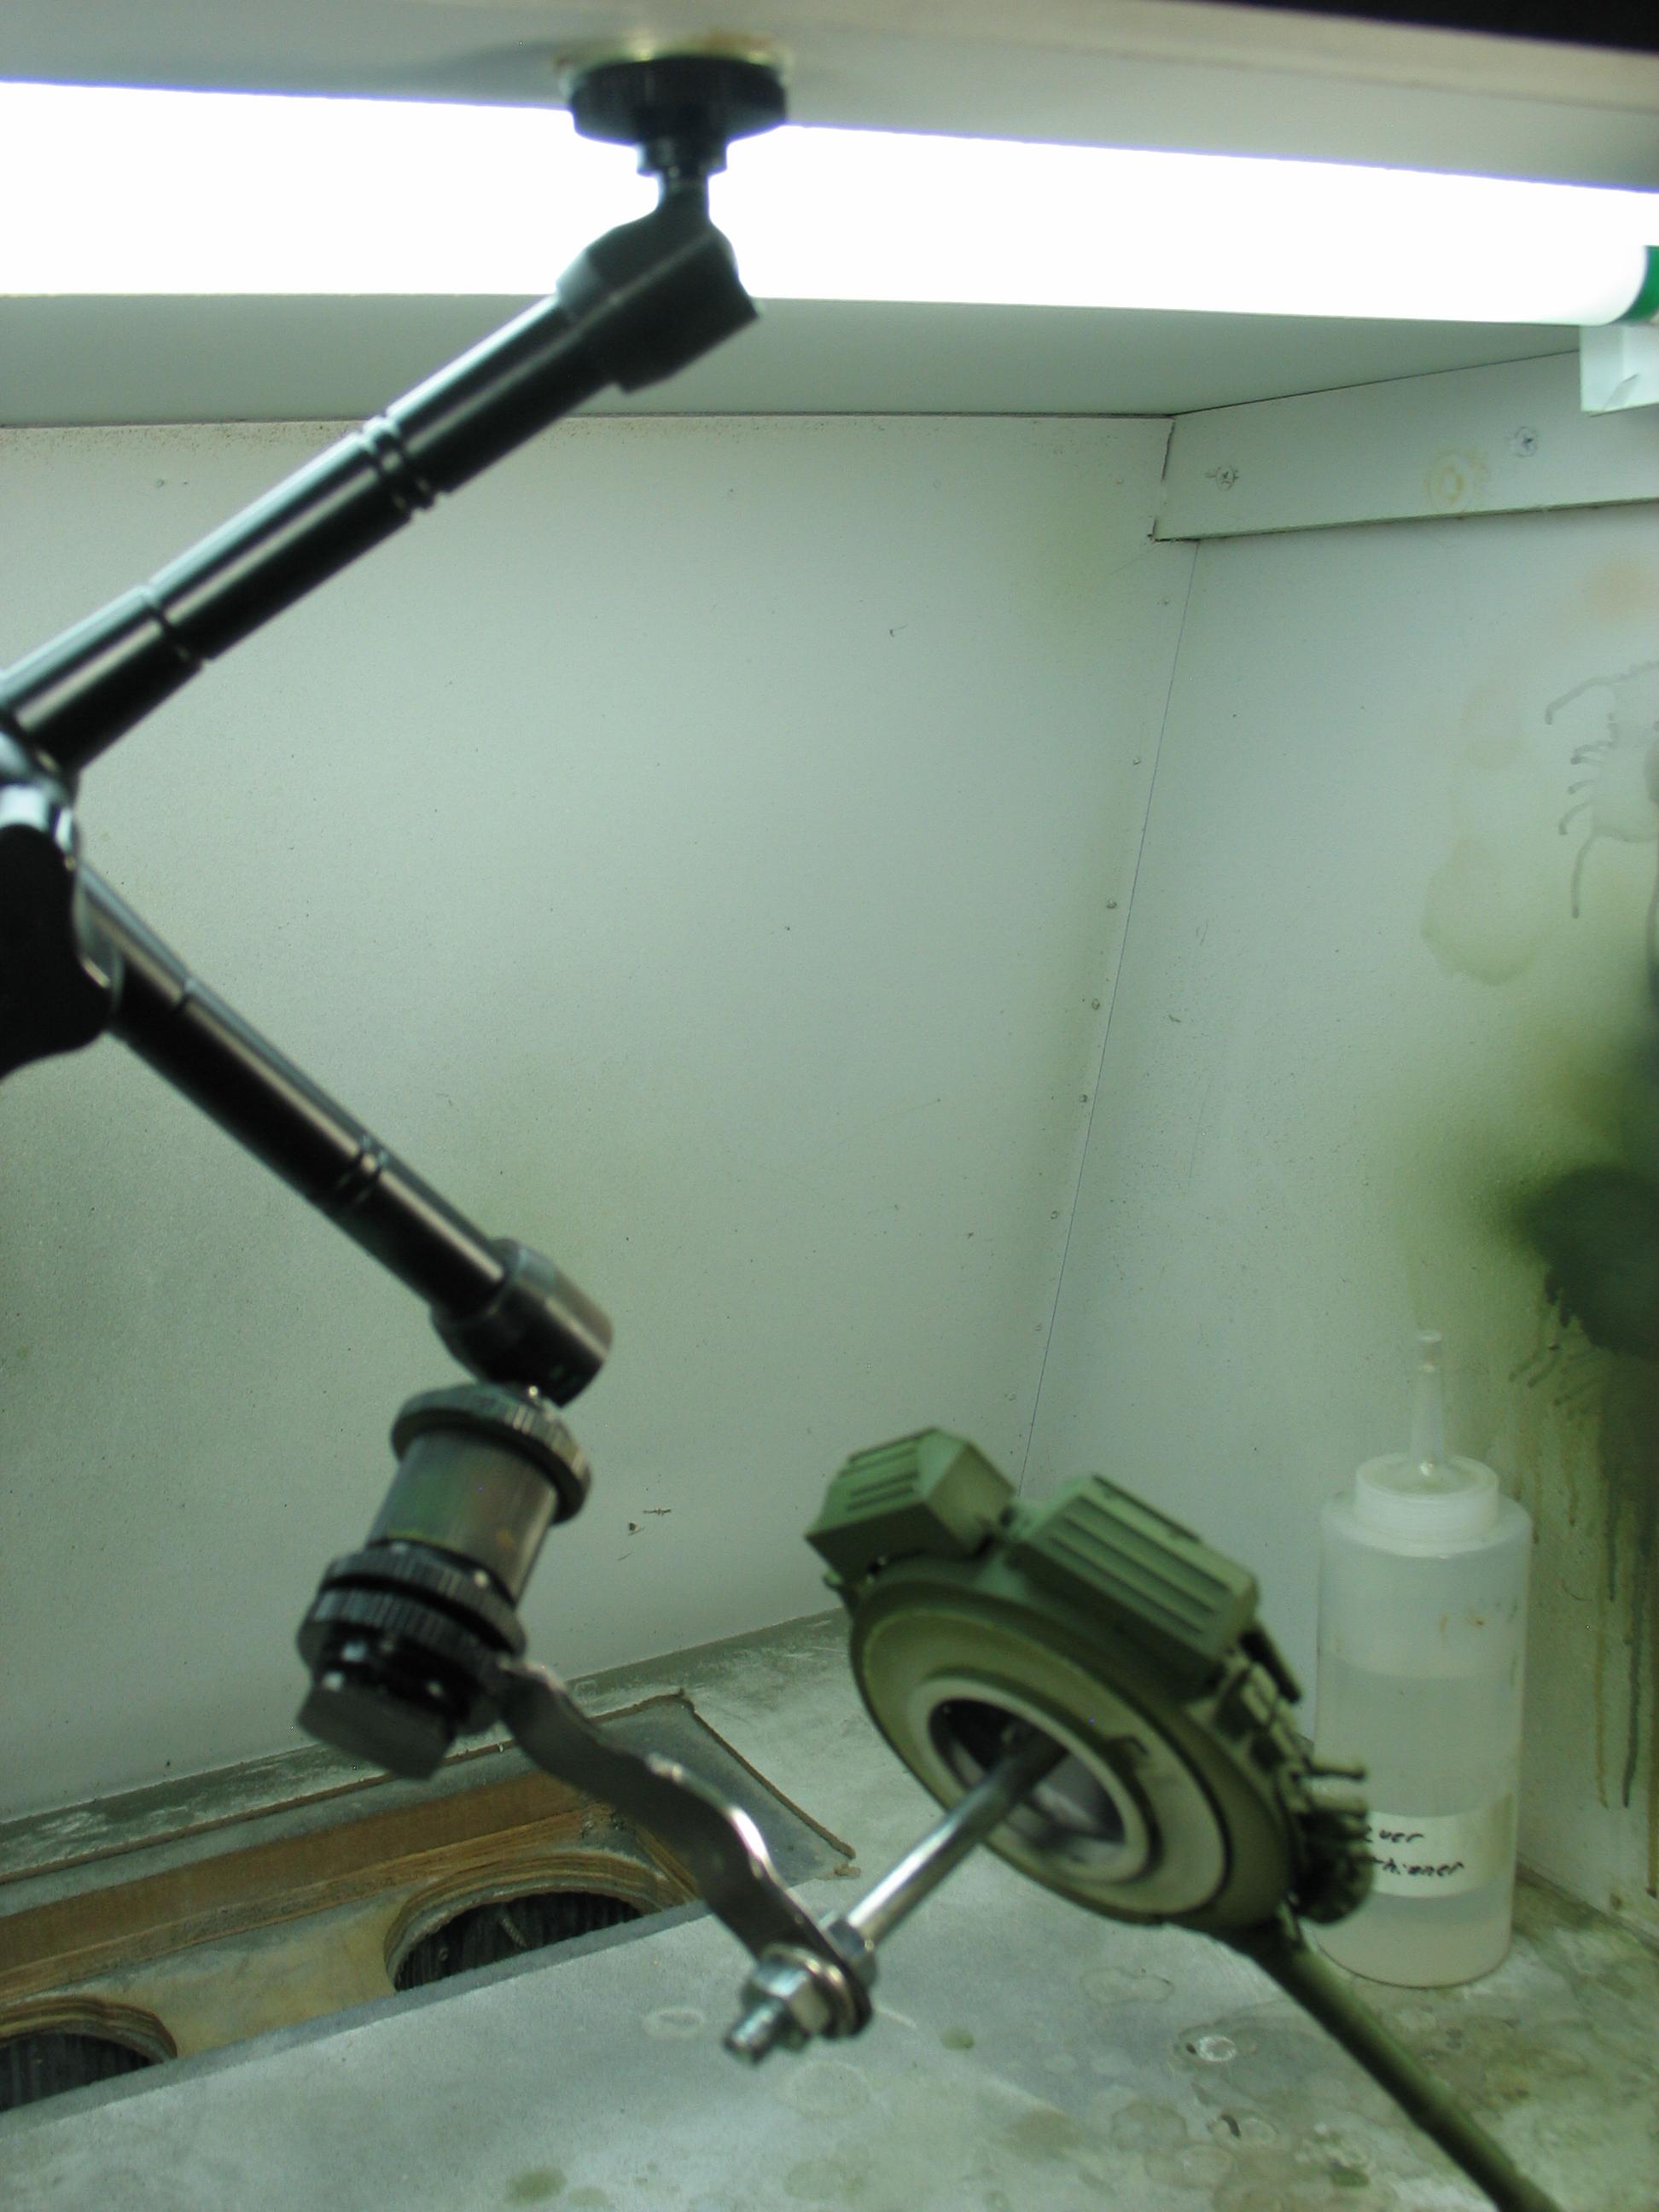
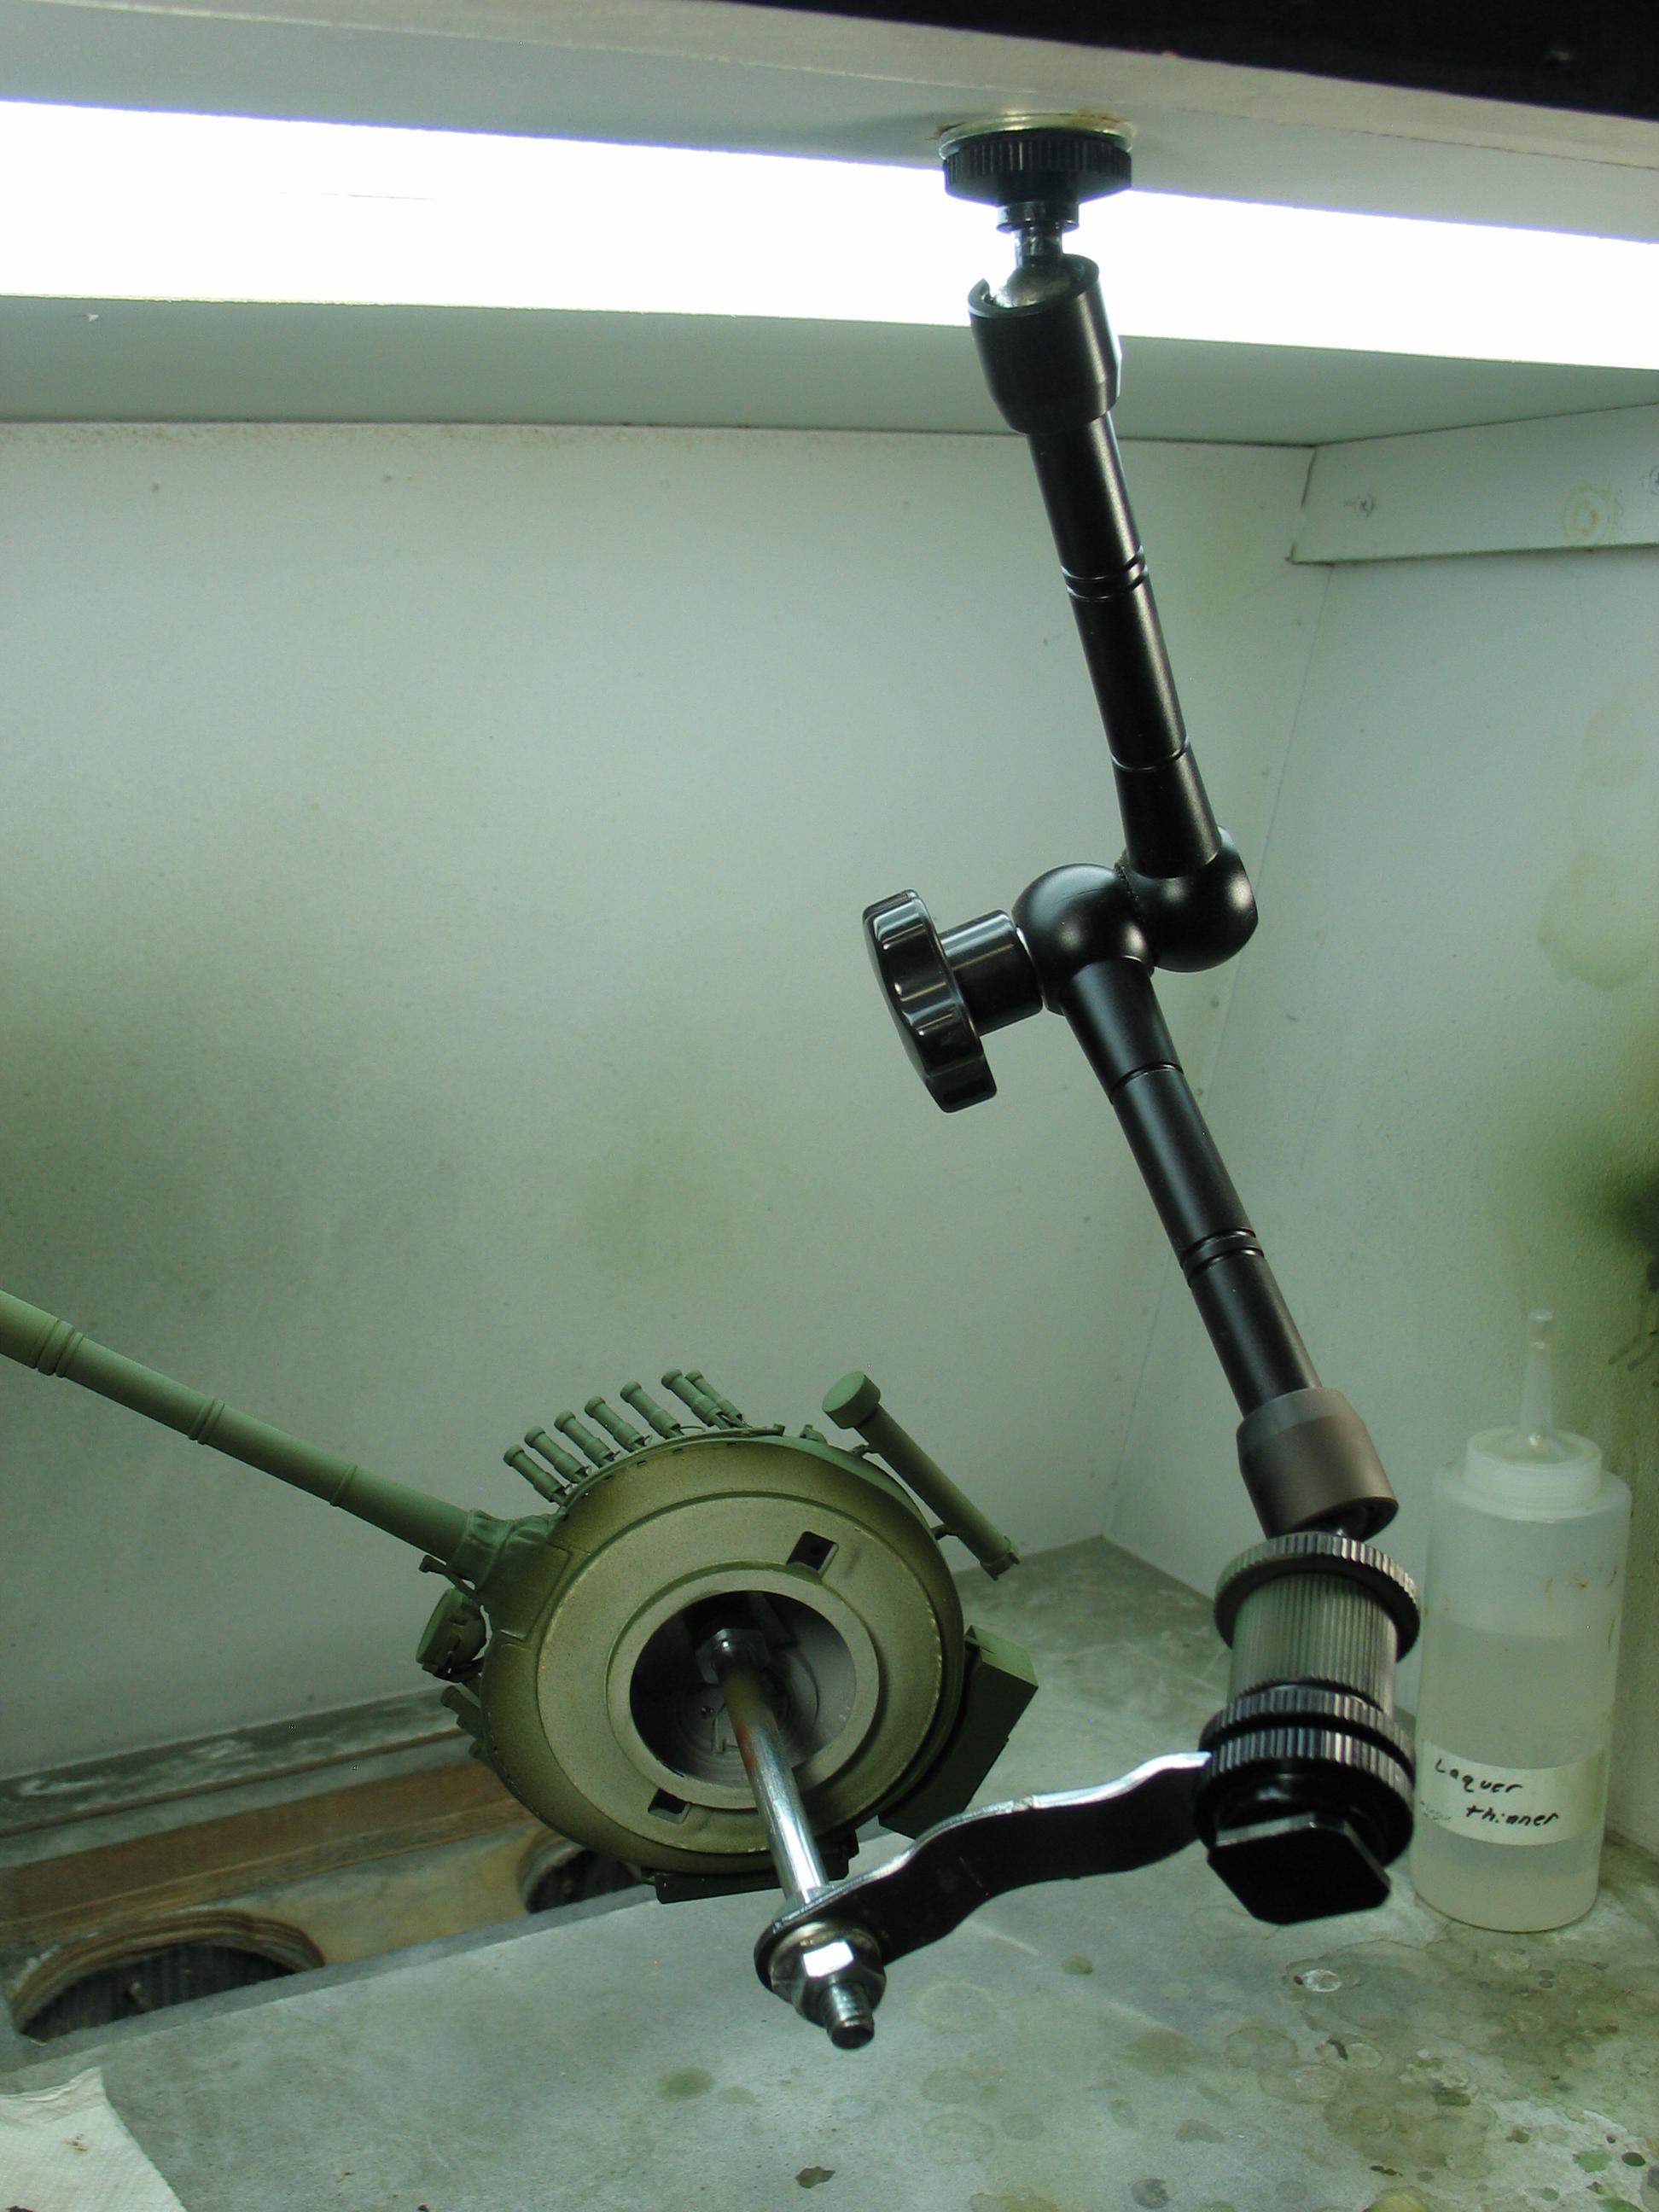
It is an 11 Inch Adjustable Friction Arm that I picked up on Amazon for about $15 bucks I think. It is used in photography, but I mounted it to the top of my spray booth. For painting hulls, I cut and drilled a piece of 1" dowel and threaded a 1/4 20 stud in one end, and epoxied a rare earth magnet at the other end.


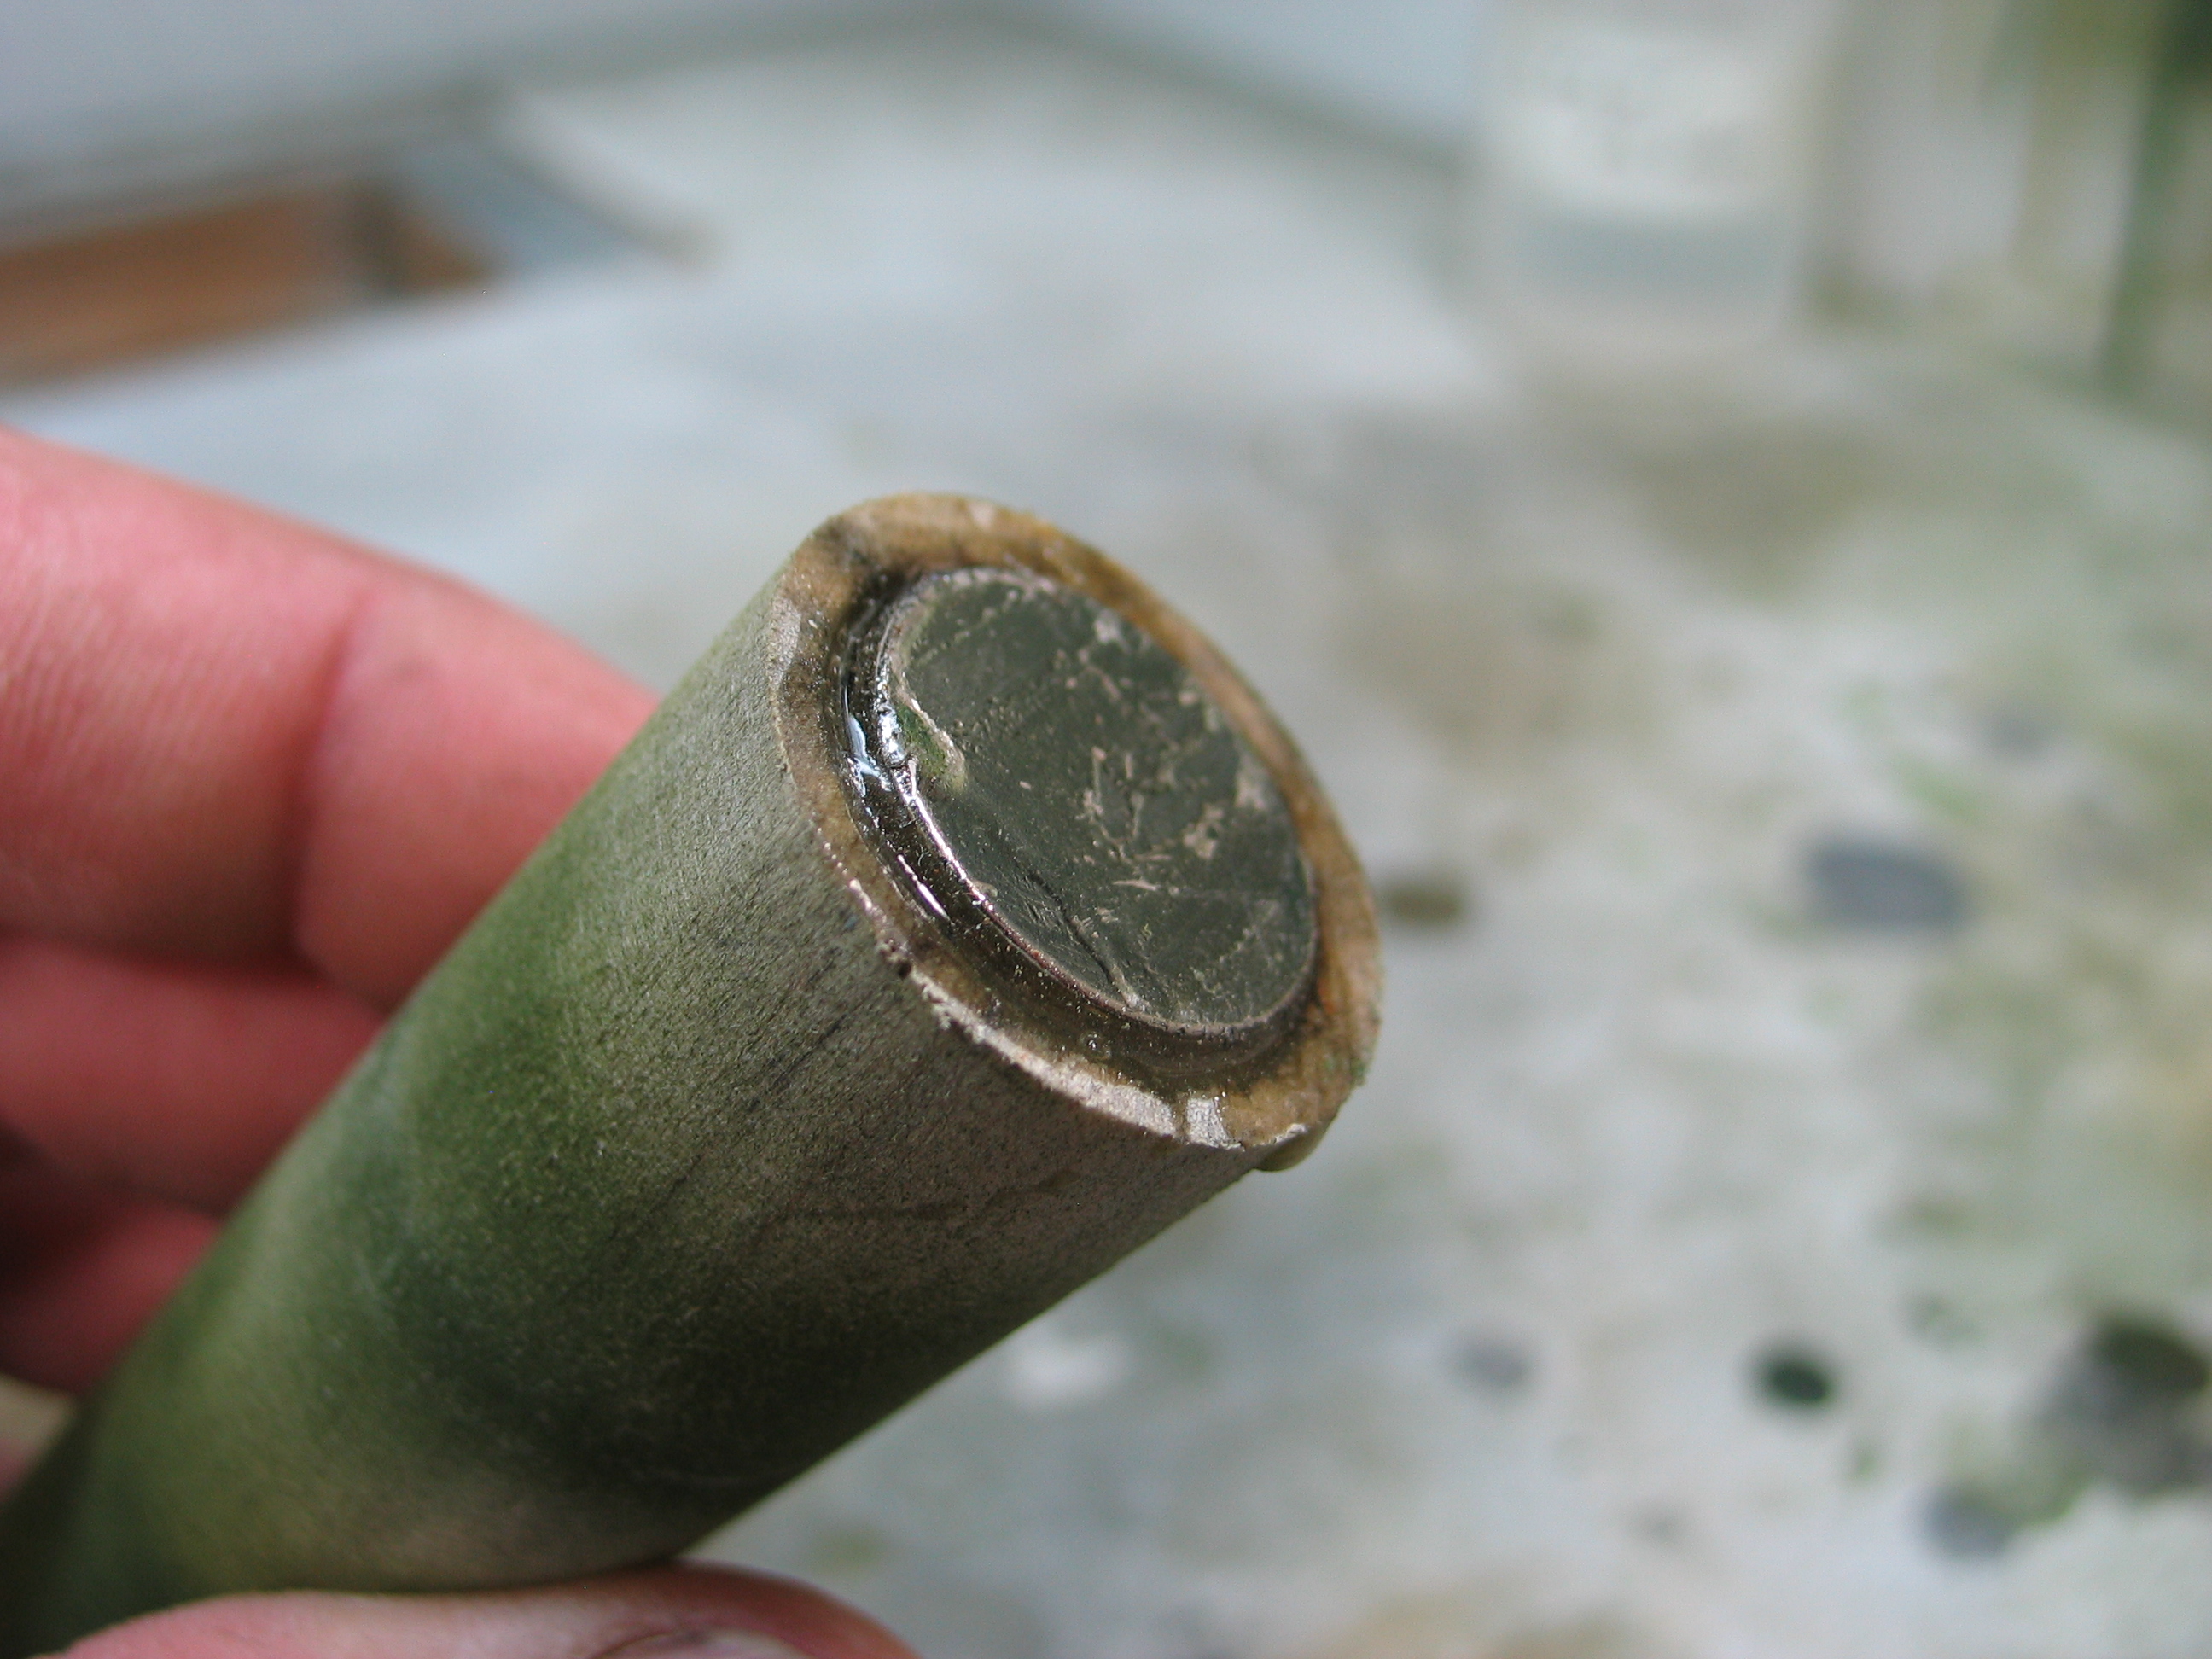
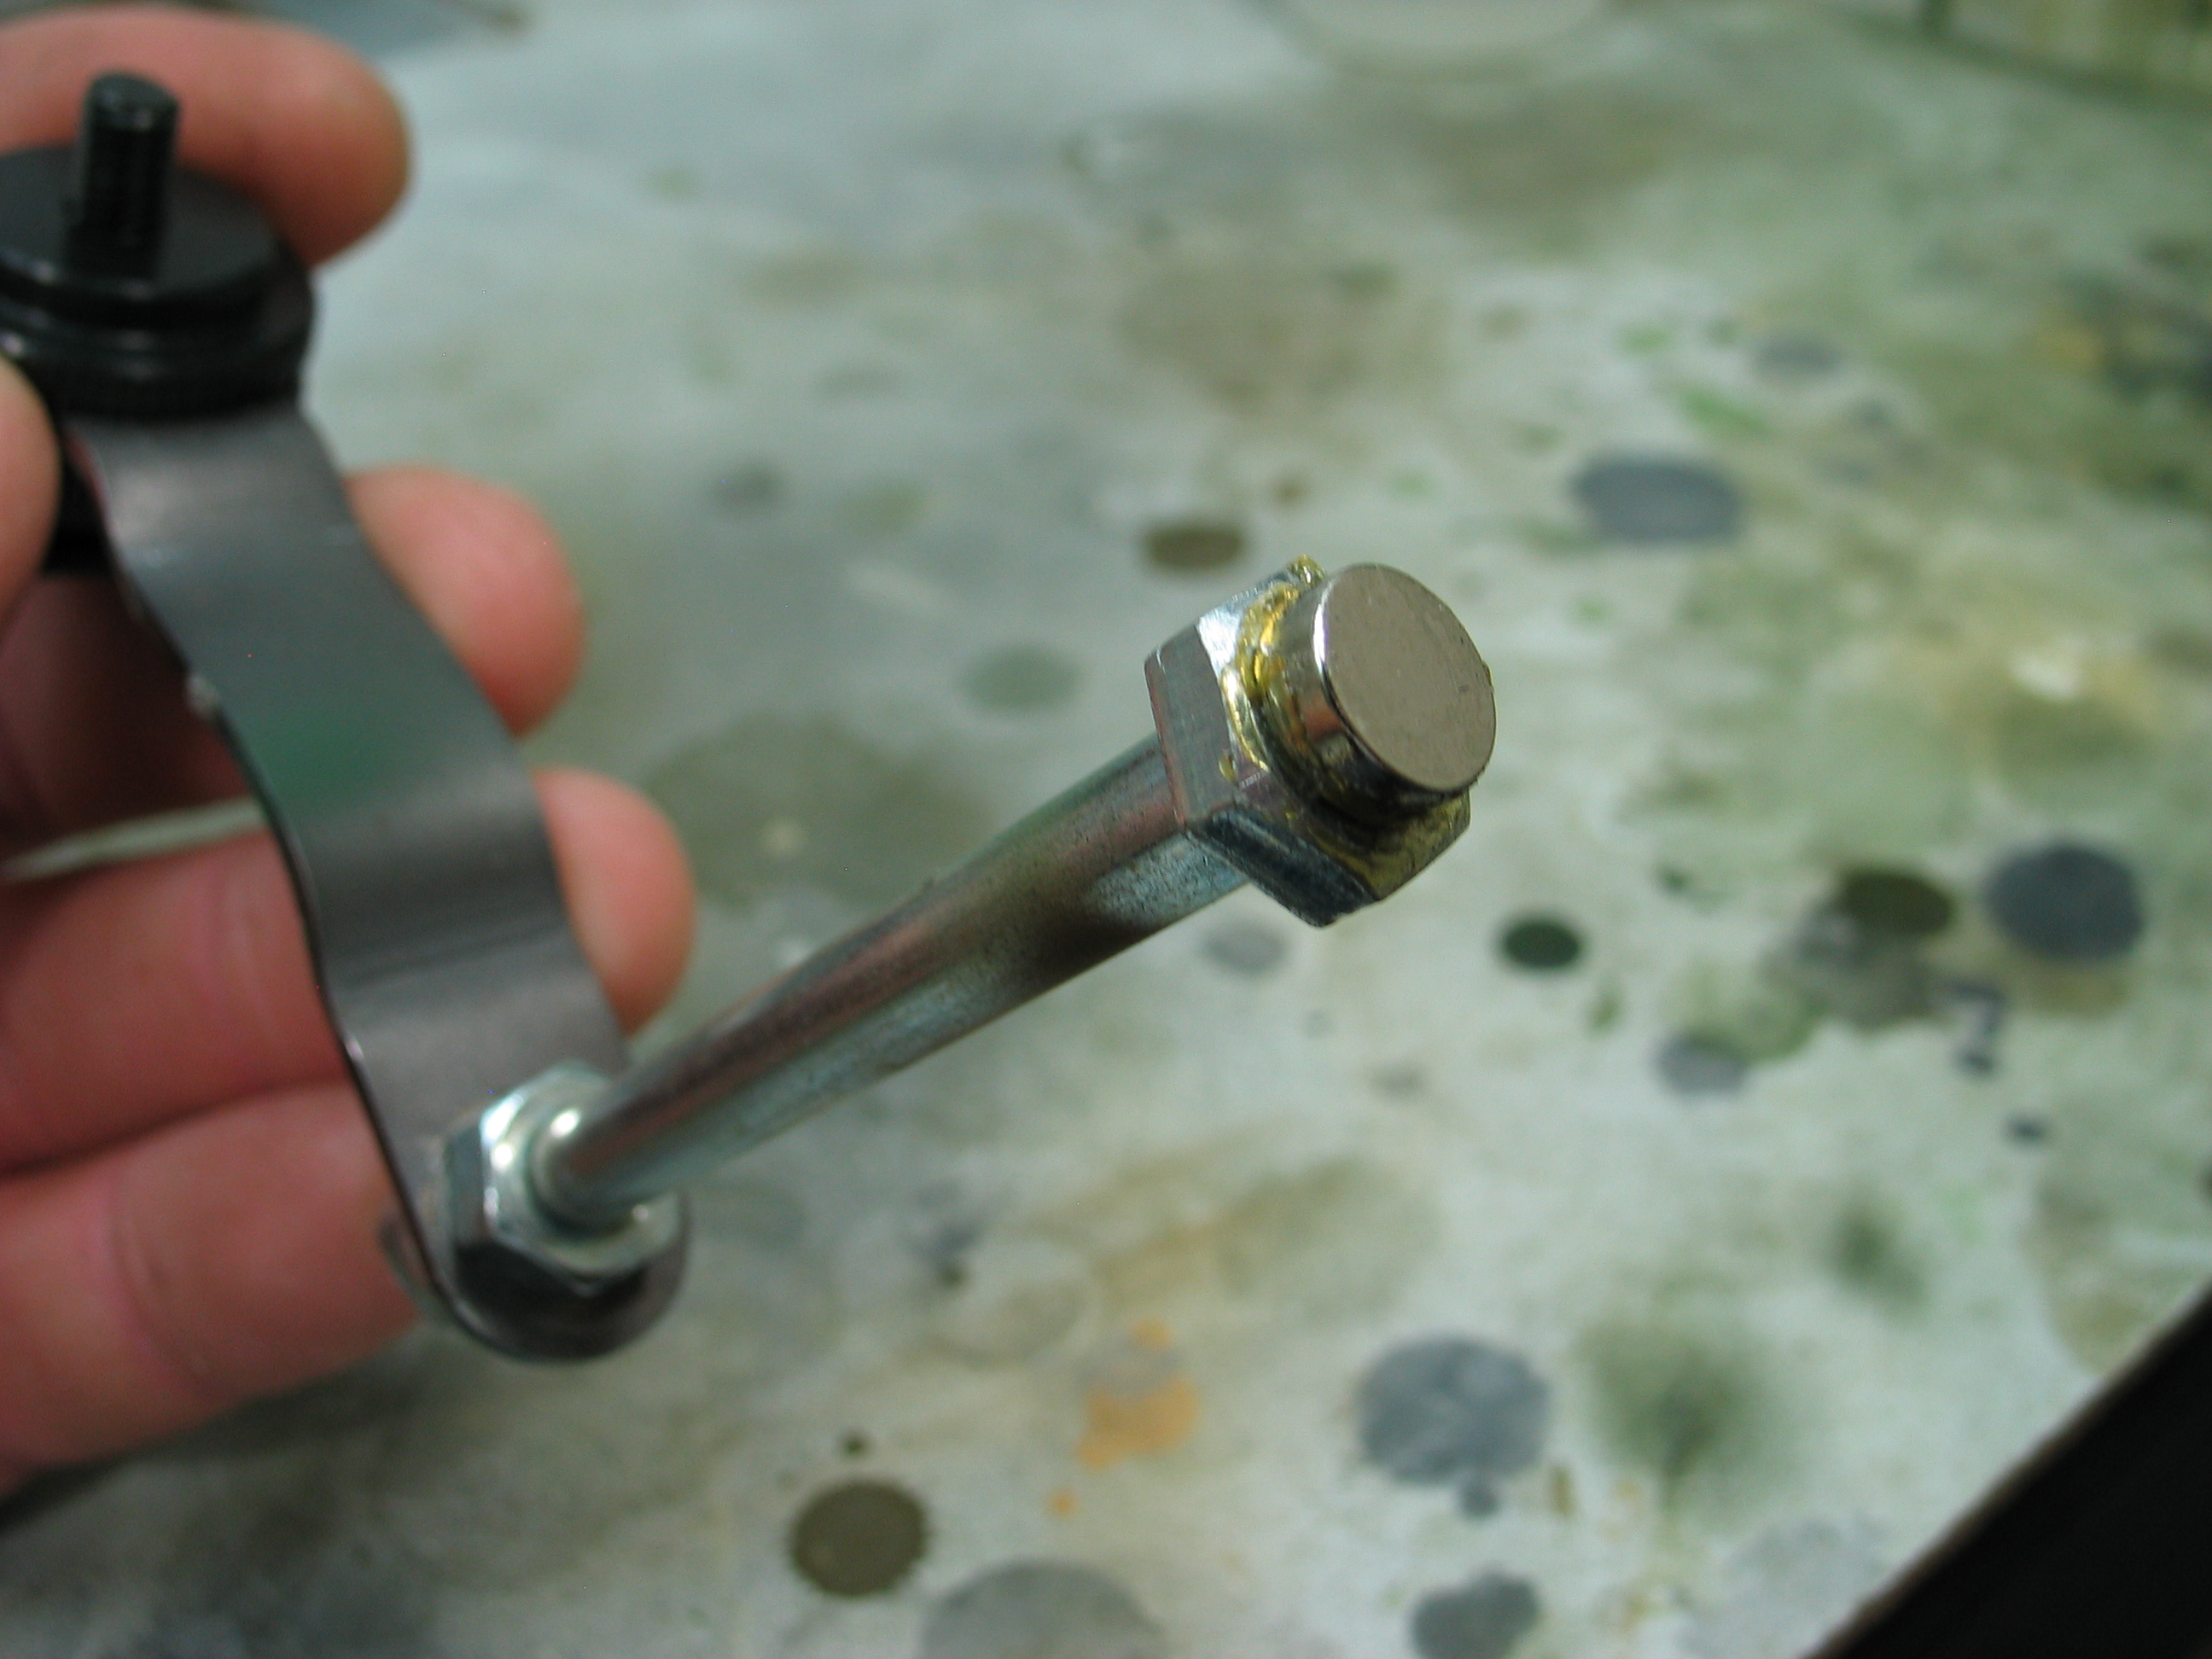
Yea, I countersunk the magnet to get a better hold on the magnet, those suckers are strong.

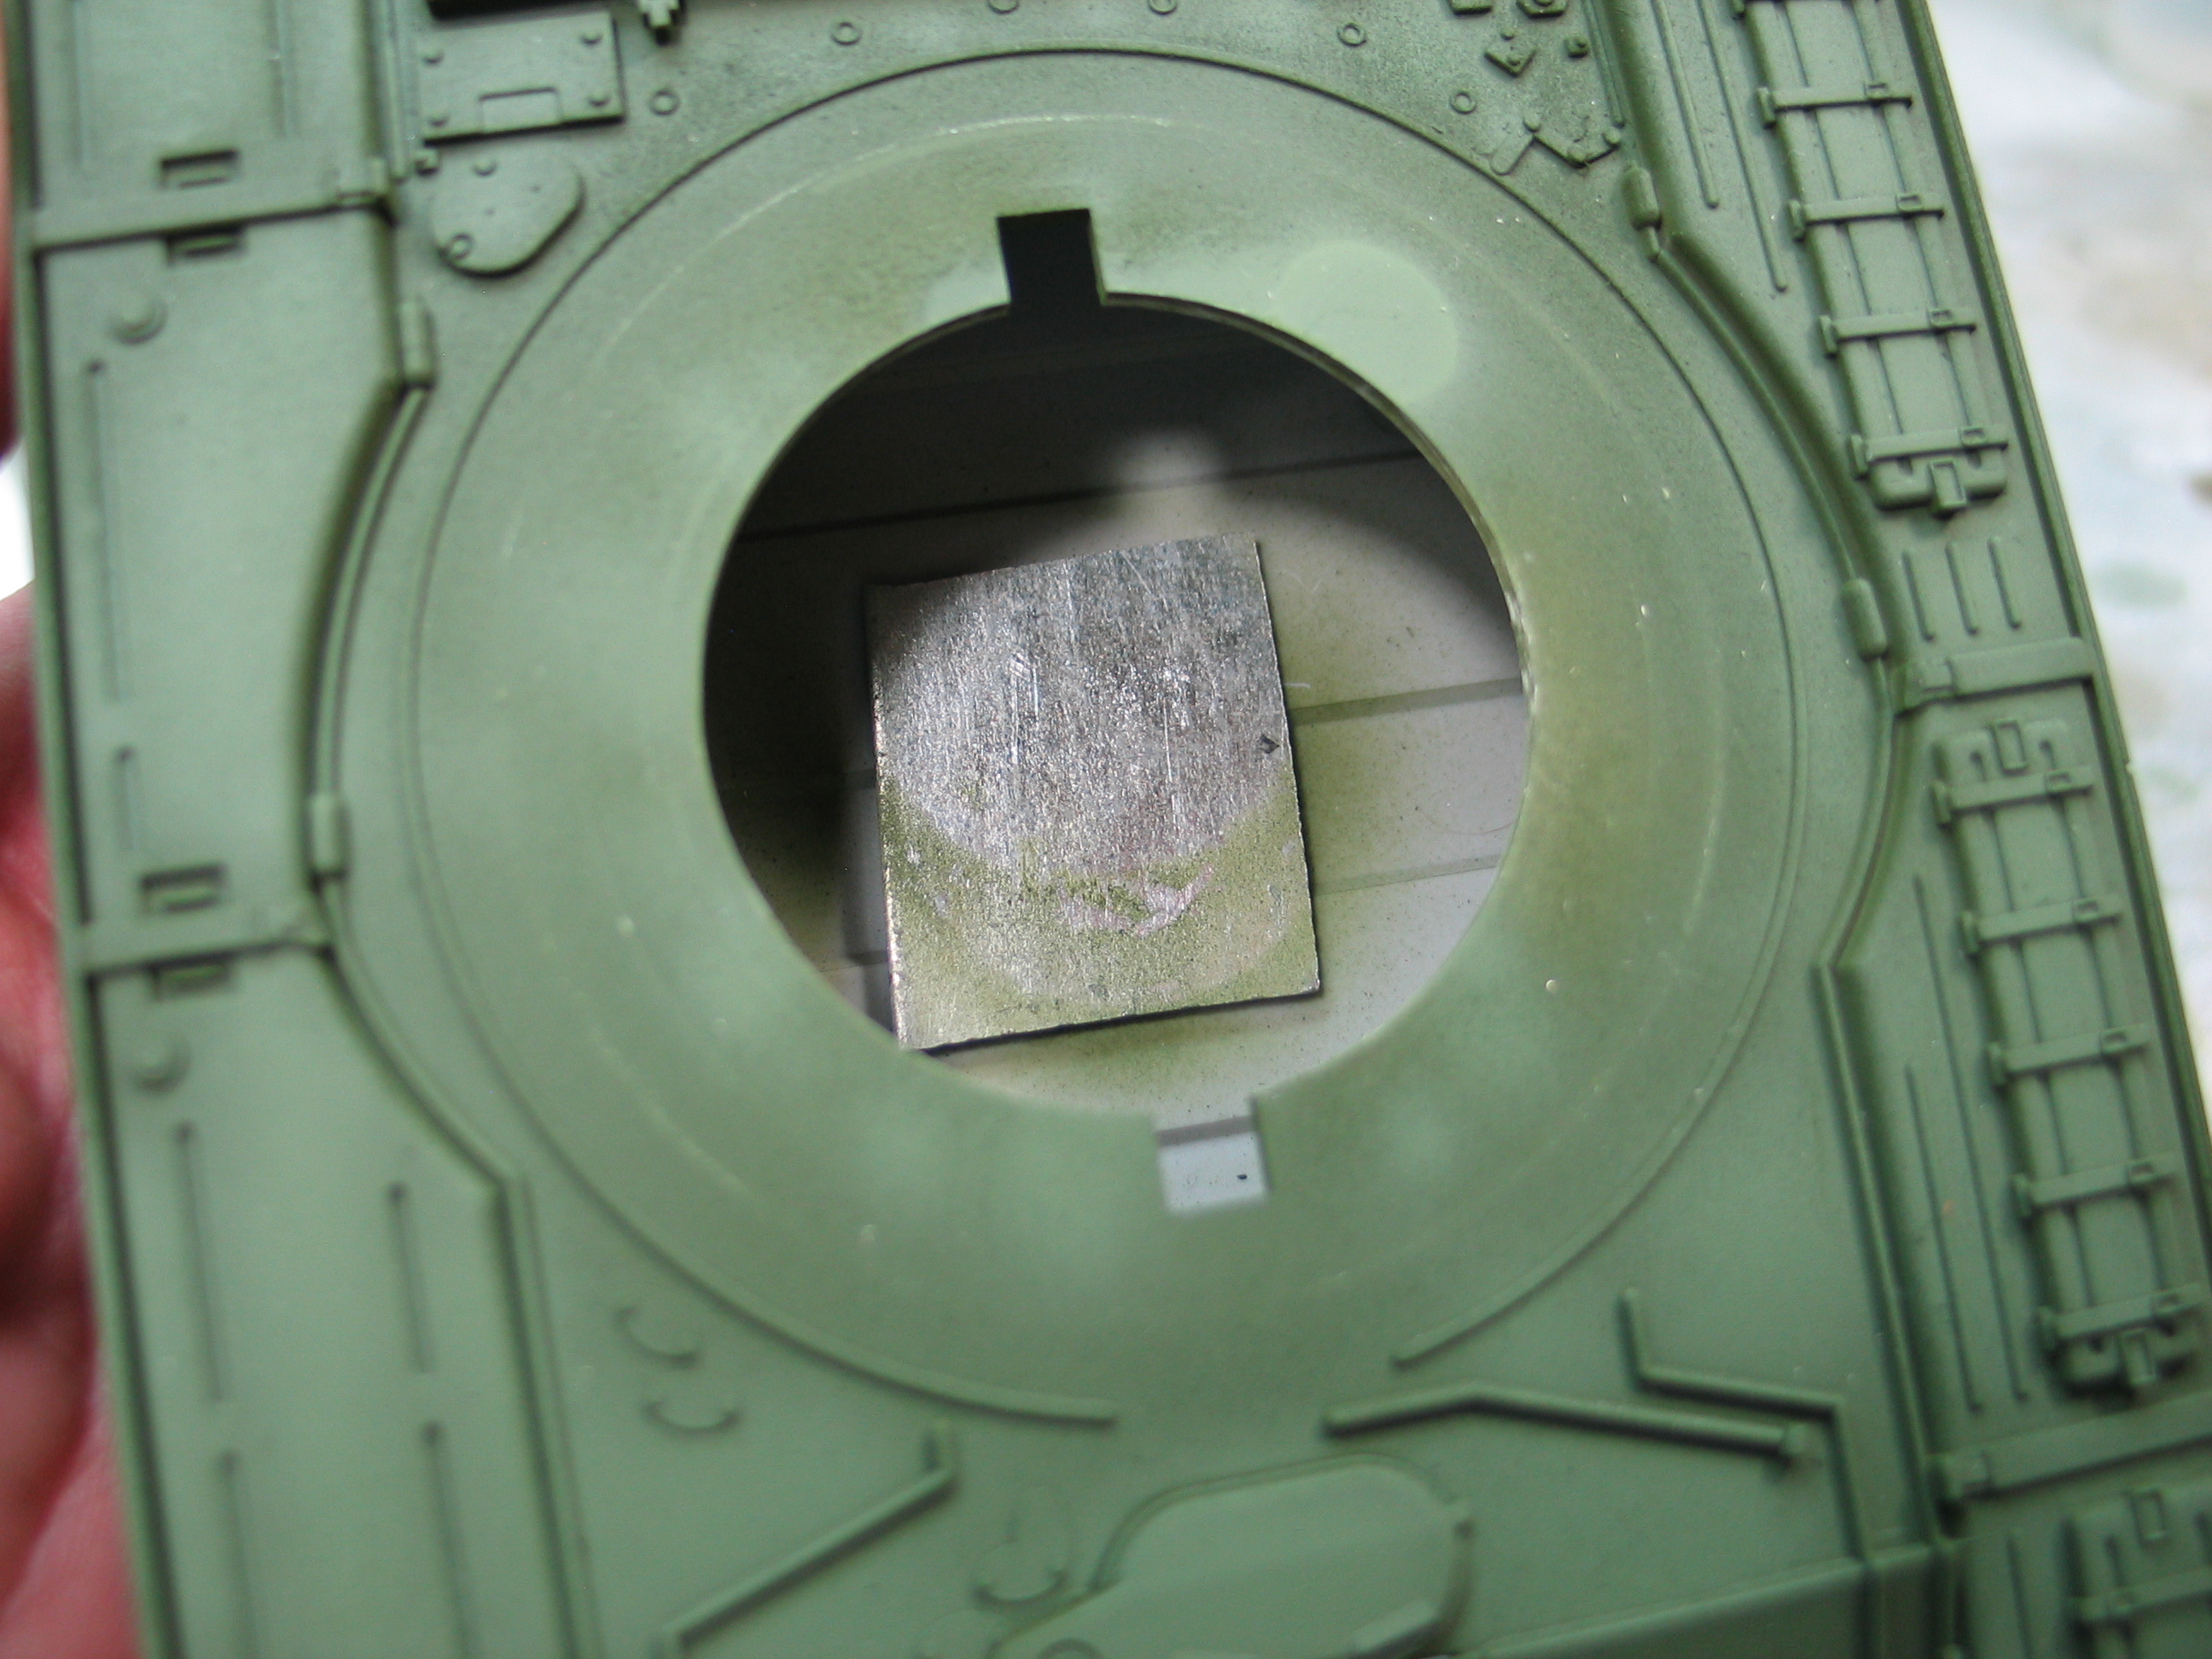
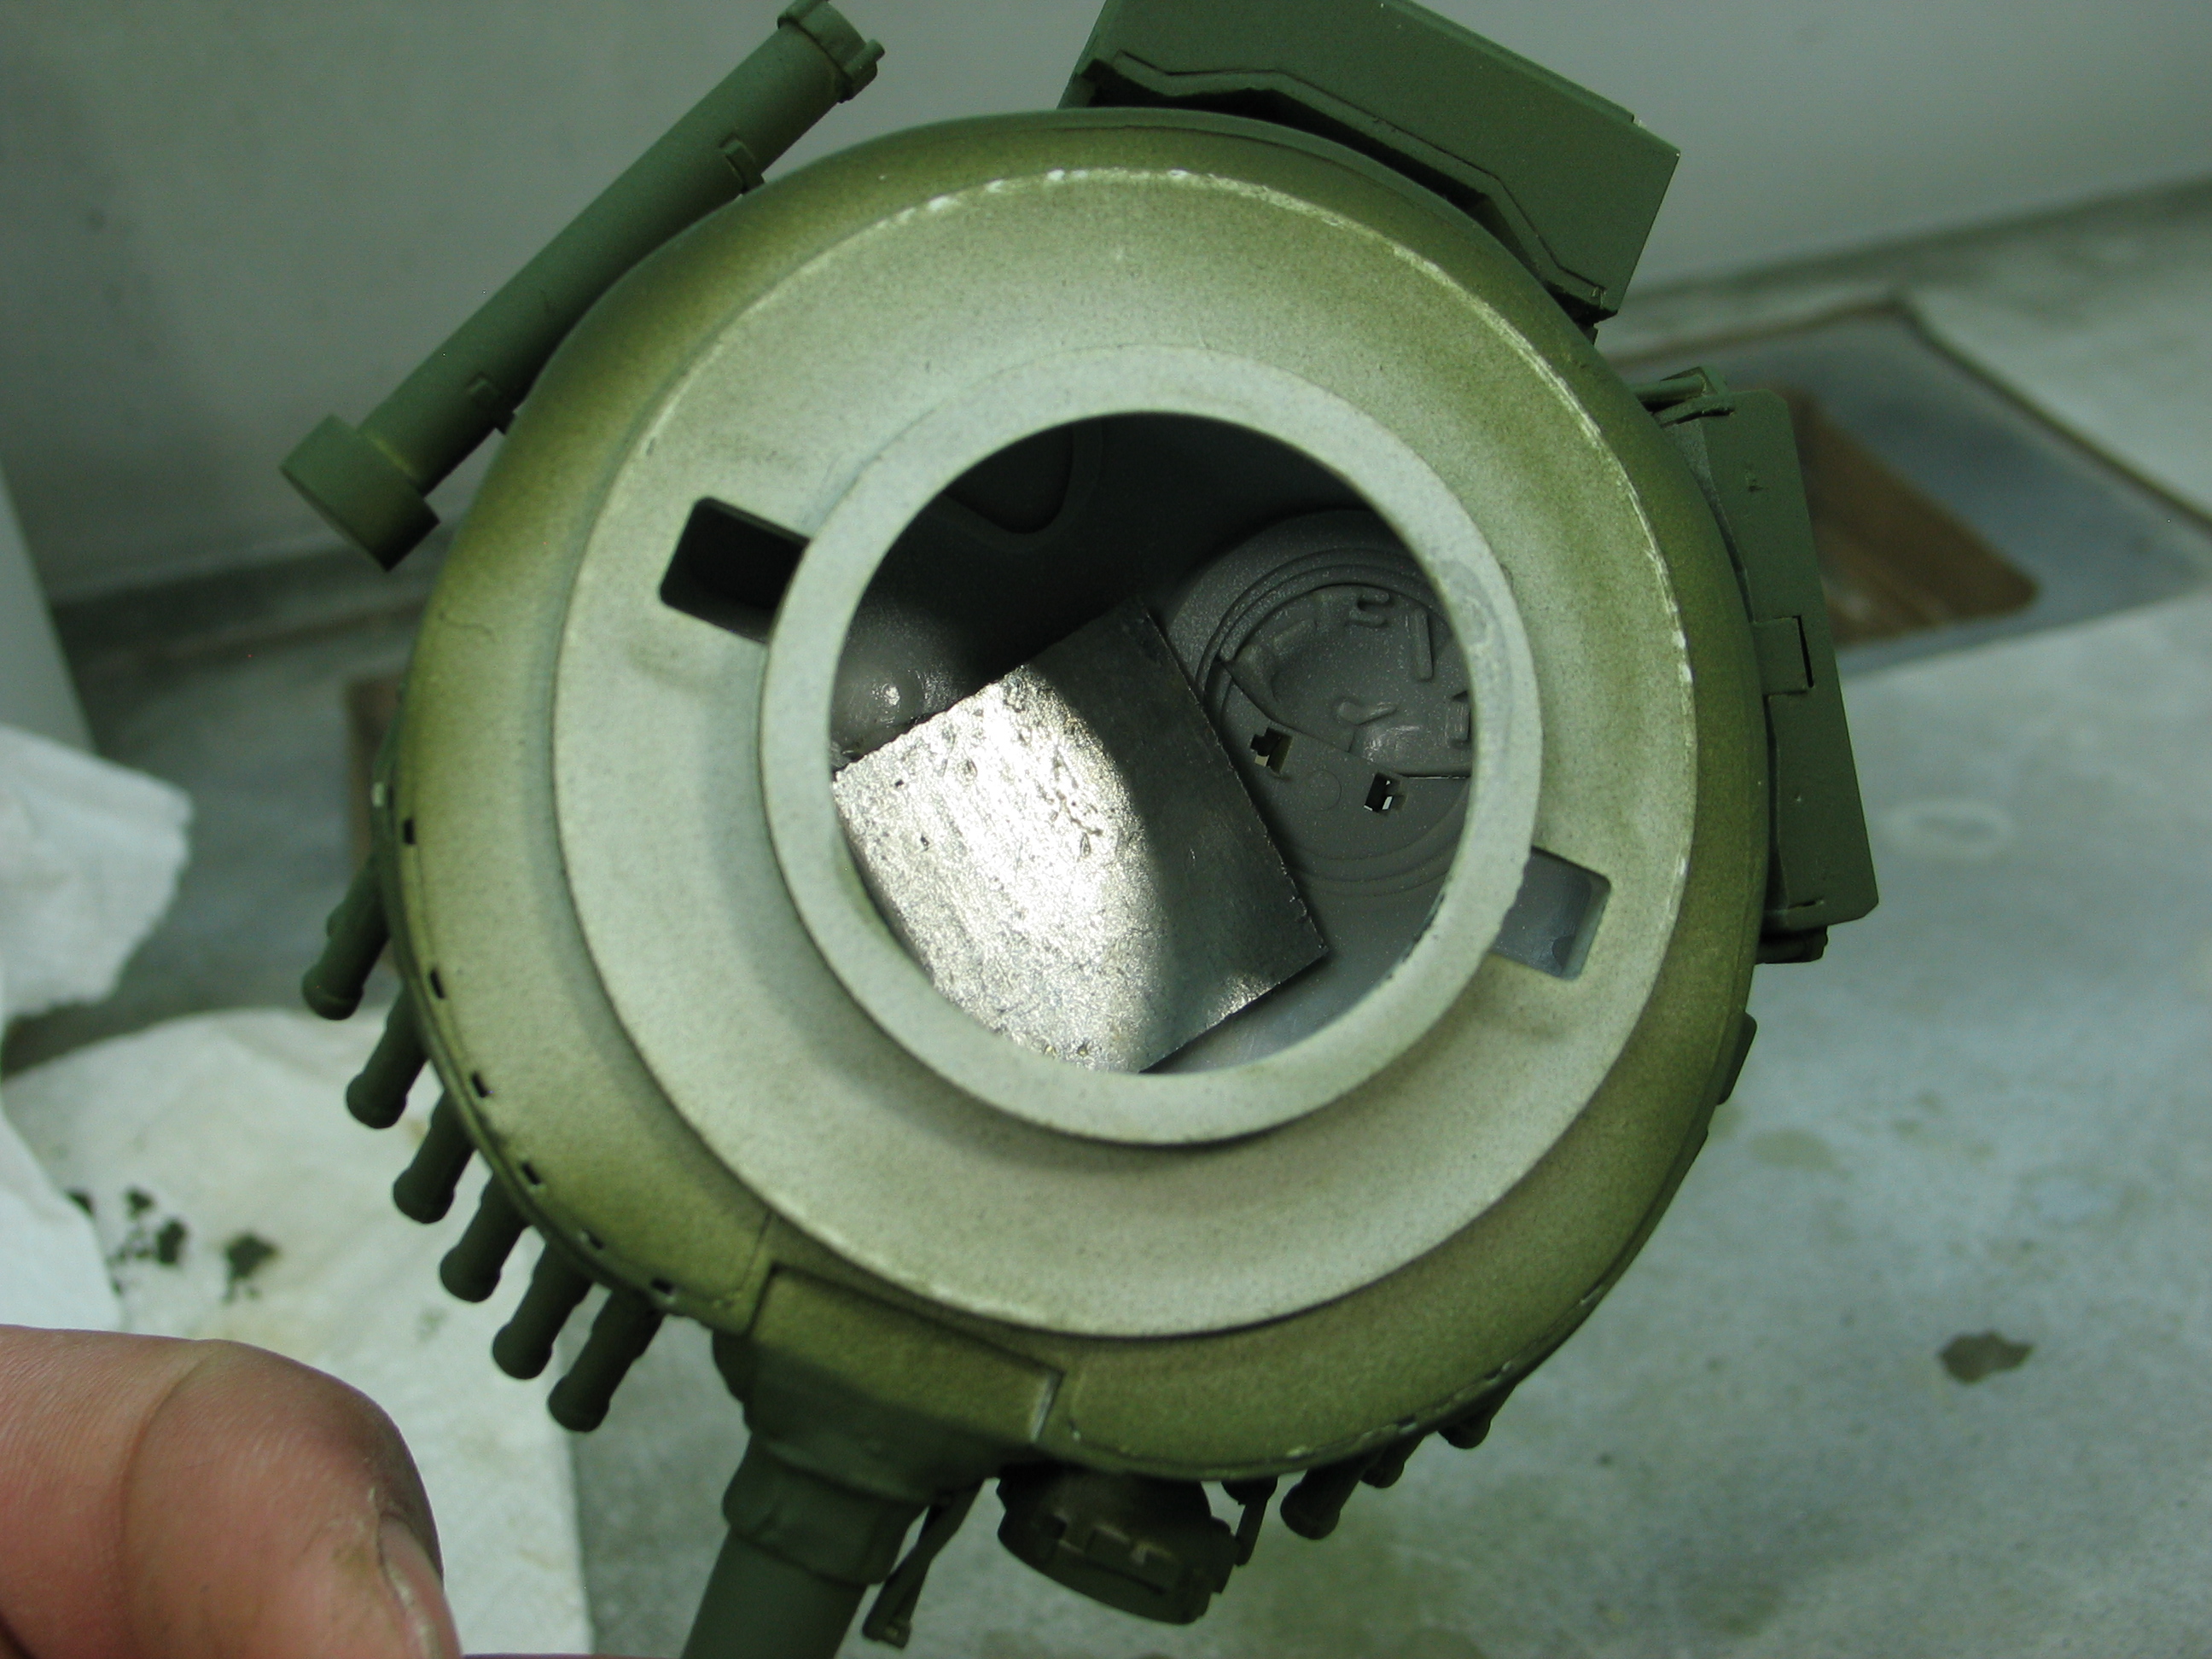
Then I epoxied a piece of sheet metal to the inside of the hull,


and then threaded the dowel into the arm...


...and now I can place the hull into almost any position...


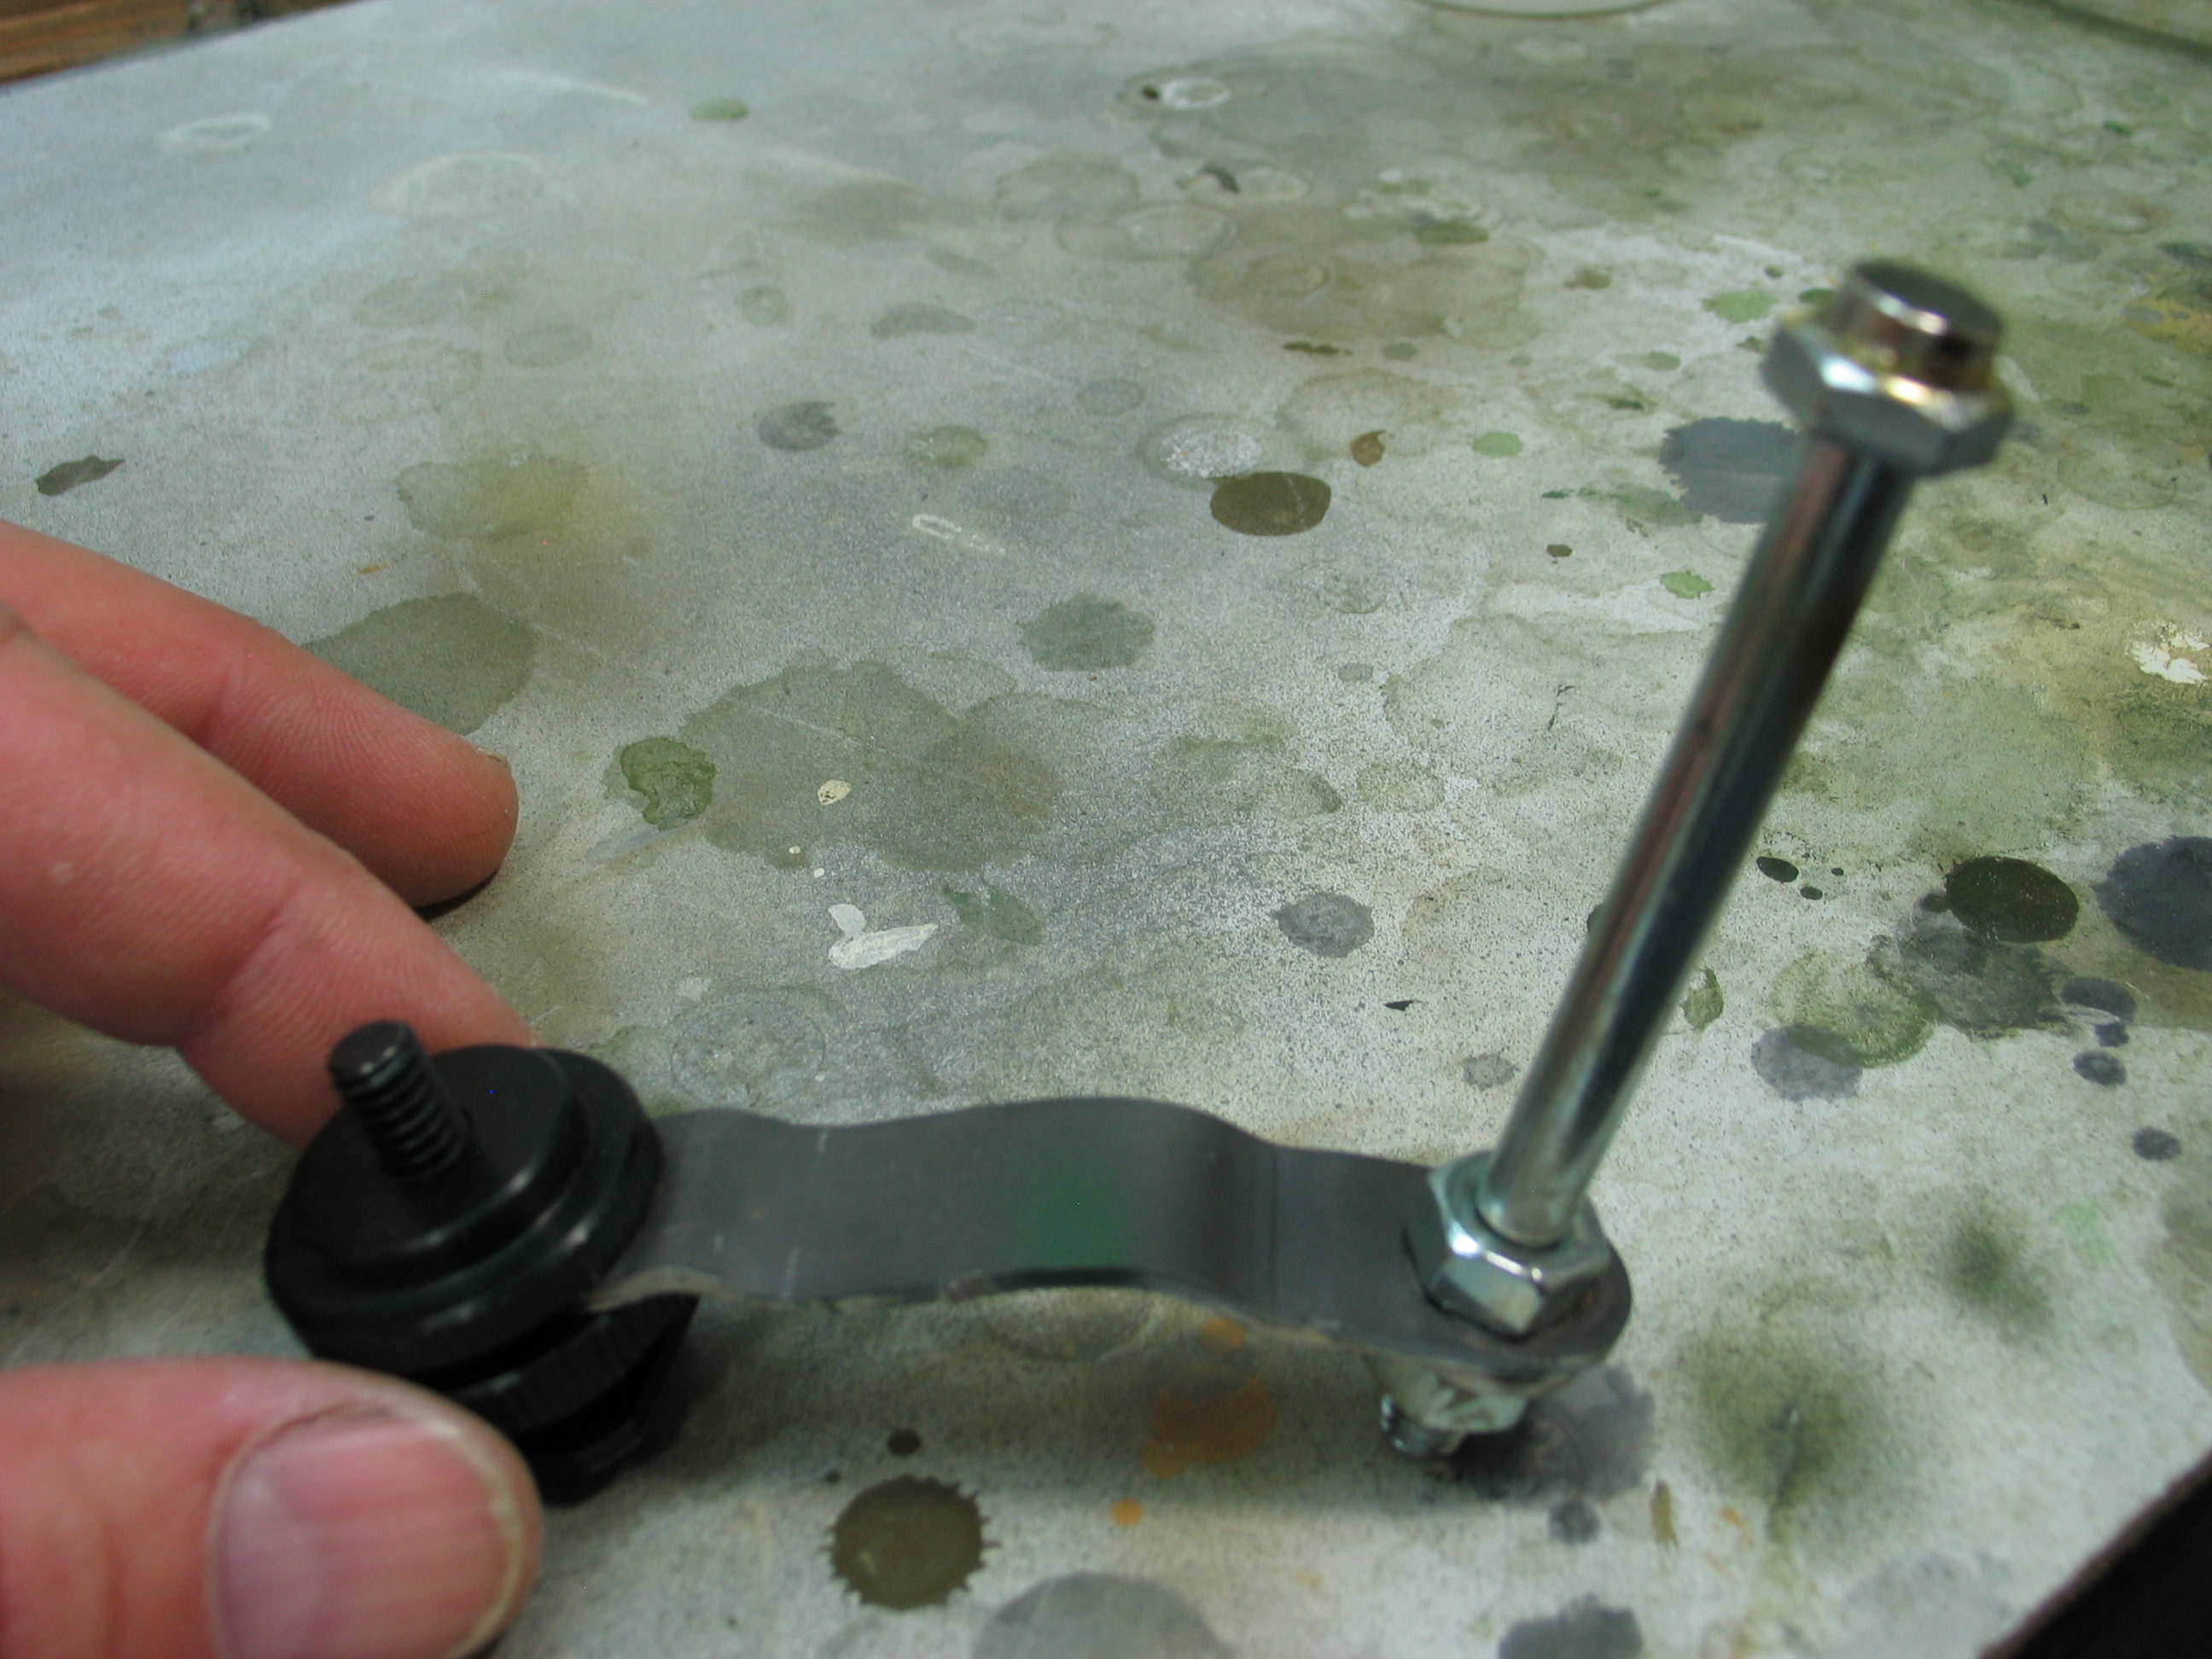
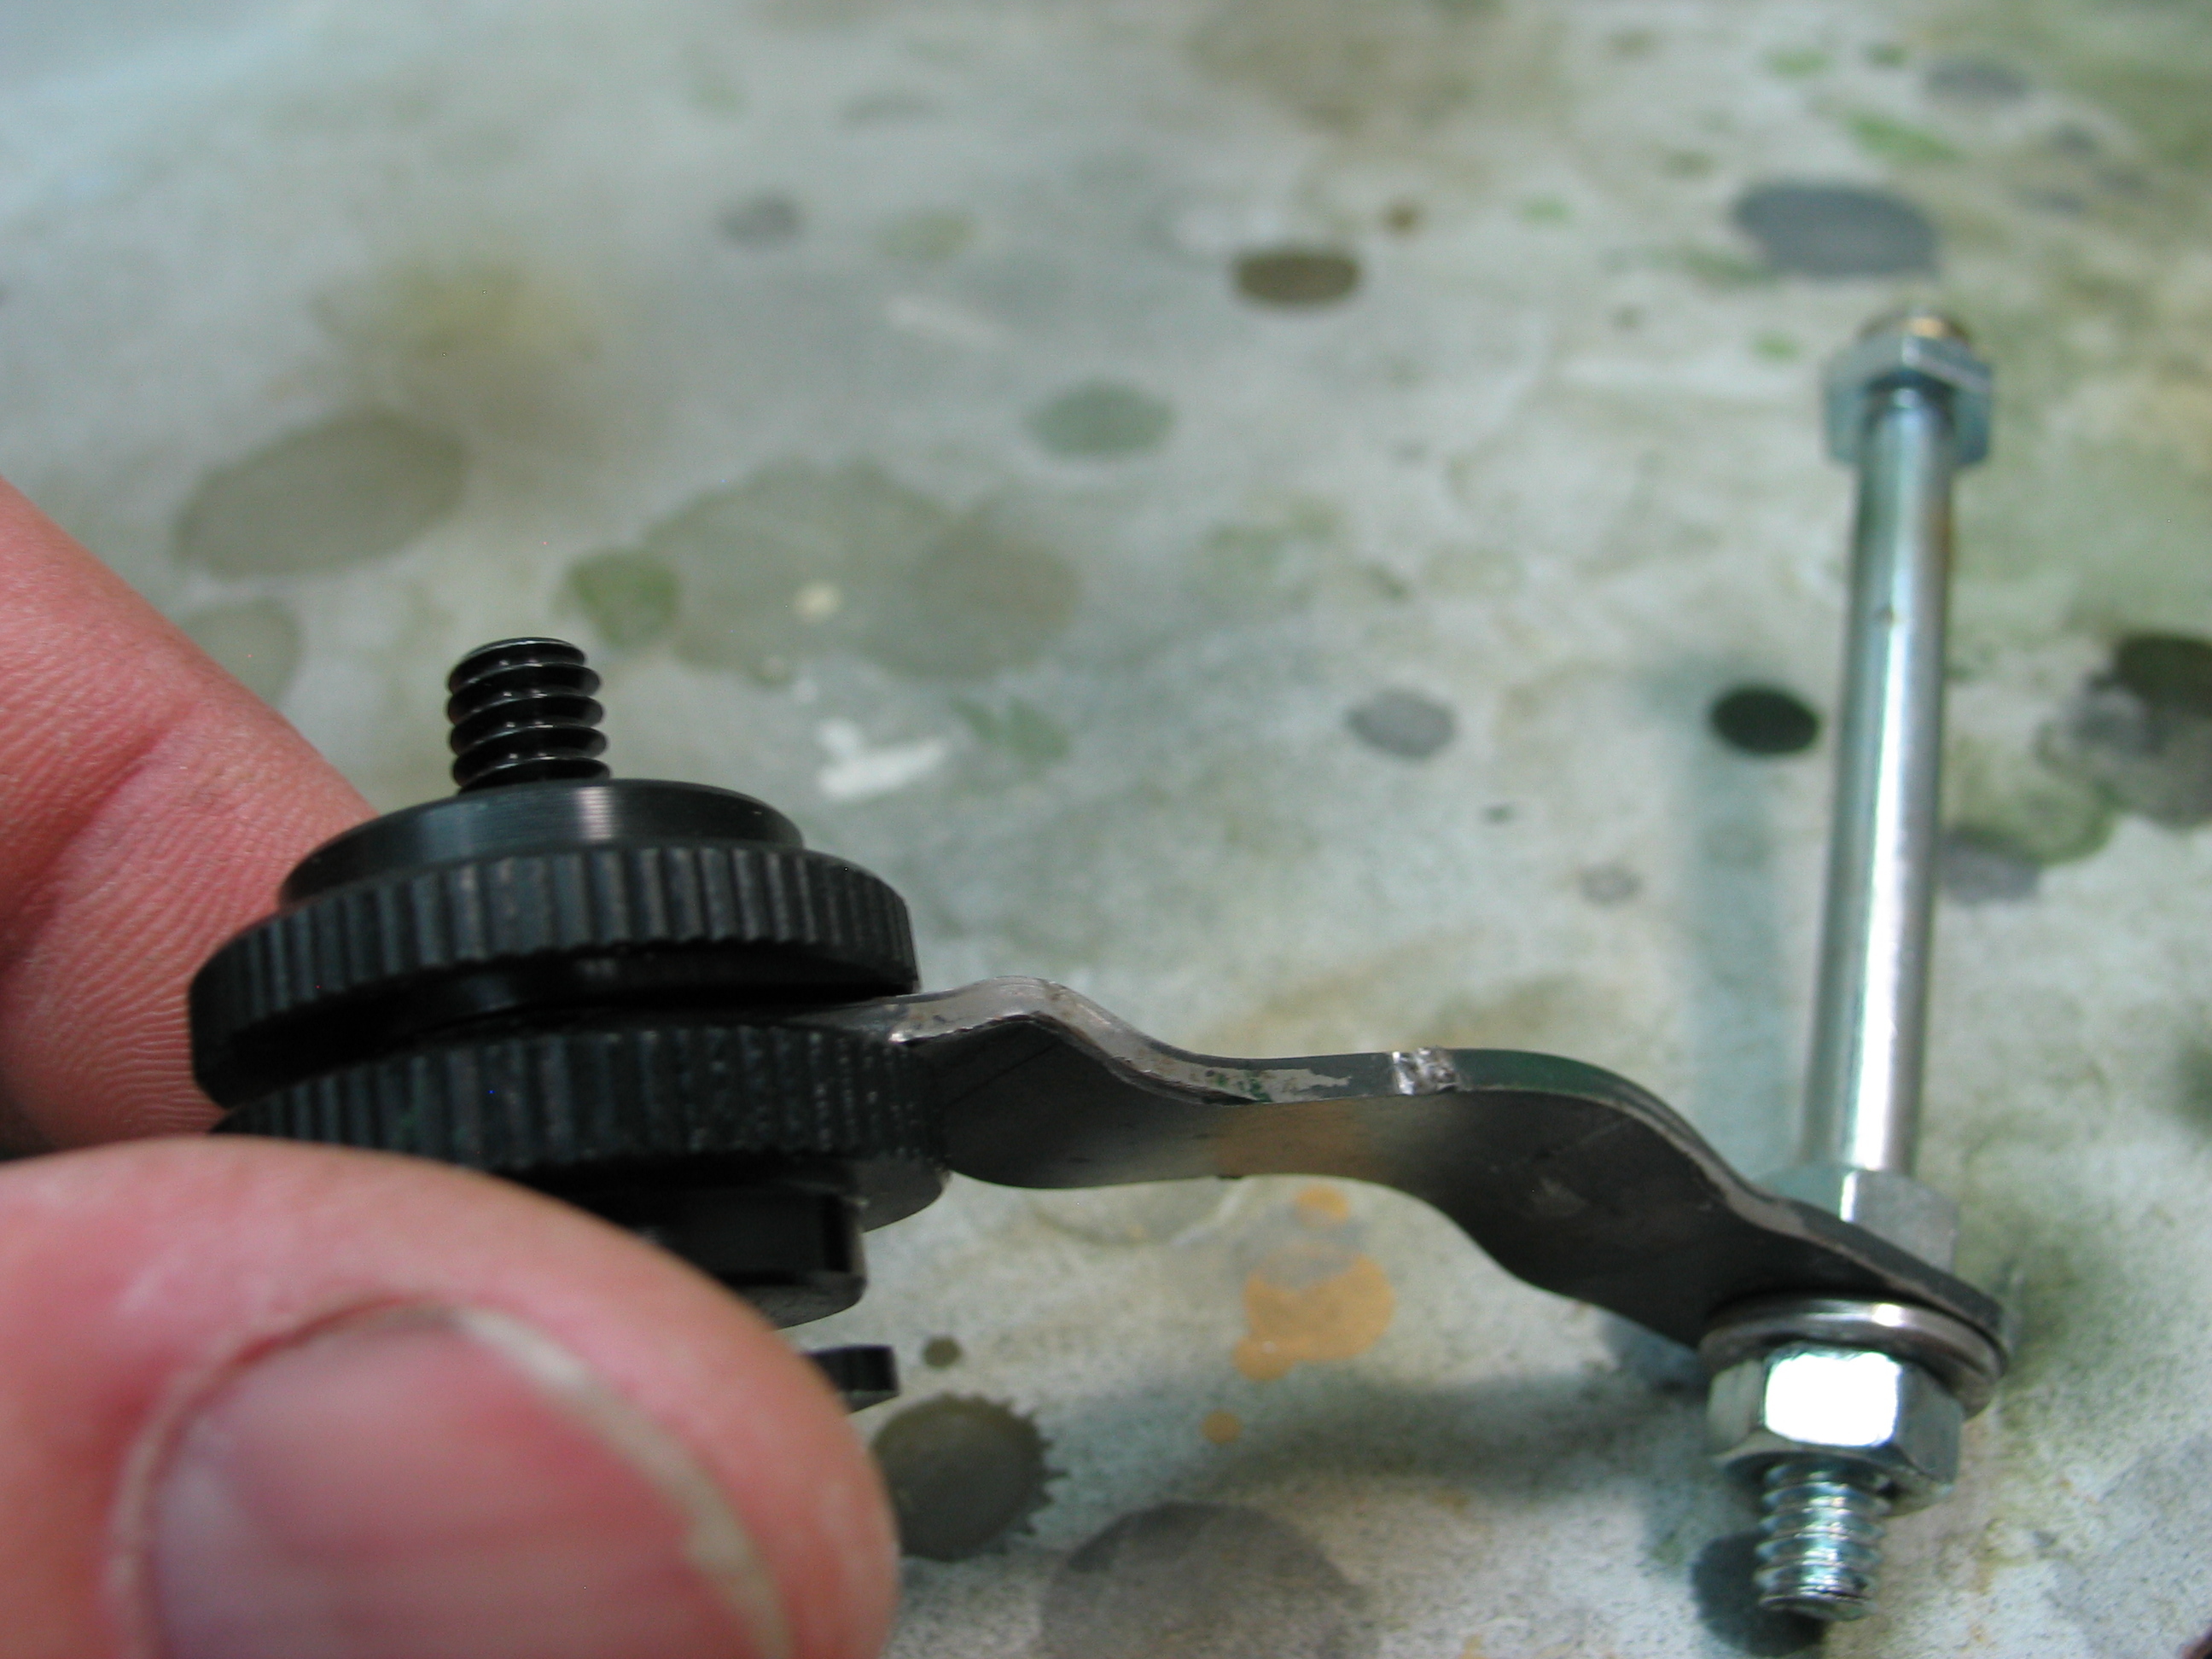
For turrets, I made a different bracket out of a part that came with the arm, a piece of scrap metal, a couple of nuts, and a bolt with a small rare earth magnet epoxied to the end...


...and now with another piece of sheet metal epoxied to the inside of the turret...


And that's my rig!
Now for the disclaimer, it can be a little frustrating to get used to at first, as the joints have to line up with a slot to make deep bends in them, but with a little patience, and experience, I find it works great. One thing to watch out for is those MAGNETS! they are so powerful, they can snap really hard to the metal glued to the model, and as a result, some small parts can pop off (especially PE) if not secured well. Try it on a practice kit first, and experiment with different size magnets.

I hope this can help someone, it has really allowed me to get much better with my airbrushing, especially for detail work, since I can be much steadier using both hands on the airbrush.
panzer_fan
Visit this Community
Ontario, Canada
Joined: March 25, 2003
KitMaker: 427 posts
Armorama: 348 posts
Posted: Saturday, September 30, 2017 - 11:42 AM UTC
Quite ingenious. Thanks for sharing.
JSSVIII
Visit this Community
Massachusetts, United States
Joined: March 28, 2007
KitMaker: 1,169 posts
Armorama: 1,067 posts
Posted: Saturday, September 30, 2017 - 05:25 PM UTC
Thanks Sebastian, it was fairly inexpensive too.
barkingdigger
Staff MemberAssociate Editor
ARMORAMA
#013
Visit this Community
England - East Anglia, United Kingdom
Joined: June 20, 2008
KitMaker: 3,981 posts
Armorama: 3,403 posts
Posted: Saturday, September 30, 2017 - 06:24 PM UTC
Cool rig! Can we turn it into a Feature for the website? (These forum posts disappear over time, as new posts pile up on the front page...). I should be able to harvest the pics and text from your post, so you won't need to do anything extra.

BTW, when I saw the "hands free" title I wondered how you hold the airbrush!
JSSVIII
Visit this Community
Massachusetts, United States
Joined: March 28, 2007
KitMaker: 1,169 posts
Armorama: 1,067 posts
Posted: Saturday, September 30, 2017 - 07:12 PM UTC
Sure Tom, put it wherever it will be the most helpful. As for the title, I was thinking it was not exactly the best description, but couldn't think of a better one LOL!
alanmac
Visit this Community
United Kingdom
Joined: February 25, 2007
KitMaker: 3,033 posts
Armorama: 2,953 posts
Posted: Saturday, September 30, 2017 - 07:16 PM UTC
Can't see anything but little icons instead of the pictures.
JSSVIII
Visit this Community
Massachusetts, United States
Joined: March 28, 2007
KitMaker: 1,169 posts
Armorama: 1,067 posts
Posted: Saturday, September 30, 2017 - 07:20 PM UTC

Quoted Text

Can't see anything but little icons instead of the pictures.


Not sure why Alan, I can still see them on my computer, gonna need some outside help with that one.
Kanguroo
Visit this Community
Vietnam
Joined: May 07, 2006
KitMaker: 416 posts
Armorama: 312 posts
Posted: Saturday, September 30, 2017 - 07:32 PM UTC
A good solution. Thanks for sharing.
Regards,
K.
JSSVIII
Visit this Community
Massachusetts, United States
Joined: March 28, 2007
KitMaker: 1,169 posts
Armorama: 1,067 posts
Posted: Saturday, September 30, 2017 - 08:46 PM UTC
Thanks K. I apologize for the fuzzy photos, my digital camera is kind of old, and the operator is not very good either!
JPTRR
Staff MemberManaging Editor
RAILROAD MODELING
#051
Visit this Community
Tennessee, United States
Joined: December 21, 2002
KitMaker: 7,772 posts
Armorama: 2,447 posts
Posted: Saturday, September 30, 2017 - 09:36 PM UTC
Brilliant
babaoriley
Visit this Community
California, United States
Joined: June 23, 2017
KitMaker: 195 posts
Armorama: 179 posts
Posted: Saturday, September 30, 2017 - 09:47 PM UTC
Very nice. Now watch one of those pro modelers with his own product line put a version on the market for $99.95, LOL.
TopSmith
Visit this Community
Washington, United States
Joined: August 09, 2002
KitMaker: 1,742 posts
Armorama: 1,658 posts
Posted: Saturday, September 30, 2017 - 11:02 PM UTC
You can put something thin like a piece of card board from a shoe box and place it in between the magnet and metal plate to reduce the magnetic pull if needed.
Dragon164
#226
Visit this Community
British Columbia, Canada
Joined: February 20, 2012
KitMaker: 1,909 posts
Armorama: 1,066 posts
Posted: Sunday, October 01, 2017 - 12:32 AM UTC
Thanks!

I just ordered one!

Cheers Rob.
Steven000
Visit this Community
Antwerpen, Belgium
Joined: August 07, 2016
KitMaker: 191 posts
Armorama: 120 posts
Posted: Sunday, October 01, 2017 - 12:41 AM UTC
Very handy John!

Kind regards
Steven
JSSVIII
Visit this Community
Massachusetts, United States
Joined: March 28, 2007
KitMaker: 1,169 posts
Armorama: 1,067 posts
Posted: Sunday, October 01, 2017 - 01:25 AM UTC

Quoted Text

You can put something thin like a piece of card board from a shoe box and place it in between the magnet and metal plate to reduce the magnetic pull if needed.


I tried that Greg, but it caused the hull to slide when set at an angle, risking it falling off. maybe if the cardboard was coated in something sticky, but not glue. I found that once I got used to dealing with the powerful magnets, and taking the proper precautions , (i.e. making sure the pe is secure, or leaving it off til later)
I did not need to do anything else.
 _GOTOTOP