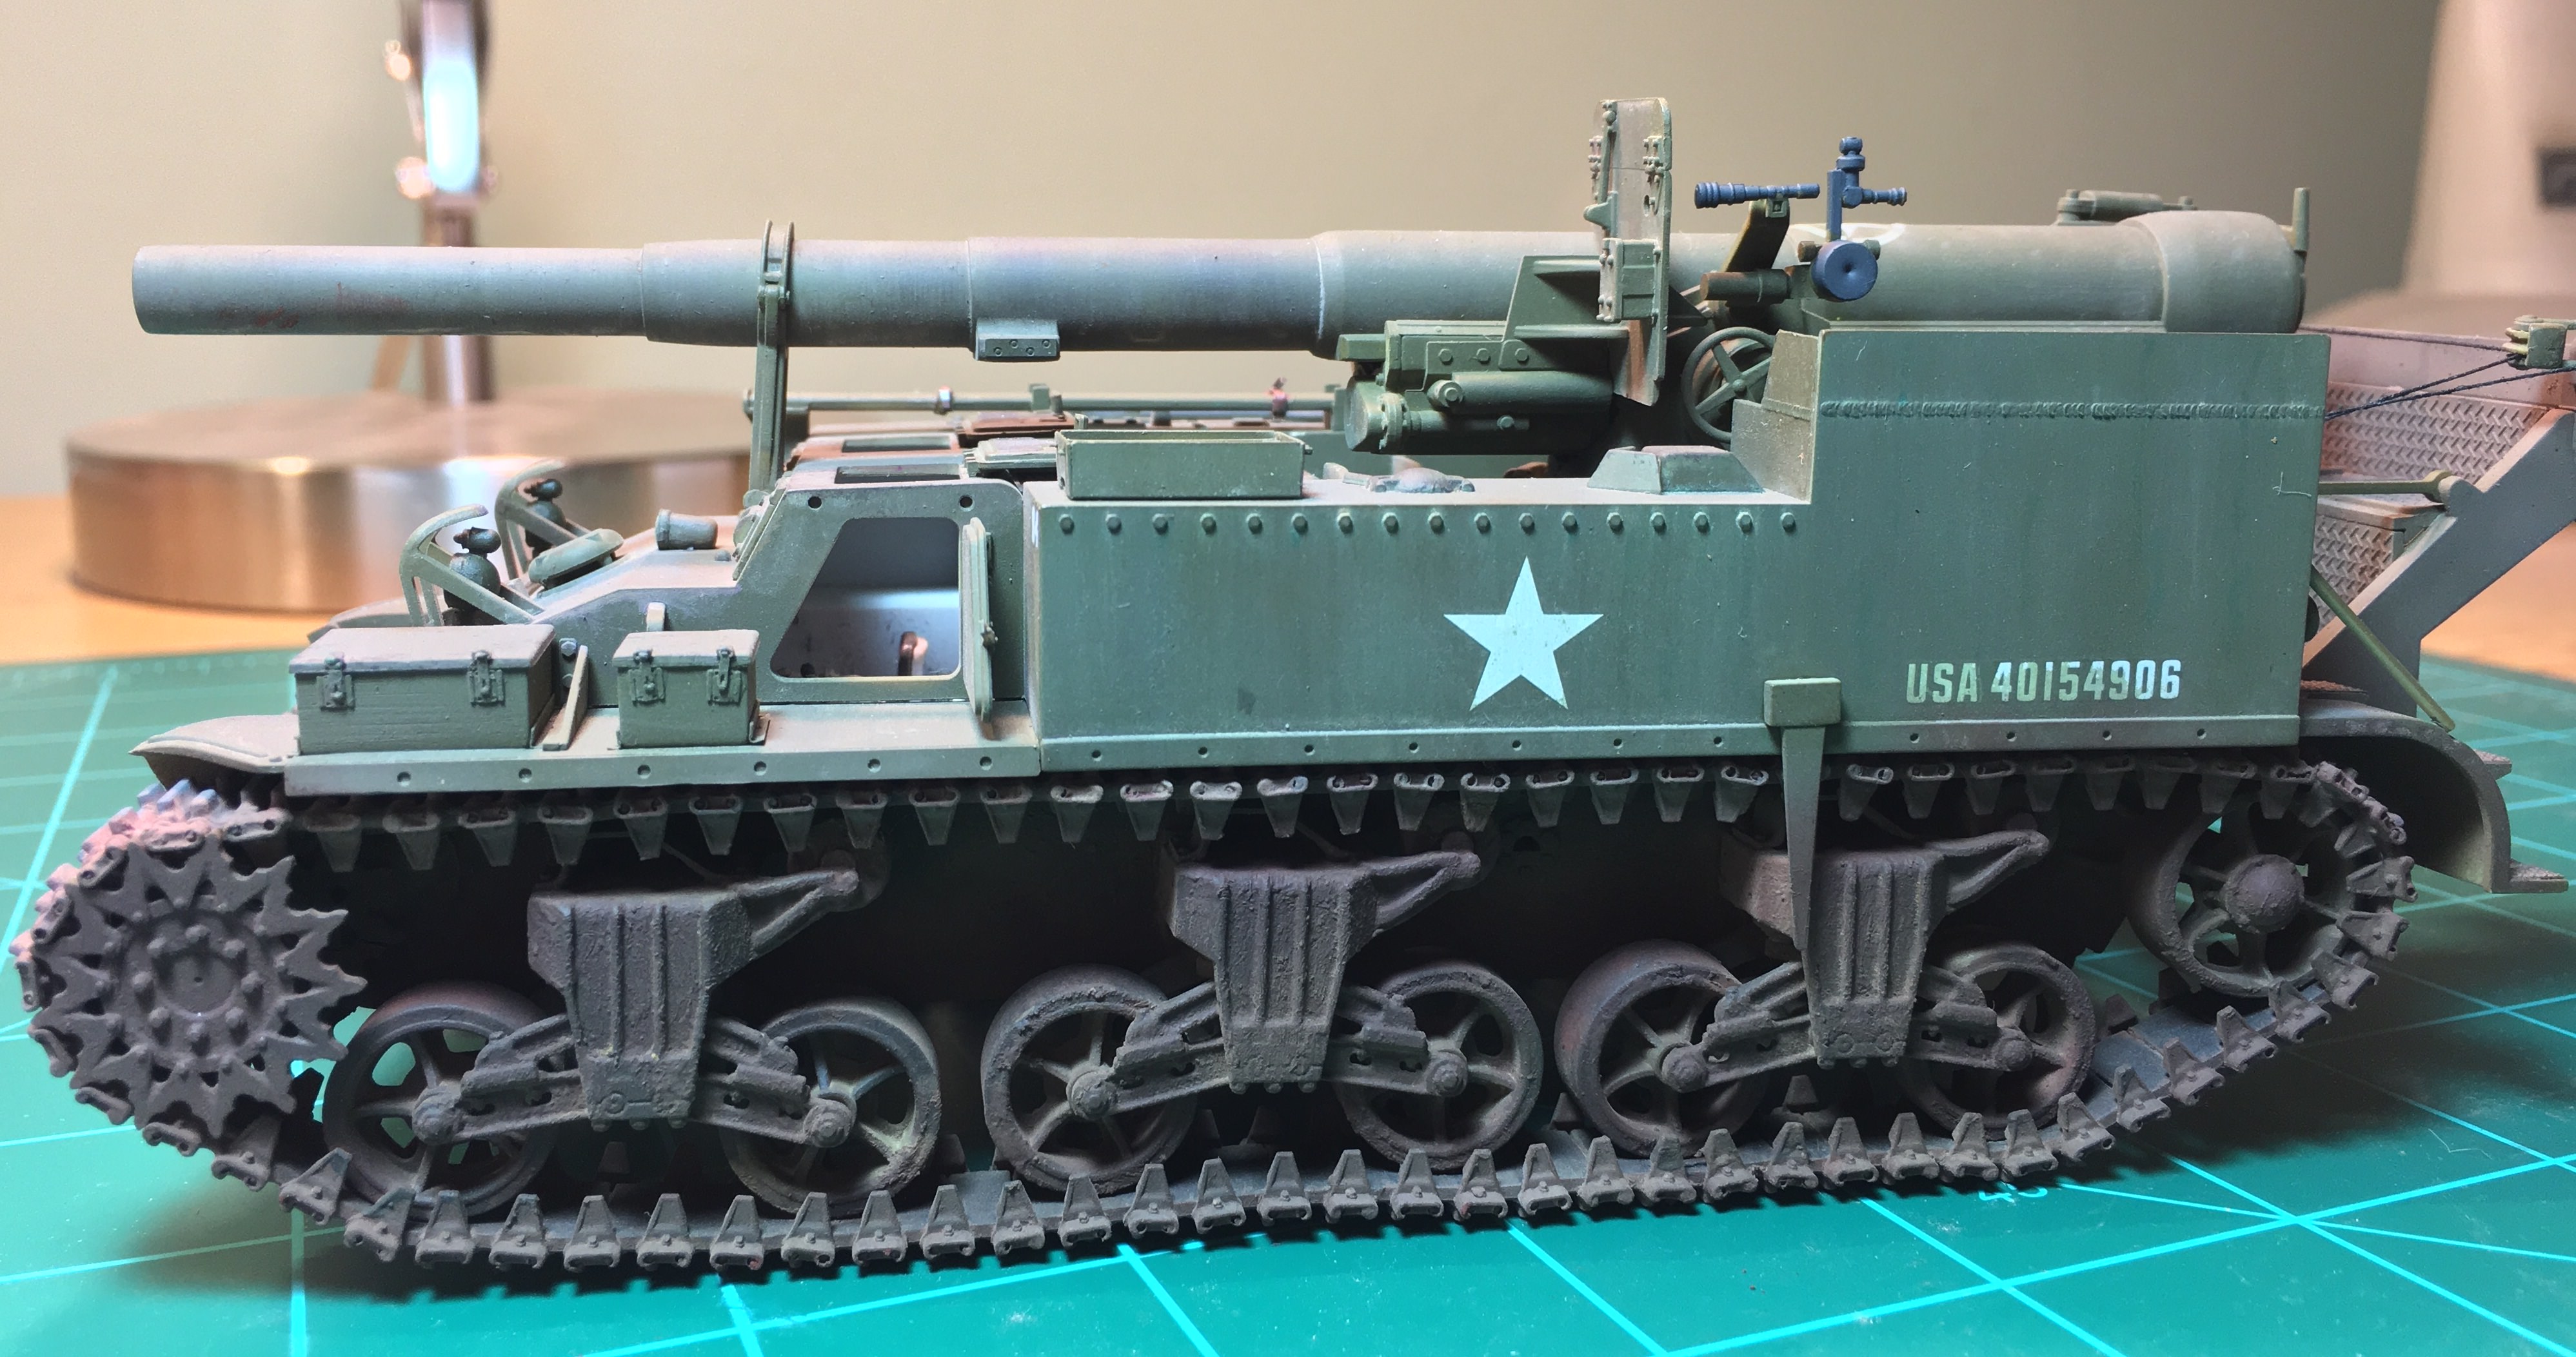
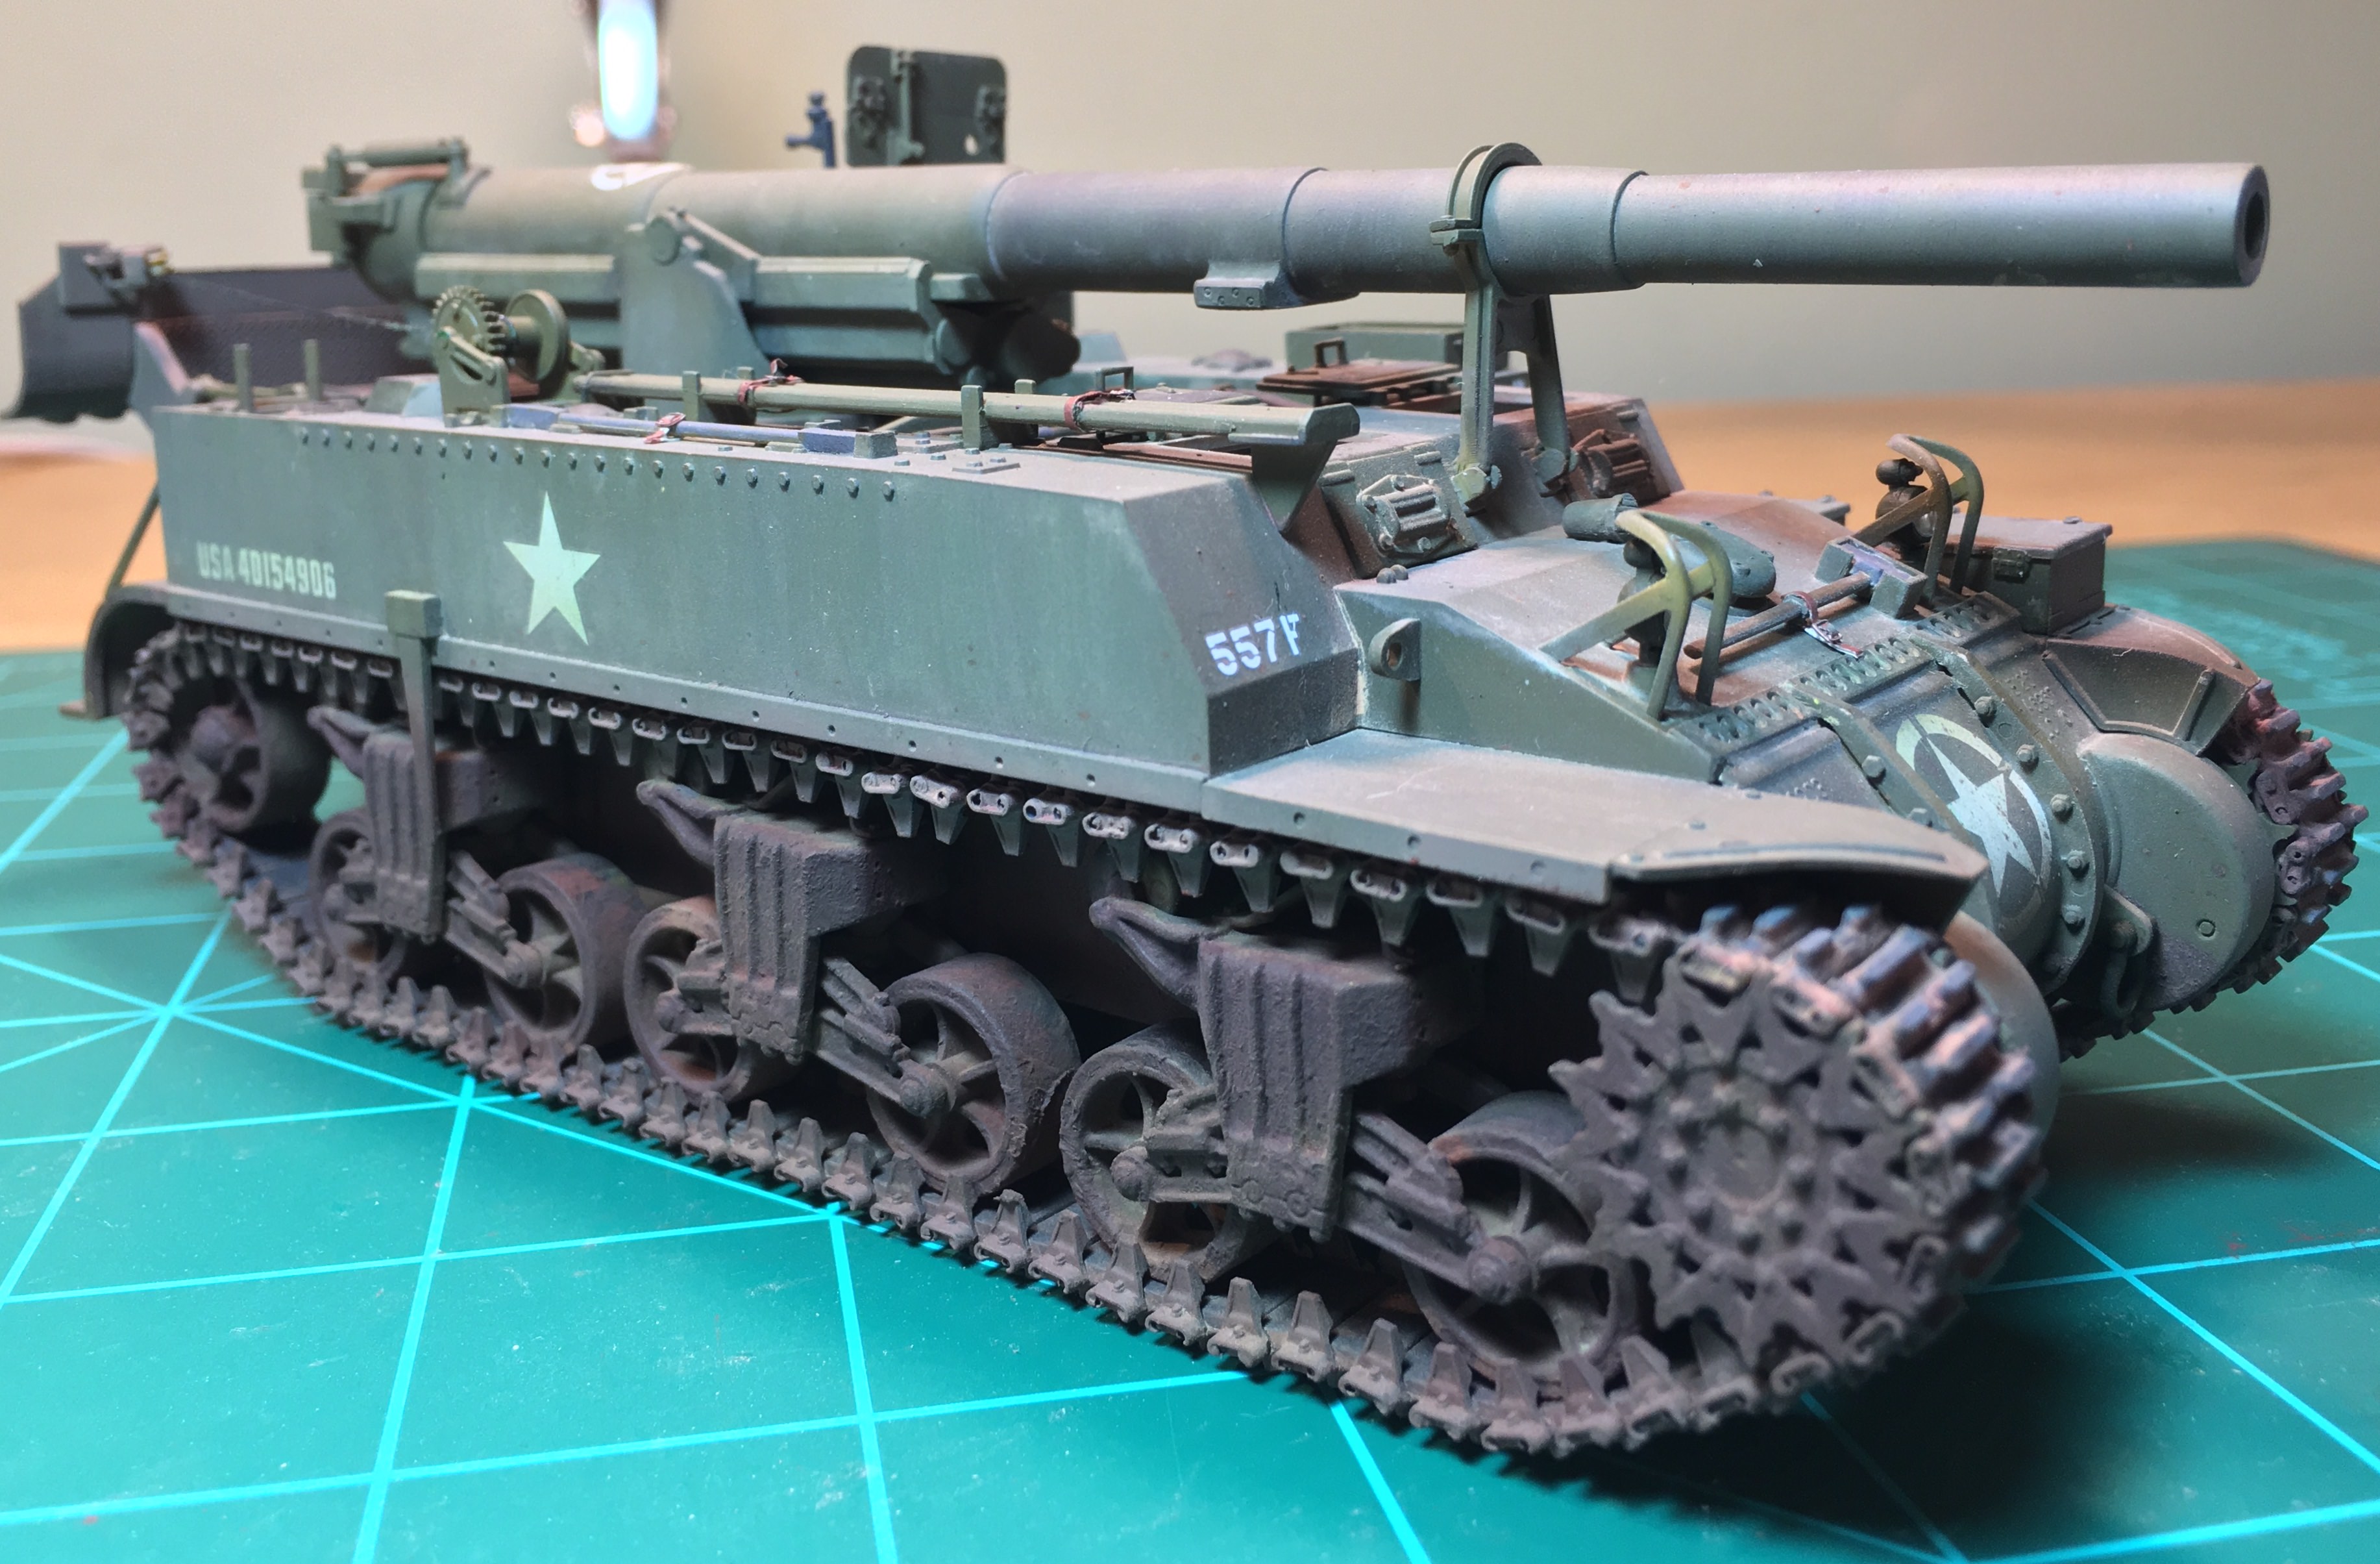
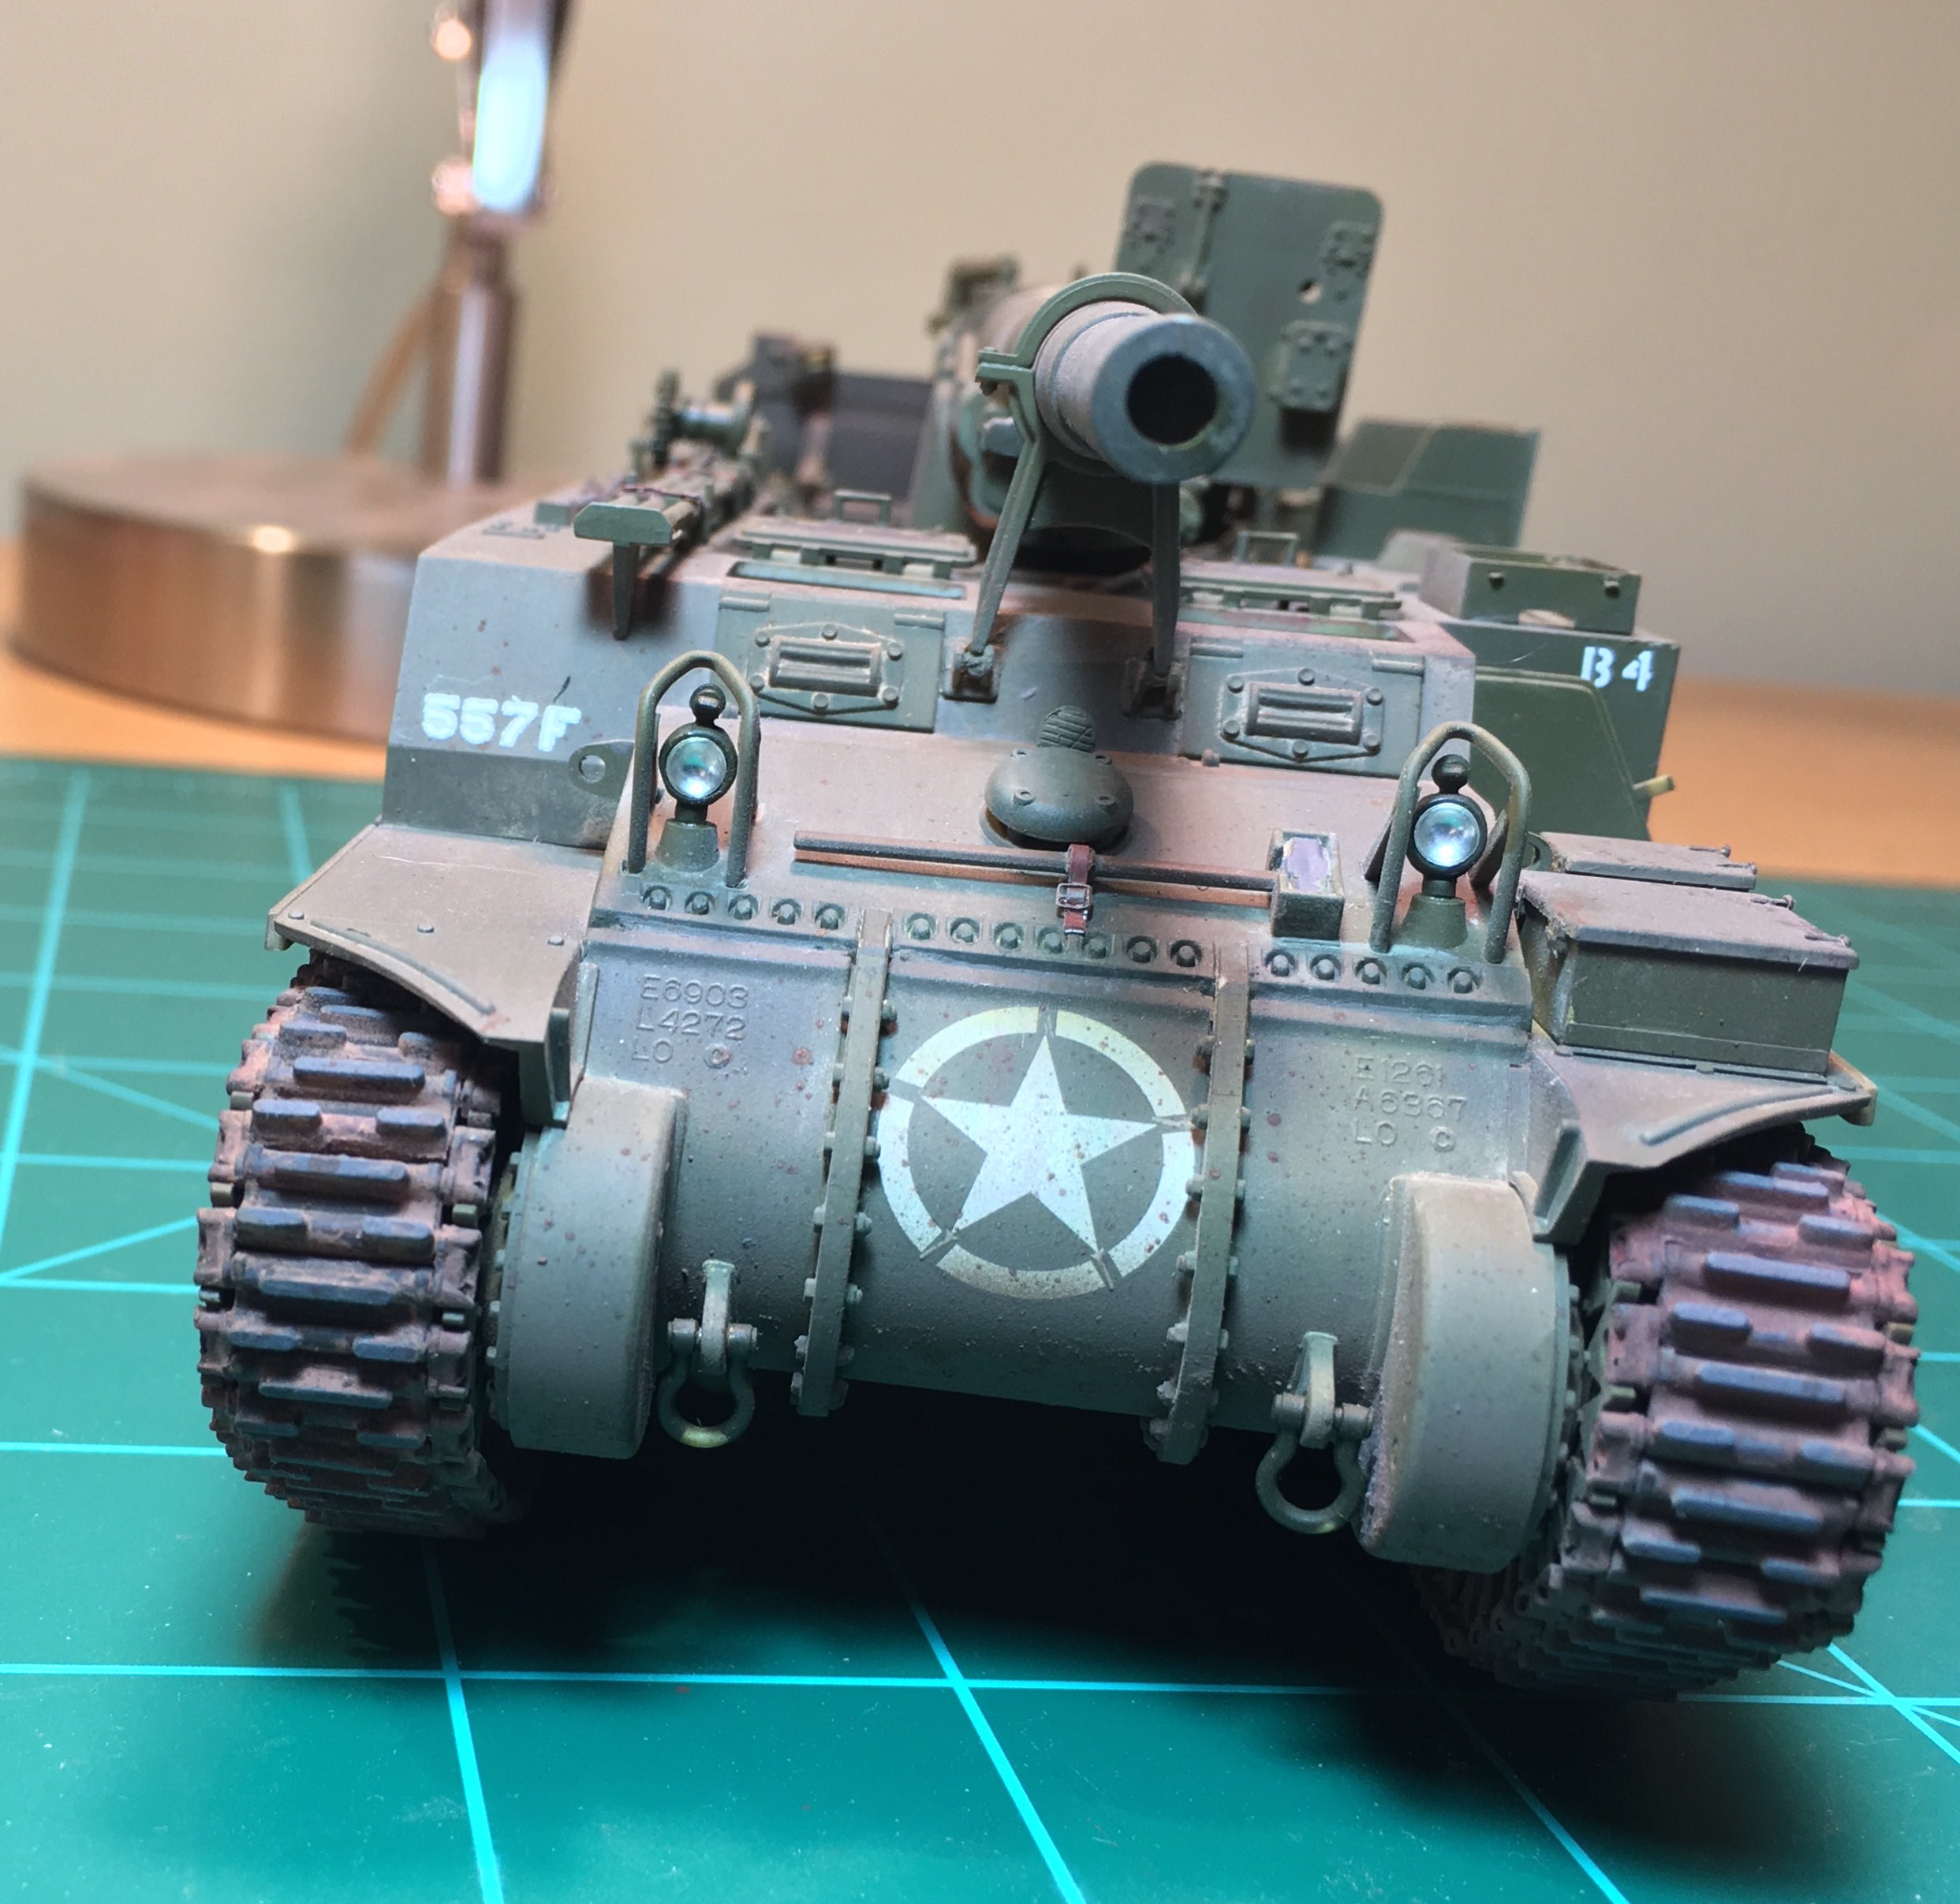
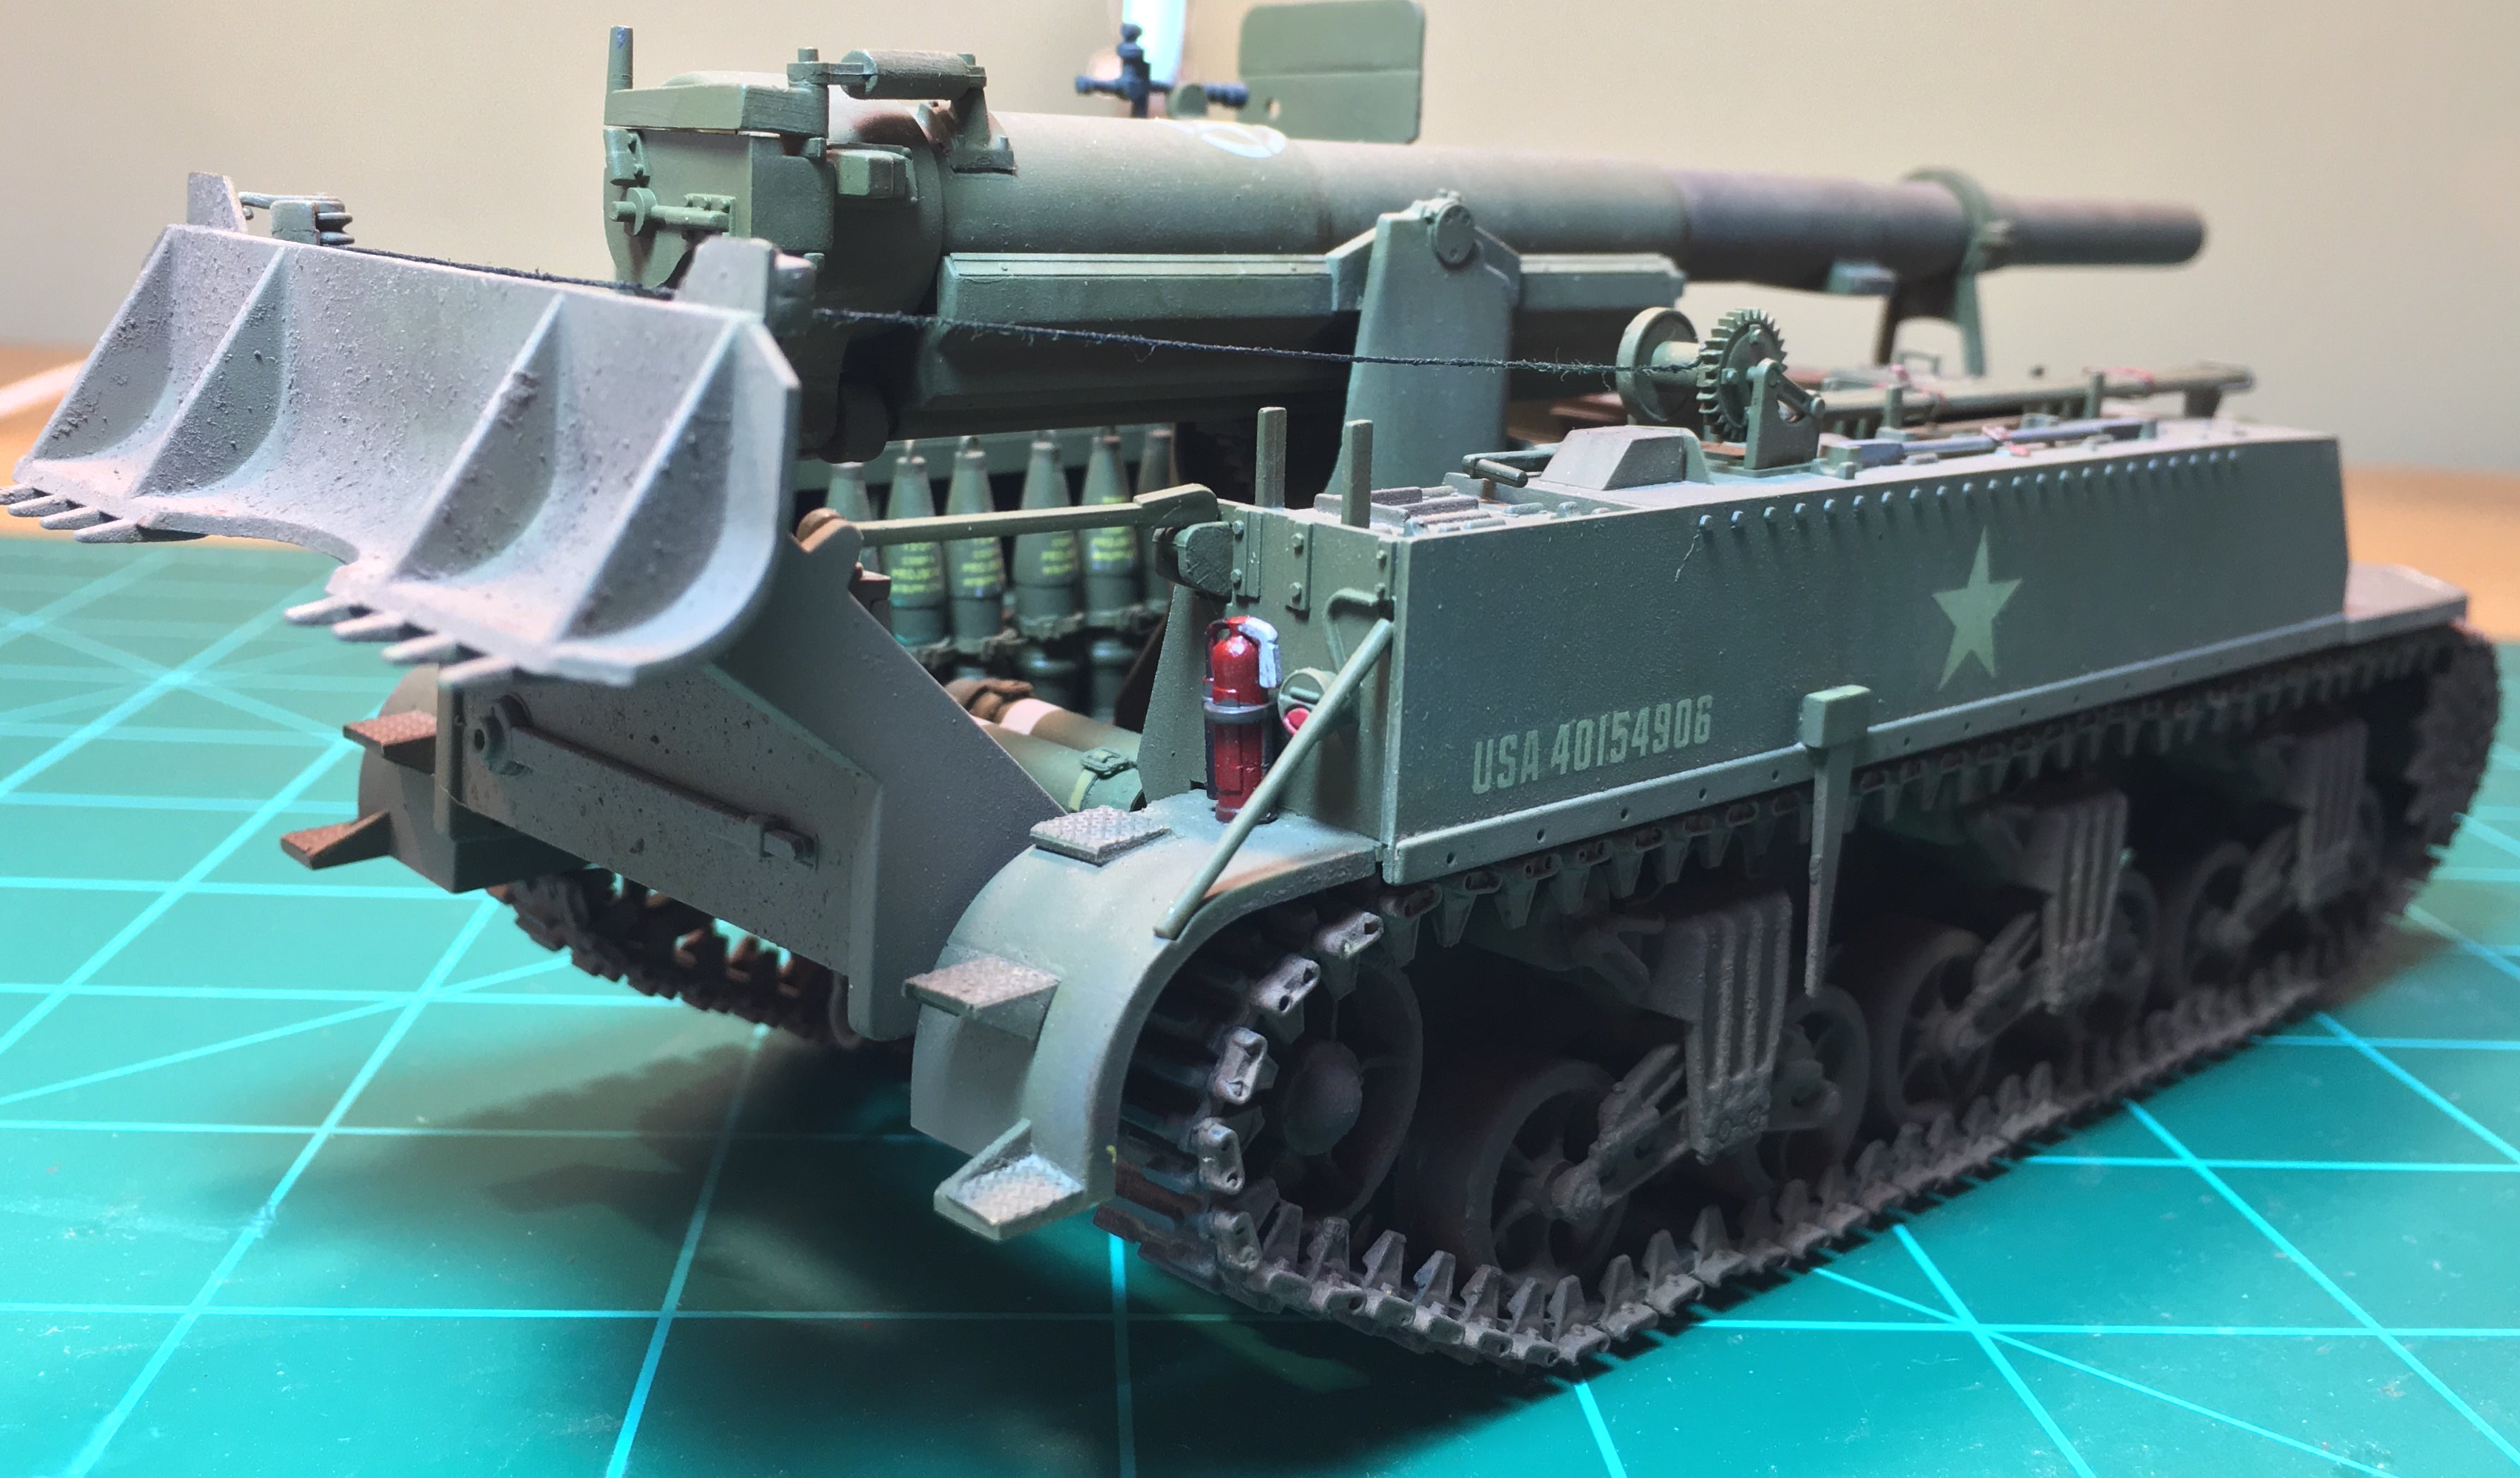
Completed this over the past few weeks. Well aware of the errors made in this build but regardless I'm pretty happy with how it came out. A bit more dirt and weathering than I usually do but I learned some new techniques that I will use in future builds. I liked the Academy kit enough to maybe doing another this time correcting my errors and also correcting the vehicle width. The T49 tracks are from Panda.
Hosted by Darren Baker
M12 GMC
27-1025
North Carolina, United States
Joined: September 16, 2004
KitMaker: 1,281 posts
Armorama: 1,222 posts
Joined: September 16, 2004
KitMaker: 1,281 posts
Armorama: 1,222 posts
Posted: Monday, November 06, 2017 - 08:41 AM UTC
Kevlar06
Washington, United States
Joined: March 15, 2009
KitMaker: 3,670 posts
Armorama: 2,052 posts
Joined: March 15, 2009
KitMaker: 3,670 posts
Armorama: 2,052 posts
Posted: Monday, November 06, 2017 - 11:22 AM UTC
Fantastic work Chris. Take away the green modeling mat, and youd swear You were looking at the real thing sitting in a motor pool somewhere in Europe! Just incredible work.
VR, Russ
VR, Russ
Kevlar06
Washington, United States
Joined: March 15, 2009
KitMaker: 3,670 posts
Armorama: 2,052 posts
Joined: March 15, 2009
KitMaker: 3,670 posts
Armorama: 2,052 posts
Posted: Monday, November 06, 2017 - 11:24 AM UTC
Fantastic work Chris. Take away the green modeling mat, and youd swear You were looking at the real thing sitting in a motor pool somewhere in Europe! Just incredible work. My only comment would be to run some wax over the thread representing the cable for the spade to get rid of the fray. Other than that, it's very realistic.
VR, Russ
VR, Russ
RobinNilsson
TOS Moderator
Stockholm, Sweden
Joined: November 29, 2006
KitMaker: 6,693 posts
Armorama: 5,562 posts
Joined: November 29, 2006
KitMaker: 6,693 posts
Armorama: 5,562 posts
Posted: Monday, November 06, 2017 - 02:40 PM UTC
What is the issue with the vehicle width ?
Is it fixable ?
/ Robin
Is it fixable ?
/ Robin
GTDeath13
Attica, Greece / Ελλάδα
Joined: June 12, 2015
KitMaker: 921 posts
Armorama: 919 posts
Joined: June 12, 2015
KitMaker: 921 posts
Armorama: 919 posts
Posted: Monday, November 06, 2017 - 02:54 PM UTC
Very impressive work and weathering. The track looks great.
Did you use pigment fixer on the tracks?
alchemymike
Texas, United States
Joined: December 14, 2011
KitMaker: 208 posts
Armorama: 192 posts
Joined: December 14, 2011
KitMaker: 208 posts
Armorama: 192 posts
Posted: Monday, November 06, 2017 - 02:56 PM UTC
SWEET!
27-1025
North Carolina, United States
Joined: September 16, 2004
KitMaker: 1,281 posts
Armorama: 1,222 posts
Joined: September 16, 2004
KitMaker: 1,281 posts
Armorama: 1,222 posts
Posted: Monday, November 06, 2017 - 07:02 PM UTC
Quoted Text
Fantastic work Chris. Take away the green modeling mat, and youd swear You were looking at the real thing sitting in a motor pool somewhere in Europe! Just incredible work. My only comment would be to run some wax over the thread representing the cable for the spade to get rid of the fray. Other than that, it's very realistic.
VR, Russ
Will give that a try on the thread. Thanks.
27-1025
North Carolina, United States
Joined: September 16, 2004
KitMaker: 1,281 posts
Armorama: 1,222 posts
Joined: September 16, 2004
KitMaker: 1,281 posts
Armorama: 1,222 posts
Posted: Monday, November 06, 2017 - 07:05 PM UTC
Quoted Text
Very impressive work and weathering. The track looks great.
Did you use pigment fixer on the tracks?
Thanks. I just used railroad model pigments and fixed them in place with flat coat lacquer.
27-1025
North Carolina, United States
Joined: September 16, 2004
KitMaker: 1,281 posts
Armorama: 1,222 posts
Joined: September 16, 2004
KitMaker: 1,281 posts
Armorama: 1,222 posts
Posted: Monday, November 06, 2017 - 07:17 PM UTC
Quoted Text
What is the issue with the vehicle width ?
Is it fixable ?
/ Robin
3” too narrow in width. This modeler shows how he made the needed corrections.
http://paulbudzik.com/armor/M12%20155mm%20GMC/Academy_M12_155mm_GMC_pg3.html
GTDeath13
Attica, Greece / Ελλάδα
Joined: June 12, 2015
KitMaker: 921 posts
Armorama: 919 posts
Joined: June 12, 2015
KitMaker: 921 posts
Armorama: 919 posts
Posted: Monday, November 06, 2017 - 08:21 PM UTC
Quoted Text
I just used railroad model pigments and fixed them in place with flat coat lacquer.
Take in mind that the lacquer may change the pigment color to a more pinkish-brownish accent that it is. That is why I asked. The pigments will stay on the model even without fixer, especially on a nice flat matt surface.
Kevlar06
Washington, United States
Joined: March 15, 2009
KitMaker: 3,670 posts
Armorama: 2,052 posts
Joined: March 15, 2009
KitMaker: 3,670 posts
Armorama: 2,052 posts
Posted: Monday, November 06, 2017 - 09:27 PM UTC
Quoted Text
Quoted TextFantastic work Chris. Take away the green modeling mat, and youd swear You were looking at the real thing sitting in a motor pool somewhere in Europe! Just incredible work. My only comment would be to run some wax over the thread representing the cable for the spade to get rid of the fray. Other than that, it's very realistic.
VR, Russ
Will give that a try on the thread. Thanks.
Here's how you do that-- take a length of thread in each hand and drag it over a chunk of beeswax-- Micro Mark and Model Expo carry beeswax in a plastic container designed to coat thread for ship rigging-- but I use a chunck of beeswax I purchased at my local farmers market and keep on my workbench. You can also use candle wax, although it's a little harder to drag the thread over a curved surface. Works every time to get rid of frays in thread. This is an old ship modelers trick. You can use cyanoacrylate to attach the thread.
VR, Russ
27-1025
North Carolina, United States
Joined: September 16, 2004
KitMaker: 1,281 posts
Armorama: 1,222 posts
Joined: September 16, 2004
KitMaker: 1,281 posts
Armorama: 1,222 posts
Posted: Monday, November 06, 2017 - 10:43 PM UTC
Quoted Text
Quoted TextQuoted TextFantastic work Chris. Take away the green modeling mat, and youd swear You were looking at the real thing sitting in a motor pool somewhere in Europe! Just incredible work. My only comment would be to run some wax over the thread representing the cable for the spade to get rid of the fray. Other than that, it's very realistic.
VR, Russ
Will give that a try on the thread. Thanks.
Here's how you do that-- take a length of thread in each hand and drag it over a chunk of beeswax-- Micro Mark and Model Expo carry beeswax in a plastic container designed to coat thread for ship rigging-- but I use a chunck of beeswax I purchased at my local farmers market and keep on my workbench. You can also use candle wax, although it's a little harder to drag the thread over a curved surface. Works every time to get rid of frays in thread. This is an old ship modelers trick. You can use cyanoacrylate to attach the thread.
VR, Russ
Very cool. I got the bees wax covered; I’m a bee 🐝 keeper with a dozen hives
27-1025
North Carolina, United States
Joined: September 16, 2004
KitMaker: 1,281 posts
Armorama: 1,222 posts
Joined: September 16, 2004
KitMaker: 1,281 posts
Armorama: 1,222 posts
Posted: Monday, November 06, 2017 - 10:44 PM UTC
Quoted Text
Quoted TextQuoted TextFantastic work Chris. Take away the green modeling mat, and youd swear You were looking at the real thing sitting in a motor pool somewhere in Europe! Just incredible work. My only comment would be to run some wax over the thread representing the cable for the spade to get rid of the fray. Other than that, it's very realistic.
VR, Russ
Will give that a try on the thread. Thanks.
Here's how you do that-- take a length of thread in each hand and drag it over a chunk of beeswax-- Micro Mark and Model Expo carry beeswax in a plastic container designed to coat thread for ship rigging-- but I use a chunck of beeswax I purchased at my local farmers market and keep on my workbench. You can also use candle wax, although it's a little harder to drag the thread over a curved surface. Works every time to get rid of frays in thread. This is an old ship modelers trick. You can use cyanoacrylate to attach the thread.
VR, Russ